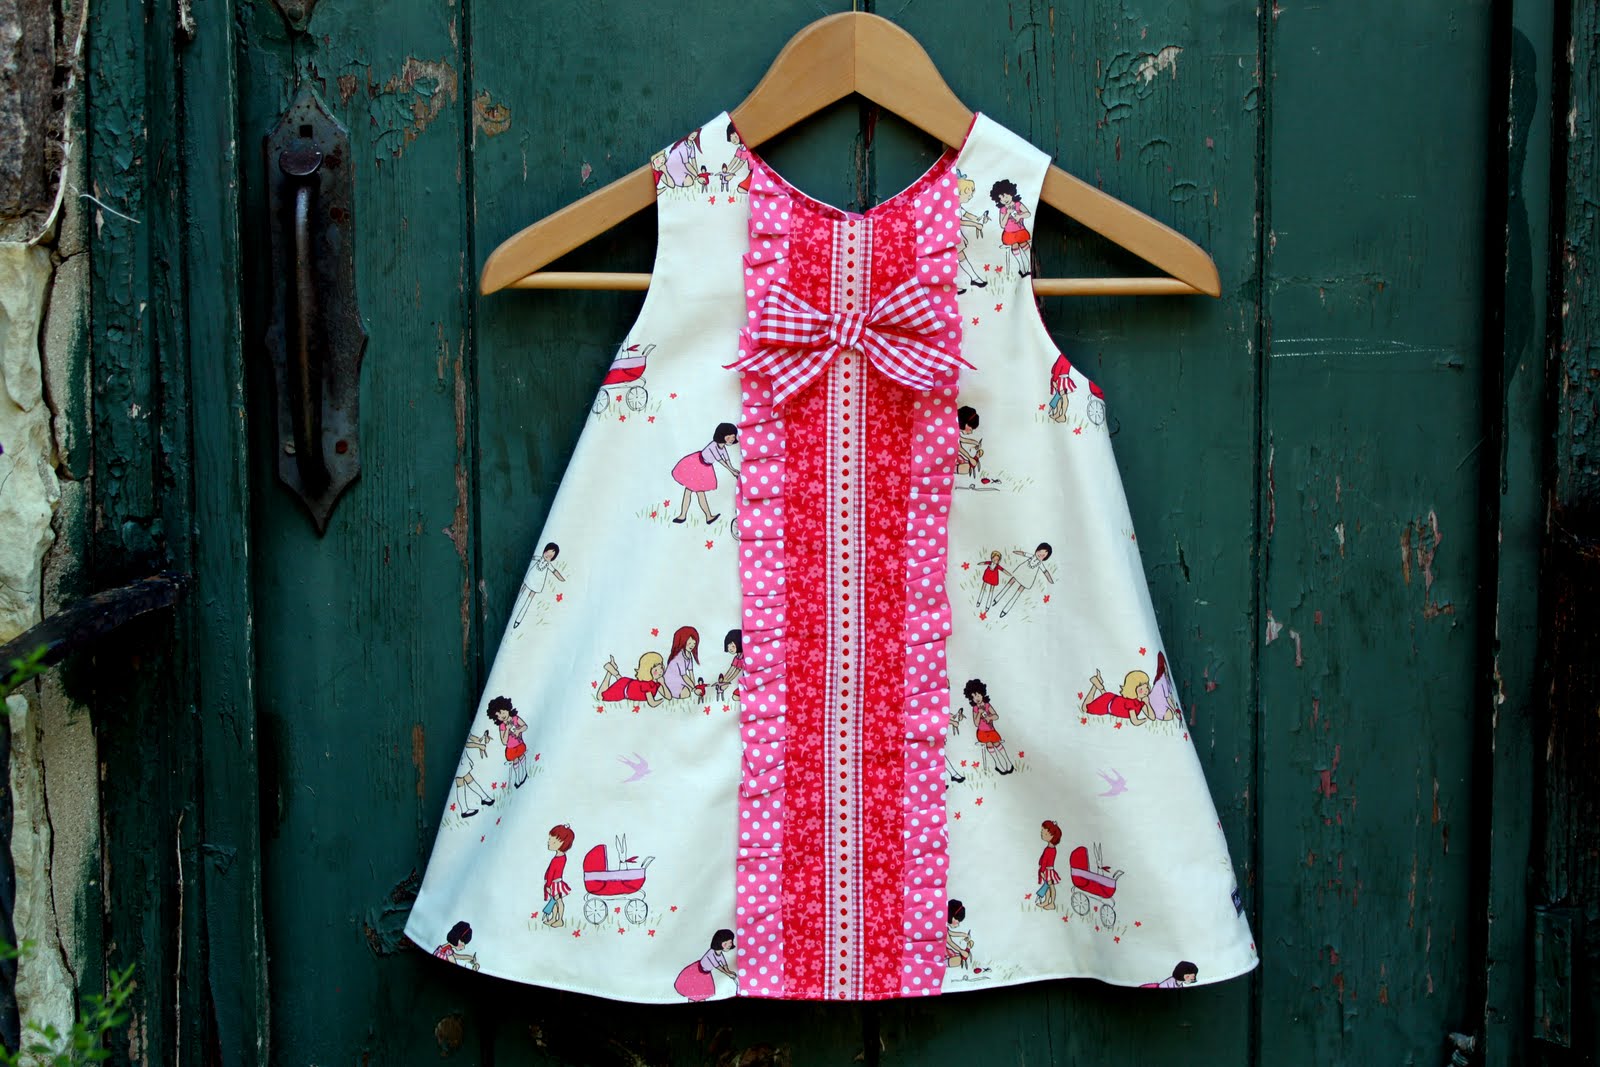
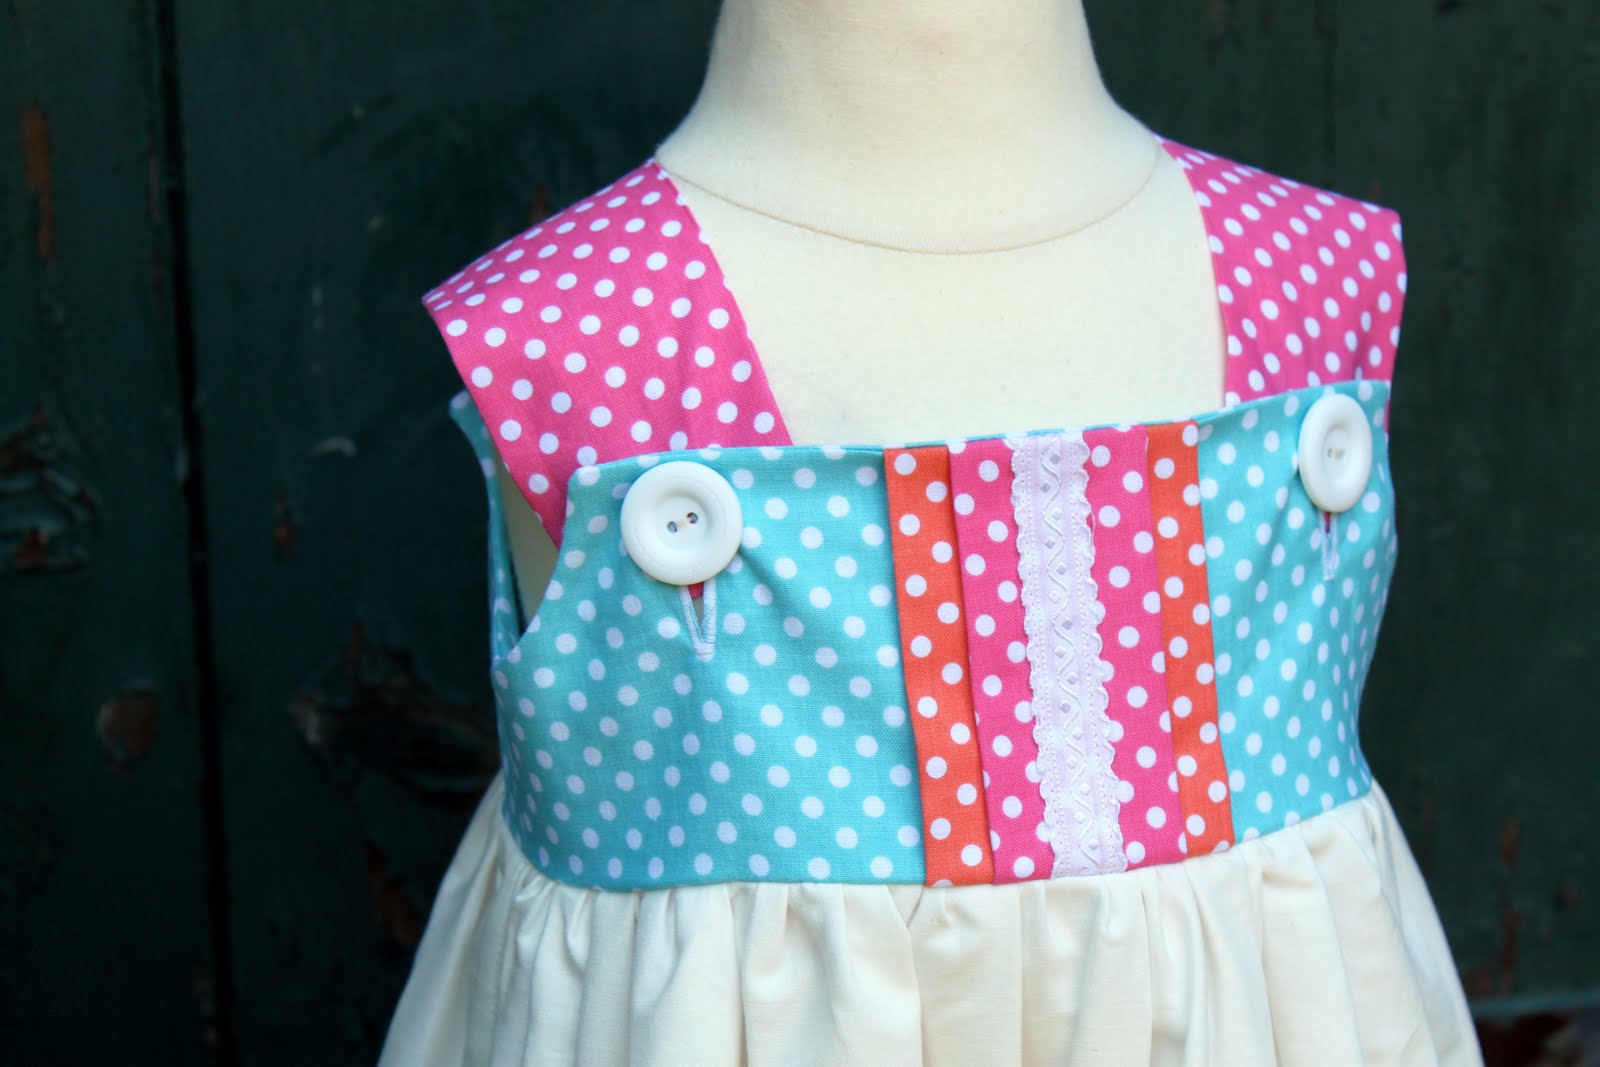
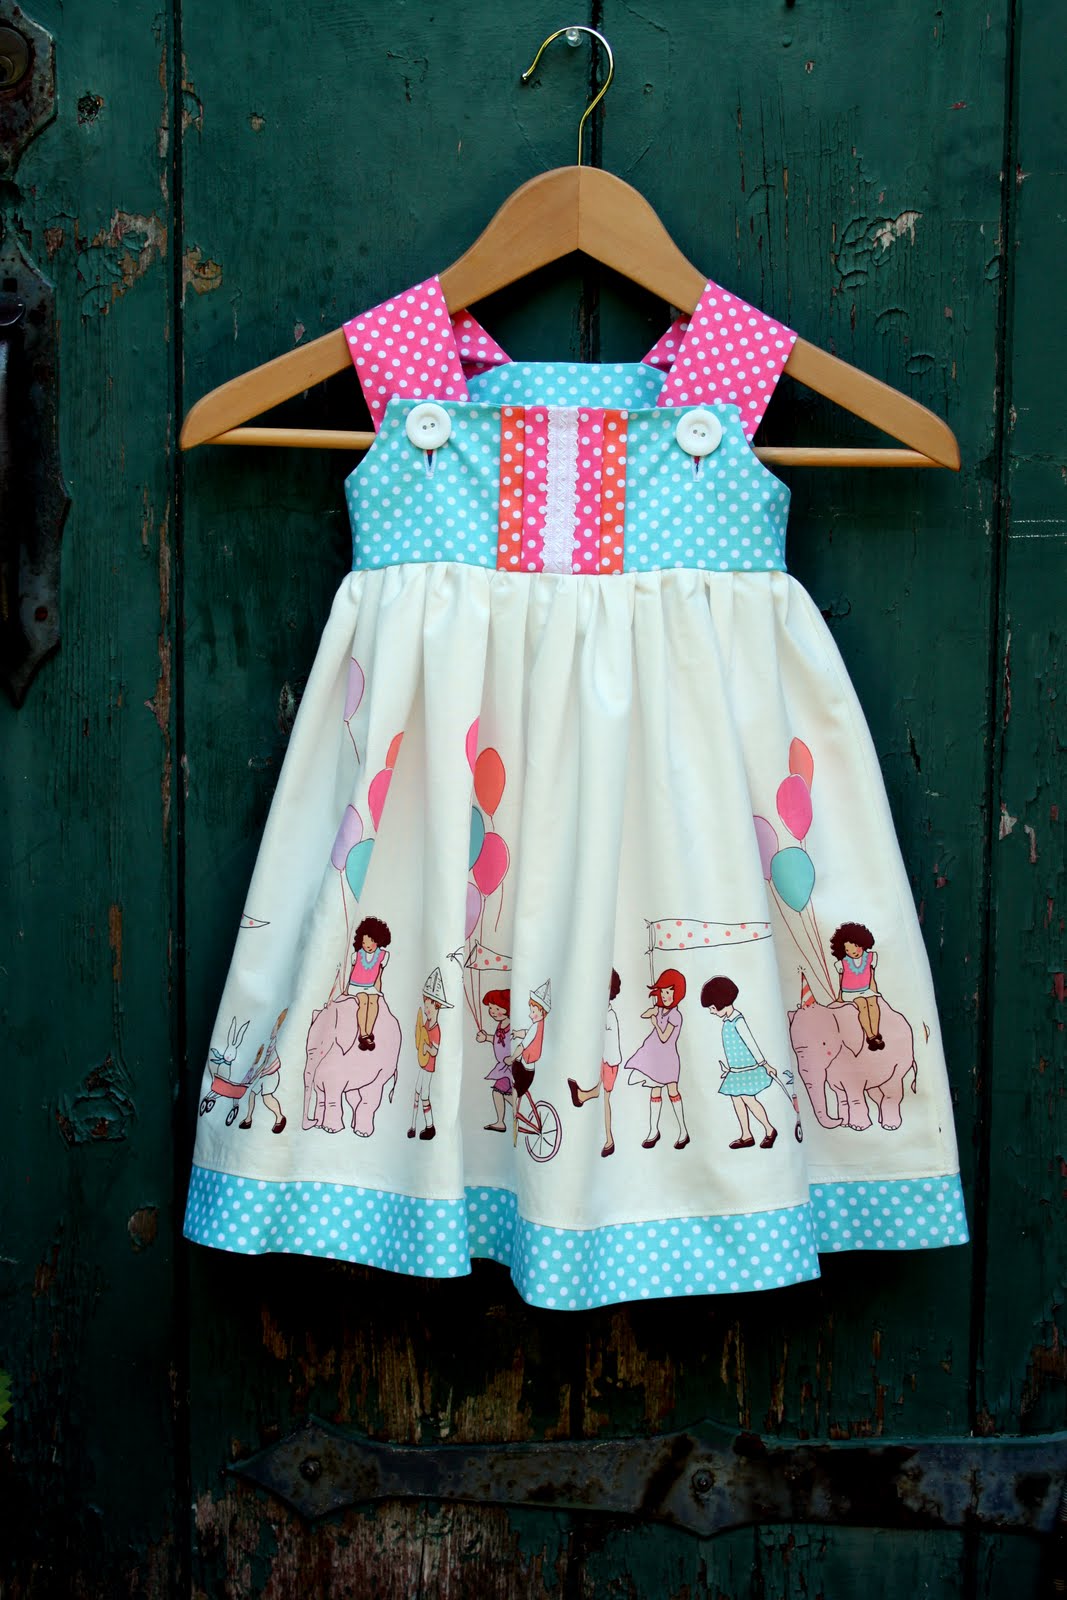
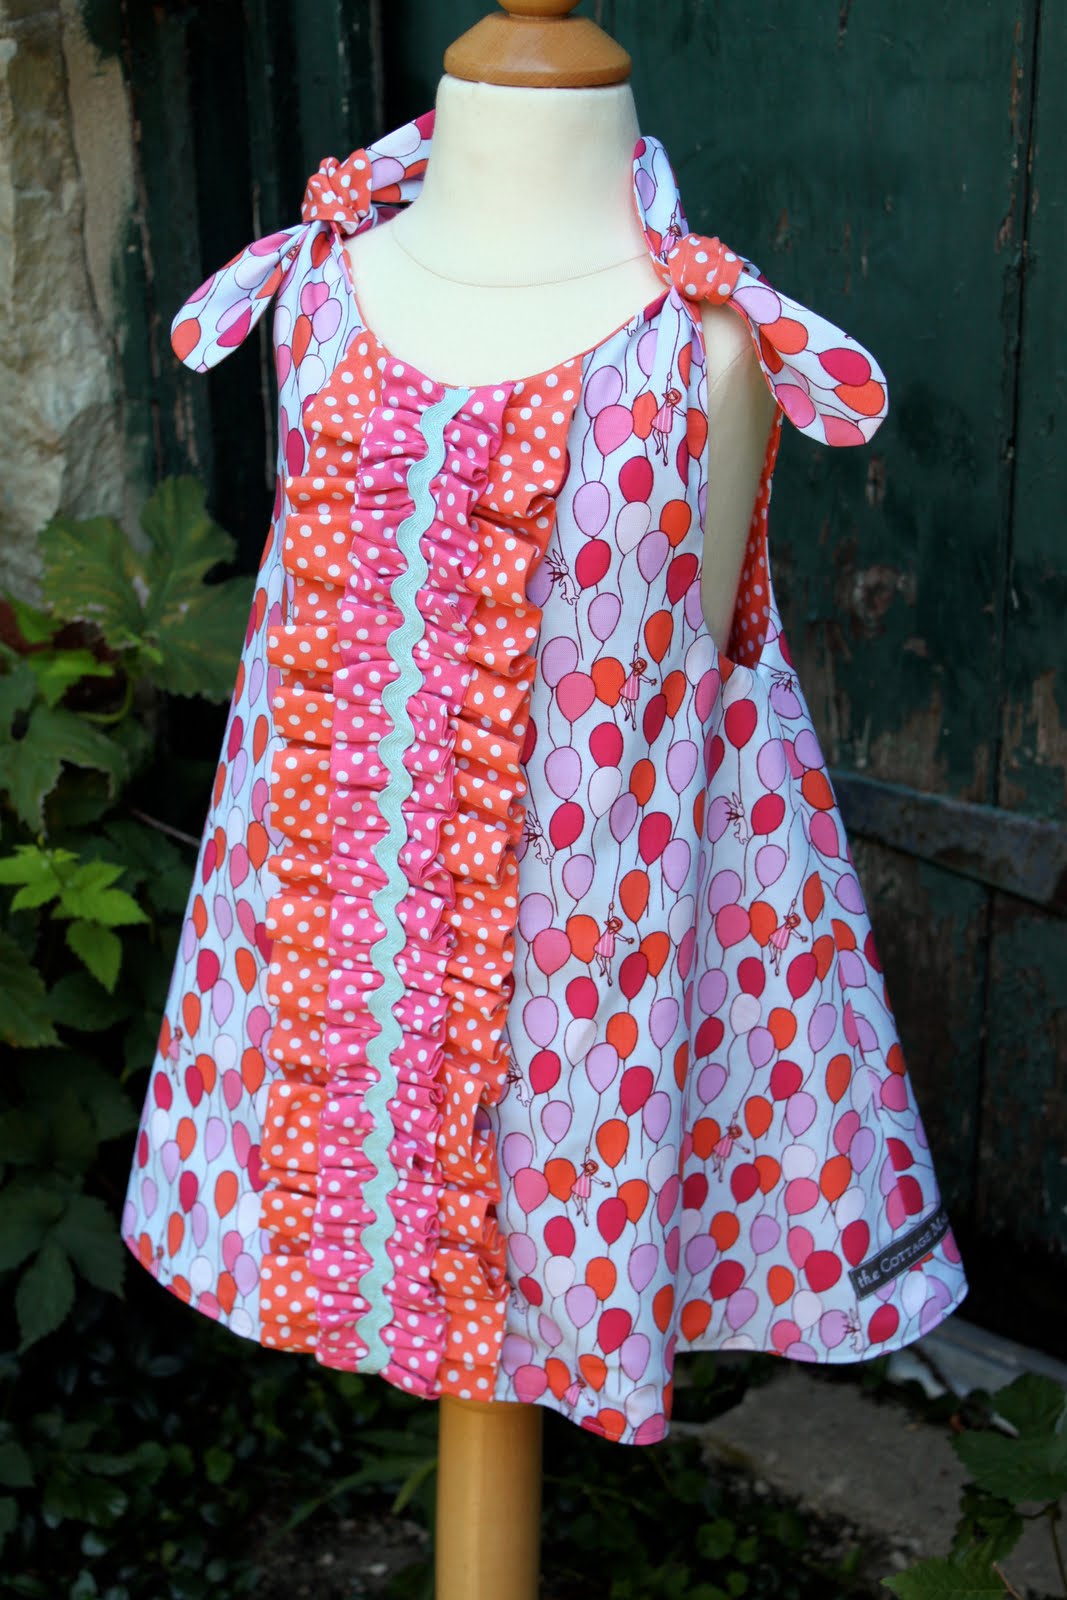
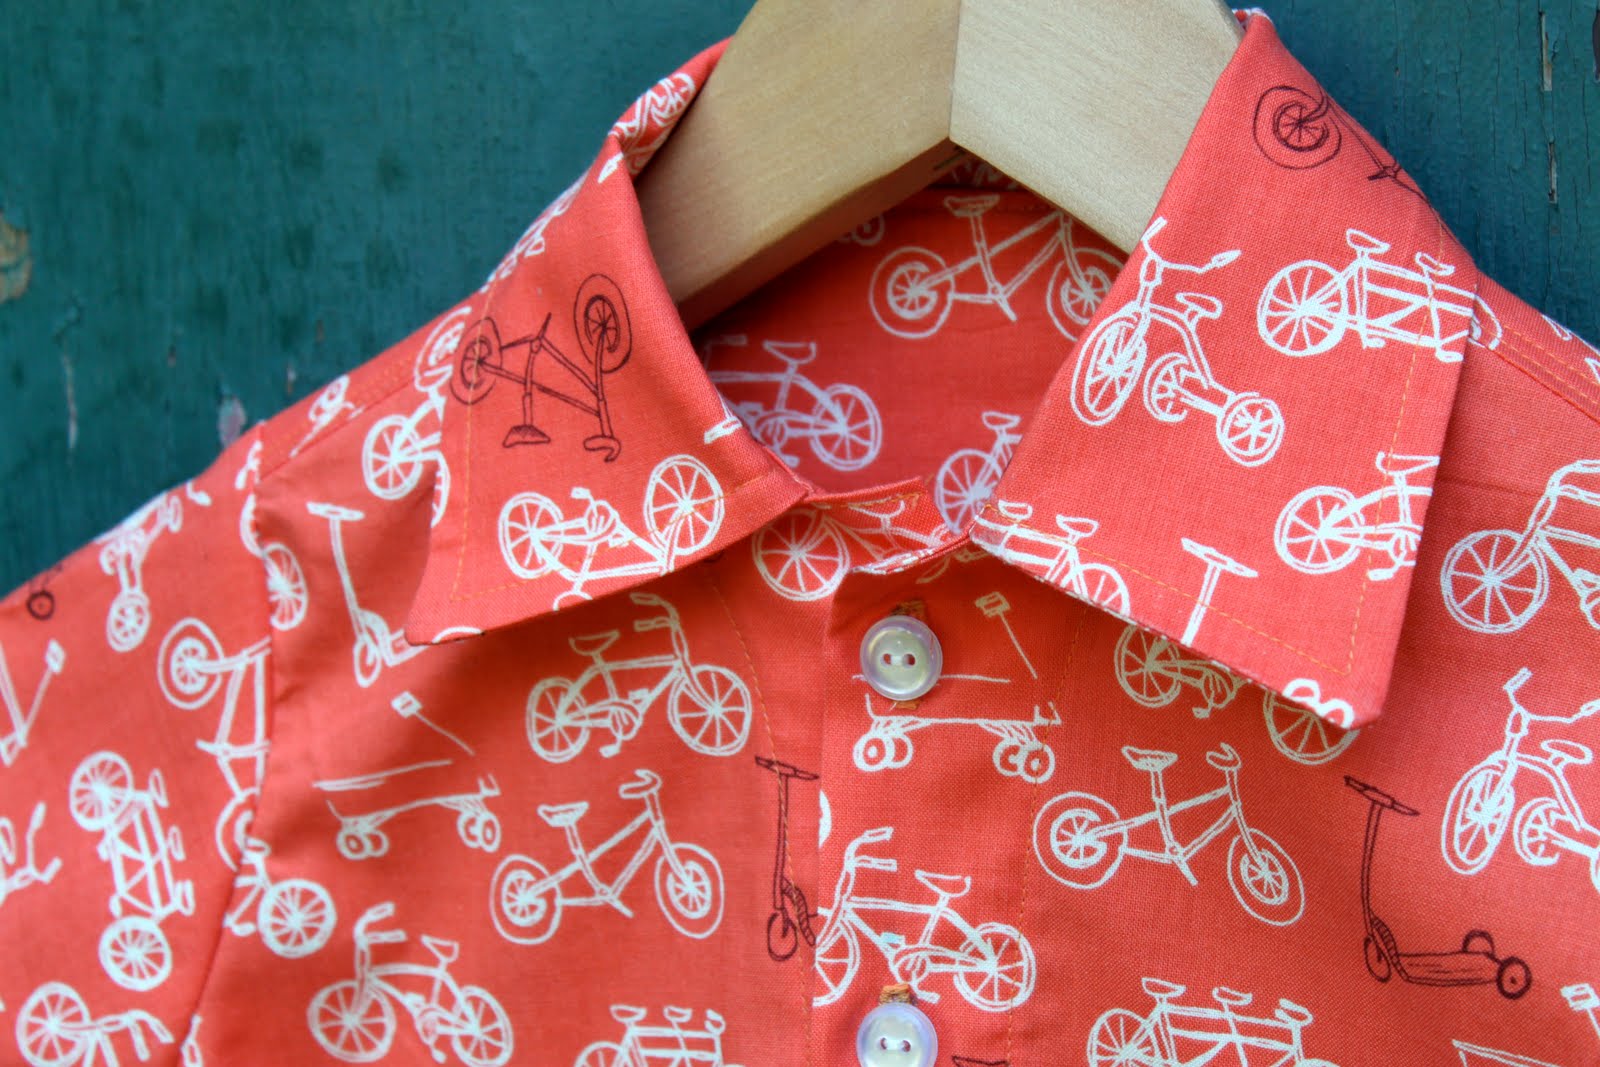
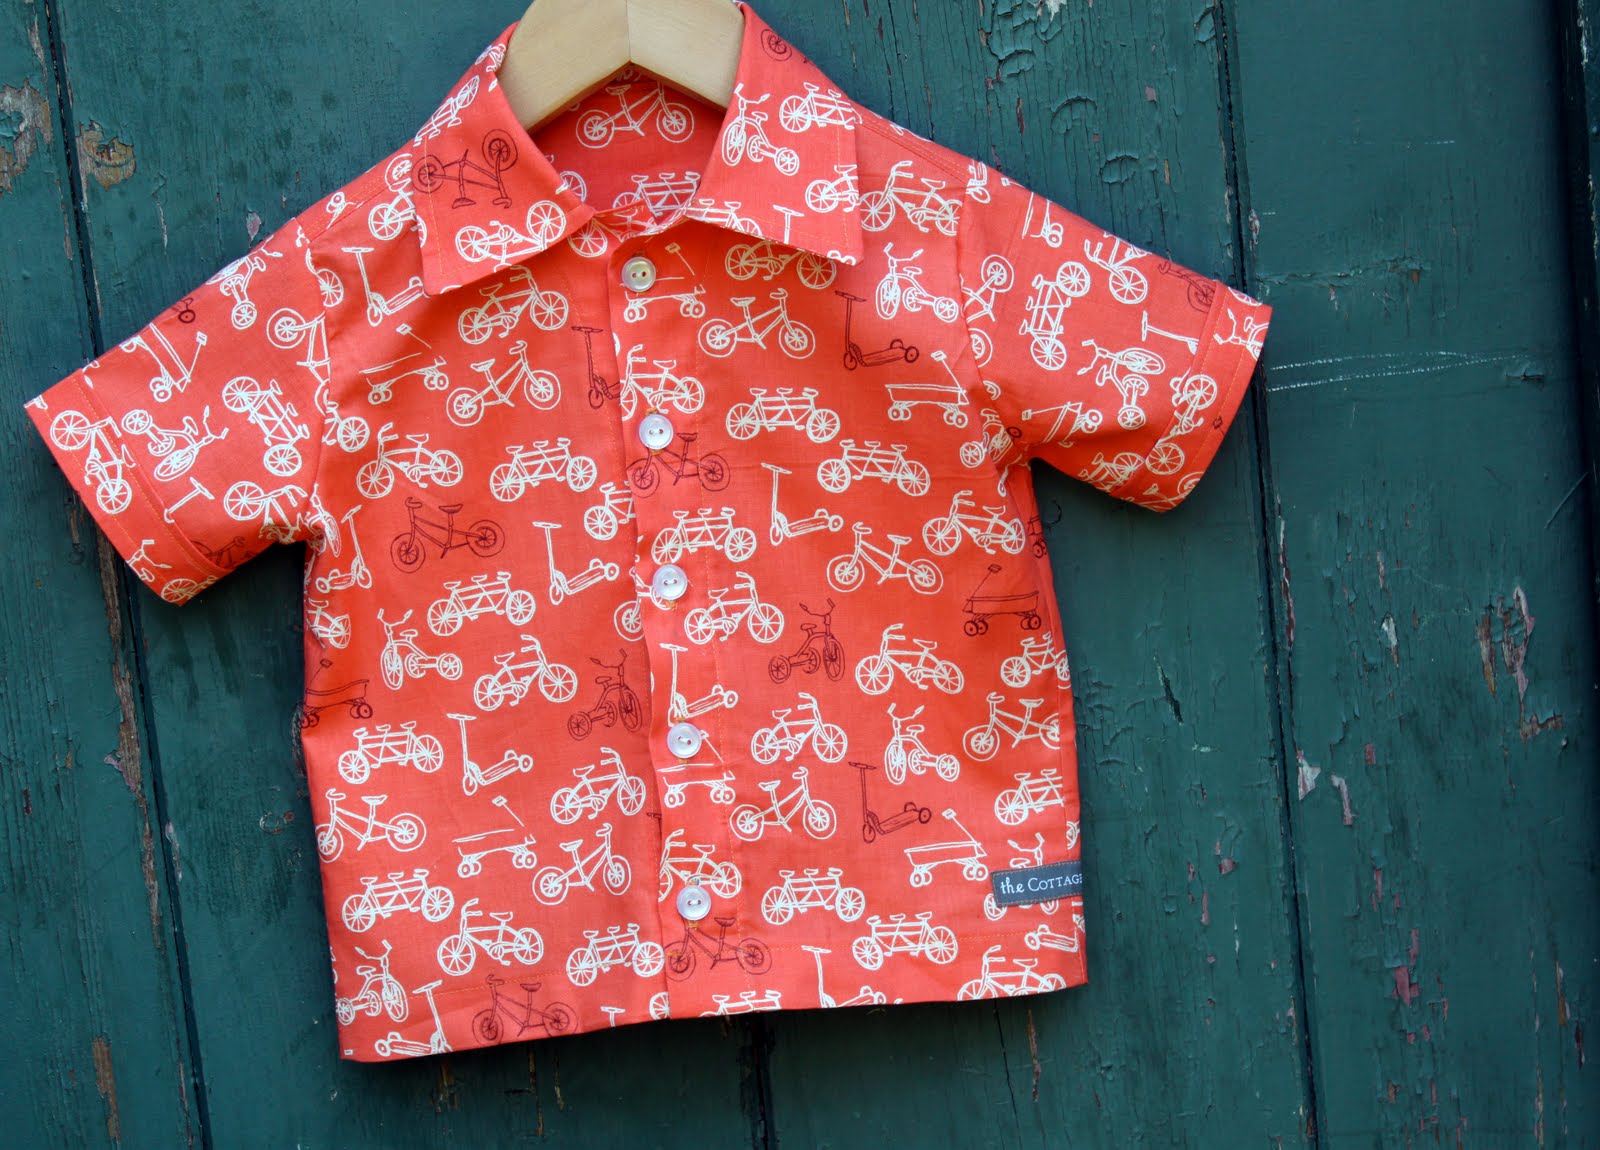
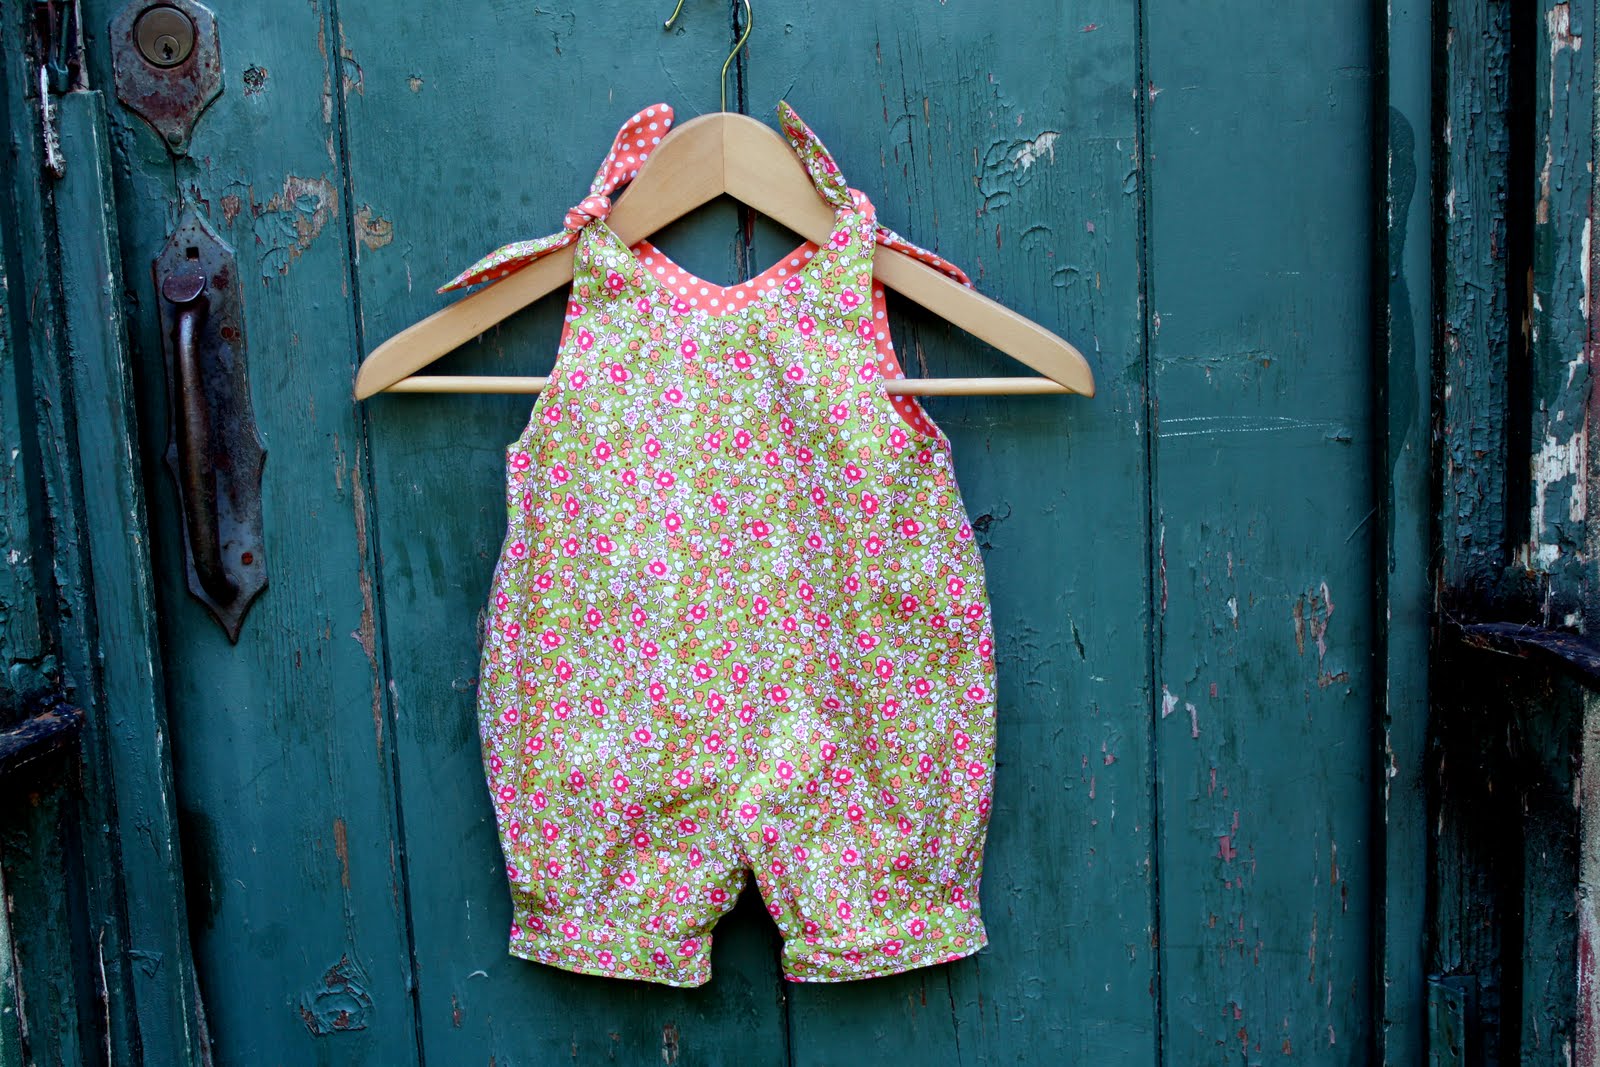
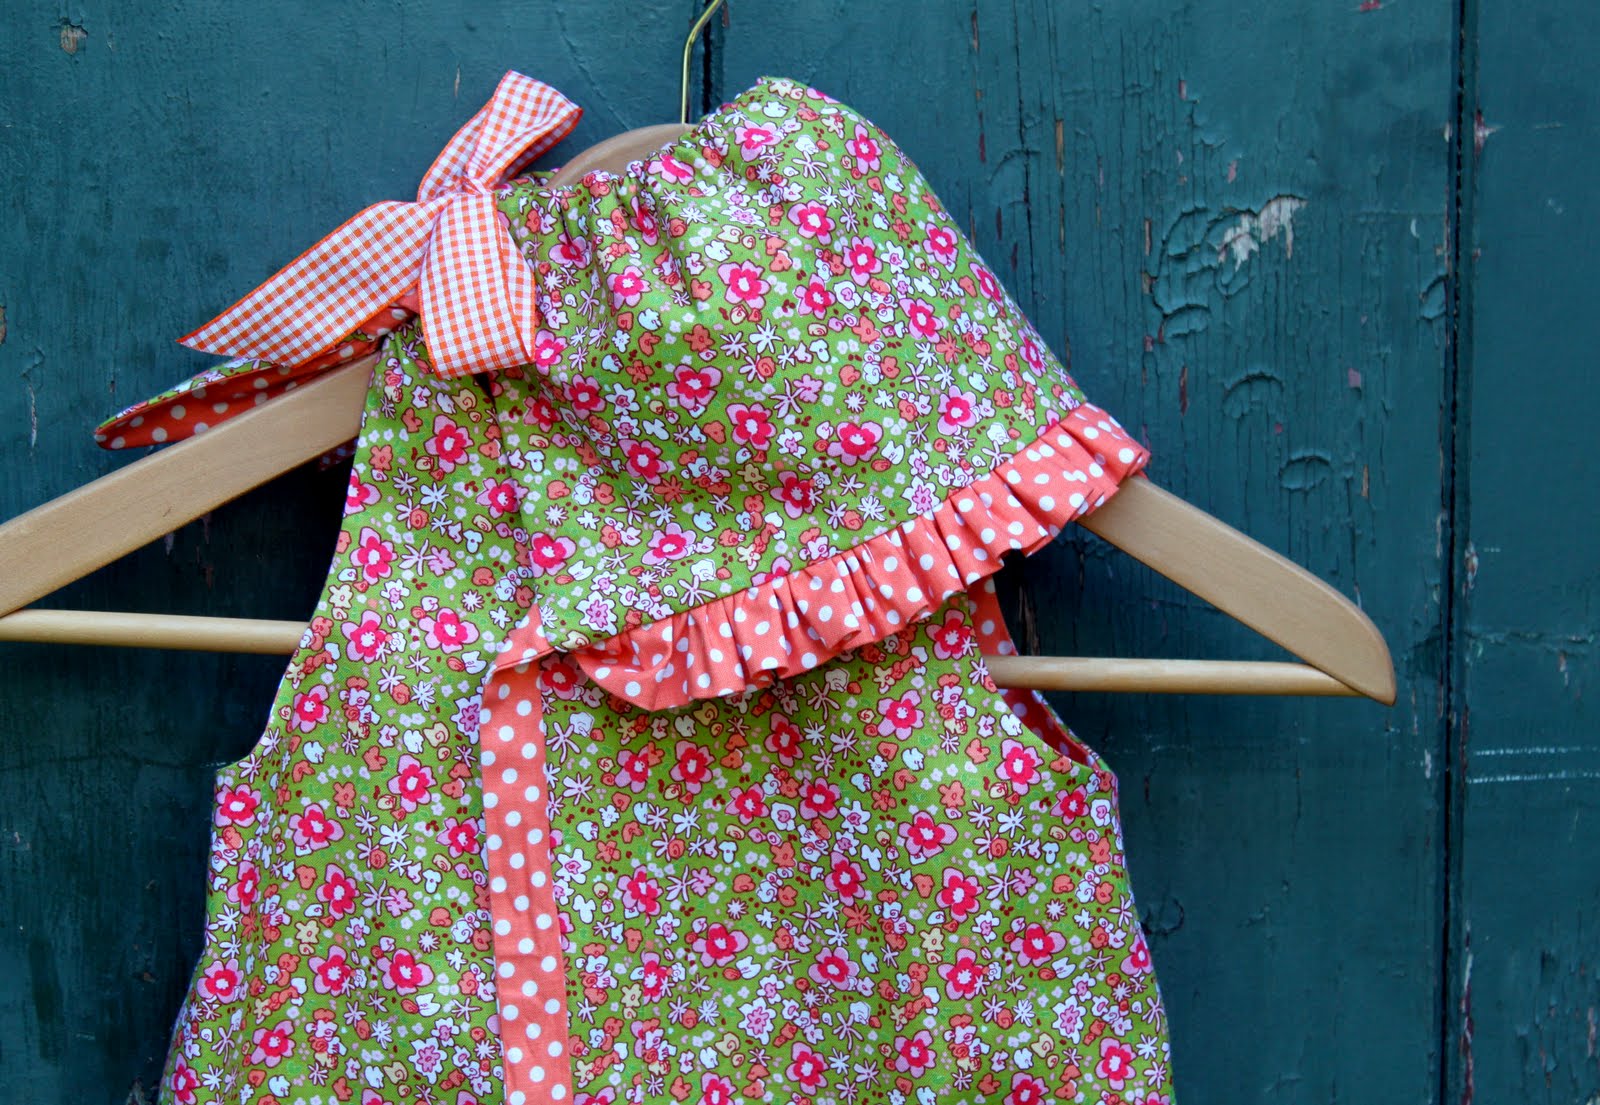
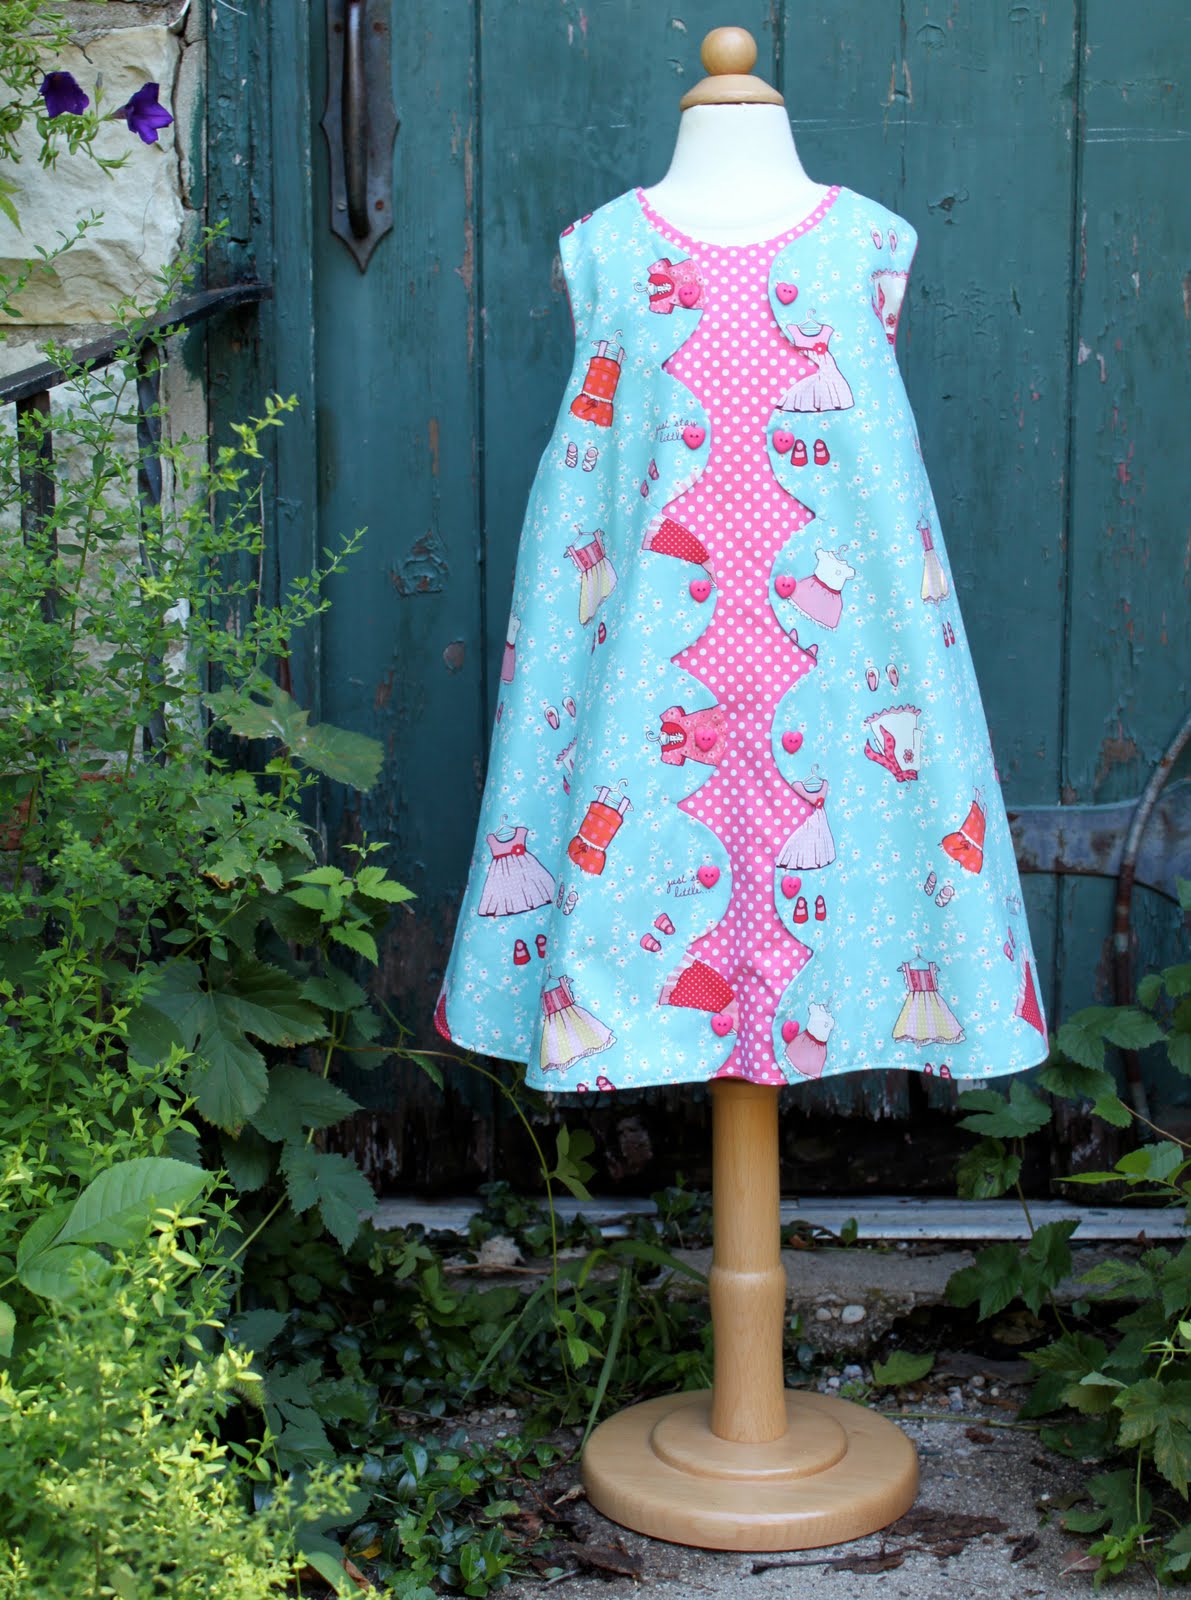
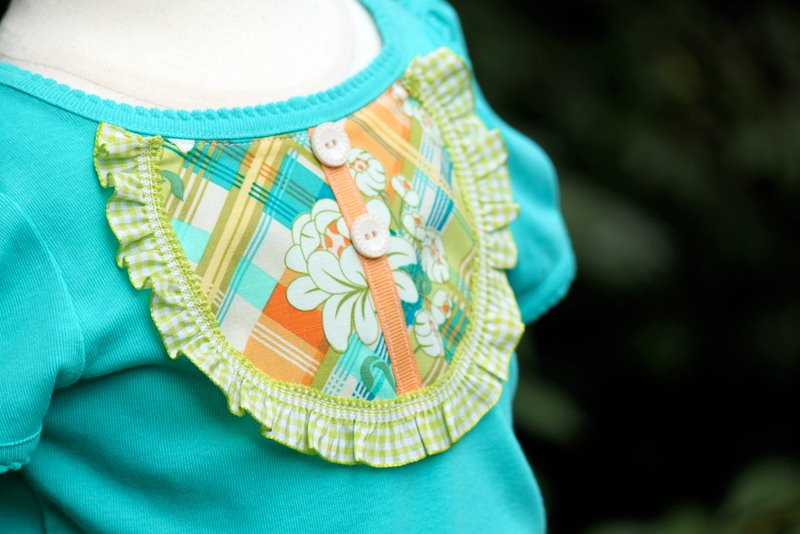
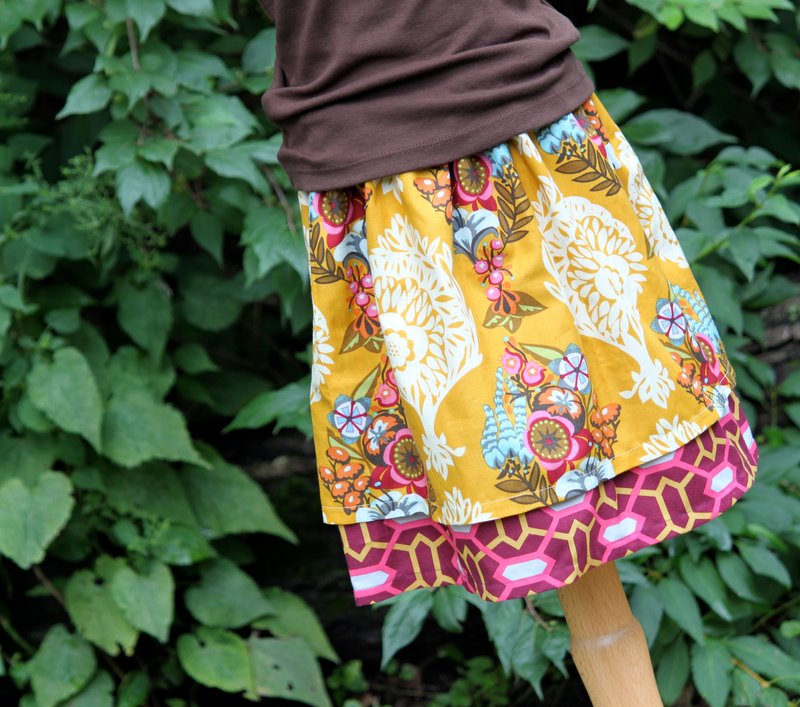
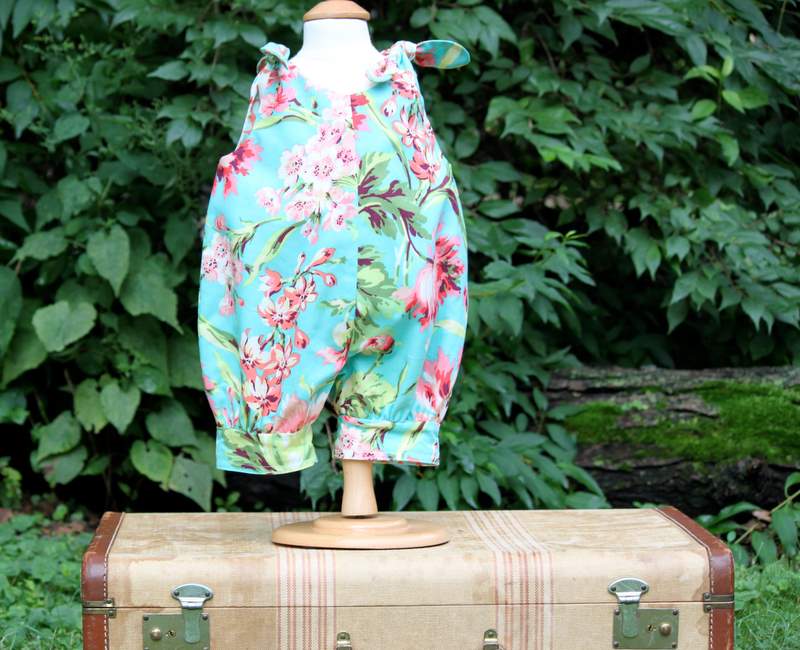
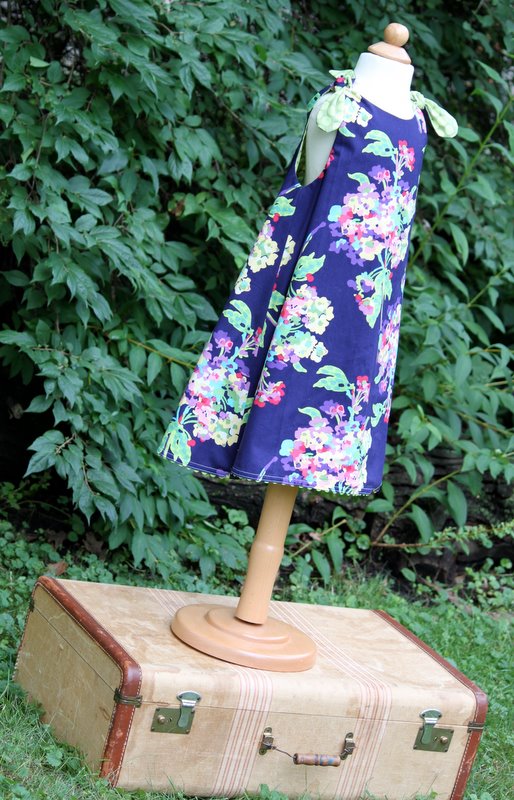
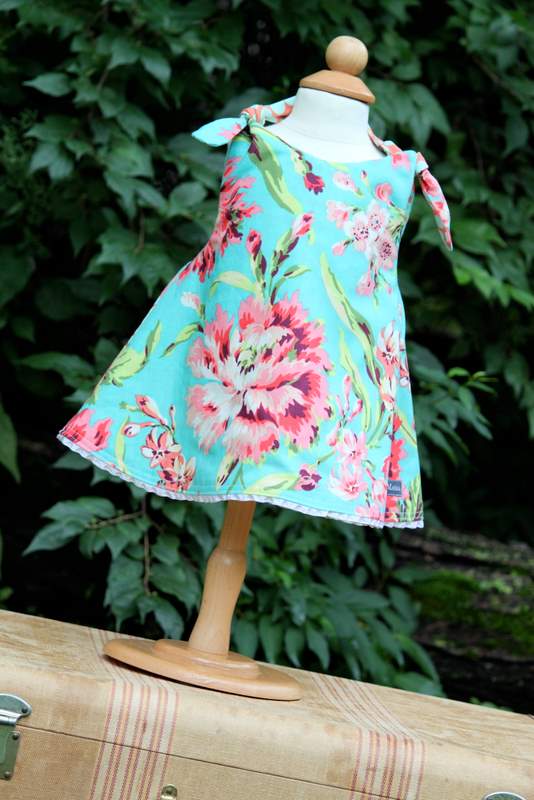
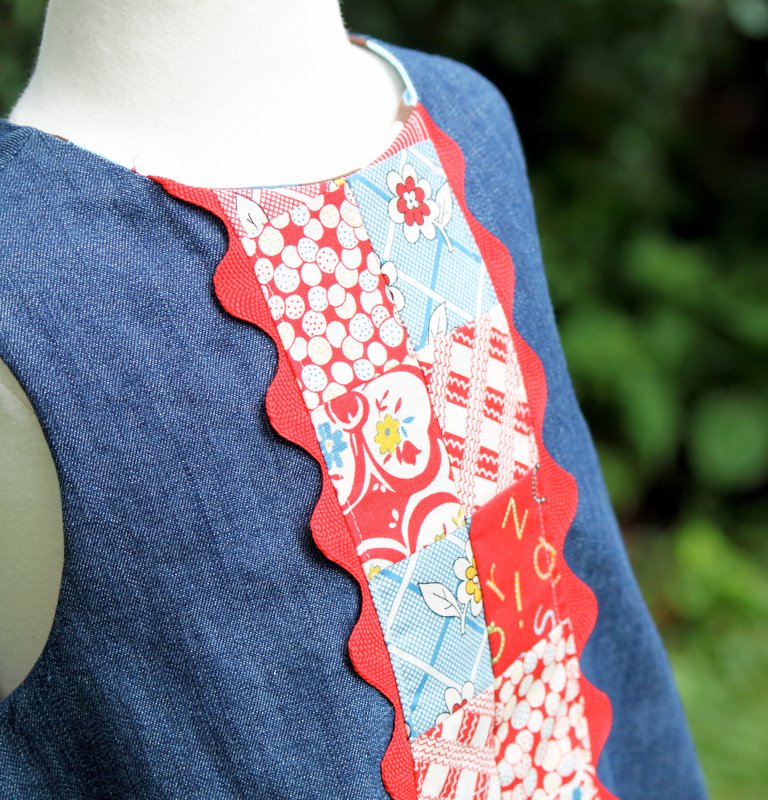
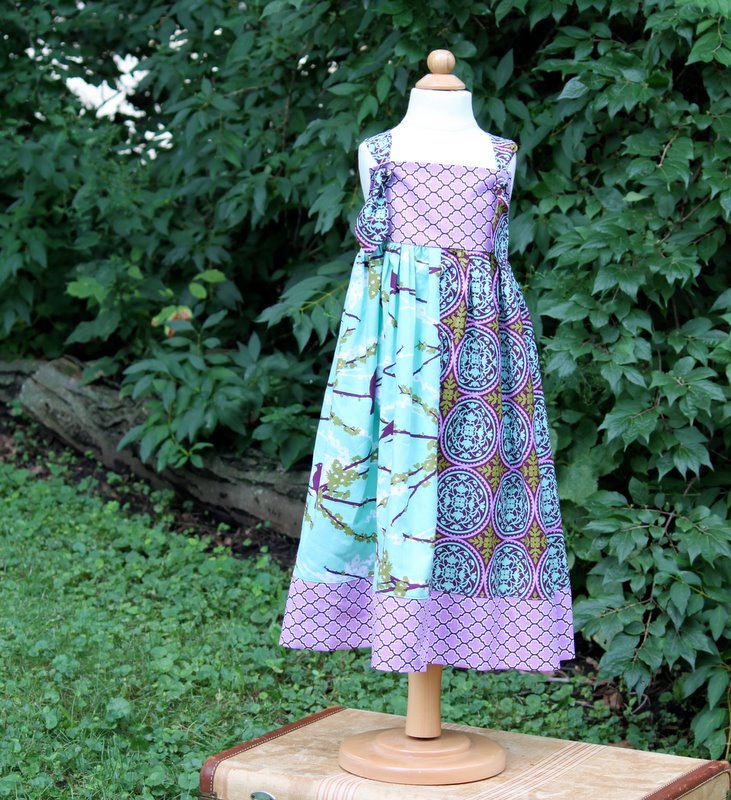
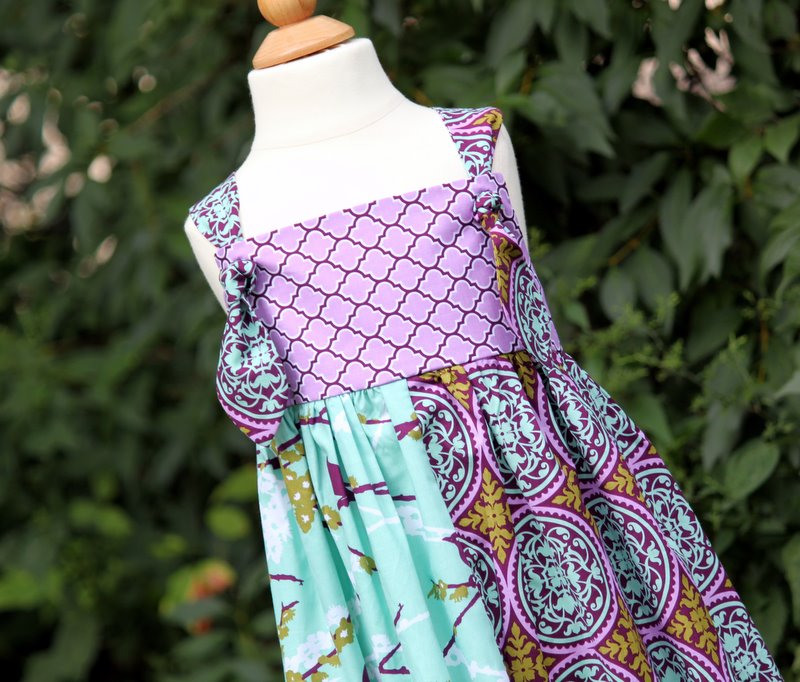
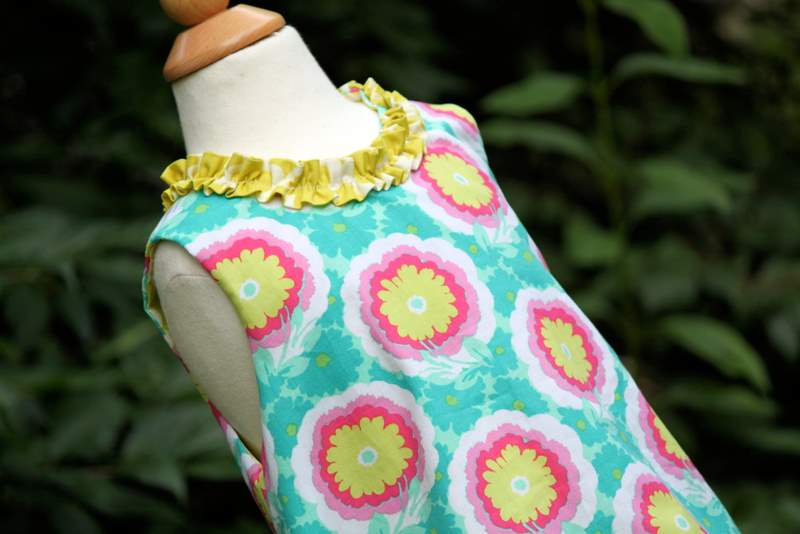
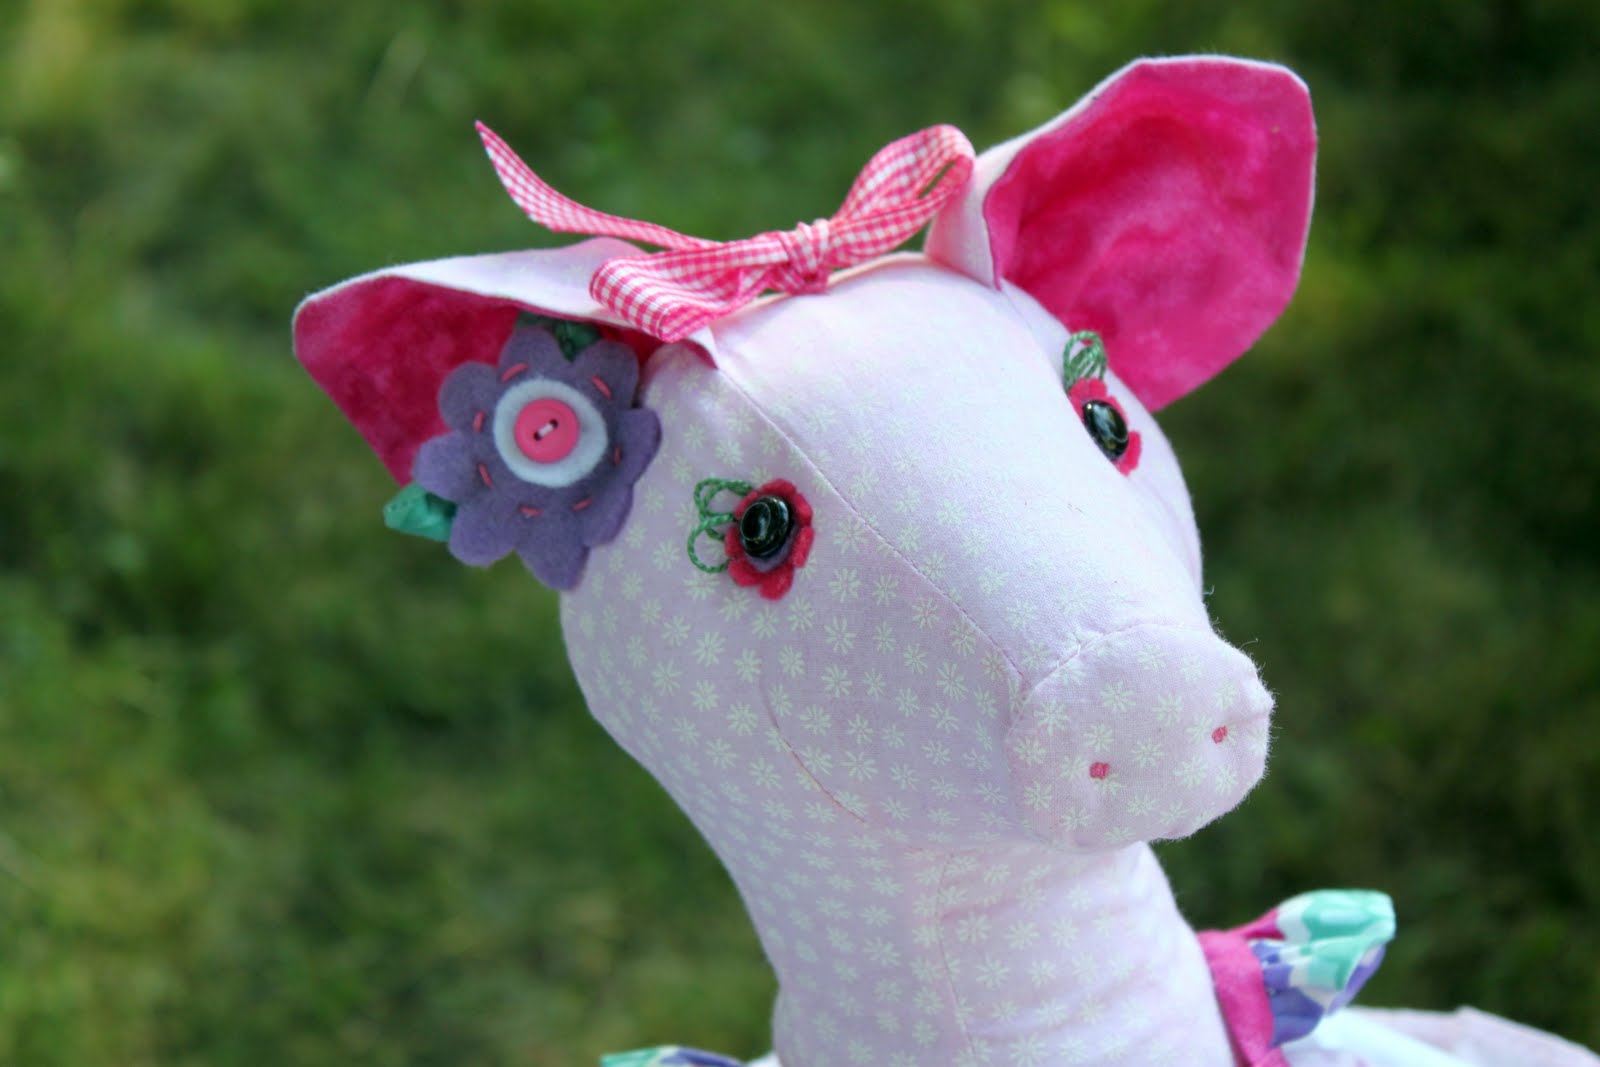
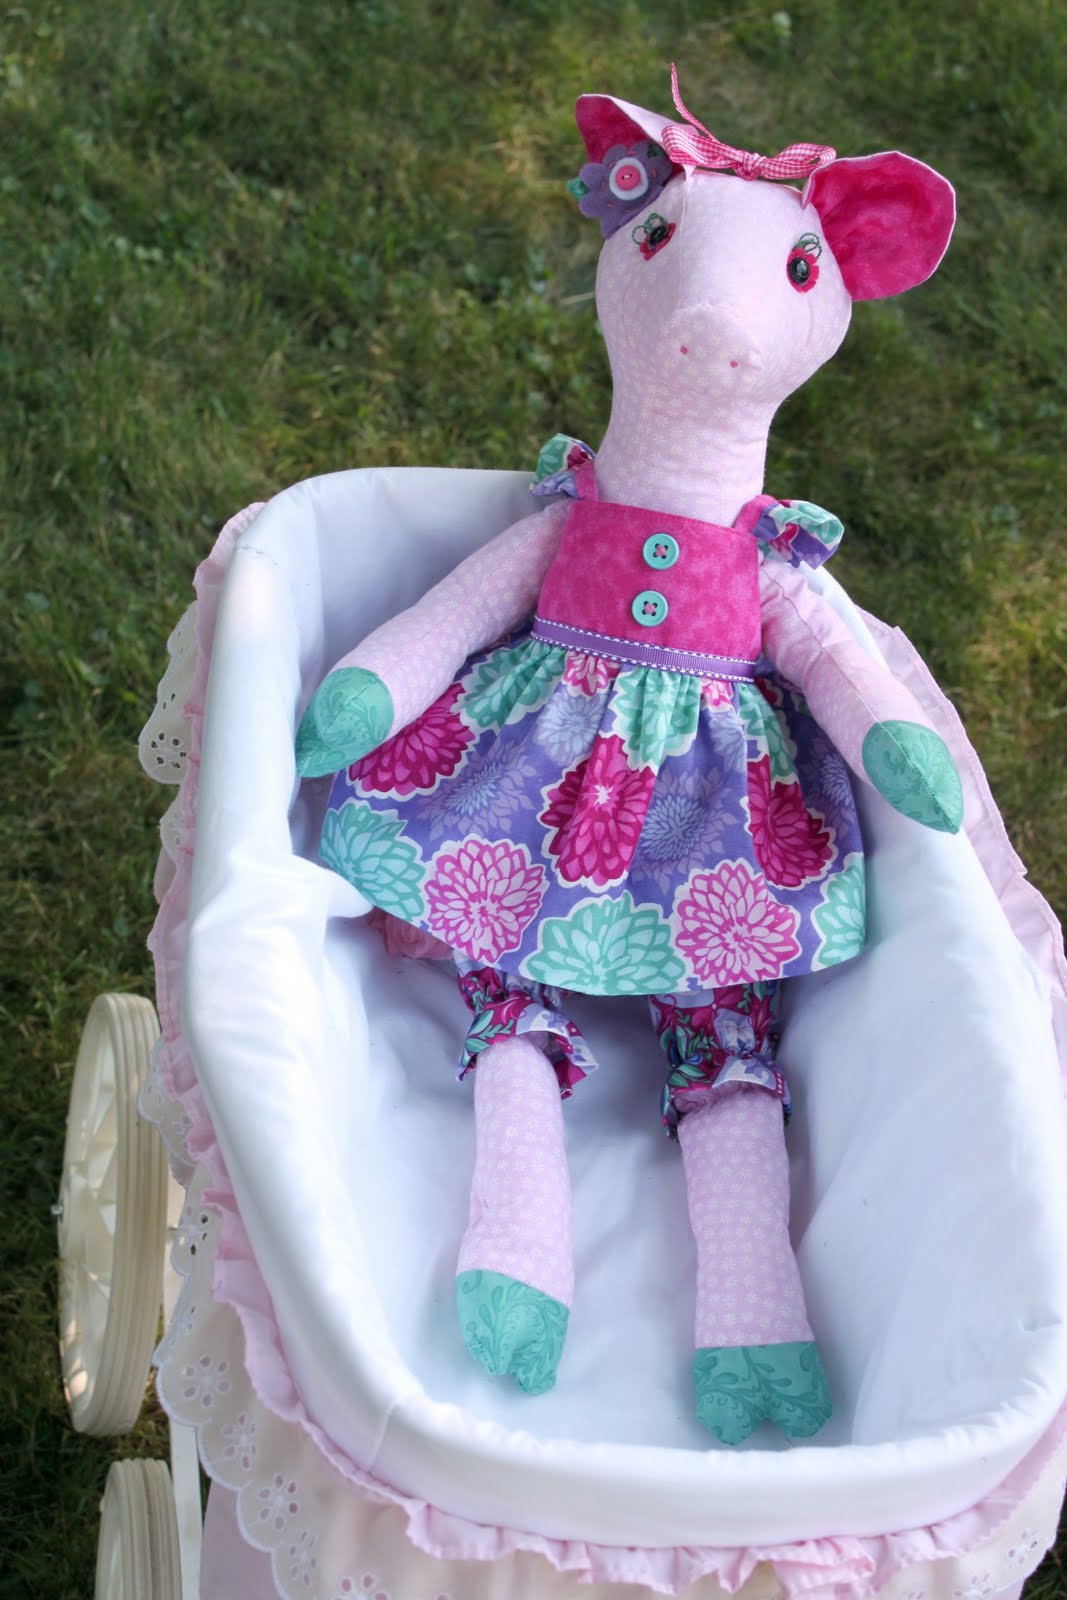
The Busy Mama

So I have been crazy busy around here lately.  I sort of feel like I am moving in 500 different directions trying to get everything done before our little baby boy arrives.  He’ll be here in three weeks (if he doesn’t come early)!  That being said, there is SO much I would like to do before we meet him so that I can fully focus on him and the girls during this new transition with our family.

As most of you know, that nesting instinct kicks in big time towards the end of pregnancy and I guess you could say I’ve sort of been “nesting” in my etsy shop.  I wanted to add some “ready-made” items to the shop along with my custom order pieces.  Here are some new things that have been added in the last month……….

I’ve added several “Paris Twirl Skirt and Shirt” sets to the shop as well as some skirt-only listings.  My girls love these outfits.  They are super cute, but Savannah says they are “super-cozy” which means she thinks they are soft.  The skirts are double layered for extra twirl factor and the tops are trimmed out with vintage lace trim.

In addition to the “Paris” sets, I’ve added several other skirt and shirt sets as well…….


(Skirt is available by itself as well)


Fall Ruby Twirl Skirt and Shirt Sets

In addition to the skirt and shirt sets, I’ve added several new reversible rompers and dresses…….

The Reversible Rompers are just that – FULLY reversible, so it’s basically like having two looks in one.  I can totally see these rompers transitioning to fall with tights, boots and a long sleeved shirt.  They have a sort of knicker look to them which I love for the cooler weather.

The Reversible Dresses are the same concept as the rompers, FULLY reversible so you get two looks in one.  You or your child can choose which side they feel like wearing on that particular day.  These dresses are cut with a wide-swing to them, so they are perfect for layering and twirling as well.

And here are a few other things that have shown up in the shop lately……..

Patchwork Janey Jumper

Plum Bird Knot Dress


Mod Shift Ruffle Neck Dress

In other very exciting news, I was asked by “Sew Beautiful” magazine to do a 3-5 page pictorial shoot featuring my designs and my new sewing patterns.  New sewing patterns, you say??  Yes, they are coming…..I promise!!  I’m just trying to get them off to the right printers and the first two should be available next month.  Both patterns feature designs you might have seen in my etsy shop and each pattern includes several different design variations.  Patterns will be available through my etsy shop and I will definitely be announcing when they have arrived!
I was seriously honored and flattered to be asked to be part of “Sew Beautiful” magazine and I have been working on my collection of samples to send to them by the end of the month for the photoshoot.  The photoshoot will take place next month; however, my pictorial will not be released until the July 2012 issue.  
The entire collection is being done in “Children at Play” by Sarah Jane Studios.  I met Sarah Jane at quilt market and just fell in love with her fabric as well as her darling personality.  This fabric has been SO much fun to work with and if you follow along on Facebook, then you’ve seen a few of my sneak peaks over there.  There is even BOY clothes!!
So for the next several weeks, I’m going to be finishing up my “Sew Beautiful” collection, getting my patterns ready to go, working on custom orders from the shop, putting the final touches on our little man’s room (pictures to come!), and maybe, just maybe………putting my feet up and resting a little.  
To be honest, I thrive on busyness so hopefully I can accomplish my goals in the next several weeks, but if not, that’s ok too.  I’m just going to roll with it……….you never know when this little guy is going to decide to make his grand entrance!!  We can’t wait!!

OnStar FMV Product Review

Have you heard of OnStar?  You might be most familiar with this product on GM vehicals; however,  I had the opportunity to test out the new OnStar FMV mirror on my Toyota Sienna mini-van and I’m telling you all about my experience on my review blog today.

Click HERE to read more!

Book Review: Glorious Embellishing with Gloria McKinnon

Sewing and crafting books are one of my favorite pieces of reading material.  I could flip through sewing books time after time and never get bored with them.  I find these books to be so inspiring and a wonderful resource for learning new tricks and techniques.   Most nights, before I fall asleep, I am looking at some sort of sewing / crafting magazine or book – it’s just a great way to end the day!
I was recently sent a copy of a fabulous new book from the publishers of Sew Beautiful and Martha Pullen for my review and I am thrilled to share this new publication with you all…………
Glorious Embellishing with Gloria McKinnon
The Ultimate Resource for Decorative Stitching and Beading

Have you ever been interested in embroidery or hand embellishing?  “Glorious Embellishing” with Gloria McKinnon includes seven different detail oriented projects in the first half of the book and then includes an invaluable embroidery stitch library in the second part of the book.  The projects are truly delicate works of art and are pieces that will be cherished for a lifetime.


Many of the projects include instructions on the piecing of fabric and then finish with the elaborate embellishing stitches that can be used.  The projects are meant to be inspiration and you really can make them into your own works of art.  The vintage women (seen in the project above) are included in the book so that you can put them on fabric transfer paper and use as part of your creation.

I am a big visual learner so I love all the illustrations that come with the embroidery stitch library.  They are very clear and easy to understand, especially for a novice when it comes to hand embroidery.  Most stitches start off showing you the most basic version and then go into more and more advance techniques.  The author also shows you how to add things such as beading or silk ribbons into your embroidery embellishment techniques.

Even if some of the projects are not necessarily your style, they can be adapted and made your own.  And again, I have to say that the embroidery stitch library in this book is like none I have ever seen.  I have always wanted to get more into embroidery and I think this book might be the push I need to make that happen.

If you are interested in reading more about “Glorious Embellishing with Gloria McKinnon”, please visit the Martha Pullen Store where you can purchase this book as well as many other sewing and craft resources.

Summer Berry Cones

These summer berry cones were one of my favorite looking dishes at Matilda’s “Tea for 2” party!  Not only were they tasty, but they were just so pretty that they made a wonderful centerpiece on our buffet table.

I had seen this idea on Pinterest to serve fruit salad inside waffle cones and I just thought it was brilliant!  Have I mentioned how much I L.O.V.E. Pinterest?  It is such amazing daily inspiration.  You can see some of my pins HERE.  I loved the idea of fruit salad, but I wanted to do something that represented Matilda and she loves berries, so I went with a berry salad instead.

With my style of entertaining, I like to have most of my food prepped ahead of time, but this was one dish we saved for the last minute.  Berries can start to go bad pretty soon after they are washed.  So we waited until about an hour before the party to wash and dry the berries.  We wanted to make sure that the berries were thoroughly dried, otherwise they would have made the cones soggy.

We went with strawberries, blueberries and blackberries.  I thought about raspberries, but sometimes those can get smashed pretty easily, so I left them out.  Also, we are lucky that Matilda’s birthday falls right during berry season.  I think if it were another time of year we would have done a different fruit because berries can be really pricey out of season.

I also toyed with the idea of dipping the tops of the cones in chocolate, but with it being in the 80’s, I was worried they might melt and be messy.  I still think I might do that for an indoor or fall party!

From Grandma with Love………Claira the Pig

I knew my mom was working on something special for Matilda’s 2nd birthday, but when Matilda opened up “Claira the Pig”, I could not believe my eyes.  Total and complete adorableness! 

This pig doll is named “Claira” and was made from Heather Bailey’s pattern “Claira and Clancy Pig Dolls“.  Mom put her own twist on the pattern with her use of fabrics, trims and buttons.  The details in this doll are amazing!

 
I am in love with the eyes and the little eye lashes.  Also the sweet flower next to the ear is another special detail that makes this doll one-of-a-kind.

The doll pattern comes with boy and girl clothing options which makes it a great gift for a boy or girl.  The long, skinny legs with the bloomers are totally adorable.  I could seriously eat this doll up!  I didn’t get a picture of it, but the arms are attached with buttons so they can move up and down. 

Matilda is one lucky little girl because mom made the clothing for this doll from Kate Spain’s “Terrain” line that has yet to be released – she is SO cutting edge.  She used some fat quarters from the bundle that she picked up at the sample spree at quilt market.  This fabric will be released in September 2011.

As you know, I just love handmade gifts and this one is no exception.  I really should have taken a picture of Matilda with Claira because the doll is quite large and is 3/4’s of her size.  I love seeing her walking around with Claira’s long skinny legs wiggling around.  Matilda has added Claira to her nightly sleeping buddy collection along-side Elmo and her little lamb.

Hmmmm, wonder if Mom will be making one of these for little man too once he arrives?  I think Claira might need her Clancy!

Altered Couture Magazine Fall 2011

It happened again – The Cottage Mama was published in the Fall 2011 Issue of Altered Couture Magazine!  I’m so thrilled to be part of this wonderful publication for the second time and I have to admit, I don’t think I will ever get tired of seeing my work in print.  This issue of the magazine is full of all sorts of tutorials and inspiration for altering your fall wardrobe. Oh, how I love fall!

In the fall issue I have three pieces that are featured……..

The first two pieces are combined into one article and they are my Shawl Collar Sweater and T-Shirt Shrug.  Both of these are easy fall pieces that can be made for next to nothing and both in under an hour.

The third featured piece is a felted wool coat I made last year for my oldest daughter, Savannah Rose.  The coat is made from several different felted wool sweaters as well as some felted wool yardage.  My favorite things about this piece are the leaves and the little mushroom button.  The coat will be too small for Savannah this year, but should be just right for Miss Matilda.

The fall issue of Altered Couture is on newsstands now, so if you love upcycled, recycled and repurposed fashions, I highly recommend you pick up the latest copy.  This is a quarterly publication so it should be available for the next three months.  Again, I’m so happy to be part of the Altered Couture family and I’m looking forward to sharing my winter piece with you in the next issue.

To view step-by-step tutorials for some of these pieces, visit my TUTORIALS tab for more information.

Crepe Paper Flowers

The crepe paper flowers that I made for Matilda’s “Tea for 2” party were really simple to make and incredibly inexpensive.  I bought three rolls of different colored crepe paper and was able to make about 10 different flowers and a ton of ruffled streamers (and I still had some left over).  At $1.00 per roll, I would definitely say this was budget decorating.

Here’s how to make your own crepe paper flowers……..

Supplies:
3 rolls crepe paper (different colors)
Tape
Sewing machine

Directions: 

Grab your three rolls of crepe paper.   I chose two different shades of pink and yellow.  I purchased these at Walmart for $1.00 per roll and they coordinated with the napkins and plates as well.

Place your three different colored crepe papers on top of one another.

Set your sewing machine to the longest stitch length (mine is 5.0) and run a straight, gathering stitch along one of the edges of your crepe paper.  Do not back-stitch at the beginning or the end of your stitching or you will not be able to gather your crepe paper.

The length of crepe paper you cut is really up to you.  The longer the crepe paper length, the larger your flowers will be.  I used many different lengths for a variety of sizes, but you could do them all uniformly as well.  You might test one out first to see how long you want your crepe paper.

Pull one of the threads and begin to gather your crepe paper.  This will take a little effort, but keep pulling and sliding the gathers until you have successfully gathered the entire length of your crepe paper.

Here is what your crepe paper will look like after gathering.  You can see that it already starts to form the shape of a flower.

Work your crepe paper around in a circle and tape the back with clear tape to secure in place.

Above is your crepe paper flower before you fluff it out.  To fluff it, just seperate each layer of crepe paper from the other until you’ve achieved your desired look.

And when you have successfully fluffed your flower, you will have a gorgeous, full-looking crepe paper flower to use for your next party.  Try making these in a variety of colors and sizes to coordinate with any party theme.  These would also be really great for a baby or bridal shower as well!

{ Nesting } – Organization Overload

It’s less than two months now until little man’s scheduled arrival.  And when I say scheduled, I mean really scheduled since, unless I go into labor early, I have a c-section date already on the calendar (due to my previous c-section with Miss M.).  Anyway, I have since realized that there are 5000 things I want to get done before this little angels arrival and SO little time to get it all done.

Recently I went slightly crazy organizing the house.  I think my good friend, Lara, thought I had lost my mind when I was showing her all the insides of my cabinets.  Do any of you get crazy-organized before a baby arrives?  I have done this each and every time during all three pregnancies now.  I think it’s my last ditch effort to have total control over my life until chaos ensues with life and a newborn.

I love feeling organized and I am feeling pretty good about the state of our house right now.  Here are just a few things I’ve been up to with my home organization………

The Kitchen

Kitchen Cabinets:  I only did a little organizing in the kitchen cabinets, but I love having things placed in containers.  I think it makes the cabinets so much more pleasing to the eye.  I also think you can store so much more when you get rid of the bulky boxes.

Kitchen Drawers:  Ok, you might find this crazy, but I measured all of my cabinets, shelves, drawers, ect., before I went shopping for any containers.  I wanted to make sure I got the perfect fit and didn’t over-buy or under-buy.  I headed to the dollar store (Dollar Tree) in my area for all these different drawer containers.  I find they have a great selection of organizing supplies, some even come in sets of three, and for $1.00, you can’t beat it!

Corner Kitchen Cabinet:  This cabinet has always been a little awkward.  It’s really deep and in the corner of our kitchen.  Things have tended to get lost towards the back.  I found these two shelves in my in-laws basement that they were using and I think they make the cabinet feel so much larger.  I’ve always loved having our cereal in these plastic containers.  It makes it easy to see how much is left and keeps it fresh longer.

Spices: I keep the majority of my spices in the double-tiered, lazy-susan pictured in one of the earlier cabinet photos.  But for the spices I reach for frequently, I keep them stored in this rack that is attached to our kitchen walls.  We found this one at IKEA several years ago and it has been great!
I keep all my cooking utensils in this tall white container (to the left) and our oven mitts in one of my favorite white woven stone bowls.  I always have a cookbook out and we keep our olive oil and white balsamic vinegar on the counter as well.

Kitchen Hutch:  This is one of my favorite additions to our kitchen – the hutch.  I bought this about four years ago from the JC Penny catalog.  It was not a very expensive piece, but it has provided us with so much additional storage that it was well-worth whatever the price was back then!

We keep our pasta stored in plastic and glass containers on the main shelf.  Baby bibs are concealed in that brown box and the little silver platter on top is a great catch-all for hair ties and little things that just end up out of place.  Our dinner plates are kept here and are easy to access.  I added a hook to the side of the hutch to hang all of our aprons (the girls each have one and I have one as well).
I keep some things we use less frequently in the bottom cabinet of the hutch.  I’ve got our salad serving bowls, decorative plate chargers, ramekins, creme brulee dishes, individual casserole dishes as well as some cocktail napkins and paper plates.
The Downstairs Bathroom
Downstairs Medicine Cabinet:  I kind of feel like we are getting personal here, showing you the inside of our medicine cabinet, but we’re all friends, right?  Again, I got these sets of three little baskets from the dollar store as well as the one long basket.  Total cost of organization – $3.00 – totally worth it!
The Family Room

Media Storage:  I’ve stored all of our movies under our entertainment center.  I know it’s hard to believe, but yes we still have a VHS player, therefore, we still have VHS movies.  Don’t worry, we’re not totally in the stone-age……we have DVD and all that other stuff too.  But if you are in the market for movies, I’m telling you, they are practically giving away VHS tapes at your local thrift stores.

I purchased these plastic bins at Wal-Mart and they fit the VHS movies perfectly.  We already had the photo storage boxes which work great for DVD, video games and VHS.  The one wicker-basket are pretty much all my husband’s movies and the rest are all kiddo movies.

Someday when I’m being really organized, I’ll use our DVD burner and burn all the VHS onto DVD, but who knows when that day will come.

Side-Board Storage: This is where my OCD measuring came in handy before I went shopping.  I found these three baskets at TJ Maxx and if I wouldn’t have measured, I probably would have only bought two because they looked so big in the store.  But I pulled out my handy “Notepad Holder” and saw that three would fit exactly in our side-board.  We keep diapers and wipes in one basket and right now the other two are pretty open.  It’s always good to have additional storage for the future so we’re not constantly having to try to figure out where to put things.
Dining Room

Corner Hutch: I love this little corner built-in, in our dining room.  It’s very reminiscent of the 1930’s-1940’s (which was when our house was built) and is original to the house.  I keep all our non-everyday glassware in here arranged by type.  I also keep some special occasion dishes on the bottom shelf as well.  It the bottom cabinet, I’ve stored our margarita glasses as well as some other special occasion tableware.
So that’s what I’ve been up to lately……..nesting, BIG time!  I’m trying to take full advantage of this amazing energy burst because I know it will soon be disappearing and I will be heading into the “I’m done being pregnant mode” during my final month.  I’ll soon be showing your our “Nautical” themed nursery. It’s not quite finished yet, but it’s coming along.
What kind of crazy nesting activity have you all gone through?  Anyone else go organizationally crazy?

Fat Quarter Shop Fabric Giveaway Winners

I’m so excited to announce the winner(s) of the Fat Quarter Shop “Meadow Friends” jelly roll giveaway.  Did you notice how I said winner(s) plural?  Well, Fat Quarter Shop contacted me this week and said because you guys did such an awesome job at visiting their shop and ordering fabric, that instead of just giving away one jelly roll, they are giving away FOUR!!!

Here are the FOUR lucky winners………

Congratulations to all four of you!  Each winner will receive a jelly roll of “Meadow Friends” by Deb Strain from Fat Quarter Shop and can choose whether they would like the boy or girl version.  If you were one of the lucky winners, please email me at thecottagemama[at]gmail[dot]com with your contact information, your boy or girl selection and we will get you your prize as soon as possible!

Thank you so much to everyone who entered and if you didn’t get a chance to visit Fat Quarter Shop, make sure to pay them a visit – their shop is like a slice of fabric heaven!
If you are interested in becoming a sponsor of The Cottage Home blog, please email Lindsay at thecottagemama[at]gmail[dot]com for rates and more information.

Decorating ~ Girls Shared Toddler Bedroom

About a month ago we moved the girls into the same bedroom.  I’m not going to lie, I was extremely nervous to make this move, but we knew it needed to happen well in advance of the other big adjustment in our future (baby brother).  It was a big transition for them and for us into their Girls Shared Toddler Bedroom.  It was Matilda’s first time in a “big girl bed” and the first time either girl has ever had a roommate.  We had a rough first couple days, but since then it’s been working out pretty well.

The girls bedroom is not a huge room, I think it’s 11′ x 13′ and we weren’t really sure if both beds were going to fit.  Sure enough, they did!  I just love these beds.  They were given to us after my husband’s Grandma passed away last year – they use to be in her guest bedroom.  I love the ornate lines and the creamy white color.  It’s exactly what I would have picked out for the girls had I gone shopping for these myself.  And I’m sure Brett’s Grand-Molly loves looking down seeing her great-granddaughters snug as little bugs in the beds she picked out.

I’ve been collecting embroidery hoops from local thrift shops for the past year or so.  Just picking them up here and there, not quite sure what I was going to do with them.  These were so inexpensive, maybe .25 – .49 cents a piece.  I used my designer fabric scraps and just stretched them into each canvas and then trimmed around the edges.  They are each hung on a nail and are very light-weight.

The embroidery hoops on the wall is not my original idea, I’ve seen this done in designer magazines as well as on lots of online websites and I have always loved the look.  We used to have Savannah’s name on the wall, but when we moved Matilda in, we had to come up with something new.  I have so many fabric scraps that I just love, I knew this inexpensive art work would be just perfect to fill the large wall in the girls room.

The pink polka dot duvet covers and pillow shams are from Potterybarn Kids.  The twin-sized quilt on the foot of Savannah’s bed is one that I made for her from Heather Bailey’s “Freshcut” fabric line before Matilda’s arrival.  I haven’t had time to make Matilda a big quilt yet, so her quilt is store-bought.  It’s really cute with owls, flowers and birds.

The cream colored drapes were in the nursery, but didn’t really go with our new “Nautical” theme for baby brother.  So I moved them into the girls room, but they needed something against the yellow wall.  I found these two valences at Home Goods store in the clearance section – $3.00 a piece.  I stitched them to the top of each curtain panel to add a little interest around the window.  They are trimmed with ric-rac and were just the right colors.

I covered this lampshade for Savannah’s original room and I still love it.  I covered it with fabric and then made fabric yo-yo’s that I hot glued all around the bottom.  It is finished at the top with a pink, ruffle trim ribbon.

Above are a couple pillows I made for their room.  I haven’t gotten around to making an “M” pillow, but hopefully that is on my short list of to-dos.  The other pillow is made from scraps from Savannah’s quilt and several handmade fabric yo-yo’s.

The elephant wall art was made by me from different fabric scraps that I cut up to create the piece.  There are two other similar pieces in the room (though I didn’t get a photograph of them) – one has two little birds and the other has a lion and a whale on it.  All three photo mats are covered in the same pink polka dot fabric.

Matilda’s bed is still a little high up for her to climb in, so she uses this painted trunk to climb into bed.  It’s great because it also doubles as storage and looks pretty too.

The girls are having a great time being roommates.  Since they are only 16-months apart, I think it works out really well for them to share a room.  I’m currently having them nap in separately (Savannah naps in Mama and Daddy’s bed), but other than that it’s worked out really great!
Shared Toddler Girls Bedroom from The Cottage Mama. www.thecottagemama.com