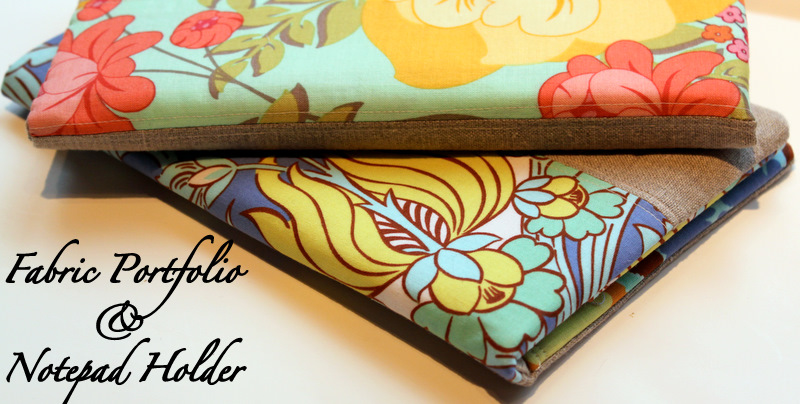
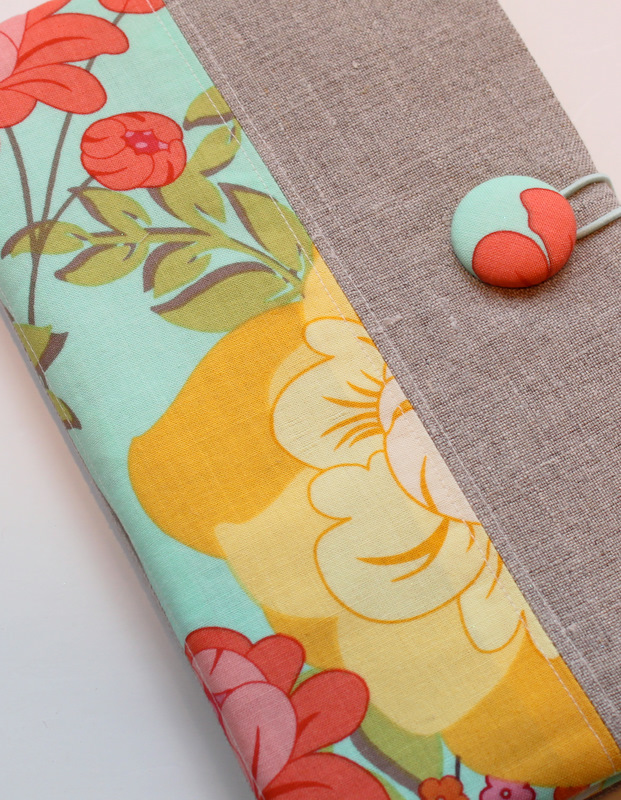
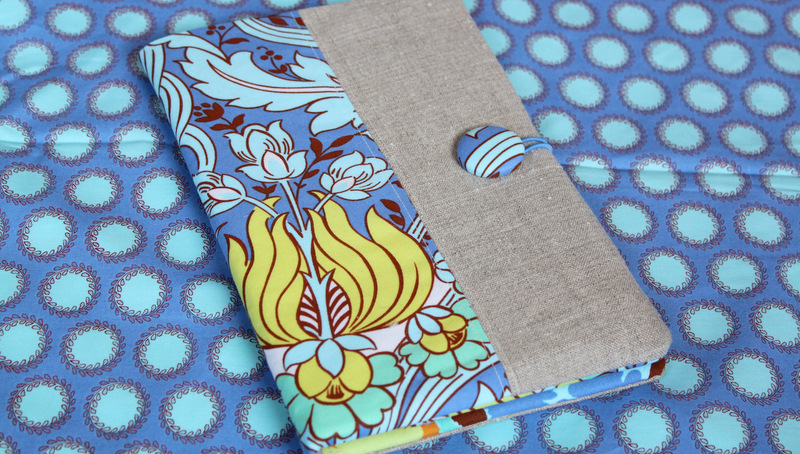
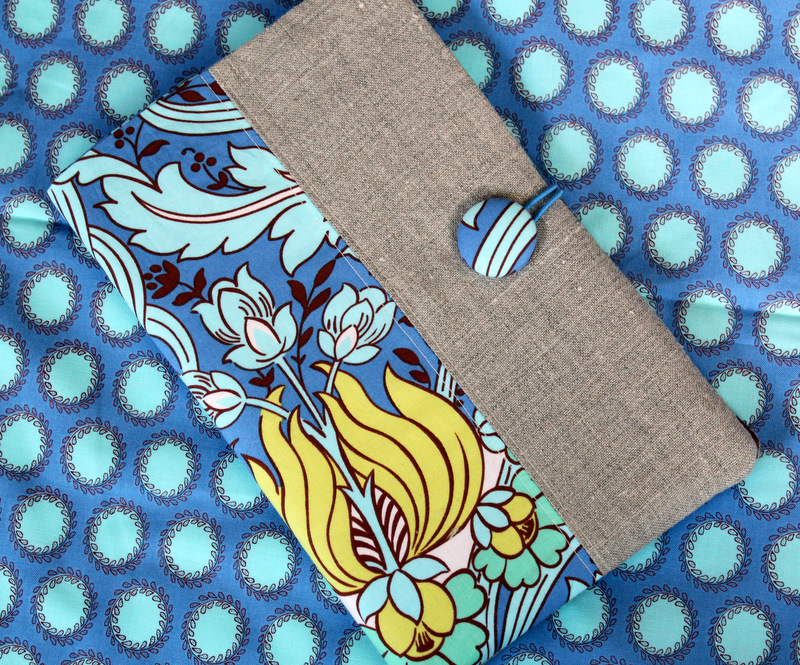
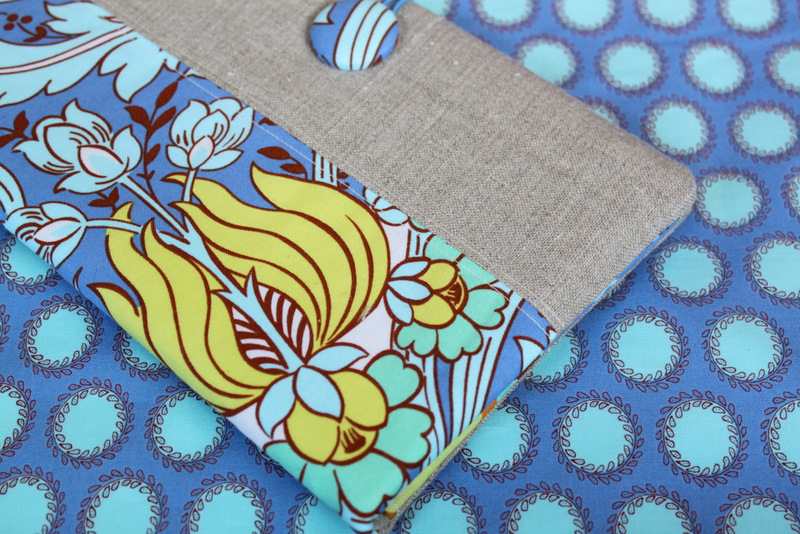
So I’ve been meaning to post this tutorial for the last several weeks, but just haven’t had the time to get it written up. I made these Fabric Portfolios for my mom and I to take to quilt market. I actually sent my mom hers for mother’s day with the business cards I had printed up for her. I wanted us to have something to carry around our business cards, postcards, credentials and a notepad. These turned out to be just perfect!
I designed these portfolios to fit easily inside of a purse, but big enough to hold a good amount of notes and documents. Make one of these to tote around while you run errands, to carry your coupons, grocery list, or make one for a gift (perhaps for a recent graduate). I think just about anyone you know could probably find a use for the Fabric Portfolio and Notepad Holder.

Supplies:
Fabric – Fat Quarters (I used 4 different designs as well as linen)
Medium-weight fusible interfacing
1 hair elastic
1 button
Two pieces of cardboard
Basic sewing supplies
1 notepad
Directions:
Cut your fabric pieces.
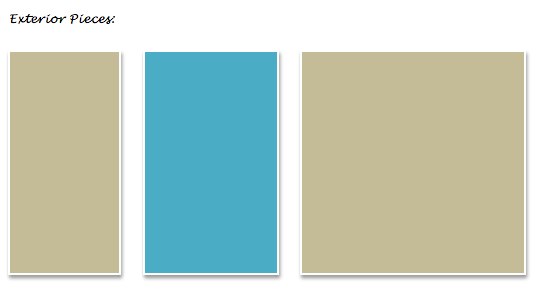
Exterior:
Cut 1 – 10″ x 3.5″ (Linen)
Cut 1 – 10″ x 4″ (Fabric A)
Cut 1 – 10″ x 6.5″ (Linen)
Interfacing:
Cut 1 – 10″ x 13″

Interior:
Cut 1 – 10″ x 13″ (Linen)
Cut 2 – 10″ x 6.5″ (Fabric A)
Cut 1 – 10″ x 6.5″ (Fabric B) – Hem top down 1″ – this is the piece that will hold notepad
Cut 2 – 10″ x 6.5″ (Fabric C) – Fold in half, top down (one goes on each side)
Cut 1 – 6.5″ x 5″ (Fabric D) – Fold in half, top down
Cut 1 – 5″ x 5″ (Fabric B) – Fold in half on the diagonal
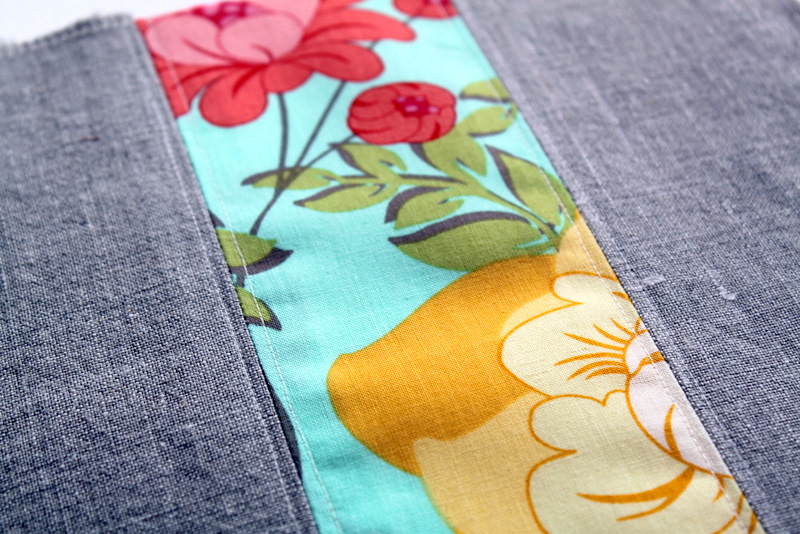
Sew the outer pieces together. Place one piece of printed fabric on top of one piece of plain fabric (right sides together). Stitch a straight line – 1/4″ seam allowance. Do the same on the other side of the printed fabric. Press both seams open. You will now have a plain piece of fabric on either side of the printed fabric for your exterior.

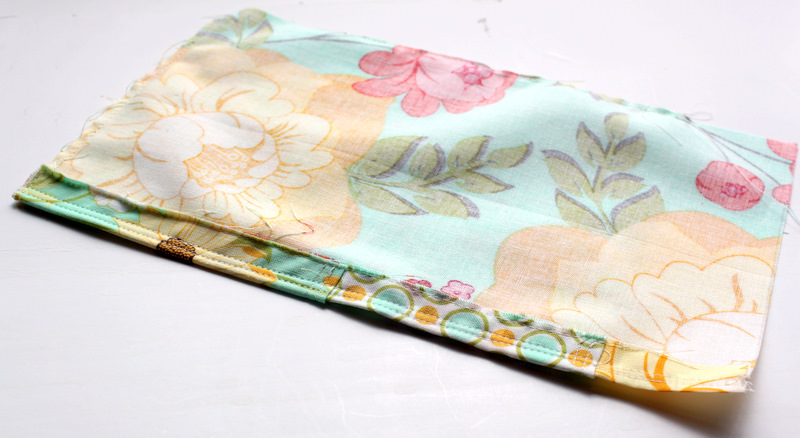
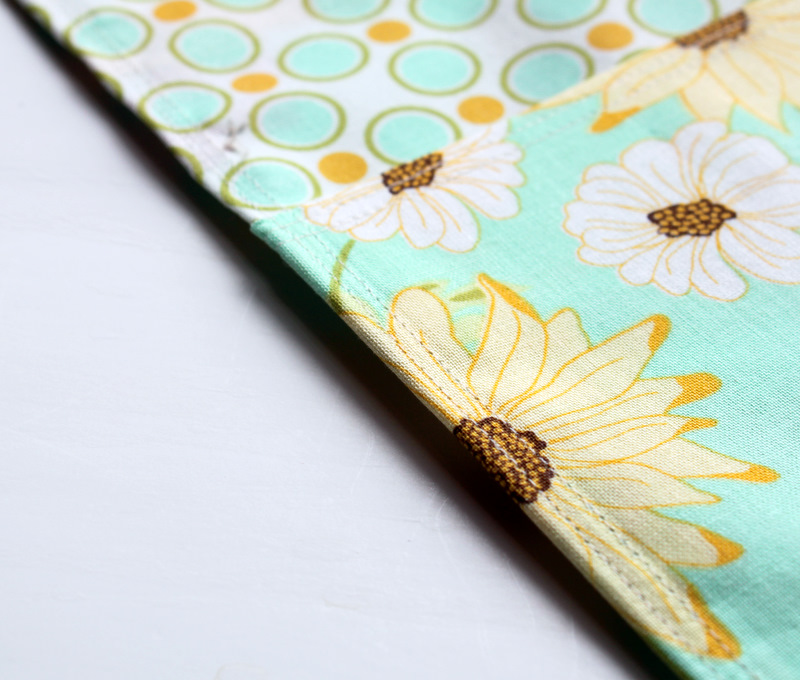
Top-stitch on both sides of the seam. 1/8″-1/4″ on either or both sides. See picture above. I top-stitched on both sides.

This is what the back side of the exterior piece will look like when you have pressed your seams open. Press your interfacing to the back side of the exterior piece of fabric.
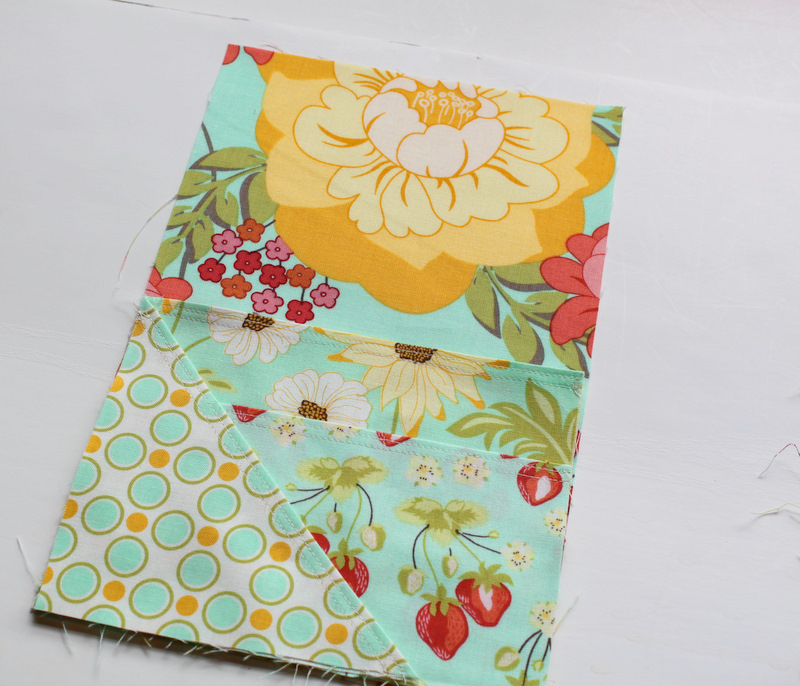
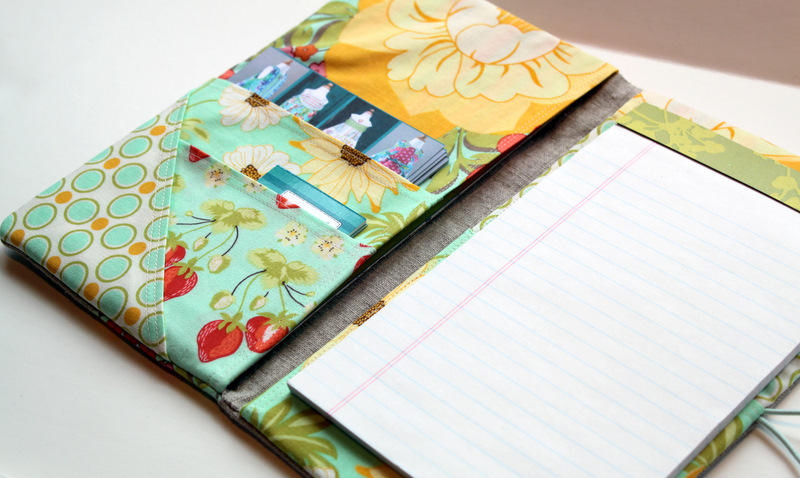
Now construct the inner pockets. I’ve given you the measurements and pieces I used, but you can customize this to fit your needs. Add more or less pockets, whatever works for you.
I double-stitched the hem on all of the pocket pieces. You don’t have to do this, but I think it looks nice and adds extra durability. When I said above to fold in half, I stitched the hem by the fold. You could just fold and not stitch, but I don’t think it would hold up as nicely.
Place all of your pockets on top of each other and run a stitch all the way around the edge of the whole pocket piece. Stitch as close to the edge as possible. This will hold your pockets all together.
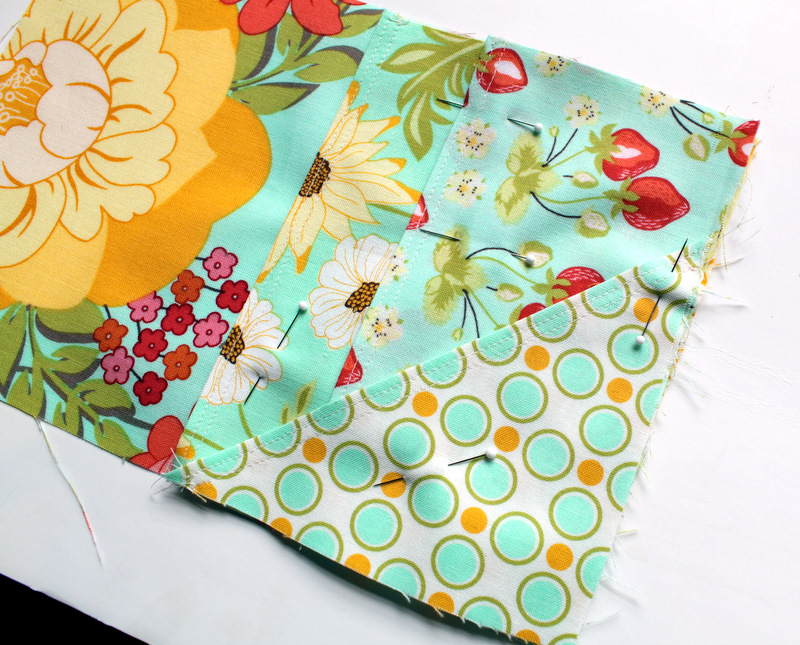
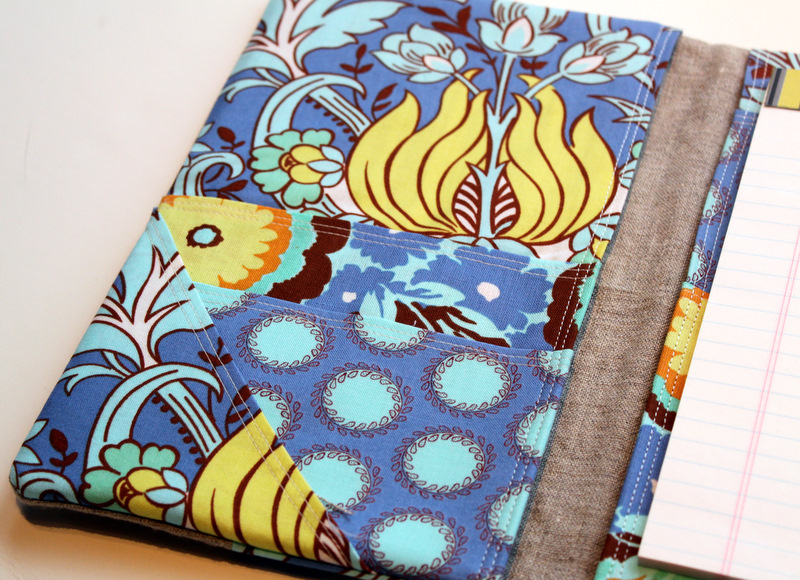
Now construct the pockets for the other side. I made one tall pocket to hold the back of my notepad and then another pocket underneath for extra storage. Put pockets in place and stitch around the entire rectangle to keep them from moving around.
Here are your pocket pieces once you have run a stitch around each rectangle just to hold them in place.
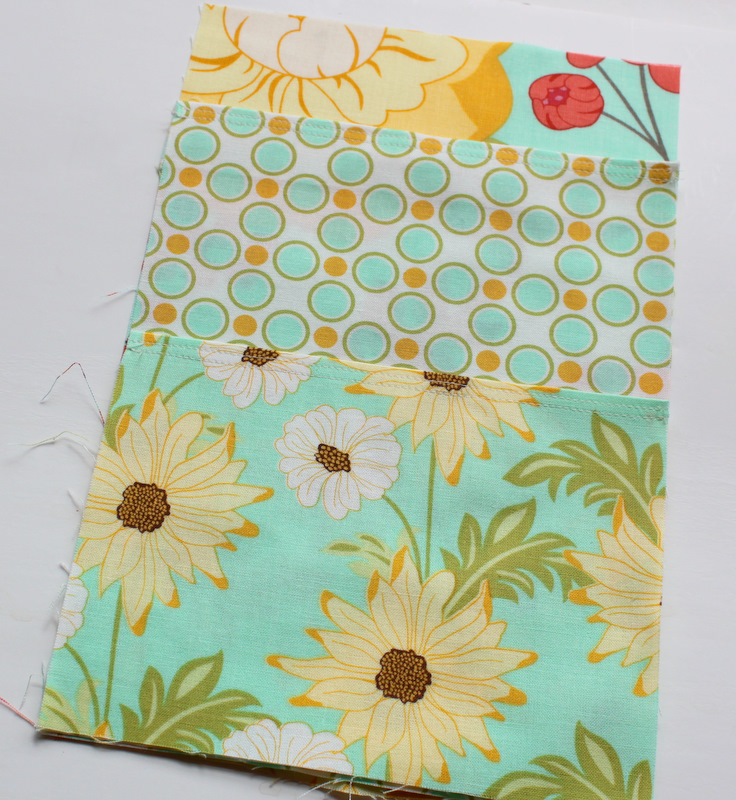
Next you want to hem one long side of each rectangle. You are going to do a 1/2″ hem. Again, I double stitched here, but you certainly could just do one row of stitching. Do one side on each of the two pocket pieces. The hem should be on the side that you plan to have towards the middle of your portfolio, the other side is left raw for now.

Here is what the hemmed edge will look like on the pocket pieces.
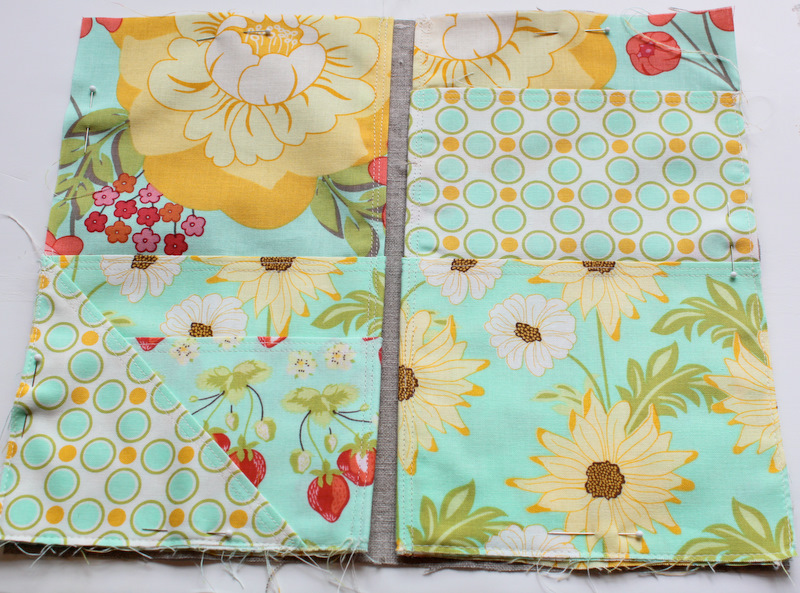

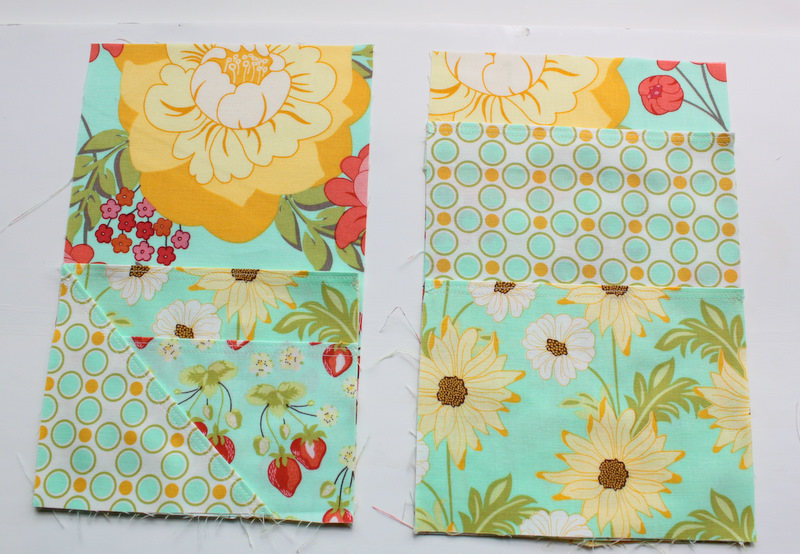
Now place your pocket pieces on top of another solid piece of fabric (linen, in my case). Pin in place. Run a stitch around the entire large rectangle to secure the pocket pieces to your solid piece of fabric. The stitching might seem a little excessive, but it’s just always best to have everything nicely secured when sewing.

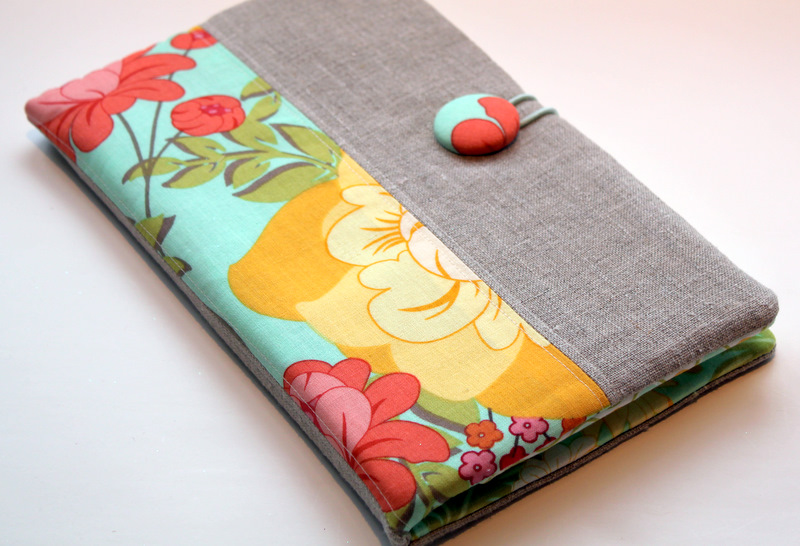
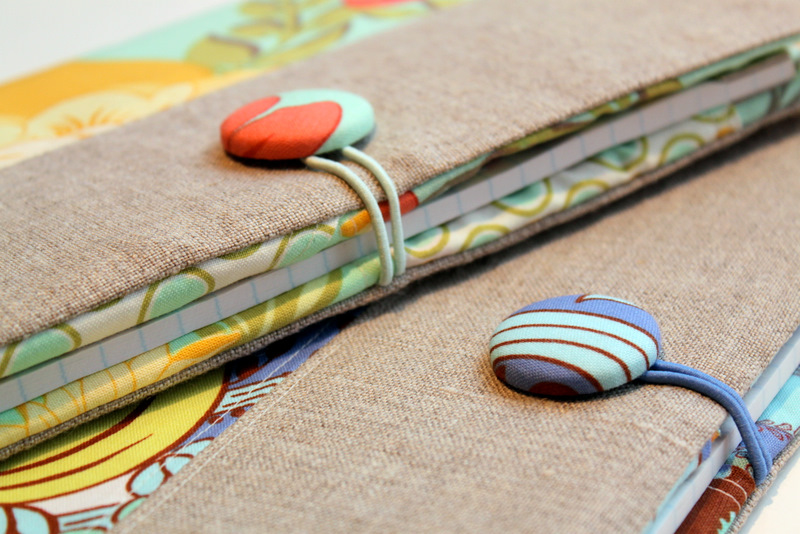
Now figure out where you would like your button placed on the exterior fabric. Mark with a fabric marking pen. Then stitch in place. You can use any button and button size that you would like.

Next grab a hair elastic to make the band that will close the portfolio.

How long you leave your elastic will depend on the size of your button. My button was fairly large, so I left a longer piece of elastic. I also didn’t want it to be too tight because I wanted there to be room to load up my portfolio with documents and notes. Stitch your elastic together by machine stitching back and forth several times.

Now place your exterior fabric piece and your interior fabric piece (the one with the pockets), right sides together. On the side where you would like your elastic closure, point the elastic loop inward.
Stitch all the way around the rectangle, but leave a 3″-5″ opening for turning right side out – 1/2″ seam allowance. You will catch your elastic in this seam. I stitched back and forth over the elastic piece just to make sure it was secure in place.

Clip the corners to remove excess fabric bulk. You can also trim off the additional elastic since it has now been caught in the last seam we just sewed. Turn right side out and press with a hot iron.
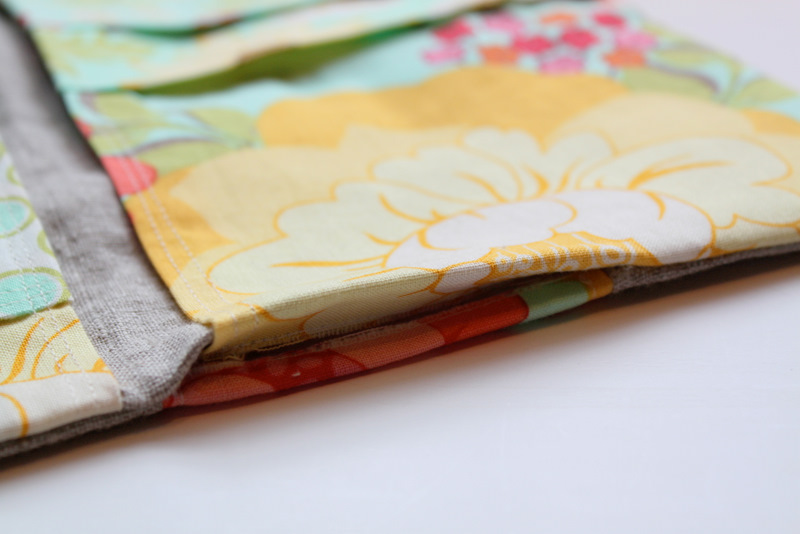
Hand-sew the opening closed with coordinating thread.

I cut two pieces of cardboard to make my portfolio a little more sturdy. Cut two pieces approximately 9″ x 5.5″ (give or take) I also decided to cover the cardboard with coordinating paper, just in case it were to ever show. I’m all about the details and I just like knowing the interior looks as pretty as the exterior.

Slide your cardboard pieces underneath each pocket piece. Slide one in on the right side and one in on the left.
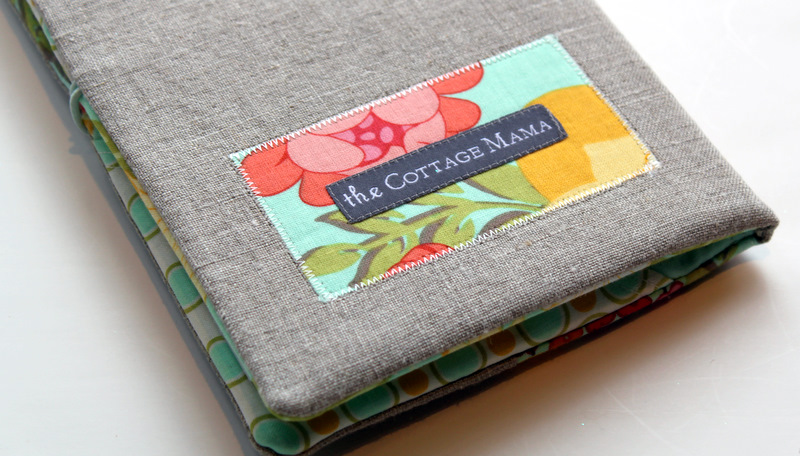
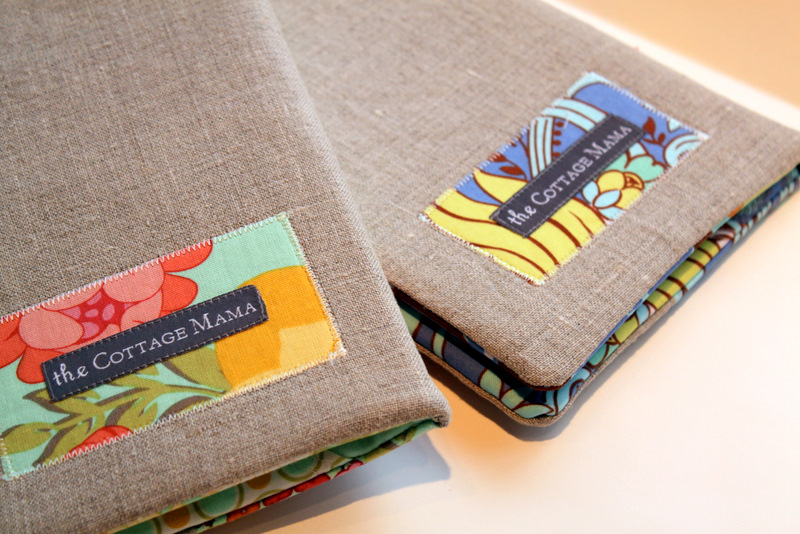
If you would like to add your own label, make sure you do this before you sew the interior and exterior pieces together. I wanted to add a pop of color to the back as well, so I backed my labels with matching fabric.

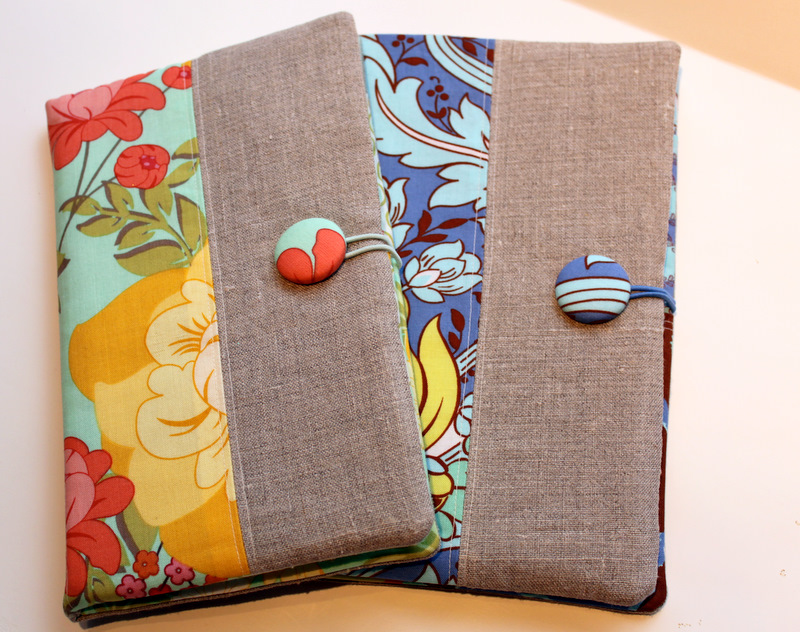


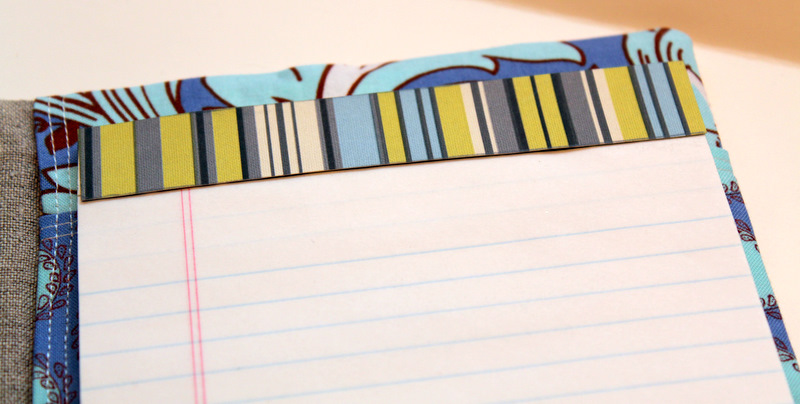
The above portfolio is the one I made for my mom. I also added some decorative paper to the top of the notepad. I wasn’t too fond of the big “Office Max” label on the notepad, the paper looks much prettier. I simply cut the scrapbook paper to size and glued it down.


 Lindsay Wilkes is the owner and designer behind The Cottage Mama. She creates timeless, vintage inspired sewing patterns for children’s clothes. She is also a fabric designer for Riley Black Designers / Penny Rose Fabrics, author of the book ‘Sew Classic Clothes for Girls’ and can be seen teaching nationwide and online in her video series ‘Lessons with Lindsay’ sponsored by Baby Lock Sewing and Embroidery machines.


I totally love this tutorial! I have zero time to sew, but I guess I’ll need to find some so I can make one of these! You’re such a good tutorial maker.
This is super cute!! It’s a perfect summer project for me. Thanks for sharing!
LOVE it!!!!
I just love this tute! Thank you for sharing so many nice ideas with us all! I love your eye for fabrics. God Bless You and your family!
Very cute! I don’t really have a need for something like this right now, but if I ever do, I’ll be sure to come back! 🙂
Lovely fabrics! I made 3 of a very similar item back at Christmas for family members using Jennifer Casa’s patter (http://jchandmade.typepad.com/jcasapatterns/), and they have been a total hit! I really like the idea of putting cardboard in for stability and the corner pocket for notecards. I may have to make the “new and improved” version for myself!
You are amazing. I have been thinking of making something to carry all my notes in and this is perfect!!! I have done a couple of your other tutorials and this one as clear and well written as the others. Thanks So Much!
All I can say is that this is crazy good!
Thanks for the GREAT tutorial! I have some Japanese linen that looks like school notebook paper with the lines and I wanted to make “something” for my DD’s teacher and embroider her name on the “paper”. This will be PERFECT!!
Ooooo….I LOVE this. You are on fire, Lindsay! Anytime you want to make one of these for me, I’ll take it!! In the meantime (wink), I’ll have to add it to my to-do list. Gorgeous!!
xo,
Stef
Dying over this. The little details and finishing on the back are so pretty Linds!!! Love it!!!! Thanks for sharing this 🙂
I’ve love this! You can be sure I’ve safely bookmarked this great tutorial for future reference. Thanks!
very cute Lindsay! they look so awesome and all the little details really make them fab!
Neat! This is going on my to do list!
oh I love it! great tutorial!!! can’t wait to make some:)
this is fabulous Lindsay! I love your fabric choices, and your sewing is superb. Lovely label on the back, a nice surprise!
This is the cutest thing ever!!!! I love it. I used to sew when I was younger. I bet I haven’t sewn in over 15 years. I’d love to start again but right now don’t have the time. Will keep for later reference. thanks for the GREAT tutorial!
Really lovely tutorial and notepads! Like you said, this would make a perfect gift – and I want one for myself too. Thanks!
Your tutorials are very detailed. Thanks for that. I’m thinking I need to make some of these for my friends (for using at their craft shows) and maybe my daughter (when she starts on job interviews).
Pegg
I love this tutorial. I need one of these. Thanks for sharing. Hugs Ariane
Very cool, and I do so love little pads, I have notepads everywhere! I’m sure I have room in my life for more. In fact I think I *have* to have one. Yep, I’ve talked me into it, I *need* to make one of these. I can use it at fairs, it holds business cards and everything, ideal…
This is SO awesome! Thank you very much. I have another tutorial that is similar but, it uses composition books. The other is a great tutorial but I rarely buy composition books for anything. I buy TONS of these notepads so this will be a very nice tutorial to use so they aren’t ugly just laying there or being put into the ugly black notepad holders I have.
Your tutorial was brilliant! Just made one myself. I would suggest to anyone making one to use a fabric that’s not too thick. I probably should have graded my seams a bit! I’ll have the pic up on my blog within the week if you care for a peek.
Please keep up with the creativeness. I love looking at things that people are making or tutorials for things that I could make, and thanks for your generosity!
I just made my first of 4 of these. The directions were EXCELLENT!!! Thanks so much! I am making them as teacher gifts!
This is amazing! I love it!!! So glad I just stumbled across your blog 🙂
Lindsey
Thank you so much for this wonderfully clear tutorial! You’re a life-saver! I needed a grad present for my sister… did I mention that her grad is TOMORROW? She’s getting her degree in marketing so I wanted to give her something to help her keep organized.
I only had 2 matching fabrics (1 patterned, 1 plain) so for the interior pockets, I did the top and bottom pocket in the patterned fabric and the middle pocket in the plain. On the left side, I eliminated the triangle pocket and added a pen pocket instead.
Thanks for this Lindsay! This is soo great!!
I have been looking to make something like this for a while and now I have NO excuse!
Love your color choices…your fabric stash is the envy of the masses, well, me at least!
They are amazing! Im going to make one and use it as a travel wallet. Im off to Bali in 2 weeks. It can store my passport and boarding pass. Ive been looking for a tutorial like this for a while. Thank you.
Oh Lindsay, those are great! I’d love to make one. I especially love the mix of the prints you used and the linen. So beautiful!
This is adorable! I stumbled upon your blog just a few minutes ago and fell in love with this! I have so much fabric and not much to do with it, this will help! Thanks! 🙂
Beautiful covers! I especially like your covered button fastener.
OMG cuteee!!! LOVE it!!!! <3
Wow! Those are great and your fabric choices are wonderful too. Thanks so much for sharing!
There is so much I love about this tutorial. I have to bookmark it and then come back to your blog with a cup of coffee and stay for a while. I’m glad Ellen pointed me in your direction.
Thanks for the great tutorial! I made one today. Your instructions are top notch!
Wow, I was looking for this kind of portfolio, thanksssss!!!
Absolutely adorable!! Making one tomorrow!!
Thanks Lindsay, I made this portfolio and it looks great. Great tutorial and really easy to follow. Pop over and see how it turned out.
http://lifeatnumbersix.blogspot.com/
These look so beautiful! Thanks for the great tutorial.
Wow, this is such an amazing tutorial!! I think I will need to make a few of these as gifts this year :o)
This is lovely – what size notebook did you use? Time to hit the office supply store!
Thanks for the fantastic tutorial. I’ve been looking for a little something to make for my friend’s birthday, and this is perfect. Cheers!
Great tutorial and fantastic photos. Thank you for sharing!
I just made one for my son’s Pre-K teacher as a Xmas gift. I LOVE how it turned out! Thank you for this amazing tute!!!
Found your tutorial via Pinterest! These are beautiful! I always have a portfolio with me, but it is getting hard to find one with the type of interior pockets that I like. I want to try to make your version for myself…then maybe for someone else! Thanks so much!!
very, very nice! I originally found your site through allfreesewing.com, looking for a dopp kit. I found your pattern for the dopp kit, but it said the page was removed or something, so I just clicked on your home page and somehow got to this tutorial. Now I will be bookmarking this so I can get back to it, and to the dopp kit (which I did finally find! LOL). I’m trying to make some Christmas gifts this year, and I love both these patterns!!
If you use the plastic needle work canvas this could be washable :o)
Great tutorial! You’ve been featured on the Quality Sewing Tutorials blog.
We hand select only the best free tutorials and patterns for home sewers.
This is gorgeous 🙂 thanks for the tutorial, can’t wait to make some for presents 🙂
Very cute… Thanks for the great tutorial!
Bia Costa
Lindas…maravilhosas!!!
o que mais dizer???
Muito obrigada pela aula|||
abraços de MF
I love this tutorial. I know it’s February, but I just bought my 2012 engagement calendar. I’m totally going to make a fabulous cover for it… Love your side pockets and diagnol pocket. I’ll blog about it and let you know when it’s finished. I really like the way you did your label on the back too. I’d love to have the little printed strips… Where did you ever get them? Sweet.
It would take me all SUMMER to do one. Don’t you have any on sale at Etsy or somewhere? . . . seriously!
I did forget to mention that they are BEAUTIFUL!!
I love this! Already made seven for gifts. Would you allow me to pin this(which would link to your blog)to my Pinterest board?
Thanks for sharing
Yes, absolutely! Thanks for asking.
Beautiful! Did you print your ‘cottage mama’ labels yourself or did you order them from somewhere?
Hi, I order my ‘The Cottage Mama’ labels from Fancy Weaver on Etsy.com.
Love this! Am planning to make one this weekend for a designer friend of mine who could use it on design consults. Any tips on how to expand it to fit an 8.5×11 pad of paper?
Thanks!!! 🙂
bellissima idea *_*
Hi Lindsay, I featured your notepad cover in a blog post today. Thanks for posting this tutorial, it’s just the thing I’ve been looking for. I can’t wait to make one for myself!
This is interesting, i will try one soon.
You are so clever 😉 I work in a restaurant and this type of thing might be really cute for our servers too, all dressed in black, to have a bit of color.
This is perfect! I have an old plastic folder that I’ve carted around for years. My daughter-in-law only recently commented on its usefulness. Now I can make her one! However, I need to print this off, but can’t locate a “printer-friendly” icon. Is there one?
Loves to Sew
I want to make one like this!
Or two.
Or three.
Or more.
It *would* be nice indeed to have printer-friendly version of this.
This is a great tutorial…..I have completed my first notebook holder but it won’t be my last….thanks so much this helpful tutorial.
Love your tutorial…..I am going to take out my sewing machine.
Juanita
Love this idea!Thanks for sharing it, I can’t wait to try one!!
Love this idea!Thanks for sharing it, I can’t wait to try one!!
I realize that your tutorial is over 15 months old but I saved the link and have finally made one of these for a friend. I’ll definitely be making more! Thanks so much for the great instructions. http://grand-finale.blogspot.com/2012/09/meanwhile-at-sewing-machine.html
Just finished one! Bthanks so much!!
Just wanted to thank you for sharing this pattern and awesome tutorial!!! I’ve finished 3 this week…..love them!!!! Thanks again!
cool…
http://www.rajalistrik.com
I think this will be perfect for passing around sign up sheets in our congregation on Sunday. I’m going to try and blow it up to accommodate a low profile clipboard and pockets large enough for 8.5×11 paper newsletters. Thanks for the tutorial!
I think this will be perfect for passing around sign up sheets in our congregation on Sunday. I’m going to try and blow it up to accommodate a low profile clipboard and pockets large enough for 8.5×11 paper newsletters. Thanks for the tutorial!
Made two already! adapted the second with taller pockets to hold more securely….love the pattern making as bday gifts along with matching hobo bags…thank you!
Thank you so much for sharing this great tutorial! I am in the process of making one for my mom. I’ll give it to her on Mother’s Day. I am enjoying making the project and loving the result! Thank you!!!
Hi, what a great tutorial and beautiful finished product! I was wondering if you could tell me the finished size? I would like to make one as a passport/boardingpass/document wallet for our next trip and want to make sure it is long enough for the boarding pass and tickets.
Thank you
Oriana
I know this is an old tutorial now, but I am hoping you might read my question anyway. I am having a really hard time finding a notepad to make this project. Can you tell me where you get yours (and I am hoping it is an online source 🙂 ), or at least give me a size to go by. Many thanks. (BTW great tutorial!)
These are absolutely gorgeous! Love the selection and coordination of you fabrics and colors. Great design.
I needed to thank you for this great read!! I absolutely loved
every little bit of it. I have you book-marked to look at new things you post…
That was a beautiful tutorial!! well done, pretty pictures, good words…perfect.
I cannot wait to make these!
This is so sweet! I am all about cute stuff in the office! I just have to print this tutorial so I can make some for gifts! Thank you!
Where do you get your labels from?
I purchase my labels from Fancy Weaver on Etsy. Hope that helps!
Hi Lindsay,
thank you very much for your tutorial. I used it to do a present for a friend. If you want to see it:
http://veroszakka.blogspot.de/2014/11/bolsito-porta-panuelos-y-funda-libreta.html
I wrote (in Spanish) that I took the idea from you.
Cheers
Vero
Hi! I love your tutorial and would love to make one. What size notepad does this hold? Did I miss it somewhere? Thank you!
HELP! I just made a portfolio for a gift. Got it all done and was fastening the elastic to the button and the elastic came out of the seam. I stitched over it several times, what can I do to keep it in.
I love this tutorial and I am wondering if you have a printable version of it?
I have to add this comment for the New Year 2016! This is a fabulous looking pattern, and I believe I’ll work one up tomorrow, New Year’s Day!!! Thanks!!
Love this! Is it for a full size legal pad other half size?
This was my first tutorial with a lot of steps and I thought starting out that I’d probably get half way, get stuck, and ditch the project. But your instructions were clear as day and the photos helped! As I moved from one step to the next with ease, I couldn’t wait to finish so I could see the finished project! Your tutorial made me believe I can actually sew AND follow instructions! Thank you for sharing this great tutorial and for your excellent step-by-step instructions
I had four fat quarters I received as a white elephant gift and a novelty print that I didn’t want to use in a quilt. I made this and love it!
I have tried to print out the instruction for the Fabric Portfolio & Notepad Holder, but all I get is the first 2 pages. How can I get to print this?
Hi Mary, This pattern is not in PDF format. It’s really used to be viewed online. I don’t have a way for you to print this out….sorry about that. Thanks! Lindsay