Sleepover Ruffle Pillowcase Tutorial

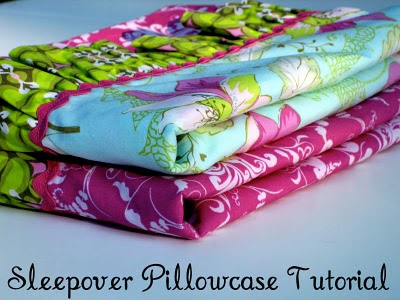
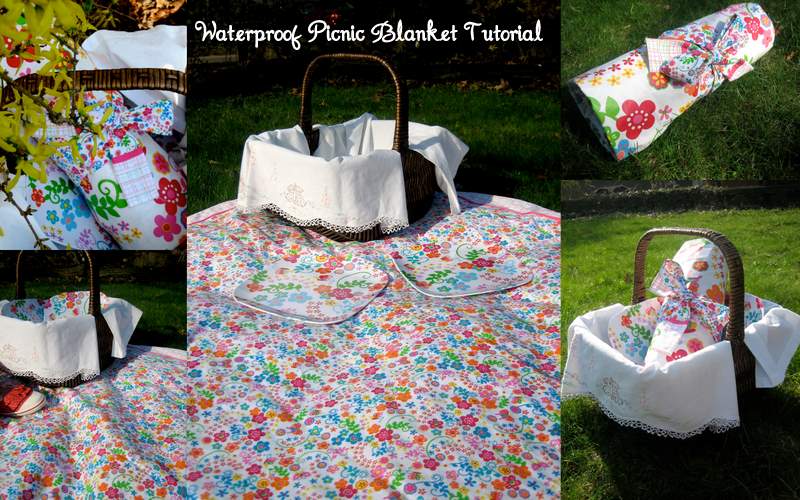
Sleepovers are one of my fondest memories as a little girl.  I loved staying overnight with my girlfriends, watching movies, giggling and trying to see if we were able to stay up the whole night (which never actually happened).  I had a really neat sleeping bag that I took to sleepovers and I always felt really special when I brought it over to my friends houses.

So, here’s a tutorial to make your darling little lady her very own “special” sleepover pillowcase.  This pillowcase would also be great as a special “travel” pillowcase or would be super-cute for a little toddler going to daycare who needed a nap-time pillow and blankie.

Supplies:
Different patterned Fabric
1 package of rick rack
Fusible interfacing (such as WonderUnder)
Sewing Machine
Thread
Iron and ironing board

Directions:

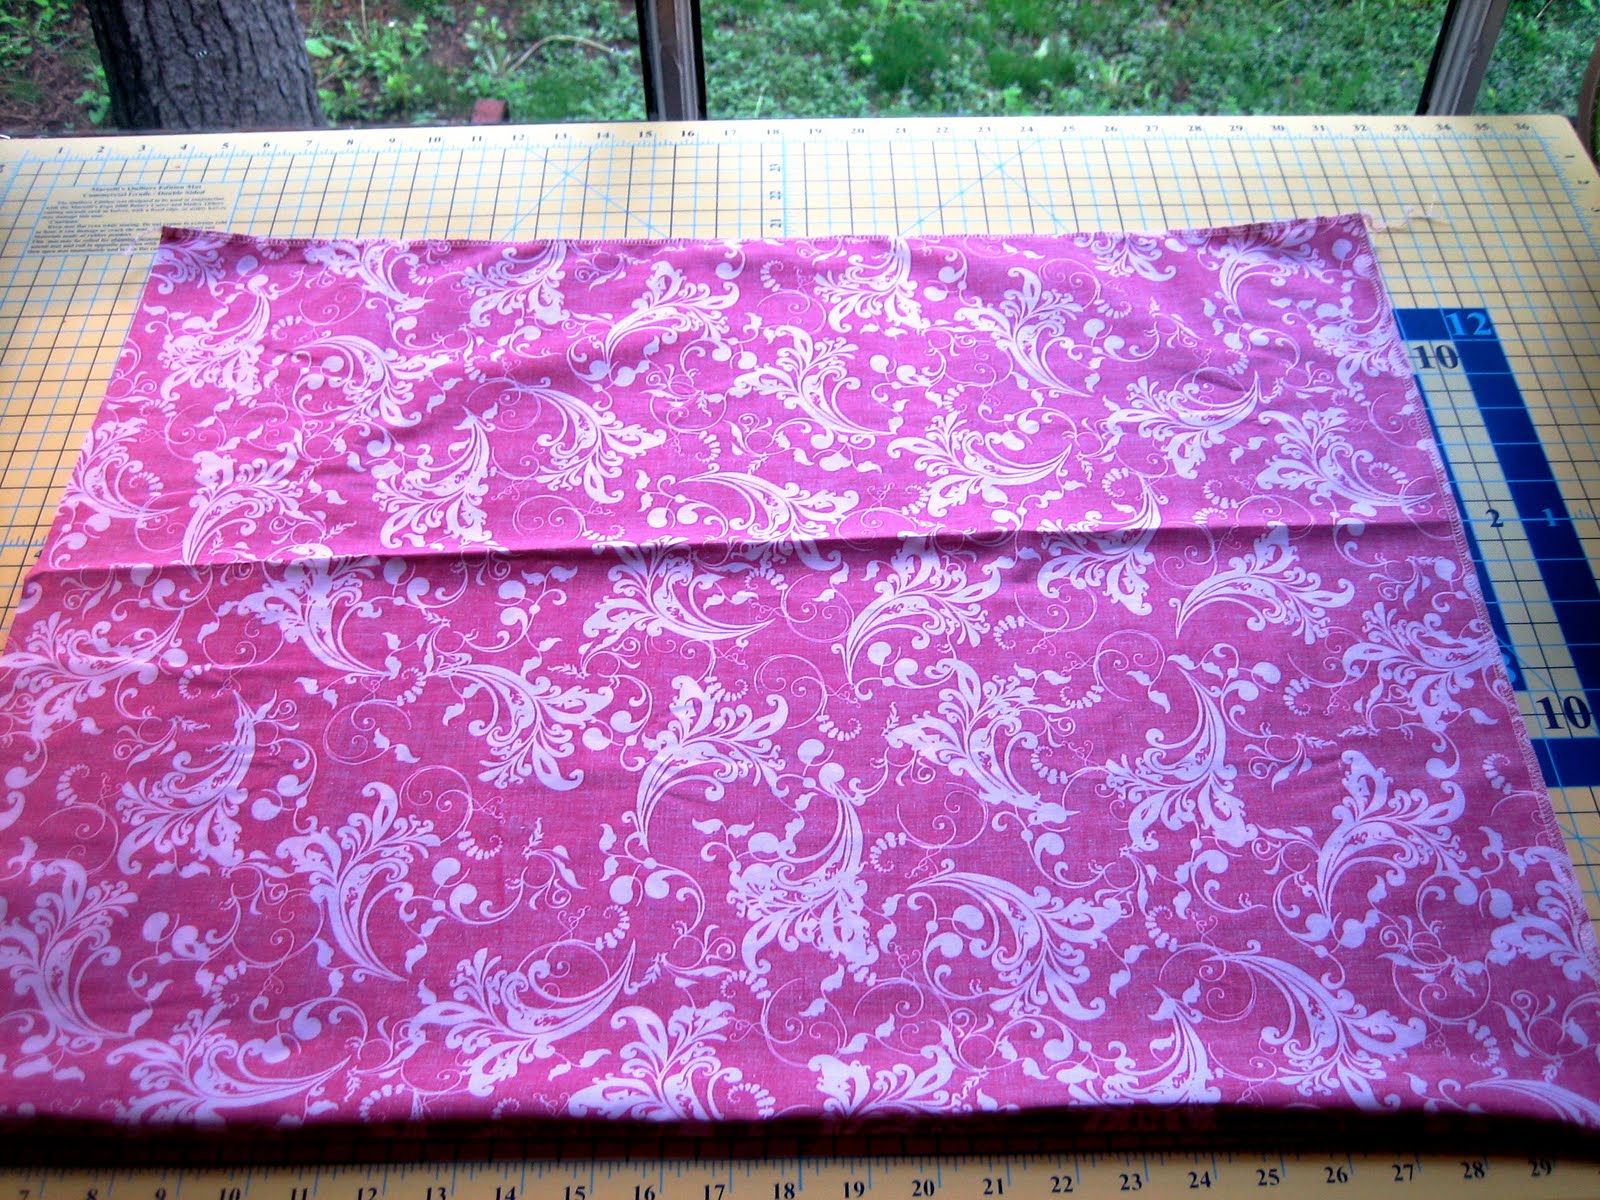
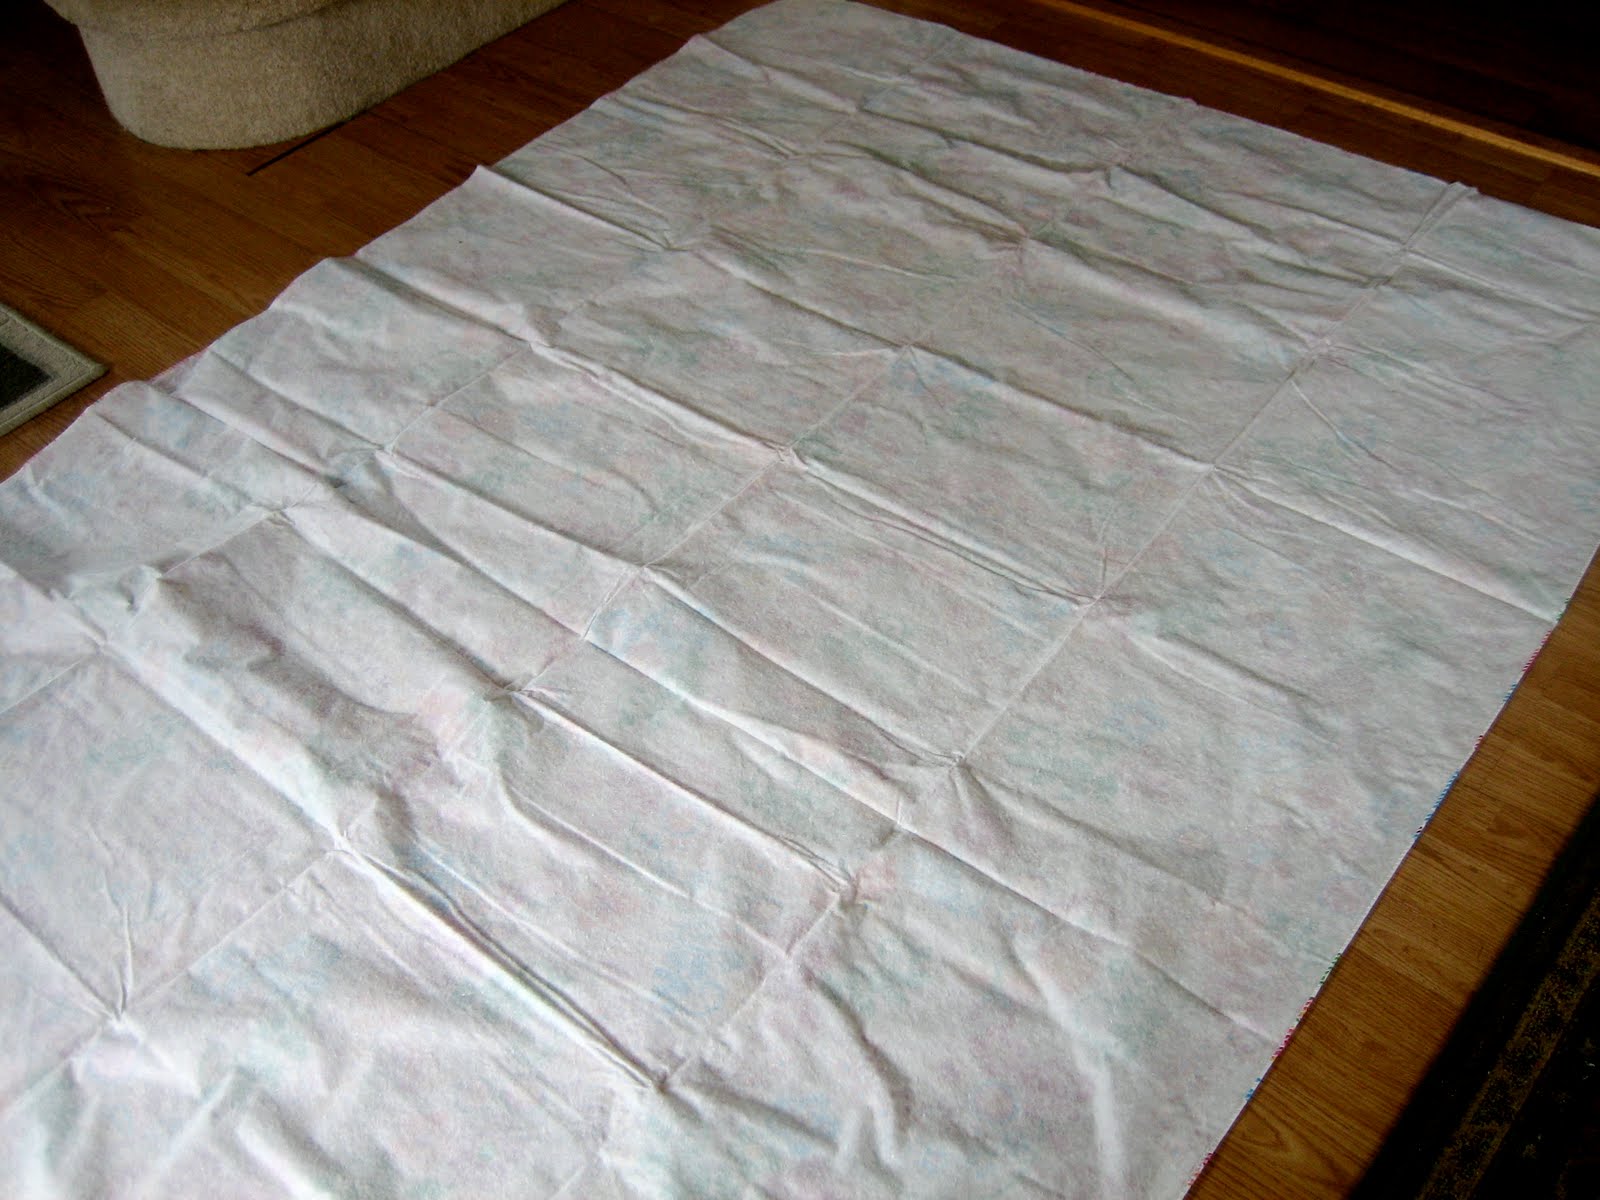
First you will need to cut your fabric pieces.  The pieces are sized as follows for a large standard sized pillowcase:

Main body fabric: 27″ X 42″
Cuff fabric: 11″ X 42″
Ruffle fabric: 5″ X 88″ (will need to cut 2 pieces 5″ X 44 and stitch together)
Rick Rack: 42″

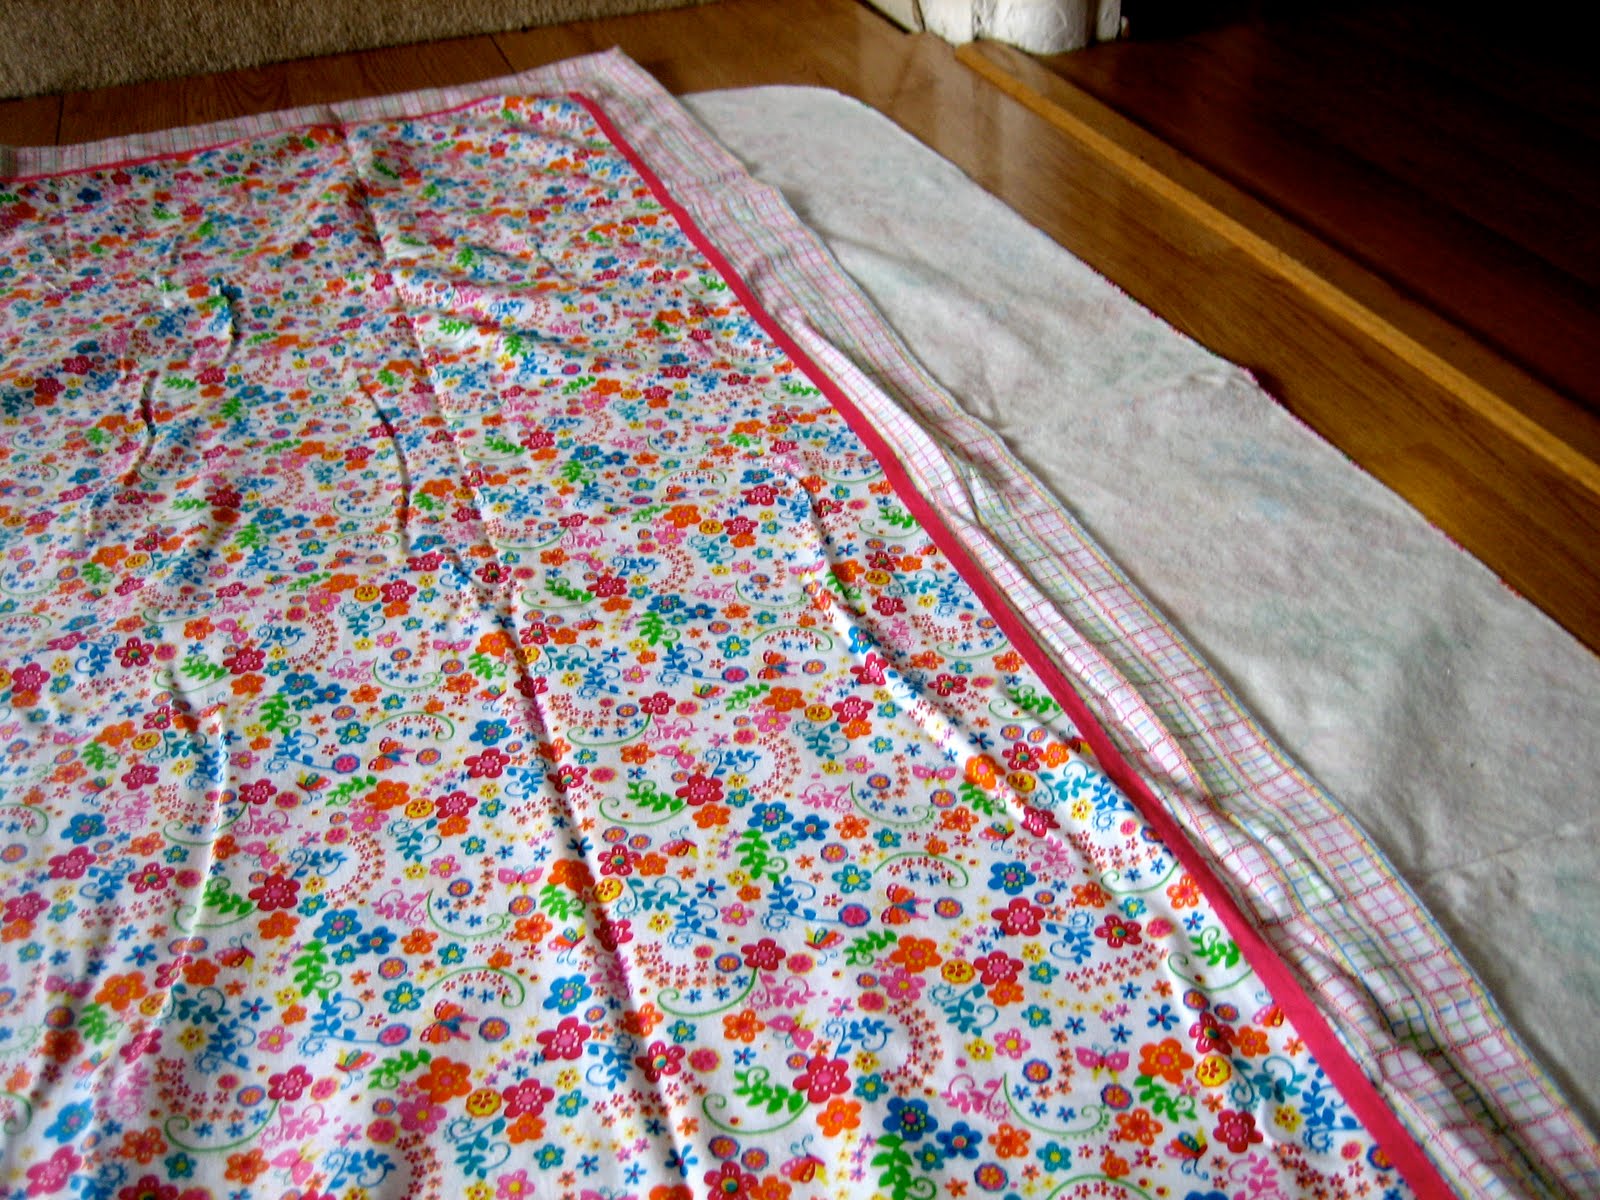
Here are your fabric pieces after they have been cut.  Next you will need to sew them together – 1/2″ seam allowance unless otherwise noted.

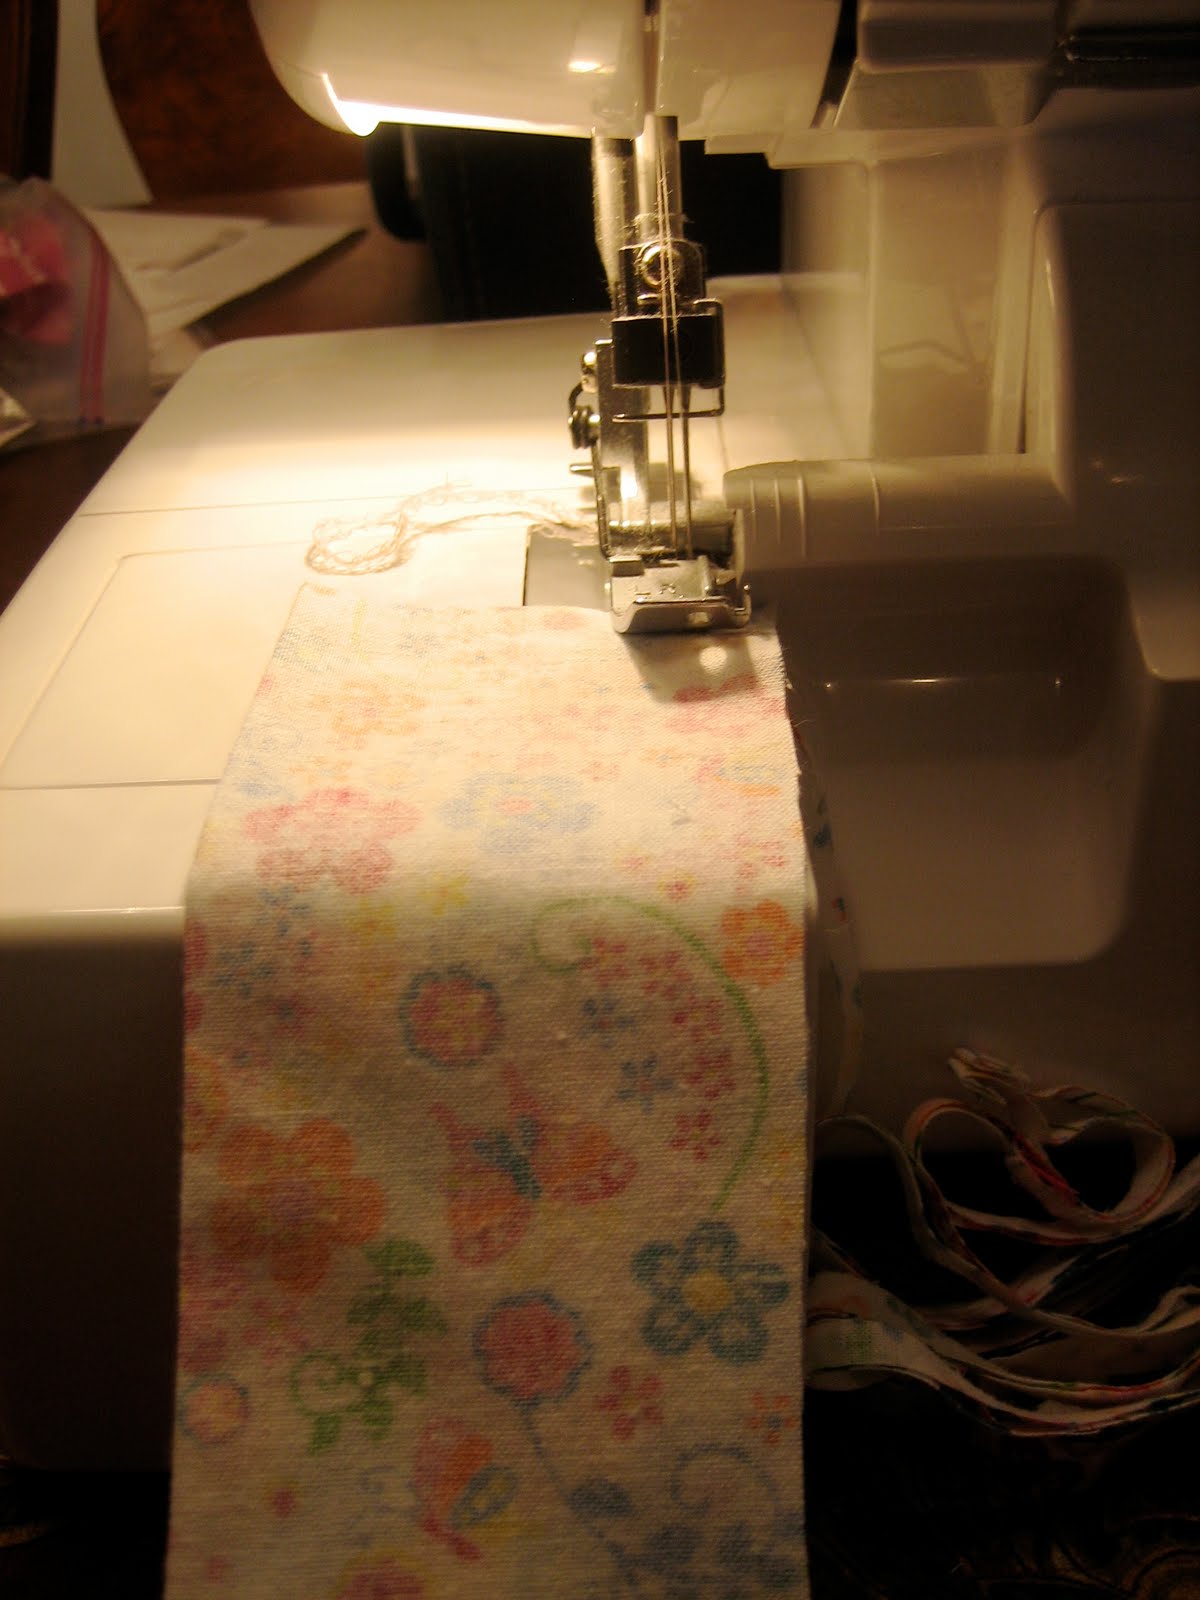
For the main body of the pillowcase you will need to sew one shorter side and one longer side – right sides together.  As you can see here, I used my serger, but simply for convenience, you can definitely use a regular sewing machine for this.

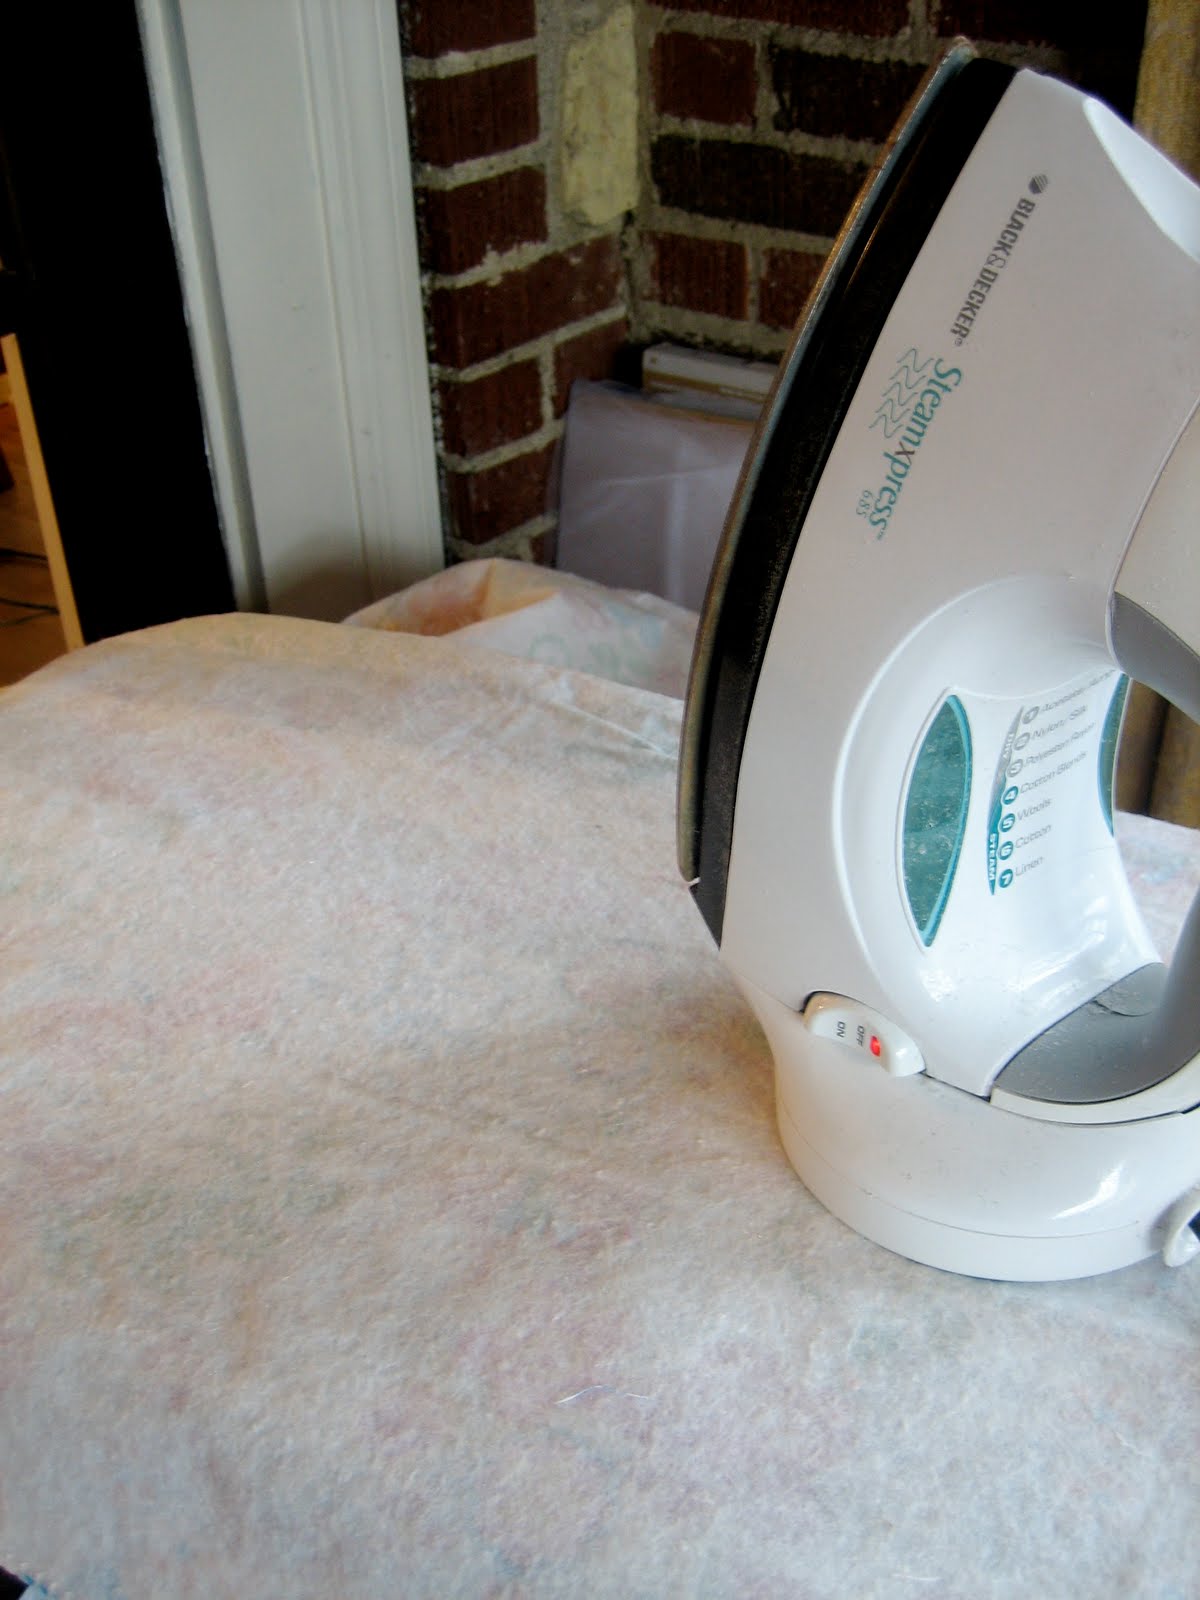
So you should have one side open after you have sewn the other sides together.  Then turn the main body of the pillow right side out and press with your iron.

For the cuff, you will need to sew the one shorter-side of fabric – right-sides together.

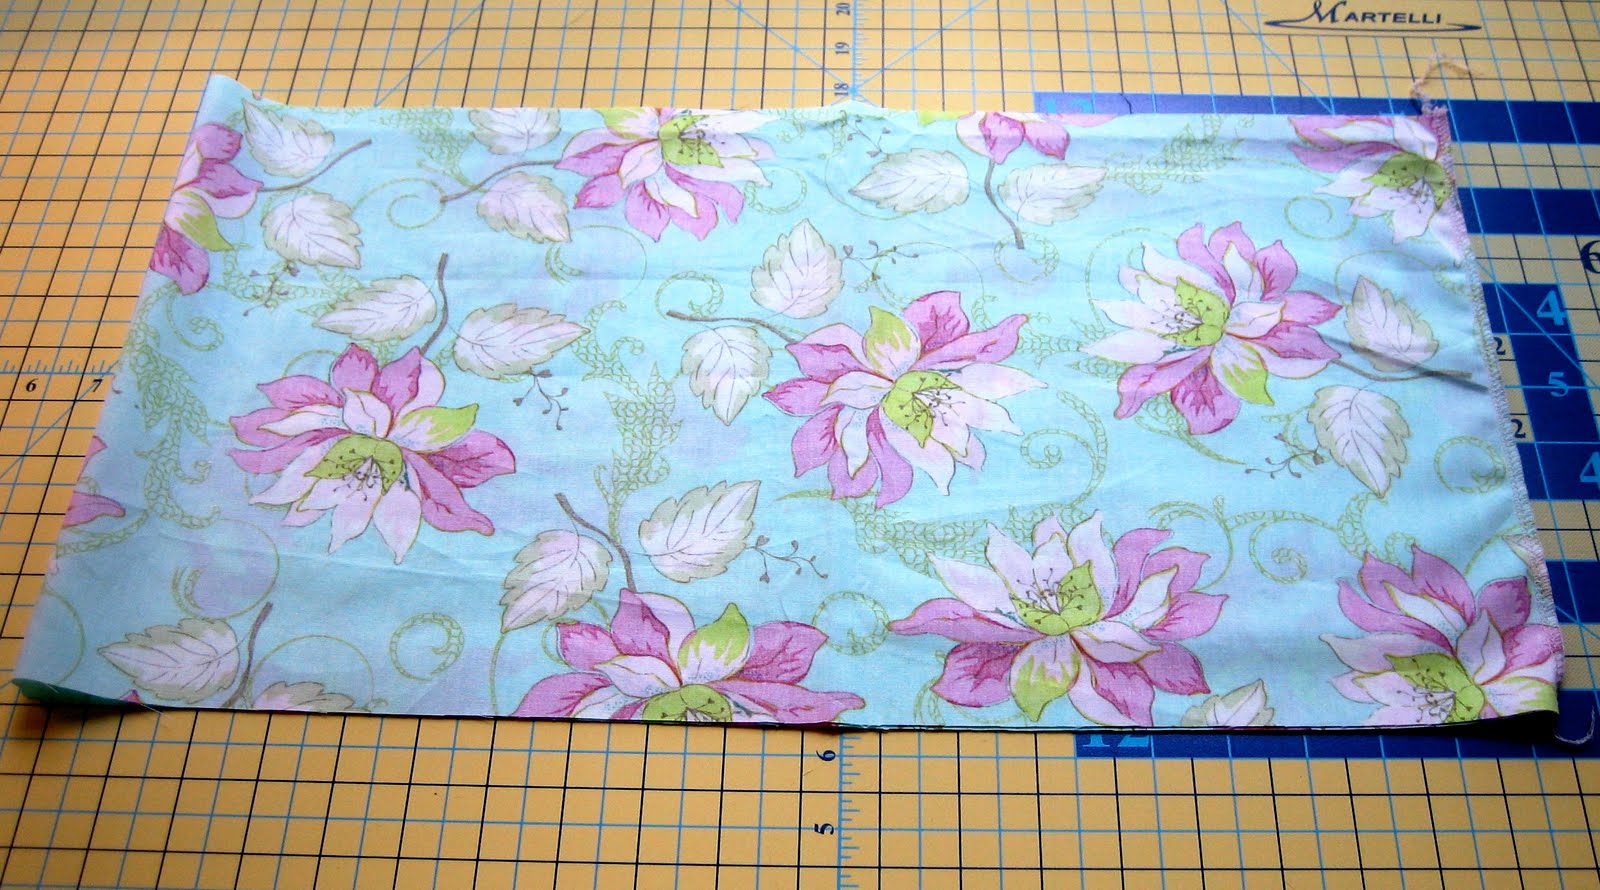
This is what your cuff will look like after you have sewn the one-side together.  Then turn it right-side out and press your seam open.  For the cuff you will need to fold it in half long ways, wrong-sides together.

To make the long ruffle pieces, sew the ends – right-sides together.  Once you have sewn the ends together you will have a big circle.  Then you need fold it in half (wrong-side together) and press with your iron.

To make the ruffle, you need to set your sewing machine on the longest straight stitch possible.  Then stitch around the entire circle on the raw edge side (not the fold) – 1/8″ seam allowance.  Do not back-stitch at the beginning or the end or the gathering will not work.

This is what your ruffle piece will look like after you finish your long straight stitch.

In order to gather and form the ruffle, you need to pull on one of your threads.  Keep doing this until you reach the desired ruffle length.

Once you have formed your ruffle, pin it to the main body of the pillowcase.  The ruffle should be pointing inward towards the main body.

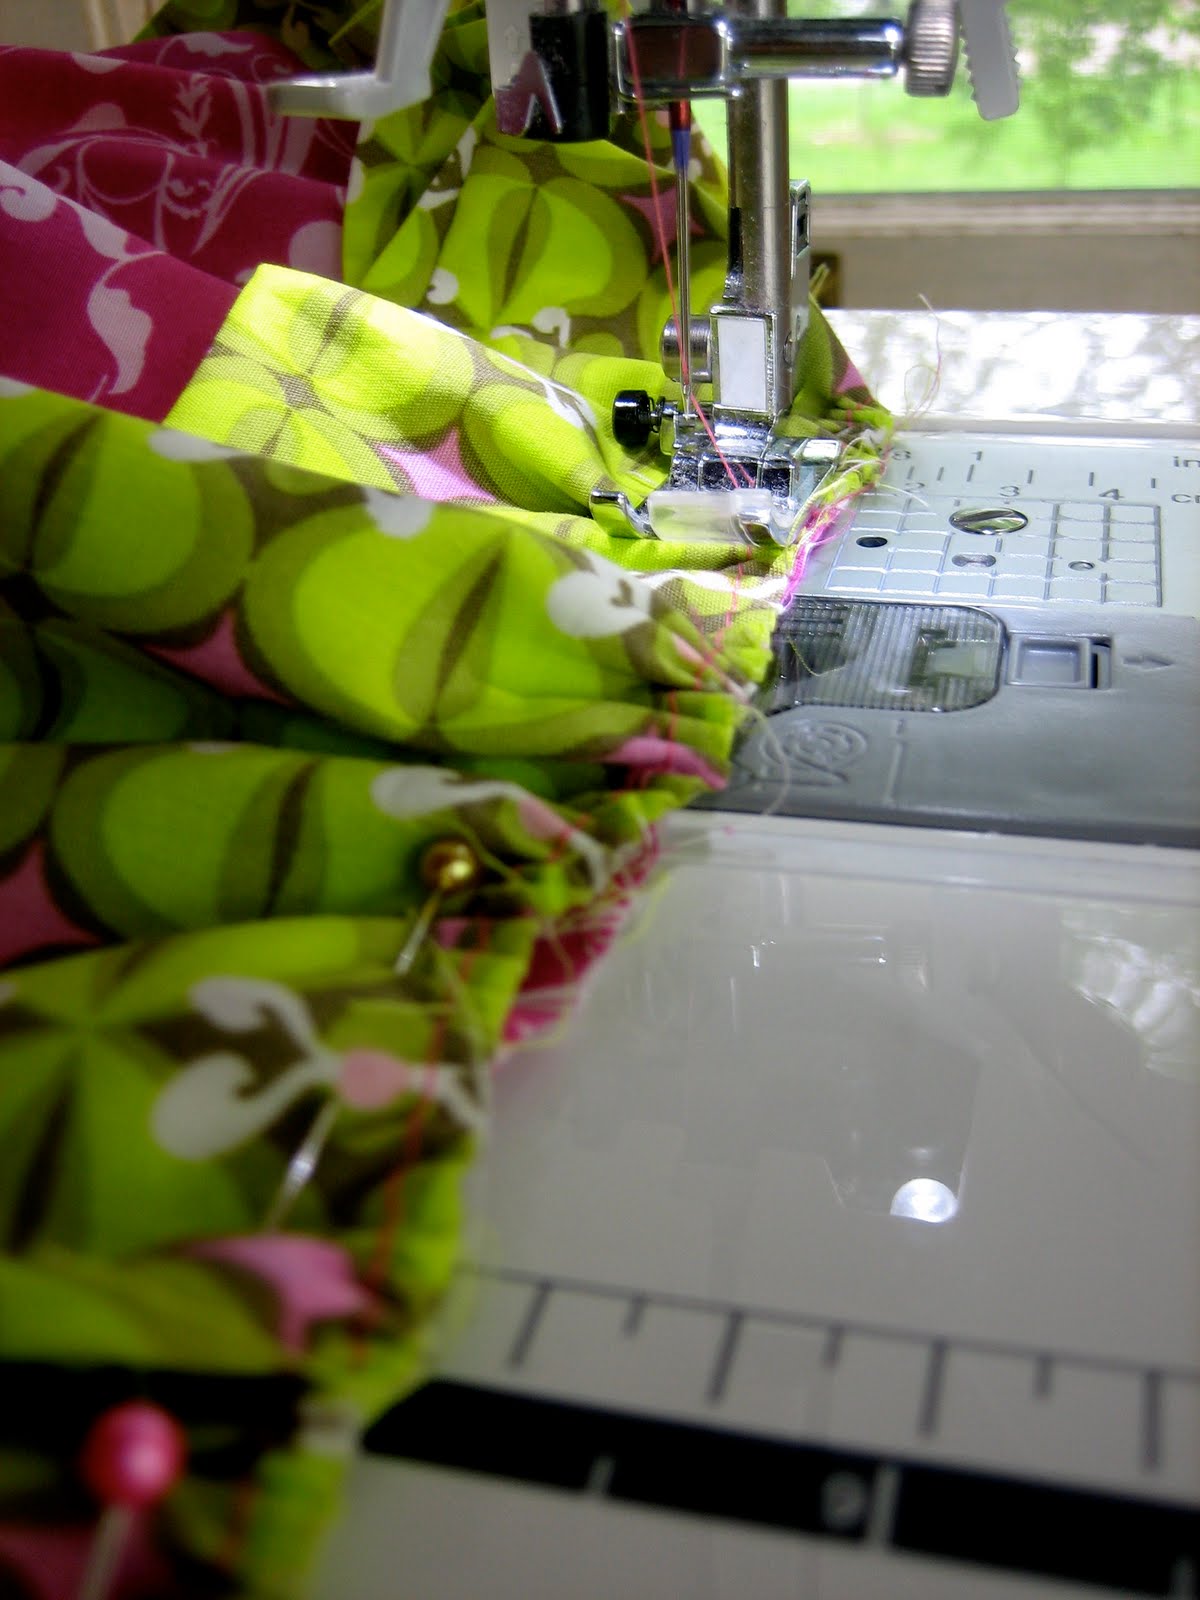
Stitch your ruffle onto the main body of the pillowcase.

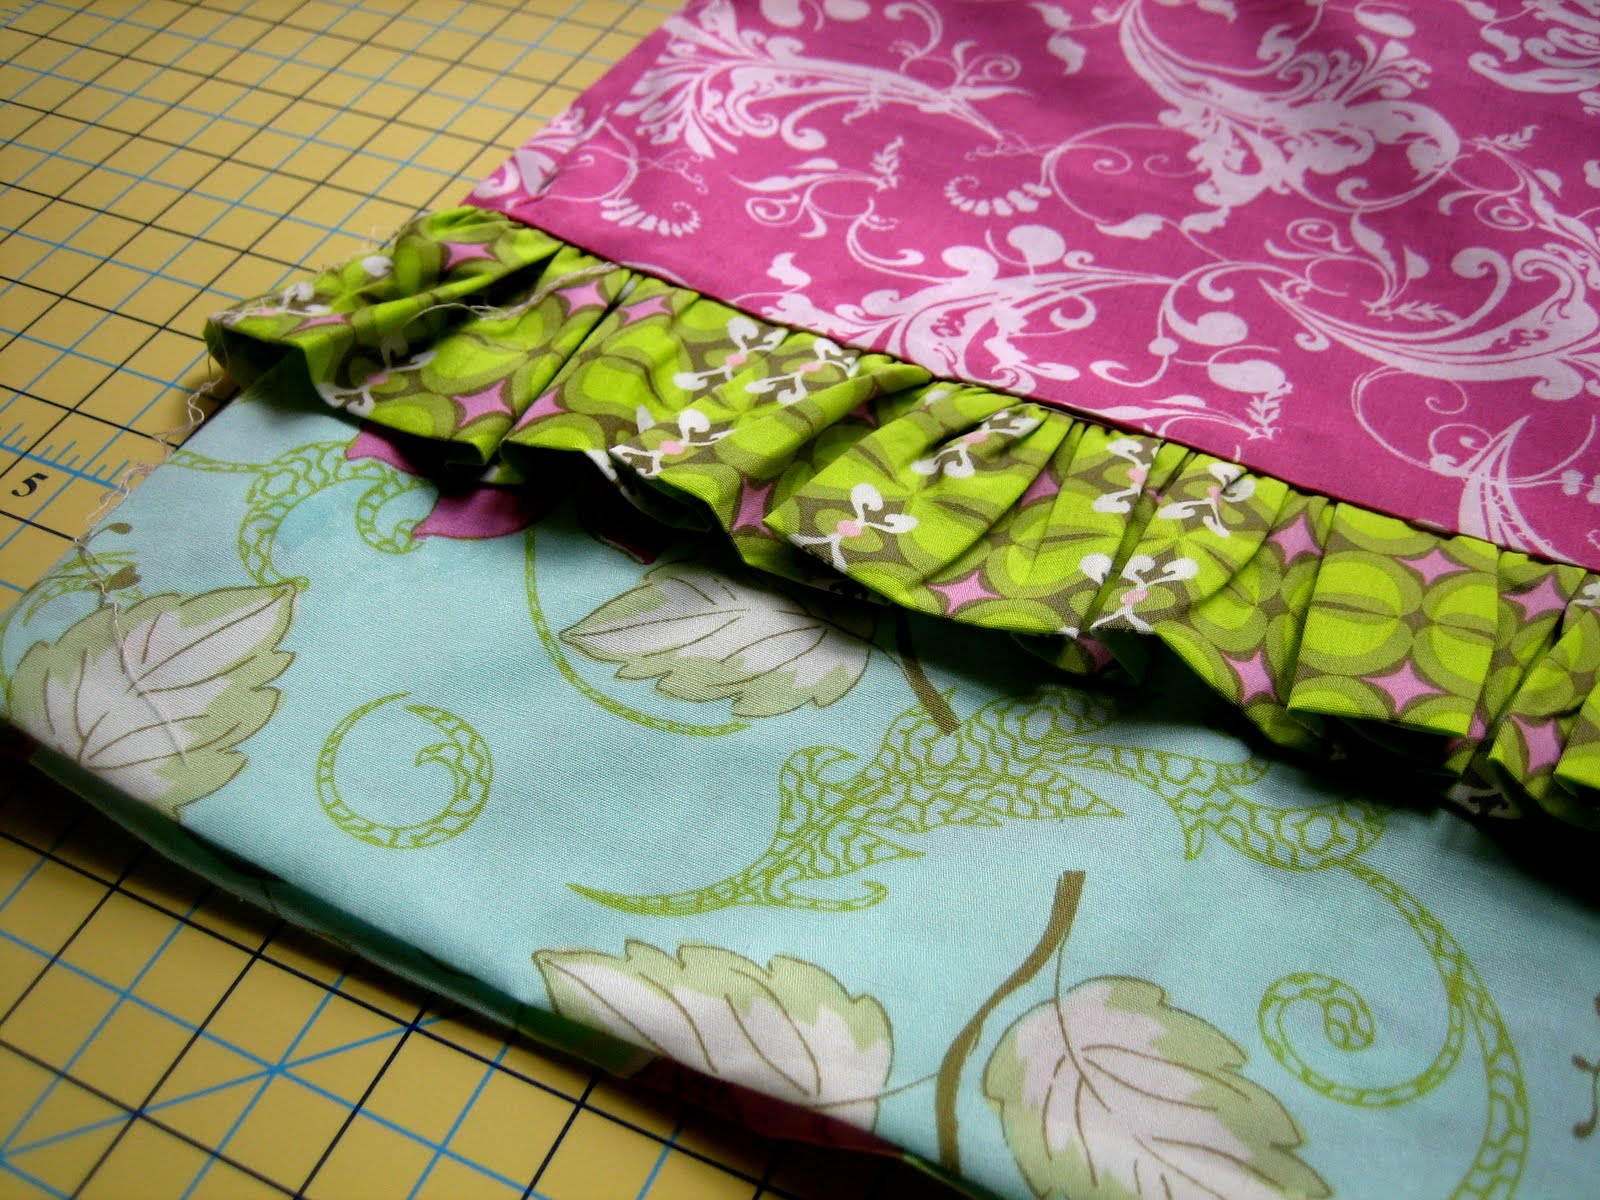
This is what your ruffle will look like after you have stitched it to the main body of the pillowcase.

Next you need to attach the cuff.  Pin the cuff the same way you did the ruffle.  The folded edge should be pointed inward towards the main part of the pillowcase and the raw edges should be towards the outside.

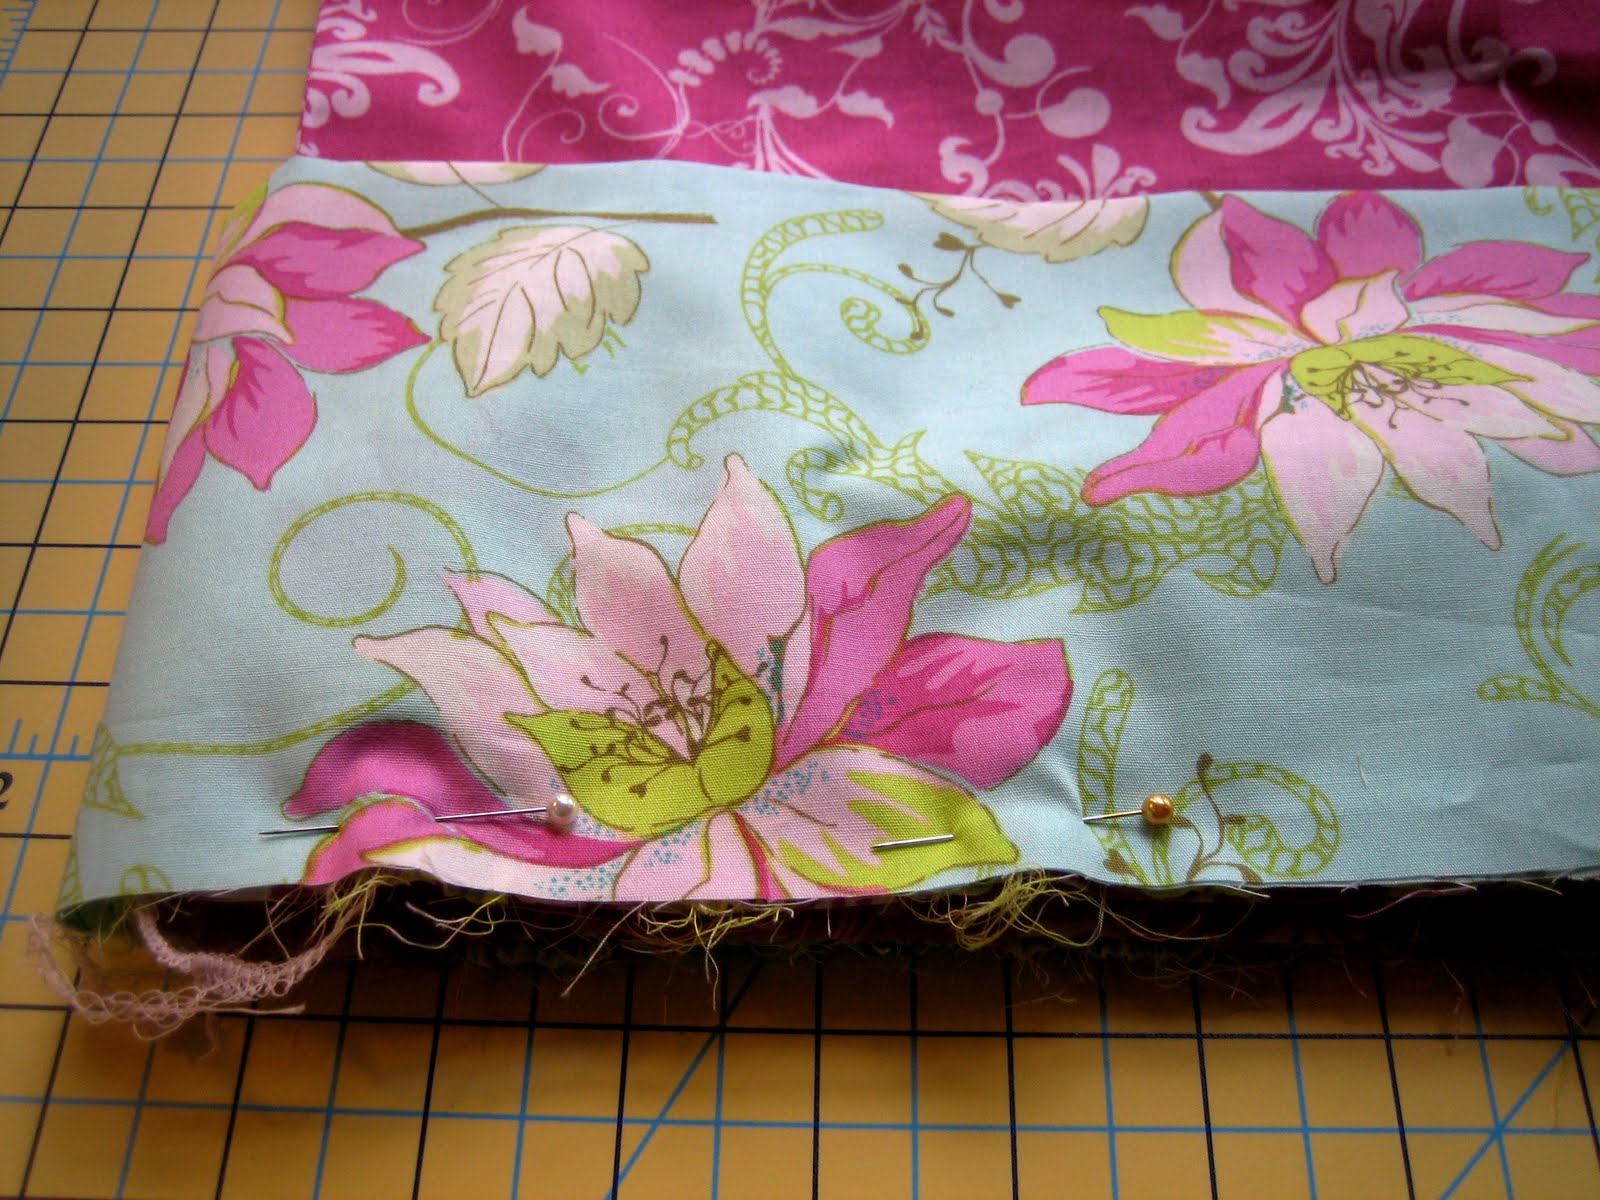
Here is what the cuff will look like before you stitch it down – make sure you pin it well.

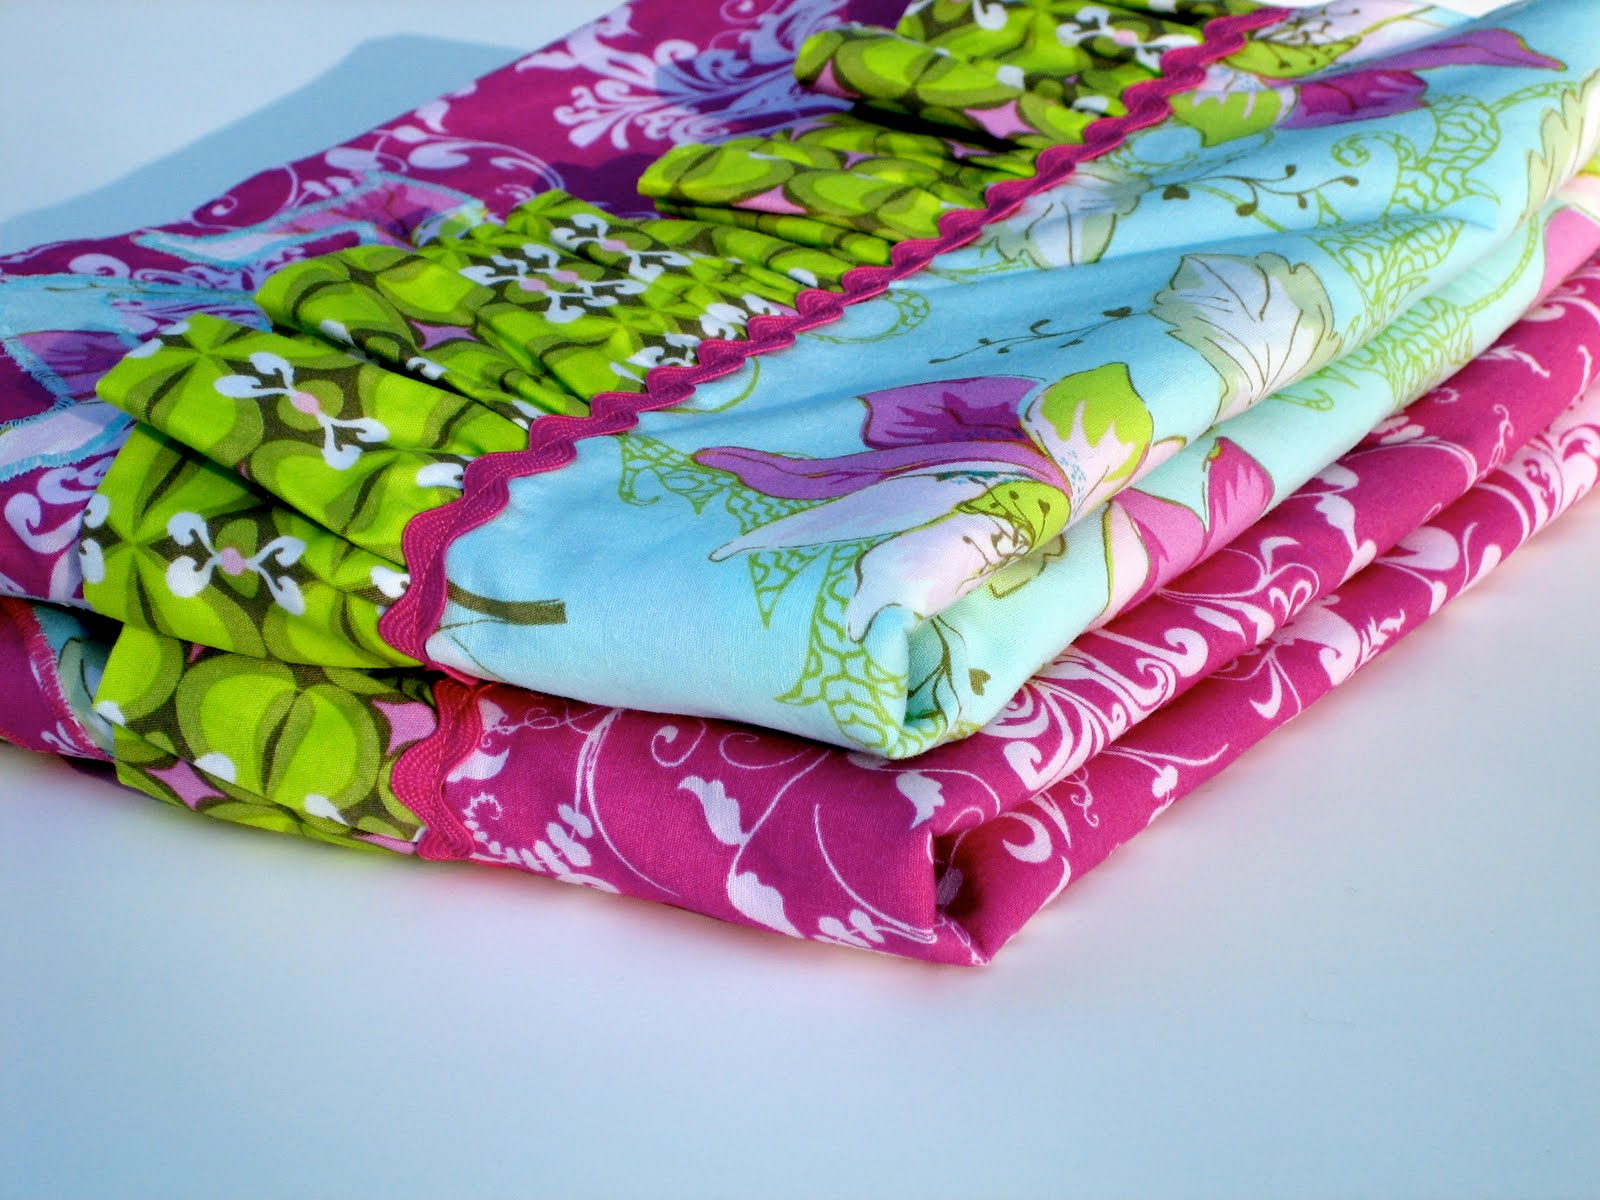
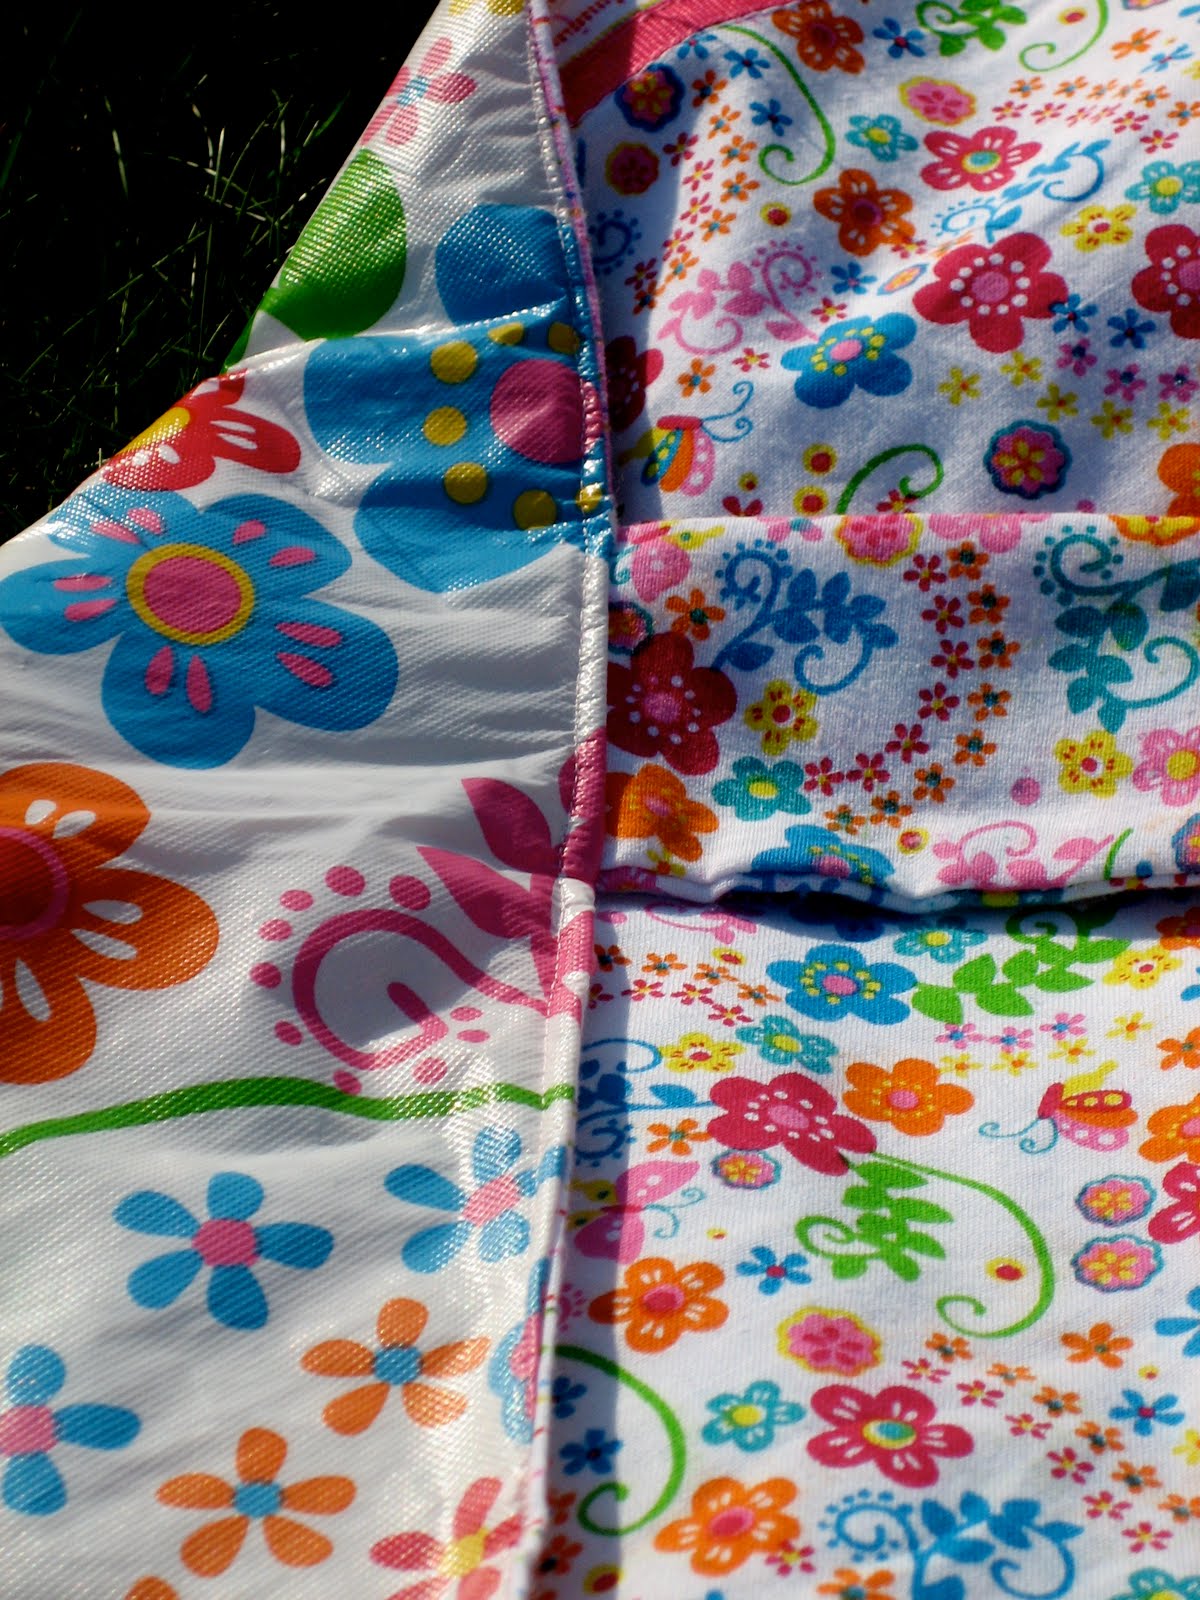
Once you have sewn the cuff and the ruffle, press them with your iron in the opposite direction that they were sewn…….see, doesn’t it look nice and pretty now?

If you don’t care to attach the rick rack trim, then I would suggest top-stitching on top of the pink (main body) 1/8″ seam allowance to secure the ruffle and cuff into place.  If you are going to attach the trim (in the next step) then don’t worry about this step.

Pin your rick rack right on the seam between the main body of the pillowcase and the ruffle.  Pin all the way around.

Stitch the rick rack into place.  Do this by sewing down the center of the trim.

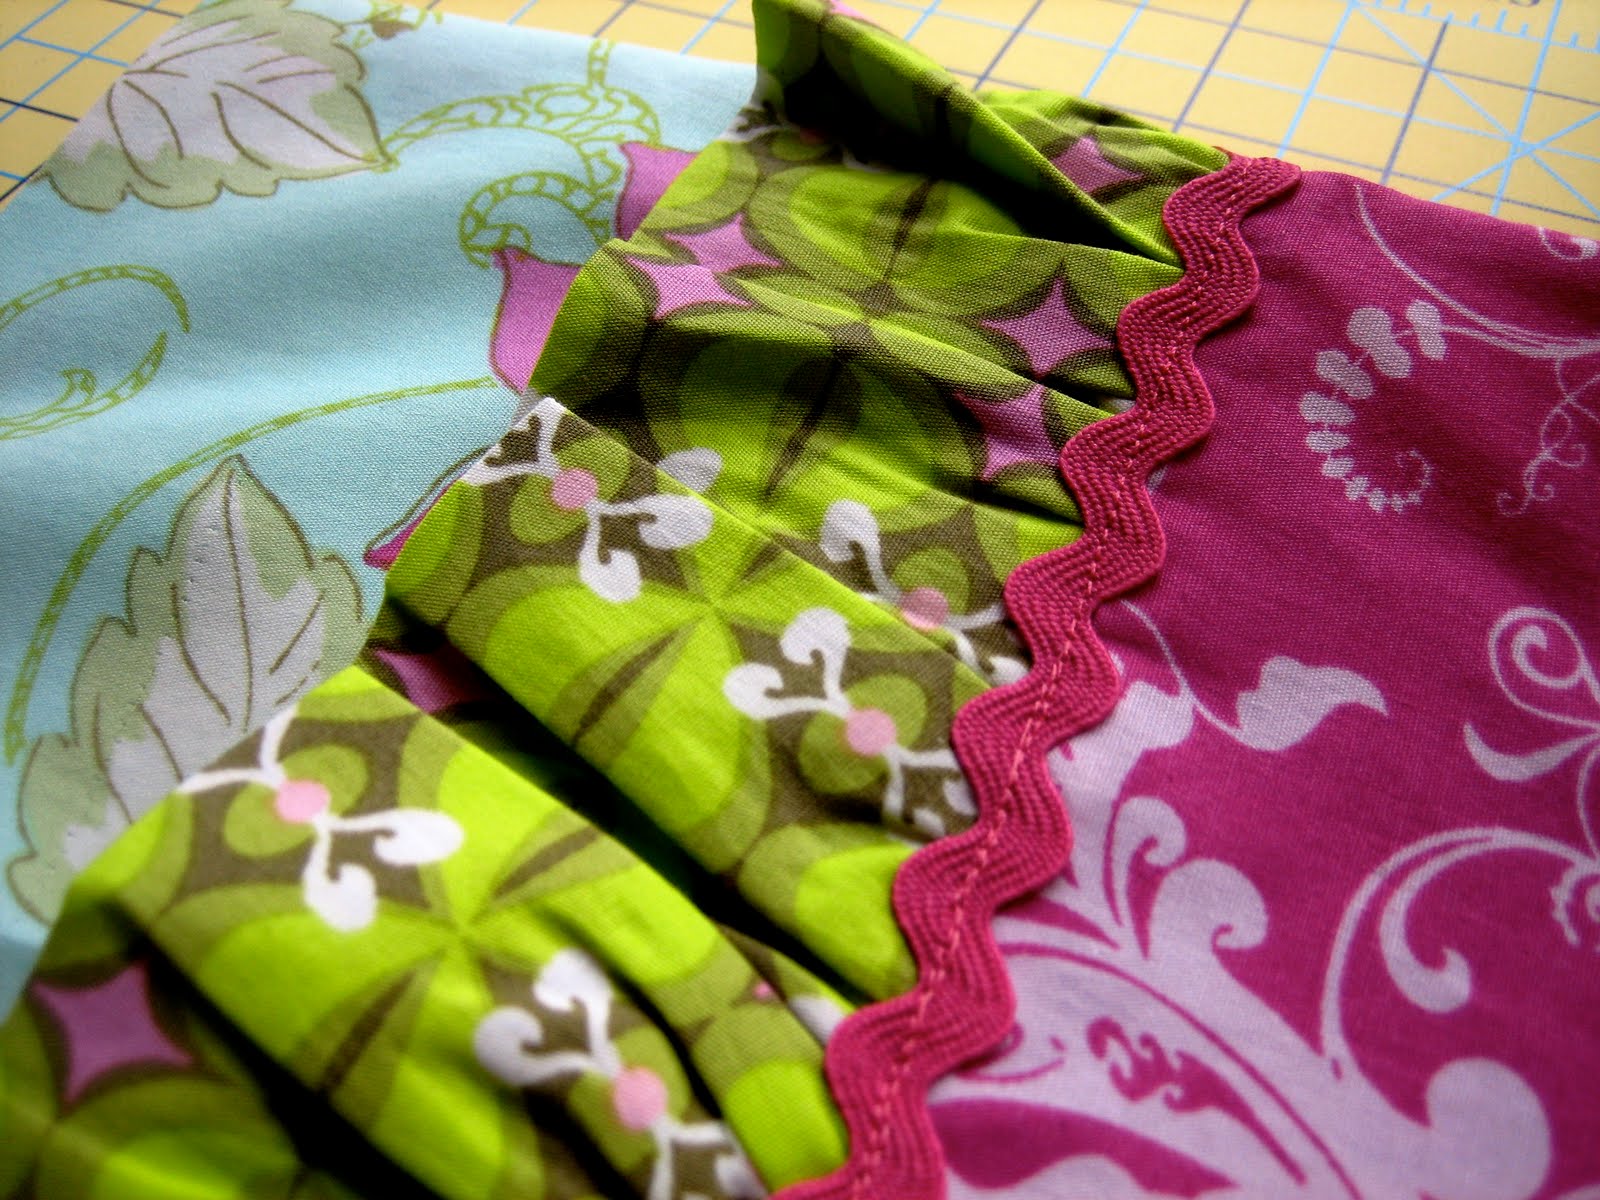
This is what the rick rack will look like after you have stitched it to the pillowcase.

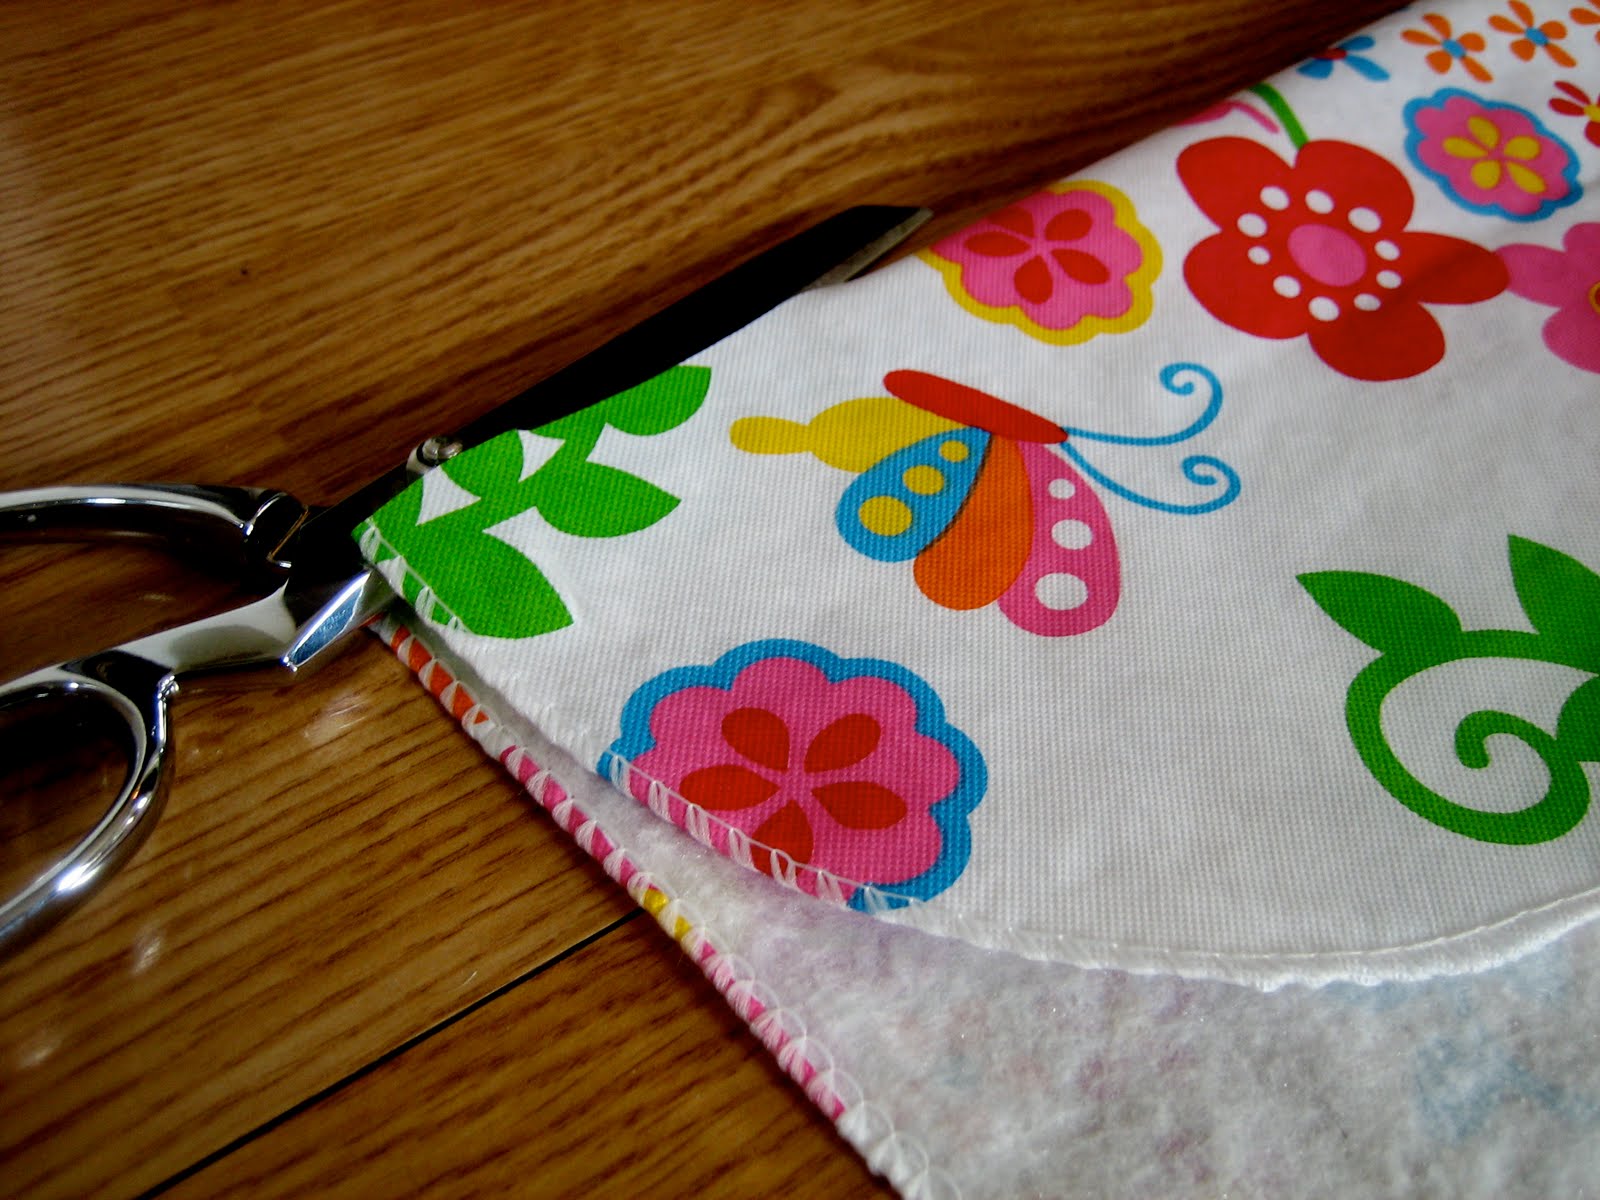
If you would like to add a monogram or name to the pillowcase then simply cut out letters out of coordinating fabric and follow the directions on your fusible interfacing to secure them to the fabric.

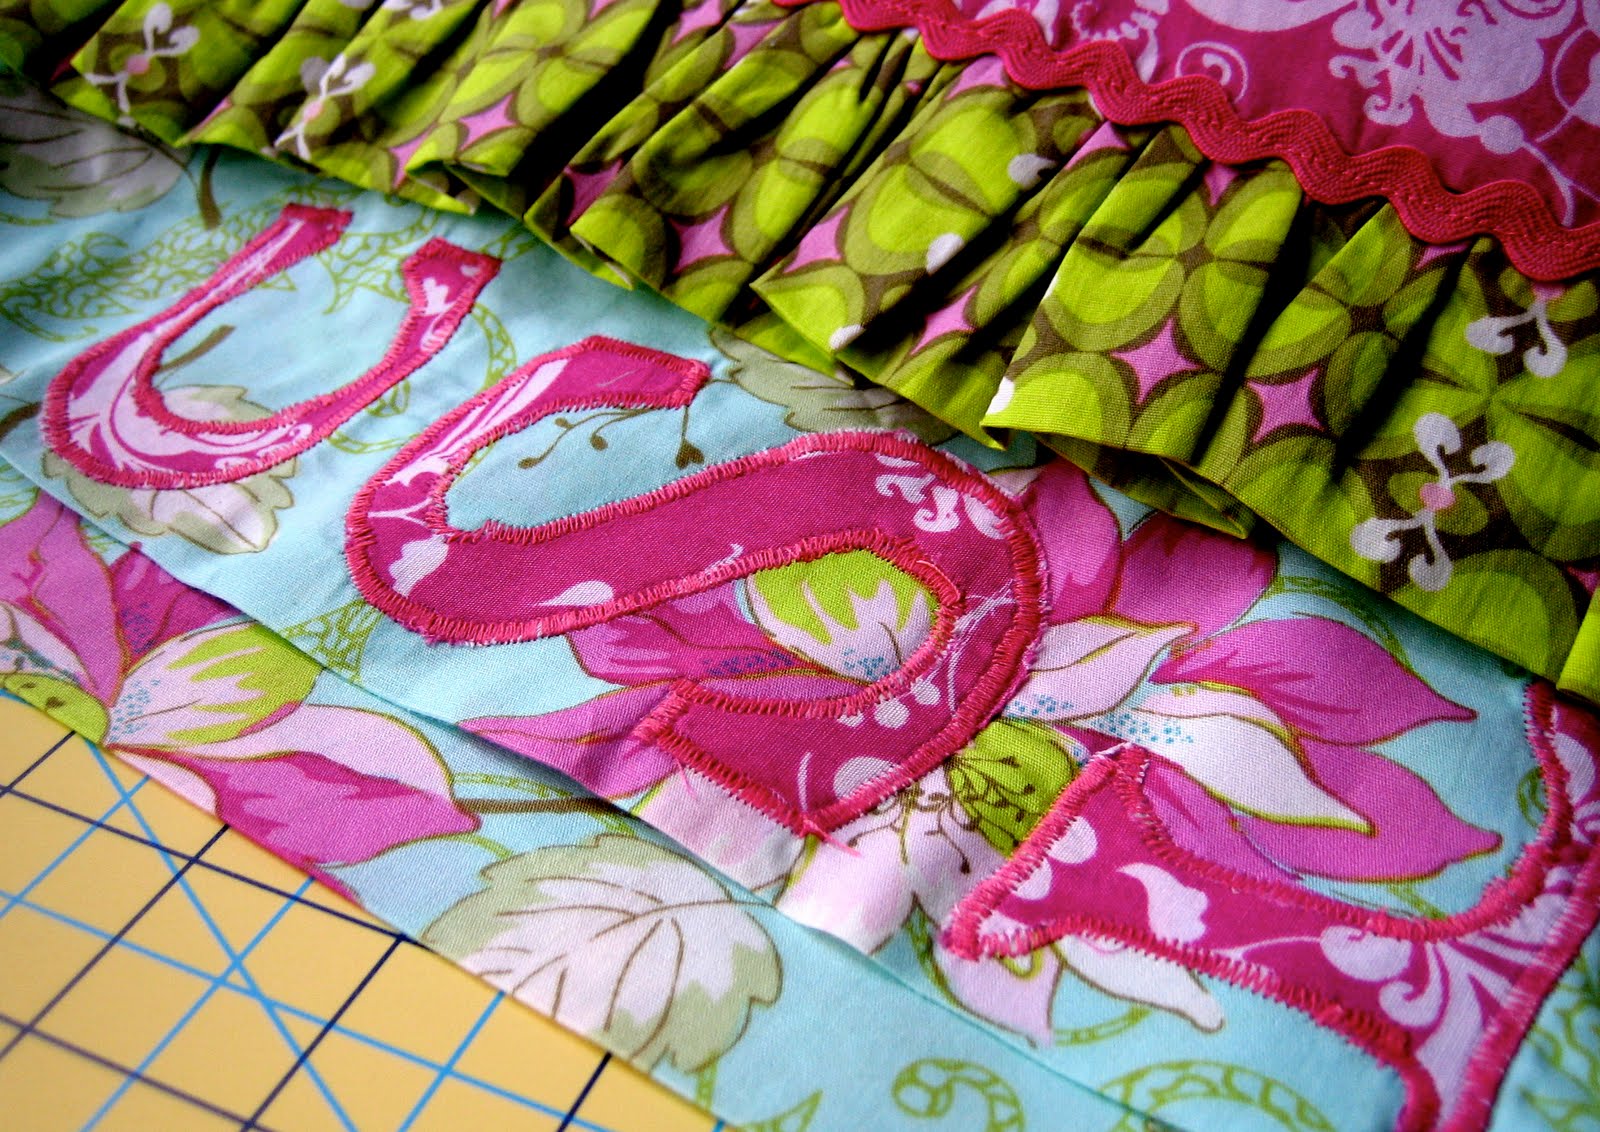
Then zig-zag stitch around each of the letters.  You can also do a simple straight-stitch, I would just recommend using fray-check around the edges so it will still look nice after washing.

And there you have it!  A special pillowcase for a very special little lady!
This is a set of pillowcases that I made for a customers twins for their 2nd birthday.  They will be taking these pillowcases and matching patchwork blankets to their daycare for nap time – SO cute!!

Sleepover Pillowcase Tutorial – Guest Post at My Four Monkeys

Just wanted to let you know that I’m blogging over at the Craft Bonanza at My Four Monkeys with my Sleepover Pillowcase Tutorial.

Head over to My Four Monkeys and learn how to sew one of these super-girly ruffle pillowcases!  Don’t sew?  Well, I just listed these pillowcases as part of the Toddler Naptime Set in my etsy shop – come pick one up for your darling little lady!

Jambalaya Egg Casserole

This morning I was scheduled to host our bi-weekly playgroup.  The group is pretty large, with 12 Mama’s, 12 two-year olds, and several younger siblings.  Typically the playgroup host provides some type of breakfast/brunch for everyone.  I wanted to try something new and saw a recipe on the back of the Zatarain’s Jambalaya mix that looked very interesting and right up my alley.

I modified the recipe ever so slightly, but I must say, I thought it turned out pretty darn tasty and so did the other Mama’s.

Jambalaya Egg Casserole

(Serves 8-12)
Ingredients:
1 family size box of Zatarain’s Jambalaya, prepared according to package directions
1 ham steak, cubed
5 pieces of cooked bacon, crumbled
1 8oz bag of shredded Mexican cheese blend or Monterey Jack
3 green onions, sliced
1 cup heavy cream
7 eggs
Parsley, optional for garnish


Directions:
Preheat oven to 375 degrees.
Prepare Jambalaya mix according to package directions.  Use the cubed ham and crumbled bacon when the mix directions tell you to add the meat.  Meanwhile, beat the 7 eggs and heavy cream.  Add 3/4 of the bag of shredded cheese and the sliced green onions.  Once the jambalaya is cooked, allow to cool.  Once cooled, mix the jambalaya with the egg, cream, onion, and cheese mixture.  Stir to combine.  Pour combined mixture into a 9 x13 glass baking dish.  Sprinkle remaining cheese over the top.
Bake in the oven for 25 minutes.  Garnish with chopped parsley and serve.  Enjoy!
I also served a couple other dishes along side this yummy casserole.


Crunchy Asian Peanut Slaw
Apple, Strawberry, Pineapple Fruit Salad with Lime
 
Cottage Mama’s Note:  The jambalaya would also be delicious with the addition of andouille sausage or you could even use your basic breakfast sausage.

Mother’s Love Tree

I could not ask for a better mother – she is everything I hope to be.  As I have gotten older and am now a mother myself, I’ve grown to appreciate her more and more.  As her “adult” child I truly consider my Mom my best girlfriend.  She is always a voice of reason for me, always encouraging me to take the high road and do my best, full of kindness, amazingly supportive and a wonderful listener.  My Mom is such a joy to be around and when we get together we always laugh so hard and have the best time!

This mother’s day I wanted to make my Mom something really special.  Sadly for me my Mom lives many miles away down in Texas, so we don’t get to spend nearly has much time together as I would like.  I saw a variation of this project by a guest blogger, At Second Street, over at The Trendy Treehouse and it inspired me to do a version of my own.

Mother’s Love Tree

This tree is made from Mary Engelbreit’s “Recipe for Friendship” fabric line.  My Mom is working on re-doing her sewing room and I knew this art-work would go great with the rest of her decor.

The branches of the tree are made from our handprints.  The big middle one is mine and the other two are my daughters – Savannah Rose (2-years old) on the right and Matilda Jane (10 months old) on the left.

I used mod-podge to adhere everything to a standard artists canvas.  I even mod-podged the background fabric, though you could certainly use a staple-gun to attach this piece.

The leaves were made from several different green, blue and black fabrics – I wanted them to be different from the main trunk of the tree, though some of the fabrics did have flecks of red to tie them altogether.

On the back I wrote a quote from unknown, “Mother’s hold their children’s hands for a short while, but their hearts forever”.

This was an incredibly fun project that even my 2-year old was able to help me with.  This would also make a wonderful gift for a mother or grandmother for any holiday (i.e. birthday or Christmas).  Try using different combination’s of fabrics to tie in with the gift recipients room decor.

Or perhaps you would like to make a “Family Tree” and have a branch represent each member of the family with Mom, Dad, and all the kiddos – the options are endless with this fun project!

Happy Mother’s Day!

Cottage Mama’s Note:  There is a wonderful tutorial on a similar project over at The Trendy Treehouse.  Guest blogger, At Second Street, did separate hand-print trees for each of her children using burlap as the background and more earthy color-tones.  Check it out – she did a wonderful job!

Craft Room Organization: Fabric Lid Jar Tutorial

This past weekend my hubby decided to help me turn our office in to my official sewing/craft space – yippee!   It’s a very small space, but I think we’ve got it functioning pretty well.  And I can’t complain, I feel pretty lucky to have a sewing room that I can call my own. I can’t wait to show you all the pictures, but we aren’t quite finished yet.

So in the meantime, I thought I would share a few tutorials with you on some of the ways I’ve decided to organize my space.  I have A LOT of metal shank buttons that I cover with fabric and use on the children’s clothing that I sell in my shop, The Cottage Mama.  My Grandma and Grandpa used to do a lot of canning, but have recently slowed down in that arena, so they gave me a bunch of mason jars.  Some are your standard jars and others are the really neat older blue jars.

Anyway, I decided I wanted to find a quick and easy way to make the tops of my jars pretty.  So, here’s what I did……..

Fabric Mason Jar Lid Tutorial
Supplies:
Mason jar with lid
Spray paint
Scraps of fabric
Strong glue – I like Fabri-Tac
Scissors
Pen
Directions:
You will need to use the inner and the outer portions of the lid for this project.
This project is great for using up your scraps of fabric, so pull out your scrap bin to find some fun fabrics you would like to use.
Spread out a plastic bag outside and lay all of the outer parts of the lids on the ground.  I sprayed one other additional lid that was a little different – you can see it to the bottom right corner.
Spray paint the outer portions of the lids.  I used a brown spray paint that I had on hand from another project, but you could totally jazz these up even more and use a fun, bright color.  Let these dry overnight.
Lay the inner part of the lid onto your fabric.
Trace around the lid with your pen.  Don’t worry about the pen on the fabric because the very edge will not even show.
Now you have a circle drawn onto your fabric.  I doubled up my fabric and cut two circles at one time.
Use your scissors to cut the circle out of your fabric.
Turn the inner portion of the lid, side up, and apply glue all over the top.
Press your fabric on top of the inner portion of the lid.  Securing the fabric to the lid.
Now take the spray-painted outer lid and place some glue around the inner edge.
Turn the inner portion of the lid upside down and press it into the glue in the outer portion of the lid.  Allow to dry for about an hour.
And there you have it, pretty fabric topped mason jars!
I’m in love with these blue mason jars – they just shout vintage to me.
For these two jars, I used some fabric from Amy Butler “Love” and Heather Bailey’s “Nicey Jane”.
I love getting organized, but I love it even more when I’m organized AND things look pretty!
Cottage Mama’s Note:  Want to do something else fun with your mason jar lids?  Check out my Mason Jar Pin Cushion Tutorial.

Linking to:  Today’s Creative Blog and A Soft Place to Land

Avocado Enchilada Casserole Recipe

Avocado Enchilada Casserole from The Cottage Mama. www.thecottagemama.com
Avocado + cheesy enchiladas = HEAVEN
If you are an avocado lover, as I am, then you must try my new Avocado Enchilada Casserole recipe. I love casseroles because they can be made ahead of time and put in the oven when ready to bake.  This recipe is perfect to have the kids help you make dinner.  Even my 2-year old daughter Savannah helped me with this one.  She sprinkled the cheese between each layer and finished it off with the green onions – she felt so proud being Mommy’s big helper in the kitchen!
Now I am a HUGE fan of Green Chile Chicken Enchiladas, which apparently I haven’t given you my recipe for as I just noticed searching my own blog for it (oops – sorry)……..you must have that recipe too…..future blog post I guess.  Anyway these were so good that I think they might rival my fav.  Give them a try and let me know what you think!


Avocado Enchilada Casserole

Avocado Enchilada Casserole
Author: 
Recipe type: Entree
Cuisine: Mexican
Prep time: 
Cook time: 
Total time: 
Serves: 6 - 8
 
Ingredients
  • 3 large ripe avocados (4 if they are smaller)
  • 1 can red enchilada sauce
  • 1 can green enchilada sauce
  • 1 can "Rotel" tomatoes with green chiles
  • 1 package corn tortillas (10-12), sliced into strips
  • 1 lb. Monterey Jack cheese, shredded
  • 2 green onions, sliced
  • Salt and pepper, to taste
  • Garnish: Sour cream and fresh salsa
Instructions
  1. Preheat oven to 375 degrees.
  2. Drain, Rotel tomatoes with green chiles. In a mixing bowl, combine drained rotel, red enchilada sauce and green enchilada sauce. Cut avocados in half and then into strips.
  3. Now begin layering your casserole in a 9 x13 glass baking dish. First layer ⅓ tortillas, then ½ of the avocado (spread out the avocado - it doesn't need to cover all the tortilla), then ⅓ of the sauce and tomato mixture, ⅓ of the cheese. Then layer all of these things again. Finally, finish the casserole with a final layer of tortillas, the rest of the cheese and the rest of the sauce. Sprinkle green onions on top and some salt and pepper, to taste.
  4. Bake for 20 - 25 mins. or until heated through and cheese is bubbling.
Directions:
Preheat oven to 375 degrees.
Drain, Rotel tomatoes with green chiles.  In a mixing bowl, combine drained rotel, red enchilada sauce and green enchilada sauce.  Cut avocados in half and then into strips.
Now begin layering your casserole in a 9 x13 glass baking dish.  First layer 1/3 tortillas, then 1/2 of the avocado (spread out the avocado – it doesn’t need to cover all the tortilla), then 1/3 of the sauce and tomato mixture, 1/3 of the cheese.  Then layer all of these things again.  Finally, finish the casserole with a final layer of tortillas, the rest of the cheese and the rest of the sauce.  Sprinkle green onions on top and some salt and pepper, to taste.
Place in oven and bake for 20 minutes or until heated through.
Serve with a dollop of sour cream, fresh salsa and good tortilla chips .

Yum!!

Waterproof Picnic Blanket Tutorial

In case you weren’t able to make it over to my guest post at “Someday Crafts” last week, I thought I would go ahead and share my tutorial for a Waterproof Picnic Blanket!  I thought this would be a really fun spring/summer tutorial to share with you that is super simple and VERY useful!

Have you ever been outside for a picnic only to lay your blanket down are realize the ground is damp?  Well, that is no fun and kind of ruins the picnic experience.  So, make yourself one of these waterproof picnic blankets and you will never have to worry about wet ground again!

Supplies:
1 Vinyl Tablecloth (52 x 90) or smaller if you prefer
1 Cloth Tablecloth (similar size to vinyl) or 2 yards of your favorite fabric
Scissors
Thread
Iron
Sewing Machine
Optional:
Ribbon or Rick Rack for trim

Directions:

You will need two tablecloths – 1 vinyl and 1 cloth.  If you don’t have a cloth tablecloth, feel free to use a couple yards of fabric.  I got both of these coordinating tablecloths at my local Joann’s.

You want to choose a top and bottom that will coordinate nicely with each other – I just thought these two prints shouted “Spring!!”.

Here is what the packaging for the vinyl tablecloth looked like.  It was $6.99 and I got it 50% off – wooohoo!

Lay out your vinyl tablecloth on a large surface.

Lay your other tablecloth or fabric on top of the vinyl cloth.  You need to do this so you can trim off any extra length or width you may have to make sure they are the same size.

Fold over your excess length or you can draw a line marking the excess length.

Cut off the excess length from the vinyl tablecloth.

Before stitching the two cloths together you want to prep the fabric.  ALWAYS iron your fabric before sewing – it is the only way to achieve professional looking results.  For the vinyl cloth turn it so the flannel side is up, set your iron on the lowest setting and press, smoothing out any creases.  Your vinyl will not melt as long as you move the iron quickly and make sure you set it to low.

Then stitch your two cloths together on three sides – 1/2″ seam allowance, leaving one of the shorter sides open.  I used my serger just because it makes it faster, but you can just as easily use your sewing machine – just make sure you use a needle designed for thicker fabrics, such as a denim needle.

You want to leave one side of the blanket open in order to insert the ties.  The ties should each be 20 inches long and 3 inches wide (I actually made mine too long in my original design….oops!).  You will need to cut four pieces (2 for each tie).

I used left over fabric I had from the cloth tablecloth – the stuff I had to cut off to make sure the top and bottom were the same size.  You could also use ribbon if you prefer.

Place right sides together and stitch the ties along both long sides and one short side (leave one of the shorter sides open).  Again, I used my serger, just for time-sake, but using the sewing machine will yield the exact same results.

Once you have stitched three sides, turn your ties right-side out and press.

Place your ties, pointing inward, in the middle of the fourth side (that you have yet to stitch).  Place the raw edge of the tie against the raw edges of the tablecloths.  Then stitch this side of the tablecloths 3/4 of the way closed.  You need to leave an opening to turn the blanket right-side out.

Turn the blanket right-side out and press lightly.

To close the little opening, I recommend top-stitching around the entire blanket – 1/4″ seam allowance.  Or you can just close the opening by hand-sewing – your choice.

And there you have it – your waterproof picnic blanket ready for a day out in the park!!

My tablecloth came with a border and some ribbon trim already on it, but if you are using fabric and would like to add some trim, make sure you do that before you sew the two tablecloths together.

To fold the picnic blanket, fold over one third of the blanket towards the middle.

Then fold over the other one-third towards the middle.

Then just roll it all the way up, starting from the end without the ties.  Once rolled, wrap your your ties around and tie a pretty bow.

Here is your blanket all wrapped up and ready for a fun day with family and friends!
Cottage Mama’s Note:  You can also use oilcloth for this project, but the vinyl tablecloth was the more inexpensive option.  This vinyl backed tablecloth would also be great as an actual tablecloth.  Just eliminate the ties and presto, you have a waterproof tablecloth that still looks classy, but will protect your table as well!!

Pattern Weights

I don’t know about you, but cutting fabric is one of my least favorite parts about sewing.  I love having a design idea in my head and I LOVE sewing it together, but the cutting……not so much.

I was reading my most recent issue of “Sew News” magazine and they had a great idea that I thought I would share with all of you.  Typically when you are working with a pattern, you will pin it to your fabric and then cut it out.  Well, their tip was to use washers (like the kind your find in the hardware store) to weight-down the pattern pieces.  Genius, I say!!  Why didn’t I think of this?!  This helps to stabilize the pattern pieces so that they don’t move during cutting.

So now I simply weight down my patterns onto my fabric and use my rotary cutter to cut them out.  And if you don’t use a rotary cutter to cut your patterns, you must!  As painful as I find cutting patterns to be, it makes it go 10x’s faster.

The next time you are sewing from a pattern or even if you are trying to simply trace something, grab some washers………it is a seriously good thing!!

DIY Pattern Weights from The Cottage Mama. www.thecottagemama.com

Spring Has Sprung!

Spring has sprung and fabric designer, Heather Bailey, has come out with some super-cute new sewing patterns!  I have always loved Heather’s fabrics (as I’m sure you’ve seen in my etsy shop), but I’m really thinking I just may have to get my hands on some of these patterns.

Check out some of her new pattern designs:

And are these adorable or what?  I’m loving the butterfly and the ladybug – imagine one of these little critters sitting next to you at your sewing machine?  These pincushions would make great gifts for all of the crafty people in your life.

And these…….well these are so ridiculously cute, I can’t even stand it!  I can just imagine my two little ladies playing pretend with these two adorable characters.

And finally, this beautiful bag!  If you have some extra time before Mother’s Day I think this would make a great gift for Mom!

Speaking of Mom………my Mom (The Cottage Mama’s Mama) has agreed to do a guest blog post reviewing a recent sewing pattern that we picked up at the Chicago Quilt Festival this last weekend (which was amazing, by the way).

The Sewing Workshop patterns claim they are “patterns that teach”……well, we’ll just have to put them to the test!  My Mom is an amazing sewer (though she is very humble and would never admit it), so I’m very excited for her to share some of her knowledge with all of you.

Here is the pattern she will be reviewing:

I would love to do more sewing pattern reviews and tutorials on The Cottage Home, so if you are interested in guest posting a pattern review, please leave me a comment or email me and we can work out the details – TheCottageMama@gmail.com

Happy Sewing!

Cottage Mama’s Note:  All patterns are scheduled to be in-stock tomorrow, April 23, in Heather Bailey’s store.

Roasted Vegetable Shrimp Pasta Primavera

So as I mentioned last week, my Mom came to town from Texas for a visit this past weekend.  While she was here I wanted to fix her something super yummy for dinner the first night she arrived.  I prepared a roasted vegetable shrimp pasta primavera with basil in a light cream sauce.  It was SO good, I could go for some right now!!  This is not the most figure flattering recipe (but I’m sure you’ve figured that’s the way with most of my recipes) but I do have some healthy ones coming, I promise!

Roasted Vegetable Shrimp Pasta Primavera

Ingredients:
2 zucchinis, cut in half lengthwise and cut into half inch chunks
1 large red onion, cut into 1 inch cubes
4 Roma tomatoes, diced
1 lb. fettuccine noodles, cooked according to package directions
2 cups heavy cream
2 garlic cloves, minced or a spoonful of jarred garlic
1/2 cup fresh basil
1/2 cup freshly grated Parmesan cheese, plus more for sprinkling
1 tablespoon butter (REAL butter)
1 – 2 tablespoons olive oil
Salt and pepper to taste
1 lb. frozen shrimp
Directions:
Preheat oven to 425 degrees.  Begin boiling water for pasta and cook according to package directions.
Cut all of your vegetables as mentioned above.
Spread vegetables out on a cookie sheet.  Drizzle with olive oil and sprinkle with salt and pepper.  Use your hands to mix vegetables in order to thoroughly coat with olive oil.  Place vegetables in preheated oven for 15 minutes or until cooked through.

Add 1 tablespoon olive oil to a large skillet on medium heat.  Add garlic, saute 1-2 minutes.  Add frozen shrimp and cook until warmed through.  Pour in 2 cups heavy cream and increase heat.  Once cream mixture starts bubbling, reduce heat to medium low – should become a simmer.  Allow to thicken for 10 minutes.  Add parmesan cheese and 1 tablespoon butter and simmer for 5 more minutes or until it reaches your desired consistency.

Once vegetables, pasta, and cream sauce are ready, combine everything in the same skillet where you cooked your cream sauce.  Here I added the vegetables, then pasta, then fresh basil.

Combine all of the ingredients with your pasta spoon until every noodle is coated with the delicious cream sauce.

Plate the pasta in a large pasta bowl, sprinkle with parmesan cheese and fresh basil or parsley.

Enjoy your pasta with a nice glass of wine, garlic bread, and good company!

Here’s my good company – my hubby (taking the picture) and The Cottage Mama’s Mama!  My Mom and I had such a great time together and we had a blast at the International Quilt Festival.  It’s always so hard to say goodbye, but I keep hoping and praying that some day we will live closer to one another.  
Miss you and love you Mom!