Simple Felt Hair Clip Tutorial

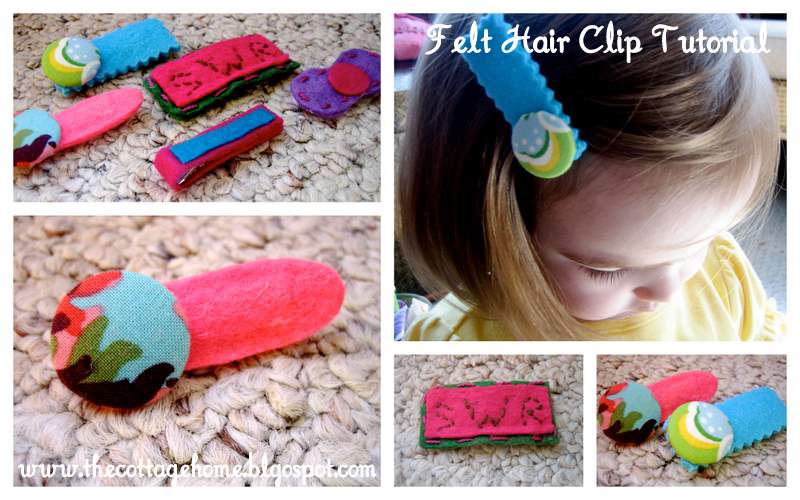
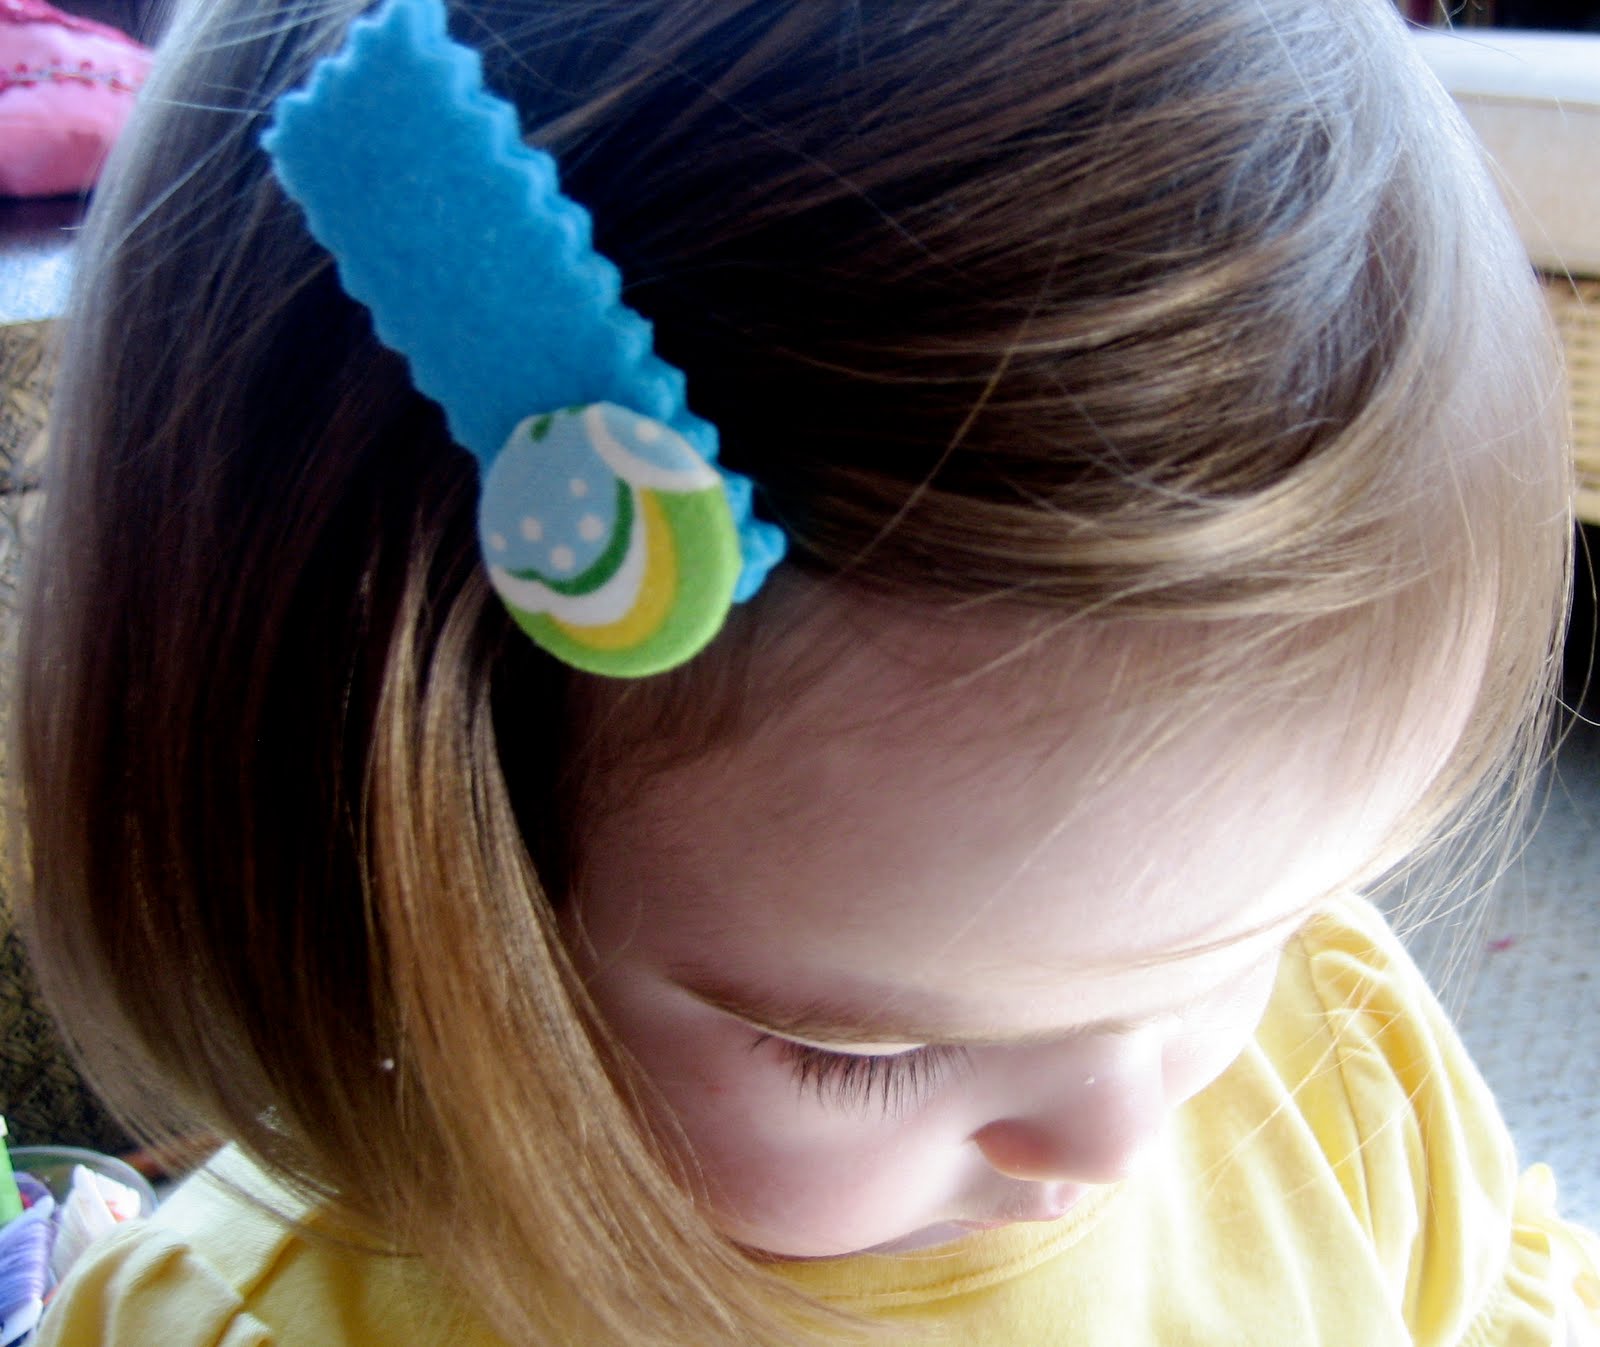
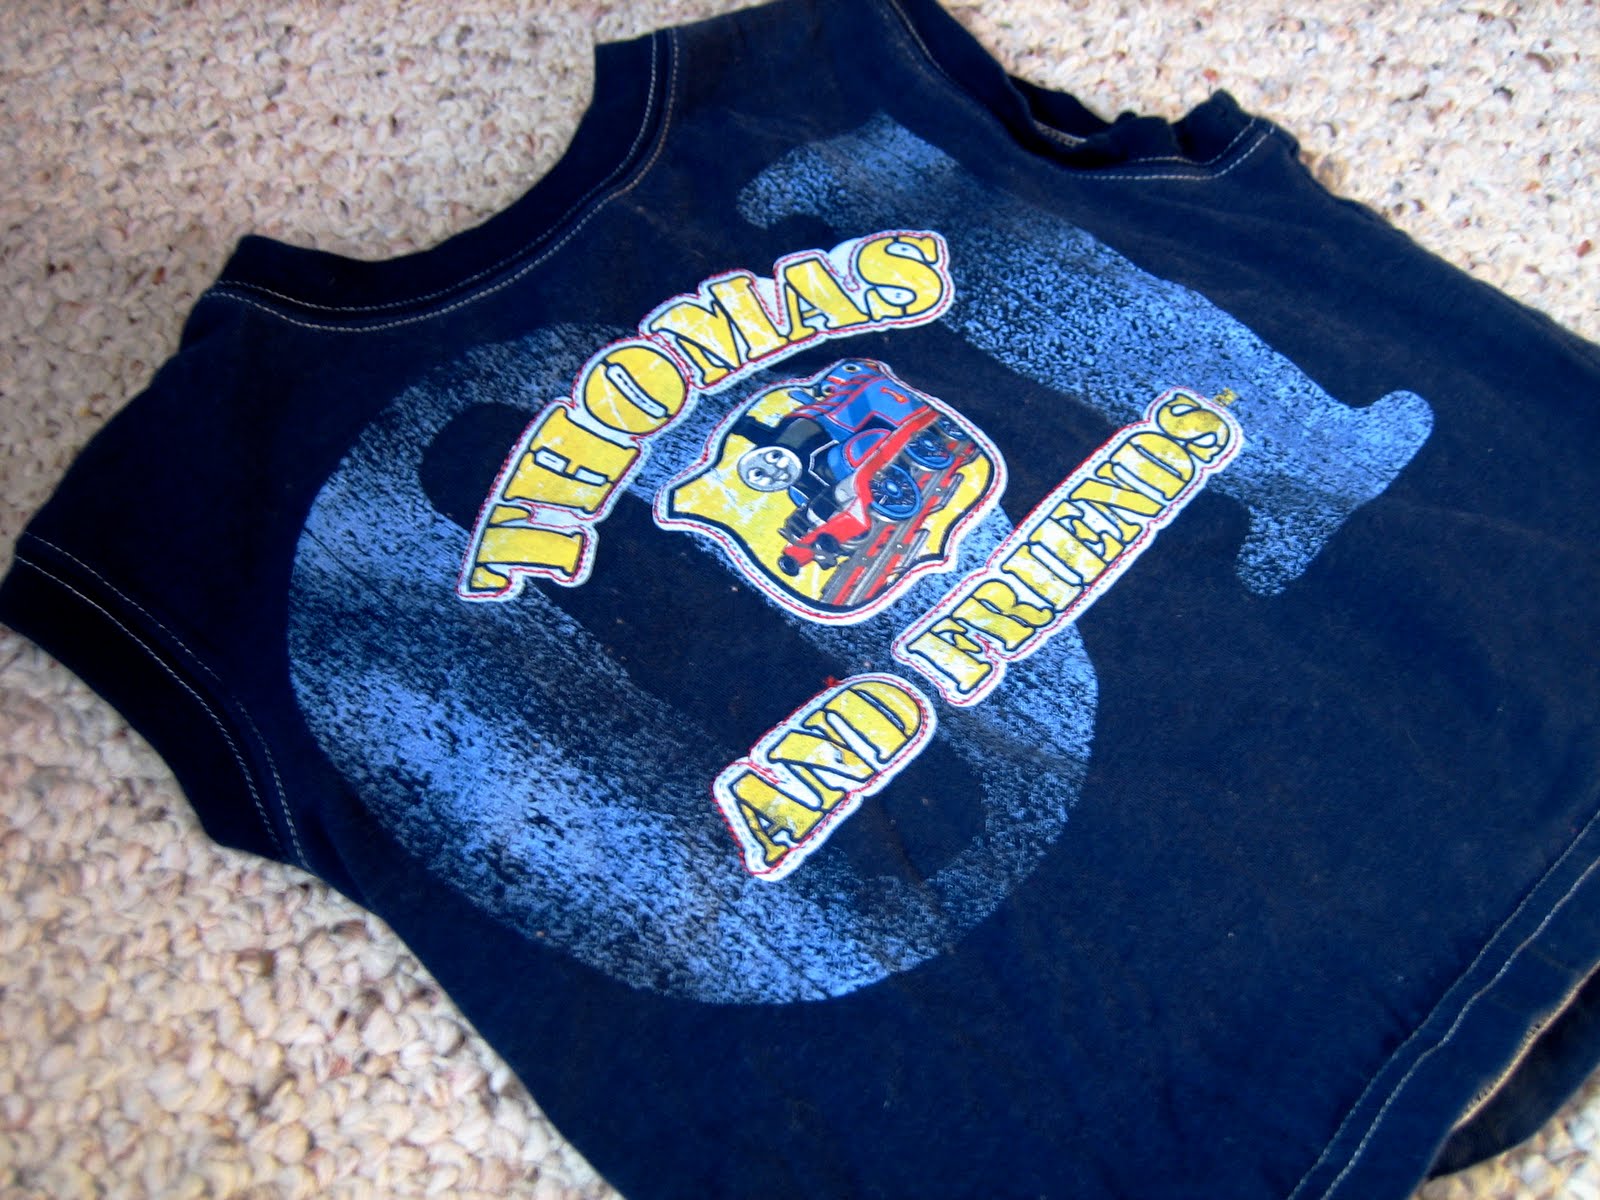
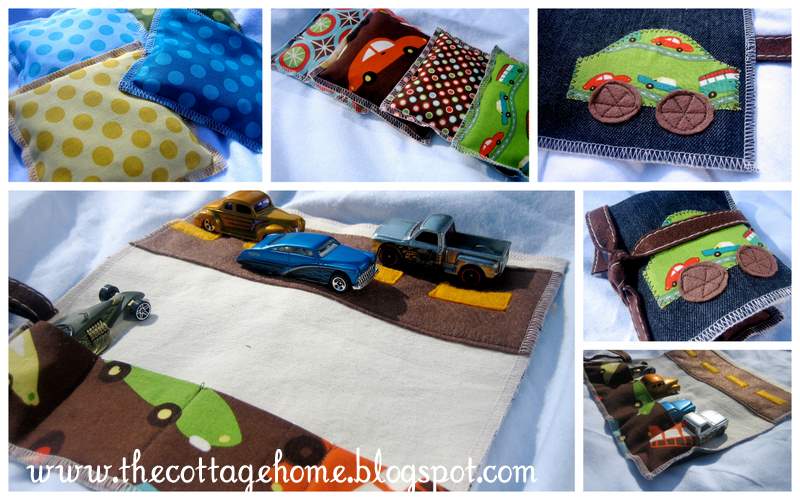
Have you seen all of the super-cute felt hair clips that are out there on the market?  Well, if you haven’t, just Google them and you will see this hair accessory craze!  There are some incredibly cute designs being sold, but I just can’t stomach paying $6-$10 for a hair clip that my daughter might wear (the operative word being…..might).

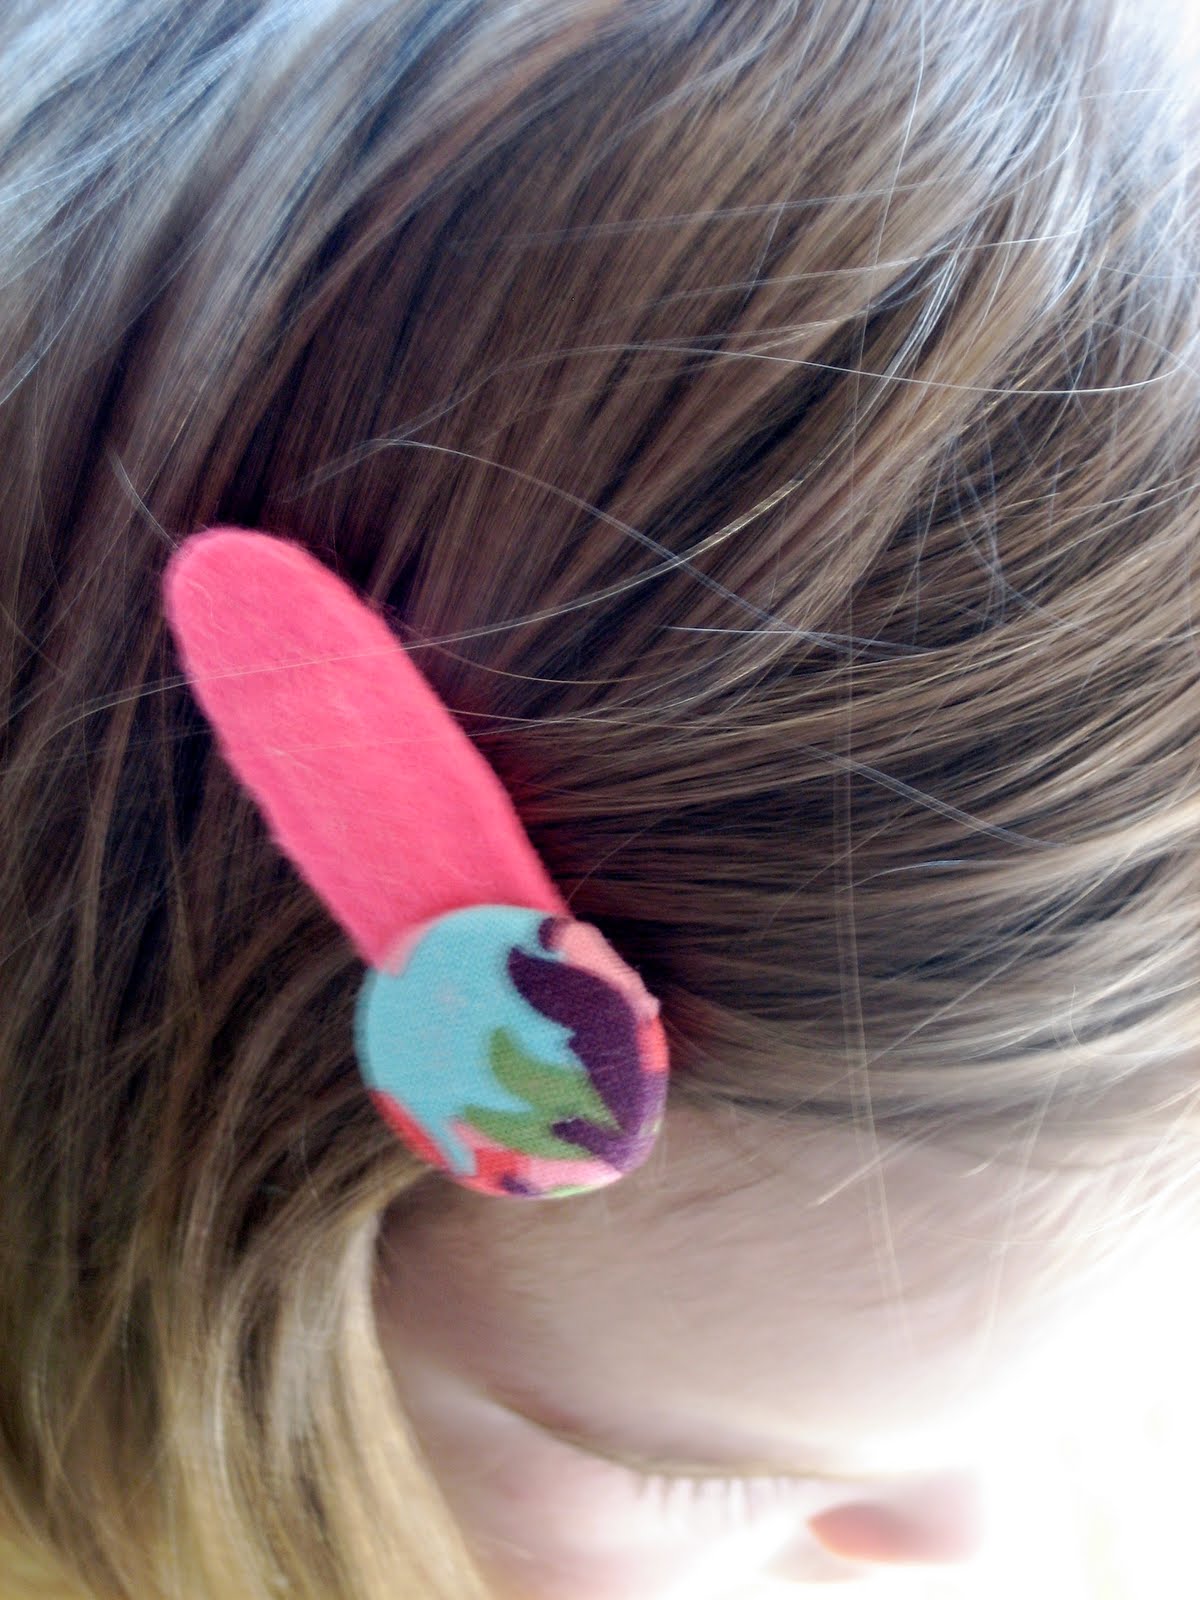
This afternoon I decided to make some little felt hair clips of my own for my daughter Savannah (Matilda doesn’t have any hair yet).  These were so simple and easy and there was NO sewing involved – I know I’m not the best about posting “non-sewing” tutorials.

Felt only costs 29 cents per sheet (or less if you get it on-sale) and a pack of hair clips is about $1.99 – so if you are on a budget (as most people are these days) this is the project for you!

Simple Felt Hair Clips

Supplies:
Craft Felt (whatever colors you like)
Strong Glue – I use fabri-tac
Hair clips (again, whatever kind you like)
Scissors
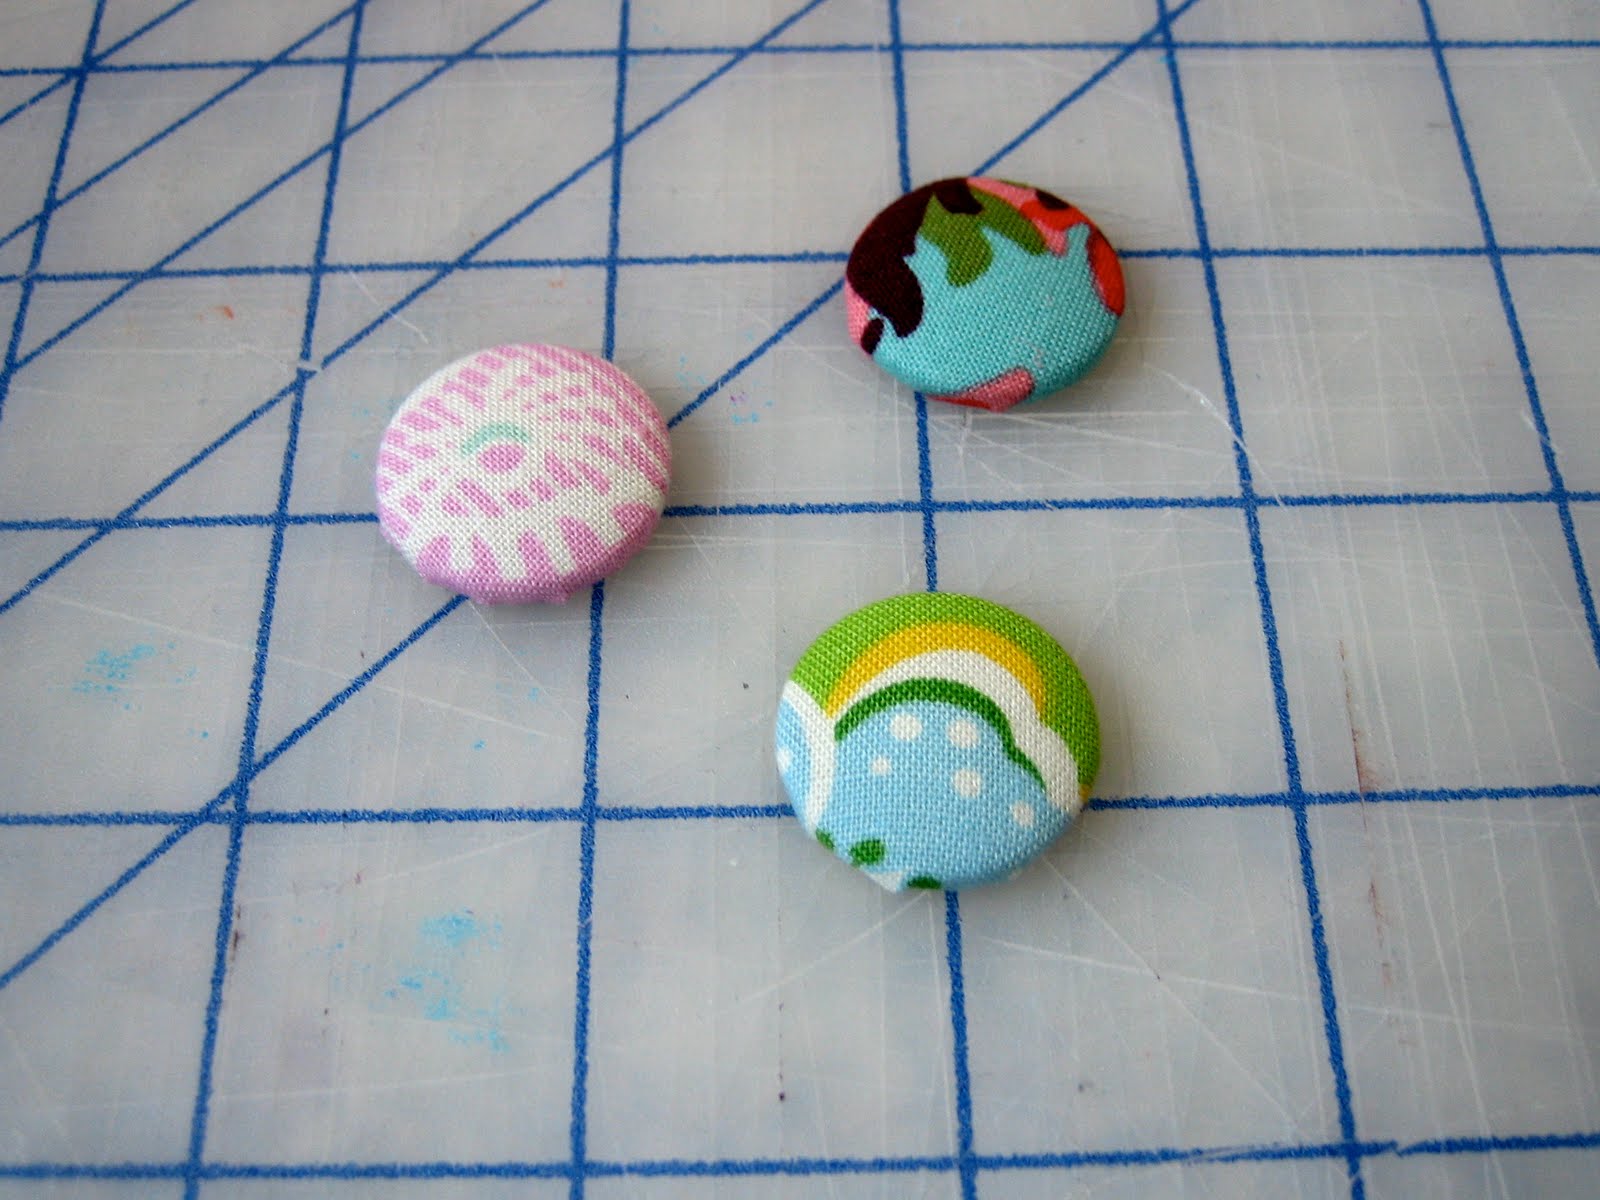
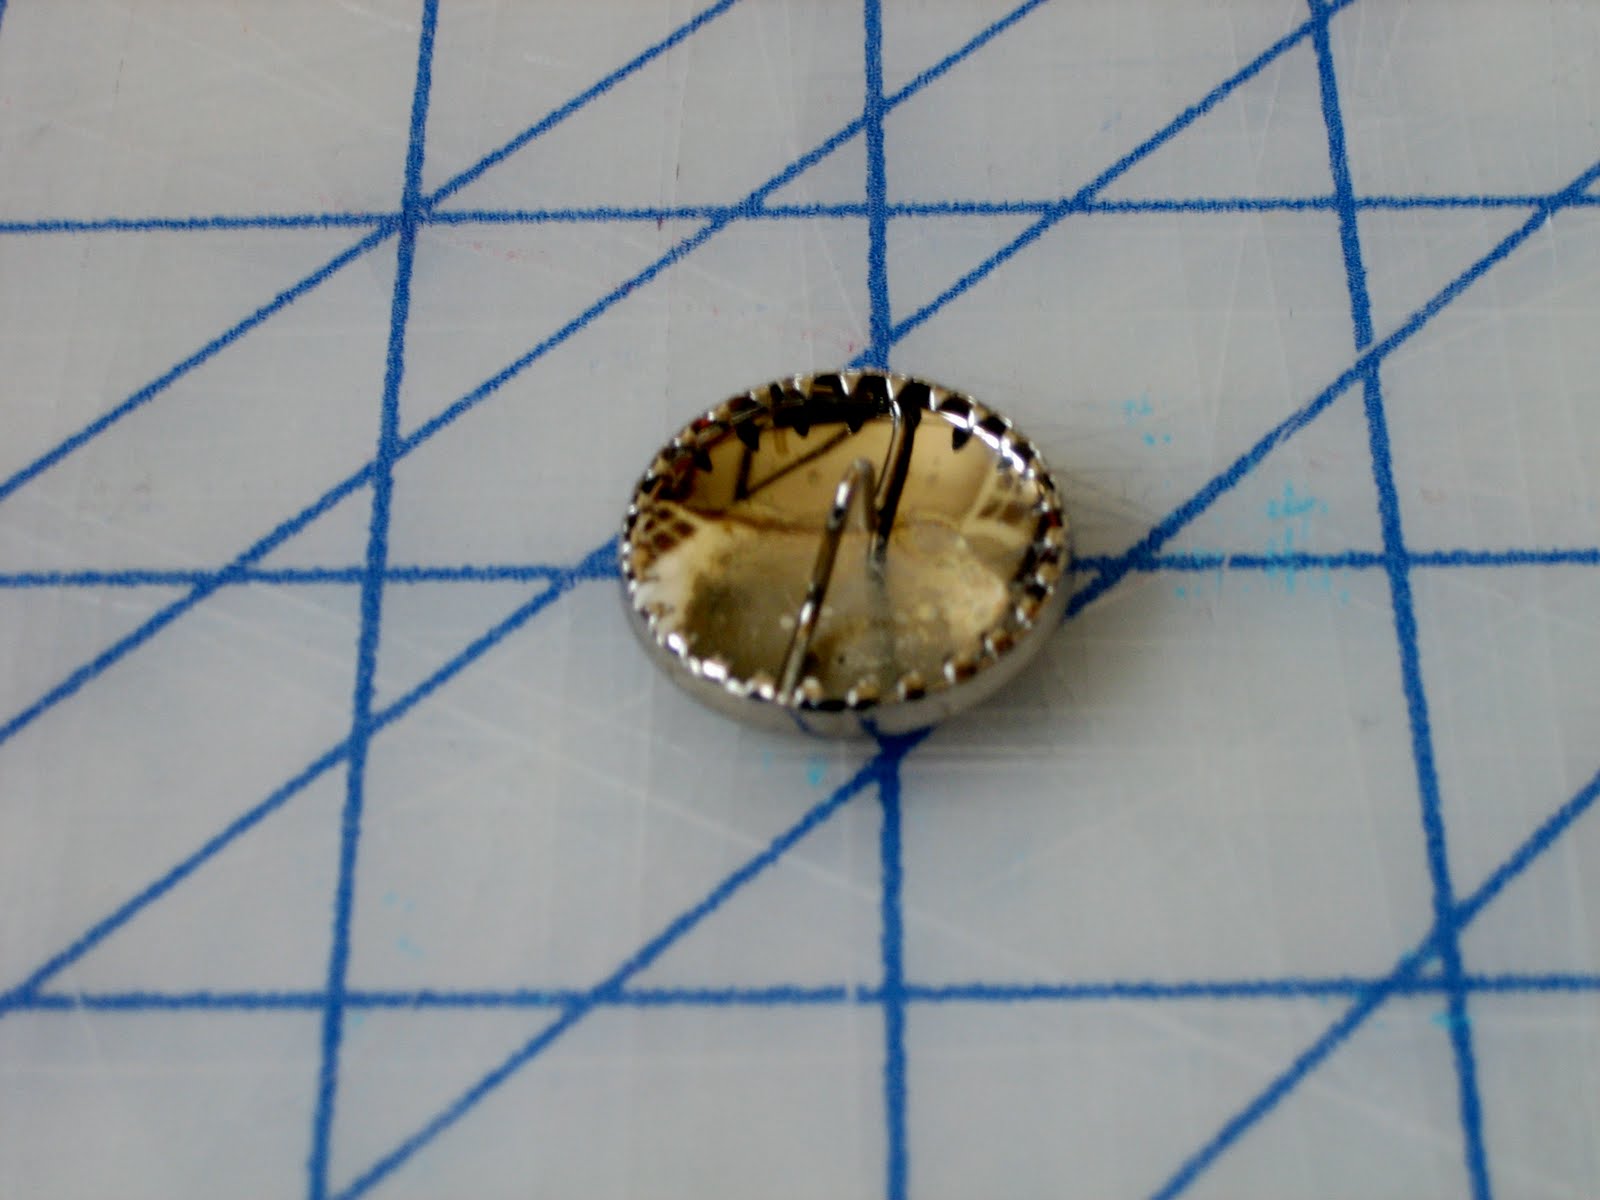
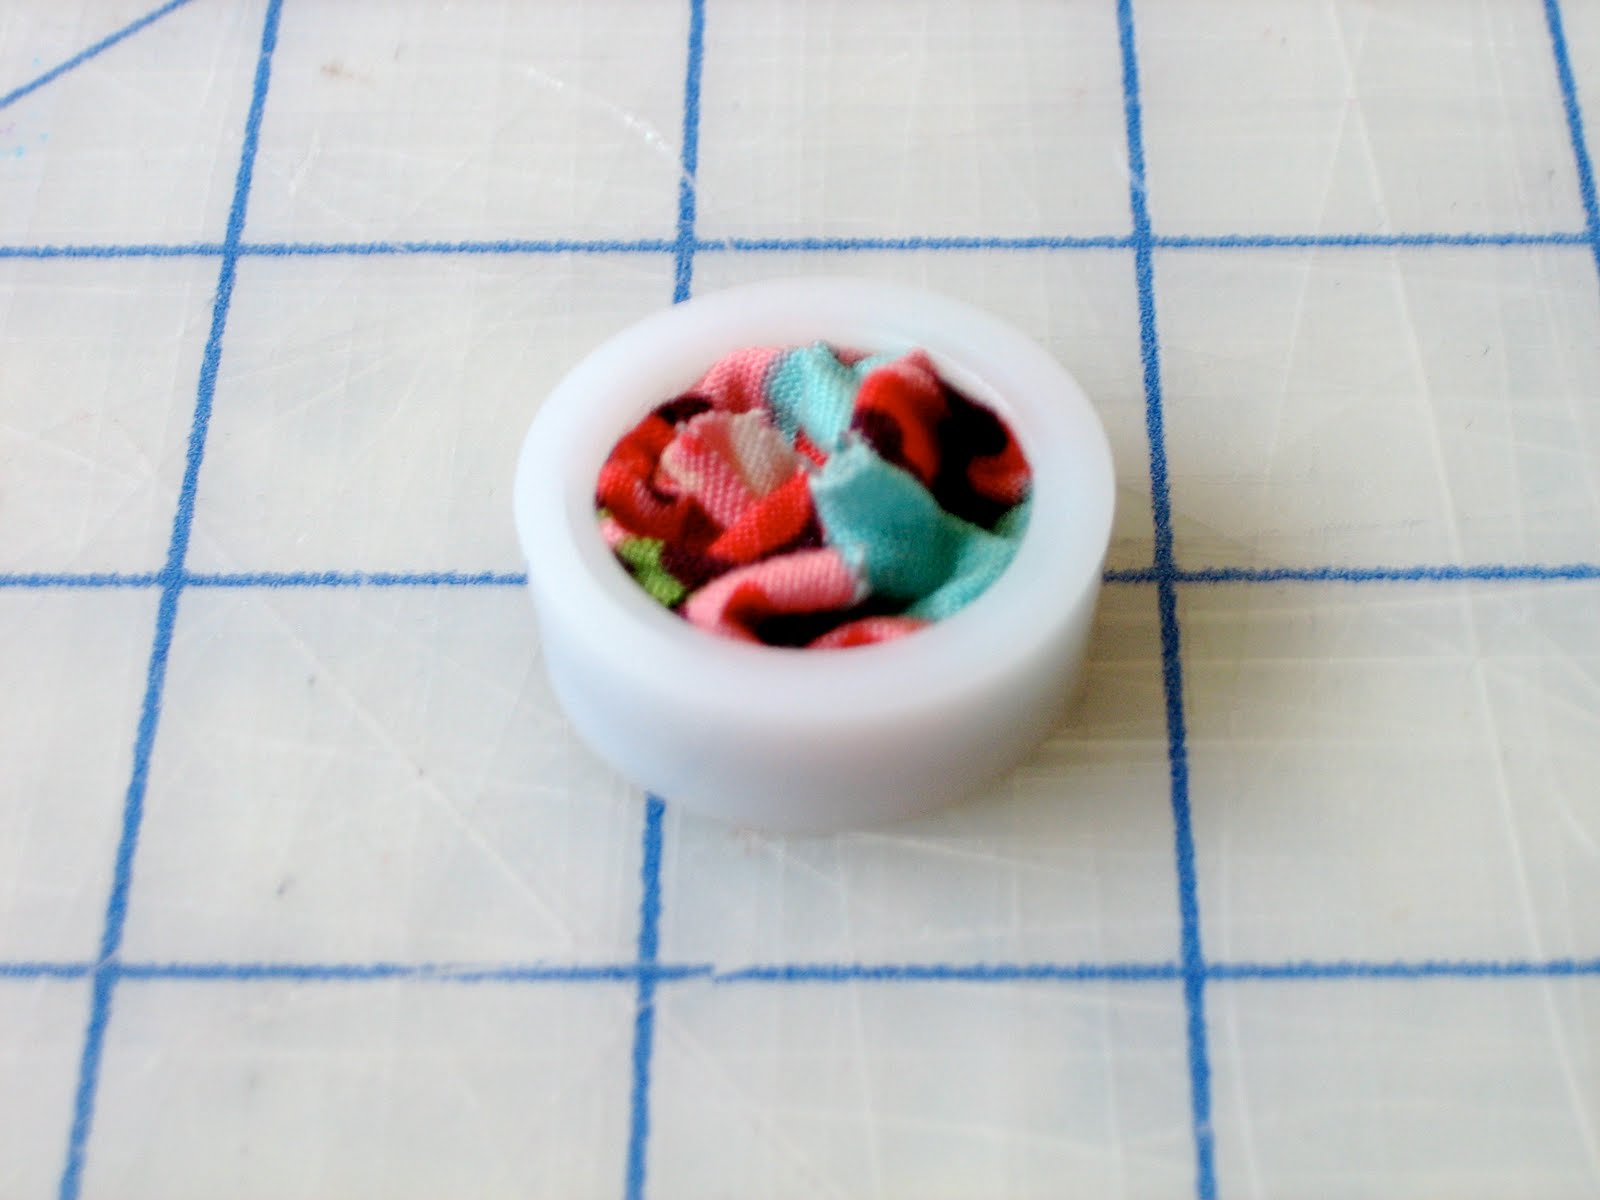
Optional Supplies – Fabric covered button maker & embroidery floss/hand-sewing needle

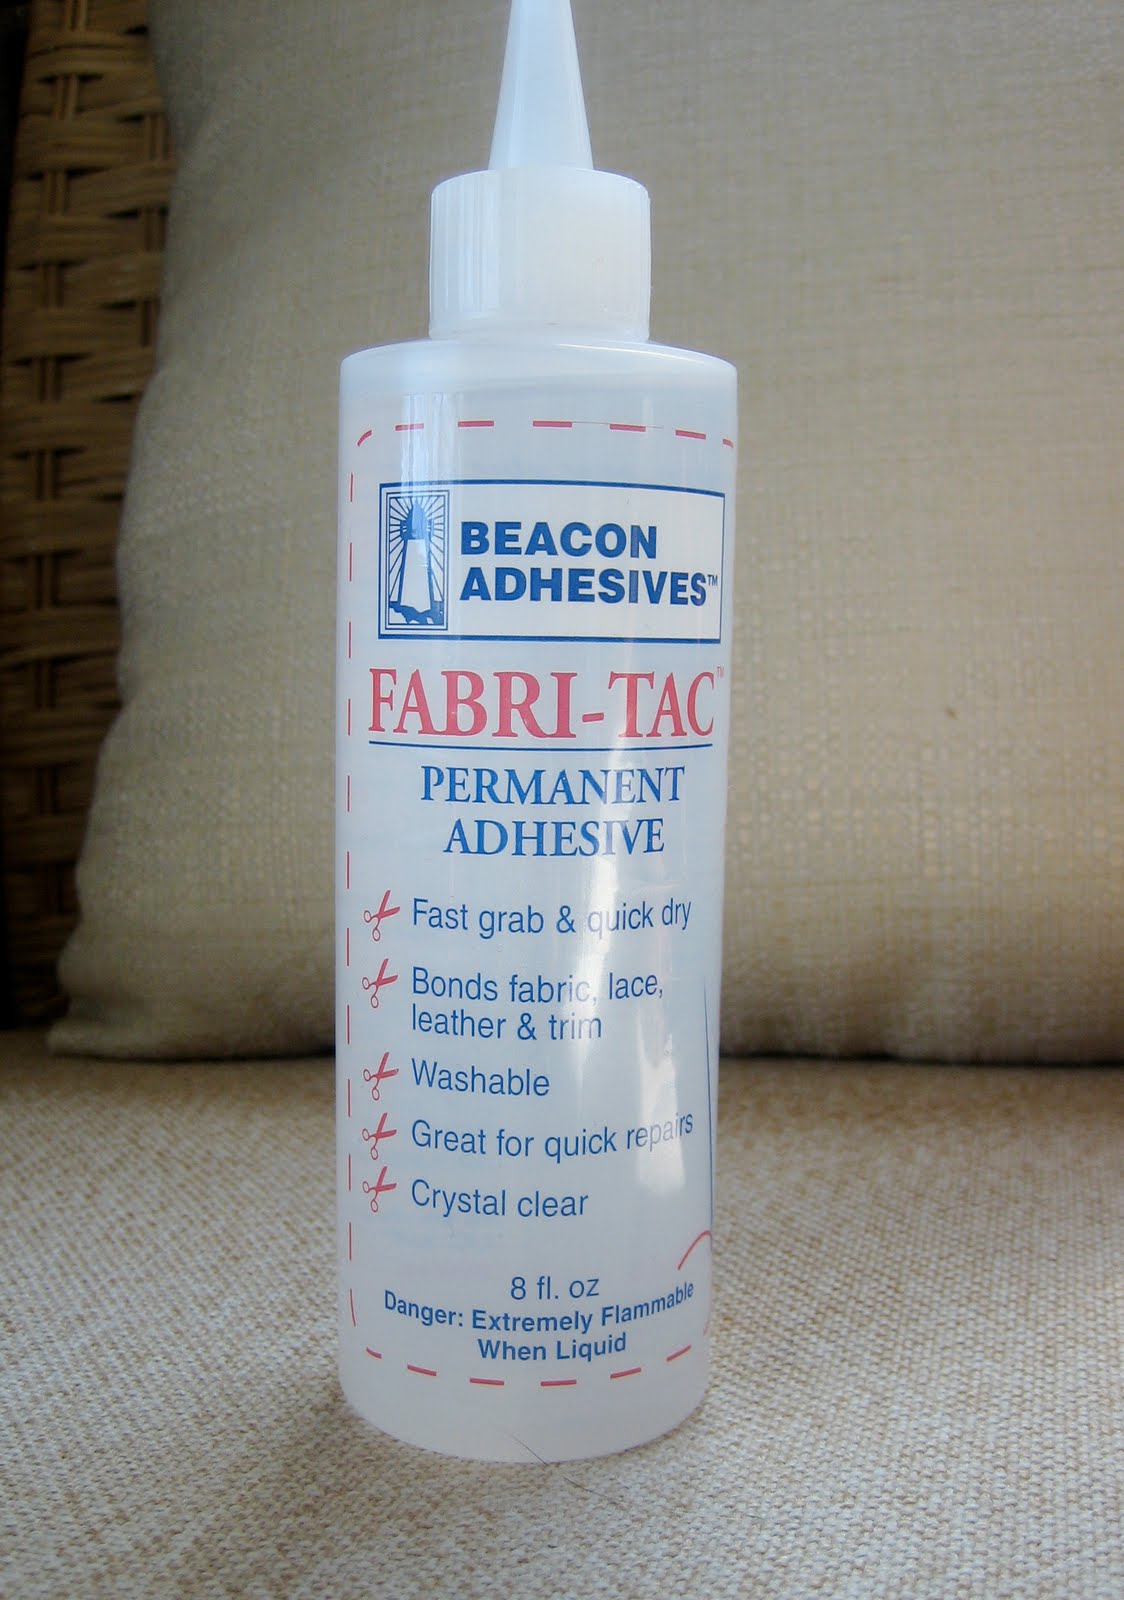
Before we start, I cannot say enough about this glue – it is amazing!  You can use it for all of your craft projects, you will never need any other type of glue.  The bond is incredibly strong, fast drying, and completely clear. 

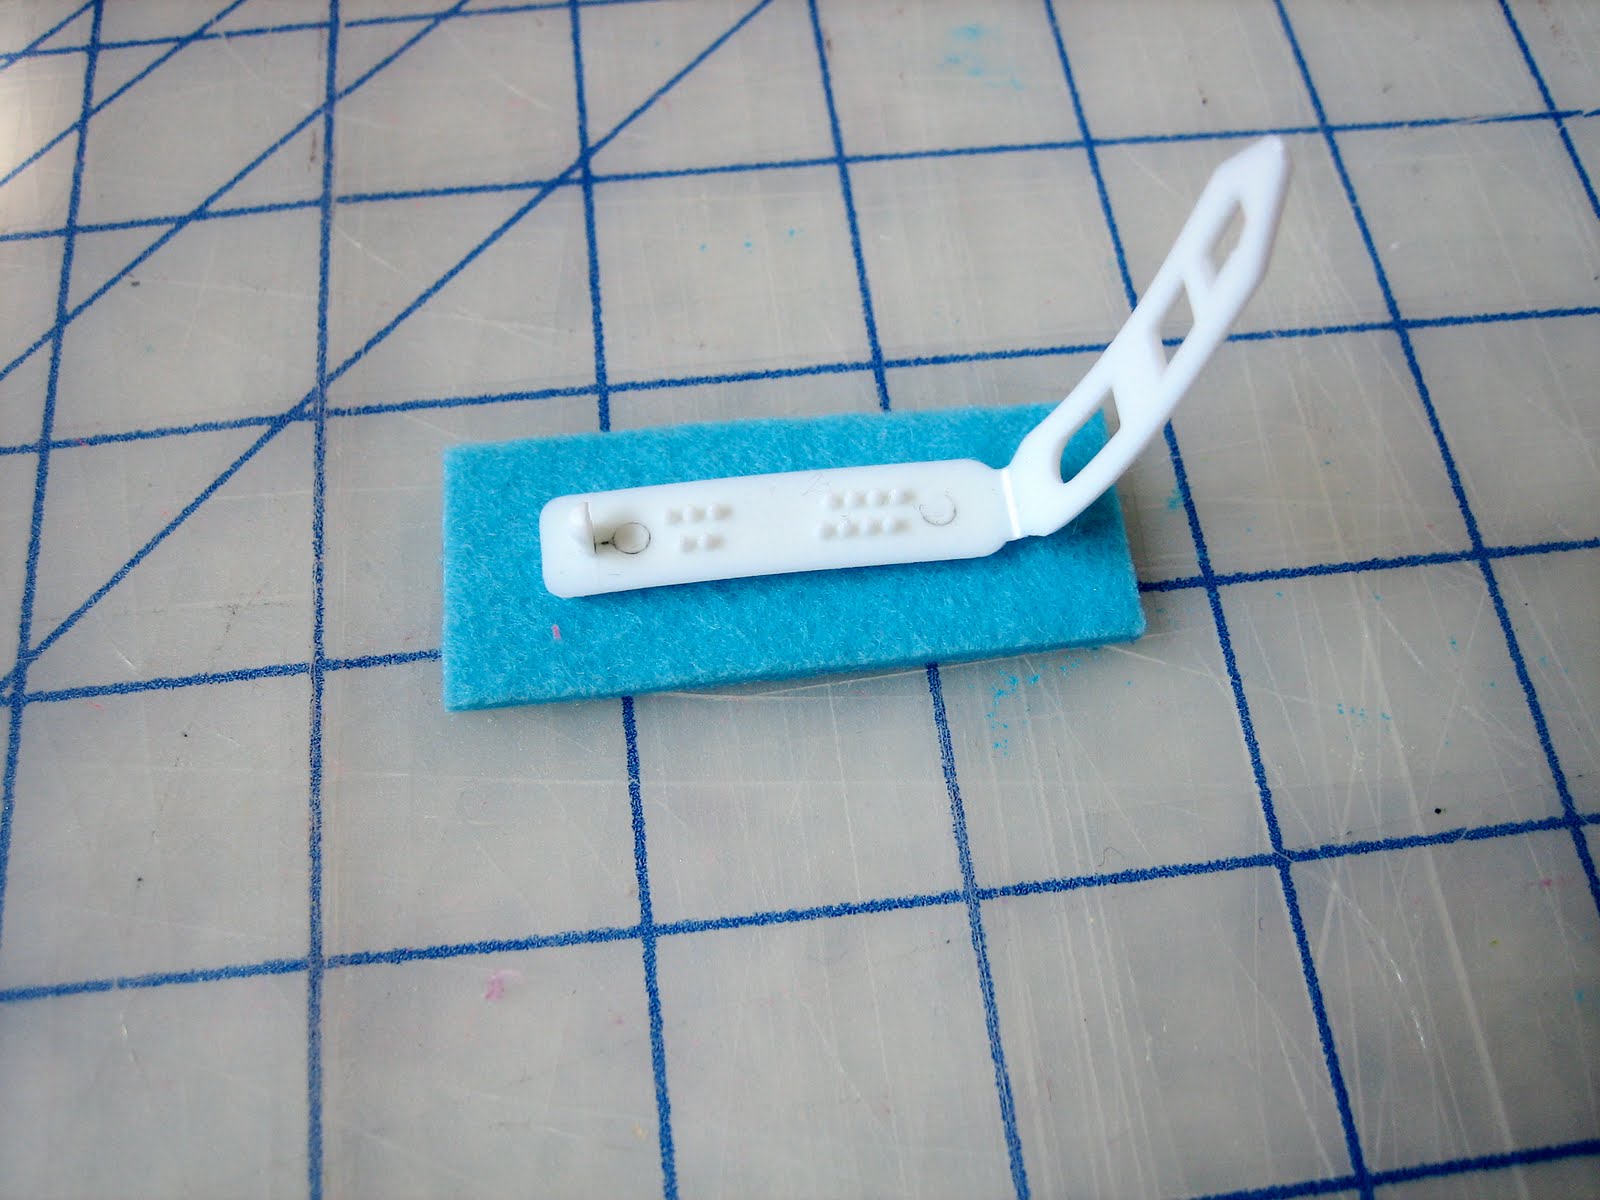
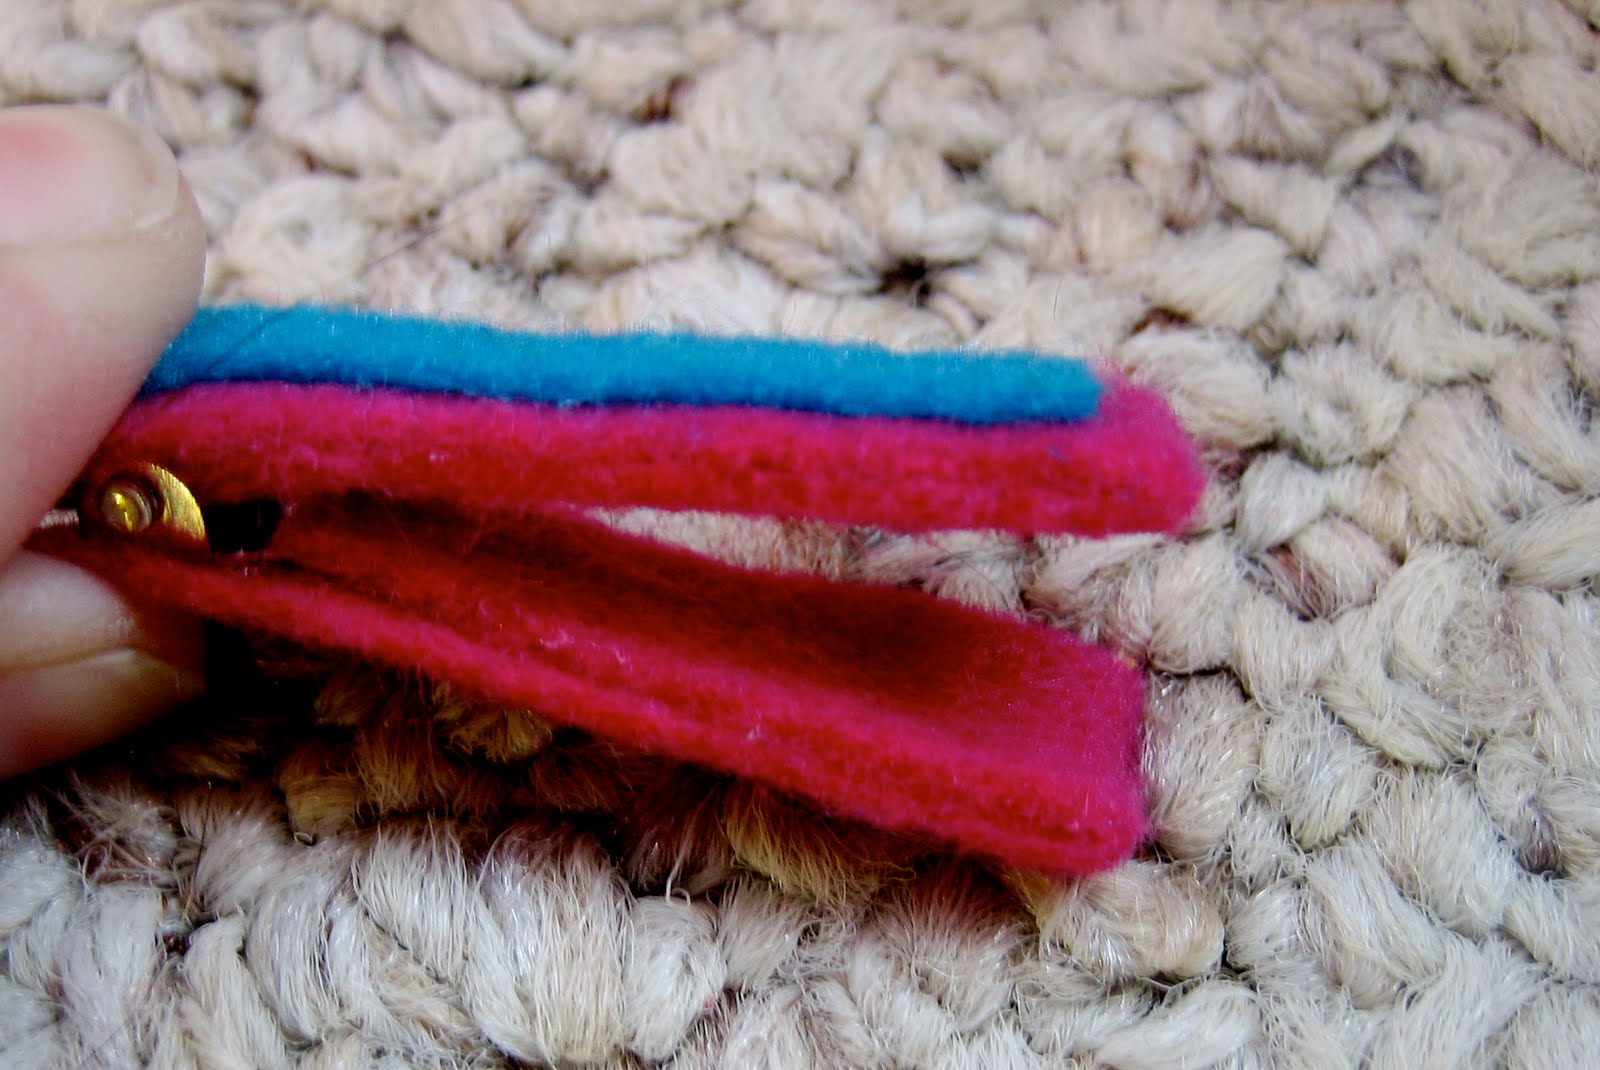
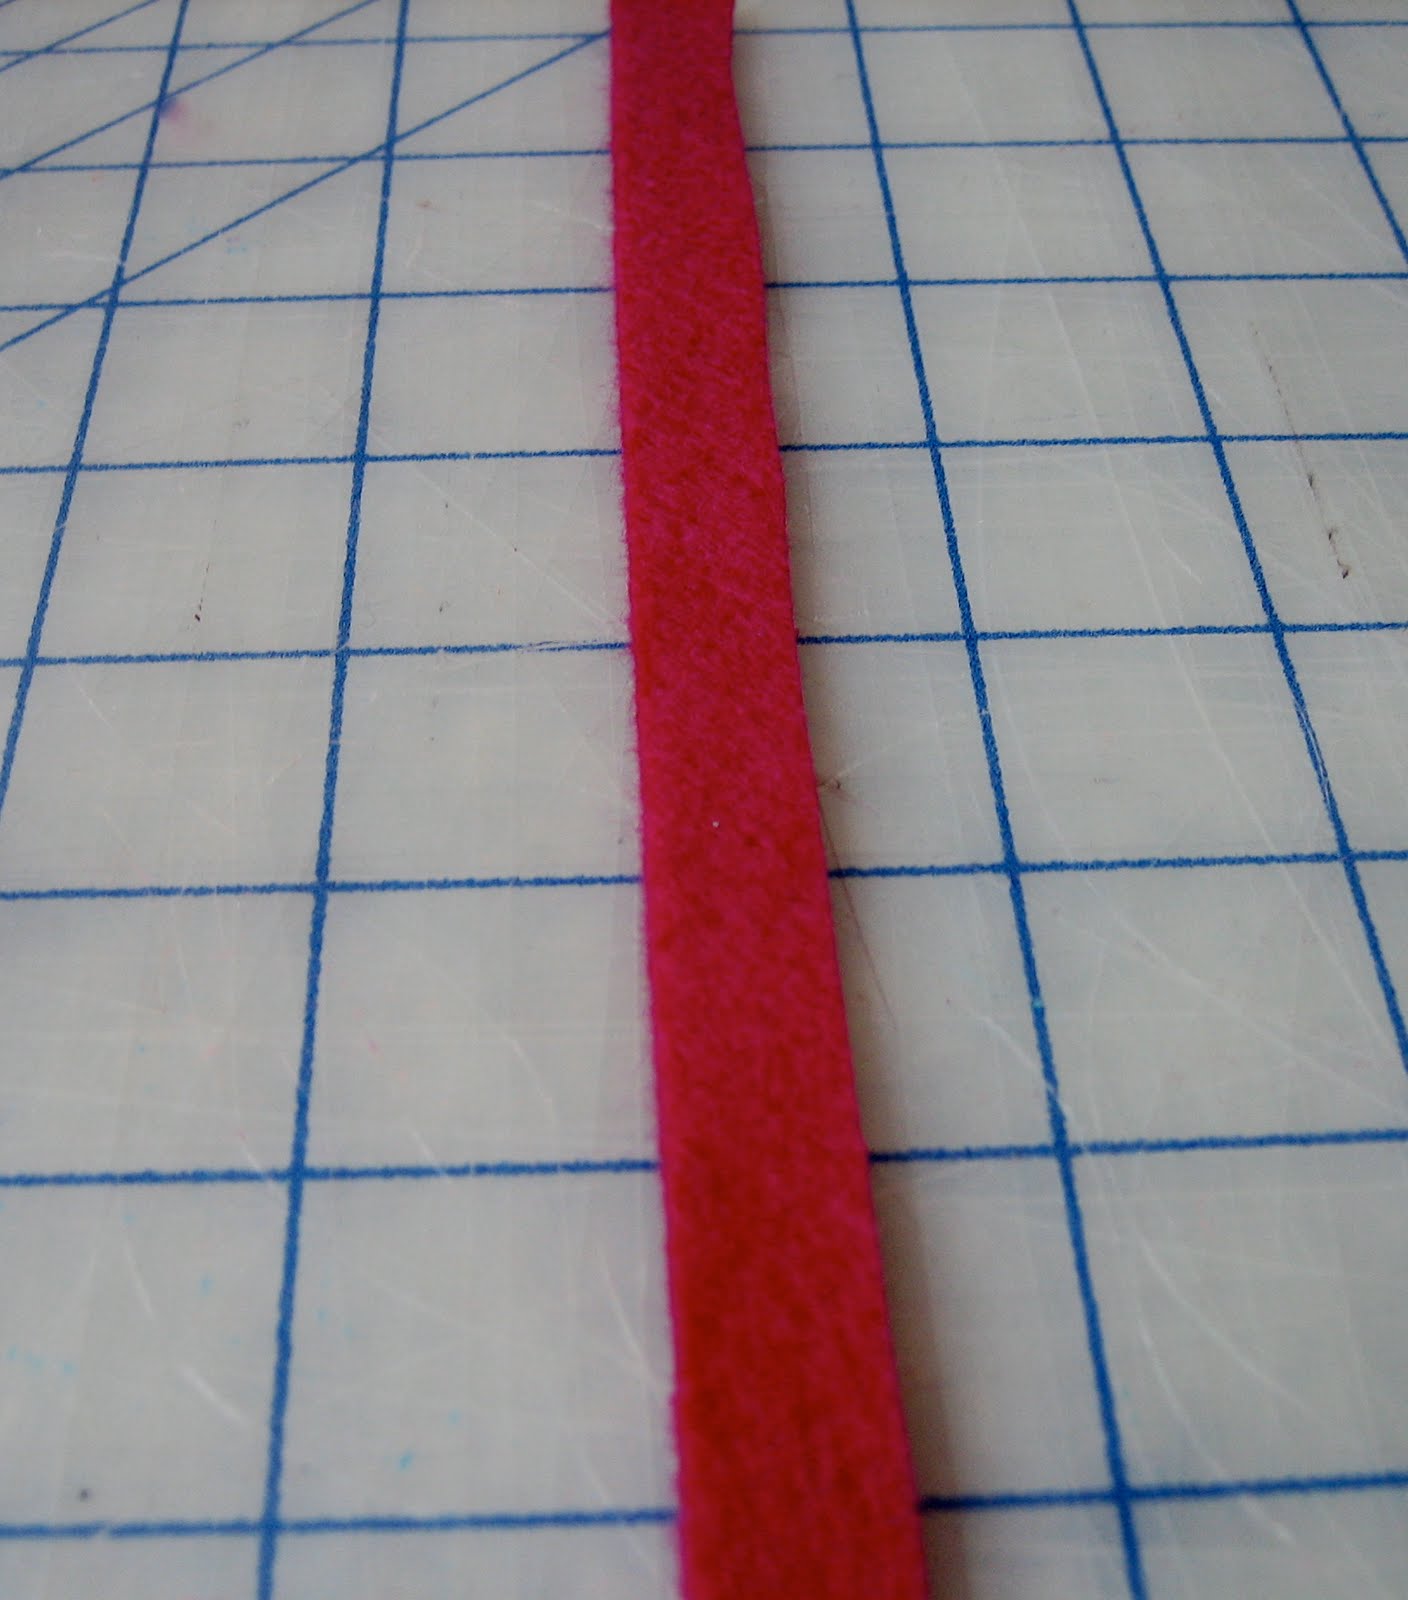
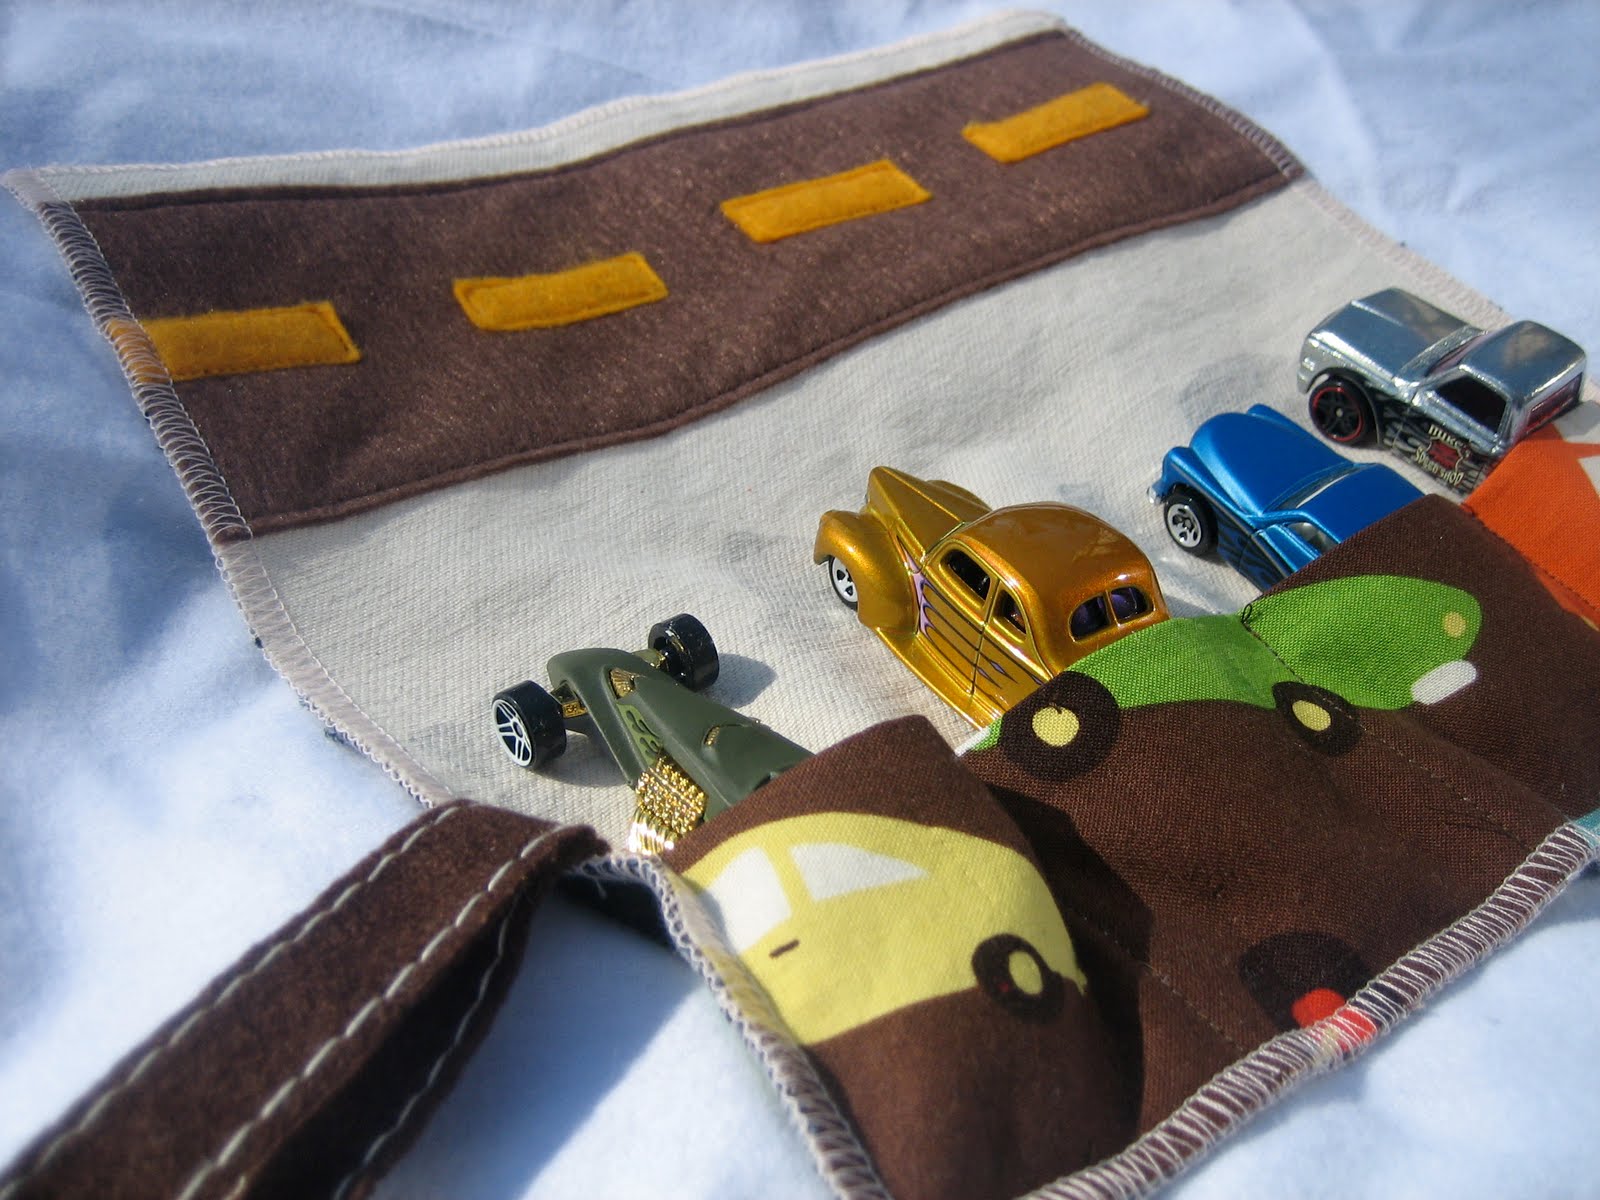
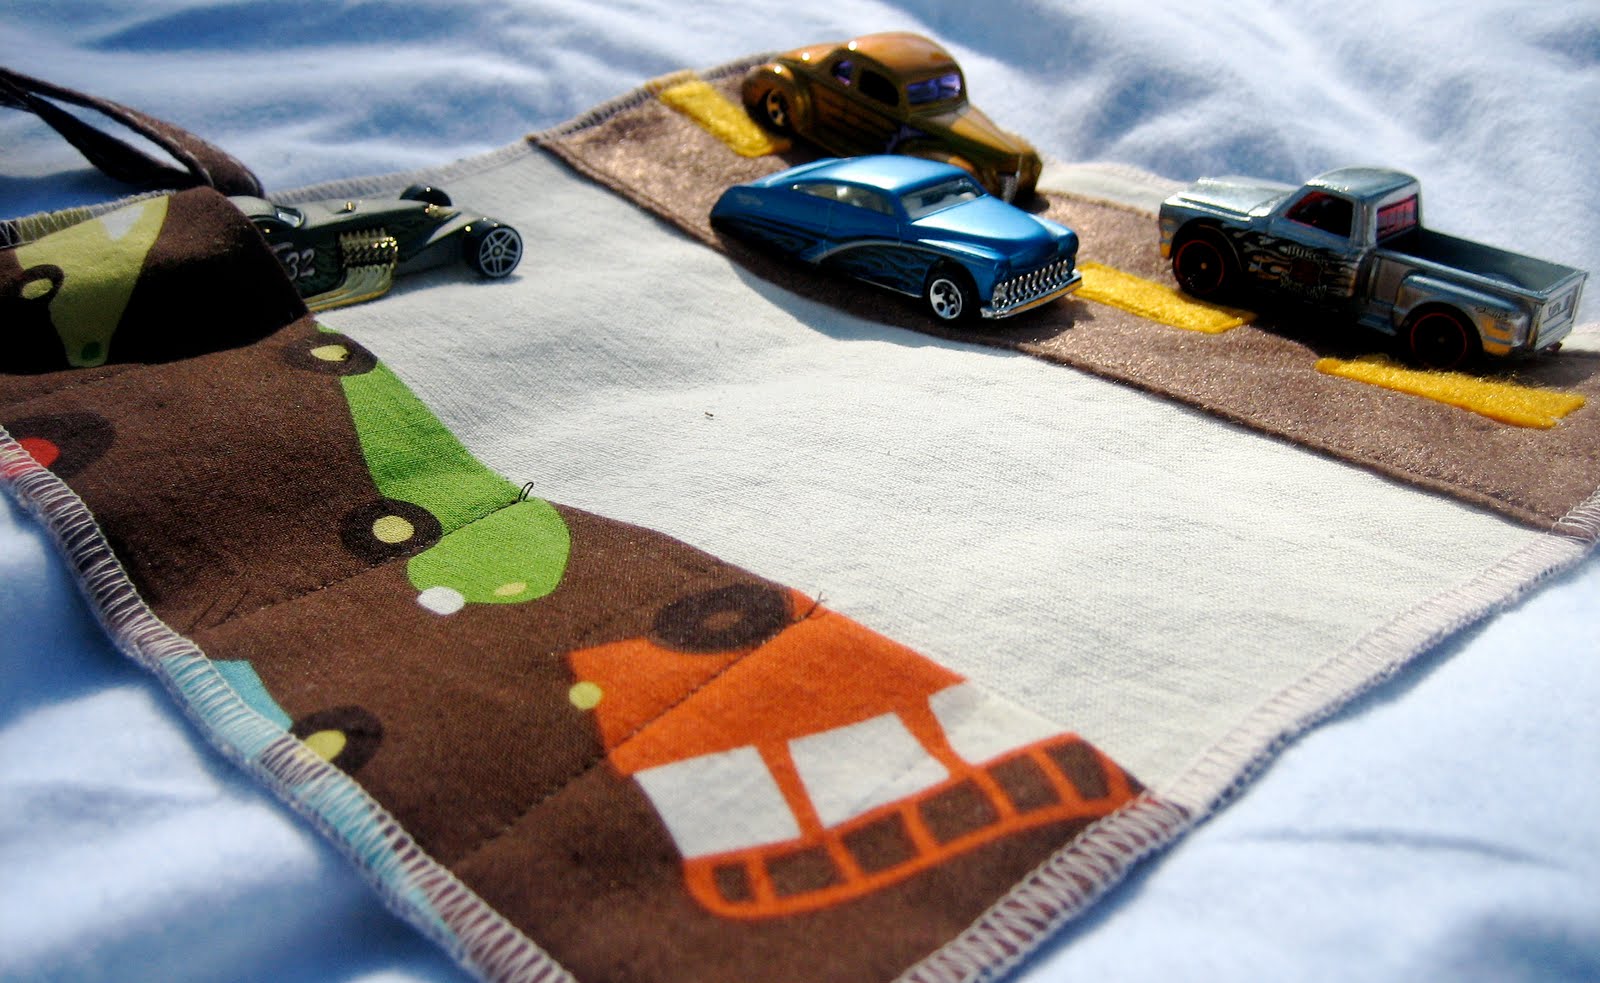
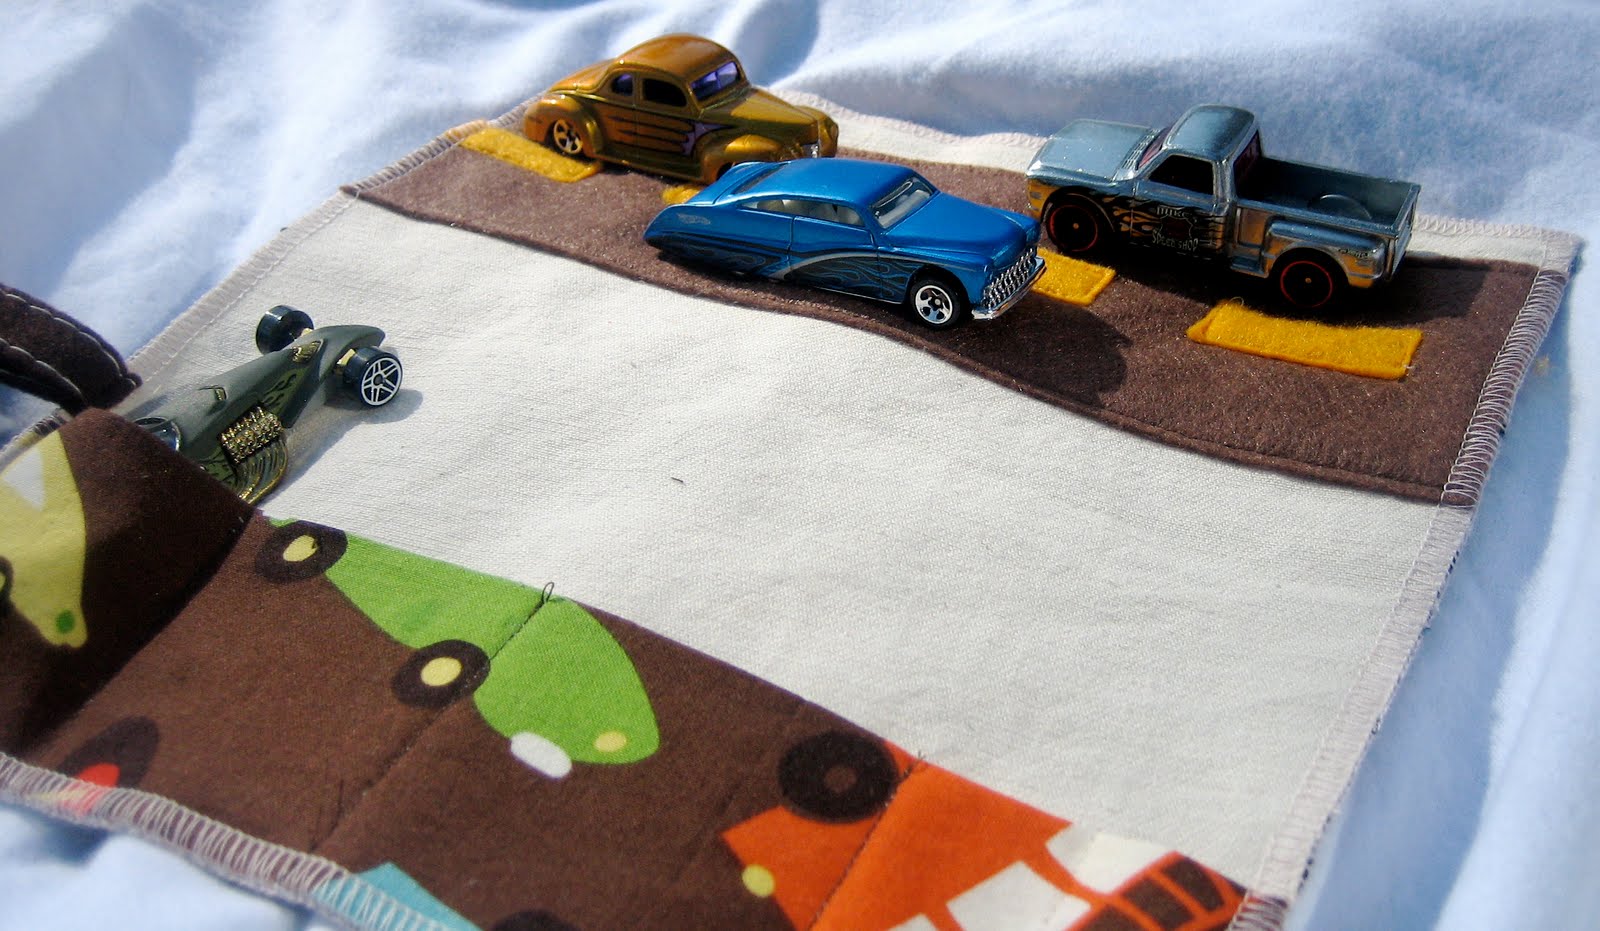
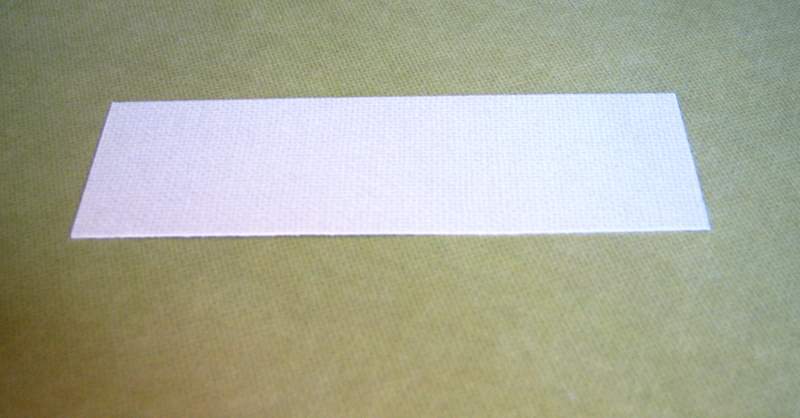
Cut a rectangle of felt a little larger than the clip you are using.

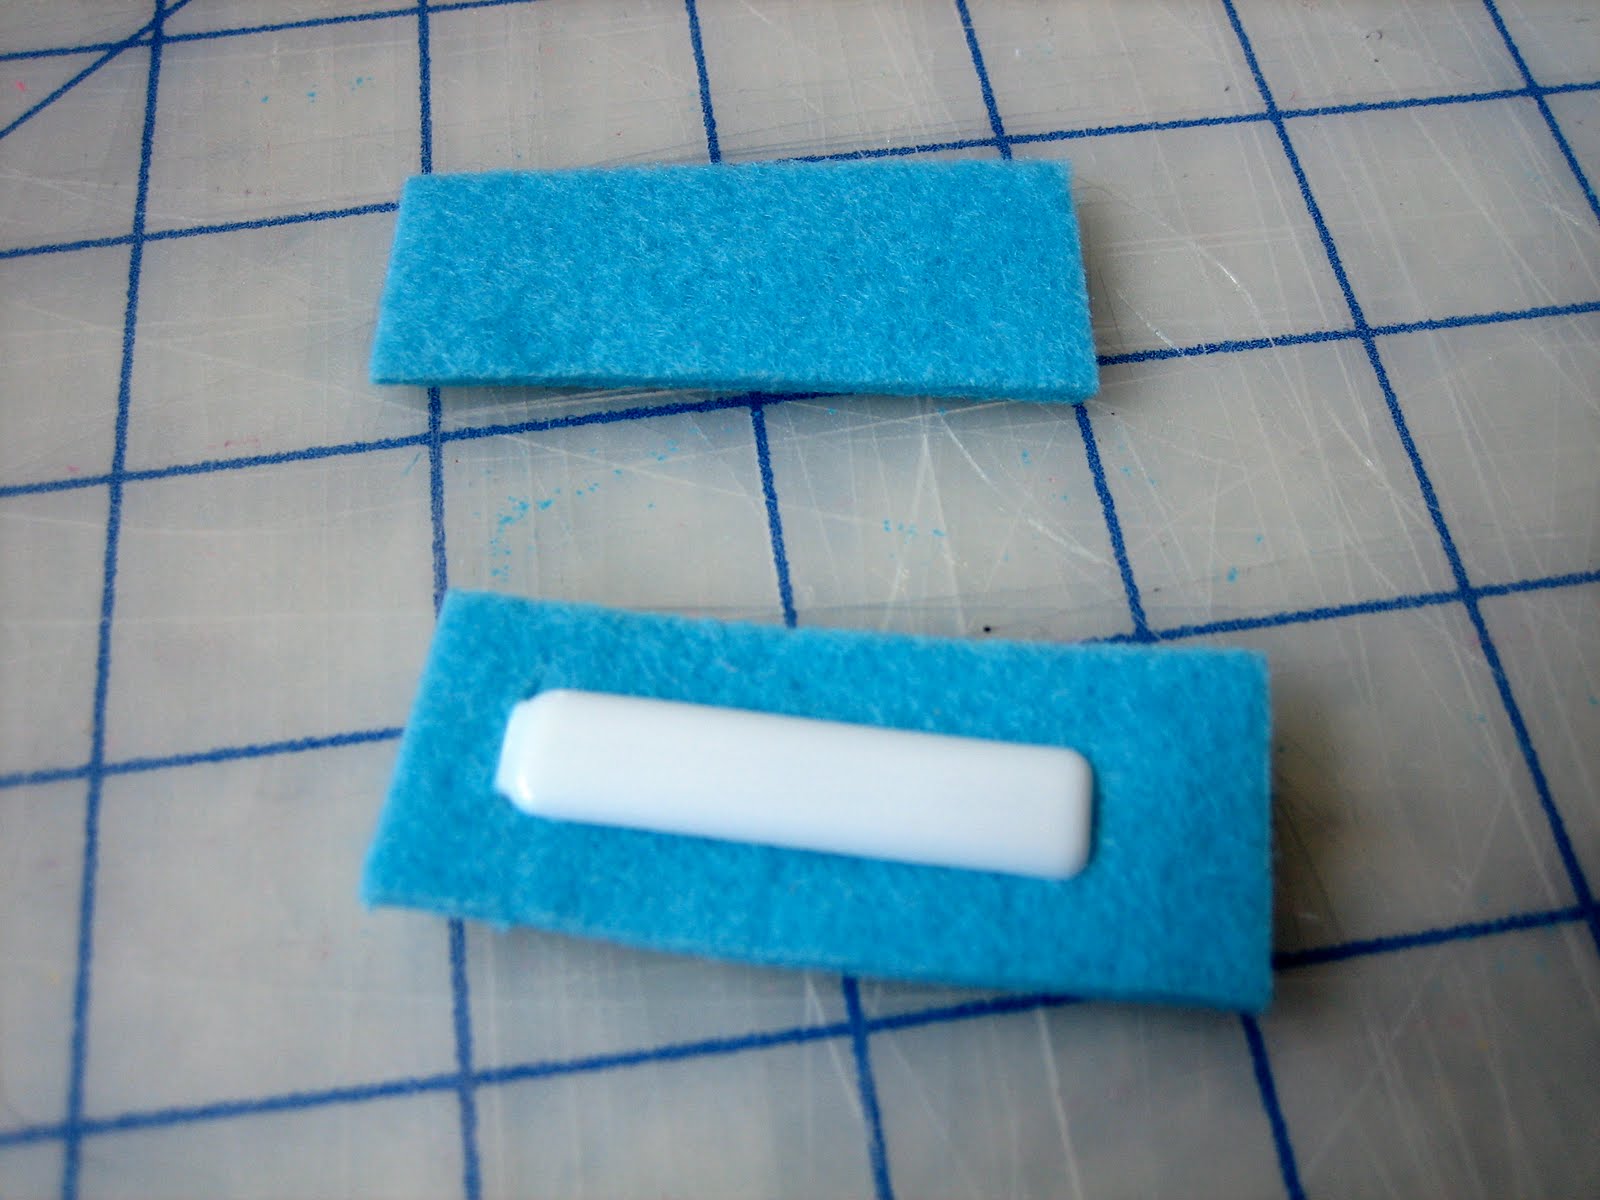
You will need two pieces – one for the front and one for the back.

Cut a little slit in the felt rectangle.  Slide the bottom part of the clip through the slit.

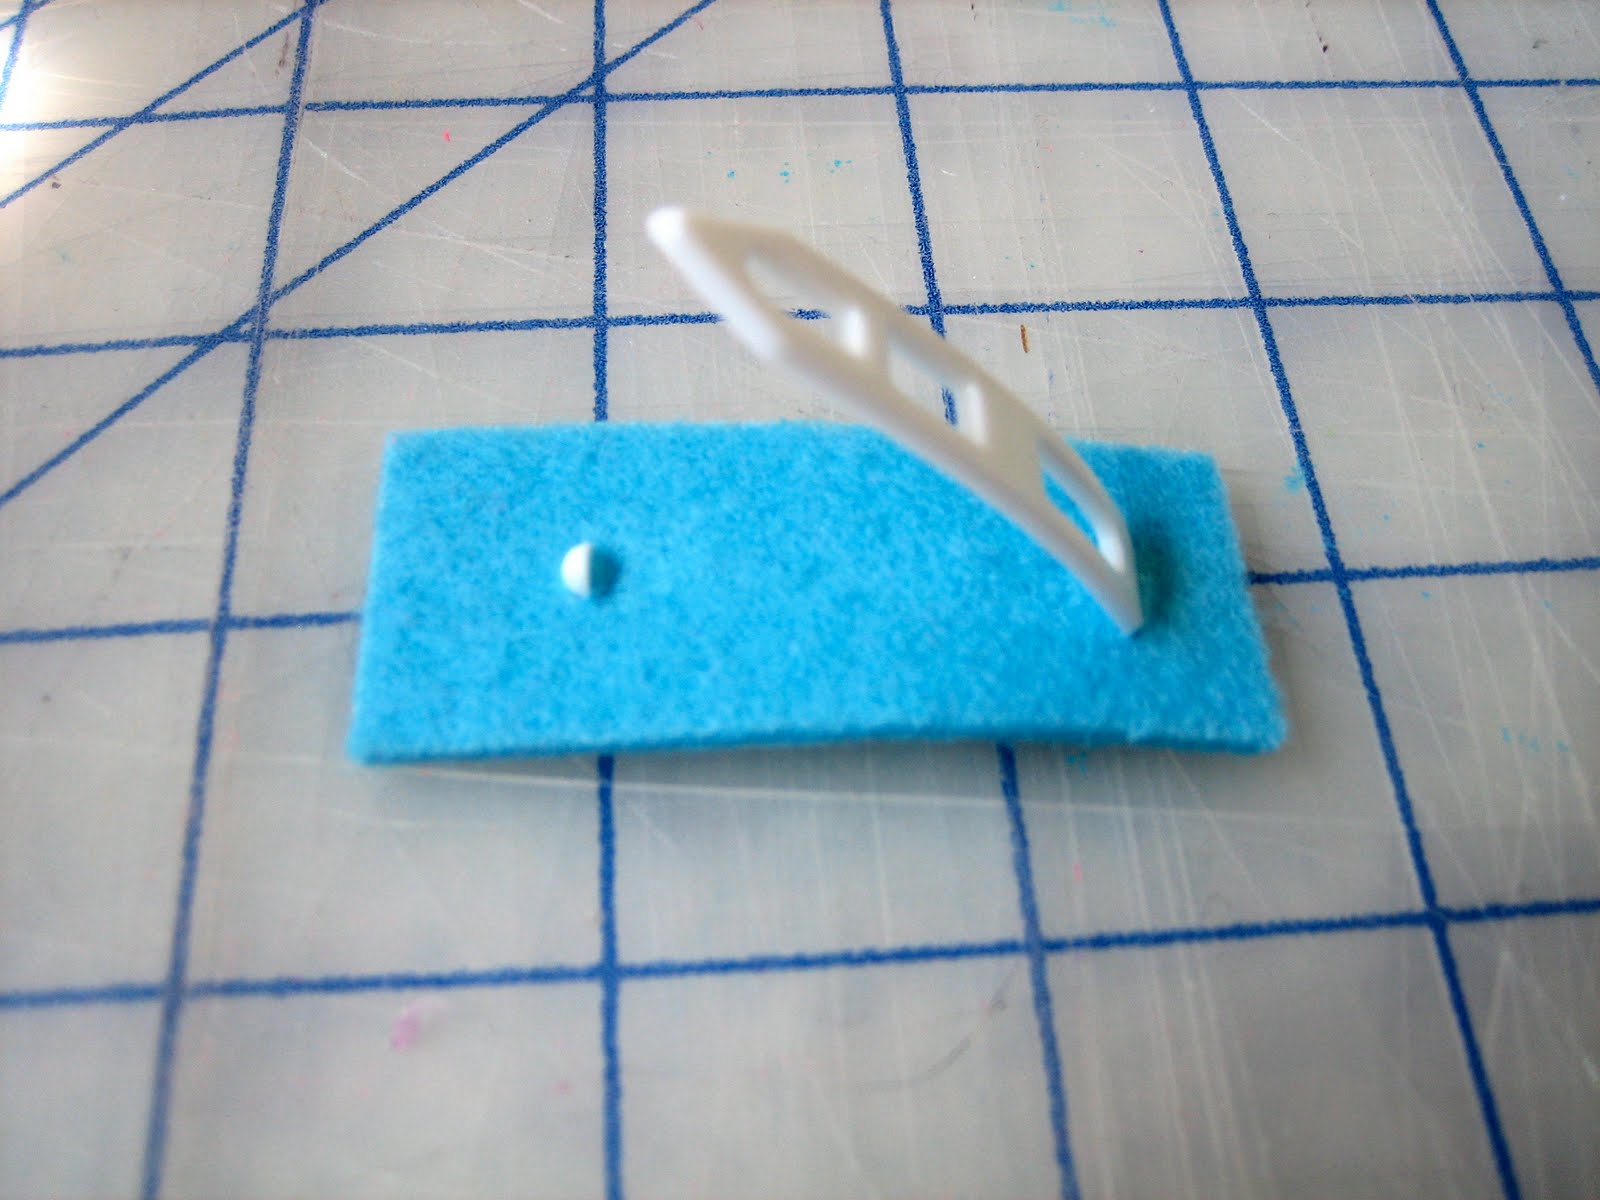
Then cut a smaller slit on the other-side for the smaller latch to poke through.

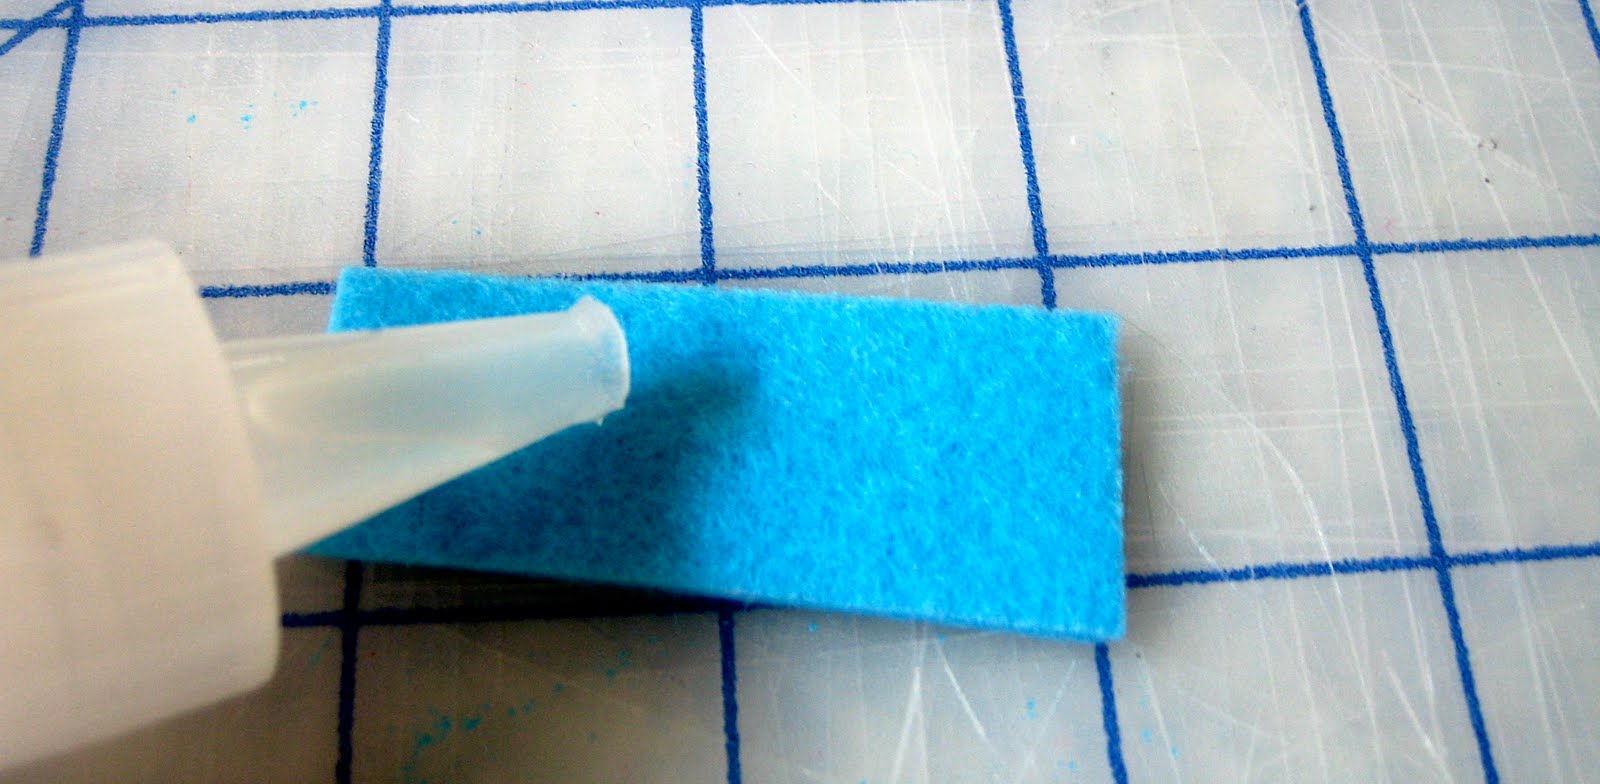
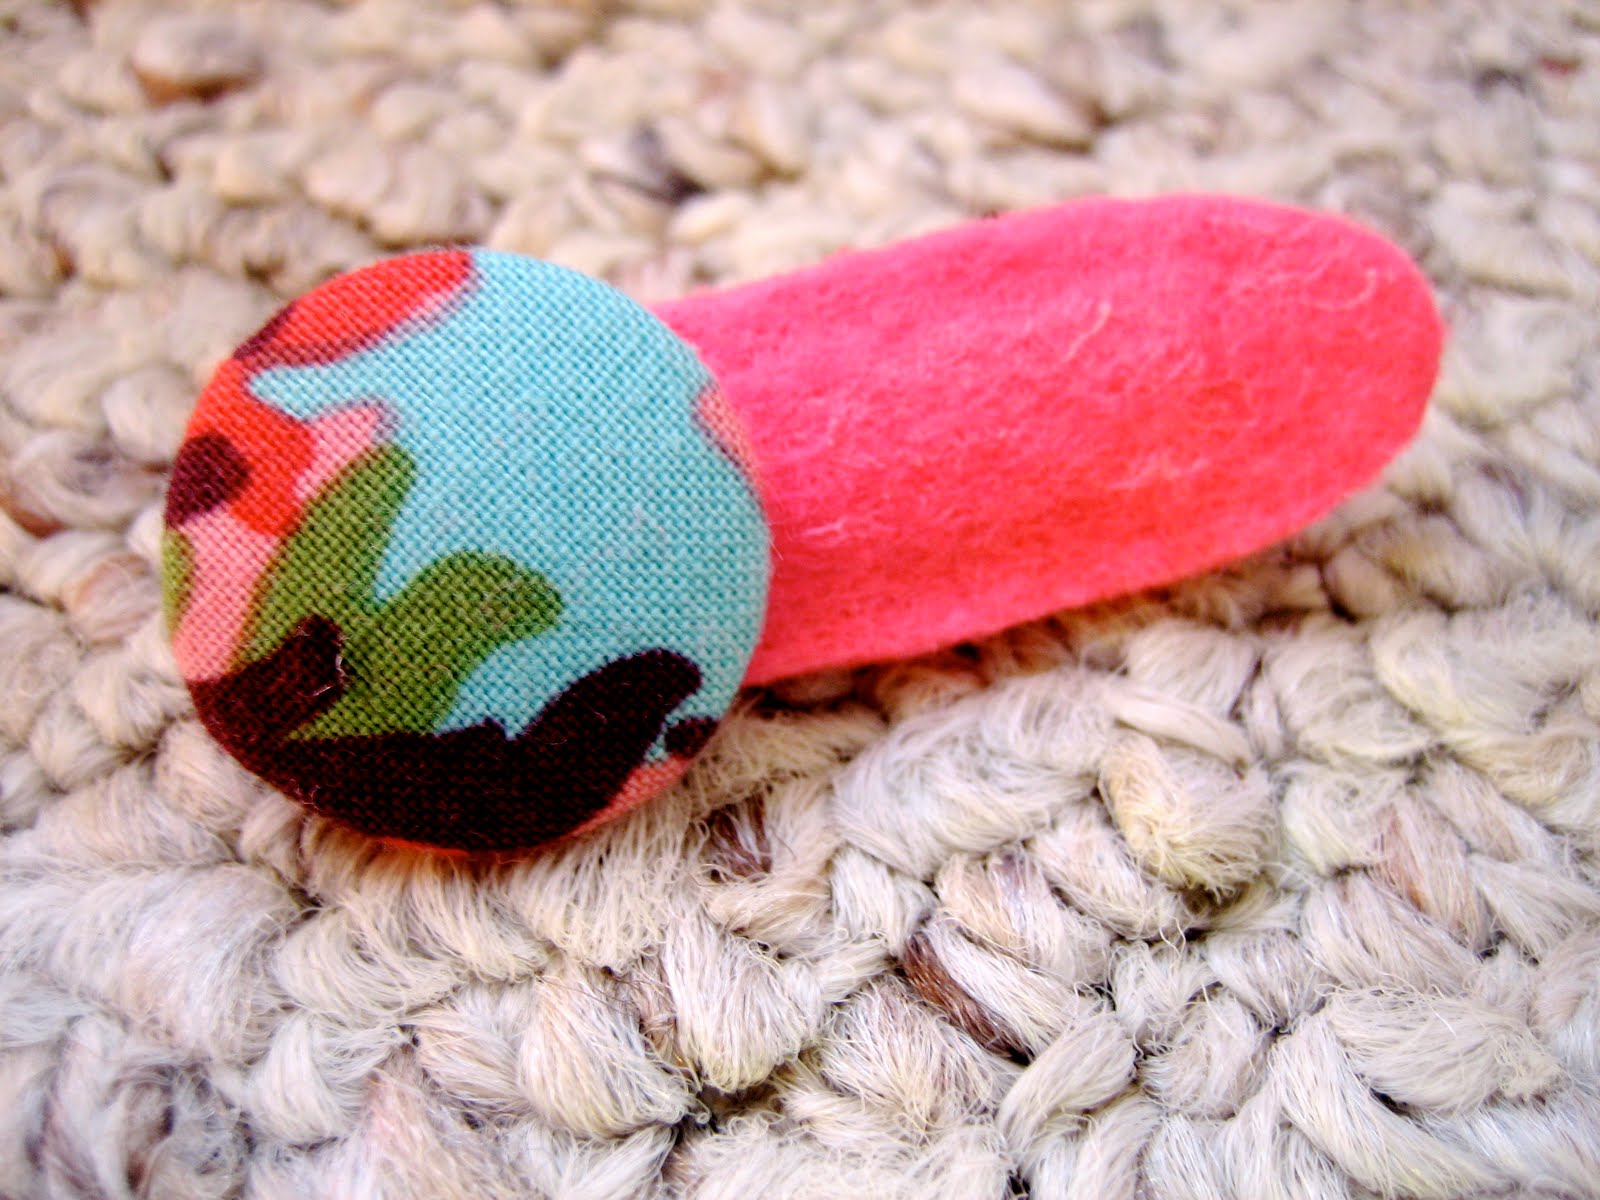
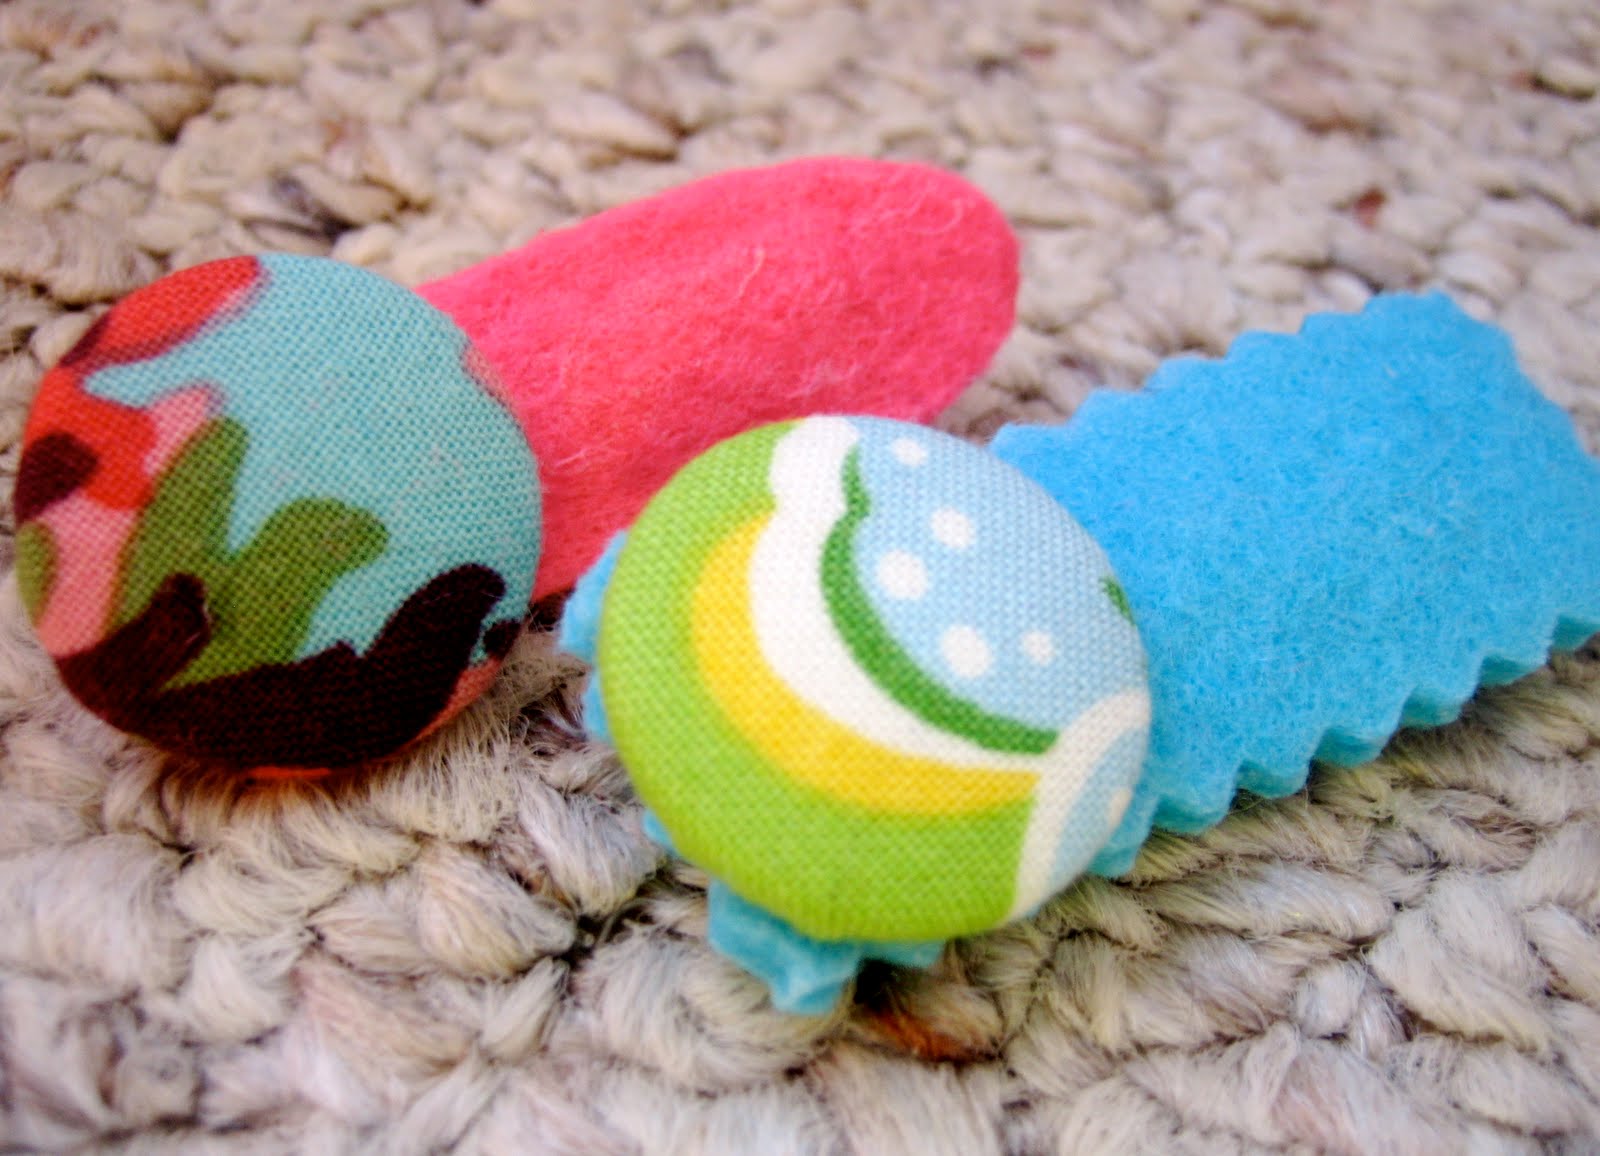
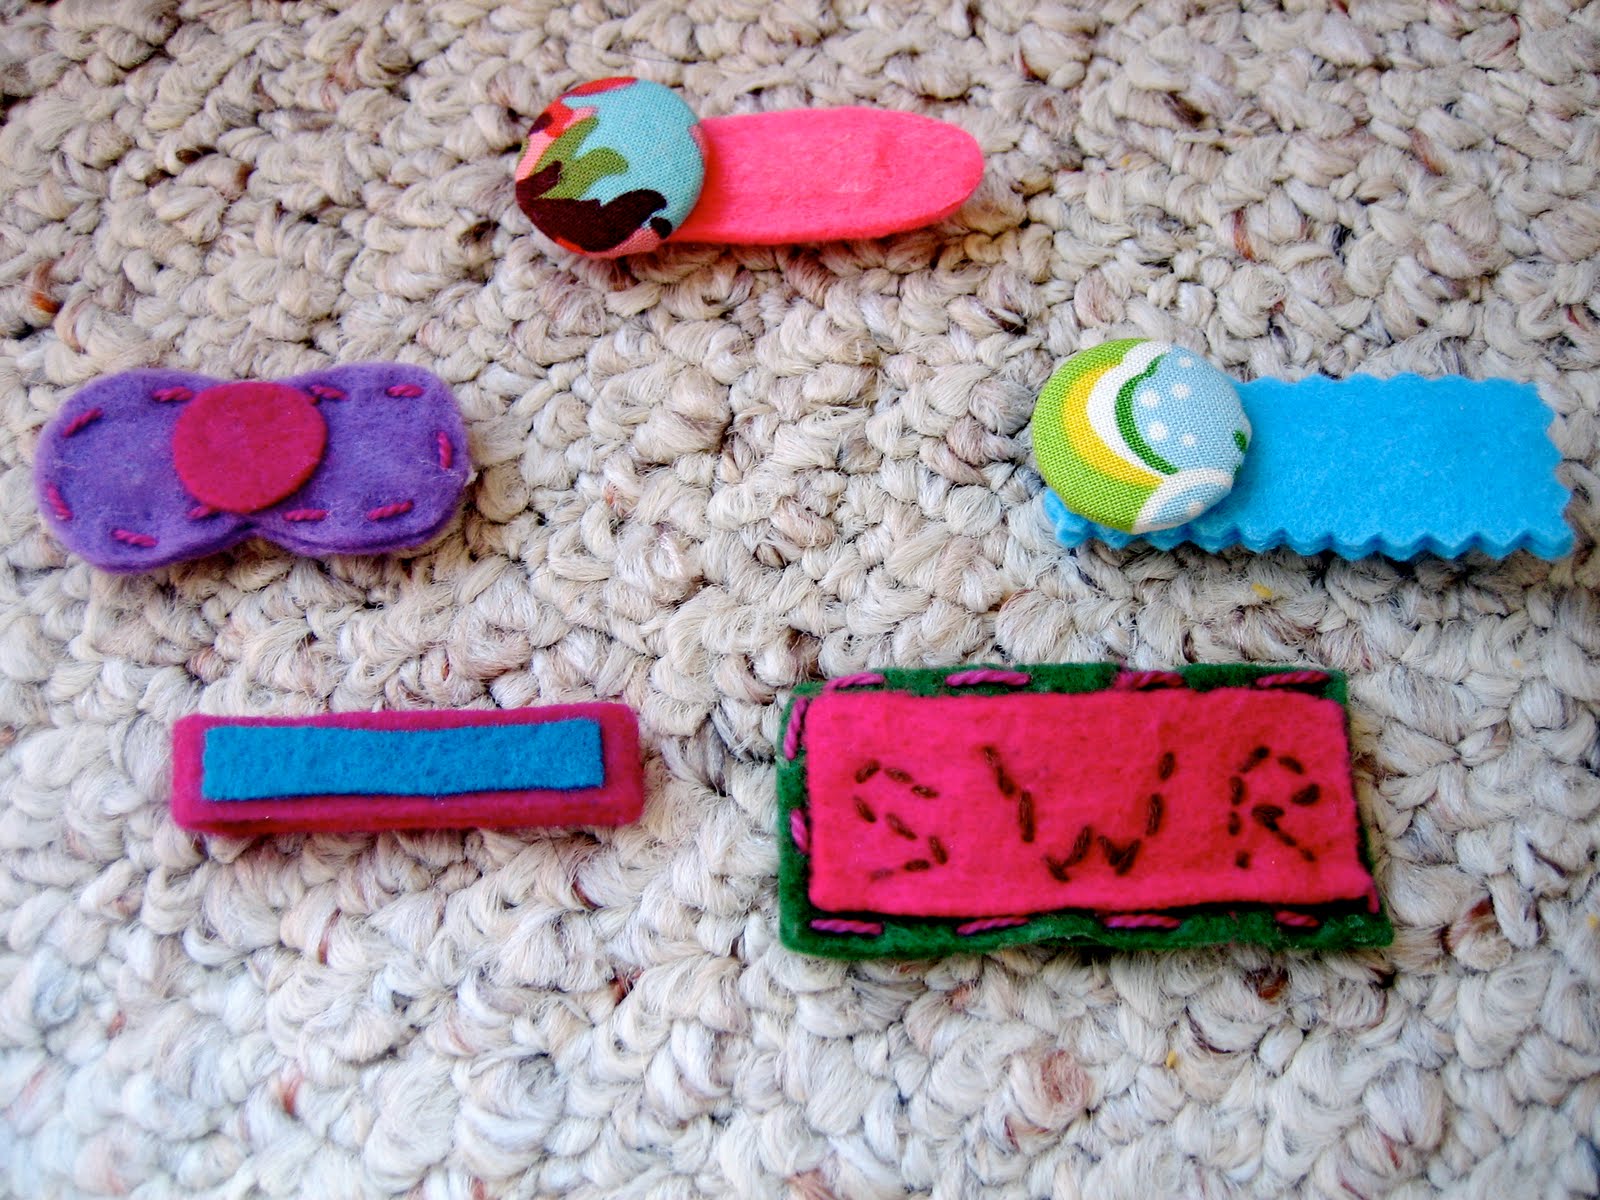
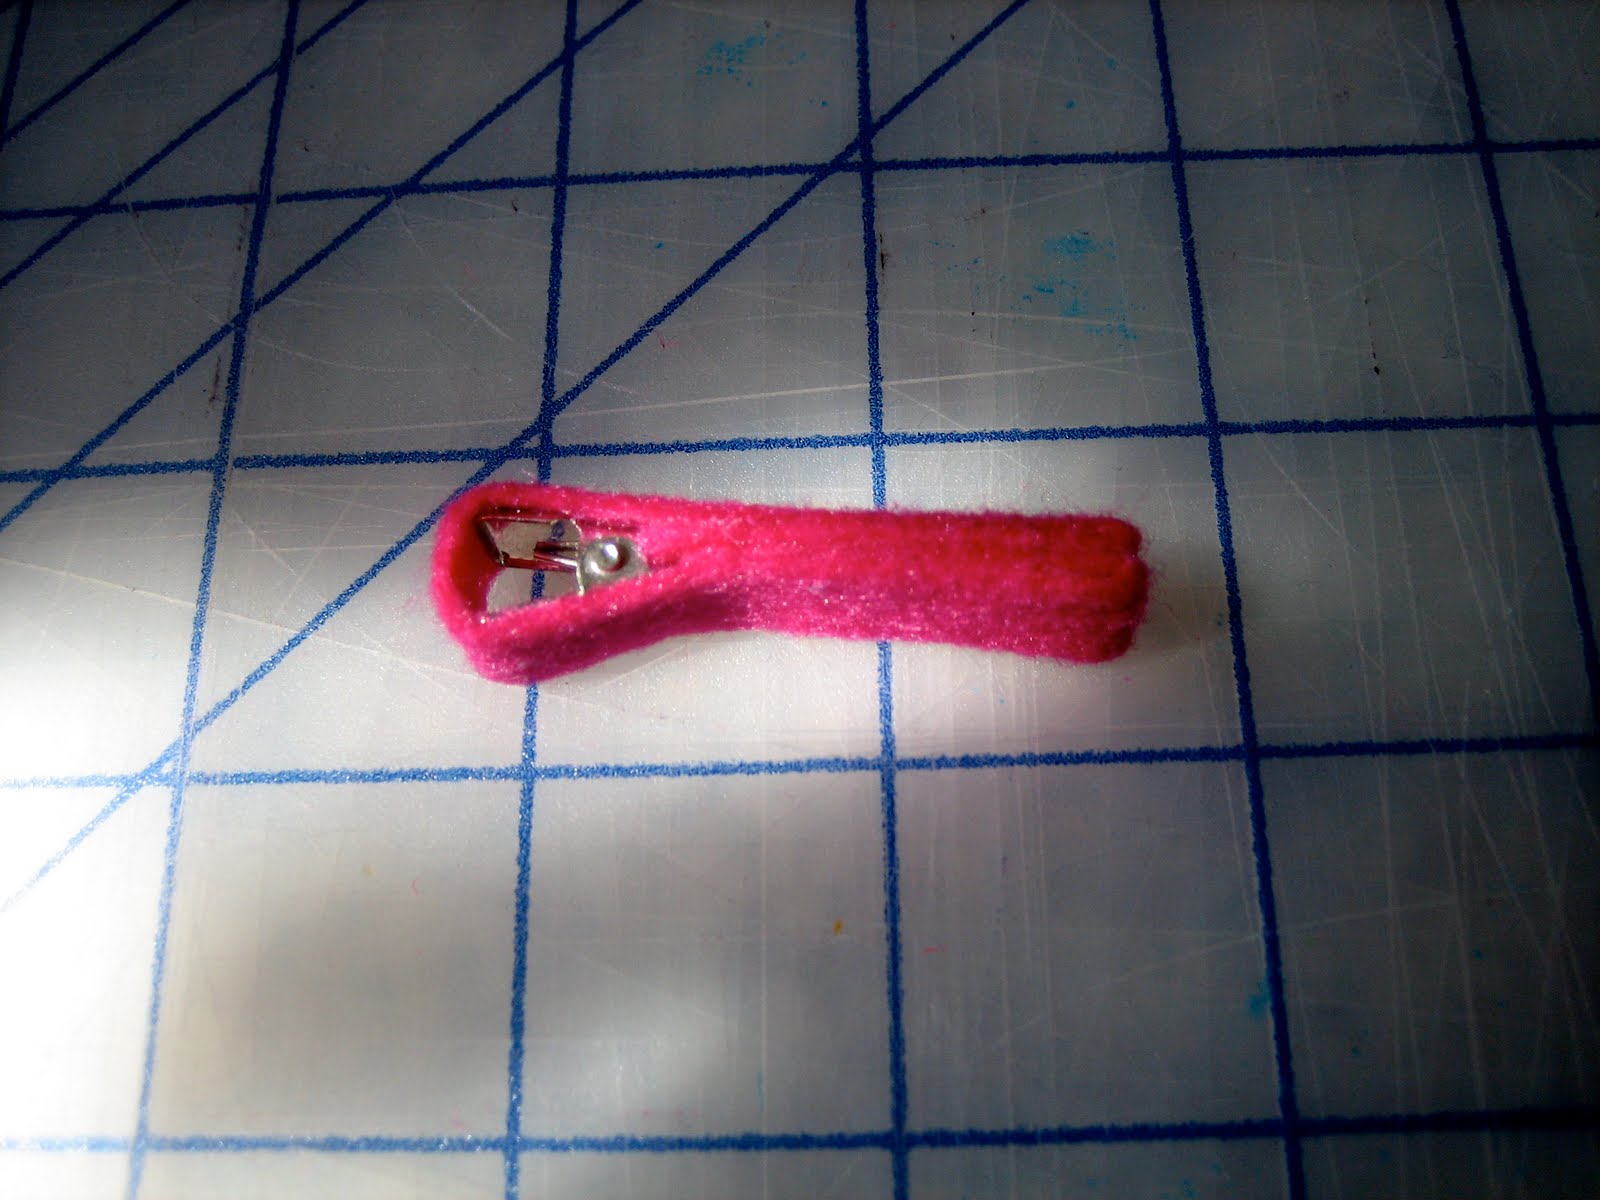
Apply some strong glue adhesive to one side of your other piece of felt.  Place this felt piece (glue side down) on top of the other one.  Then I just took pinking sheers and cut around all four sides to give it a zig-zag look and glued (using my same, beloved, Fabri-tac) a fabric covered button on one side.

Here is my darling little lady wearing her cute new felt hair clip.

Fabric Covered Buttons
If you would like to use fabric covered buttons for this project you will need to purchase a covered button kit (available at the craft store or Joann’s). I used 7/8″ buttons for my daughter’s clips.
Here is what the underside of the uncovered button will look like when you remove it from the package.
You need to remove the shank from the button.  This comes out VERY easily with a pair of pliers.
You will need to cut a circle of your fabric to cover the button.  This fabric is from Amy Butler’s “Love” collection.
Then follow the instructions on the package to complete your covered buttons – this is VERY easy, trust me.
Here is the hair clip I made with the “Love” button.  I made this the same way as the other one, but I used straight scissors to round the edge.
 Two fabric covered button felt hair-clips!
Here are some more clips that I made for my little Miss Savannah:
Assortment of Hair Clips
For this clip, I used embroidery floss to spell out my daughter’s monogram.
This is a super-simple, basic clip design that I created that I thought would go with a lot of Savannah’s Spring/Summer clothes.
The actual clip that I used for this one is a little different than the other two.
I cut a long skinny piece of felt and wrapped it around the whole clip – inside and out.  
Once the clip was covered with the pink felt, I just added a thin strip of blue to the top for an accent color.
Cottage Mama’s Note:  You can get much more creative than I did with your hair clip designs.  Think about using stars, hearts, or any basic shape.  Also, think about other embelishments you could use, such as plain buttons or individual sequins…….gosh the options are endless…….if there were only more hours in the day!

Homemade Cranberry Granola

I’m a huge fan of granola or anything with oats for that matter, especially oatmeal cookies!!  This afternoon I decided to try my hand at making my own homemade granola from scratch.  I just put the ingredients together that I enjoy and luckily it turned out (you never know when you are making up your own recipe)!

So if you have an extra minutes one of these days, whip up a big batch of this yummy granola for you and your family.  First of all this recipe will make your house smell A-mazing! It’s also great for breakfast, served with milk or over yogurt, makes a healthy crunchy snaking food, and would be “oh so good” on top of some vanilla ice cream!

The Cottage Mama’s Homemade Granola
Ingredients:
3 cups traditional oats
1 cup shredded coconut (sweetened)
1/2 cup pecan pieces
1/4 cup walnut pieces
3/4 cup dried cranberries
1/2 cup honey (I used really good local honey)
1/3 cup vegetable oil
1 teaspoon cinnamon (I love cinnamon, so if you don’t, you may want to use less)
1/2 cup brown sugar
Directions:
Preheat oven to 325 degrees.  
In a medium sized mixing bowl combine the following; oats, coconut, pecan pieces, walnut pieces, honey, and vegetable oil.  Mix until thoroughly combined.
Once combined, spread mixture out onto a large baking sheet.  Place baking sheet in the oven for 30 minutes, stirring occasionally.  Oat mixture is ready to come out of the oven once it has reached a nice, toasted golden color.
Immediately after you remove the oat mixture from the oven add the brown sugar and stir to combine.  This will allow the sugar to melt into the granola.
After the granola has cooled add your dried cranberries.  Store granola in an air-tight container and enjoy!!


Cottage Mama’s Note:  You can change up the ingredients easily with this recipe.  Add any type of dried fruit you like (i.e. raisins, apricots, apples, cherries) and feel free to change up the type of nuts you use as well.

Easy Dinner Idea: Chili Cheese Baked Potatoes

We used to eat a lot of baked potatoes growing up.  My Mom would “doll” them up with all sorts of toppings and we would make an entire meal out of them.  So, a few weeks ago I was trying to come up with something yummy for dinner and remembered how much I loved my Mom’s “Chili Cheese Baked Potatoes” and realized I hadn’t made those in years.

I don’t know if I would call this a recipe (all you are really doing is assembling), but this is a very satisfying and inexpensive meal that is sure to please all of your family members.  So here you go………..

Chili Cheese Baked Potatoes
Serves 3-4
Ingredients:
4 Large Baking Potatoes
1 Can Chili (whatever kind you like) – if you have super-hungry adults use 2 cans chili
Shredded Mexican Cheese Blend
Sour Cream (Regular or Light)
Sliced Green Onions
Seasoned Salt, to taste
Freshly Ground Black Pepper, to taste
Directions:
Cook your potatoes.  If you are in a hurry, use your microwave.  If you have plenty of time, cook them in your oven at 400 degrees for 1 hour (or until they are pierced easily with a knife).
I LOVE this chili (I buy it at Costco in a 6-pack)
Meanwhile, heat your chili up on the stove.  While the chili is heating, slice your green onions.  Use all of the parts of the green onion – it all has great flavor.
Once the potatoes are ready, place them in a bowl and cut them down the center.  Scoop some chili on top, then shredded cheese, followed by sour cream, and then green onions.  Sprinkle a little seasoned salt (I like Lawry’s) and ground black pepper on top.
Serve and Enjoy!!

Cottage Mama’s Note:  I used red potatoes when I made this recently and they were very good.  Just use whatever type of potato you have on hand.  You could also make this entirely vegetarian by using veggie chili!  This is also a great way to use up leftover chili!

Happy Easter from The Cottage Home

 The Cottage Family
 Matilda Jane

Savannah Rose
Just wanted to wish you a happy and blessed Easter from 
The Cottage Home!

Easy No-Sew Applique Tutorial

As I have mentioned in previous posts, it is “birthday season” around here.  My daughter’s 12 little friends all have their birthdays within a month of each other.  Well this weekend is the grand finale of all the birthday festivities!

This weekend my friend Danica’s little guy, Roaran, will celebrate turning 2 and will finally join his friends in the “2” club!  She is planning an awesome “Thomas the Train” party that I’m sure will be amazing.  She wanted to jazz up his basic train overalls to make them “Thomas” themed and I agreed to help her out with this little project.

This is a simple, inexpensive no-sew (or a little bit of sewing if you want) project.  This would be perfect for your child’s jeans, a little jacket, a t-shirt or anything you are wanting to add something to, just to make it a little bit more special.

Easy No-Sew T-Shirt Applique Tutorial
Supplies:
1 pair overalls
1 T-Shirt (whatever theme you like….Thomas, Elmo, Dora, Mickey Mouse)
Fusible Web (WonderUnder or any other brand)
Scissors
Iron
Thread
Directions:
Start with your basic overall.  Danica picked out this super-cute classic train overall.
She then found this “Thomas” shirt at a local children’s resale shop in town.  It’s a cute shirt, but she (and I) didn’t care too much for the fact that it was a tank-top and looked a little too plain for a birthday boy.
I cut the “Thomas” and the wording off of the t-shirt as close to the edge as possible.
I then cut fusible interfacing out to match the shape of each of the cut-outs from the t-shirt.
I ironed the interfacing to the back-side of each of the t-shirt applique pieces (follow the directions for whatever brand of interfacing you use).  Then I took the paper off of the back of the appliques.
I placed the applique pieces where I thought they would look best and ironed them into place. 
I appliqued the picture of Thomas on the front pocket of the overalls and the “Thomas and Friends” onto the back-side.
You can stop after you have ironed on your applique, but I like to take it a step further.  I stitched around each applique piece after ironing, just to increase durability.  If you know anything about toddler boys, they are super-rough on their clothes so this is a good idea if you plan on having your little one wear these after the party.
The nice thing about using knit t-shirt material for the applique is that you don’t have to worry about the edges fraying like you would with regular quilting cotton.
Hopefully Danica will be “guest” posting about her fabulous “Thomas” party in the coming weeks!!
Cottage Mama’s Note:  The next time you are out at a garage sale or resale shop, look around for t-shirts that could be deconstructed for their applique potential.  Maybe your child likes Elmo or Diego or Barney or simply look for t-shirts that have pretty flowers or designs.  This Thomas shirt was not particularly special, but once I took it apart and added it to the overalls, it became just that!!

The Cottage Mama is in the Mommyhood!

I’m so excited that Shannon over at luvinthemommyhood.com has posted this lovely feature/interview about my family, myself and my etsy shop “The Cottage Mama“.  Yes, that’s right, I have an etsy shop!  I know I haven’t officially talked too much about my shop here on the blog, but I just recently got some inventory listed and I’m open for business!! 


I am doing a giveaway for a $25.00 gift certificate to my shop over at luvinthemommyhood.  I would love if you would head over to luvinthemommyhood, check out the interview and enter to win!!  You will also learn lots more about “The Cottage Mama”.  While you’re over there, take a few minutes to poke around Shannon’s blog – she has some wonderful projects, ideas, and gorgeous pictures!

If you would like to keep updated with “The Cottage Mama” become a fan on facebook.  Click here to become a fan!

Boys………

If you have been following my blog here for very long, you know that most of the things I post about (when it comes to children) has to do with girls.  I’m sorry, I can’t help it, I have two of them!!

Well, I have been working on some birthday presents for my daughters little friends and they happen to be mostly…………boys.  I love to make Savannah’s little friends handmade gifts for their birthdays.  Now it is not always possible to make ALL of them totally handmade, but I try my best.

I’m a huge fan of making super-hero capes for the little ones, but here are some other gifts I made recently that will be given to my daughter’s 2-year old “boyfriends”.

The Car Cozy:

 I love this gift idea!  I think this is so perfect for a little guy on the go.  Mom can take this simple “Car Cozy” in her diaper bag or purse and whenever she needs to entertain the little guy, she can pull it out and he can have instant fun! 

I based this design off of the “Car Cozy” tutorial by Homemade by Jill.  So if you are interested in making this gift for someone, I definitely recommend checking out her tutorial – it’s great and very thorough.  I did change it up a bit, so I’ll let you know what I did.

As you know, I love toys that encourage imaginitive play and this one is perfect.  You’ve got the street and the different cars – so much fun!

I used brown and yellow felt to make the road.  And used Riley Blake’s new “Wheels” line for the fabric to hold the cars.  The light khaki color is a thick cotton twill.

I appliqued a car out of fabric (again, Riley Blake “Wheels”) and sewed wheels made from felt to the exterior of the “Car Cozy”.

For the exterior, I used a thick denim.  This would be a great idea for recycling a used pair of jeans that you are no longer wearing.

To speed up this project, I used my serger to sew around the entire exterior.  Homemade by Jill’s tutorial does not use a serger.  I know many of you don’t have a serger, but if you do, I think this is the way to go!

For the tie, I used two pieces of felt ribbon that I got at my local Michael’s.

To close the “car cozy” you fold it in half (as you can see, I included my “The Cottage Mama” label).

Then you fold it in half again and secure with the tie.

 I think any little guy would be thrilled to receive this gift – Vroom, Vroom!!!

Charm Square Car Bean Bags:

I included these four bean bags in one my my daughters friends gifts.  The main portion of the gift was a tote with a bunch of outdoor sand toys and I thought these bean bags would make for some additional outdoor fun!

These four bean-bags were all made from charm squares of fabric.  I made one side from Riley Blake “Wheels” fabric.

And on the other side I used a fun polka-dot in “boy” colors.

Again, if you have a serger this makes for a super-simple project.  Just serge three sides of the fabric together, fill with beans, and then serge the fourth side.  I finished all of the corners with fray-check to prevent future fraying.

If you do not have a serger, place the right-sides of the fabric together and stitch three sides (1/2″ seam allowance), then turn them right-side out and press your seams.  Fill with beans, and hand-sew the fourth side to close the bean bags.

I used an entire bag of beans for these four bean-bags.


Cottage Mama’s Note:  Since this wasn’t a full tutorial, if you have any questions about these gifts, feel free to leave me a comment or send me an email.

Pretty Scrapbook Paper Covered Magazine File ~ Tutorial

I’m in the midst of needing to re-do my sewing/crafting/office space – it needs it – desperately!!  If you came into my house right now I would be so embarrased.  I have a gazillion yards of fabric everywhere and have taken over the entire dining room and office.  I am the type of person that needs my space to be organized and put together in order to feel like I can move ahead and create…….well right now, I should be at a stand-still because it is a disaster!

So in an effort to start to re-do my “studio” (that’s what we’ll call it…….sounds good, right?), I decided to start with an easy project.  Several years back I had purchased some inexpensive cardboard magazine files from IKEA – these to be exact:

They are only $2.99 for a pack of 5 – a bargain!!  But look at them…….they are screaming for some color.  So here is my overhaul project for these great deal, but not so pretty, magazine files.

Pretty Covered Magazine File Tutorial
Supplies:
-Magazine files
-Pretty scrapbook paper
-Glue
-Scissors or a paper cutter
-Pencil or pen
Directions:
Grab your scrapbook paper.  I used Amy Butler’s scrapbook pack so that I would have a bunch of designs and colors that all coordinate and you know how I feel about Amy Butler (love her)!
Get out a sheet of 12 x 12 paper.
Flip your paper over and trace (with your pen or pencil) around the long-side of your magazine file.
This is what it will look like after you have done your tracing.
Use your paper cutter (or scissors) and cut out what you traced.  If you don’t have a paper cutter, I highly recommend getting one.  They are pretty inexpensive (especially if you use your 40% off coupon at Joann’s or Michael’s) and if you plan on doing much crafting at all, it is well-worth the money.
Here is your long front piece cut out and ready to go.
Take your glue and place it all over the side of the file and place your long piece on top (be sure to line it up perfectly).  I just used your basic glue, but the stronger the better.  Another idea is to use Mod Podge for this project – if you are into that sort of thing.
Now you could stop here, as you really will only see the front of the file if you keep these in a bookcase, but I decided to take it a few steps further and cover the entire file box.  For the sides trace each one on another piece of scrapbook paper.
Use the first one you cut out as a template for your second.  You need two in order to cover both sides.
Again, swirl glue all around the side of the file and place your pretty paper on top.
For the other small piece, use a scrap from the first long-piece we cut.   Trace the same as the other pieces.
Here is what the smaller side of the file should look like.
To add your labels, I cut small pieces of neutral cardstock (approx. 1″ x 3″) to back my printed labels.
For the printed part of the label, I used my label maker (oh how I love my label maker!), but if you don’t have one, just print your text out on your computer or hand-write it.
Place your labels all at the same height on the long-side of the file.
Here is what your pretty magazine file will look like after it is complete.  Looks like it cost a lot more than the 60 cents that I paid for each file, right?
Here are some more files that I did as well in coordinating Amy Butler scrap paper.
These files just make me so happy, now if I could just get the rest of my “studio” to make me this happy!!

Easy-Sew T-Shirt Shrug Tutorial

So I never sew anything for myself these days.  Right now it is all about my girls, but I decided today was a new day, the sun was shining and it was time for the cottage mama to have something new to wear.  I saw this idea here and it looked SO easy that I had to give it a try. 
I know several of you have commented or emailed me about being new to sewing.  This is the perfect project for a beginner sewer.  Don’t be intimidated by the fact that I am using knit here…….trust me……you can do it!
So let’s begin…….
This was a long-sleeved t-shirt that I had been wearing this past winter.  Unfortunately it had gotten several small holes right in the center of the shirt and had a small little stain (as is with most of my white shirts).
There are the holes in the middle of the picture……see them……they are very tiny, but they are there.  But no worries, they will be hidden as I turn this t-shirt into a shrug.
I used my quilters ruler and drew with a regular pencil.
Make sure you just cut the top layer of the shirt and don’t cut the back.
It was sad to cut off this beautiful trim, but I saved it and will use it for another one of my many projects.
Turn the shirt inside out and measure around the entire area that you have cut – up and around the neck-line.
Pin all the way around – please, please do not skip this step.  I know there are some who think that having to pin is a big pain in sewing, but trust me, it is the only way to achieve professional looking results.
When sewing with knits, I prefer to use a Singer “orange” needle that is especially designed for sewing with knit-like fabric.  You can use your regular needle, but I find the other needle to move through the fabric more smoothly.
Once you have sewn around the entire center and neck-line turn your shirt right-side out.  I don’t know if you can see it very well, but we have created an opening all the way around the neck-line.  Ok, stay with me, we’re almost done!
This was a really fun piece of trim that I got recently and I decided to use it for my shrug.  Any ribbon or string will work.  You can find bodkin’s at all of your sewing shops – they are very inexpensive and I much prefer them to the safety pin.
You will use approximately a yard and a half of ribbon – give or take, depending on your size and how much gathering you do with your shrug.
 Completed T-Shirt Shrug
 (that’s me taking a picture of myself)

Then pull your ribbon tight and tie it into a bow (pulling the ribbon on both ends will cause the shirt to gather).  You can wear the bow higher or lower on your chest.  Just play around with it and see what fits your personal style.
There are so many ways to personalize this shrug.  Use any kind of knit t-shirt – go edgy, punk-rock, preppy, laid-back……..whatever your style, you can make it work with this look! 
Have fun and happy sewing!!

Spring May Finally Be Here – Time for Spring Fashion!

Here in the Midwest we have FINALLY thawed out from this cold winter.  As of right now, we have no snow on the ground and it was 63 degrees today – hooray!!  I don’t mind the beginning of winter, but after months and months, it is so nice to finally be able to play outside with my girls.

Today I had a little nap-time project that I’ve been wanting to accomplish and I finally got around to it and thought I would share it with all of you.  Several months back my Mom sent me this skirt that she picked up at Goodwill:

My Mom saw this skirt and loved the fabric (she and I have similar taste).  This skirt is way too big for me, but she knew that I had been really into “upcycling” things lately so she thought I could use the yardage for something.  When I got this skirt in the mail, I was in love with the fabric – gorgeous, bright, and cheery!!  I instantly new this had to be made into a dress for my oldest daughter, Savannah Rose.

So in less than 30 minutes during nap-time this is what I came up with –

A cute spring/summer dress for my sweet Savannah Rose.  I took in about 8-10 inches on each side of the skirt to make it fit my daughters chest measurement (21 inches).  No hemming was required because the hem was already in place.  I folded over the waistband about two inches on the top in order to get the desired length.  I decided to leave it longer for now so it will grow with my daughter.

The side of the skirt had a zipper closure, but I just decided to use that as the back of the dress.  How easy was that?  I didn’t even have to put in a zipper!!  I did two additional tucks/darts in the back of the dress (about two inches from the zipper on either side), that way as my daughter grows, I can easily seam rip the darts out (which are just sewn at the top) and the chest size will expand.

I used two pieces of polka-dot bias tape for the straps and simply sewed them into place.

For the front detail I sewed two fabric yo-yo’s in coordinating fabrics layered on top of one another and stitched them together.

I then covered a button with fabric, using additional yardage from the skirt and stitched it on top of the two yo-yo’s.  I think I may be addicted to yo-yo’s – they are so cute and add vintage charm to just about anything!

Happy Start of Spring!

Cottage Mama’s Note:  If you would like any further explanation on how this dress came together, feel free to leave me a comment or send me an email and I can answer any questions you may have.