Archives for January 2011

Weekend Sewing

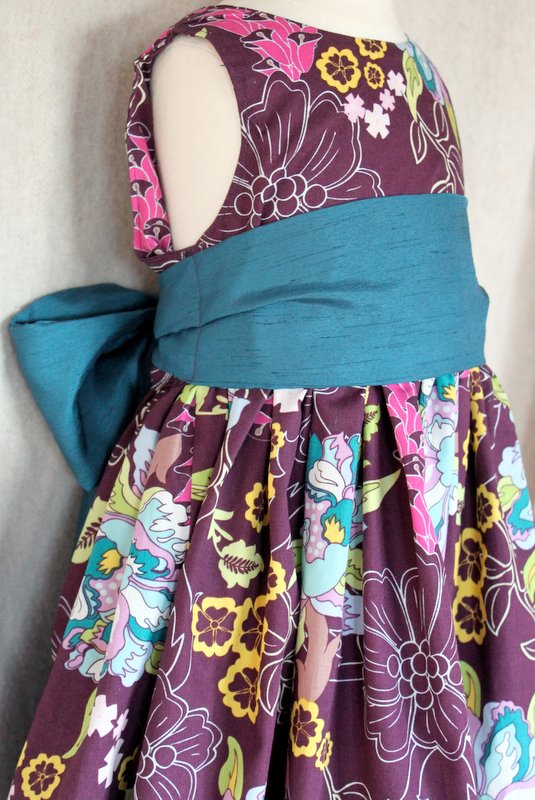
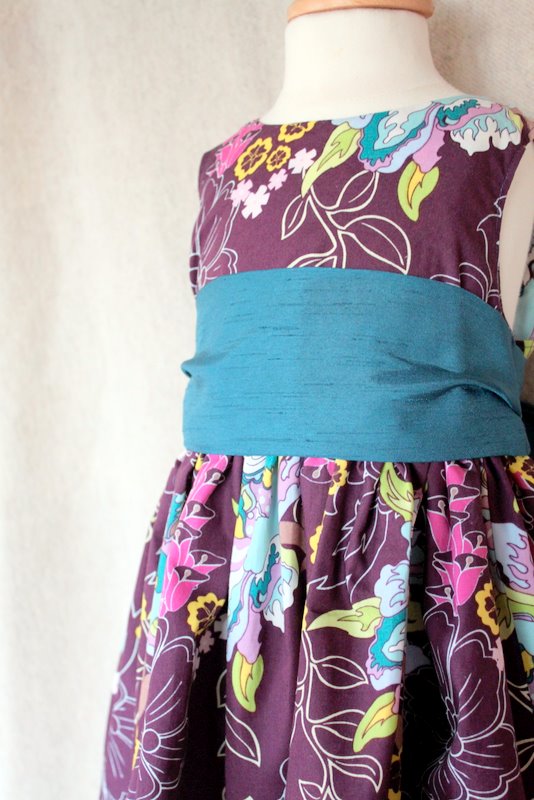
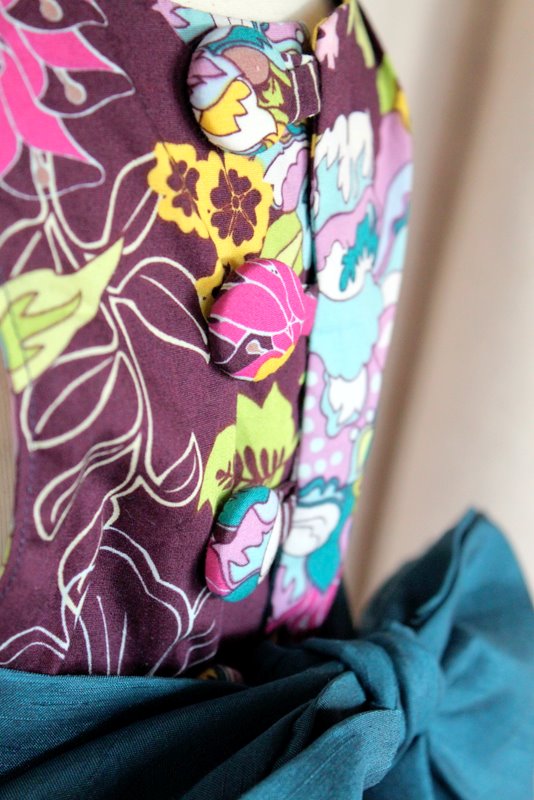
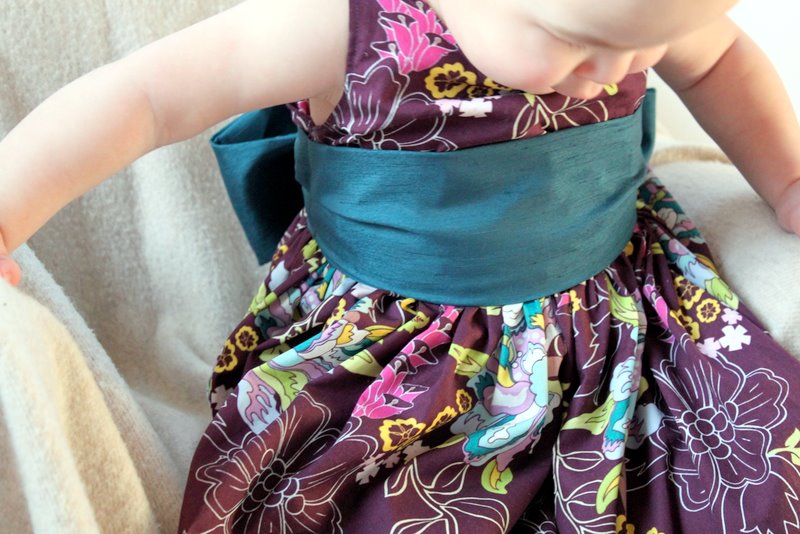
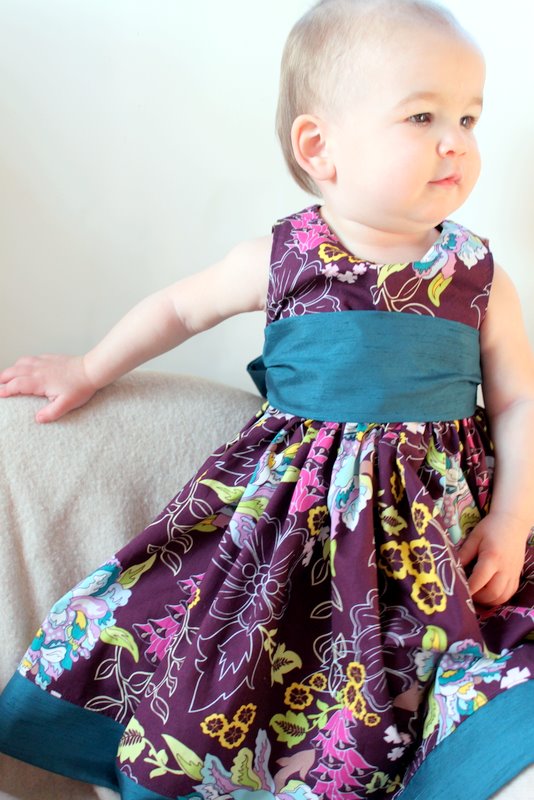
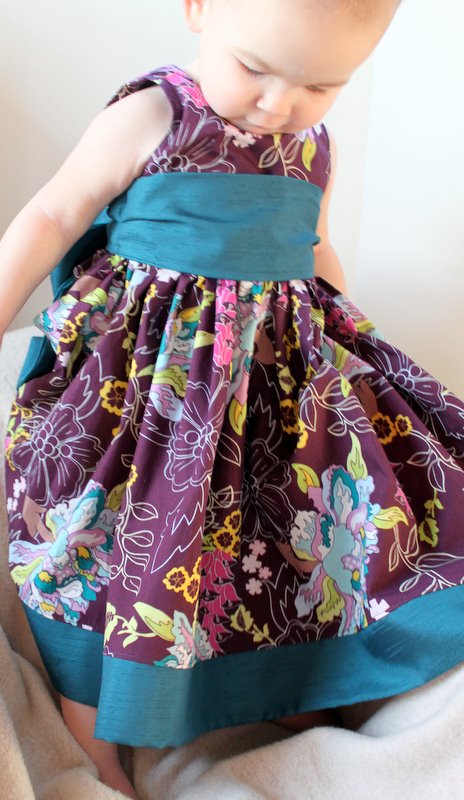
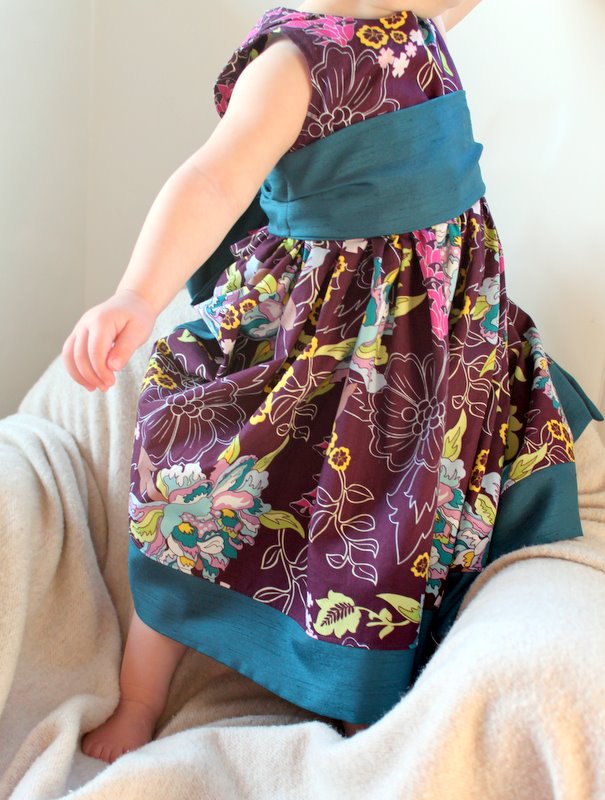
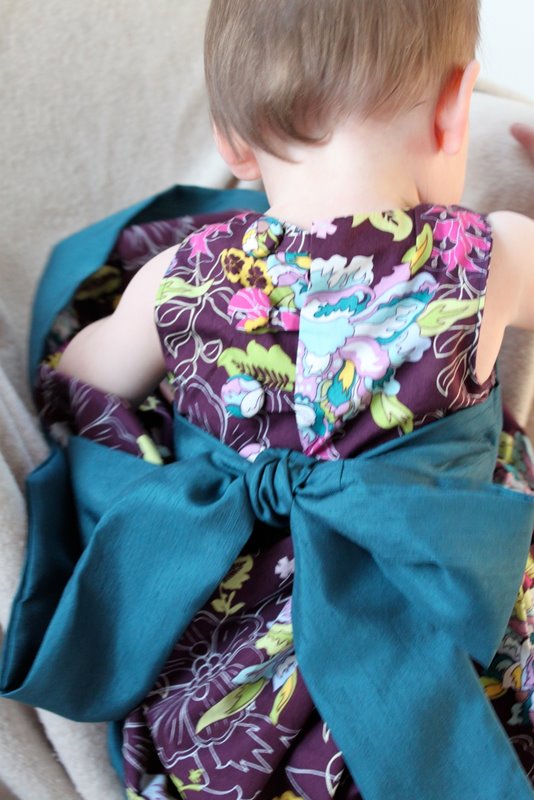
First off, if you haven’t gone over to Project Run and Play to vote this week, would you mind heading over there and voting for #3 “Lindsay’s Girly Girl Twirl Dress”?  I usually ask you guys to vote for your favorite look, but this week I need your help! 

This was a particularly hard challenge for me (I’m not much into current women’s fashion trends).  We are definitely at risk for being eliminated and the next week is the vintage-inspired challenge which I know I can rock!!  So, if you all would please, pretty please, head over and vote, I would be so grateful!  Voting is only open until midnight tonight.

Click HERE to visit Project Run and Play!

This weekend I decided to take a little time to do some sewing for myself and my family.  I started my very first string-block quilt and these are my first four squares.

For those of you that sew a lot of clothing, you know how many scraps you end up having left over.  I thought this quilt would be perfect for using up all those skinny little scraps that I can’t bare to throw away.  Plus, I love the eclectic look of all the different pretty fabrics.

A string block quilt has a “constant” strip of fabric that is sewn down the middle on the diagonal that is usually some type of solid color.  I chose to use white.  When all of the blocks are arranged the “constant” ends up making a diamond shape.  Pretty neat, huh?

In the picture above, you can see how the thin white strip forms a diamond when four blocks are placed together.  I plan on this quilt taking me a very long time, but I love that I am using my scraps and I know it will be gorgeous when it is all finished.

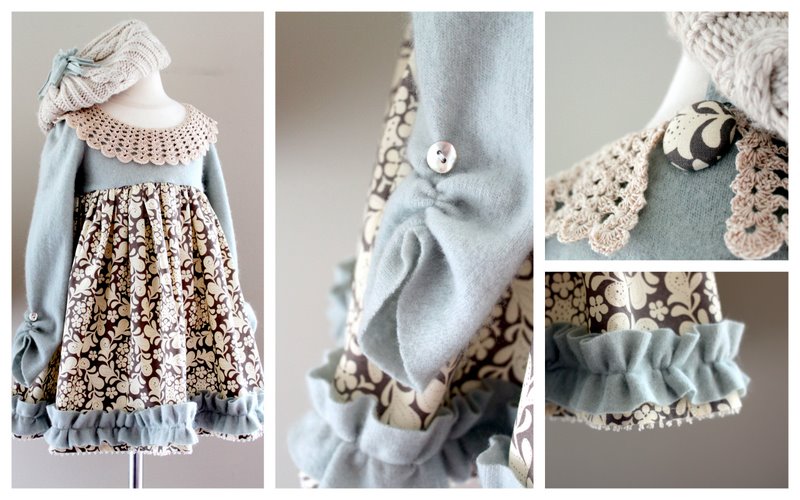
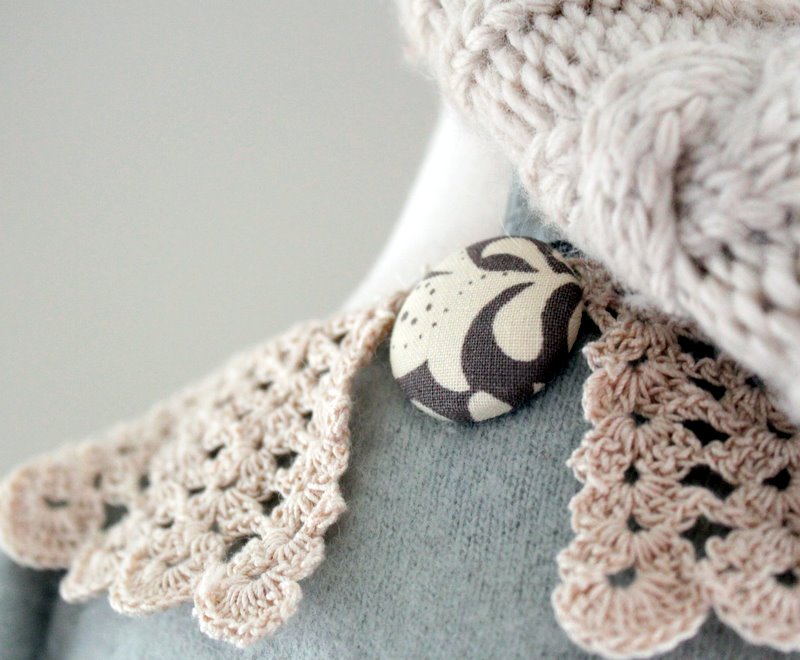
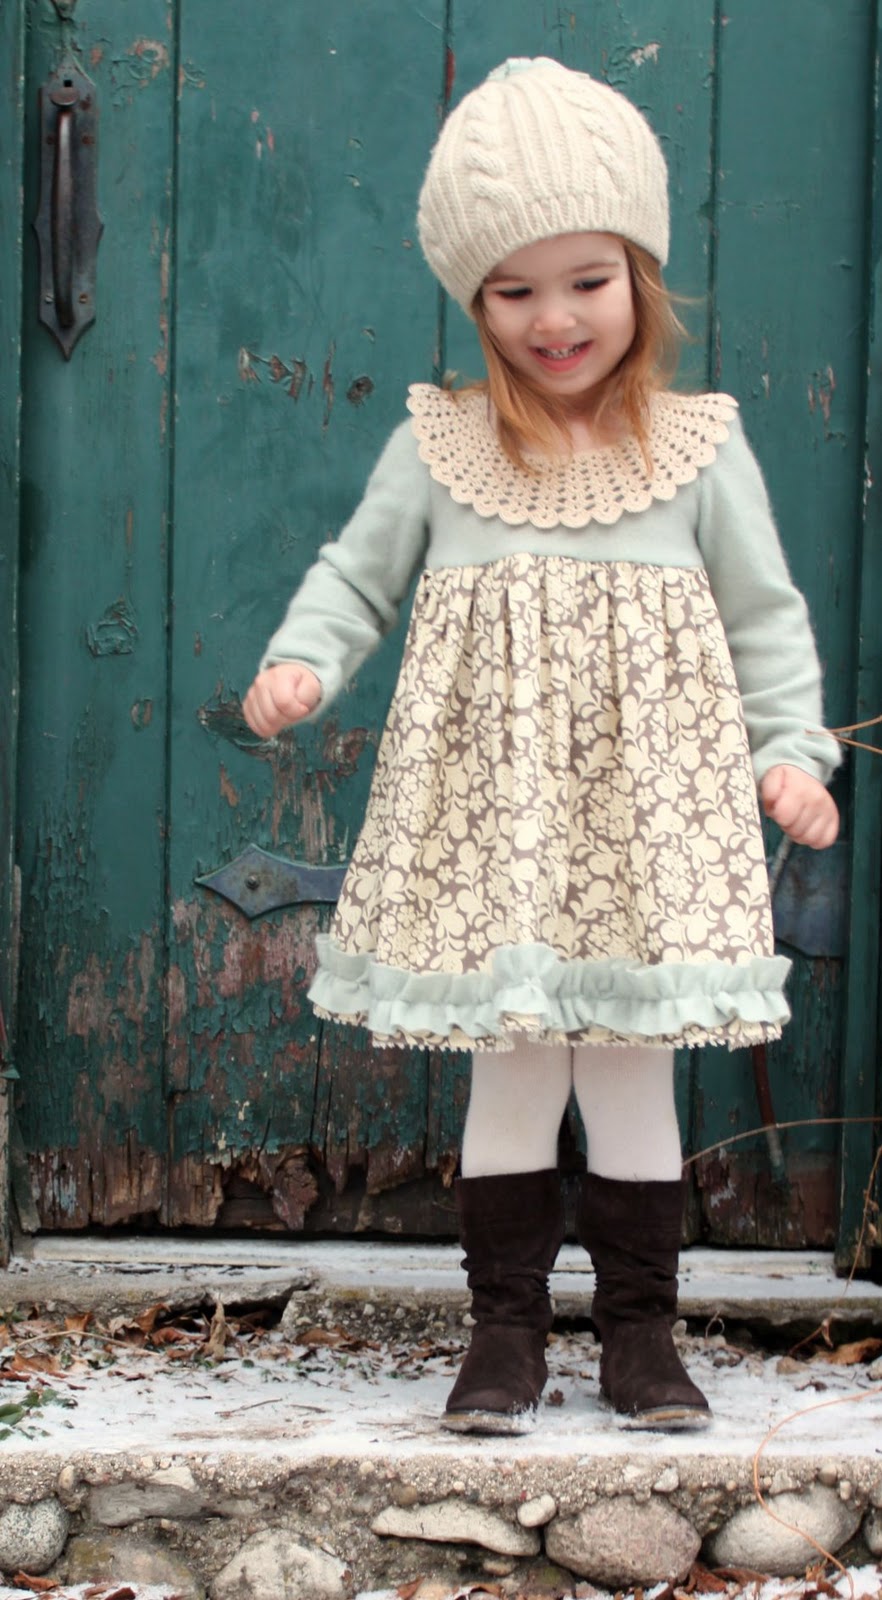
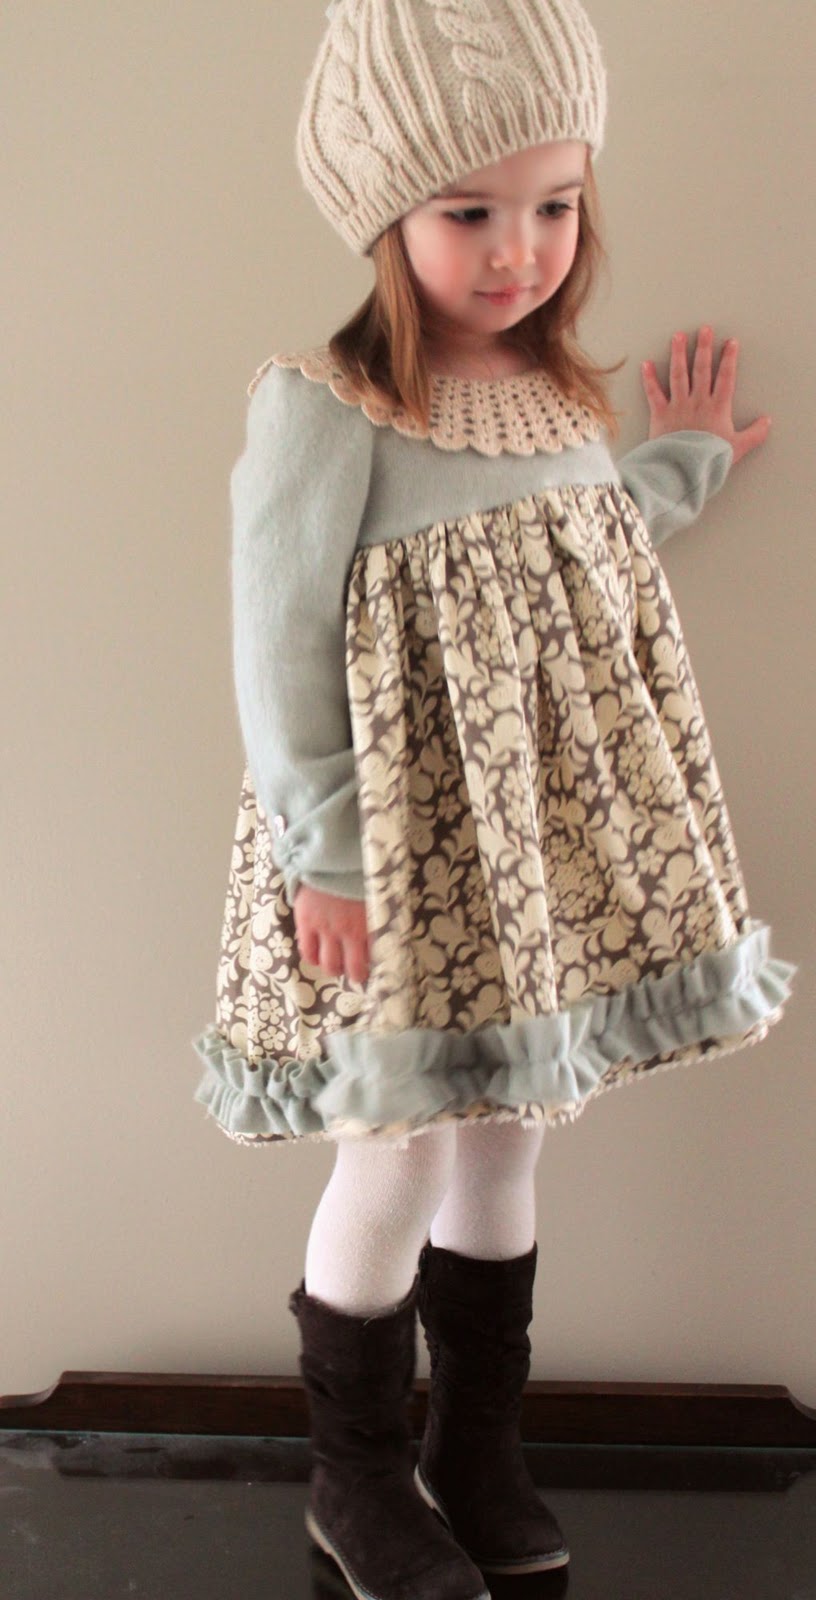
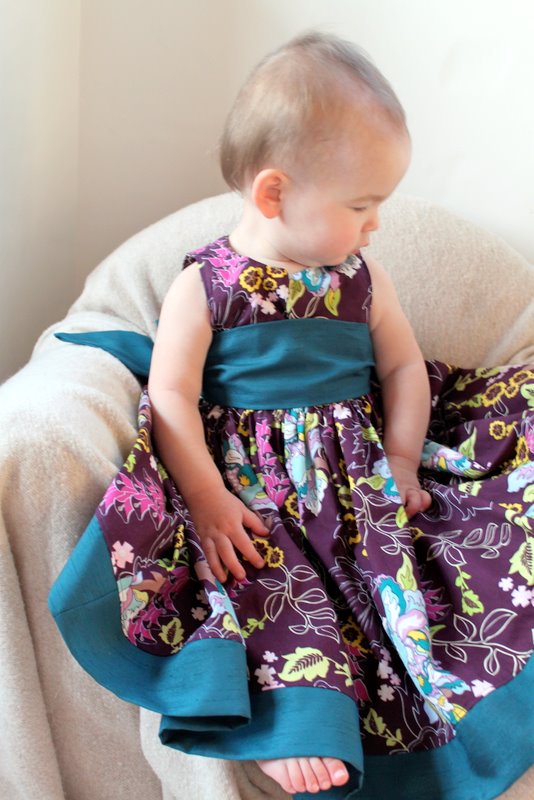
I also decided to sew a quick peasant style dress for my daughter Savannah.  I used the pattern that was given to us during the last Leila and BenProject Run and Play Challenge (the Sweet Dress pattern).  I actually sewed the pattern the way it was instructed this time.

This dress pattern took me about 45 minutes to get sewn (garment label and all!).  I would say if you are a beginner it might take about an hour and a half, but no more than that.  It’s super-simple and only has two pattern pieces to cut! I would highly recommend this pattern to any new sewer that is looking to start to make children’s clothing.

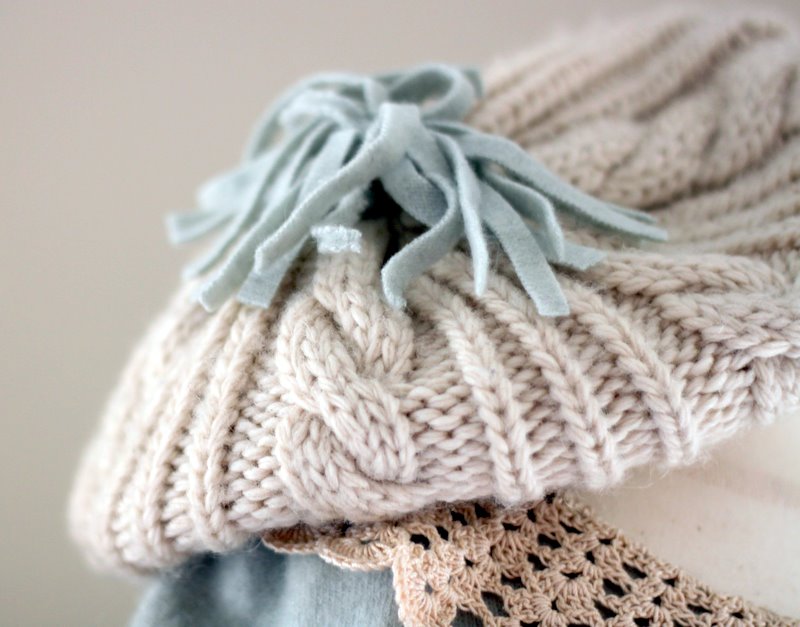
The only thing I did different with the pattern was to add the ruffle detail down the front.  I think this is going to be a great little dress for spring/summer.  And what I really love about this pattern is that Savannah will be able to continue to wear this as a top when she gets taller – gotta love that!

I hope you all had a great weekend!
Cottage Mama’s Note:  The fabric used for the peasant dress is Heather Bailey’s Pop Garden – Rose Bouquet – Emerald.

Week 3 Project Run and Play: Adult Fashion Inspiration

The Girly Girl Twirl Dress
This weeks Project Run and Play challenge was to take a women’s fashion trend, brand, or look and create an outfit for a child.  Rather than making a mini-version of an adult look, I decided I wanted to create my own unique look based on several women’s fashion trends that would be truly wearable for a child – thus, I created the Girly Girl Twirl Dress.
These were my inspiration dresses for creating this look………
I have been loving the soft, tiered feminine ruffles, the gorgeous deep jewel-tone colors, and the little lace details that we’ve been seeing in women’s fashion.
I used a super-soft cotton/spandex fabric to create the long-sleeved top for the dress.  I also added three tiered ruffles to the end of both sleeves.  On the bodice I added tiered ruffles, surrounded by a little lace detail and finished with a gorgeous piece of woven vintage trim.
The skirt of the dress is made from a spandex, ruffle fabric in the a mix of the gorgeous jewel-tone colors.  Underneath the dress, I added a pair of black leggings that have a ruffle edge at the bottom (it’s kind of hard to see in the photos).  I created a head-band from the ruffle fabric and the vintage woven trim.  The look is finished with a pair of Chanel-inspired, black patent-leather, quilted ballet flats.

Comfort is key when it comes to children’s -wear.  I really wanted to create a look that was truly wearable for a child.  She could run, jump, play or twirl and be incredible comfortable and stylish at the same time!  And I know this dress fit the bill, because Savannah did not want to take it off – she told me it was “SO cozy and soft”.  Perfect – mission accomplished!!

Head on over to Project Run and Play and vote for your favorite look!
Click HERE to visit Project Run and Play.

Oilcloth Giveaway

I realized it’s been awhile since I did a giveaway here, so I think it is time!  Today I am giving away two half yard cuts of oilcloth from my personal stash for a total of 1 yard (the two prints are pictured below).  

If you’ve never worked with oilcloth, you are going to love it!  There are so many super-fun projects you can do with the versatile material.  Here are some examples of some great projects made with oilcloth:

Click HERE for more information.
To enter the Oilcloth Giveaway do one (or more) of the following (please leave a separate comment for each entry):
1)  Leave a comment and let me know what you might make if you win the oilcloth.
2)  Become an official follower of The Cottage Home blog (if you already follow, just let me know)
3)  Become a fan of The Cottage Mama (http://www.facebook.com/TheCottageMama) on facebook (again, if you already are, then simply let me know).
4) Finally, “suggest” your facebook friends become a fan of The Cottage Mama.
There are FOUR chances to enter this giveaway.  Please include your email address with each entry.  Giveaway will be open through Tuesday, February 1 at midnight (CST).
Cottage Mama’s Note:  My next giveaway will only be offered to The Cottage Mama facebook fans, so if you are interested in a chance to win exclusive giveaways, please join us over on The Cottage Mama facebook page (http://www.facebook.com/TheCottageMama).

Just an update…….

First of all, thank you guys so much for voting for my “Sweet Ruffle Play Coat” over on Project Run and Play.  We, again, came in a very strong second place and have moved on to the next round – woohoo!

Many of you have emailed and asked and, yes, I do plan to make this pattern available on the blog.  I just need a little time to get my pattern pieces together, scan them into the computer and the tutorial written.  I have been really tired lately and slightly under the weather, so please be patient with me……..I promise it’s coming.  Oh, and I’ll be posting the pattern for the “Winter Snowflake Dress” too!

For this next weeks challenge we were instructed to take a woman’s fashion trend, brand, or look and make it into an outfit for a child.  To say this was a challenge is an understatement!!  But I’ve come up with a look that I hope you and the judges will like – I’m looking forward to sharing it with you on Saturday.

Secondly, thank you, thank you, thank you to everyone that commented on my “Adventures in Potty Training” post.  You all have shared some invaluable information with me and I can’t wait to give some of this strategies, tips and tricks a try.  Miss S. did ok on Monday.  Probably the most humorous part of the day (though it was NOT funny at the time) was that in the time it took me to go upstairs to grab something, Savannah took off her Minnie Mouse underwear, went into the play room, peed on the floor, then put back on her underwear.  When I came back downstairs she said, “see mama, I’m doing great – I’m all dry!”.  Well yes SHE was all dry, but the carpet was not – ugggh!!

Yesterday she seemed to come down with a cold that had her laying on the couch, so I decided to back off a bit.  I couldn’t bare to make the poor little lady get up off the couch when she was feeling under the weather.  But today she seems to be feeling better and is, oddly enough, very excited about using the potty.  So, this is good, I guess………we shall see!

But again, thank you guys so much for all your comments and support.  You’re the best!

Adventures in Potty Training

We interupt our regularly schedule program because today is a big day………we have officially begun potty training.  I have been dragging my heels about this one for some time now, but it’s finally time to get the ball rolling.

Savannah will be three in March, so I figured now was probably a good time.  I am SO nervous about this adventure.  I don’t imagine Savannah is going to be one of those “I put big kid underpants on them and, poof, they were potty trained”.  No way, not my strong-willed, opinionated little girl.  This is going to take a master plan.

I have never potty trained a child in my life. There is so much advice out there that it makes my head spin.  We certainly can’t do the “let them be naked” with the negative degree temperatures going on outside.  So, right now, we are wearing underpants and the little miss gets a small treat for #1 and a lollipop for #2 and we will just have to go from there.

I kind of wish there was a camp she could go to and would be returned to me fully potty trained, but as of yet, none of those exist, so I’m left to my motherly duty of doing it on my own.  And since I kind of feel like you guys are my friends (we’re friends, right?), I thought I turn to you and see if you had any advice, tips, tricks, or things that worked for you.  Please, pretty please, help a girl out………

Wish me luck……..this is going to be a wild ride!!

Week 2 Project Run and Play – Leila and Ben Challenge

 The Sweet Ruffle Play Coat
 It’s that time again – time to vote for your favorite look for Week 2 of Project Run and Play!
For this weeks challenge each of the designers were given the basic Leila and Ben “Sweet Dress” pattern and were told to make it our own.  This pattern is a basic peasant style dress and is incredibly versatile (see picture below).  
It has been mighty cold here in Chicagoland, so I wanted to create something for my daughter to wear right now. You all know how much I LOVE dresses, but I decided to do something a little more unexpected and turned this pattern into what I like to call the “Sweet Ruffle Play Coat“.  Perfect for the transition from winter into spring! 
I have had this fabric for over two years and was just waiting for the right project to come along.  The fabric is thick, woven, and incredibly warm.  The pink, purple and white were just the right colors for my little Savannah.
I altered the sweet dress pattern quite a bit to make this coat.  I cut the pattern down the front, center leaving an additional half inch seam allowance on each side.  Then I drafted my own pattern piece for the large collar around the neck.  Instead of gathering the neckline with elastic, I used a coordinating pink and purple grosgrain ribbon that I threaded through the casing and tied in a bow in the front.  I added pink, corded piping into the collar to make it stand up a little bit and to add a bit of whimsy.  
I also added a pocket detail on the front.  I used the corded piping, grosgrain ribbon and three pink buttons to make the pocket pop.  I love how the piping stands out next to the ribbon!
I drafted a separate pattern piece for the long, wide sleeves and added an extra detail on the sleeves with the addition of the ribbon and button.  I took the length of the pattern up about four inches to make it a more appropriate coat length.
This coat would be perfect for Easter worn over a dress or works as a casual look paired with skinny jeans, a t-shirt, and black ballet flats.  However, it ends up being worn, your little lady will feel like a true princess!!
So, now it’s time for you to head over to Project Run and Play and vote for your favorite look!
Click HERE to visit Project Run and Play!  Voting will be open this weekend and through Monday at midnight (which is a change from last weekend).
PS:  Thank you to everyone who voted last week!!! We didn’t win, but it was very close and we came in second place.  I will be offering the pattern for this coat over on Project Run and Play should we win this week!!

Lemon Cupcakes with Cream Cheese Frosting

I love lemon.  I love lemon bars, lemon pound cake, lemon poppy seed muffins, and I REALLY love lemon cupcakes.  Here’s a great recipe for lemon cupcakes with the best (in my opinion) cream cheese frosting!

Lemon Cupcakes with Cream Cheese Frosting

(Makes 24-30 cupcakes) 

Ingredients:
3 cups self-rising flour
1/2 teaspoon salt
1 cup unsalted butter, softened
2 cups white sugar
4 eggs
1 cup whole milk
2 tablespoons lemon zest
1 teaspoon vanilla extract
2 tablespoons lemon juice
Cream cheese frosting (recipe below)

Directions:
Preheat oven to 350 degrees.  Beat sugar and softened butter together in a large mixing bowl.  Add eggs, vanilla extract and lemon zest.

Add the salt to the flour and add flour/salt to the wet ingredients (butter, eggs, sugar, ect), slowly.  Then add half the milk, then lemon juice and then the other half of the milk, beating the mixture in between.  Do not over-mix.

Line your muffin pan with cupcake liners.  Fill each muffin tin 3/4 full.  Place in oven.

Bake cupcakes for 18-21 minutes until the tops are golden brown and a toothpick inserted comes out clean.  Allow to cool before removing from muffin pan.

Once the cupcakes have cooled completely, the next step is adding the frosting……….

Cream Cheese Frosting
(24 cupcakes)
Ingredients:
1/2 bar cream cheese, softened
4 tablespoons butter, softened
1 cup powdered sugar
1/2 teaspoon vanilla extract


Directions:
Beat cream cheese and butter together in a medium-sized mixing bowl, then add vanilla extract. Incorporate powdered sugar, slowly.  Beat until you’ve reached a nice, creamy consistency (see above).  
 
You can also add lemon juice or lemon zest to this frosting if you would prefer more lemon taste.
 
Finally, frost your cupcakes…….
 
 
And enjoy!
 
Cottage Mama’s Note:  This frosting is SO delicious.  If you like lots of frosting, I would suggest doubling the recipe.  It’s not too sweet and has a really great cream cheese flavor.  I also like to add extra coarse sugar on top for added crunch and sparkle.

Week 1 Project Run and Play – Winter Wonderland

Project Run and Play starts TODAY!

Our first weeks challenge for Project Run and Play (the blogger version of Project Runway for kids) was “Winter Wonderland”.  I have to admit, when I saw this theme, I was 100% stumped.  I just couldn’t wrap my head around it.  I think part of it was the theme being so wide open and the other part was that I was insanely nervous about what my fellow bloggers would be bringing to the table.  Have you checked out the competition?  There are some seriously talented ladies!

But luckily, I am married to a very creative husband who suggested that I go into my studio, look around at what I have, and see what speaks to me.  So, I thought, ok, it’s worth a shot.  And it worked!

I started out with this vintage crocheted collar that my grandma Ethel had sent me.  It just looked like a delicate snowflake that I thought was definitely “Winter Wonderland” like.  Then I dug through my pile of felted sweaters and found this dreamy, blue/green cashmere sweater that was feminine, cozy, and warm.  Finally, I had purchased a bunch of Sandi Henderson’s “Meadowsweet 2” and thought this light speckle damask fabric would be perfect for the skirt and the circles reminded me of snowflakes as well.

And here’s what I came up with for my final look……….

I wanted this to be a very feminine, romantic winter look.  I gathered the sleeves a little bit and added a small shell button at the top of each gather.

The bottom of the dress is finished with felted cashmere ruffle and picot edging at the very bottom of the hem.

The hat incorporates recycled sweaters and I used strips of the cashmere sweater to accent the top.

The back of the dress has a coordinated fabric covered button where the vintage crocheted collar meets.

Our snow had mostly melted, but as we were shooting these pictures inside, it began to snow outside.  Perfect weather for a “Winter Wonderland” shoot!

In the past, Savannah has not been a huge fan of modeling for me, but she seems to be warming up to the idea.  She told me that this dress was “beautiful and SO cozy”……..well, that’s cashmere for you…….the girl’s got taste, that’s for sure!!

I’m so, so happy that I am participating in Project Run and Play – it is definitely going to be a great exercise to stretch my creativity and it’s always fun to change things up a bit.

The competition starts today and the voting is open to the public, so head on over and vote for your favorite look!
Click HERE to visit Project Run and Play and VOTE!!
Fingers crossed that I make it to the next round!  If I happen to win this round, I’ll be sharing the pattern and tutorial for this dress over on Project Run and Play!

Blackberry and Mustard Glazed Ham

This ham was SO good (if I do say so myself)!  I served this for Christmas Eve dinner for my family, my in-laws and my two sister-in-laws.  And even my husband, who would much prefer some type of red meat, absolutely loved it.  This recipe was given to my mom by someone she works with (Miss Mary) and then was passed onto me.

If you’re looking for a great, crowd-pleasing ham, this recipe will do the trick!
Blackberry and Mustard Glazed Ham
Serves 8-10
Ingredients:
1 6-8lb. fully cooked, spiral sliced ham
1 jar (12 oz.) blackberry preserves
1 jar (7 oz.) whole grain mustard
1/2 cup apple cider or apple juice
Directions:
Preheat oven to 350 degrees.

Prepare glaze.  Mix blackberry preserves, whole grain mustard and apple juice together.  Set 1/2 of mixture aside to be made into sauce (see step below).
Brush some of the mixture on top of the ham.  Place ham in oven for 1.5 hours, basting with glaze every 20 minutes.
Place 1/2 of the reserved glaze into a heavy bottom saucepan.  Set on medium-low heat and allow glaze to reduce by half.  Place in a dish and serve alongside ham as a sauce.
Place ham on a large serving platter and garnish with fresh blackberries, sliced apples, and fresh herbs.  Enjoy!
Cottage Mama’s Note:  This glaze would be delicious on grilled pork chops, chicken breasts, lamb or any other meat that is complimented by a slightly sweet sauce.  Ham was served with mashed potatoes and gravy, cornbread stuffing, salad with dried cranberries, sugared pecans and feta cheese, and homemade bread.

The Party Dress – Printable Pattern and Tutorial

In case you missed my guest blog post on U-Create, here is my pattern for The Party Dress.  I’ve updated a few of the steps and tried to clarify some things people had questions about.
In thinking about my guest post for U-Create, there really was no question in my mind what I wanted to do.  It had to be a dress!  I am very excited to offer this free printable pattern!  The Party Dress (size 18-month through size 5) is the perfect outfit for any special occassion – it’s a birthday dress, a holiday dress, a church dress or even a modern flower girl dress.  I encourage you to get creative with this pattern and make it your own.
So let’s get started………..
**UPDATE**

**The Party Dress instructions and pattern pieces have been removed. There is a brand new updated version of the pattern available for all The Cottage Mama Newsletter subscribers. Sign up for the newsletter at the top of the blog home page and you will receive the full, FREE The Party Dress PDF pattern sent to your inbox in size 6 month – size 10.**

 I used Art Gallery Fabrics “Paradise” in Twilight Pond for my main fabric.  The coordinating deep teal is a Dupioni silk.  Another coordinating cotton fabric would be beautiful for the accent fabric as well.
I have a thing for fabric covered buttons – I L.O.V.E. them!  You can find covered button kits in the notions section of your local sewing store.  They are super-easy to make and add a timeless, vintage flair to garments.
 And here’s my little Matilda Jane wearing “The Party Dress”.  She loves it!!
Now it’s time to party!