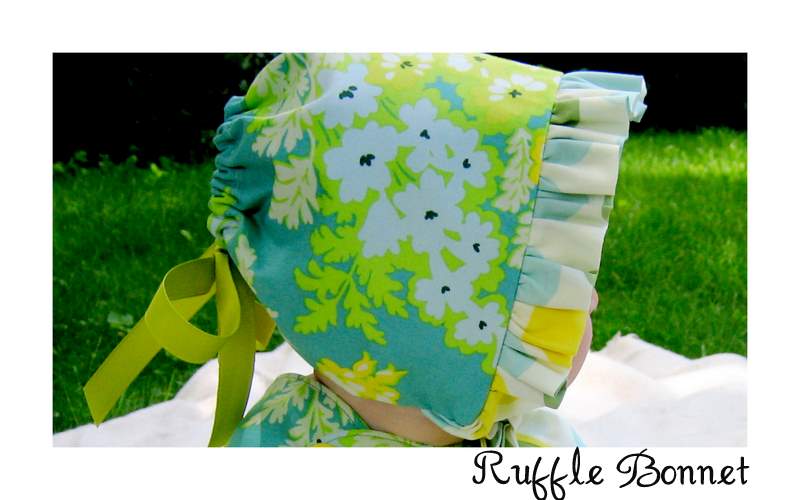
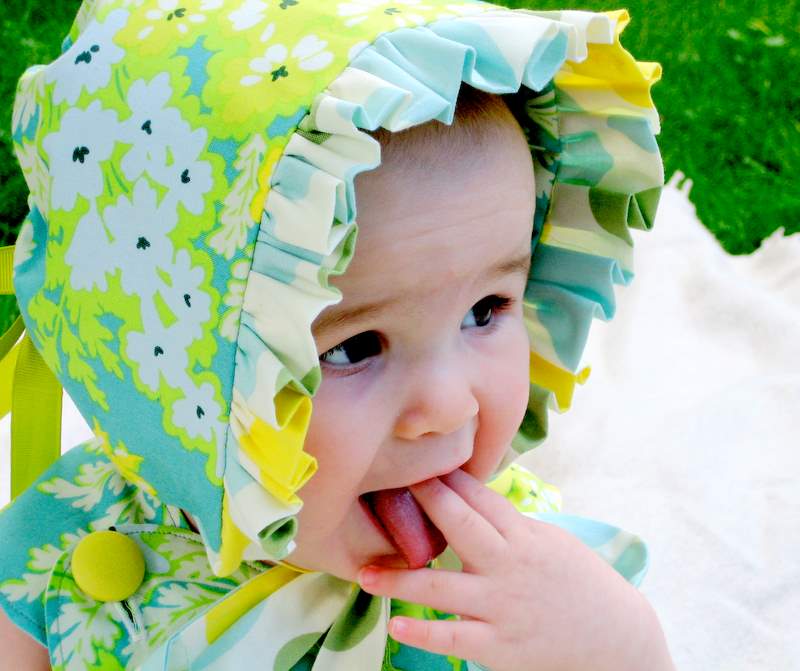
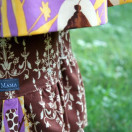
Yesterday I just had to show off the little birthday outfit that I made for my sweet Matilda Jane. I just loved the way it came together. But what I think really completes the look is the ruffle bonnet.
This project is actually more simple than it looks. And the great thing about this bonnet is that it is one-size and adjustable. Cinch the ribbon in the back really tight for a 6 month old and let it out as they grow. The bonnet Matilda is wearing fit my daughter Savannah (2 years) as well once I let out the back a little and still has room to grow.
This tutorial is designed for a one size bonnet, size 6 months – 3 years. It involves some very basic sewing techniques, so if you are new to sewing, give this a try. Let’s get started……
Ruffle Bonnet Tutorial
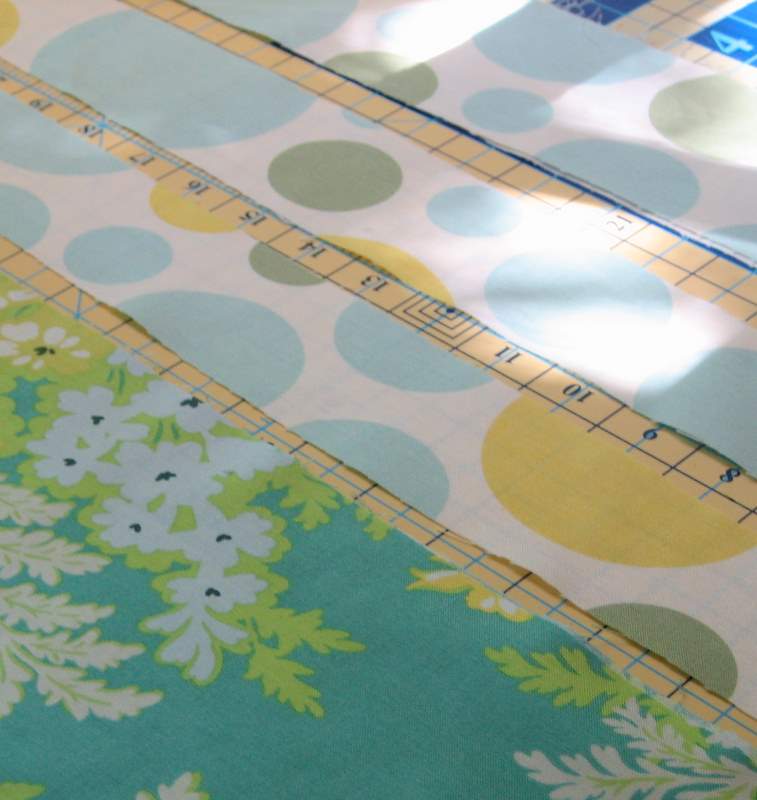
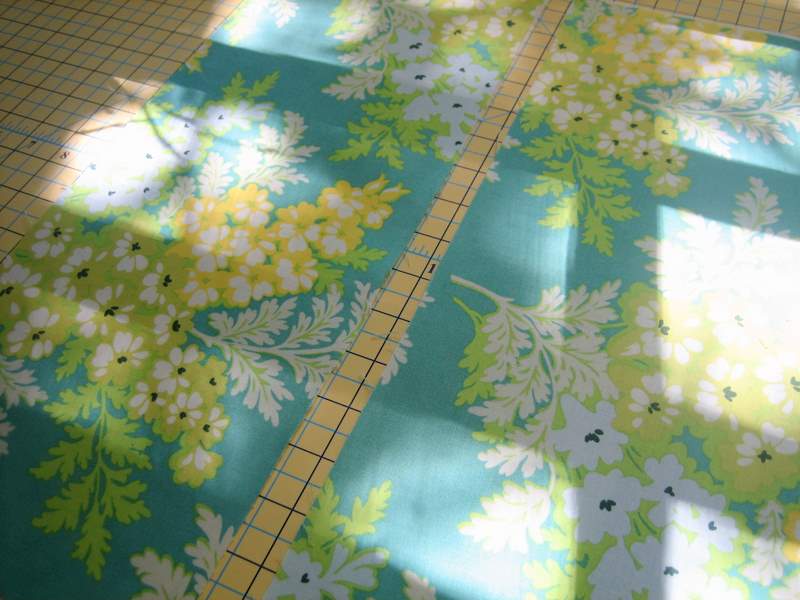
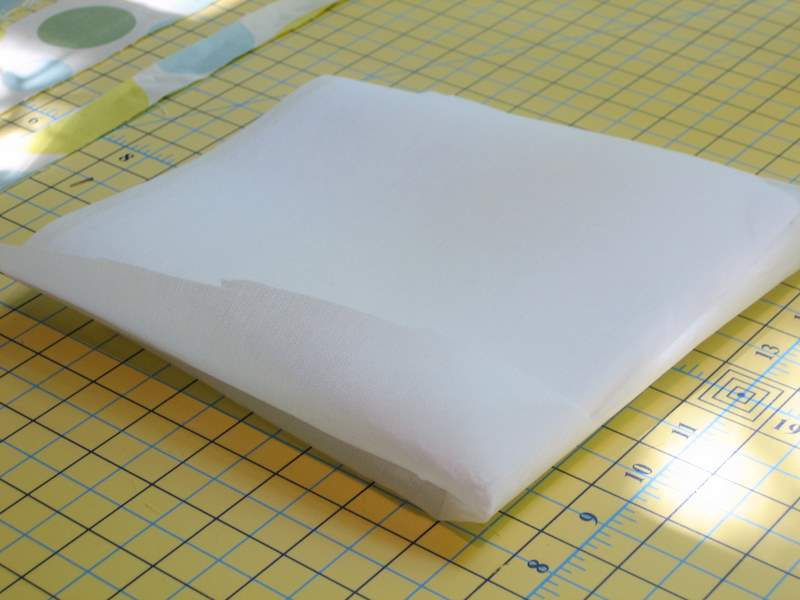
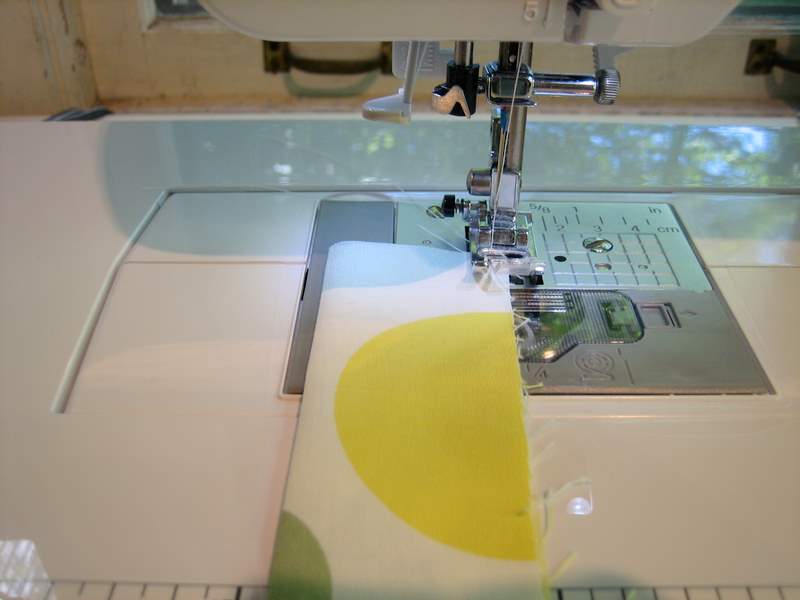
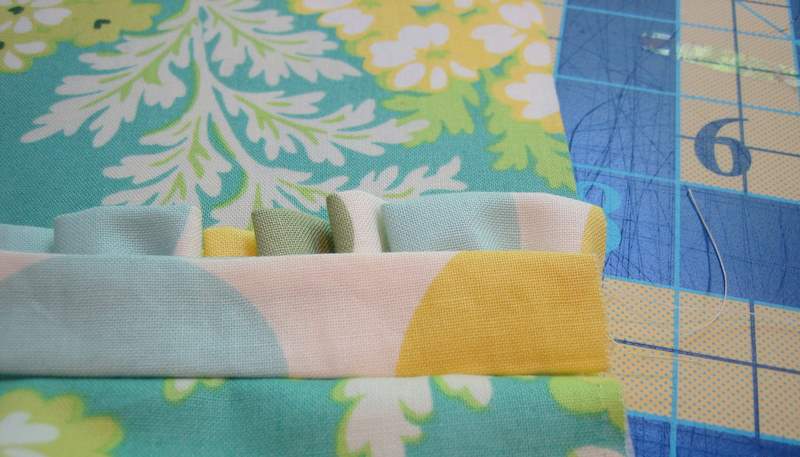
Fold your ruffle piece in half, length-wise and press – wrong sides together. Run a gathering stitch along the top of this piece. To do this, set your machine to the longest stitch length. Stitch along the top of the fabric making sure NOT to back-stitch at the beginning or end.

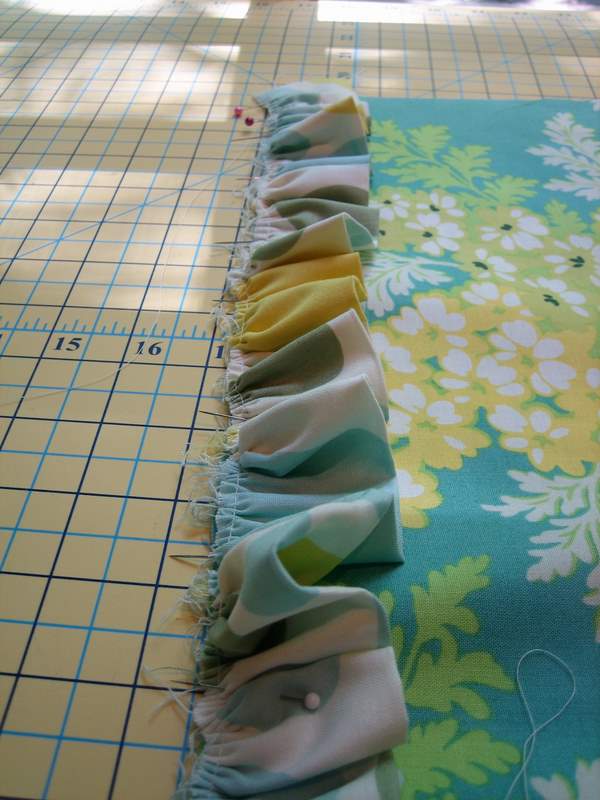
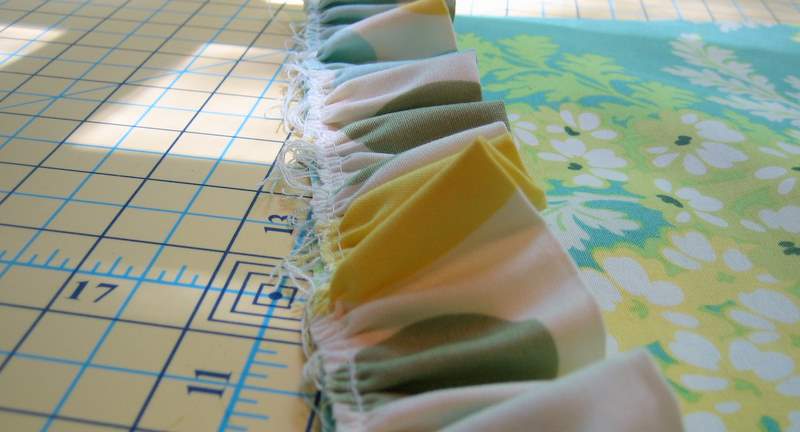
Here’s your ruffle after you have run your gathering stitch. As you can see, we still need gather it.

To do this, pull one of the threads on either end. Continue to work the gather until you have reached 17.5″ long.
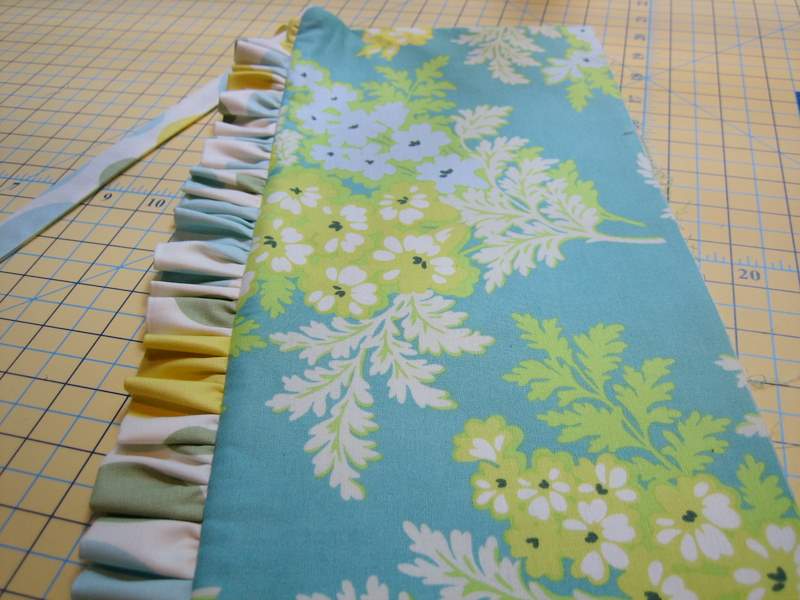
Pin the ruffle to the long-side of one of the main fabric pieces. The ruffle should be pinned to the right-side of the fabric facing inward.

Stitch the ruffle in place – 1/4″ seam allowance.

Now place the other main bonnet piece on top of the piece with the ruffle – right-sides together.

Stitch the two main fabric pieces together – 1/2″ seam allowance.

Now to make the ties that go around the neck. Fold each of the two fabric pieces in half – right-sides together. Stitch down the long-side and then close one of the short sides. I cut the ends at a diagonal for fun. Then turn the tubes right-side out and press.
Open up the main bonnet pieces to reveal the ruffle inside. Place one of the straps, pointing inward at the seam on top of the ruffle. The raw side should be lined up with the raw side of the ruffle and main bonnet.

Close the main bonnet piece again and pin. Do the same thing on the other short side with the other strap.

Stitch both short sides closed – 1/2″ seam allowance.

Clip both of your corners. You need to do this so it will look nice when you turn it.

Turn right-side out and press.
Now three of your four sides should be closed. The ruffle is complete as well as the tie straps.
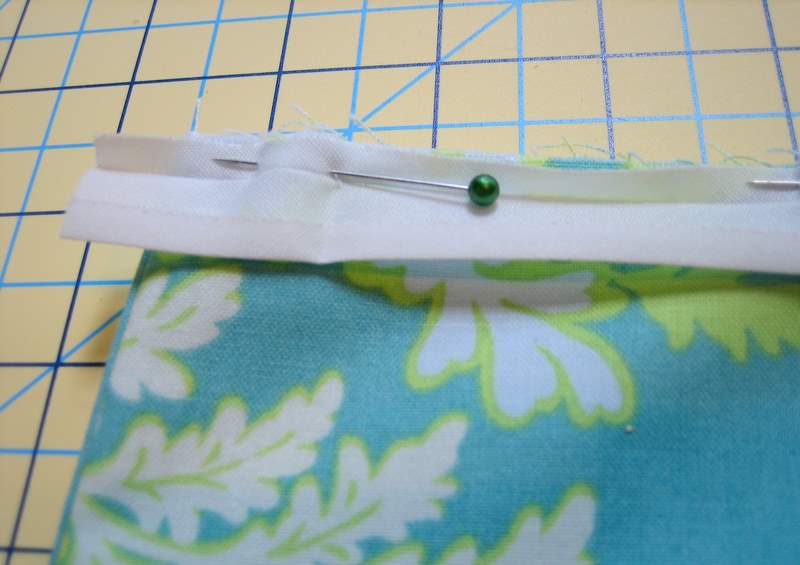
At this point you need to decide what is the interior of your bonnet and what is the exterior. Once you have decide that, you need to pin your single-fold bias tape to the exterior. Cut your bias tape the same length as the long side of your bonnet. Unfold one side and line it up with the raw, unfinished long-side of your bonnet and pin. Stitch in place.

Now fold your bias tape over to the interior side, making sure that you leave a wide enough opening for whatever ribbon you have chosen to use. Press, pin into place and stitch as close to the edge of the bias tape as possible. This will make a tunnel for you to thread your ribbon through.

Now for the ribbon. Like I said before, you can cut this ribbon to your desired length. Maybe you want a big, huge long bow or maybe you want something more subtle. I would thread the ribbon and then cut it to see how you like the look.
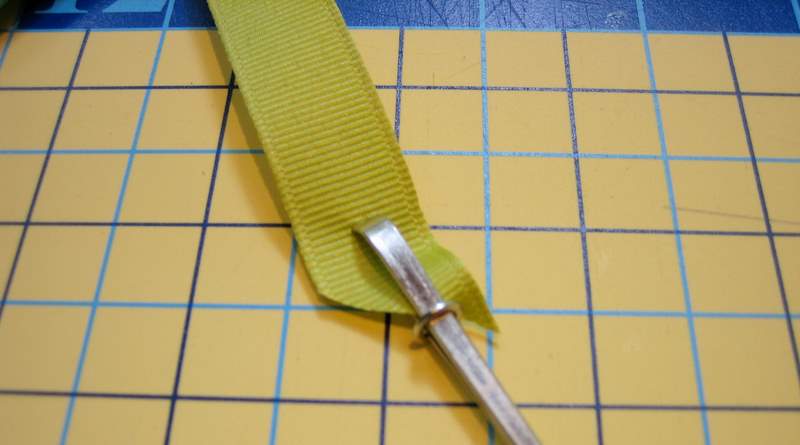
Now it’s time to thread the ribbon. Do you have one of these? It’s called a bodkin and I seriously don’t know what I would do without this thing. It makes threading ribbon, elastic, ect…….SO easy. If you don’t have one, head to your sewing shop and buy one – you can find it in the notions section and they are very inexpensive. If you don’t have one, just attach a safety pin to one end of the ribbon and thread that way.

Thread the ribbon through the opening you just made with your bias tape.
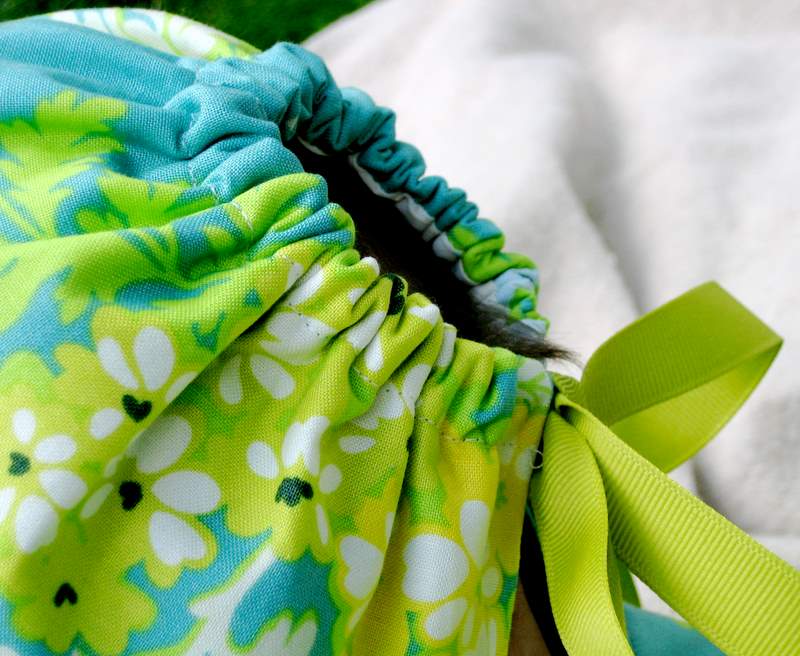

Cinch the ribbon as much or as little as you like, depending on the child’s head size. Tie in a bow.
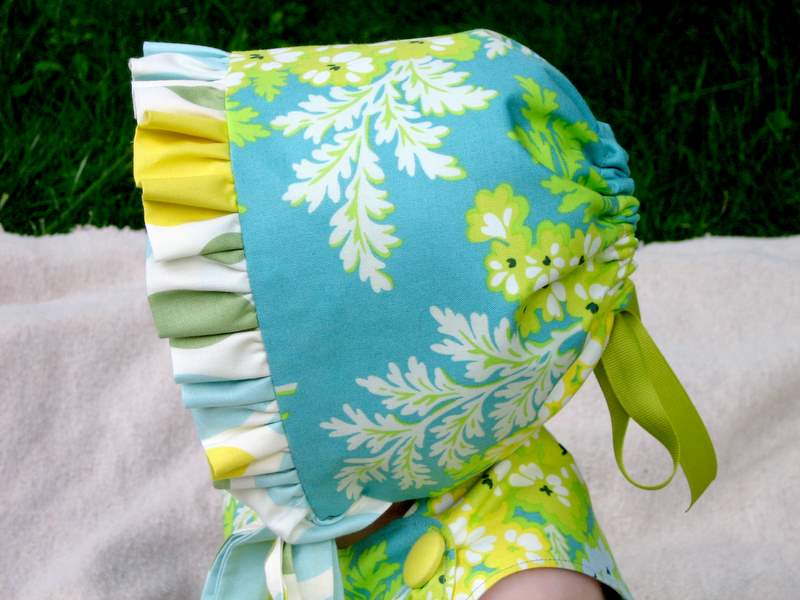

I really think that the bonnet makes this little outfit. Make one of these bonnets to coordinate with any of your little ones favorite dresses or outfits. This would also make a wonderful gift for a new baby.

My sweet baby girl sure loves her new hat. Her sister loves it too – I think I may be making another one of these so we don’t have any fights over this cutie little hat!

Cottage Mama’s Note: This project is great for a beginning sewer to practice some basic techniques. If there is anything you have a question about, please feel free to email me or leave me a comment and I am always happy to help.


 Lindsay Wilkes is the owner and designer behind The Cottage Mama. She creates timeless, vintage inspired sewing patterns for children’s clothes. She is also a fabric designer for Riley Black Designers / Penny Rose Fabrics, author of the book ‘Sew Classic Clothes for Girls’ and can be seen teaching nationwide and online in her video series ‘Lessons with Lindsay’ sponsored by Baby Lock Sewing and Embroidery machines.


I wish I had a baby to make this for! I may make it anyway just because it’s too adorable! :]
Thank you, thank you, thank you for the ruffles tutorial! 🙂
That is the sweetest thing! I have to make one. Thanks for the tutorial!
Thanks so much! My first grandbaby is coming to visit us next month and I’m going to make one (maybe more) of these lovely bonnets!
Oh my, how cute is this!!!! I love the dress too!!! E-Patterns Linds, Epatterns, we need them…..
SO cute Lindsay! I’ve been making bonnets for my baby girl too. This one is great!!!
I love this – thank you so much! Do you think I would be able to increase the sizes a bit and have everything work out? My peanut is almost 3 but has a large noggin!
Thank you, great tutorial!
Thanks everyone for your comments – they make me feel all warm and fuzzy inside :-)……seriously, I love them, thank you!!
Sarah,
Yes, you can definitely increase the size. I would try adding 1 to 2 inches to the main pieces of the bonnet, thus increasing the bias tape that much as well. As for the ruffle, add another inch and keep the ties/straps the same length. Should work out just fine.
My Savannah (2 years) has a HUGE noggin too and this size fit her, so I think just adding a little more too the pattern will work for your 3 year old.
So where do we get the pattern for this. I love it. I made them 30 years ago. I now want to make them for my granddaughter
O my goodness! These turned out absolutely darling!! Bravo!!
I guess I kind of forgot to mention this in the tutorial. If you use a contrasting fabric for the lining and coordinating bias tape, this bonnet ends up being REVERSIBLE – yay!!
Happy Sewing!
What a precious site. A gorgeous little girl wear a gorgeous little bonnet!
Thank you for taking the time to answer my question! I’m off to try that very soon, and I love the idea of making it reversible. Perfect!!! I have to try this (even tho she’s almost 3) because I’ll kick myself when she’s older if I don’t! Easier than having another, right?!?
This is such a pretty bonnet!! I love that it’s adjustable so it will continue to fit as baby grows!
I linked to your tutorial over at Craft Gossip Sewing:
http://sewing.craftgossip.com/tutorial-ruffle-baby-bonnet/2010/06/12/
–Anne
This is just to cute! I will be making one for my little one!
Thank you
amy
How cute!
I found my way to your blog today, and such a good first impression!
Now I’m going to continue to read as much as I can of your older posts.
// Linda (Sweden)
omg! soo sooo adorable. love the fabric
THis is scrumptious. I have always wanted to make one and this is the cutest one EVAH!!!
Thanks for the great tute. My bald baby will be so much safer and cuter this summer.
Such a gorgeous Bonnet and an even more Gorgeous Baby Girl! I love it! The outfit is sooooo lovely.
~Amber
Adorable! Thanks for sharing!
Sarah
That is the cutest outfit!!! Bonnets and ruffles :)) gotta love them!! I just recently posted about the bonnet I made for my grand baby Kylee. Come and visit and take a look!! I will definitely be following your blog as inspiration. I share your love of sewing and just domestic life in general. It’s so great to meet so many like minded women. I look forward to many more post :))
Michella
I can not thank you enough for posting this tutorial. I have looked and looked and looked some more for a bonnet to fit my new baby for an upcoming trip and just for the summer and have HATED everything I have seen. So I have been waiting to find a great tutorial on a bonnet that was just right to make and yours was perfect!!! Everything I have been wanting but couldn’t find. I sat down and made it tonight. I’ll send you the link once I get it posted up on my blog 🙂 THANKS FOR SHARING it with us all 🙂
LOVE this little bonnet… love everything about this birthday outfit actually! what a darling little model as well. 🙂
I think the shirring is definitely worth another try- I had a couple of failed attempts first as well. The secret for me turned out to be using my bobbin winder to put the elastic thread on my bobbin. I noticed that if the thread isn’t stretched out when its wound onto the bobbin, when I sew, the elastic thread line is all wiggle-y instead of straight… which translates into no bunching when I spray and iron. hopefully you have more success when you try again. 🙂
love your blog, by the way… I came over to see the nicey jane outfit and spent all sorts of time browsing your archives- LOVELY!
Your tutorial is a lot easier to follow! Thanks for sharing. It is one adorable bonnet and lovely little baby. 🙂
Wow that is so adorable. That would be great as a gift ! love it , I will have to try it out.
You have a great blog! I am your new follower. Come by and visit me at http://showememama.blogspot.com
wow! it’s beautiful! compliments
I am in love! I’ll be featuring this on BCD on Aug. 26th! Thanks for linking!
Becca
Your little Matilda Jane looks like a baby doll in that adorable bonnet!
Lindsay,
I’m so embarrassed! I accidentally posted your tutorial early/back logged! So I deleted it and will have it front and center on Aug. 26th like I mentioned before and not July 26th! You deserve to be the center of attention and that you will! So glad you’ll excited to be featured! It’s already a favorite of mine and may in fact be in the running for tom ten tutorials of the year! You’re the best! Tahnks!
Becca
and HOLY AWESOME BIRTHDAY BASH! I adored your little ones birthday and I love her name!
Such a cute project, and such great instructions! Thanks!
Where did you get the pattern for the dress??? I LOVE what I can see of it and would love to recreate this entire outfit for my two girls to wear when the little one comes home from the hospital! (I am due in April) PLEASE let me know where I can get this dress pattern as I LOVE it!:) Thanks!
Jocelyn
I love this bonnet! With two nieces due in March, I know what will be part of their present.
I love that dress as well, would you mind sharing which pattern you used?
Wow!!! I love this bonnet.
Thank you so much for this tutorial! This is only my second sewing project (besides hemming curtains!) and I had no problem putting them together. The hardest part for me was choosing the fabrics! There are so many beautiful prints available – it’s hard to choose! I ended up making five of them so far. I went with the reversable instruction and they are just amazing! I even made one fleece-lined since it’s still chilly here in upstate NY. Soooooo easy and soooooo cute!
Thanks for sharing!
So stinking cute! Love the pattern for the bonnet and like others would love the pattern for the romper as well. I was looking for a bonnet just like this for my baby girl
I am determined to make this even though I don’t have a machine. My little granddaughter, Eden, is three months old and summer is almost here. Thank you! Wendy
Thank you! VERY much. I loved this tutorial, and made a bonnet for my daughter, here’s a link http://myjourneyasablog.blogspot.com/2011/05/sweet-ruffle-bonnet.html. I can’t wait to make some more. Awesome tutorial, thank you again 🙂
I just recently found your blog and I love; LOVE, LOVE it!
This is yet another wonderful tutorial and I hope it’s ok that I’ll try to add your “button” to my blog so others can find you as well.
You are amazing!
Best regards from Eva Mari in Norway
fantastic tutorial! just made it, it’s simple and beautiful.
Thank you.
So sweet!I have a brand new niece and I can not wait to make one for her, thanks for sharing!
Your bonnet is beautiful! I want to make one for my daughter’s Christening next month; she’ll be 4 months and has a small head – how much do you think I’ll need to adjust the size by please?
Thank you so much x
I made this in white/ purple reversible for my neighbor’s little girl and it was so easy – thank you so much for the tutorial!!
http://www.flickr.com/photos/32348548@N03/5978832097/
For a smaller size, I would probably reduce each side by 1.5″. My girls have pretty large heads, so that should do the trick for a little one.
My babies are too big for a bonnet, but I’ll be making some for their dolls! Thank you for a nice tutorial! Love your baby’s dress too!
Thanks for your tutorial. I have included a link on my blog http://chamomileandpeppermint.blogspot.com.au to your page for my readers to link back here.
Thanks Lindsay, I borrowed your ruffle idea and made a bonnet and linked to this tutorial from my blog http://www.debbiefeely.com/?p=318
Debbie
I found this through Pinterest and just finished making one for my niece for Easter. The instructions were great and for my first ruffle and bonnet it turned out great. Thanks!
Thanks so much for this tutorial! I made my daughter’s Easter bonnet using it. Here’s the link: http://www.cottonbottommama.com/2012/04/easter-bonnet-and-other-ruffled-sewing.html
Ha! I featured this as a Top Pattern today on SewSet as well!!!
I didn’t realize it was yours until I clicked it open, I guess I should have known – Of course that is why I love it :).
You are on amazingly talented woman! Thank you again Lindsay!
– Jess
http://www.sewset.com
Just finished mine! I found the instructions so easy to follow – thanks SO much for posting this!! My sweet Kalleigh will look adorable this Sunday… now off to find a tut for booties… 😉
This is so cute! I can’t wait to make sunbonnets for all the babies I know!
http://www.thesitsgirls.com/get-paid-blogging
Love the bonnet!!! Is there a pattern (either free or to purchase) for the dress and bloomers she’s wearing?
[email protected]
Hi Cheyenne,
Thanks for your kind words! The dress is very similar to the Ruby Ruffle Dress that you can find in my shop: http://www.thecottagemama.com. I hope that helps! Thanks for stopping by, Lindsay
This is very adorable. I plan to make this. I’m new to sewing so I need advise on how much fabric I should buy when I go to the fabric store. I plan on using the same measurements you used.
Thanks
Hi there! I’m not sure the exact yardage, but you should be good to go with a 1/2 yard of each print and maybe you could even get just a quarter yard of the accent fabric. Again, I don’t have yardage calculations for this since it’s one of our free patterns, but it doesn’t require very much fabric. I hope that helps a little bit!
Have a great day,
Lindsay
Thank you very much!
I made this and it is adorable. Clever pattern! I think when it gets washed the first time, the ribbon casing will fray. Did I do something wrong there? It seems like I missed a step that would have closed that up. Also, the ruffle and ties don’t lay nicely like yours, they turn at a strange angle. ? Any suggestions?
I just finished making one of these for my 9 month old daughter and I love it! I am a relatively new sewer and I found your directions very clear and concise – thank you. I can’t wait to use it this summer. My bald baby won’t have a burnt head now!
Thank you SO much for this tutorial!!! It was my second sewing project ever and it was so easy! I made one for my 10 month old for her 4th of July outfit, and am now in the process of making a few more for friends. Thank you again- this was a total confidence booster for someone new to sewing and a gorgeous final product! http://instagram.com/p/b1N0cLOiSO/
Yay!! I’m so glad it turned out well for you and your little cutie is SO darn adorable! Your sweet compliment really means a lot to me. My goal is to get people excited about sewing, so thanking you for taking the time to comment and let me know that this was a good experience for you. I REALLY appreciate it!!
🙂
I1ve just finished one for my 9-months-old and I can hardly stand not to wake her up! Thanks so much! It’s so pretty, so practical, so elegant, so unique!
And yes, it was a very good experience for me, too! It made me so happy that i could make it!
(Though I’m not sure I sewed the ties perfectly as the ruffle seems curves at the edges – or I don’t know how to say what they make – but I will make other ones , that’s for sure)
Thank you so much! This success makes me so happy and so excited that I’m afraid I won’t be able to sleep! 🙂
Thanks a lot!
I just made THREE of these last night! What a great Grandma gift. I’m going to take all three of these cute bonnets shopping for shoes and ruffled panties. I can’t wait to give them as fluff gifts! Thank you so much!
I am new to sewing and was wondering what fabric line was the aqua and lime fabric from that you used for the sweet baby bonnet? It is just beautiful.
Hi Brandi,
This fabric is by Heather Bailey and it is one of her previous lines called ‘Nicey Jane’. It’s not in print anymore, but you might be able to find some online. Thanks for stopping by!
I didn’t read through all the comments, but am wondering if the pattern of her dress is available also! It’s adorable – all of it! (Almost as cute as that baby!) Thanks!
Hi Amber, Great to hear from you! That was my daughters 1st birthday dress that I created when she turned 1. It’s hard to believe she will be turning 5 this July! Anyway, I ended up turning that design into my Ruby Ruffle Dress Pattern that is available in the shop. It doesn’t have a criss-cross back, but it’s very similar and great for babies up to bigger girls. Here is the link: http://thecottagemama.com//product/printed-ruby-ruffle-dress-pattern/
Do you have a pattern for the old style bonnet that had cardboard in the head piece? Would appreciate a reply.
Thank you for the tutorial. I made a bonnet for my grand-daughter. http://tammyscraftemporium.blogspot.ca/2015/05/ruffled-bonnet-for-baby-girl.html
What was the name of that fabric been looking for it everywhere! I bet it’s out of print now but I’d still love to know.
Thanks
Emily
Maybe this is a stupid question, but could you do this without bias tape? If the main piece was made from a single piece of fabric (no pretty contrast), could you just run a stitch as wide as your ribbon along the fold?
Thank you 🙂
The bonnet is adorable, but the dress is just as and would love to know what pattern you used.
Thank you for blessing everyone with your willingness to share!!