Walnut Chicken Salad Sandwiches

Walnut Chicken Salad is another easy recipe with a few ingredients that is “oh so good.”  I remember this recipe from late junior high and high school.  My mom and I used to be in National Charity League (NCL), which is a mother-daughter charity group, and every year we would have an annual tea.  Everyone would bring something to the tea, but there were specific recipes that were used each year and this Walnut Chicken Salad was a staple every single time.

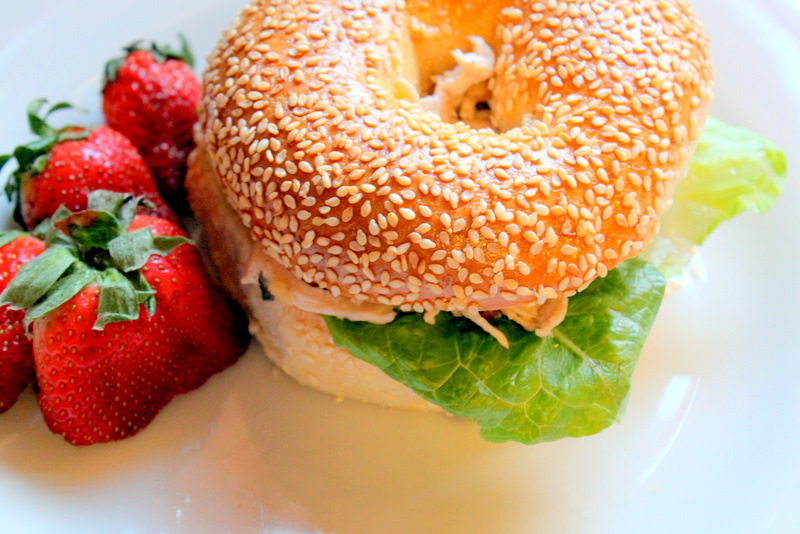
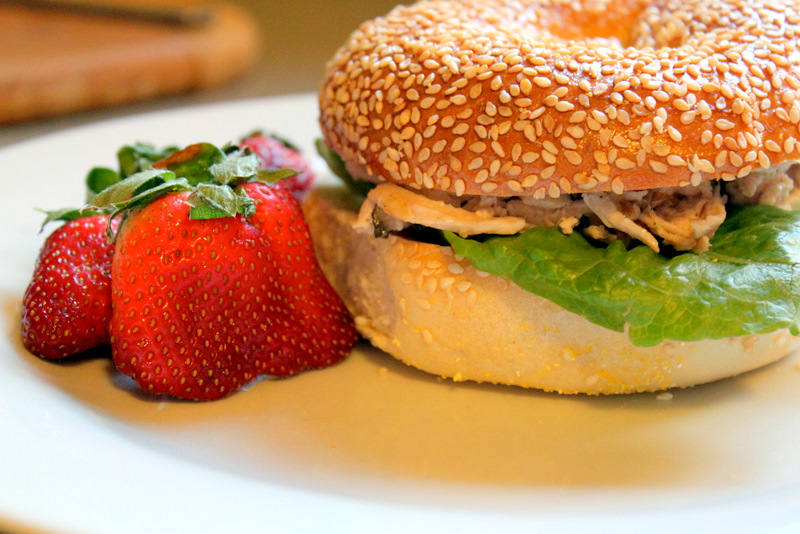
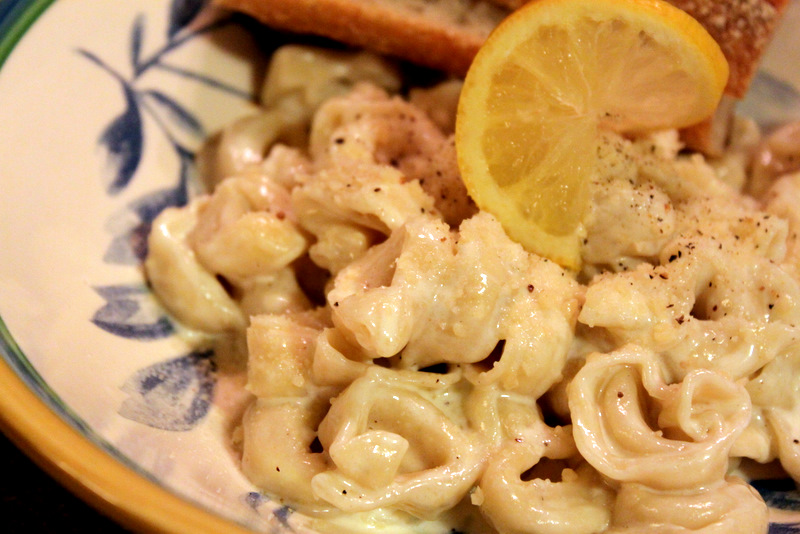
I’m on kind of a bagel kick right now, but traditionally this is served as a tea sandwich.  Serve the chicken salad in between two pieces of white or wheat bread, cut off the crusts and cut into four triangles.  This is a great dish if you are hosting a lunch or wedding/baby shower.  It can be made up to a day in advance and just chill in the refrigerator.

Walnut Chicken Salad

Ingredients:

2 roasted chicken breasts (bone-in) or a pre-cooked rotisserie chicken
1/2 cup chopped walnuts
3/4 cup good mayonnaise
Salt and pepper, to taste
Olive oil (for roasting chicken)

Directions:

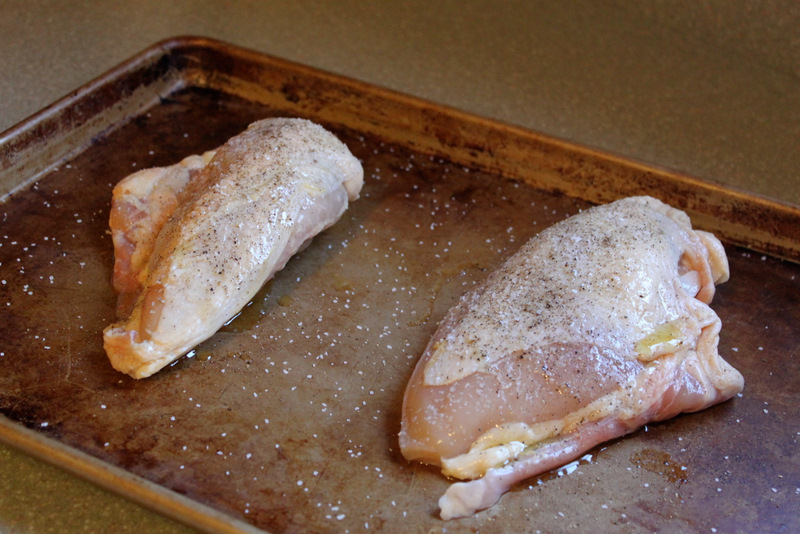
Drizzle chicken with olive oil and sprinkle liberally with salt and pepper.  Roast chicken breasts (bone-in) in the oven for 45 minutes at 400 degrees or until the juices run clear.  You can also use a store-bought rotisserie chicken for this dish and just remove the meat from the bone.

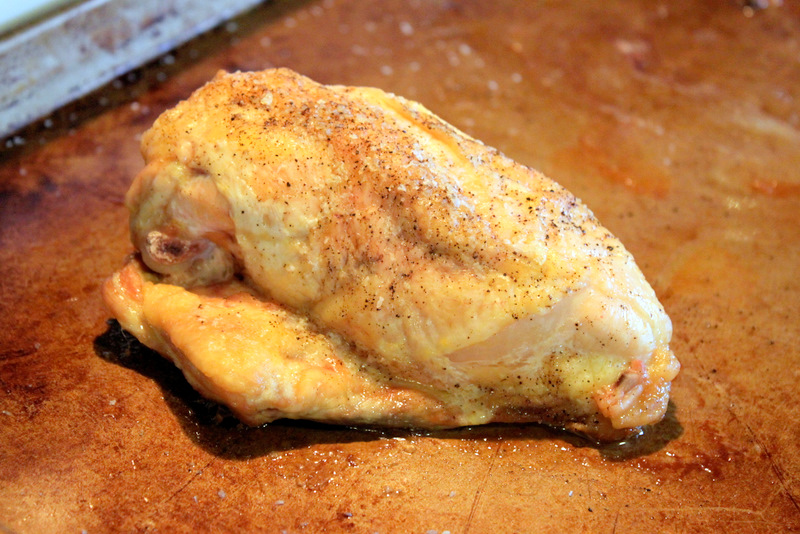
Once chicken is cooked through, remove the meat from the bone and discard the skin.  I find roasting the breasts with the bone-in gives the chicken a ton more flavor than just a regular chicken breast – it also keeps it moist.  Chop or shred the chicken breast.

Combine chicken breast meat, mayonnaise, walnuts and salt and pepper.  You do not want too much mayonnaise in this dish because it will over power the chicken, so just enough to keep it moist.  Add more if you think it needs it, but less is definitely more.  Taste to adjust for salt and pepper.  I like a lot of freshly cracked black pepper in my chicken salad.

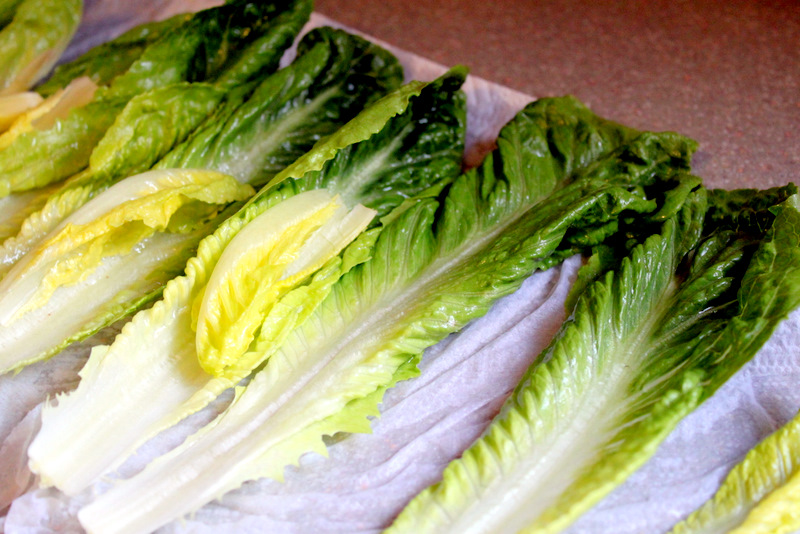
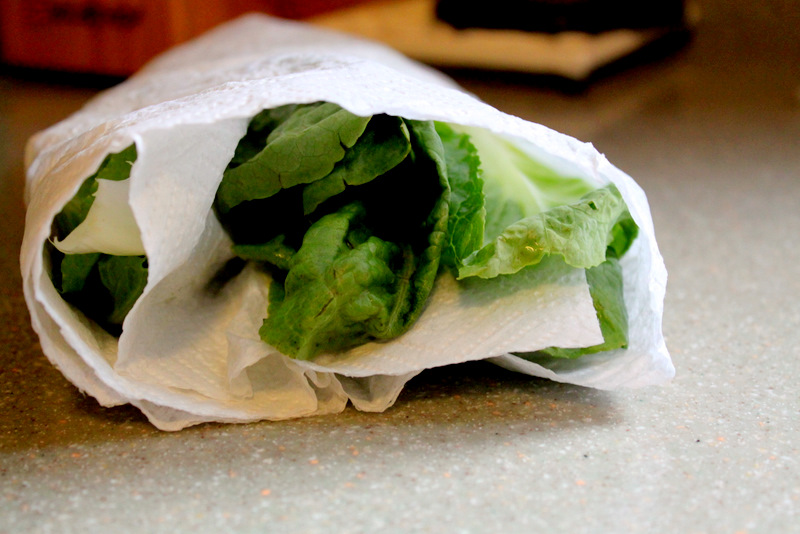
Serve as a tea sandwich (described above) or spread on your favorite bread with some fresh romaine lettuce.
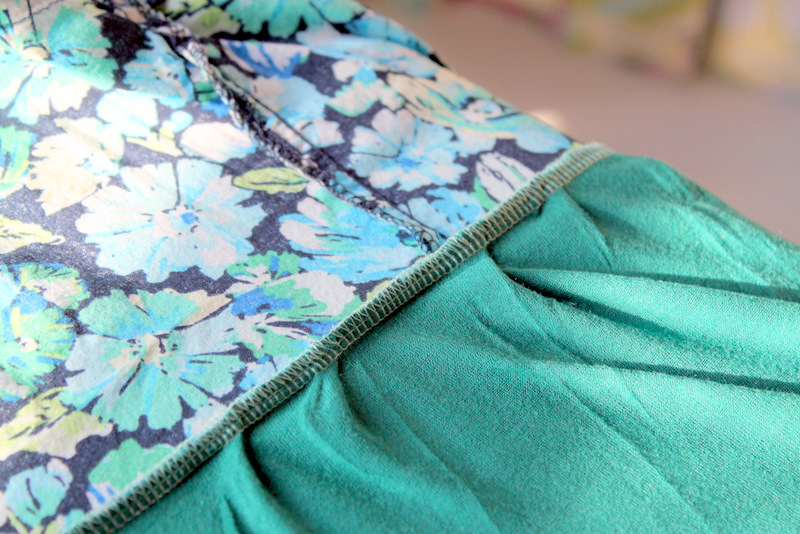
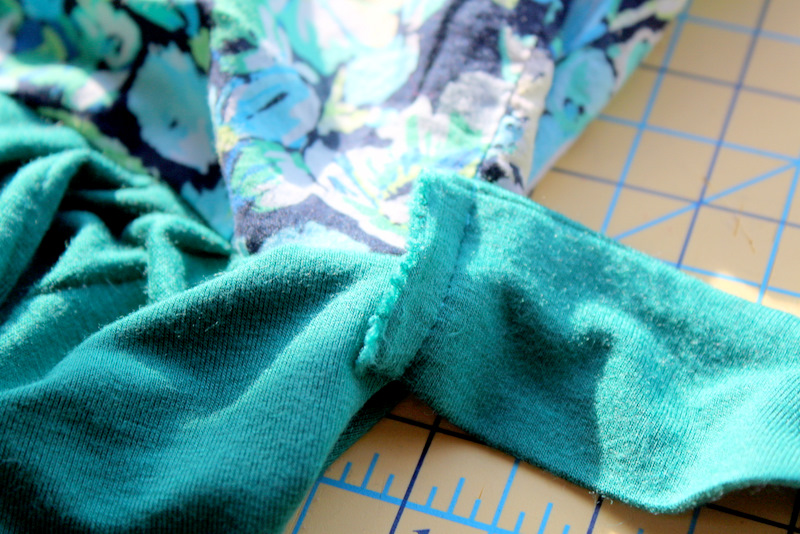
Add some fresh fruit and enjoy!

Shabby Apple Dress Winner

 And the winner of the Shabby Apple Dress is…………
Congratulations Kristy!!  I’m so excited for you – you’re right, with four littles I’m sure you and your hubby could use a night out on the town.  Enjoy!  Email me with your contact information at thecottagemama[at]gmail[dot]com so we can get your sizing and have this dress mailed out to you ASAP.  Thanks to everyone who entered!

The Modest Mom – Maternity Skirt Giveaway

We’re on a roll here with giveaways here on The Cottage Home and I’ve got another great one for all you expectant mama’s out there!  Today’s giveaway comes from a wonderful new blog sponsor, The Modest Mom.  Owner, Caroline, is giving away one of her handmade single-ruffle denim skirts to one very lucky reader.

Here’s a little bit about The Modest Mom in Caroline’s words:
“During each pregnancy I have tried to find modest, modern, feminine maternity skirts only to turn up empty handed.  I knew of many pregnant women who had the same problem as I did, and they didn’t have the ability or time to sew their own maternity clothes. There have also been many women who have had a need for long modest skirts.The Modest Mom was created after recognizing this need. We are devoted to providing you fashionable yet modest clothing.”

Caroline sent me a custom made version of the pink floral skirt above and I love it!  It is incredibly comfortable and really well made.  She has professionally finished seams and great attention to detail.  The tummy panel is so comfy that I am sure it’s going to last me throughout this entire pregnancy.

Here are the two different styles of tummy panels that you have to choose from when placing your order:

Most of her skirts can be made from a bunch of different fabrics so if you see a style that you like, check out her fabric selection page to see what fabrics she currently has available.

Today you have the opportunity to win a single ruffle denim skirt from The Modest Mom.  Enter to win for yourself or enter to win for a friend or family member.  You will be able to select your custom size if you are the winner.

Here’s how to enter The Modest Mom giveaway (one entry per person):
-Visit The Modest Mom and tell us what style of maternity skirt is your favorite.

Giveaway is open to US residents only and will be open through Monday, April 11 at midnight (CST).

Good luck and congratulations to all you expectant mama’s out there!

Empire Waist Dress – Comfy Sews Vs. Cozy Knits

Shannon from Luvinthemommyhood invited me to participate in her latest “Versus” series – Comfy Sews vs. Cozy Knits.  Guess which side of the ring I’m on?………ding, ding, ding……you guessed it, Comfy Sews.  I love Shannon and her blog so I’m thrilled she has chosen to include me again!  You might remember my Shawl Collar Sweater tutorial that was included in the last round.

For this challenge I decided to create an easy Empire Waist Dress.  As most of you know, I am pregnant with baby #3 and I wanted to create something super-comfy to wear throughout the summer during this pregnancy.  I made this dress from a shirt that was a little too boxy for my body and some additional jersey knit yardage.  The dress will take you only about an hour to complete and is great practice for sewing with knits.

This dress could certainly be made the exact same way for a non-pregnant person and would be just as cute!  So let’s jump in the ring and let the battle begin……….

Empire Waist Dress
Maternity and Non-Maternity
Supplies:
1 shirt
1-1.5 yards jersey knit fabric (60 inches wide)
Scissors
Sewing machine
Iron and ironing board
Ball-point sewing needle (for sewing with knits)
Directions:
Grab a shirt.  I chose this one because I liked the print but I always felt like it was a little boxy in the waist area.  You could certainly use a simple t-shirt or any shirt that you are ready to transform into a dress.
Cut off the bottom of the shirt.  I left the top of my shirt 13.5″ long from the shoulder to under the bust line.  Try on your shirt to figure out how much of the bottom you would like to take off.  Make sure to allow for a 1/2″ – 1″ seam allowance for attaching the skirt piece.
Here’s the top of my shirt after it had been cut.  There were also a couple of fabric ties at the top that I decided to remove as well.
And what will I be doing with the bottom of the shirt?  Well, that is going to be turned into a skirt for one of the girls.  I like a little cheesy “mommy and me”, so I think it will be just darling on Miss Savannah or Miss Matilda.
Since this shirt had buttons down the front I decided to sew the button area shut.  I used my zipper foot to make this happen.  This way I don’t have to worry about any buttons coming undone.
Now it’s time to cut your knit fabric.  I chose a jersey knit because it is SO soft, super-stretchy and very light-weight.  If you are making this as a maternity dress I would highly recommend sticking with jersey because of the amazing stretch.  If you are making this non-maternity, then you could still use a jersey knit, knit interlock or you could even use a woven cotton if your top is made from t-shirt material.
I cut the skirt portion of the dress 27″ long x 60″ wide.  I am about 5’5″ and this fell right below the knee.  Cut the skirt any length that you like.
Cut 2 pieces for the fabric ties.  These were cut 32″ long x 4″ wide.
When sewing with knits you will need to change out your needle to a ball-point needle – these are specially designed for sewing with stretchy knits.  Fold the ties in half lengthwise and sew one short end and down the long end.  You should have one short end still open.
Clip your corners, turn right-side out and press with a hot iron.
For the skirt, fold in half, right-sides together and sew down the short side – in my case this was 27″.  I used my serger because I like using it for knits, but a regular sewing machine would work just as well.  This seam will go to the back of the dress.  Now run a gathering stitch around the top of the skirt.  Set your sewing machine to the longest stitch length (5.0, in my case) and sew all the way around the top making sure not to back-stitch at the beginning or the end.
Gather the top of the skirt by pulling on the bobbin thread.  Gather the skirt until it is the same width as the bottom of the shirt piece.  Place the skirt and the top, right-sides together and sew in place.
Press the seam between the skirt and the top upward.  Again, I used my serger, but that was just because it was easier for me and finishes very nicely.
Now it’s time to attach the fabric ties.  Normally I would place these in a seam, but that didn’t work out for this dress.  Stitch the ties on either side of the dress.  If you are going to have the dress tie in front then you want the raw edge pointing towards the front so that when it ties it will be covered up.
Here’s the fabric tie on the side.  You will not see the raw edge when you tie the bow in front.
I decided to leave the bottom of the dress with a raw edge because I find jersey knit doesn’t fray.  If you would prefer a more finished look definitely sew a hem, but make sure you allow for that additional length when cutting the skirt piece.
This dress is incredibly comfortable and will definitely grow with me through out this pregnancy.  It’s still a bit chilly here in Chicago so I paired it with a cardigan and a pair of leggings.  I’m so happy to have breathed a new life into this shirt.
Maternity dresses can be pretty expensive, so this dress was a bargain at $3.00 total for the jersey knit (which was found in the 50% clearance section at Joann’s).  So, what do you think?  Have any shirts that you might transform into an Empire Waist Dress?
Thanks again, Shannon, for inviting me into the mommyhood – you rock, girl!  This is just week one of Comfy Sews vs. Cozy Knits, so make sure you guys all visit Shannon’s blog and check out some of the other fabulous projects from some seriously talented bloggers.

Spring Issue Delish Magazine – DIY Fabric Covered Photo Mats

The new spring issue of Delish Magazine was just released this afternoon!  In case you aren’t familiar, Delish is a free online women’s magazine filled with tons of great information, tips, articles, recipes, ect.  In this quarters issue I am sharing an easy tutorial for Fabric Covered Photo Mats.
There are lots of fun, interesting articles in the spring issue, including some fabulous recipes and a great interview with fabric designer, Kate Spain.  Head over to Delish and check it out!

Fairytale Frocks and Lollipops – Pattern Giveaway Winner(s)

And the winners of the Fairytale Frocks and Lollipops pattern giveway are the following two lucky ladies………

Congratulations to Honour and Cheri!  You will each be receiving a pattern of your choice from our fabulous blog sponsor, Fairytale Frocks and Lollipops!  Please email thecottagemama [at] gmail [dot] com with your contact information.  Thanks so much to all who entered!  
There are more pattern giveaways coming up in the next several weeks from some wonderful new pattern designers and sponsors.  Stay tuned!

Homekeeping: Storing Lettuce

Recently I did some major cleaning in my kitchen.  The girls (Savannah and Matilda) and I scrubbed the front on all of our kitchen cabinets.  I’m sure no one would really notice the difference if you came to my kitchen, but boy did it feel good.  Not to mention the fact that Savannah said it was “the best day ever”……..the girl loves to clean and had a blast playing with sponges and soapy water.

That same day I decided to get my refrigerator in order.  I removed all of the shelves and drawers and washed them with hot, soapy water in the sink.  Then I scrubbed the sides of the fridge and now it looks as good as new!

It’s amazing how good it can make me feel to take a little time to improve the simple things around the home.  So, this might be totally random, but as I was in my organization, cleaning mode last week.  I made sure to process my produce immediately and properly when I got home from the market.

How do you store your lettuce?  Well, my mom taught me to store it this way along time ago and it makes the lettuce last FOREVER!  Now, I’ll be honest with you when I say, that sometimes I’m lazy when I get home from the store and I don’t wash my lettuce and store it right away and I end up regretting it every time.  The lettuce goes bad before I’ve even eaten half of it.  Maybe this is how you store your lettuce already, but if not, I thought I would share this little tip with you.

Homekeeping: Storing Lettuce

Remove your lettuce from the bag (this is organic romaine from Trader Joe’s).  Separate the pieces and rinse them in the sink.  Spread out some paper towels.  Lay lettuce down on the paper towels (as see above).  Blot to dry with a clean kitchen towel.

Roll up the lettuce in the paper towels.  You want the paper towels to still have some moisture in them (this is what keeps the lettuce fresh).

Place your wrapped up lettuce into a Ziploc bag and store in the refrigerator.  Your lettuce will now stay fresh for several weeks.  And it is all washed and clean so whenever you want to grab a piece for a sandwich or make a fresh salad, you are all set and ready to go! 

Tortellini with Lemon Cream Sauce

Sometimes the most delicious dishes only contain a few ingredients.  My tortellini with lemon cream sauce is one of those.  So simple, yet indulgently delicious.  
Tortellini with Lemon Cream Sauce
Ingredients:
1 package fresh cheese tortellini (8 oz.)
3 tablespoons butter
1.5 cups heavy cream

1/4 cup grated Parmesan cheese
1 lemon
Salt and pepper, to taste

Directions:
Begin cooking fresh tortellini according to package directions.

In a large pan, melt butter over medium heat.  Add in heavy cream and bring to a boil.  Once you’ve reached a boil, reduce the heat to medium.  Add in the juice of one lemon, Parmesan cheese, salt and pepper.  Taste the sauce to check for salt and pepper.  I like a lot of pepper in my cream sauce and if it doesn’t taste savory enough, it probably needs more salt.

Allow the sauce to bubble lightly until it reaches your desired consistency.  Once you are happy with the thickness of your sauce, reduce the heat to low until your tortellini is ready.

Drain tortellini and add to the large saucepan.  Toss to coat.  Serve with a sprinkling of Parmesan cheese, freshly grated black pepper and a slice of lemon.

Enjoy!

New Sponsor and Pattern Giveaway – Fairytale Frocks & Lollipops

I am so excited about the newest sponsor of The Cottage Home blog –
This online shop is full of amazing sewing patterns, fabrics and notions.  Today, owner Terri, is giving away one sewing pattern of your choice from her amazing shop for TWO readers.  
Click HERE to read more about this exclusive giveaway for The Cottage Home readers and enter to win.  Also, find out why I love Fairytale Frocks & Lollipops and why you will too!

Burlap Covered Lamp Shade Tutorial

I’m definitely in full-on nesting mode now and have been tackling all sorts of home improvement projects. I have been working on bringing more texture into our home lately.  While I love bright, fresh fabrics for little girls clothing, I much prefer a warm, earthy palette for my home decor.

I love looking through the Potterybarn and Ballard Designs catelogues for ideas and inspiration.  Both of these stores are a little out of my budget these days, but I think they do such a wonderful job of putting rooms together with color, texture and natural elements.

 image via Ballard Designs

I have been eying these burlap covered lamp shades in the Ballard Designs catelogue lately, but at $35 – $50 per shade, I just can’t justify the splurge.  So what is a girl to do?  How about a DIY version for only $1.50 per shade?  Now, that’s more like it!

 Burlap Covered Lamp Shade Tutorial
Materials:
1 solid color lamp shade (any size)
1-2 yards burlap (more yardage for bigger shades)
Spray adhesive
Heat n’ Bond
Glue gun
Iron

Clothes pins
Scissors

Directions:

Grab your lamp shade.  This was an IKEA shade that I’ve had for quite some time.  I covered two of these and one much larger shade.  I like the shape of this shade, but I never loved the fact that the light looked so white coming through it.  I knew the burlap would help fix that problem and warm it right up.

Make sure you choose a solid color shade.  Any patterns will show through the burlap and the shade will lose it’s earthy look.

I purchased my burlap at my local Joann’s.  It was $3.99 per yard, but I had a 50% off coupon, plus an additional 25% off coupon – got love coupons for fabric!

Turn your lamp shade on its side and trace it (by rolling it along your burlap).  Leave an inch or two allowance on the top and bottom.  It’s hard to see my markings in the picture above, but I just used a pink highlighter.

Cut out your pattern.  Most angled shades will look like the shape above.  If you are using a drum shade (meaning round), you will have a less curved pattern.

Spray your entire lamp shade with spray adhesive.  Do this outside since the fumes can be a little overwhelming.  You can find spray adhesive in most craft stores and hardware stores.  Wrap your burlap around the shade, smoothing all the bumps as you go.

Cut off any excess burlap from the top and the bottom of the shade.  The burlap should not extend past the top or bottom of the shade.

Now to make the finished edge or binding.  Measure around the top and the bottom of the shade.  You will want a long enough length of burlap to cover these two measurements plus and extra inch or so.  Cut the burlap 2 inches wide.  Grab your Heat n Bond for the next step.

Iron the Heat n Bond (paper side up) down the middle of your long burlap strip.  Once it has cooled remove the paper backing.

Next you will fold in both sides and press.  This will secure the two raw edges of the burlap.  Do this all the way down the entire strip.

Heat up your glue gun.  Turn the outside raw edge of the burlap under and glue in place down the back of the shade.

Take the binding and hot glue it to the top and bottom of the shade.  This will hide any raw edges.  Trim any excess burlap that might be poking above or below the binding.

I used clothes pins to hold the binding in place.  Because of the angled shape of this shade I really had to work to get the binding to lay flat since I did not cut it on the bias.  This step will be a lot easier with a round drum shade.  The clothes pins really helped me here, so I highly recommend using them during this step.  Once the glue has cooled, remove clothes pins.

When your lamp shade is complete, place it on your lamp base and enjoy this beautiful, natural look!  This lamp base is also one I have had for many years from IKEA.

I considered using bias tape for binding the top and the bottom of the lamp shade.  You certainly could give that a try if you want to skip the step of making your own burlap binding.  I think brown, cream or natural would look really nice.  Or if you are feeling a little wild try blue, green or red.

Here’s the extra-large shade that I covered for the lamp in our playroom.  This shade was a hand-me-down and had a little hole in it that drove me nuts.  But the size was so wonderful, that I couldn’t bare to part with it.  With the burlap on the shade, you would never know it ever had a hole.

Three lamp shades for a total of $4.00 – sure beats three shades for $105 – $150, don’t you think?  Granted they would be a little more if you don’t have all the supplies (I only had to buy the burlap), but still, I think it was well-worth taking the time for a little DIY!