Georgia Vintage Dress Pattern from The Cottage Mama: Now Available!

Can I tell you how hard it is to keep a secret from you all? It’s the hardest because I just love, love, love sharing with you. I have been working really hard these last several months getting my next collection of sewing patterns ready to go and today I am thrilled to share my first of four new patterns with you! I will be releasing the four patterns over the next several weeks in PDF form and they will all be available in printed, hardcopy form by the end of June.
This first pattern, the Georgia Vintage Dress, is probably the pattern I am most proud of creating since I started designing sewing patterns. I hope you love it as much as I do!
The Georgia Vintage Dress
SIZE 6 MONTH – 10 YEARS 
DESCRIPTION: The Georgia Vintage Dress was inspired by a favorite dress worn by my mother in the late 1950’s. It is a dress with many possibilities and options, yet has timeless classic appeal. View A, the Georgia Vintage Dress, features a piped bib front bodice finished with decorative buttons and sweet pointed collar. The skirt is double layered for extra fullness and has a waist sash that is gathered on the sides for a large bow tied in the back of the dress. Dress closes with buttons on the bodice back. View B is the Georgia Vintage Dress without the bib front. View C, features the Georgia Vintage Dress without the ruffle sleeve and View D, mirrors View A, yet features a single layer skirt. There are so many ways to use this pattern and you will have many opportunities to make it your own.

All design variations have a fully lined bodice and include French seams in the skirt for total comfort for your little one. This is great pattern for confident beginner sewers and offers many ways to get creative with your design!


There are four official variations included in the pattern, but there are so many possibilities! You can mix and match the different pieces to create a truly unique, one-of-a-kind look.


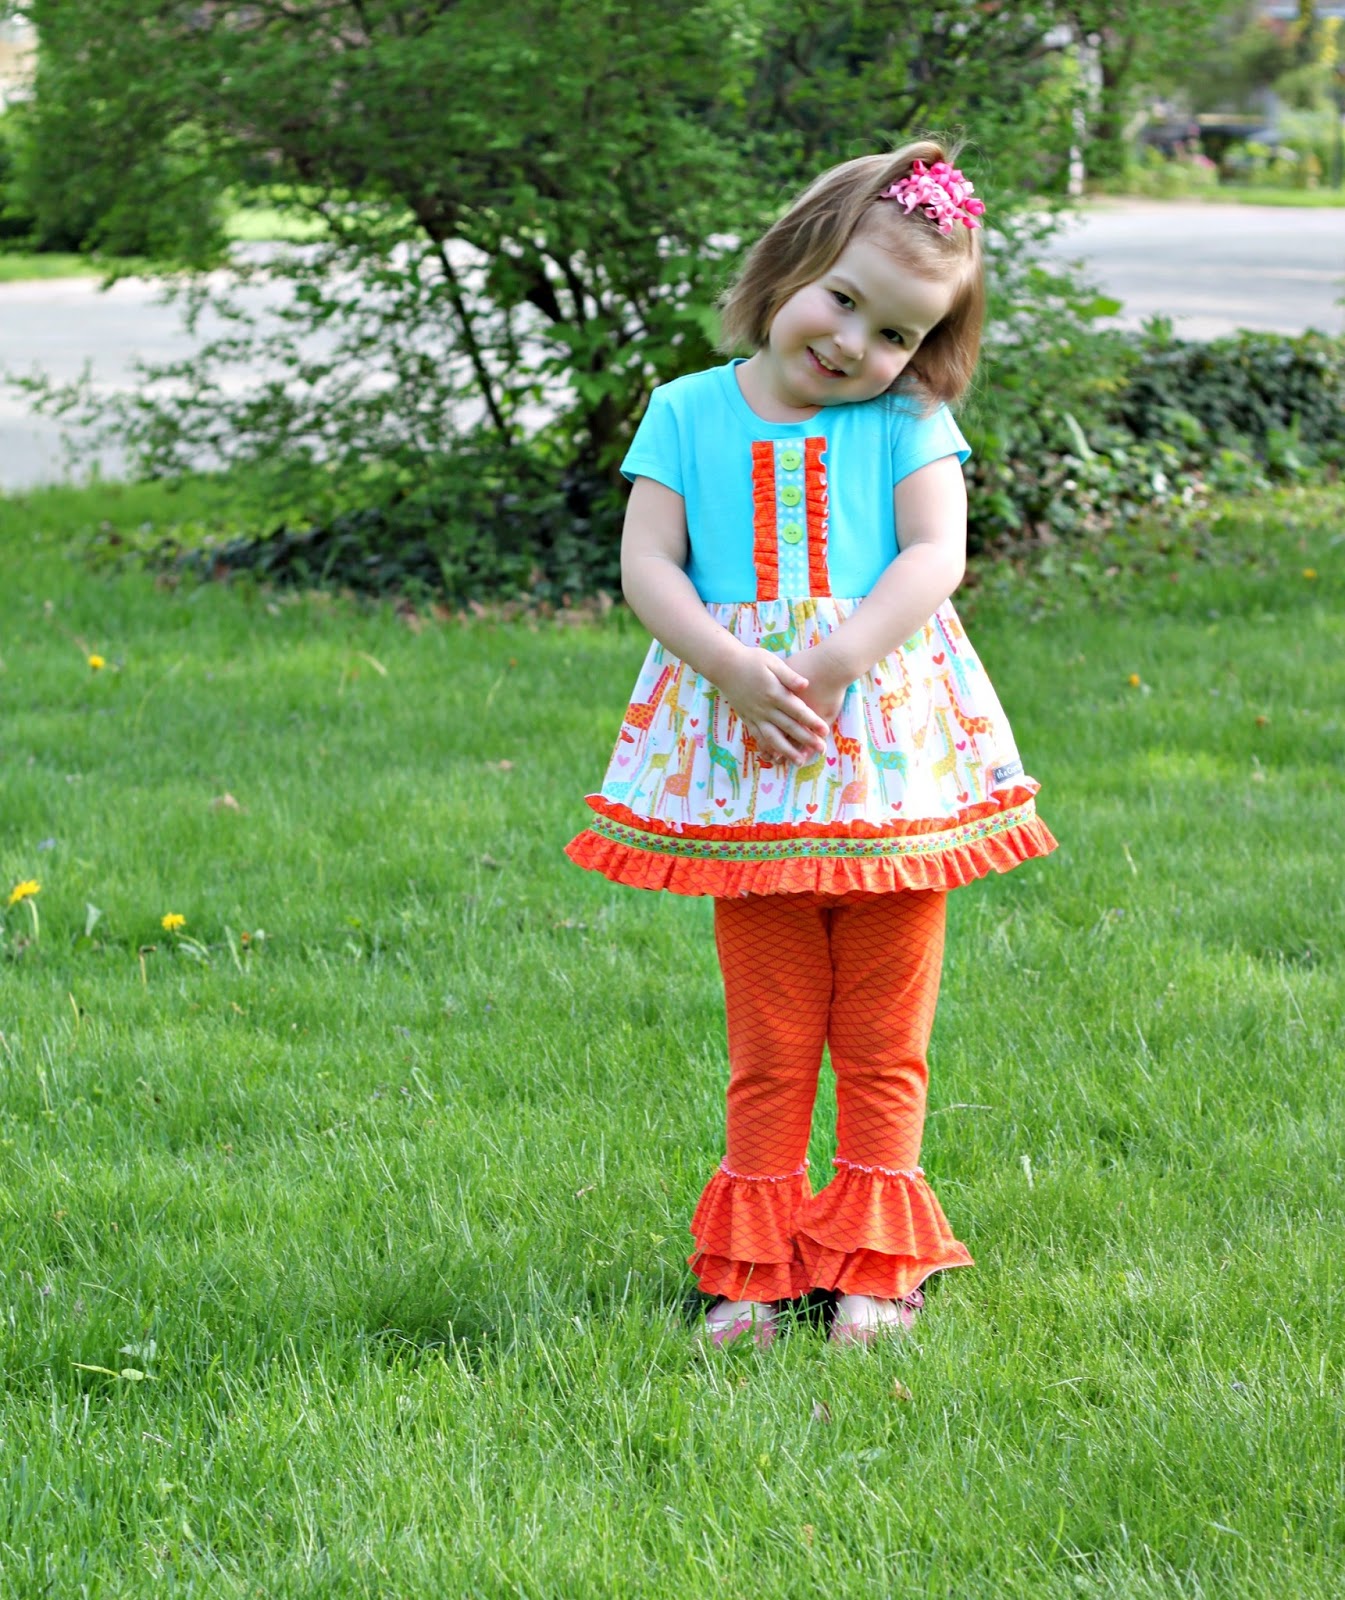
This is my little Matilda modeling the Georgia Vintage Dress, View A in Size 4T. When I photographed her in this dress, she just felt so special and pretty. I could tell by her demeanor. It was a sweet time for us. 


View A, B and D all feature a sweet flutter sleeve. And View C is a sleeveless option that is perfect for the older little ladies or those that aren’t a big fan of ruffles.


The front bib detail is trimmed out with piping on the sides and three sweet buttons down the front. You can choose to use any trim you would like in place of the piping or eliminate the trim completely. I can’t wait to show you some of the pattern testers versions with different trim options. The sweet, pointed peter-pan collar really adds to the timeless, classic appeal of this dress.
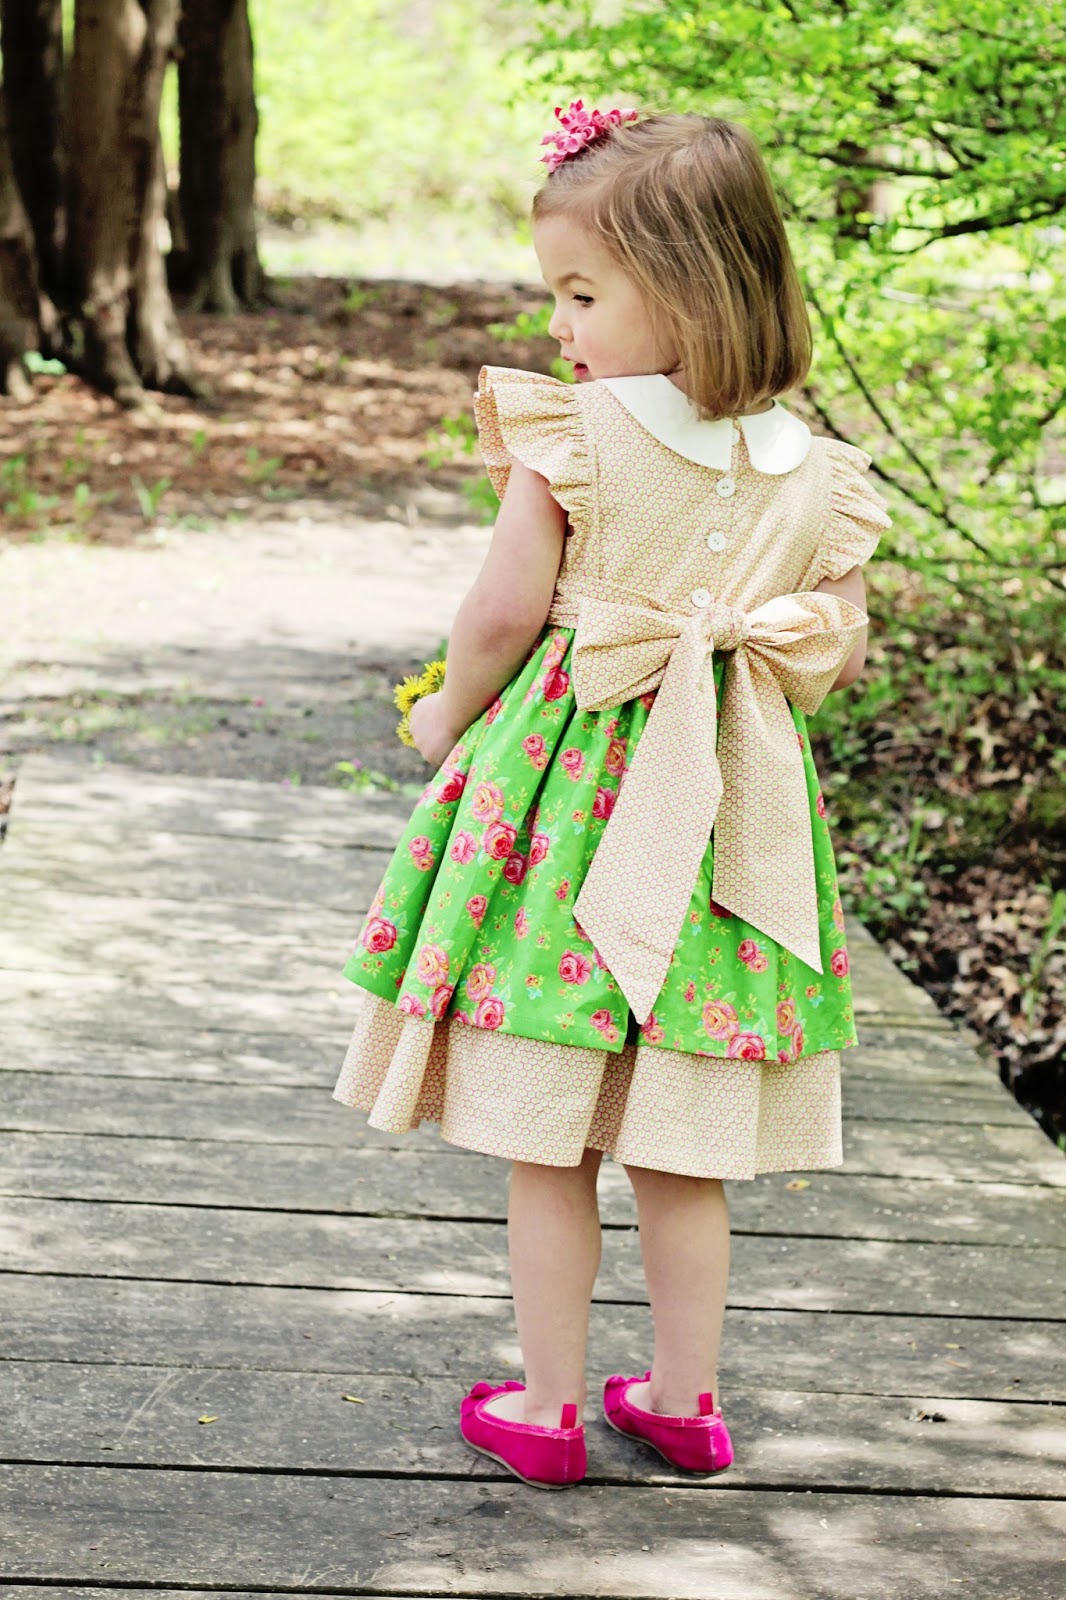
All design variations feature a large bow that is tied in the back of the dress. It is gathered at the sides and makes this dress as sweet in the back as it is in the front.

The Georgia Vintage Dress Pattern is now available for sale in PDF form. If you aren’t familiar with PDF patterns, they are patterns that you print on your home computer, tape the pieces together to form the full pattern sheet. The beauty of PDF patterns is that they are available for instant download, so no need to wait to get sewing and you can print them out time and time again (no tracing)! Plus they are a little less expensive then the printed version and you avoid paying shipping. The four patterns that are releasing over the next several weeks are also formatted for our international customers to print on A4 paper. Like I said above, the patterns will be available for sale in print at the end of June, so no worries for our printed paper pattern fans!
I have worked for weeks with an amazing group of pattern testers perfecting this pattern and throughout this next week I will be showing you some of their incredible Georgia Vintage Dress creations. I am always in awe of the talent that surrounds us here in the online sewing community and I think you will definitely be inspired by some of their adorable little dresses.
If you would like to purchase a PDF version of the Georgia Vintage Dress Pattern, you can find it HERE.
The Cottage Mama’s Sewing Basket: Tube Turners

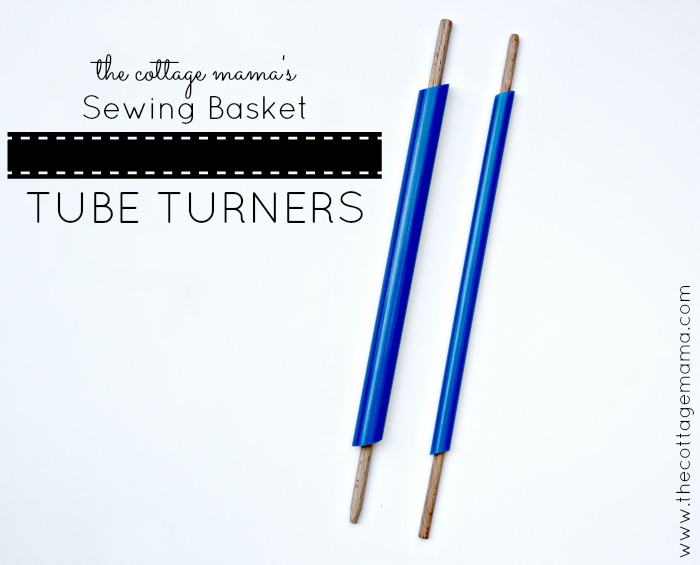
Today we are back with another fun, little tool from The Cottage Mama’s Sewing Basket. These tube turners may look like a simple tool, but they will change your life. And if you don’t have them in your sewing basket, I’m going to recommend you pick up a set.

What does this tool do? Tube turners are kind of like they sound. They make it easy to turn tubes of fabric right side out. Have you ever been working on a long sash for a dress or straps for a tote bag and found it took forever to turn the fabric right side out? Well, these little tools make such fast work of this. Here’s how…..

Simply place the blue plastic tube down inside your tube of fabric (or sash) that is currently turned wrong side out. Take the wooden dowel and push it up through the finished end of the fabric and up through the blue plastic tube.

Continue pushing the wooden dowel up through the plastic tube until the fabric appears at the top of the plastic tube and is right side out. At that point you can remove the wooden dowel and just continue to pull the fabric out through the top of the plastic tube.

And there you have it…….a quick turn tube turner! Yes, you can most certainly turn tubes and sashes with something like a chopstick, but let me tell you……these are even easier and worth the small investment. You can find Quick Turn Tube Turners in the notions section of your local fabric and sewing store. They generally come in a pack of three with different sizes. I have the Dritz brand, but there may be other brands on the market as well.

There is also another handy-dandy tool used for turning completely open tubes (with no finished end), but we’ll save that one for another installment of The Cottage Mama’s Sewing Basket.

*I was not compensated in any way promoting the products and tools found in The Cottage Mama’s Sewing Basket. These are all tools, notions and things that I love and use.

Giraffe Love Top and Leggings

I have been so busy around here I can hardly see straight. I have four new sewing patterns that are under going pattern testing right now getting ready to release next month. It’s very fun and exciting; however, it puts sewing for my own kids on the back burner for the time being…..or so it should.

I have had this giraffe fabric for about a month now. I ordered it for Miss Matilda since giraffes are her favorite animal. She was so thrilled when it arrived and has been wanting an outfit made out of it ever since she saw it. So, as I’ve been busily working on my new patterns, this fabric has been starring at me just begging to be made into something for my little lady.

So a couple days ago, I couldn’t take it anymore……I just had to make this outfit for Matilda. Do you ever get an idea in your head that you just have to do right then and there? Well, that’s where I was……I knew I would be thinking about Matilda’s giraffe outfit forever until it was made. So I took a break from my patterns and whipped up this little outfit for Miss M in an afternoon. And I’m so glad I did…..she loves it!

The top is very simple. It’s just a t-shirt cut off with fabric added to the bottom. I picked up a bunch of shirts on clearance last year for $2.00 each that have just been waiting for me to embellish them. I decided to use some knit and woven cotton for this outfit. My girls are all about comfort these days so I can see myself incorporating more knits into my sewing as they get older.

The skirt on the top was made from a woven quilting cotton, ‘Giraffe Love‘ by Michael Miller fabrics. I made a ruffle around the bottom hem out of orange stretch knit (Heaven and Helsinki by Patty Young for Michael Miller Fabrics) and added woven ribbon trim on top (from Renaissance Ribbons).

The great thing about knit is that it doesn’t fray, so you can skip finishing the edges if you are going for a more casual look. I used the Go-To Leggings Pattern with my own ruffle legging tutorial found here. And I also added a yoga waistband because I thought that would be more comfortable. Again, the knit fabric I used has a good amount of stretch to it and is ‘Heaven and Helsinki‘ by Patty Young for Michael Miller Fabrics.

I’m really loving this outfit. It’s perfect for play, but still cute and unique. And the most important thing is that Matilda loves it!
And I’ll leave you with a picture of my little giraffe lover.
Have a great day!

Goat Cheese & Mozzarella Tomato Toast Recipe

I am a savory kind of girl. What about you? When it comes to breakfast, I much prefer something on the salty side rather than the sweet. This easy little breakfast or lunch is perfect for when you want something nice and satisfying to get your day started off right!

Goat Cheese and Mozzarella Tomato Toast
Serves 2

Ingredients:
4 slices multi-grain bread (good quality, grainy bread)
4 vine-ripened tomatoes
1/2 -3/4 cup crumbled goat cheese
3/4 cup shredded mozzarella (more, if you like)
Extra virgin olive oil, for drizzling
Garlic salt and pepper, to taste
Directions:
Preheat your oven to 400 degrees.
Lay out your multi-grain bread on a cook sheet. Try to purchase a good, quality bread in the bakery section of your grocery store…..that makes a big difference. Drizzle your bread with extra virgin olive oil.
Slice four tomatoes. Place tomato slices on top of bread. There should be one full tomato per slice of bread. Season with garlic salt and freshly ground black pepper.
Sprinkle mozzarella cheese on top of tomatoes and then goat cheese. You can use more or less cheese depending on how much you like. Season again with garlic salt and pepper and another little drizzle of extra virgin olive oil.
Place in the oven for 10 – 15 minutes until bread is crunchy and the cheese is melty and bubbly. Once you’ve taken your toast out of the oven, feel free to add any fresh herbs on top.


Serve two slices per person for a hearty breakfast or lunch or one slice per person if you are serving this with eggs for breakfast or a salad for lunch.
Enjoy!

Happy Mother’s Day

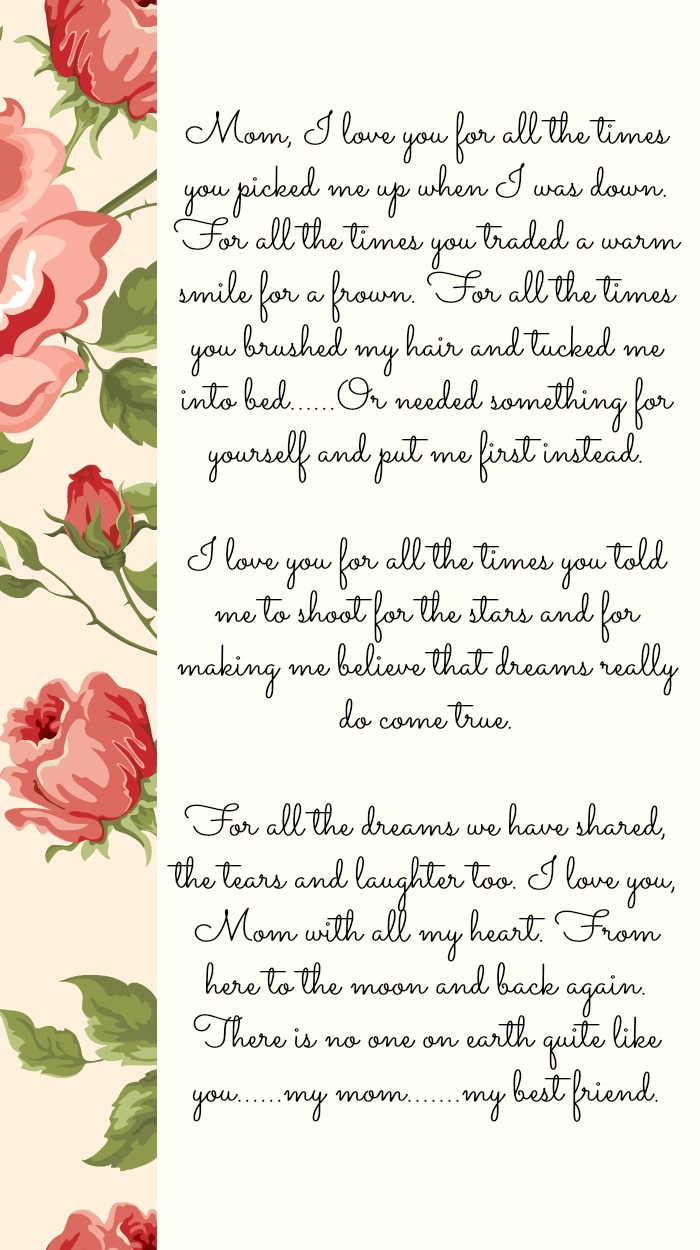
I wanted to wish you all a very Happy Mother’s Day and leave a special little note for the most amazing woman in my life, my mom.

I hope you all have a beautiful, amazing and fantastic day.
The blessing of children truly is one of the greatest gifts on earth.
Happy Mother’s Day!

The Start of Spring…….and $100 Home Depot Gift Card

It’s finally Spring here in Chicago. It felt like winter was going to last forever, but we have finally thawed out and I think the freezing weather is gone for good (or at least until next winter).

I love the beginning of spring, don’t you? I get all these great ideas of things I want to do in the yard, flowers I want to plant, landscaping to be done. I don’t usually get around to all of it, but I always make time for planting flowers on our porch.

Several weeks back I was asked if I would like to try some new Premium Plants from Miracle-Gro that were being sold exclusively in Chicago Home Depot’s. Well, they didn’t have to ask me twice for that one because I was just about ready to go buy my flowers for spring planting anyway.

I always use Miracle-Gro potting mix for my window boxes and pots on the porch because I really do see a difference in the flowers in comparison to the years where I just used the regular stuff. These Miracle-Gro Premium Plants are supposed to have extra nutrients in the soil and be set up for a great growing season. And if I’m really honest, I always seem to do great with my gardening those first few months or so, but then the weather gets really hot and the mosquitos come out and I start to lose steam……so I can use all the help I can get. And since they have a 3-month money back guarantee……I’d say I’m good to go through mid-August.

So guess what I’ll be doing this Mother’s Day weekend? Planting my new flowers on our front porch. I’m excited to see what these plants do this season. I’ll have to give you an update later into the summer. Will they still be going strong? I’m going to guess so, since Miracle-Gro always seems to do the trick, but only time will tell…….

How would you like to go buy yourself some Miracle-Gro Premium Plants (if you’re in Chicago) or something fun for spring?
How about I give you $100 Home Depot Gift Card so you can go buy some of your very own? 
All I need you to do is leave me a comment and let me know what is your favorite thing to plant in your garden each year and what region of the country you live. 
There will be one winner selected and the giveaway is open until Sunday, May 12, 2013 at midnight (CST).

Giant Fabric Match Up Giveaway ~ Win 24 Yards of Fabric!

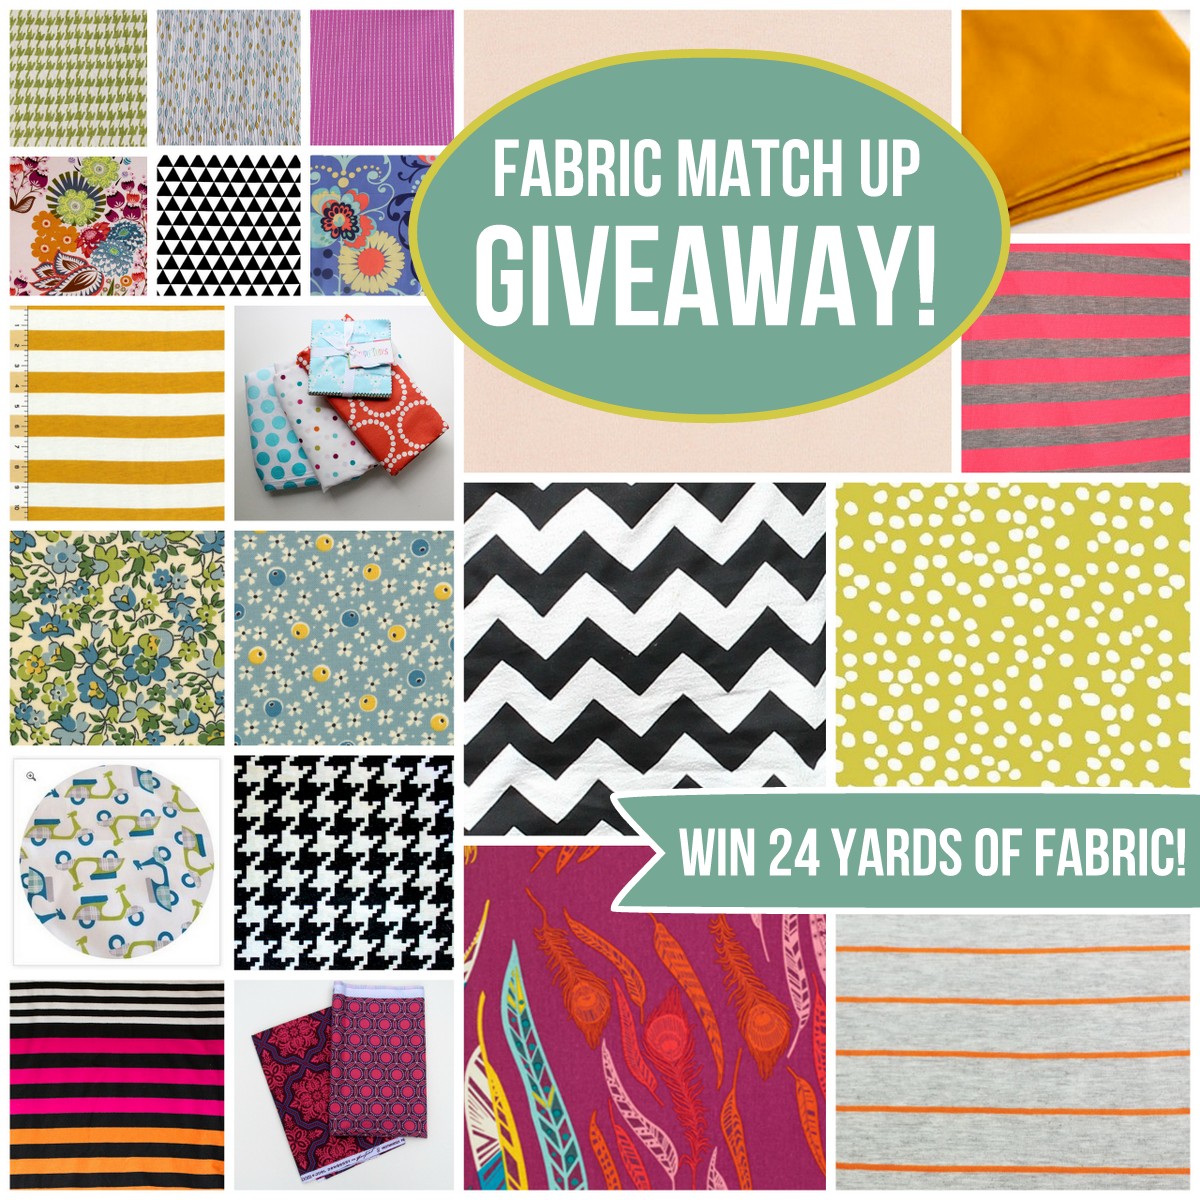
fabric match up giveaway- win 24 yards of fabric from your favorite bloggers!

I am so excited about today’s giveaway that I can hardly contain myself!

Have you ever wished that one of your favorite sewing blogger’s would go fabric shopping for you?
Or seen a project on a blog and thought, “Oh, I NEED that fabric!” If so, today is your lucky day!

Eighteen sewing bloggers picked out a yard (or two!) of a fabric from their stash and we’re giving them ALL away today to one lucky winner! 

To win this amazing stash of fabric loveliness, just match the fabric swatch to the blogger (*hint* – most of us have used the fabric we chose in a recent project, so our recent posts are your fast track to fabric matching success). The first person to correctly match all of the swatches will receive ALL of the fabric shown!

So what do you think? Want to play?
 

 fabric matching giveaway- win 24 yards of fabric from your favorite sewing bloggers! 

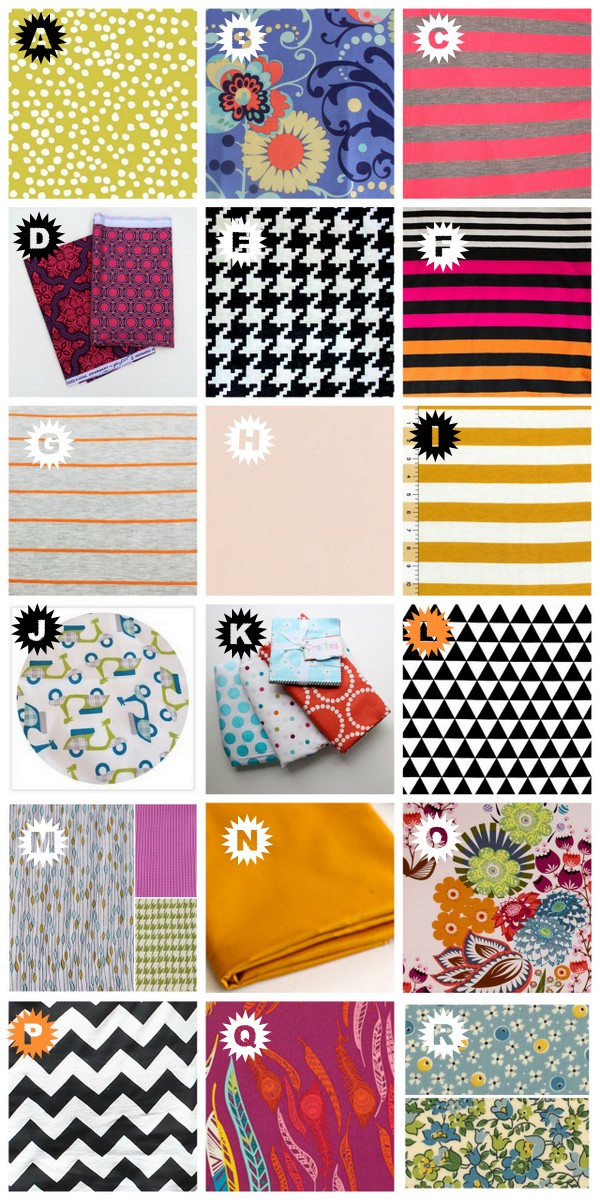
A- 1.5 yards, Mini Dot in Sunspray by Lotta Jansdotter
B- 1 yard, Paradise Garden in Periwinkle by Amy Butler
C- Florescent Pink & Gray Striped Jersey Knit
D- 1/2 yard Heirloom Tile Flourish in Garnet and 1/2 yard Heirloom Opal in Fuchsia both by Joel Dewberry
E- 1 yard, Houndstooth in black by Michael Miller
F- Pink/Orange Stripe knit
G- 1 yard, Orange and Light Heather Gray Stripe Cotton Jersey Knit
H- 1 yard, Light pink linen
I- 1 yard, Mustard and Ivory Stripe by Girl Charlee
J- 1 yard, Rally Cream/Grass by Dan Stiles
K- 1 yard Riley Blake Ombre Dots in Aqua, 1 yard Target Polka Dot Sheet Fabric, 1 yard Lizzy House Pearl Bracelet in Persimmon and Michael Miller Happy Tones Charm Pack,
L- 1 yard, Remix Triangles B/W by Ann Kelle
M- 1 Yard, Novella Rain Rayon in Aqua by Valori Wells, 1 yard, Lush Running Stitch in Purple by Patty Young, and 1 yard, Porcelain Tile Garden Wall in Olive
N- 1 yard, Mustard cotton sateen
O- 1 yard, Summer Totem in Grapefruit by Anna Maria Horner
P- 1 yard, Black and white chevron
Q- 1 yard, Parenthetical in Berry by Anna Maria Horner
R- 2 yards (1 yard each), ABC 123 by American Jane for Moda
  Loading…

Here is the list of bloggers (just in case you have a little research to do):

pattern bundle giveaway

And just to sweeten the pot a little, every reader who submits a guess will be entered in a fabulous pattern bundle giveaway.  

Here is the prize…….

~The Sugarplum Top + Dress pattern by See Kate Sew
~The Surfer Slacks Lounge Pant pattern by See Kate Sew
~The Casual Lady Top and Dress pattern by Go To Patterns
~Two “Winner’s Choice” patterns by Blank Slate Patterns
~Pattern 5 Pack (“Winner’s Choice”) by Peek-a-boo Pattern Shop
~Riding Pants pattern by the Sewing Rabbit
~Roly Poly pattern by imagine gnats
~Ruby Ruffle dress pattern by The Cottage Mama 

WOW……..I’d say that’s a pretty sweet prize package, wouldn’t you?
Ok, here you go…..ready, set, match!
 
Good luck!
*Giveaway ends at midnight MST on Friday, May 11, US residents only.

Some Bunny Loves You: Easy Rag Quilt Tutorial

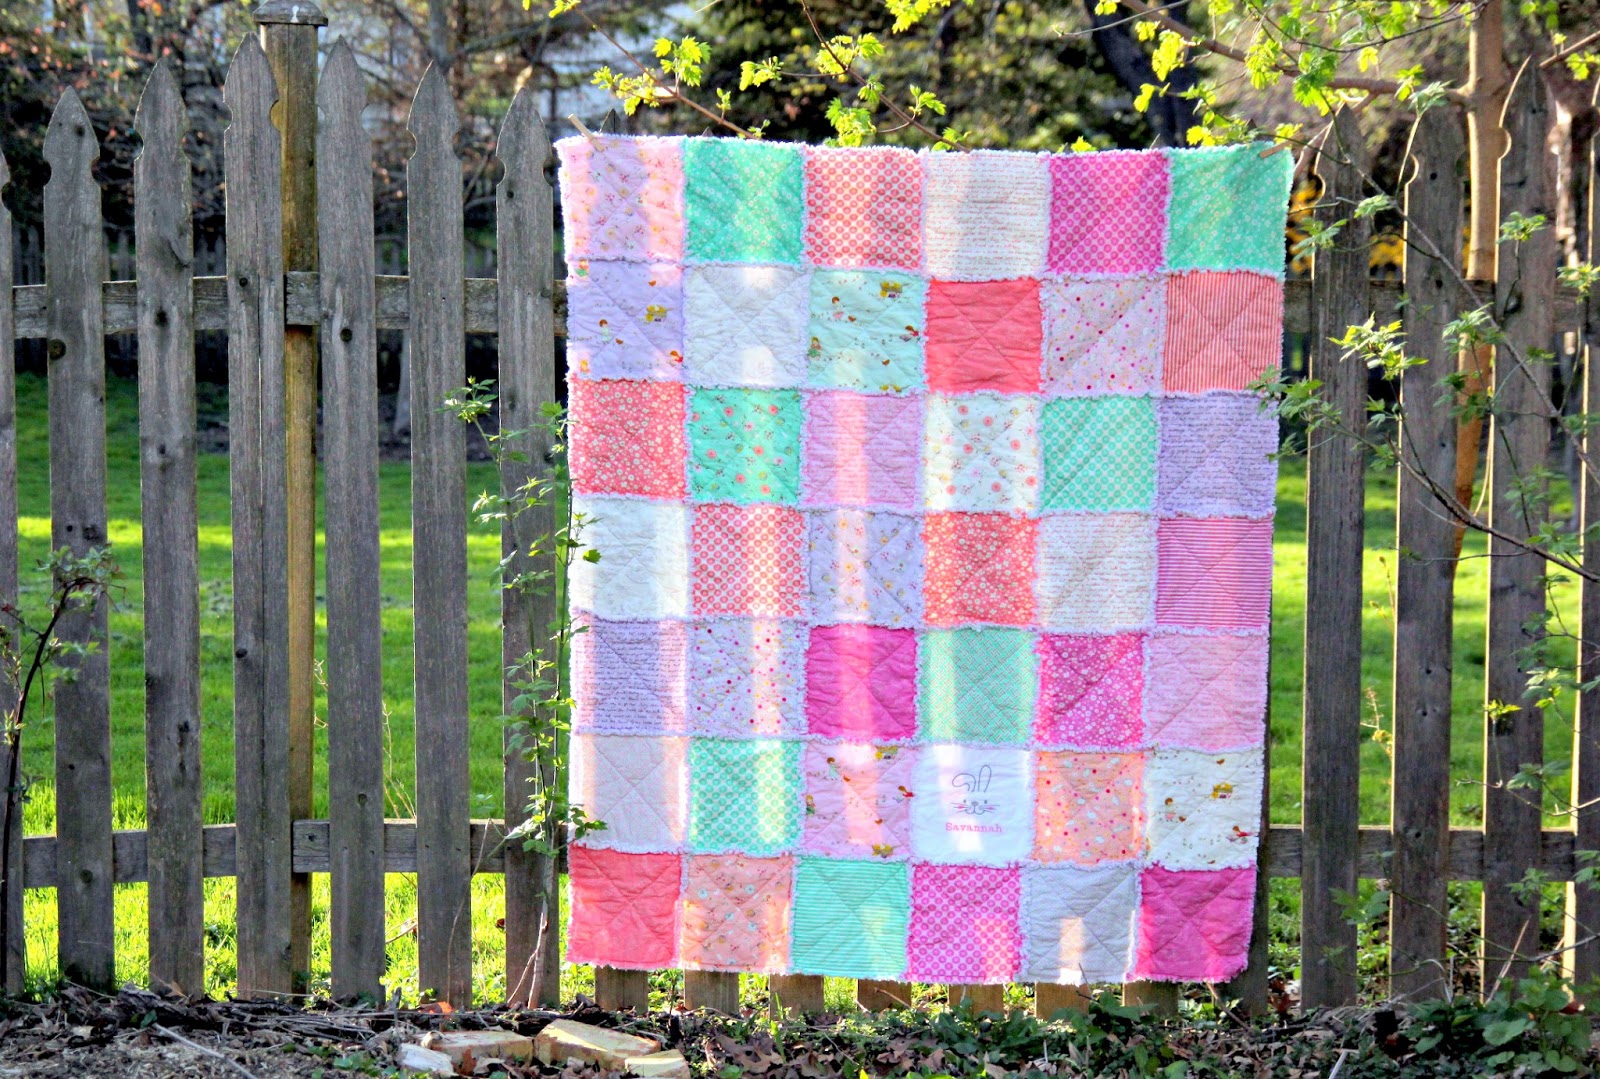
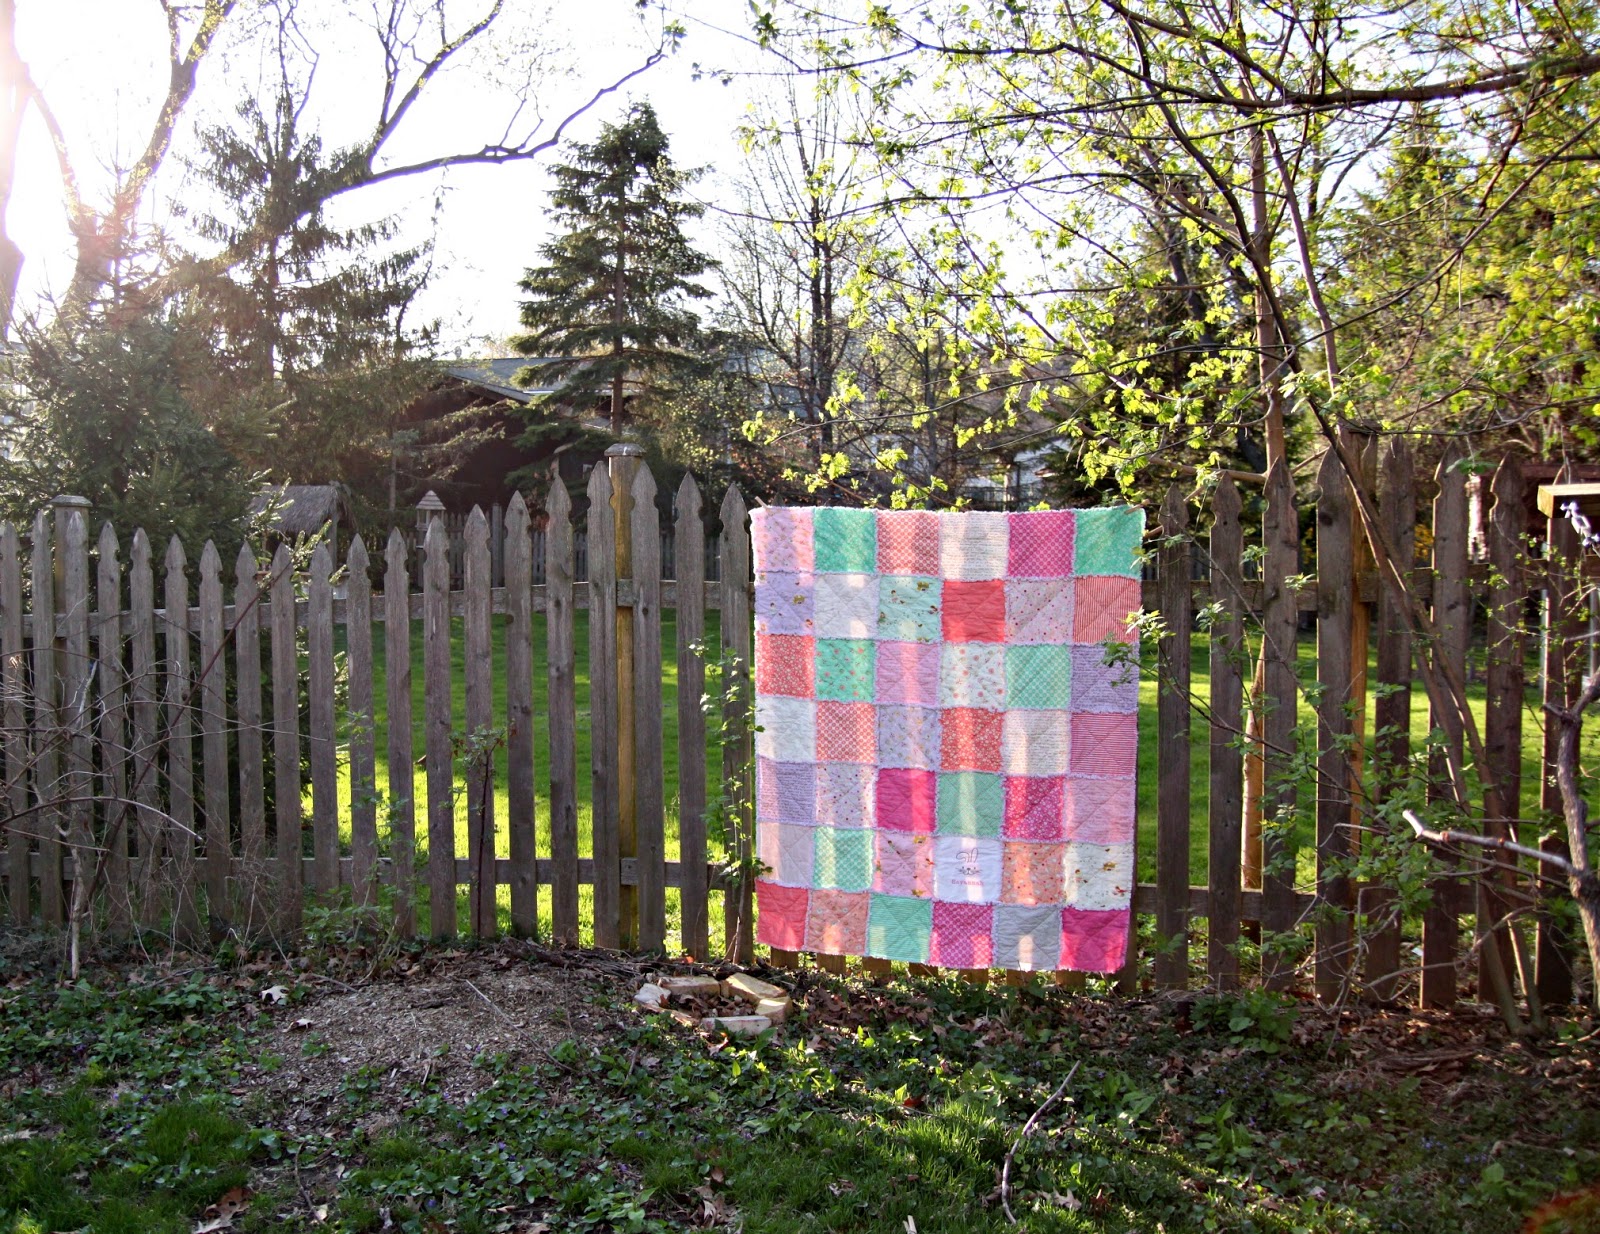
My mom (aka Grandma Jane) is here today sharing a tutorial for these adorable rag quilts she made for my little ladies. Mom made these quilts for the girls when we came to visit for Easter. She had each of the girls quilts laying out on the guest bed upon our arrival. It was SO sweet. Even though they have bunnies on them, they can be used year round. The girls have been sleeping with theirs nightly because they are so warm and cuddly.
You are going to love this easy quilting tutorial…….definitely a great beginner project, but a fun one for seasoned pros as well! And here’s Grandma Jane……. 
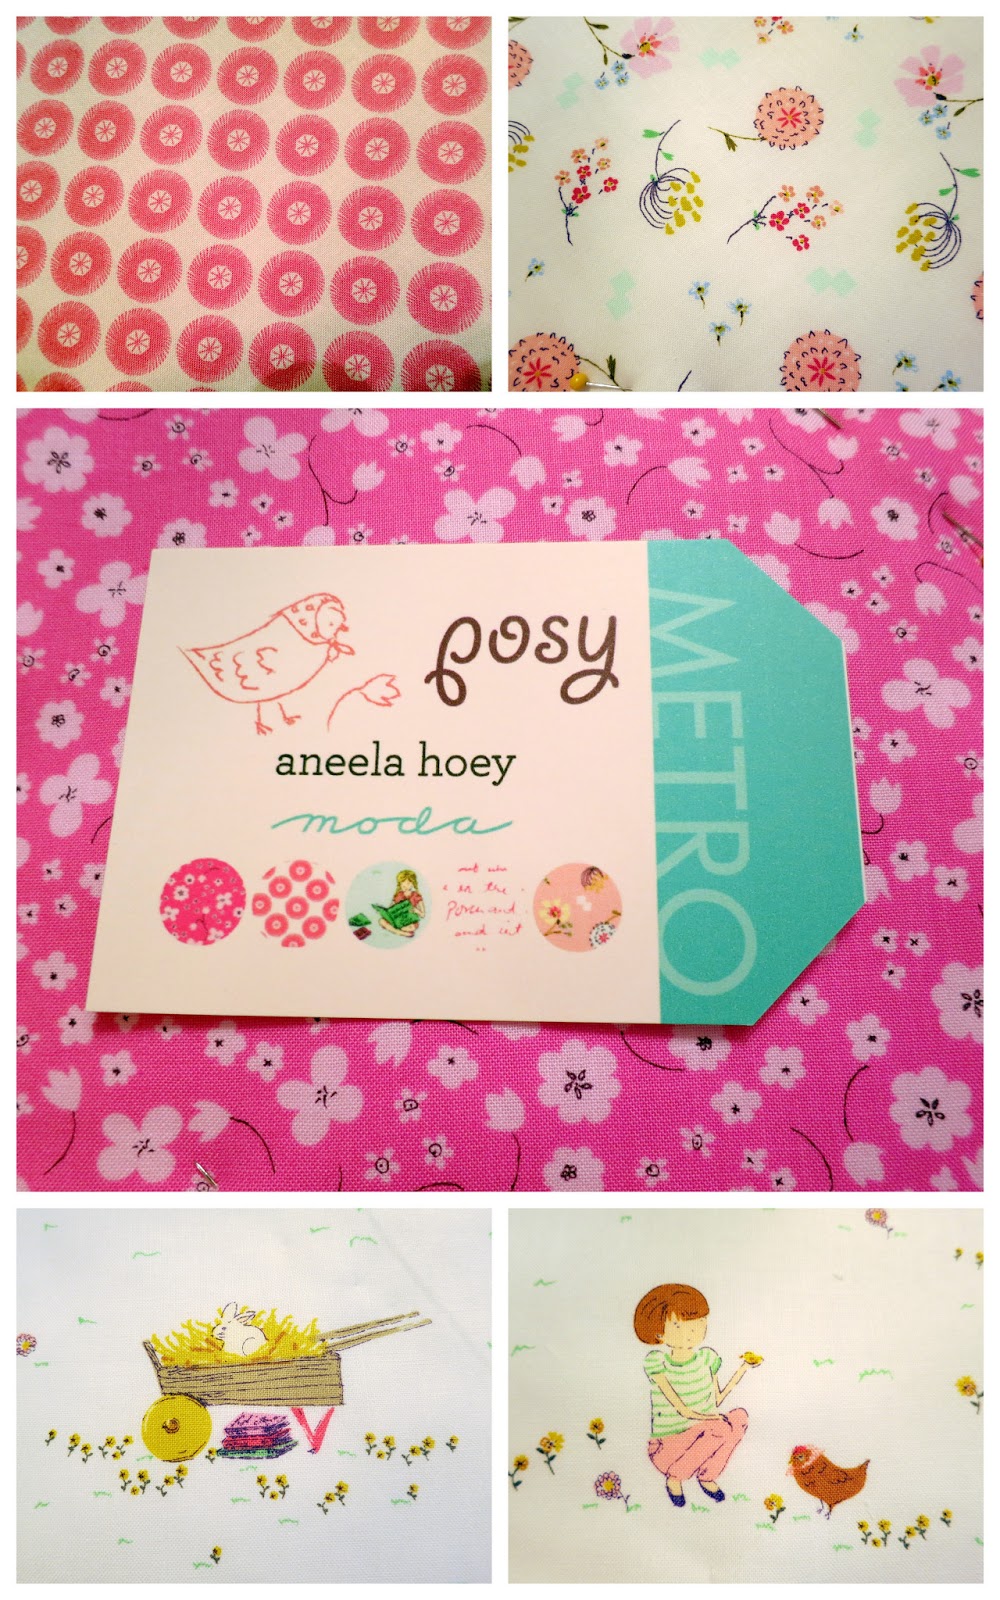
The Cottage Mama and her family coming to Texas for Easter was certainly a reason to make a new quilt (or two) out of the darling AneelaHoey line, Posy, by Moda

(This line can be purchased from several blog sponsors here at The Cottage Home)
I love the cuddly, soft  look of a rag quilt and when you need a super quick project—a layer cake, 3 ¼ yards of flannel backing and about a  yard of 96 inch wide batting (or scraps) is the recipe for a very nice size throw—just right for our little ladies, Matilda Jane and Savannah Rose. (Caspian got his I Spy Animals rag quilt this past Christmas so it was the girls’ turn.) 
Easy Rag Quilt Tutorial
by Grandma Jane for The Cottage Mama

Instructions: 

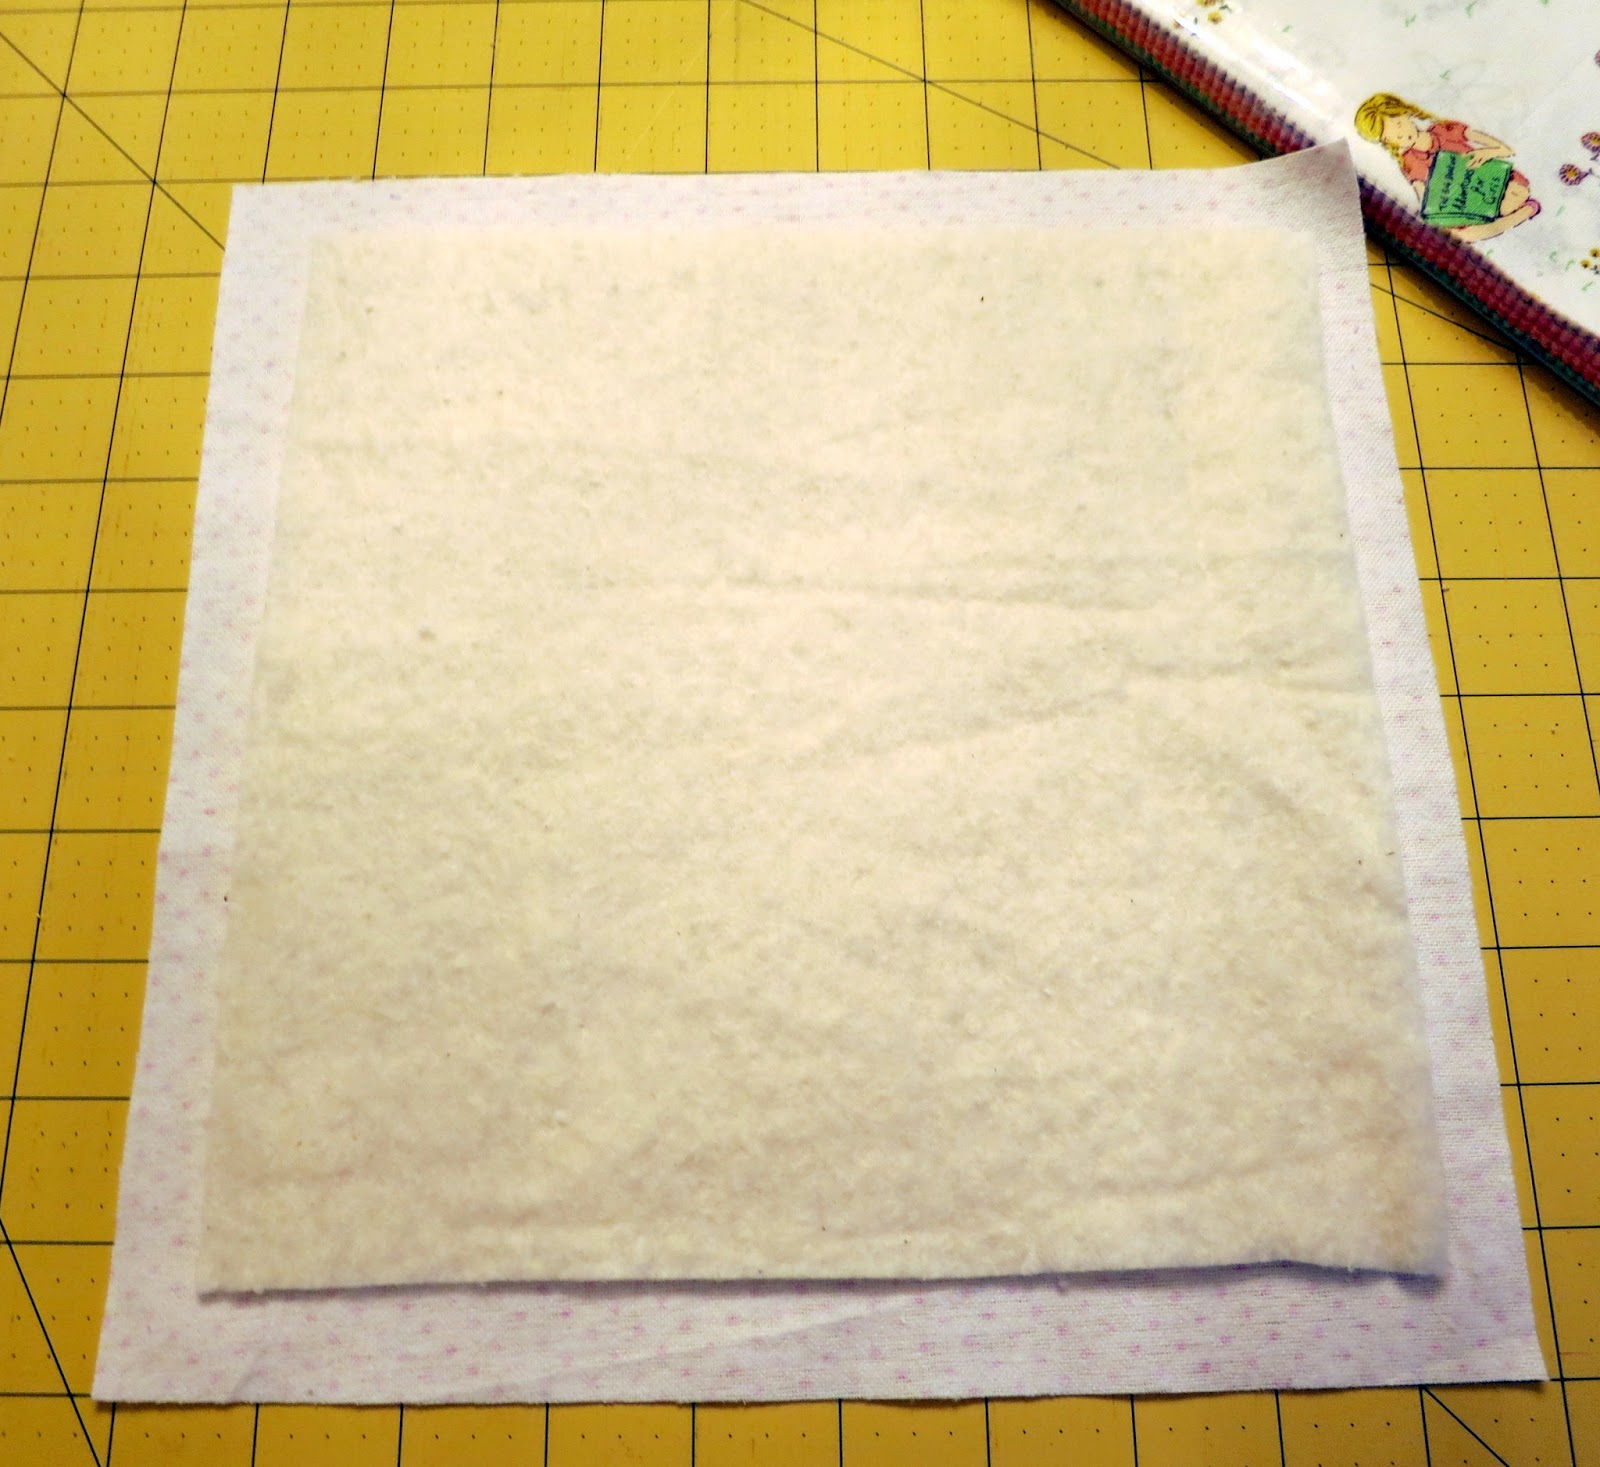
Step 1:       Cut (42) 10” x 10”squares of backing flannel fabric.

Step 2:       If you are not using a layer cake, you will need 3 ¼ yards of fabric to cut (42) 10 inch squares.

Step 3:       Cut (42) 8 ½” x 8 ½” squares of batting (I used scraps and took care to use white for the light colored squares so the darker cream colored batting did not show through.) 

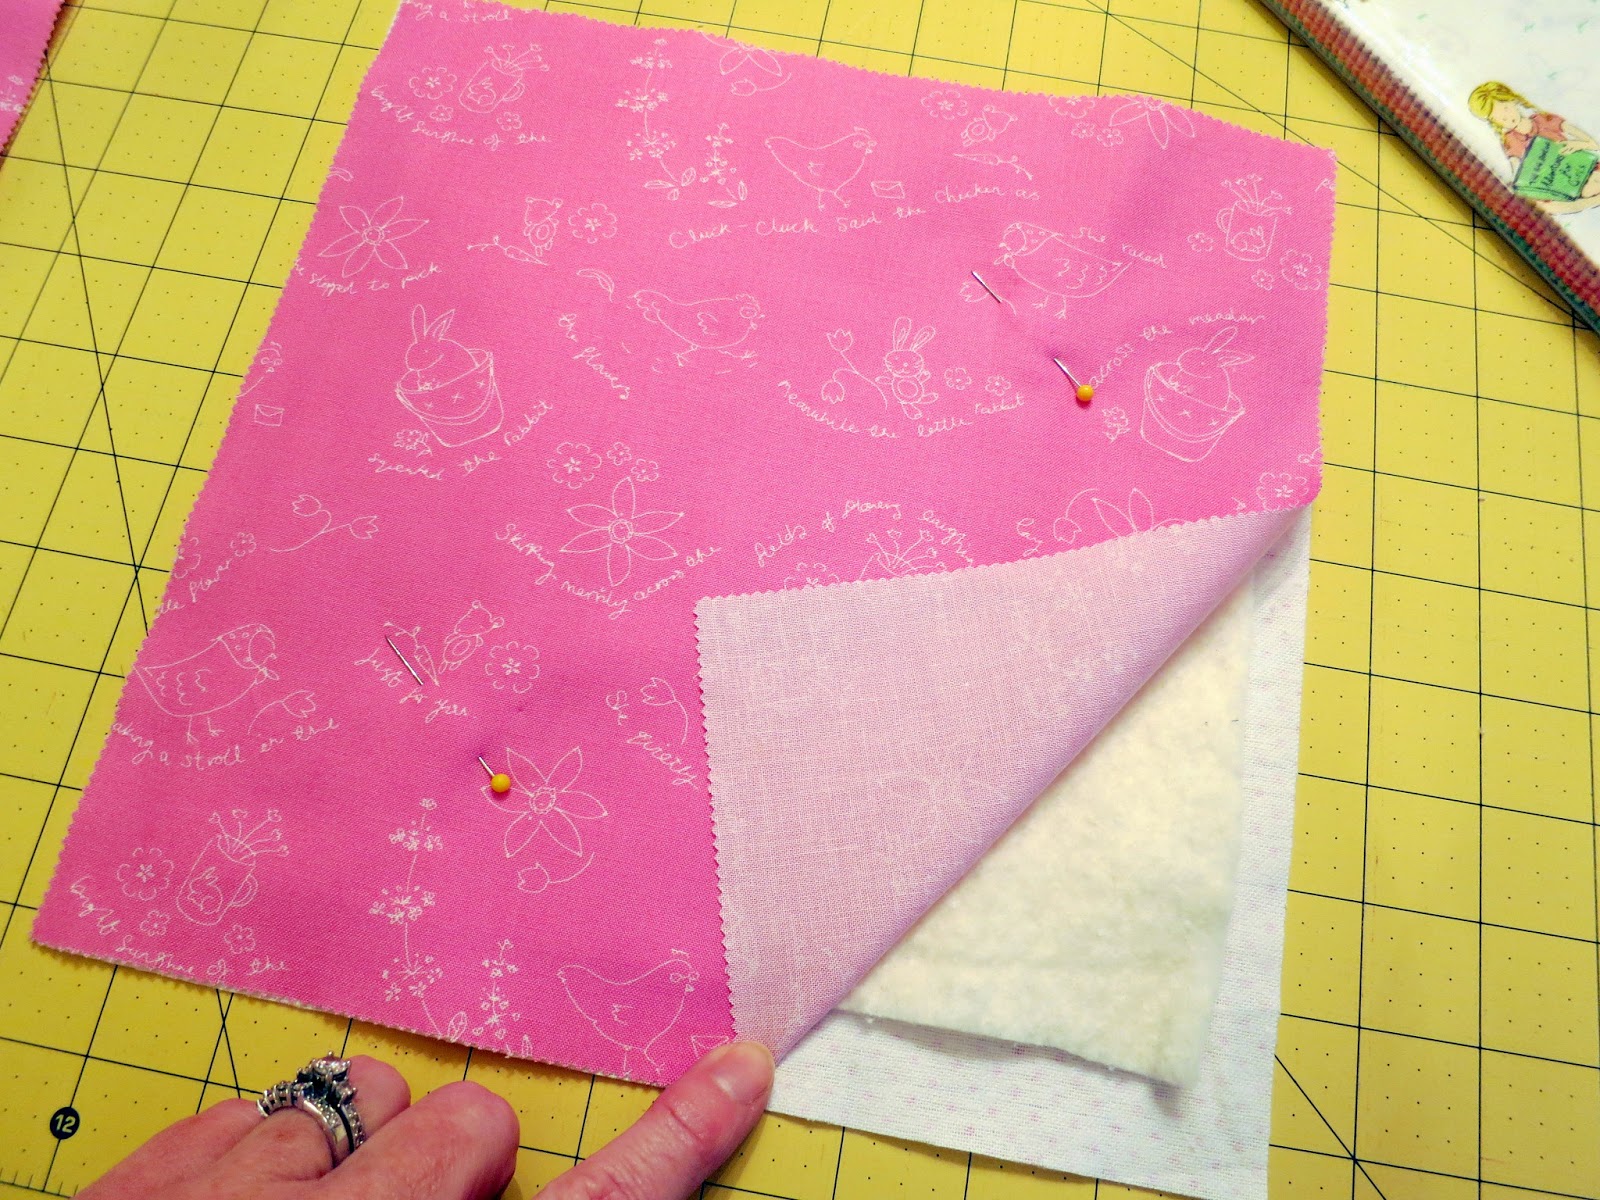
Step 4:       Lay a flannel square with wrong side up.  Center a batting square on the flannel and top with a layer cake piece-right side up.  You now have the wrong sides of the fabric together with the batting inside.  It’s a mini-quilt sandwich! Pin together with at least two pins.  Stack them up.

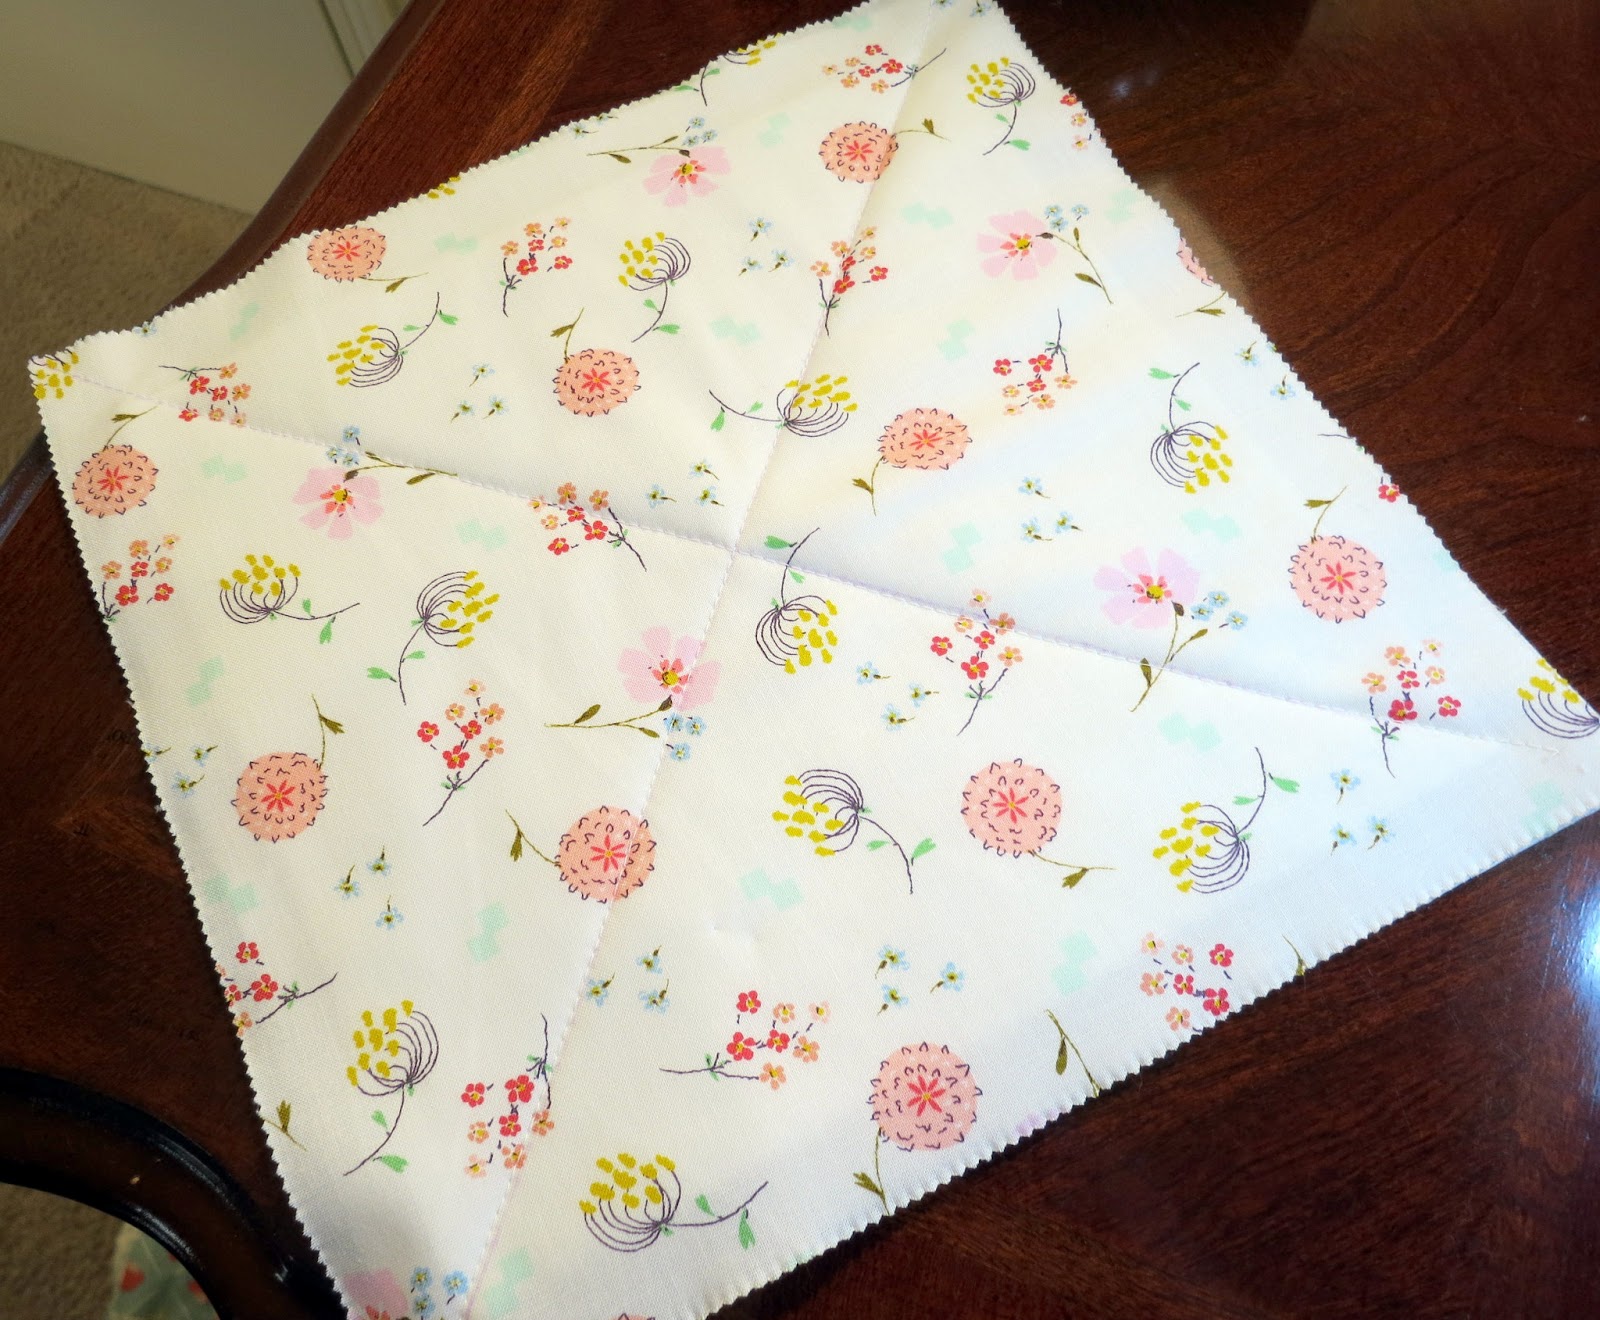
Step 5:       Sew an “X” across each square. I marked mine with a ruler disappearing fabric marker as I sewed each square to keep things straight. This is your “quilting” so you could get fancy at this point in time and quilt some other design on the blocks.

Step 6:       I substituted a white square with embroidery personalization on each quilt. If you do this, I recommend using a fusible batting or web to hold the batting in place for that square only as you do not have the secure “X” quilting across the block. This embroidery design was a built-in design on the Baby Lock Unity sewing and embroidery machine.

Step 7:       Arrange your blocks six blocks wide by seven down.


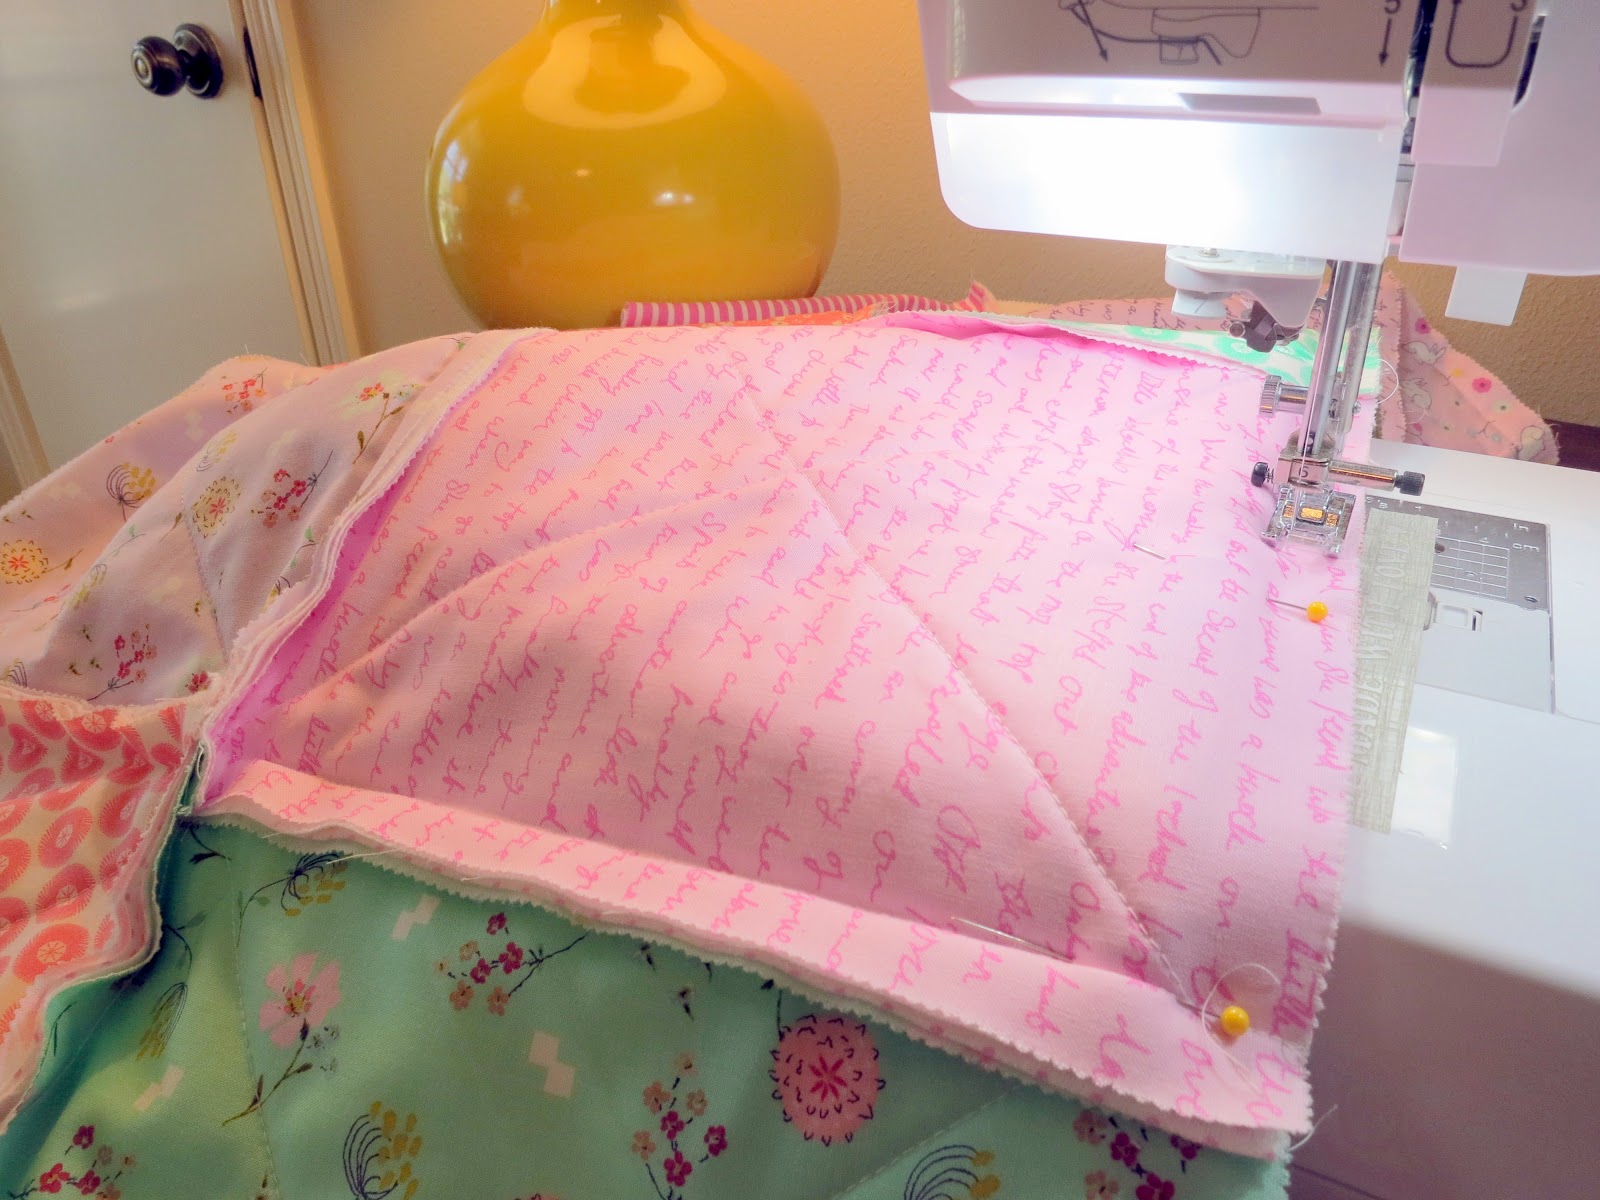
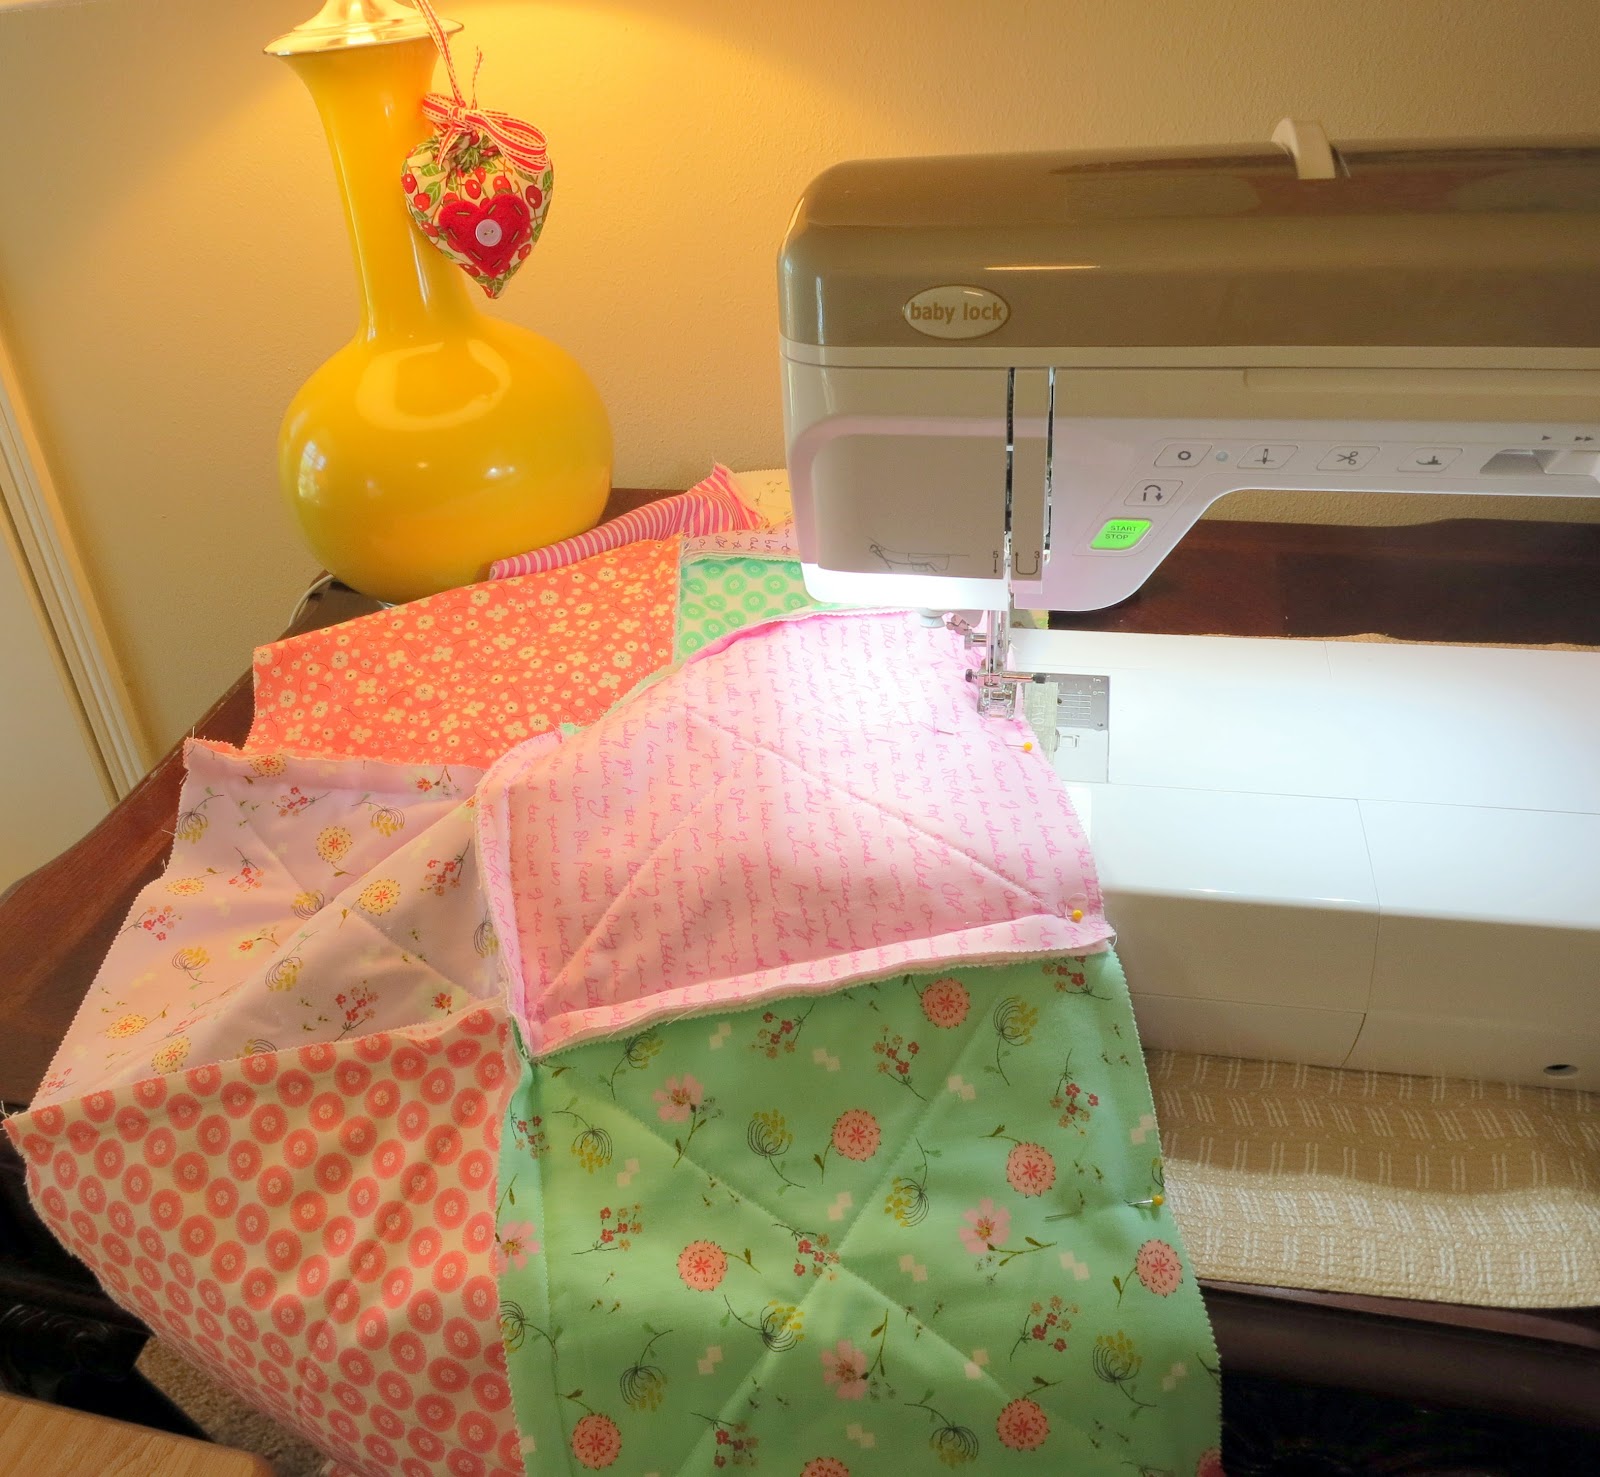
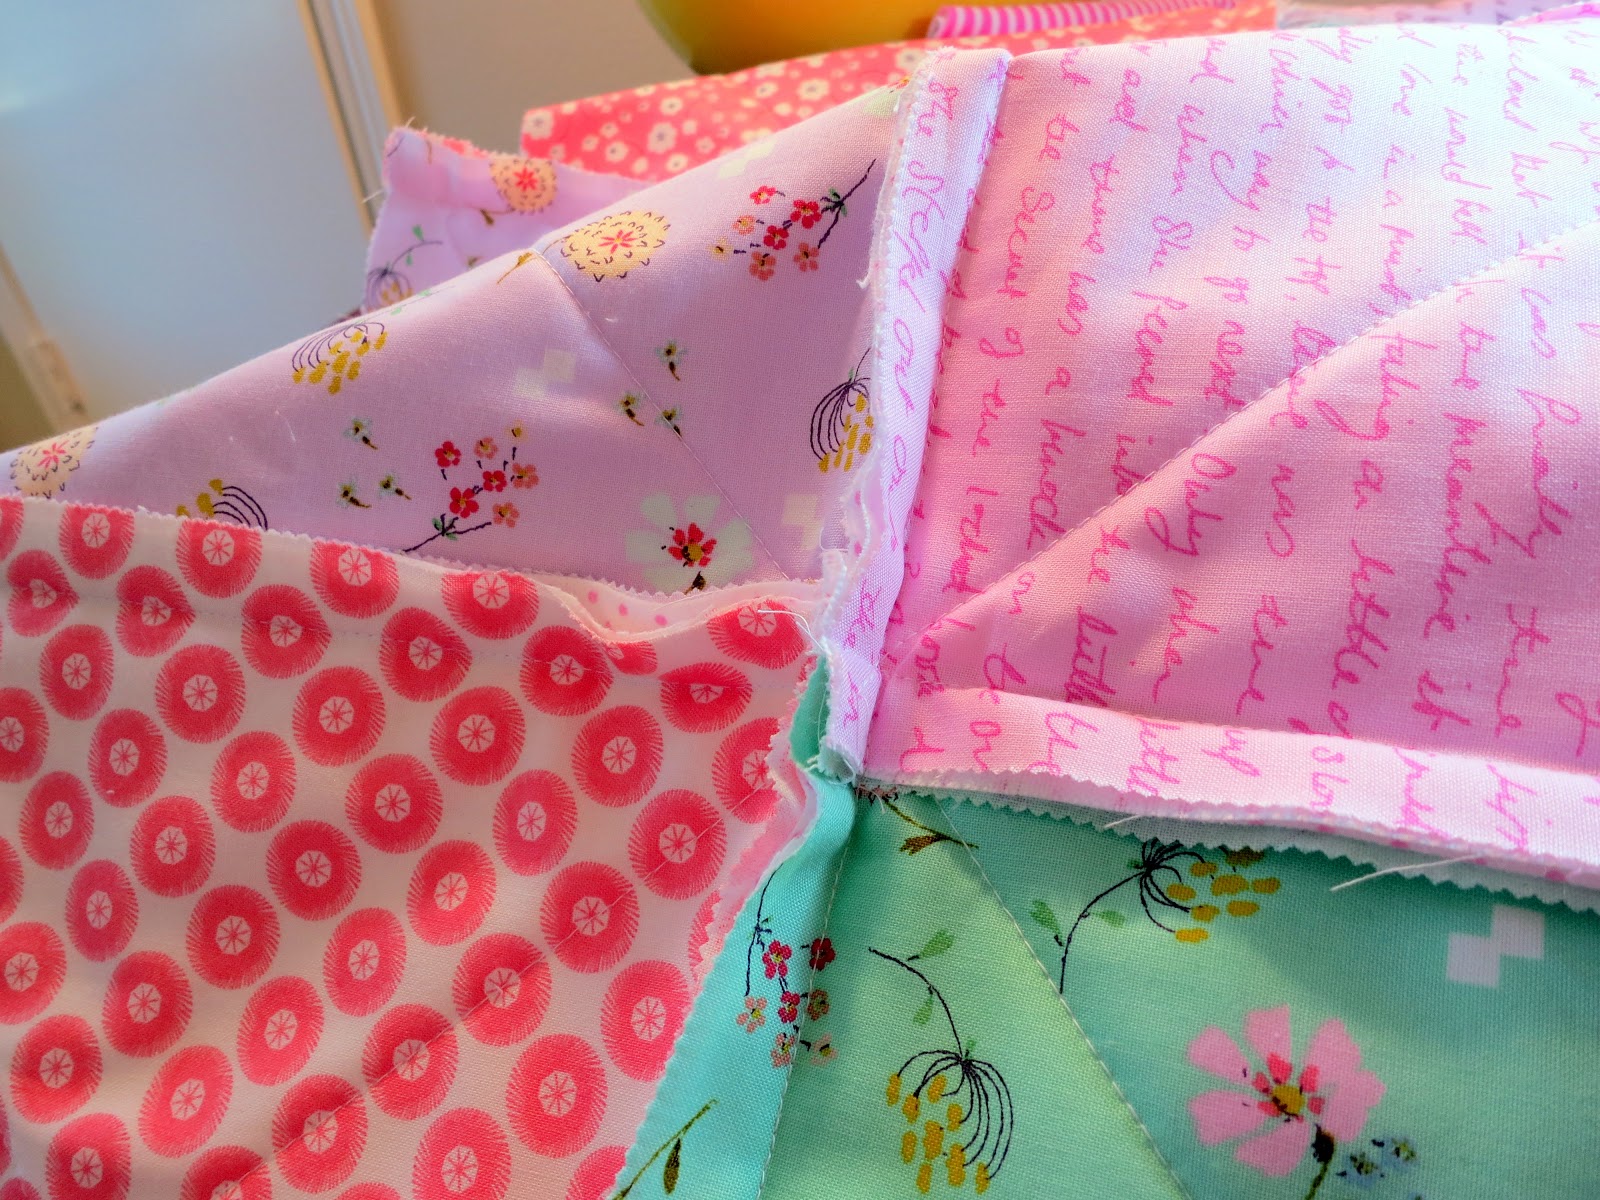
Step 8:       Stitch blocks in rows with backing sides together using a 5/8 inch seam.  Yes, you will have the unfinished edges on the front of the quilt. Adjust your seam allowance a little if necessary but you don’t want to catch the batting in the seam allowance. 

Step 9:       Stitch the rows together and then stitch all the way around the quilt 5/8 inch from the edges.


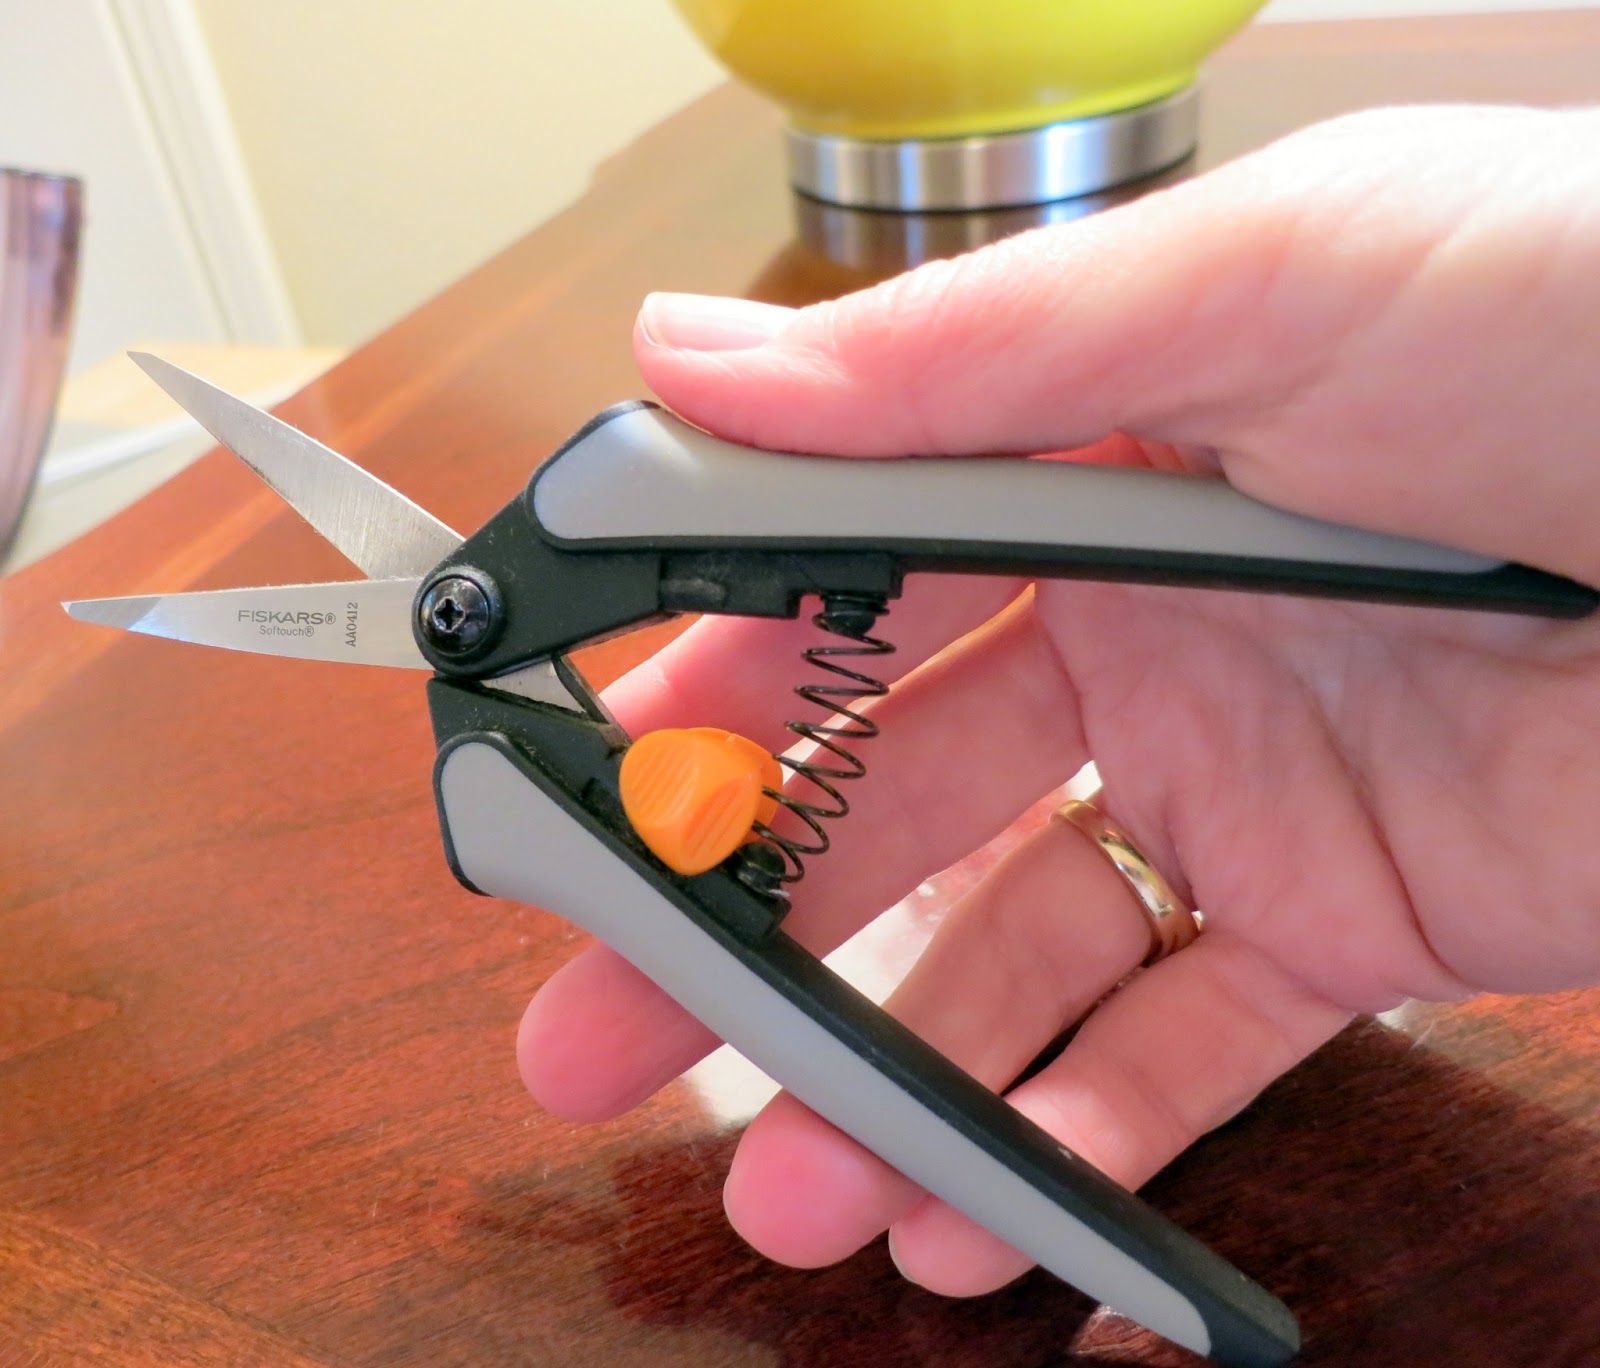
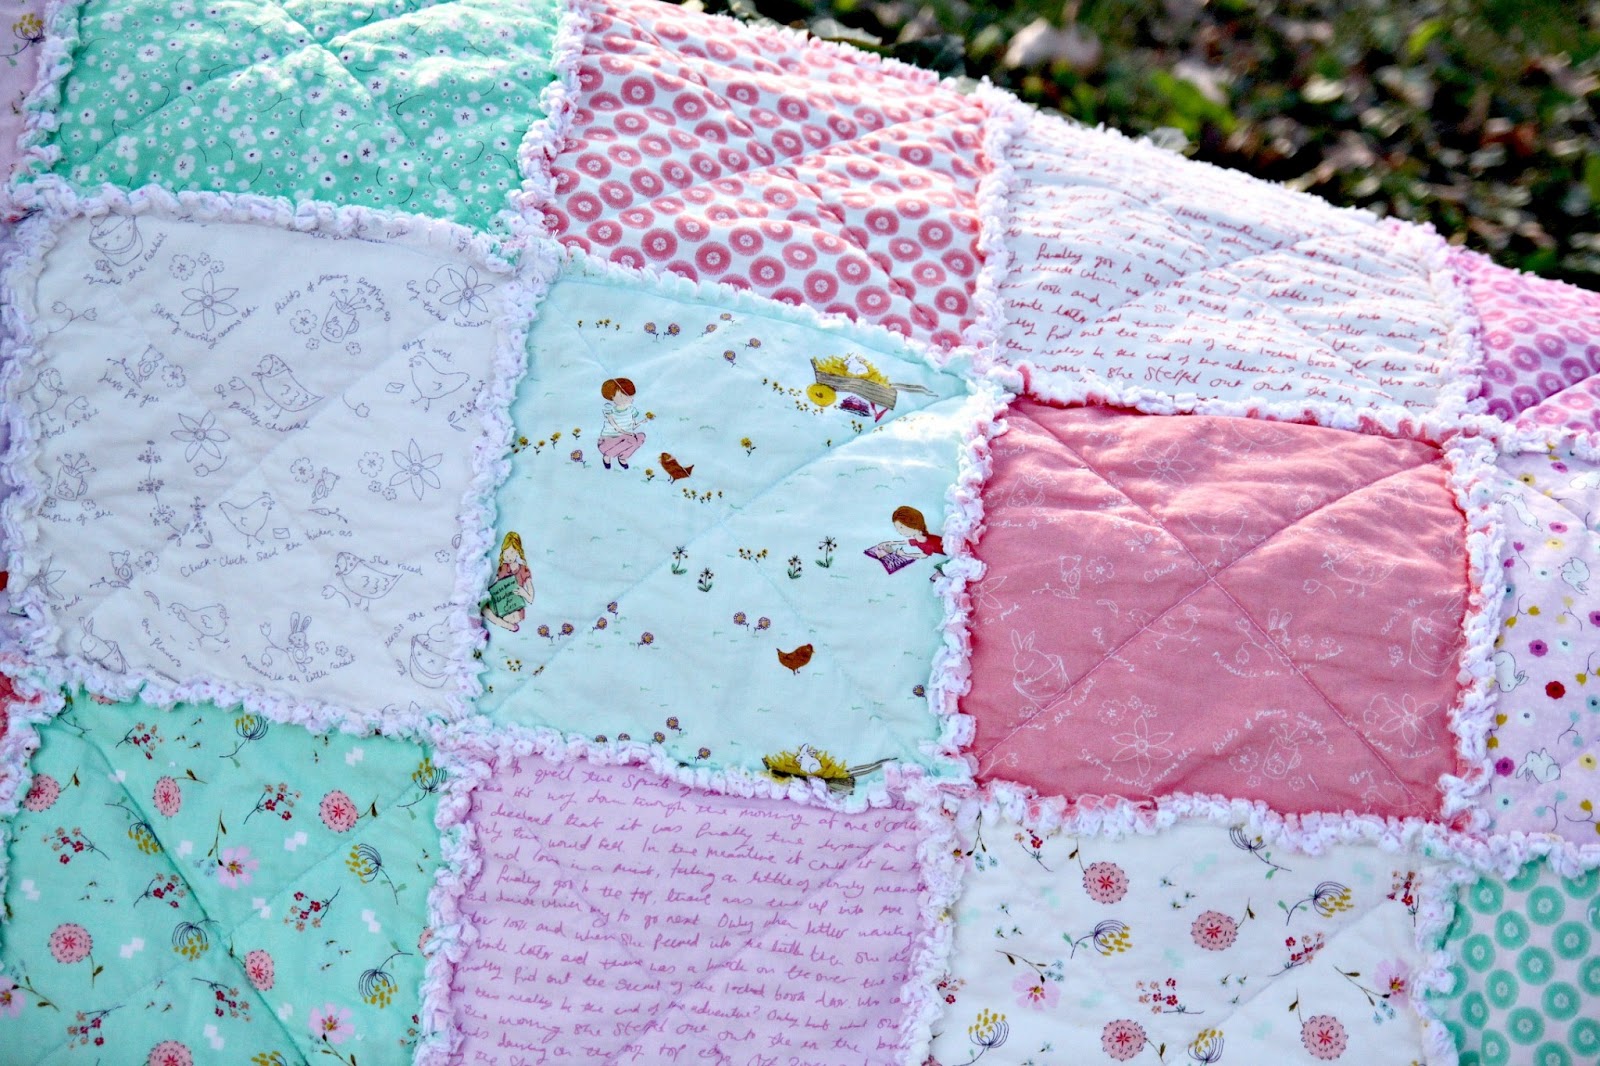
Step 10:   Now sit down in a comfy chair and get ready to do some clipping! These little spring-release clippers make clipping the seams much easier on your hands. Clip all seams and outside edge, evenly at about 3/8 inch intervals, taking care not to clip the stitching of the seam.  


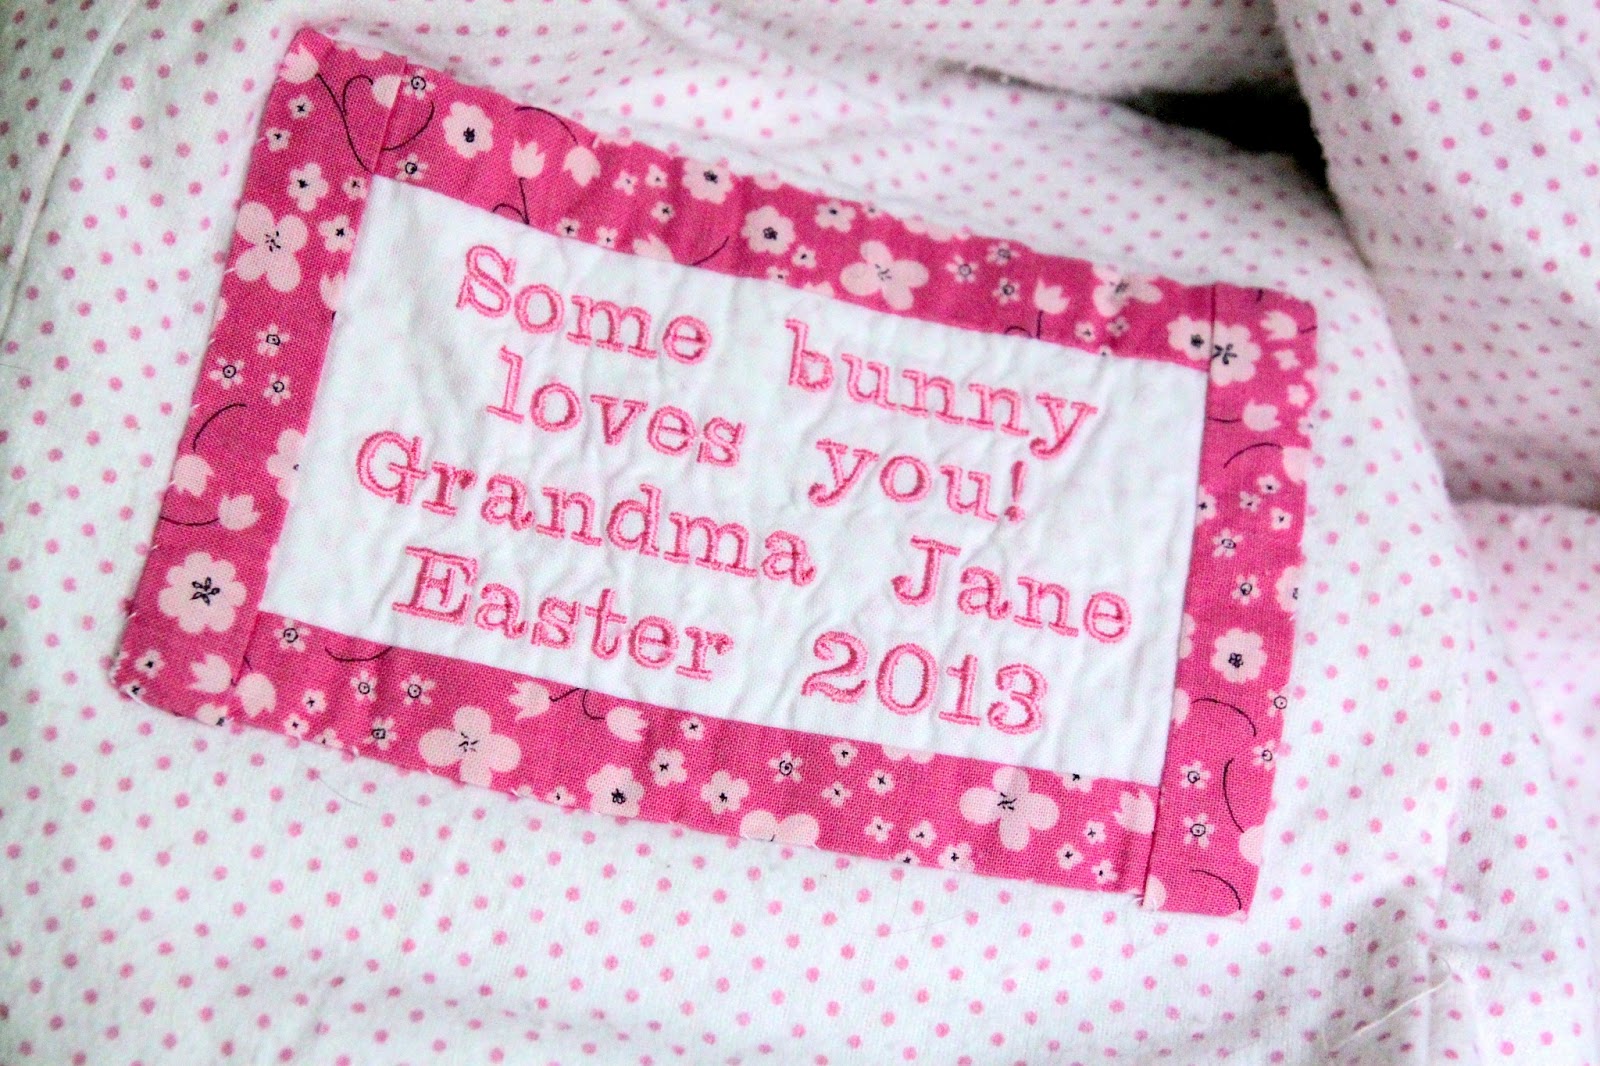
Step 11:   I added an embroidered quilt label on the back and used the extra layer cake piece to frame it. Again, this was a built in font on my Baby Lock sewing and embroidery machine.

Step 12:   Washing a rag quilt is really important to get the exposed edges fuzzy and make it all soft and cuddly. Caution! The lint created in your washer and dryer is really significant so make sure you clean out the lint trap. (If you have a really large quilt, it might be a good idea to take it to a Laundromat and use a commercial washer and dryer.)

Enjoy!!! I think you will love how quickly a rag quilt comes together. There are some really great looking ones out there done with strips of fabric, too.  Note: Rag quilts are not the best quilts for babies and infants as the lint and fuzziness could be a problem for little ones. 


~ Grandma Jane
 
Thanks so much, Mom! You are the best…..it’s so fun to have you come on the blog. I hope you all enjoyed this tutorial, if you’d like to check out more projects and tutorials from Grandma Jane, you can click HERE.
Project Design Team Tutorial and Riley Blake Fat Quarter Bundle Giveaway

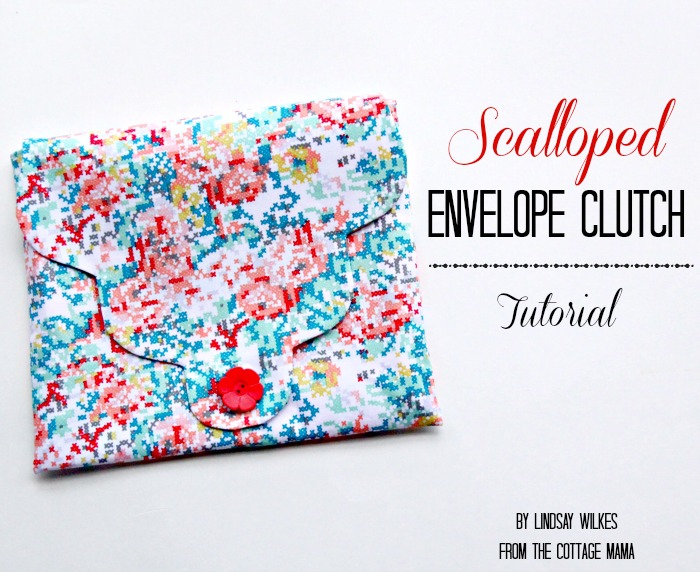
Today I am over at Riley Blake Designs sharing my Project Design Team Tutorial for this easy Scalloped Envelope Clutch. I hope you’ll pop on over and check it out!
Click HERE to visit Riley Blake Designs.

And because I’m over at Riley Blake Designs, we have a little something special for you here. Today we are giving away a full Fat Quarter Bundle ‘Bake Sale‘ by Lori Holt for Riley Blake Designs. I absolutely adore this line, well I pretty much adore anything designed by Lori Holt, but I think you guys are going to like it too!
So all you have to do is enter via the rafflecopter below. There are several chances to win. Do one or all of them, it’s totally up to you.

Giveaway is open internationally! And will be open through Saturday, May 4, 2013 at midnight (CST).

One of the chances to enter includes signing up for the *NEW* newsletter. Remember, this is not the same as the email you receive with each of the blog posts. It’s brand new and hasn’t started yet, so if you haven’t signed up, please do so!

a Rafflecopter giveaway

Sprightly Fabrics Giveaway Winner

 I love how much you all love fabric. It’s like we are kindred spirits or something. Anyway, with 902 entries into the Sprightly Fabrics giveaway, our winner (selected at random) is:

Congratulations Jennifer Oliva! I’m so excited for you……I know you will get some fantastic goodies with your $50.00 gift certificate to Sprightly Fabrics. Please email me at thecottagemama[at]gmail[dot]com with your contact info. and we will get you your prize as soon as possible.

Don’t fret if you weren’t our winner, we have a fabulous giveaway from Riley Blake Designs coming up tomorrow, so make sure to check back!