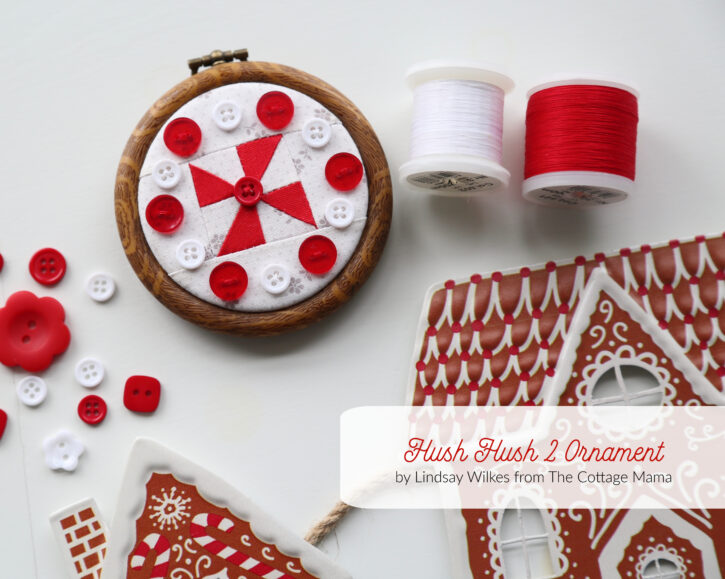
The countdown to Christmas is on! Today I’m sharing an embroidery hoop ornament that I created for Riley Blake Designs using the Hush Hush 2 fabric collection. If you aren’t familiar with Hush Hush 2, it’s a gorgeous low-volume fabric collection featuring 21 different Riley Blake Designers, including myself. The fabric design I contributed to the collection was a recolored version of the Love Notes print from my first Valentine’s collection, Love Letters. Each print in the collection is created with light colors and every print can be used as a low volume print for many different projects.
Today I’m going to give you a mini-tutorial on how I created my Hush Hush 2 embroidery hoop pinwheel ornament. I decided to use another designers print from the collection since I had used my own enough……it’s always fun to play with something new! I also used some Riley Blake solid basics in red. I’m not sure what it is about Christmas that makes me feel like using lots of buttons, but here I am again, using lots of buttons. You can see the Santa Dress I created many years ago for Classic Sewing Magazine here…..same thing…..lots of buttons!
Supplies:
2 (1″) squares low volume print
2 (1″) Riley Blake solid in red (or green or aqua)
2 (2″) squares low volume print
2 (4″ x 2″) strips low volume print
13 buttons (number of buttons will vary depending on size)
1 (3″) embroidery hoop
2 colors of thread (red and white)
Scissors
Iron
Hand-sewing needle
Batting (optional)
Craft felt (optional)
Directions:
All seams are 1/4″, unless otherwise noted.
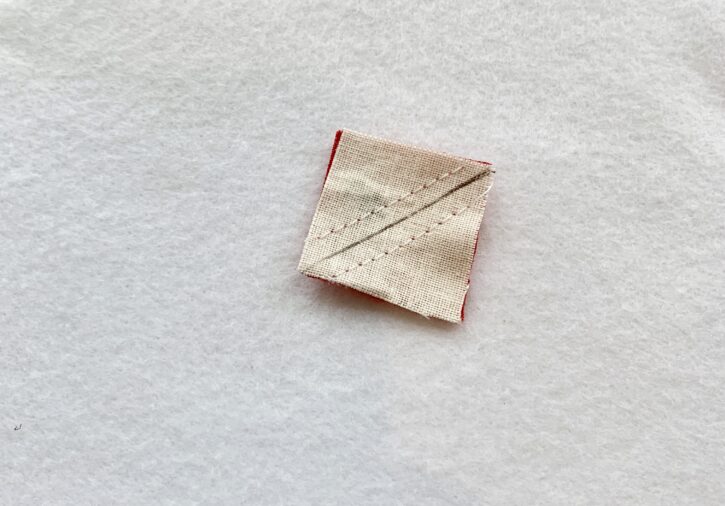
- Create your half-square triangles using the 1″ squares of low volume and solid fabric. If you have never made a half-square triangle before, you can refer to my mom’s tutorial here.
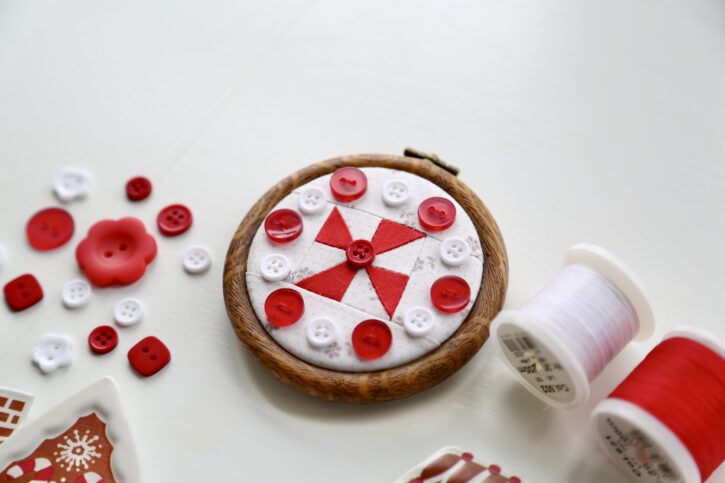
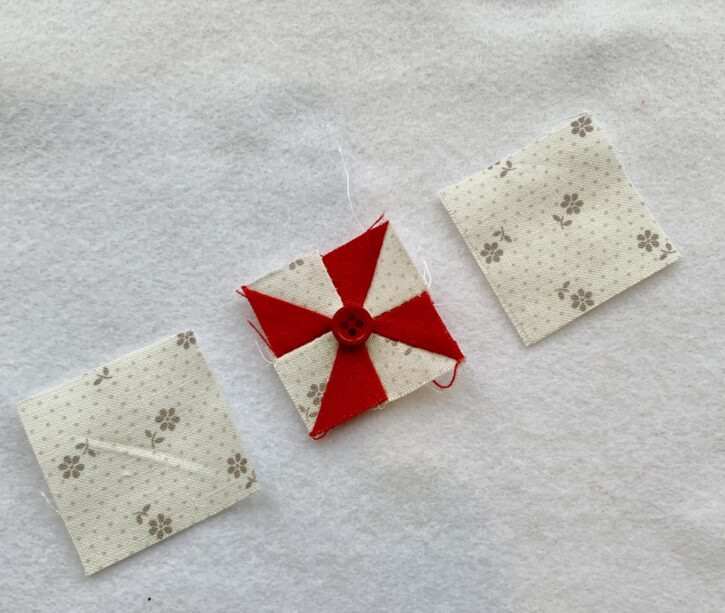
- After you have pressed your half-square triangles, lay them out in a pinwheel formation and sew the four squares together. Refer to the title picture for layout.
- Now you should have your center pinwheel square. Sew the 2 (2″) squares to the sides of the pinwheel square. Place the low volume square on top of the pinwheel square, right sides together, and sew down the side. Press seams to one side. If they are not perfectly lined up with the center pinwheel square, it’s no big deal….just use a rotary cutter to make sure all sides are even.
- Add the 2 (4″ x 2″) strips to the top and bottom by placing right sides together and sewing (of one strip and the pinwheel piece and doing the same on top and bottom). Press seams to one side.
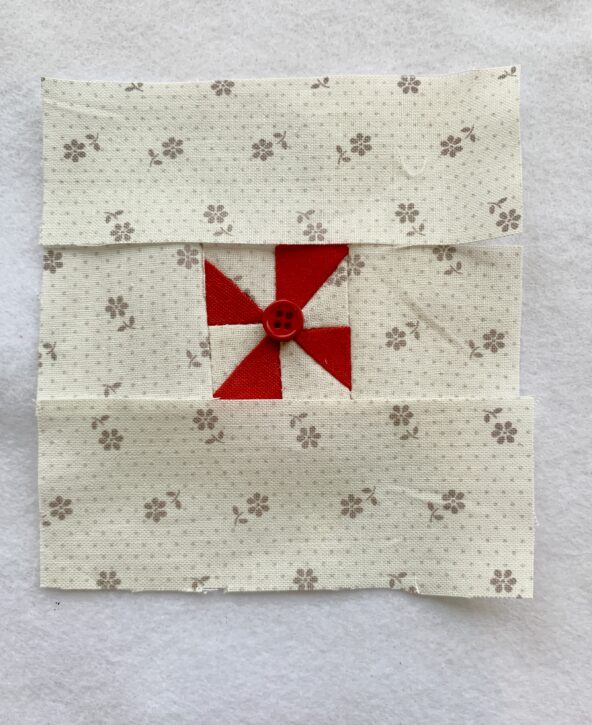
- Sew the center button to the pinwheel with your hand sewing needle and thread.
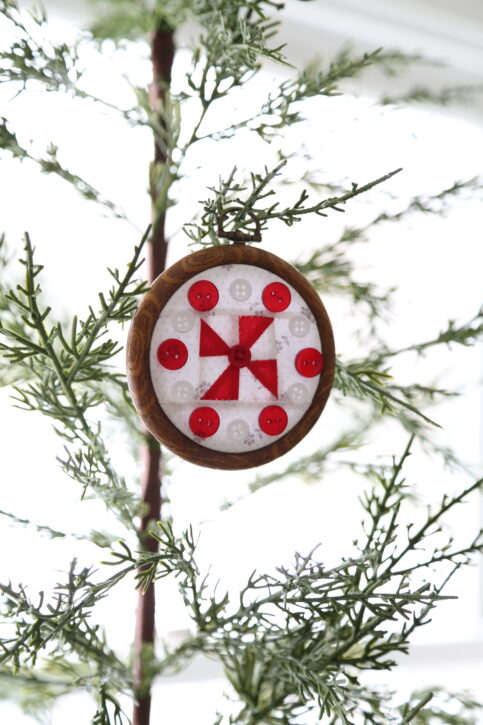
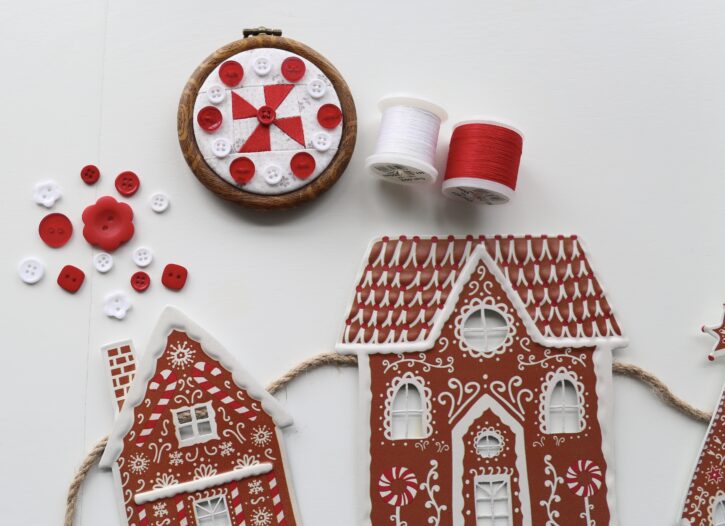
- Place the block you have created into the embroidery hoop. I wanted mine to look a little more quilt like so I added a piece of batting in between the hoop and the back of my block. You could also do a little quilting on the block with the batting before placing it in the hoop. Or you don’t need batting at all!
- Once in the hoop, trim off the excess fabric.
- Sew buttons inside the edge of the hoop with your hand sewing needle and thread. You can choose any type of buttons and any color that works for you.
- If you would like to make sure the back of your ornament looks finished, glue a piece of felt to the back side that is just a little bit smaller than the edge of the embroidery hoop.
- I selected to use these faux wood hoops so I didn’t add any trim, but you could add some cute pom-pom trim or rick-rack. You could also add a bow or a ribbon to the top of the hoop. I probably would have done that, if I didn’t have a decorative top to the hoop.

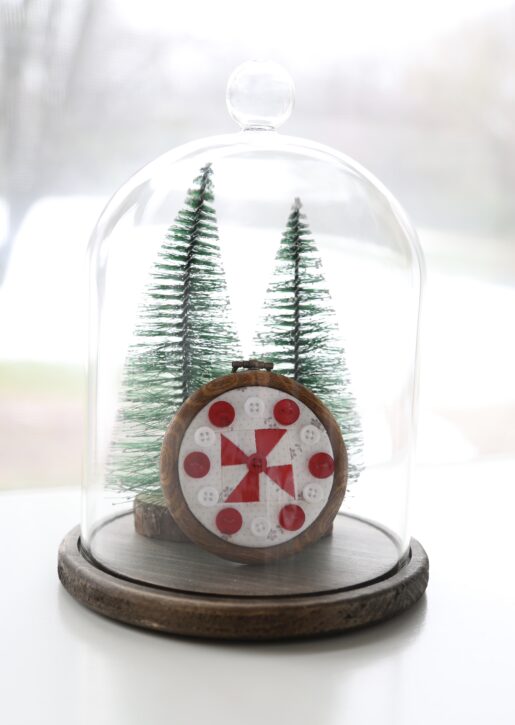
- Finally, hang the ornaments on your tree or place the hoop around your home for decoration and enjoy!
To sew the block, I used my Baby Lock Solaris sewing and embroidery machine as well as Madeira 100% polyester thread.
You can check out more free ornament patterns over on the Riley Blake instagram page. There are so many fun, creative ideas!
Until next time…….Happy Sewing!


 Lindsay Wilkes is the owner and designer behind The Cottage Mama. She creates timeless, vintage inspired sewing patterns for children’s clothes. She is also a fabric designer for Riley Black Designers / Penny Rose Fabrics, author of the book ‘Sew Classic Clothes for Girls’ and can be seen teaching nationwide and online in her video series ‘Lessons with Lindsay’ sponsored by Baby Lock Sewing and Embroidery machines.


