
Hexagons seem to be all the rage now in the quilting and sewing world and I can’t seem to get enough of them. I absolutely love the vintage vibe of hexies and was inspired to create this easy sewing pattern from the fabric line ‘Simply Sweet‘ by Lori Whitlock for Riley Blake Designs. You can use this pouch for so many things and make it any size you would like. You could also add two little handles and it would make a sweet little girl’s purse. You can never have too many cute pouches around, don’t you think? Let’s get started………..
Hexi Pouch Tutorial
Supplies:
3 Fat Quarters of coordinating fabric
1 Fat Quarter Fusible Fleece
1 Fat Quarter Fusible Interfacing
1 Fat Quarter Sew-In Interfacing
4 Buttons (more or less depending on your style)
Instructions:
ALL SEAM ALLOWANCES ARE 1/2″ UNLESS OTHERWISE NOTED
Make your hexagon shape. For the pouch seen here, the larger hexagon was 7.75″ and the small one was 5.75″ across, but you really can make this any size that you would like. Just use a piece of paper, pencil and a ruler to make yourself a pattern template for a basic hexagon.
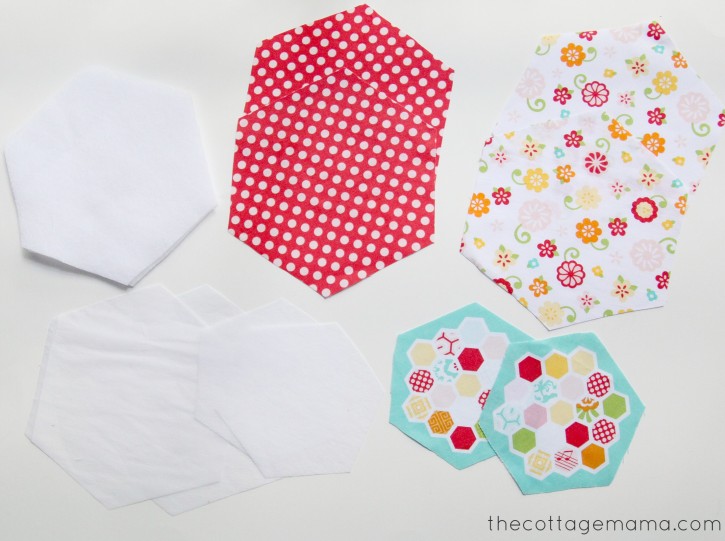
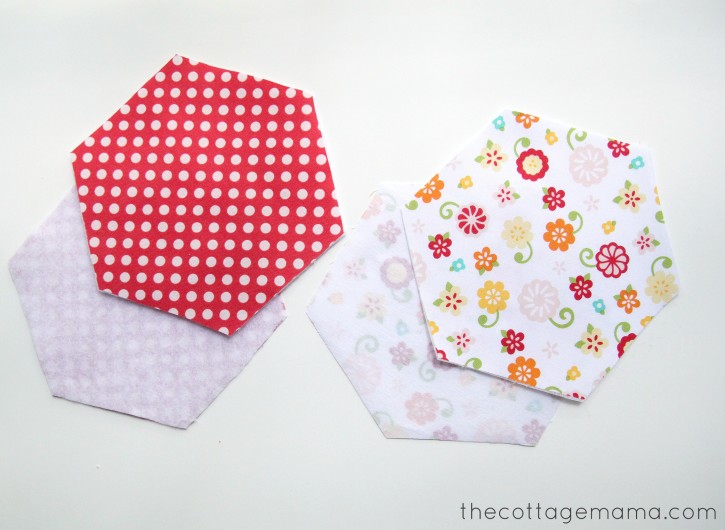
- Cut 2 large hexagons of the exterior fabric and 2 large hexagons of the lining fabric.
- Cut 2 small hexagons (or just one if you want the back of the pouch to be solid) from a contrasting printed fabric.
- Cut 2 large hexagons of fusible fleece.
- Cut 2 large hexagons of fusible interfacing (this is the interfacing that only fuses on one side).
- Cut 2 small hexagons of sew-in interfacing.
You could omit the fusible fleece and just use regular fusible interfacing for the exterior pieces, if you would prefer the pouch to have less structure.
Apply the fusible fleece to the back side of the two exterior large hexagon pieces according to package instructions. Apply fusible interfacing to the back side of the two lining large hexagons according to package instructions.
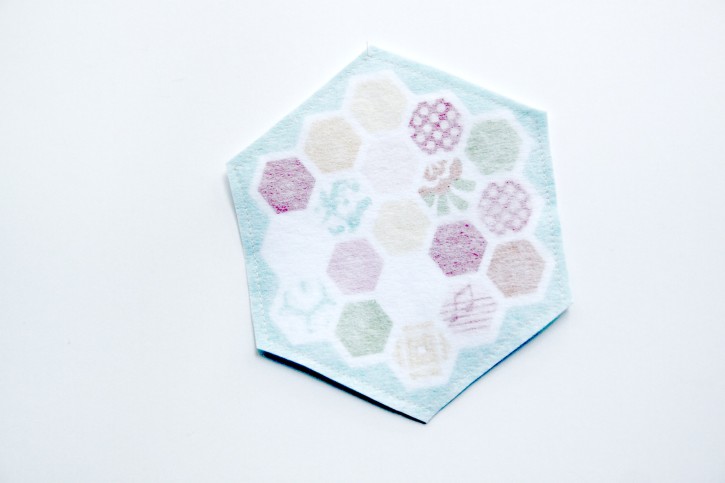
Place the sew in interfacing on top of the right side of the small hexagon and sew all the way around all six sides using a 1/4″ seam allowance. Clip all of the corners to remove bulk.
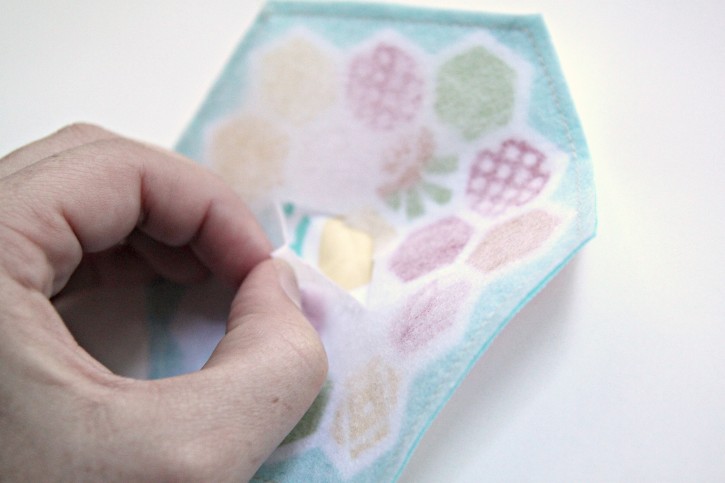
Cut a slit in the interfacing and pull the fabric through the opening to turn it right side out. Press the interfacing towards the back and use a point turner to press out the corners.
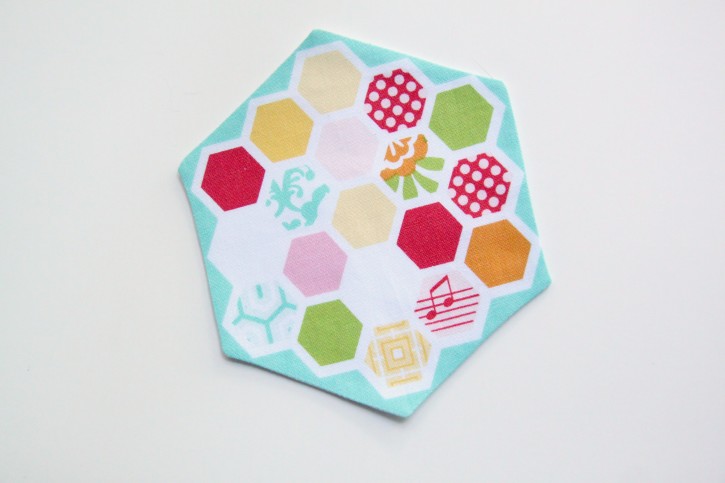
It’s important to make sure the corners are pushed out nicely. This is what your small hexagon will look like once you have turned it right side out.
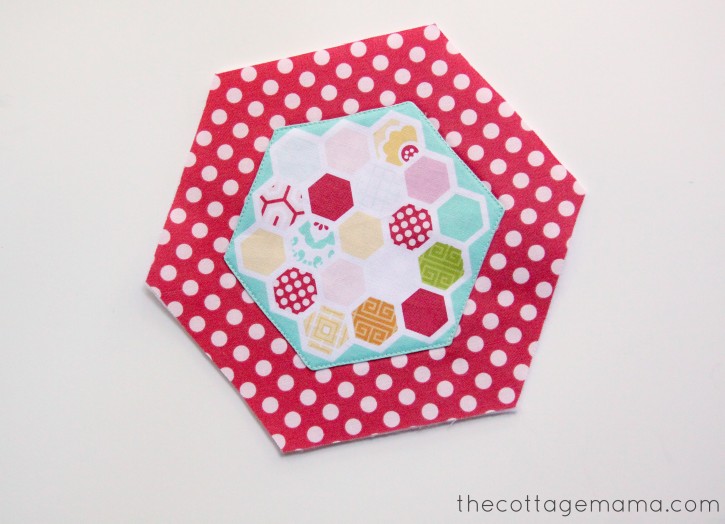
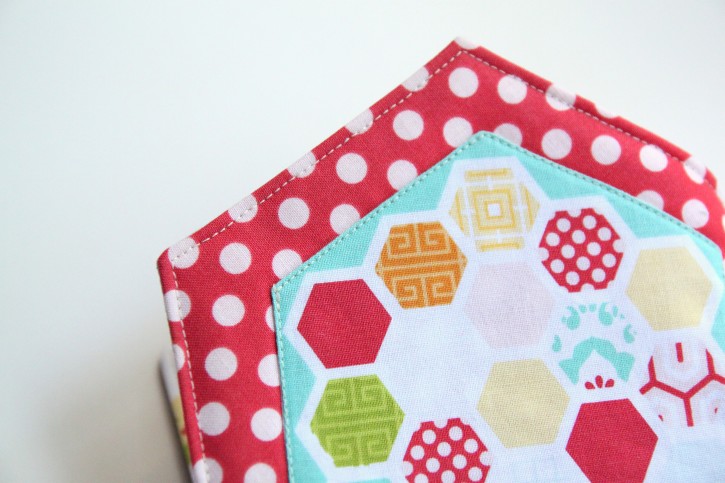
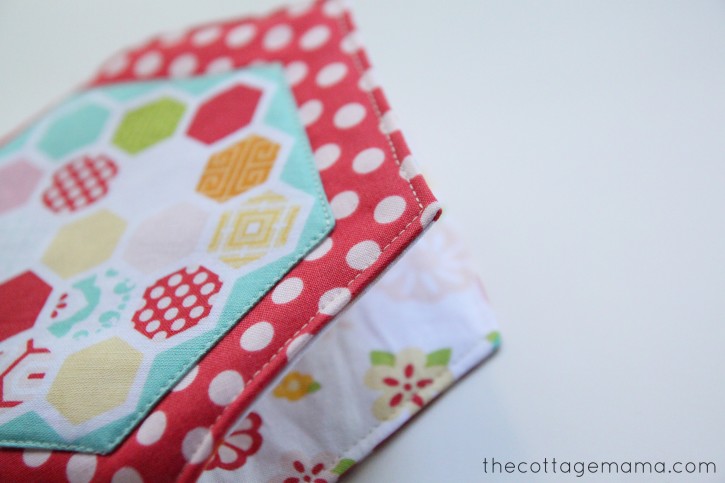
Place the small hexagon on top of the large exterior fabric hexagon, pin in place and Edgestitch all the way around the small hexagon. You can sew a small hexagon on both exterior pieces or just the one that you will use as the front.
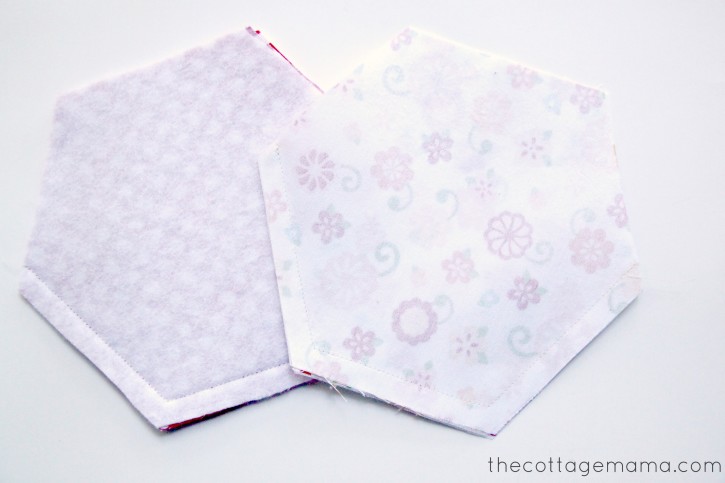
Place the two large exterior hexagons with their right sides together and sew the bottom three sides. Do the same for the two large lining hexagon pieces.
Clip the corners on both sets of large hexagons to remove bulk. Press the seams open.
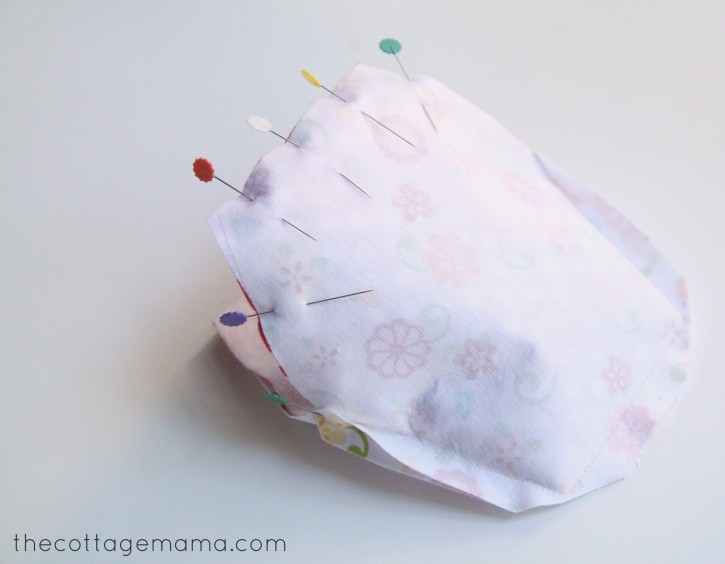
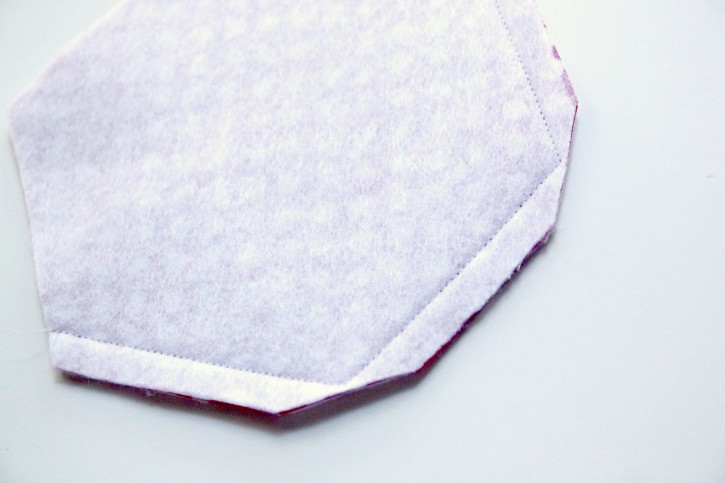
Turn the exterior large hexagon right side out and place the exterior pieces inside the lining piece, matching up the side seams. Pin all the way around the top. Sew around the top, leaving a 2″ opening along one of the straight edges.

It’s kind of hard to see, but if you look closely at the picture above, you can see the 2″ opening I left at the top of the pouch.
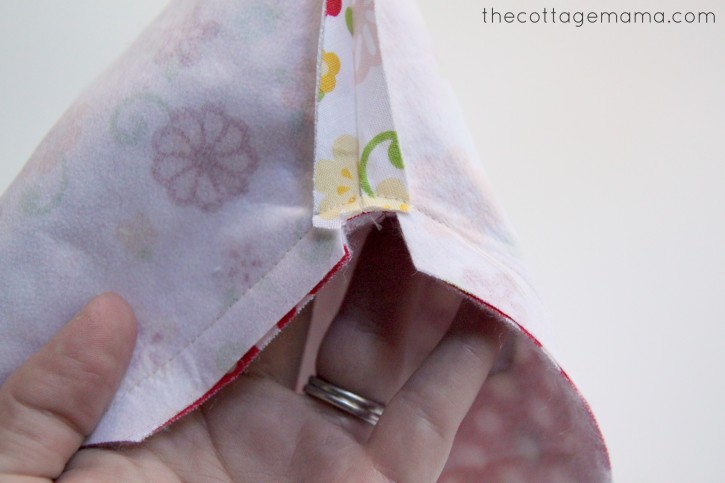
Clip all of the corners and clip a square where all four seams come together. This will remove the bulk and help the pouch to lay nice and flat.
Turn the pouch right side out through the opening. Press under the 2″ opening so it is in line with the rest of the pouch. Top stitch around the top of the pouch and that will close your 2″ opening.
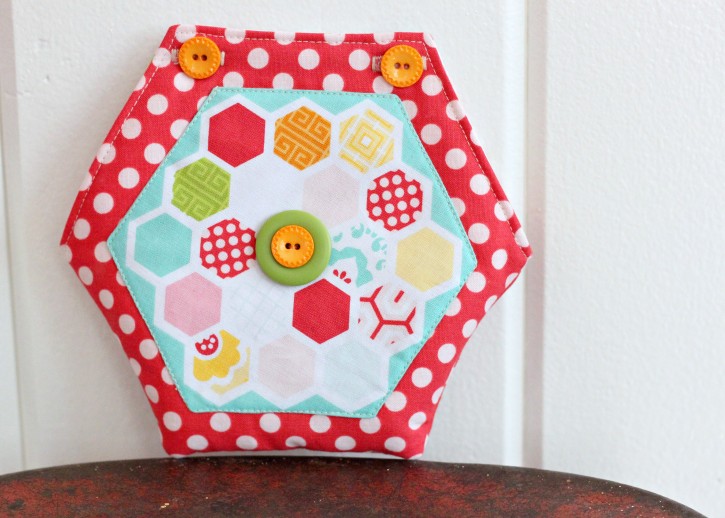
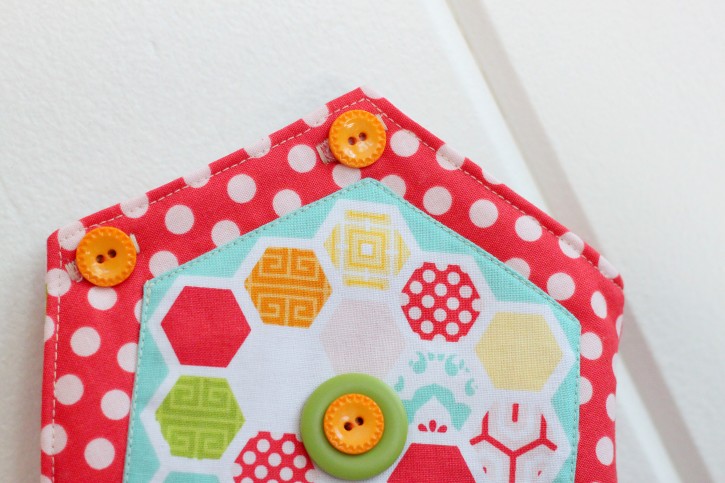
Select your buttons and make two buttonholes on the top of the pouch according to the button size you have selected. You could also layer two buttons in the middle of the hexagon for added detail. Sew the buttons to the pouch. You will have a little stitching showing on the back. If you don’t care for that, then it’s best to try to sew your buttons on prior to sewing the exterior to the lining.

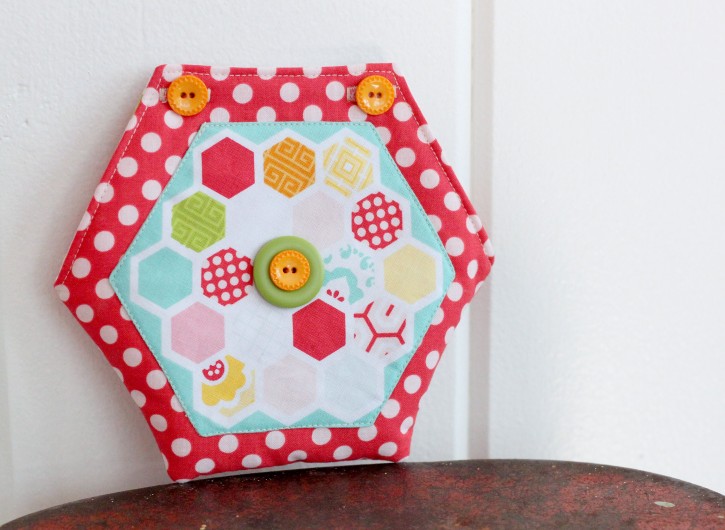
And there you have it, a cute Hexi Pouch! Perfect for carrying many different things and a great little pattern as a jumping off point to create a bag, purse, organizer, etc.


 Lindsay Wilkes is the owner and designer behind The Cottage Mama. She creates timeless, vintage inspired sewing patterns for children’s clothes. She is also a fabric designer for Riley Black Designers / Penny Rose Fabrics, author of the book ‘Sew Classic Clothes for Girls’ and can be seen teaching nationwide and online in her video series ‘Lessons with Lindsay’ sponsored by Baby Lock Sewing and Embroidery machines.


I’m loving hexis too! Thank you so much for the great tutorial.
thank you so much! It’s really lovely!