Archives for June 2011

Playdate Outfit Sew Along: Day 4 – The Flower

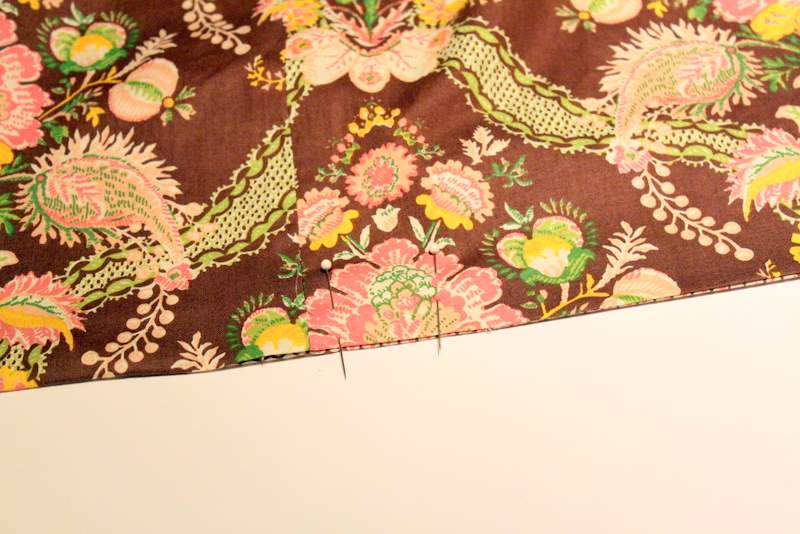
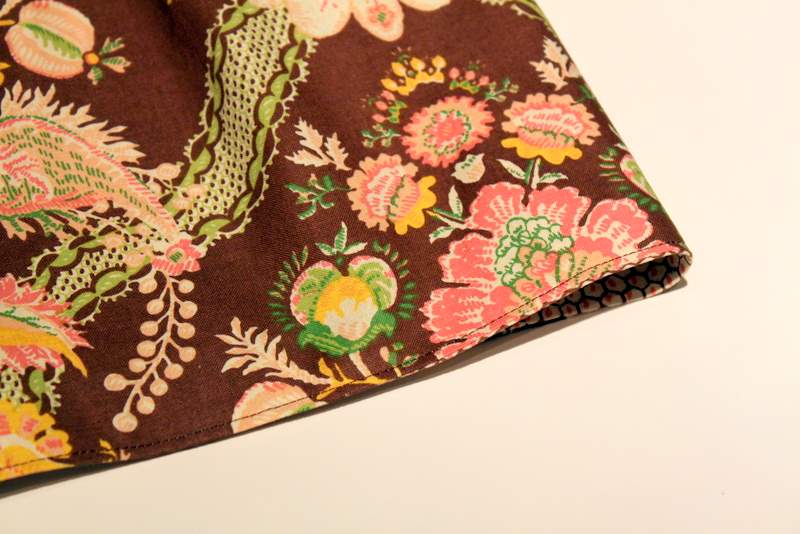
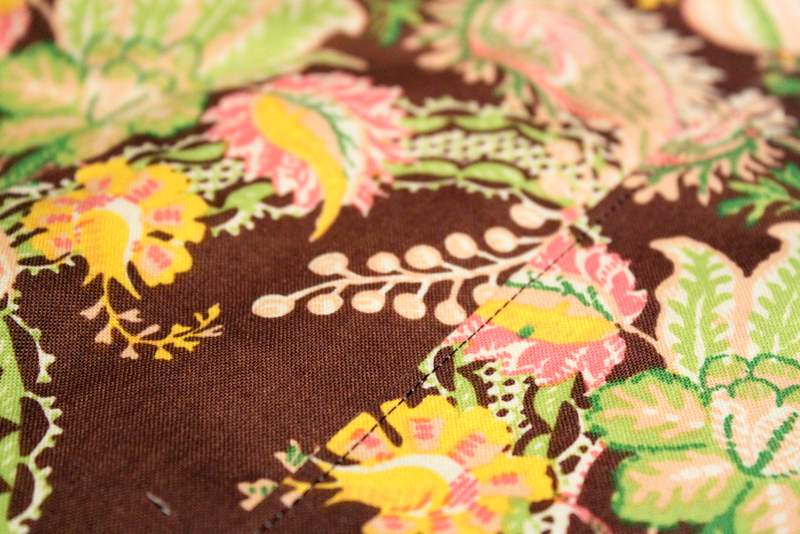
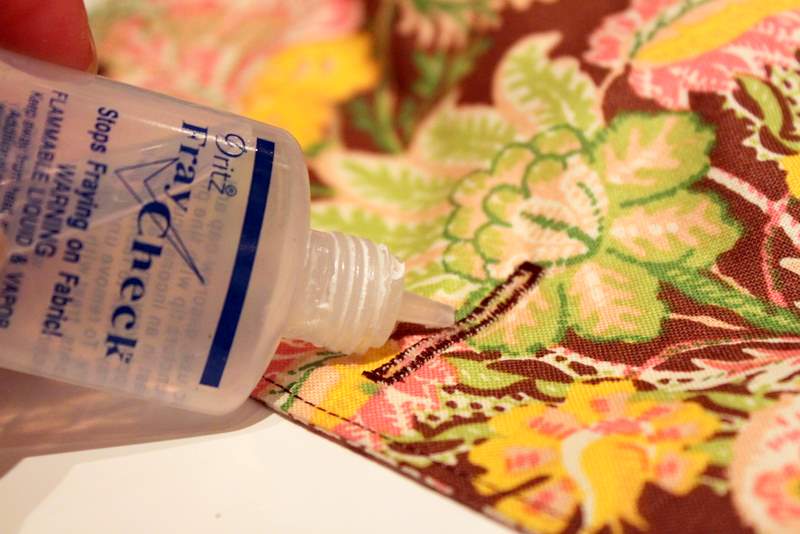
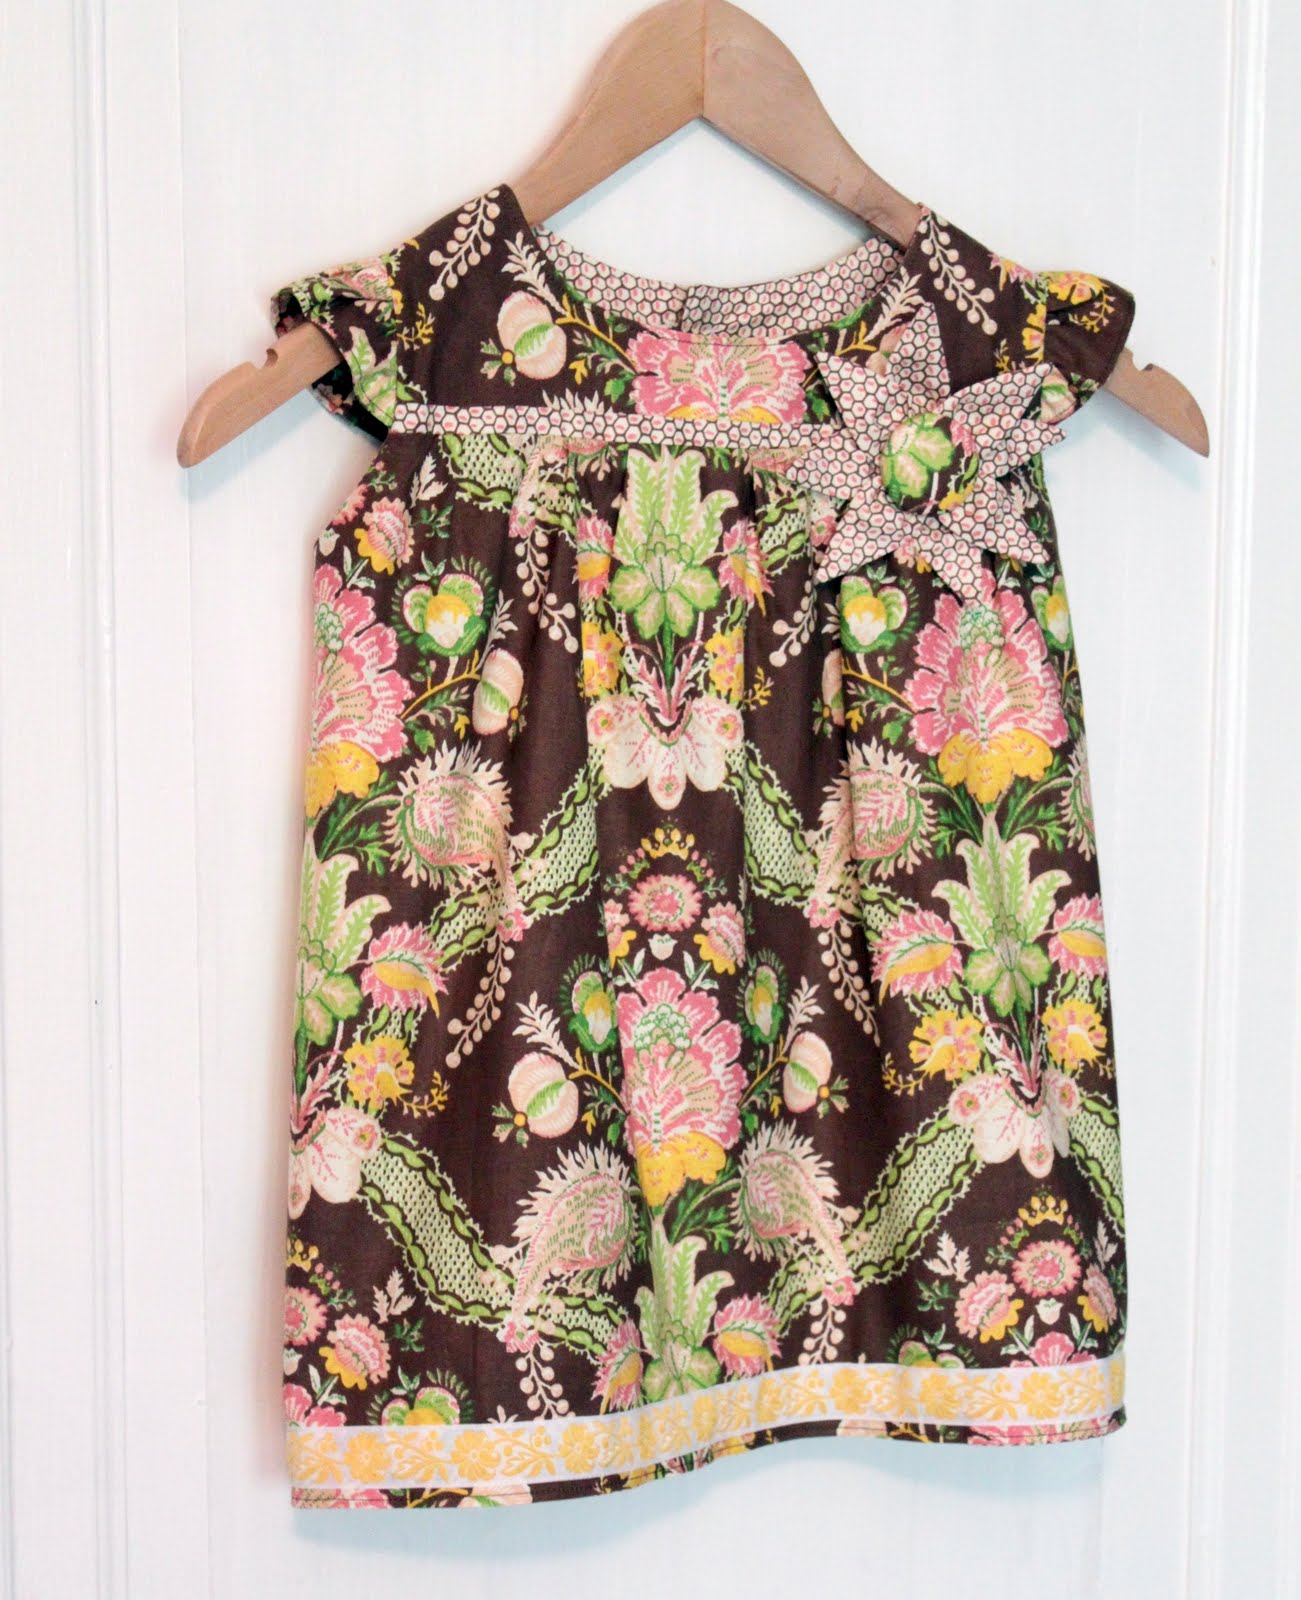
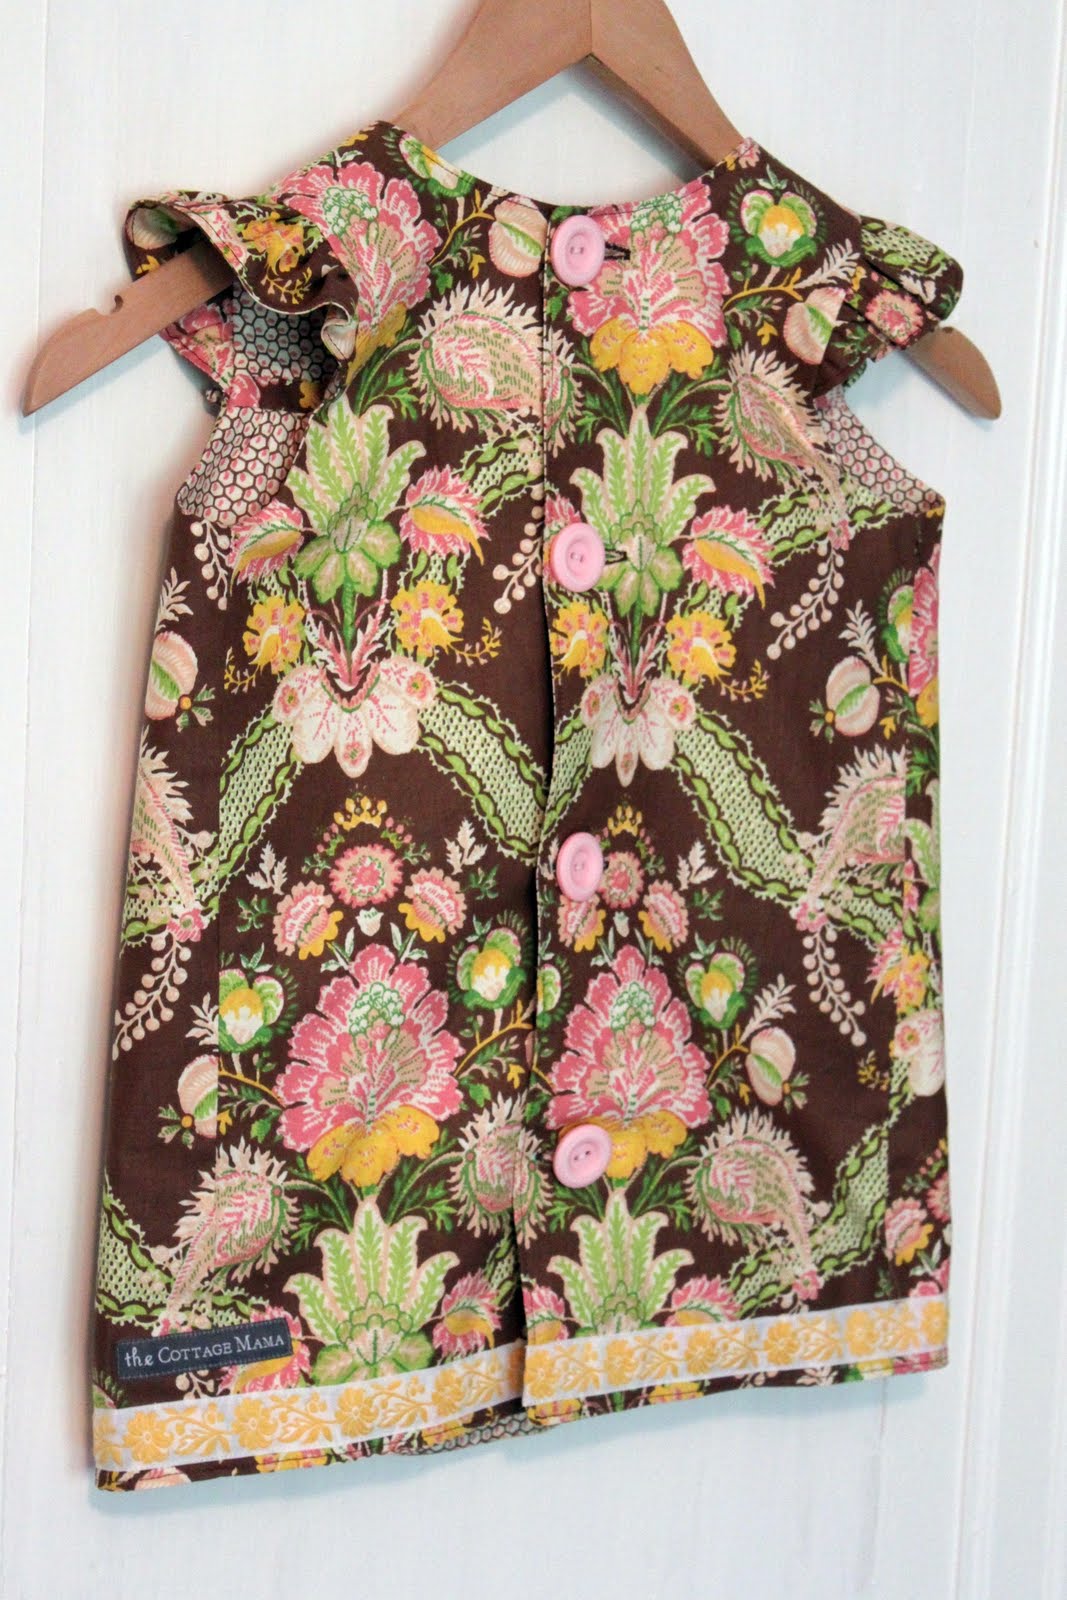
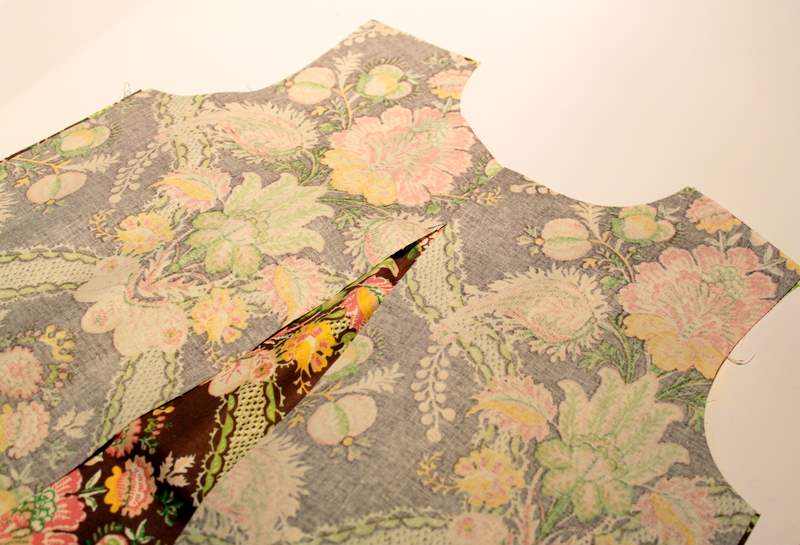
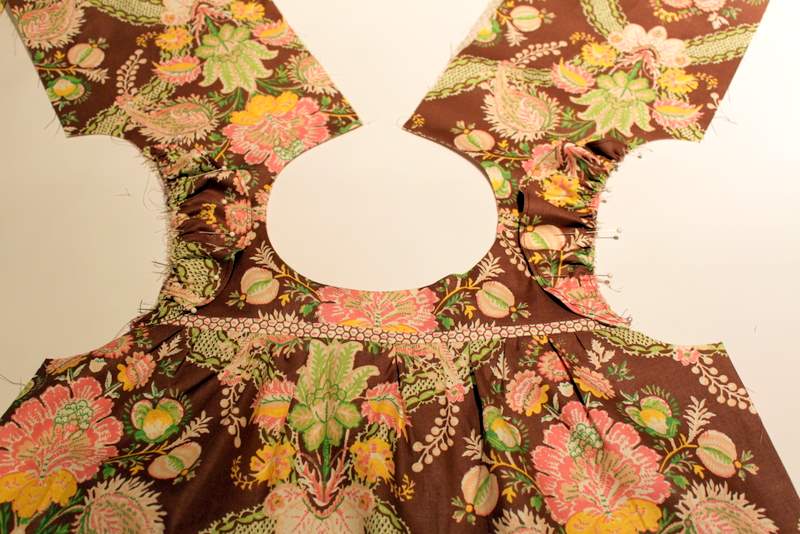
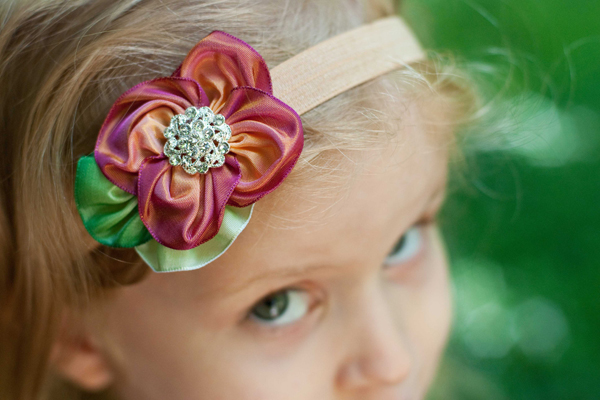
So now that we’ve got our top or dress completed, it’s time to add the fun, accent flower.  This part of the pattern is completely optional, but I think it adds a nice little bit of whimsy to the outfit.  You can get as creative as you would like with this accessory, but I opted to follow the pattern and just add an extra-large fabric covered button to the center.

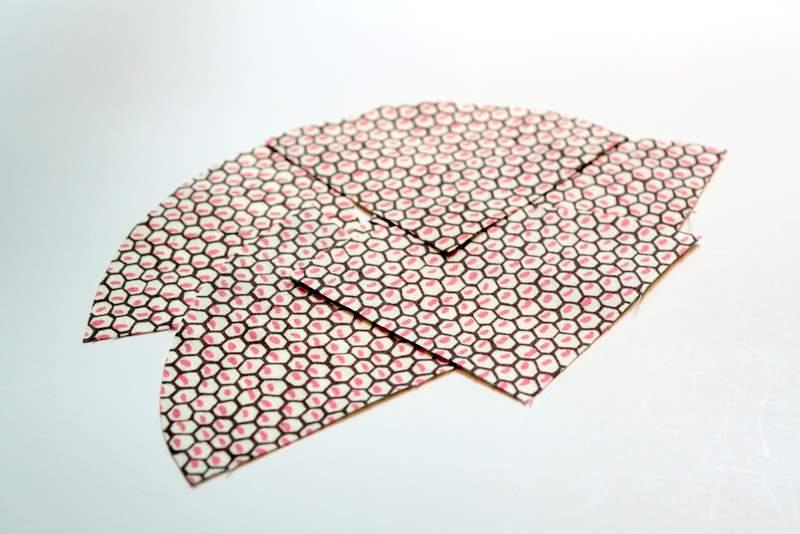
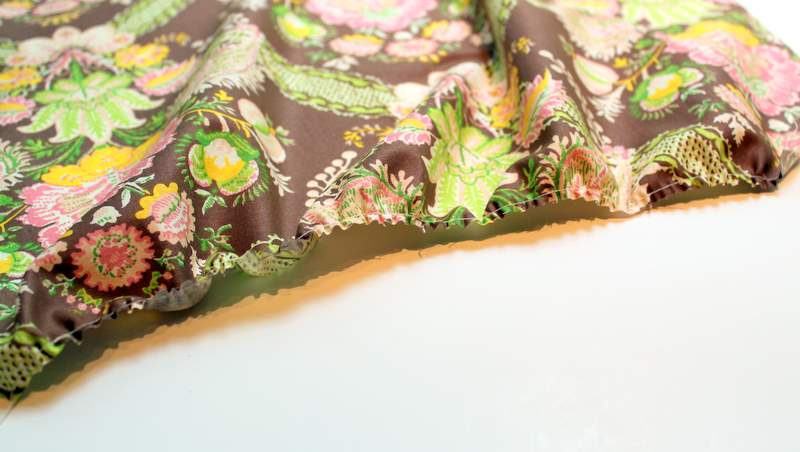
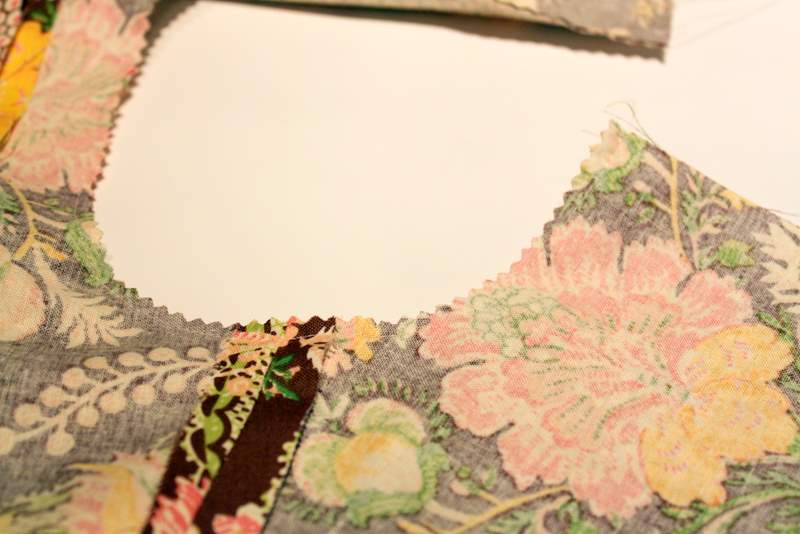
You’ve got to start by cutting 8 petals.  I used the accent fabric for the petals, but you could use whatever fabric you like……maybe even something less matchy and more bold…..it’s up to you.

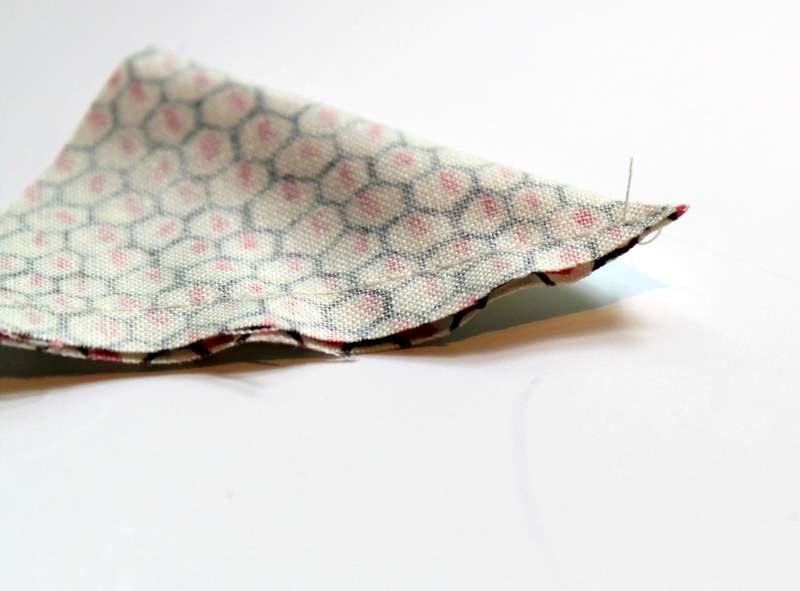
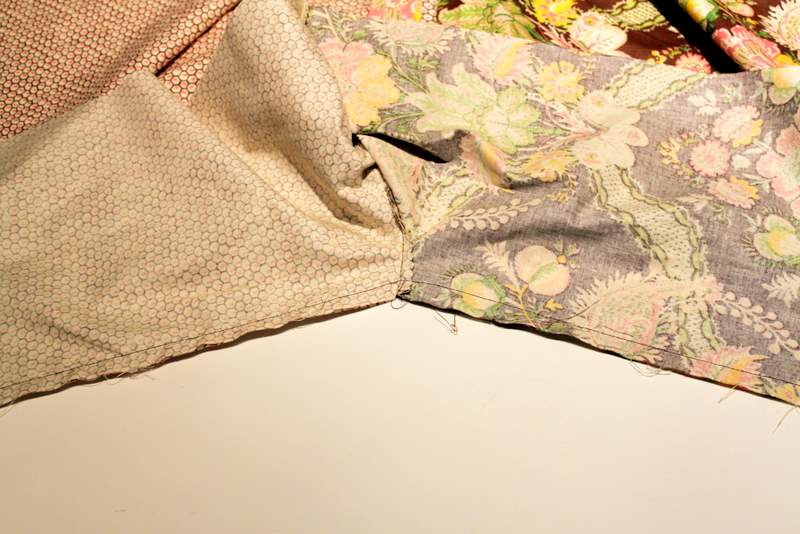
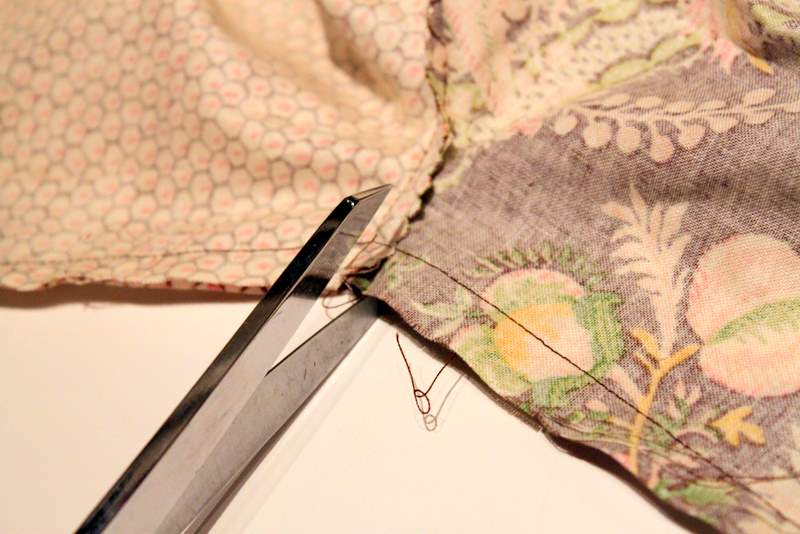
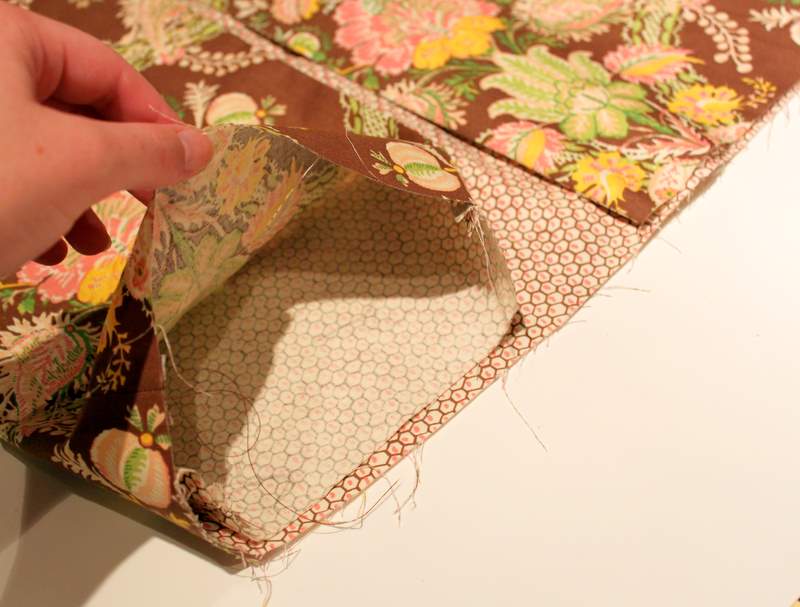
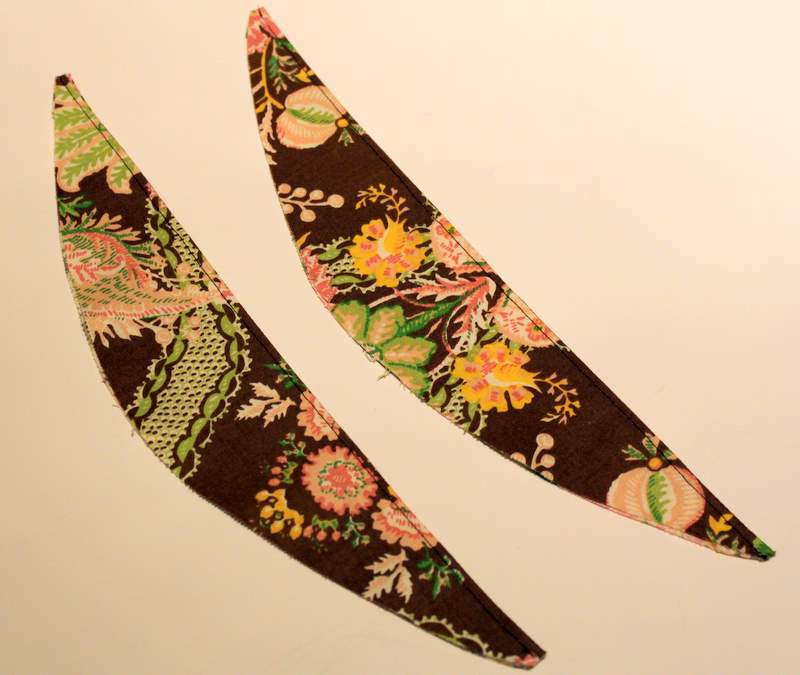
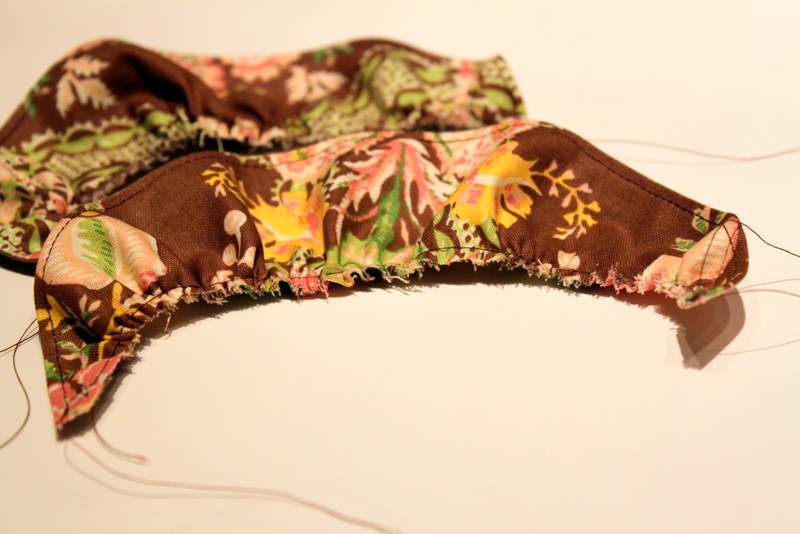
Fold your petals in half, wrong sides together, and stitch down one side.  I clipped some of the bulk off the very tip, so that they would be easier to turn right side out.

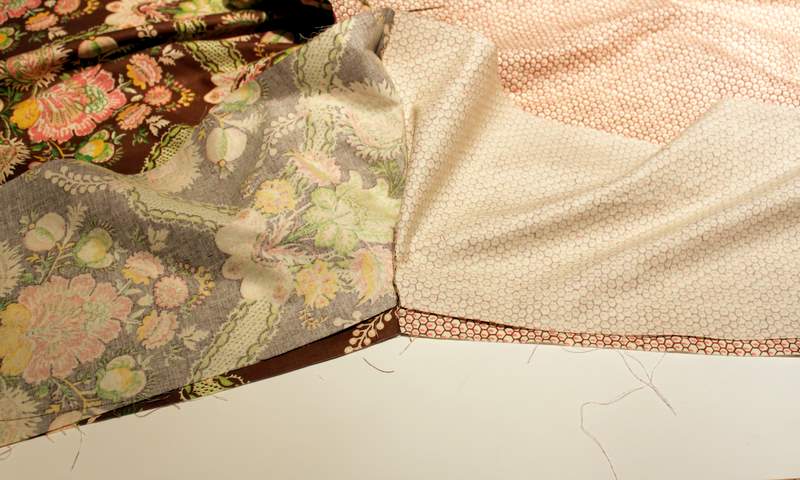
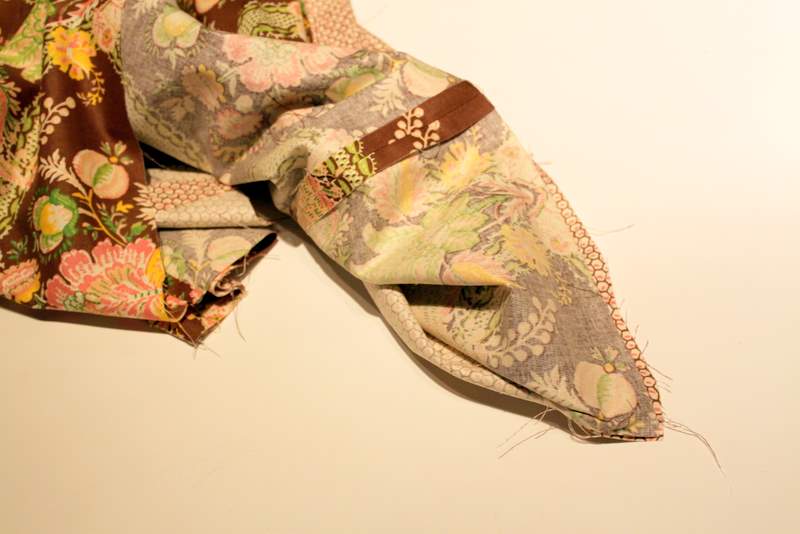
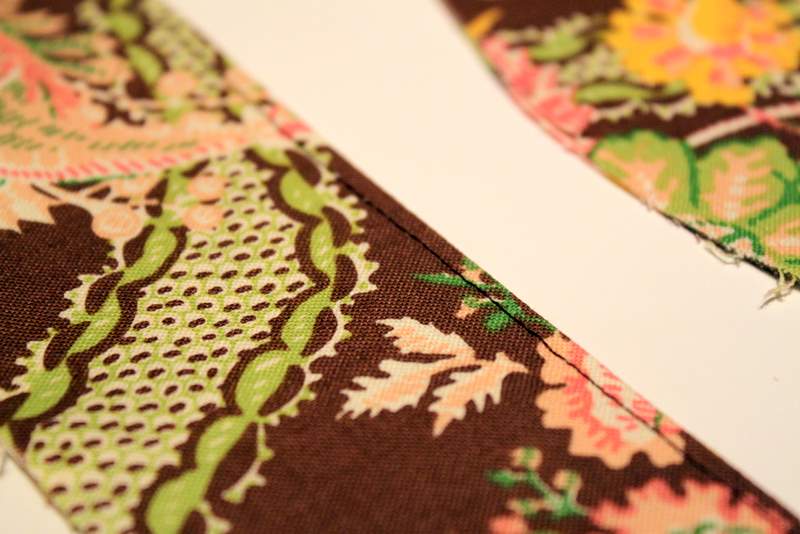
After you’ve sewn all eight petals, turn them right side out.  Try using a sharper point (like a point-turner) to really get the corners nicely turned.  Press with seams down the middle according to pattern instructions.

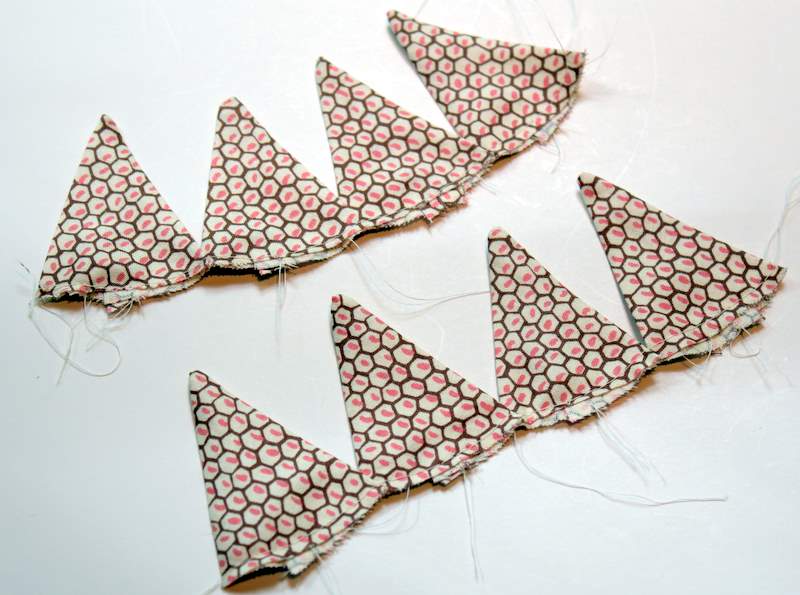
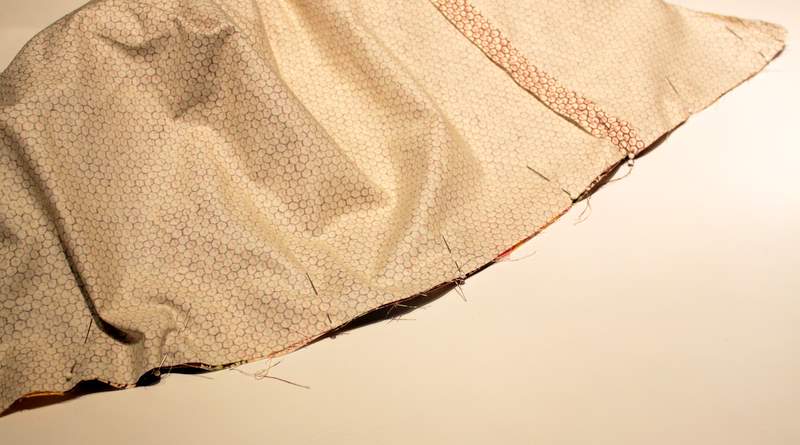
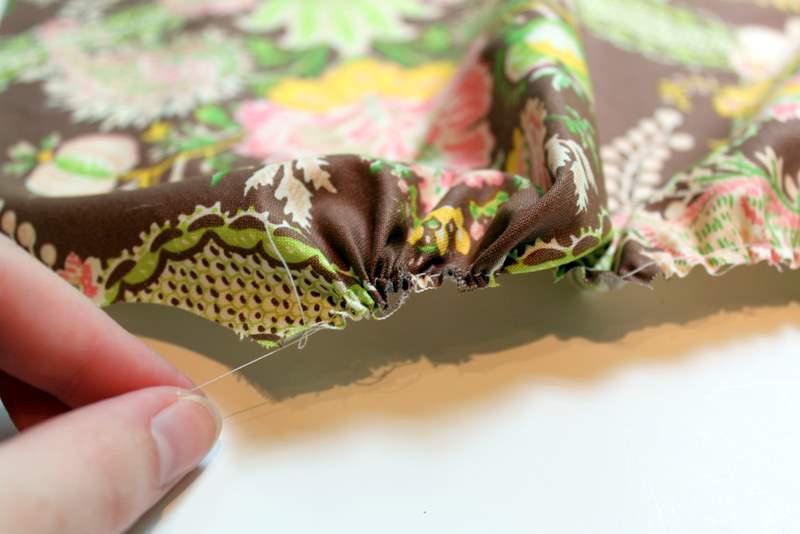
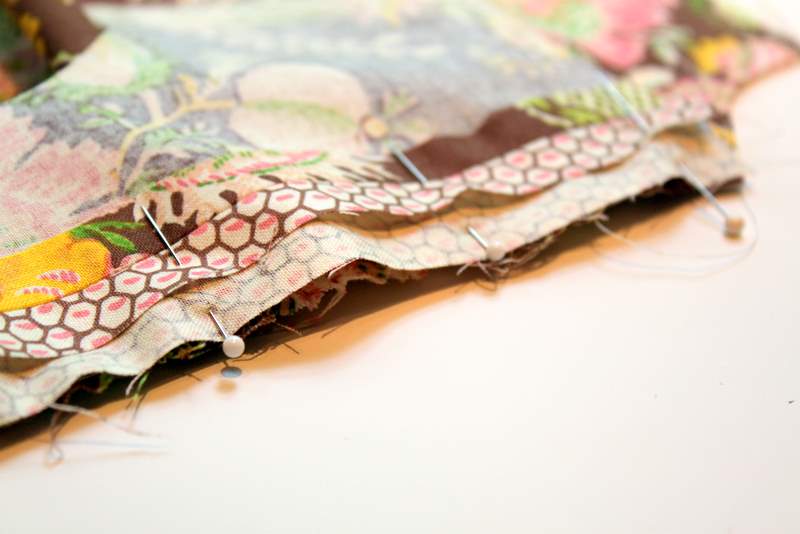
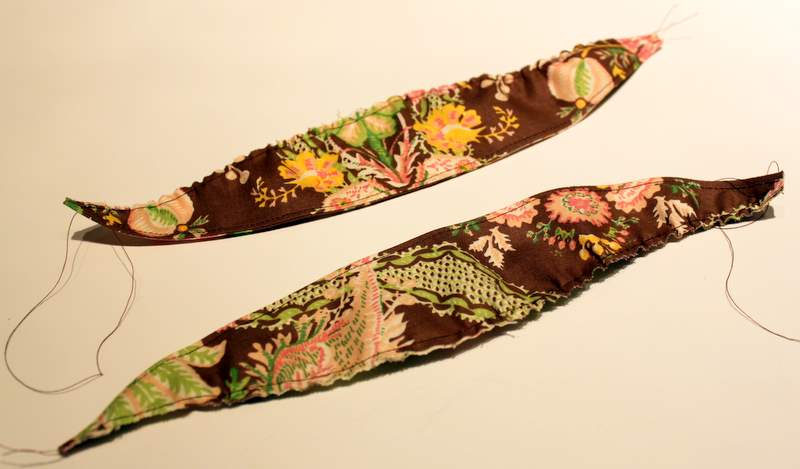
For the next step, I ran a gathering stitch across four petals at a time.  I then pulled the bobbin thread to gather the petals.  Once I had them gathered tight enough, I tied the ends of the threads together to hold them in place.  I also opted not to top-stitch each petal just because I prefer this look.

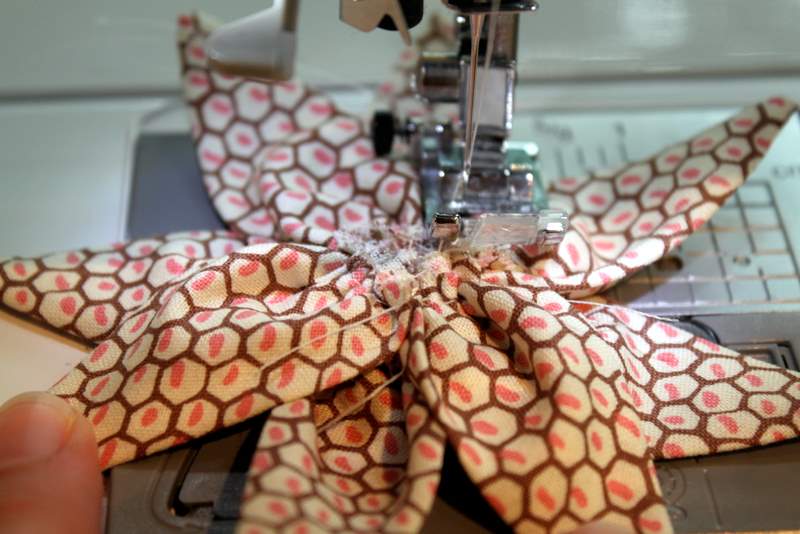
Place four of your petals on top of the other four petals in an alternating position.  Then run a stitch around in a circle to hold them in place.

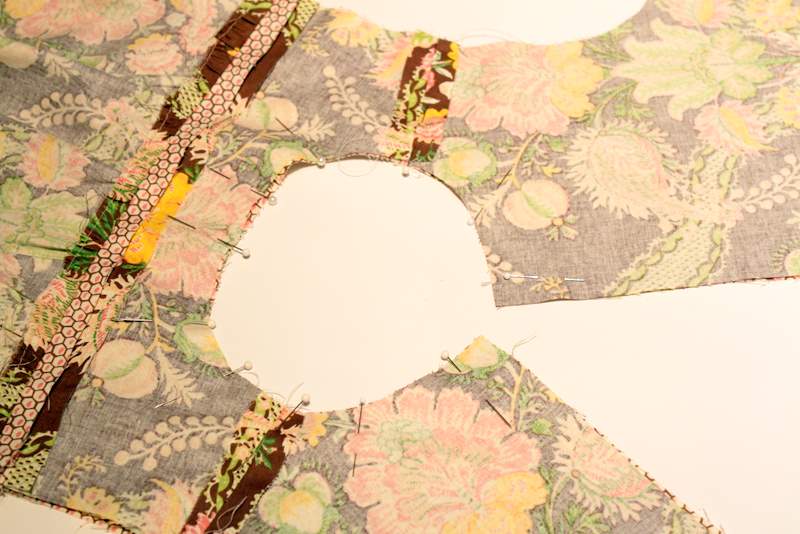
Here is my flower before the addition of the button.  Choose your button and add it to the center of the flower.  I stitched the button onto the flower at the same time I sewed it to my top.

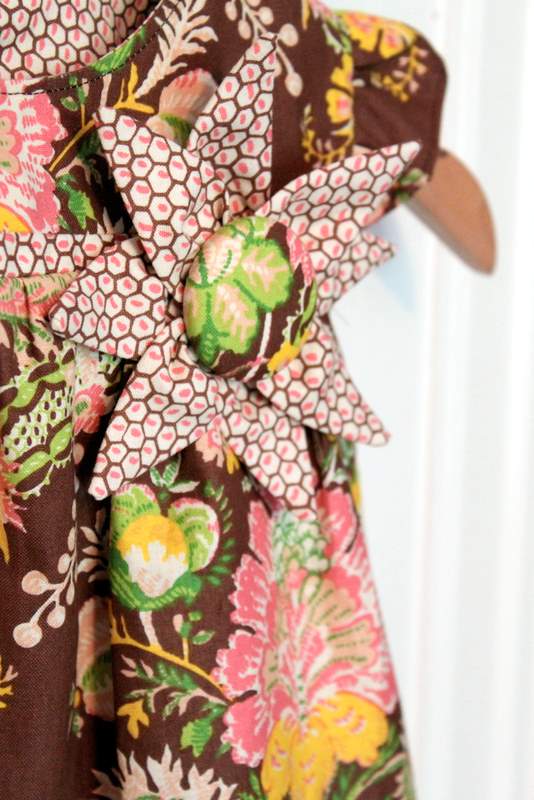
And there you have it – a fun, flower accessory.  I love the idea of adding this flower to a headband or even adding a pin on the back.  I think it would be really fun to make one of these for myself to pin to my purse or cardigan when Savannah’s wearing this outfit.  A little bit of “mommy and me” never hurt anyone, right?

Tomorrow is day 5 of our sew along where we will be working on the capris/shorts.  If you’ve reached your final destination of the sew along and were just doing the dress, don’t forget to add pictures of your completed sew along look to The Cottage Home Flickr Pool if you want to be considered for the contest and $50.00 gift certificate.  And for the rest of you, see you tomorrow!

Playdate Outfit Sew Along: Day 3 – Top/Dress (2nd Half)

So it’s time to finish up our top/dress!  How are we feeling?  Good, I hope……we’re in the home stretch, so bare with me.  Yesterday we stopped after finishing up our arm holes and shoulder ruffles, so now we’ll move on to the side seams and finishing.

Since you’ve probably just pressed your shoulder ruffles and arm holes, you will now need to pull the exterior fabric and the lining completely apart (we do this a lot with this pattern).  Place the right sides of the exterior fabric and the right sides of the lining fabric together at both sides seams.  You are now going to run a stitch starting at the beginning point of the two lining fabrics coming together and running all the way to the end of where the exterior fabrics come together.  This is going to cause us to have no exposed seams on the interior of the garment – yipee!!

Here is what your seam will look like on one side.  You will need to run this stitch on both sides.  It’s pretty much just sewing a straight line though you may have to turn your foot a tad bit at the arm hole.

I like to clip a line where the exterior and lining fabrics come together under the arm hole.  I find the arm holes lay much more flat this way.  You totally don’t have to do this step…….it’s just a little extra thing I like to do.

Turn your garment right side out and press the side seams open and press all the way around the arm holes.  I like to press the exterior seams and lining seams separately to make sure they are both fully open. 

This next step is where I took some liberties with the way I like to do a lined garment.  So for the next few steps you can totally ignore me and follow the actual instructions or give this finishing technique a try.  Let’s see if I can explain this correctly……….

Currently you have your garment pressed and turned nicely with the right sides out.  At the lower side seam (doesn’t matter which one), pull the lining fabric away from the exterior fabric.  We need to pull them apart because we are going to flip the fabrics so they will now have their right sides facing.

In the picture above, you can see the corner where I started turning towards the bottom of the picture.  It’s going to feel sort of awkward and weird but just go with it.  You want to try and turn the entire bottom of the dress so the right sides are facing each other.

In the picture above you can see that I now have the right side of my lining facing the right side of my exterior fabric.  I have pinned this in place.  You want to sew along the bottom with a 1″ seam allowance (I usually do 1/2″ but a 1″ hem is what the pattern calls for).  Sew 3/4 of the way across, then leave a 4″ gap and finish sewing to the other edge.  See picture below……

Notice how I have left a 3″ – 4″ opening at the bottom of the top.  Pull the rest of the dress through this little opening.  Again, it’s going to feel a little strange, but trust me.

Now that you have pulled the top through the opening, press the bottom seam.  You will have a 3″ – 4″ opening so you need to make sure to press that under to line up with the bottom of the top.  Place a few pins to hold it in place.

Next, top-stitch around the entire bottom using a 1/8″ seam allowance.  This will catch the opening and make it so the entire bottom is closed.  You can use this technique to make garments reversible as well.  Personally, I fell that it ensures that the bottom of any garment is nice and neat and the bottom seam is perfect.  Again, you can totally ignore me if I lost you along the way………if so, just follow the instructions in the pattern for a more typical way to hem.

The pattern now instructs for some additional top-stitching and button holes.  Again, the button hole placement didn’t seem to given exactly, so on the size small, I opted to do four buttons spaced about 4.5″ apart.  But you can do them however you would like.

I’m not going to go into details in regards to making button-holes since everyone’s machine is different.  I use a button-hole foot attachment with my machine that pretty much does all the work for me.

After you’ve sewn your button holes, open them with your seam ripper.  I place a pin at the end of each hole so as to make sure I don’t rip through the entire thing.  I’ve been VERY thankful several times that I took the time to take this extra step.

Finally, finish your button holes with fray check or other sealer so that you prevent any additional fraying in the wash.

Whew!  And that’s pretty much it!!  We will focus on the optional flower tomorrow.  But for now your top and dress is complete.  If you’ve made it this far, give yourself a pat on the back.  This was not a garment for the beginner sewer so you should be very proud of yourself!!

Here are a few pictures of the front and back of my top.  And do you think my little lady likes this outfit?  You bet she does (which makes it even more rewarding)!!
Tomorrow we’ll work on the flower, which is pretty easy, and we’ll move onto the capris/shorts on Friday.  See you then!

Playdate Outfit Sew Along: Day 2 – Top/Dress (1st Half)

It’s day 2 of the Carina Gardner “Playdate Outfit” sew along and today we are going to be working on the top or dress.  The dress is made in the exact same way as the top, but just cut a little longer.  So for the purpose of this post I will refer to this as “the top” instead of dress.

Whenever you start sewing with a pattern it’s a good idea to read through the pattern several times before you begin.  Check all the instructions, make sure you’ve cut all your pieces and pay careful attention to the seam allowances given for each step.  Generally, there is a 1/2″ – 5/8″ seam allowance for most pieces, but you always need to double check and see…..the fit of your garment depends on it!

Sometimes I have to read things three times just to wrap my head around what the designer intended us to do during a certain step.  It’s not that an instruction is poorly written, it’s usually that we all have different ways of understanding how a garment comes together.  On a rare occassion, I will take things into my own hands and do it “my way”, but that’s only if I feel really strongly about the garment construction or I have absolutely no idea what they are talking about.

Let’s get started……….

The Top/Dress:

The first step in the pattern is to assemble the bodice.  We’ve got to insert the accent piece of fabric into the exterior and interior of the top.  Place right-sides together and stitch along the raw edge.  Do this for both front bodice pieces (exterior and lining).

I’ve mentioned before that I am a huge fan of my iron, so here’s where the love affair begins.  I’m just warning you that you might get annoyed with the word “press” by the end of this sew along (I apologize in advance).  Press the seams open and then flip your bodice and press again on the right side.  Typically I would use my serger for the seams, but since this garment is lined, I went ahead and used the regular sewing machine.

A serger is not a necessary tool, it just makes the stitching move a little quicker, adds a nice clean edge and makes garments very durable.

Now we need to set up our machine to run a gathering stitch along the other front piece of the top.  Set your machine to the longest stitch length (mine is 5.0).  Stitch along the entire top of the piece, but make sure NOT to back-stitch at the beginning or end (otherwise you won’t be able to gather).  Stitch using about an 1/8″ seam allowance.

Above is what the gathered piece will look like after you’ve run your gathering stitch.  It will be somewhat gathered, but not quite enough…..which is where you come in.

Pull the bobbin thread (or the top thread) to gather the fabric.  I like to gather from both sides because it makes things go a little faster.  You want to gather your fabric until it lines up with the upper front bodice piece.  Space your gathers out evenly.

Once you have gathered your piece to equal the same width as the top bodice, pin in place with right sides together.  Stitch using seam allowance given in pattern, press your seams open, and then press on the right side.

Repeat and do the exact same thing with the lining pieces.

Next we need to sew the shoulder seams of both the exterior of the top and the lining.  Line up the back pieces with the front pieces, right sides together, and stitch in place at the shoulder.  Press seams open.

Now to sew around the neck-line.  Place the exterior fabric and the lining fabric, right sides together.  Pin around the neck-line. Stitch all the way around.

Next you need to notch out the collar in order to make sure it lays nice and flat.  You could do traditional notching as I’ve shown in the first picture.  Or you could do my “cheater” version that I’ve been doing a bit lately and use your pinking shears to cut around the collar.  I find this notches out a wider neck-line just enough to make it lay flat.  Turn right side out and press, making sure to get the seams nice and flat.

Next step……the shoulder ruffles.  Place the shoulder ruffles right sides together and stitch along the straight side.  Turn right side out and press.

After you’ve pressed the shoulder ruffles, run them back through your machine with a 1/8″ seam allowance and top-stitch.  Top-stitching adds a really nice finished look to an edge and is also great for increasing the durability of clothing due to the wear and tear a child can have on their clothing.

Now run a gathering stitch along the curved edge of the shoulder ruffles.

Pull the bobbin thread to gather and make the shoulder pieces into ruffles.  So, this is a spot that was a little confusing in regards to the placement of the shoulder ruffles.  I didn’t see specific markings for where they were supposed to start and end (though I could have just missed it), so I just kind of interpreted things and went with where I thought they should go.

Gather the ruffles until they have reached your desired length.  I started mine right where the accent fabric piece started on the front of the bodice and ran it about halfway down the back bodice arm hole.  Run a basting stitch along the edge.  A basting stitch is just a stitch length a little longer than your normal stitch to hold things in place – I usually do mine at 3.0.

Baste the shoulder ruffle ONLY to the exterior fabric.  You’re going to have to pull the lining away so you don’t catch it in your stitches.

Ok, so this next step might have confused some of you or it might not have.  I’m very used to doing arm holes this way since a lot of my garments in the shop are fully lined and this is my favorite way to achieve that nice look.  Pull your two arm hole pieces apart from one another.  Pull the exterior fabric over the top of the garment and pull the lining fabric underneath.  Pull both pieces to the other side so they will now be right sides together.

You are going to scrunch the other arm hole pieces in so you can have the pieces you just pulled over from the other side with their right sides together.  Make sure to bunch the other arm hole pieces up so you don’t catch them in your seam.  This is also why we used our basting stitch earlier so that we don’t have to worry about the shoulder ruffle shifting.

Once you have scrunched the other arm hole piece up inside this arm hole piece, you’ll want to pin it in place.  Stitch according to given seam allowance.  Clip around the curved seam so it lays flat.  Pull the fabric through the stitched arm hole and repeat on the other side.

Here’s how your shoulder ruffle should look in the arm hole once it is complete.

Ok, so that’s been quite a bit of sewing for today.  What do you say we call it quits and pick it up again tomorrow?  Sounds like a good idea to me.  See you tomorrow, when we finish the second half of our top/dress!

Playdate Outfit Sew Along: Day 1 – Getting Started

Welcome to the Carina Gardner “Playdate Outfit” Sew Along!  I’m so glad so many of you have decided to join in the sewing fun.  And even if you’re not sewing the pattern along with the rest of us, you still might find some helpful hints and tricks when sewing with commercial printed patterns.  So, let’s get started……….
The Tools:
Here are a few of the tools that I like to use when I’m sewing.  I find they make life a little easier and they can help achieve that truly professional look to your sewn garment.   I have quite a few tools in my sewing box, so I’m just going to share a few that I think will pertain to this particular pattern and garment so as to not overwhelm you.
1. Bodkin – This tool is great for threading elastic.  You can certainly use a safety pin, but this makes it even easier and it’s very inexpensive.  It is found in the notions section of your sewing store. 
2. Hem Gauge – The hem gauge is probably one of my favorite sewing tools.  If you don’t have one, you MUST get one.  This little guy helps you achieve perfect hemming lengths as well as helping with button placement and the centering of appliques.
3.  Seam Ripper – I have a love/hate relationship with this tool.  It’s definitely a must when you are sewing, but you don’t like to have to put it to much use.  This is also what I use for cutting into my button-holes.
4.  Fray Check – I use this a ton.  This prevents fraying and washes really well.  I use this on all of my button holes after they have been cut open as well as on the ends of ribbon and on the ends of all serged seams (which will not apply to you if you don’t have a serger).
5.  Button-Hole Foot – If you have an older sewing machine, you may not have one of these.  But if you have a newer model, your machine probably came with this foot.  If you’ve never used it, get out that manual and give it a whirl.  Basically, once you know how to use it, it does all the work in creating perfect button-holes.  If your machine didn’t come with one, check online and see if there is one available – it’s well worth it!
6.  Sewing Scissors – These are not your every day use scissors.  These are your super-sharp, sewing-only scissors.  Keep these scissors reserved for your sewing projects, that way they will continue to stay sharp.
7.  J-Foot – This is my go-to sewing foot, the one I pretty much always have on my machine.  I like being able to see through the bottom of the foot and it just works for me.  Use whatever foot you are most comfortable with.
I also use a rotary cutter and mat for cutting my patterns, but that is something totally optional.  If you are new to sewing, you may not want to invest in something like this yet so using pins and scissors to cut your patterns will work out just fine.
Iron, iron, iron.  I can’t tell you how much time I spend ironing when I’m sewing a pattern.  I probably spend just as much, if not more time ironing than I do actual sewing.  You must have a good iron and a steam iron can be found at most stores (I got mine at Target).  It doesn’t have to be expensive, but you must make sure it’s a good one.  Check Consumer Reports or Good Housekeeping for some of their reviews – that’s how I found mine.
Another one of my favorite tools – spray starch.  This gives your garment incredibly smooth lines and works great when sewing with cotton fabrics.  I love pressing seams with starch and it truly gives a professional look.
Hand Sewing Kit: I got this plastic box at Office Depot during one of their back to school sales and I want to say it was only a penny (hard to believe anything is a penny these days).  I keep my hand-sewing supplies in this box and it is so easy to grab when I need to sew on a button or something.  All it has inside is neutral thread, a small pair of scissors and several different size hand-sewing needles, but the convenience of it is just great.
For the next several steps, I wanted to share with you the paper I use for tracing patterns.  I use your basic Freezer Paper that can be found in most local grocery stores.  This stuff is great.  It’s thin enough to see through to trace your pattern, yet thick enough for your traced patterns to stand up to heavy duty use.  I know many people use pattern tracing paper, but I just find this to be more durable.
Preserving and Tracing Commercial Patterns:
When I purchase a nice, commercial paper pattern, I very rarely will ever cut into the original copy.  For $12-$16 per pattern, I want to make sure that I can use it multiple times and if I cut into one specific size then I am limiting the useful life of the pattern.
So how do I preserve my sewing patterns?  By tracing each pattern piece in the desired size that I am sewing.  I do this by using my large roll of freezer paper, pattern weights, a pencil and several rulers.
First, determine what size pattern works best for your child.  Every pattern designer uses different grading standards.  So a size 2 from one designer may be slightly different than a size 2 from another.  It’s best to look at the grade rules (aka measurements) on each pattern when determining what size will be the perfect fit.  If you are sewing for a friend or grand-child then you just may have to go with standard sizing.
Once you have determined what size pattern you are using, you will want to unfold your pattern and lay it out on a large flat surface.  I layed my pattern out onto my rotary cutting mat because that was just the right size.
Next, roll out your freezer paper on top of the pattern piece you wish to trace.
I like to use my pattern weights to make sure my freezer paper doesn’t move when I’m tracing my pattern.  These are just your basic washers that I had my husband pick up for me at Home Depot.  Someday I’ll decorate them and make them look pretty, but for now they work just great!
When tracing the pattern, I like to use a ruler for my straight edges to achieve the perfect line.  But if you have a steady hand, then you can certainly just trace everything by hand.  Just make sure you trace very carefully because if your tracing is off, your cutting will be off and thus, your garment will not be quite right – it can definitely cause a huge domino effect.
Here is one piece of the pants pattern that I’ve traced onto my freezer paper.  I’ve removed the original pattern from underneath so I can easily cut out the pattern piece with my rotary cutter.
After you have cut out your pattern piece, you’ll want to make sure you transfer all the markings and text from the original pattern.  You especially want to note the grain line and any notch marks where you may need to line things up.  I also like to include the size I’ve got on the traced piece so I can reference it if I decide to sew the same size again.
Determining Fabric Yardage:
Most commercial, printed patterns will provide the yardage calculations for you in the printed instructions.  Use this to determine how much fabric is needed.  Pay careful attention to whether or not a garment is lined or un-lined or whether or not there is contrast fabric used.  This will all alter the total amount of yardage needed to complete the garment.
Pattern Cutting:
Before cutting any pattern pieces, pull out the instructions and look at the cutting layout.  This will help you determine how your pattern pieces should be laid out on the fabric.  It will also help you by making the most out of your fabric so you end up with the least amount of waste.
Make sure you pay attention to what pieces might be cut “on the fold” or “not on the fold”.  When you cut “on the fold” this will make your finished fabric pattern piece double the size.  The pieces needing to be cut on the fold are usually marked, but it’s always good to double check your cutting layout.
**I did notice what I think might be a slight mis-print in the pattern or it could have just been unique to my copy.  There were two pattern pieces labeled “Waistband Front”, but if you compare them to the cutting layout, you will realize that pattern piece “H” is actually “Waistband Back”.  Again, this is another place where the cutting layout comes in handy.**
Once you have traced all your pattern pieces, it’s time to cut out your pattern.  Use pattern weights or pins to hold your pattern in place.
Remember how I said it was important to pay attention to the grain-line?  Well, this is where you need to know what direction that is going in or you could end up cutting your pattern in the wrong direction.  Generally, the grain-line you are going to want to follow runs parallel to the selvage of the fabric.  The selvage is the outermost edge of the fabric.  In the picture above, it is the cream colored line running along the printed edge of the fabric. 
For the playdate outfit, I traced the pants pattern pieces at the full length, but because I wanted to use the cuff piece, I folded the bottom up to the dotted line in order to achieve the shorter length.
I always cut my patterns out with my rotary cutter because that’s what works for me.  But like I said before, if you prefer to pin your pattern pieces and cut them out with scissors, go for it!
I like to mark my back pattern pieces with a safety pin.  This is just what works for me.  You could also use a water-soluble fabric marking pen and make an little “X”.  I just find the safety pins easy to see so I know what piece is what – the front and back of pants can be a little confusing.
Once you have traced and cut all of your pattern pieces, you will need to store them.  I like to store a lot of my patterns in large zip-lock bags.  I place the pieces folded 2-3 times with the pattern cover and instructions all together.
Then I punch a hole in the top of the bag and slide them onto hangers.  I find I can get 3-4 patterns per hanger (depending on how many sizes I’ve traced).  Then these can be hung on a garment rack or in a closet for later use.
When I am designing my own patterns and need to be very careful about folds in the patterns, these pattern hooks come in handy.  You can punch a hole in each pattern piece, slide them onto the hook and hand them up without ever having to put a single fold in the pattern.  These can be purchased online from various design supply companies.
Ok, so now we’ve finally gotten started – woohoo! 
The goals for today are the following:
1.  Gather your tools.
2.  Trace your pattern in the size you will be making.
3.  Determine the amount of fabric you need for your garment.
4.  Cut out your pattern.
5.  Press all the fabric pattern pieces after cutting to get ready for sewing tomorrow!
I can’t emphasize enough how important cutting is when it comes to using patterns.  If you don’t cut properly, I can almost guarantee your garment is not going to turn out just the way you wanted.  The fit will be off, seams won’t line up.  So it’s important to go slowly and take the time to really do each step correctly.  Trust me, if you are going to spend a week sewing a garment, you are going to want it to turn out just right!!
Generally I like to respond to your comments via email, but since we are all sewing along together, I will be responding to everyone in the comments section so we can all see the responses.  Feel free to ask any questions, give any tips and tricks you might have, or simply just talk about what you’ve learned.  Anything goes……….

Birdsong Bows – Annabelle Flower Pattern Review AND Giveaway

One of my super-fabulous, totally wonderful blog sponsors, Birdsong Bows, sent me her most recent pattern to review called the Annabelle Flower pattern. This pattern is top-notch just like all of the other patterns I’ve seen from Birdsong Bows!

If you’ve never sewn a Birdsong Bow pattern, you are missing out.  I would call myself a total novice when it comes to hair bows, but these patterns are always incredibly well instructed and very easy to understand.  I don’t know if you recall, but I made some pretty fun hair bows awhile back from the Funky, Loopy Bow pattern……….

The Annabelle Flower pattern is perfect for those of you that love to sew.  It can actually made from fabric rather than traditional hair bows that use ribbon (though you can use wider, fancy ribbon as well).  It is a wonderful way to add that matching accessory to any outfit for your little one. And perfect for using up scraps!

This pattern can be made as fancy or as casual as you would like.  The examples from Birdsong Bows are made with beautiful Duponi silk and other more upscale materials.  But you can certainly use a cotton fabric to make a more casual look for your little one.

The pattern instructions are so incredibly easy to follow and are shown in step-by-step pictures. Those of you that are visual learners (like myself) will really love these patterns.  Another feature of the Annabelle Flower pattern is the fact that she gives you several different flowers to make such as a three petal or four petal or you can even do a layered look.  There are so many options that you really can make this pattern your own.

Some of my other favorite patterns are:

Today Birdsong Bows is giving away TWO Annabelle Flower PDF patterns here to The Cottage Home blog readers.

Here’s how to enter:
Leave a comment, any comment………one entry per person.

Giveaway will be open through Sunday, June 26th at Midnight (CST).

Rachael’s Handmade Soap Giveaway WINNER!

The winner of the Rachael’s Handmade Soap Giveaway is…………

Congratulations to The Osborne Family!!  You are just going to love these soaps and scrubbies!  Email me at thecottagemama[at]gmail[dot]com with your address/contact information and we’ll make sure to get your prize out to you as soon as possible.  Thank you to everyone who entered!

Tomorrow we have a fabulous giveaway and pattern review from one of my lovely blog sponsors, Birdsong Bows!
**If you are interested in becoming a sponsor of The Cottage Home blog, please email Lindsay at thecottagemama[at]gmail[dot]com for rates and more information.**

{ Matilda’s Birthday Dress – Tea For 2 Party }

In about three weeks, Miss Matilda Jane will be turning 2!  I can’t believe it – how did my little baby grow-up that fast?  My mom has always said that every year goes by quicker and quicker and every year I believe her more and more.

Matilda loves to play tea party, so there was no doubt that “Tea for 2” would be the perfect theme for her party.  I still have lots of details to plan such as the food, beverages and decor, but there is one area where I am ahead of the game – The Dress! 

Last year I based “Matilda’s Summer Garden” 1st birthday party completely around the fabric used in her birthday outfit, so this year will probably be no exception (click HERE to view her 1st birthday party).  I find it so much easier to have a color palette to work with and gorgeous fabric makes it even easier.

I am in love with Anna Griffin’s “Carmen” line.  I have about 7 bolts of this fabric sitting on my shelves right now.  The fabric is feminine and girly, yet not too juvenile.  I also love all the different scales of prints in the line.  There are large scale, medium, small and super-small – which is perfect for mixing and matching a multi-fabric printed dress.

I have had this teapot applique in my head for quite some time, so I’m glad to finally get it out and sewn onto something.  The applique is hand-cut and a mix of all the different fabrics used in the dress.  To add extra detail (which you know I love), I added some ric-rac where I hand-embroidered some stitching.  I also added a little button on top of the pot. 

I have a few onesies and ruffle bottom pants listed in the shop right now using this teapot applique (size 3-6 month and 12-month).  I went a little nuts appliqueing one night because I just thought the design was SO cute!

I added some girly-ness to the apron with the little ruffle around the edge.  I thought about using bias-tape (which would be cute too), but I think the ruffle adds that special something.

The apron also has coordinating fabric trimming the bottom with the curvy edge of the ric-rac sticking out.  I just love ric-rac.  I know some people aren’t wild about it, but I think it just adds that little bit of vintage charm.

So I thought I would wait and show pictures of Matilda actually wearing the dress at her party.  I don’t want to spoil too much for our party guests!
Do you like this dress design?  This just may be the third pattern in my line-up to be released over the next several months with several other variations.  I’m not saying for sure (because I like to be a little mysterious), but it just. might. be.

Playdate Outfit Sewing Kit

In exactly one week we will start the sew-along for the Carina Gardner “Playdate Outfit”.  I’ve already sewn my outfit since I will be spending this week preparing the five blog posts for next weeks sew along.  Starting Monday, and each day after that, we will sew a portion of the pattern and will have all completed our outfits by Friday.  If you missed the original details, click HERE to view previous post.

Above is my completed look for my daughter, Savannah Rose.  

I also wanted to offer a sewing kit to those of you who are interested.  I know it’s sometimes hard to find designer cotton fabric in your local sewing stores.  Also, ordering fabric online can be tricky because you can’t always tell exactly what colors go with what or the scale of the different printed fabrics.

So I’ve decided I’m going to try something new.  I am going to be offering fabric and trim kits to go with different patterns, whether it be my own patterns (coming out in the next two months) or other commercial sewing patterns.  These kits will contain the fabrics and trims needed to sew your own boutique clothing look at home.  I may occasionally offer a kit to go along with one of my free tutorials as well.  Some people love picking out their fabrics and others find it to be quite stressful.  So for those of you in the later category, I thought this might make life a little easier.

Don’t sew?  No problem.  Perhaps you have a grandparent, aunt or sister in your life who likes to sew.  Purchase the pattern and sewing kit and see if they will sew up the look for your little one.  Also, some dry cleaners have excellent seamstresses, so you might approach them to see if they can get the job done for you.

Again, the sewing kits may not be for everyone, but I just thought it would be something fun to try!

So, I have listed two kits in the shop for the Carina Gardner “Playdate Outfit” sew-along.  One is for size X-SMALL/SMALL and the other is for MEDIUM/LARGE/X-LARGE.  There is a slight difference in price due to the additional fabric and buttons needed for the larger sizes.

What does the Sew-Along Kit Include?
– Two coordinating prints of 100% designer cotton fabric from Anna Griffin’s “Carmen” line (you choose chocolate/pink or pink/green colorways).  This fabric is brand-new and cut straight from the bolt.  You will receive enough fabric to complete the dress or the top and capri look.  Plus you will have plenty left over to create any accessories.
– 6-8 coordinating buttons (depending on size of kit)
– Elastic
– Yellow and white woven jacquard trim
– One extra-large fabric covered button for the flower center (I will cover this for you)

There are two different choices in regards to colors for the kits.  You can choose the chocolate/pink colorway (pictured in the garment I have completed).  Or I have the same fabrics in the pink/green colorway (pictured below) which also coordinate beautifully with the jacquard trim.

The fabric kits will ship priority mail so you should receive them in 2-3 days.  If you are interested in purchasing one, head on over to my etsy shop and check them out.

To purchase the X-SMALL/SMALL sized kit, click HERE.
To purchase the MEDIUM/LARGE/X-LARGE sized kit, click HERE.

If the kit is sold when you go over to the shop, don’t worry, I will upload more listings until I run out.

There’s still plenty of time to prepare to “sew along” with everyone, so if you haven’t purchased your pattern or fabric, I hope you’ll join in the fun!!  Looking forward to sewing with you all next week!

Lemon Roasted Asparagus

Don’t you just love summer?  It’s that yummy time of year when all of the glorious produce comes in season.  I absolutely love visiting the farmers market and picking up produce from our local farmers.  I recently picked up some wonderful asparagus that I wanted to serve as a side dish with a meal I was preparing.  When produce is actually in season, I don’t like to do too much to it in regards to flavoring and seasoning because it already tastes so good in it’s pure form.

Lemon Roasted Asparagus in the perfect side-dish for any meal.  Serve it with some rice pilaf or couscous and you have a light, summer meal that won’t weigh you down.

Lemon Roasted Asparagus
Ingredients:
1 lb. asparagus
2.5 lemons (slice 2 and leave the other one half for juicing)
Olive oil
Salt
Freshly ground black pepper.
Directions:
Preheat oven to 450 degrees.

Prep. your asparagus.  Wash and remove the tough ends (cut off approximately 1-2″ on the non-tree-looking end).  If you like, you can reserve these for later to use in a cream of asparagus soup or another one of your favorite dishes.  Or if not, just discard.
Lay out asparagus out on a baking sheet.  Drizzle with olive oil, sprinkle with salt and freshly ground black pepper.  Squeeze the juice of half a lemon on top of asparagus, then add lemon slices.  Use your hands to toss and make sure all of the asparagus and lemons are coated nicely with the olive oil, salt and pepper.
Place in the oven for 15-20 minutes until the ends of the asparagus start to become caramelized and slightly browned.
Once asparagus are finished cooking, remove from oven and serve.  I like to serve asparagus spears piled up with several lemon slices.  My husband is not a huge veggie eater, but he loves this dish.  The acidity in the lemons really brings out the deliciously nutty flavor in the roasted asparagus.  Try this with fish, chicken or pork or you could even roast some up and add it to your favorite pasta dish!
  Happy Summer Produce Season!

Rachaels Homemade Soap Giveaway

Have you heard of Racheal’s Homemade Soap Shop?  If not, you must stop what you are doing and head on over to her etsy shop to check out her delicious smelling, vegan-friendly soaps.  Racheal’s soaps contain no dyes and perfumes just essential oils.  If you have sensitive skin, you are definitely going to want to give these soaps a try!

Today Rachael is giving away three bars of her homemade soap and three hand-crocheted bath scrubbies to one lucky The Cottage Home blog reader.

I was lucky enough to receive my own homemade soap from Rachael to check out and I am definitely going to be ordering some more from her in the future.  What scents did she send me?  Well, I got Lavender Rosemary, Peppermint, and Oatmeal, Milk and Honey.  I feel like she must know me (even though we’ve never met) because those are the exact scents I would have picked out for myself!  Now deciding which one was my favorite is a really hard decision – I honestly loved them all!

The Lavender Rosemary was the scent I would most normally gravitate towards and I just loved the combination of the two.  The Peppermint Wake Up Bar was incredibly invigorating and refreshing – this would also be an amazing scent to have out around the holidays.  This bar of soap left my skin feeling silky, smooth.  The Oatmeal, Milk and Honey was warm and comforting and almost had a baby powder essence about it.  It also has bits of real oats in it that help to gently exfoliate skin naturally.

Rachael also sells a few other products in her shop that go perfectly with her homemade soaps.  I love the Rainbow Cotton Bath Scrubbie set.  These are 100% cotton, hand-crocheted and come in a wide-variety of different colors.  I’m pretty sure my girls would love to use these in the bath tub. 

And I am LOVING this soap or lotion dispenser!  I have a thing for mason jars and this just might be calling my name.  Perfect for that rustic look in the kitchen or bath!

My daughter, Savannah, has incredibly sensitive skin so these soaps are going to be just right for her.  She tends to get skin irritations very easily, so the more natural the product the better.  And as I’m writing this, I have all three soaps in front of me and the scents are truly to-die-for, not to mention the fact that they are incredibly beautiful and rustic looking.

So, like I said above, Rachael’s Homemade Soaps is giving away three bars of their homemade soap and three bath scrubbies to one lucky The Cottage Home blog reader.

Here’s how to enter the Rachael’s Homemade Soap Giveaway (2 entries allowed per person, please leave a comment for each entry):

1) Go visit Rachael’s Homemade Soaps and let us know what your number one soap choice would be (click HERE to visit her shop)?
2) Become a fan of Rachael’s Homemade Soaps on Facebook (click HERE to do so).

If for some reason you aren’t the lucky winner, I would still suggest you give Rachael’s Homemade Soaps a try.  I would not be giving away a product on this blog I didn’t love.  Not only is this soap truly amazing, but for $3.00 a bar, Rachael’s soap is a total steal!
**If you are interested in becoming a sponsor of The Cottage Home blog, please email me at thecottagemama[at]gmail[dot]com for more information and rates.**