
So it’s time to finish up our top/dress! How are we feeling? Good, I hope……we’re in the home stretch, so bare with me. Yesterday we stopped after finishing up our arm holes and shoulder ruffles, so now we’ll move on to the side seams and finishing.
Here is what your seam will look like on one side. You will need to run this stitch on both sides. It’s pretty much just sewing a straight line though you may have to turn your foot a tad bit at the arm hole.
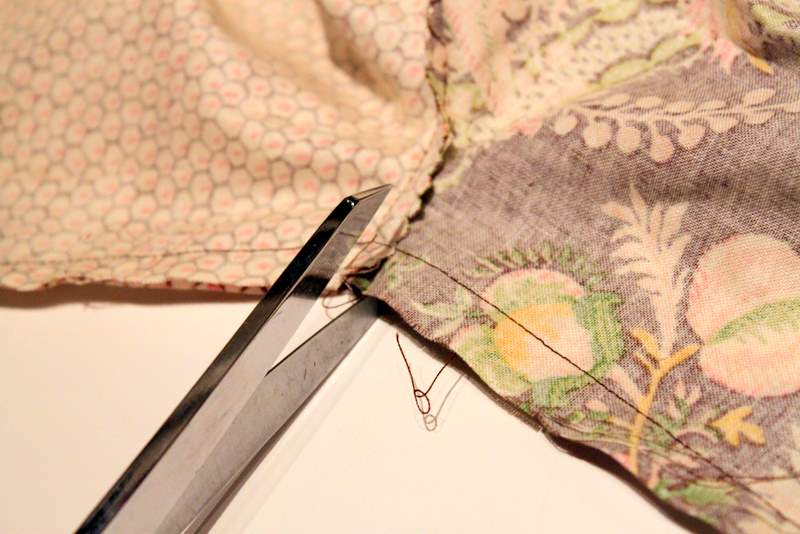
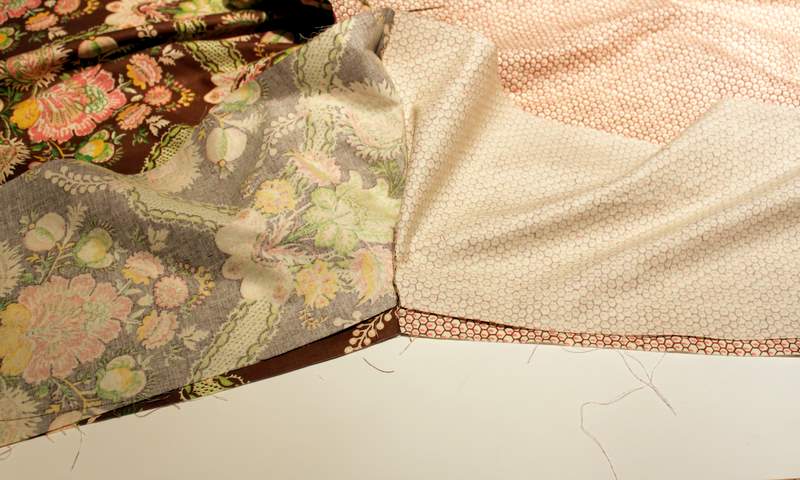
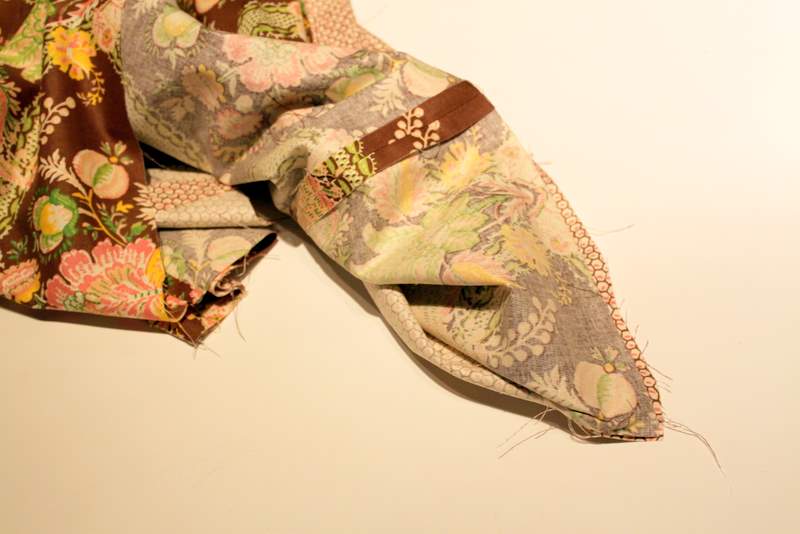
I like to clip a line where the exterior and lining fabrics come together under the arm hole. I find the arm holes lay much more flat this way. You totally don’t have to do this step…….it’s just a little extra thing I like to do.

Turn your garment right side out and press the side seams open and press all the way around the arm holes. I like to press the exterior seams and lining seams separately to make sure they are both fully open.
This next step is where I took some liberties with the way I like to do a lined garment. So for the next few steps you can totally ignore me and follow the actual instructions or give this finishing technique a try. Let’s see if I can explain this correctly……….
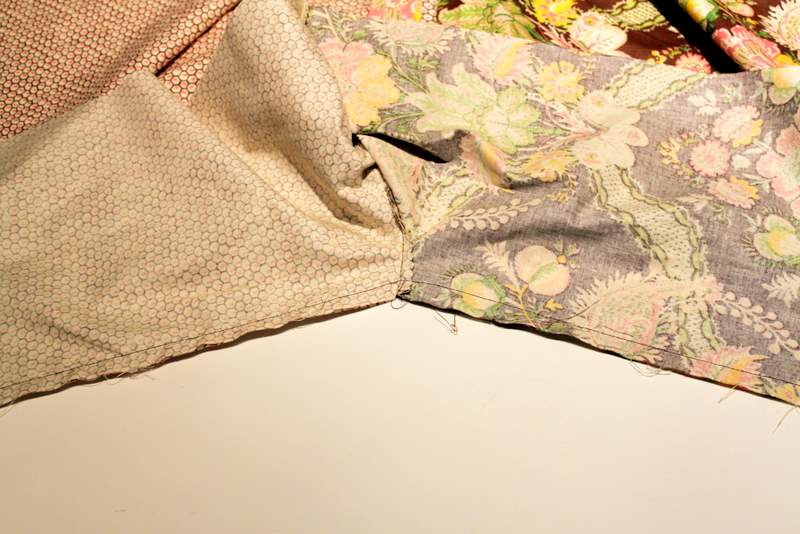
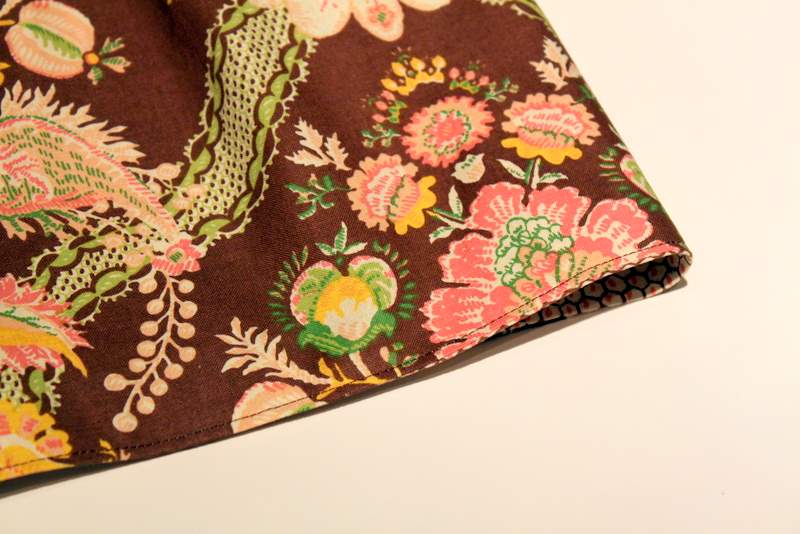
Currently you have your garment pressed and turned nicely with the right sides out. At the lower side seam (doesn’t matter which one), pull the lining fabric away from the exterior fabric. We need to pull them apart because we are going to flip the fabrics so they will now have their right sides facing.
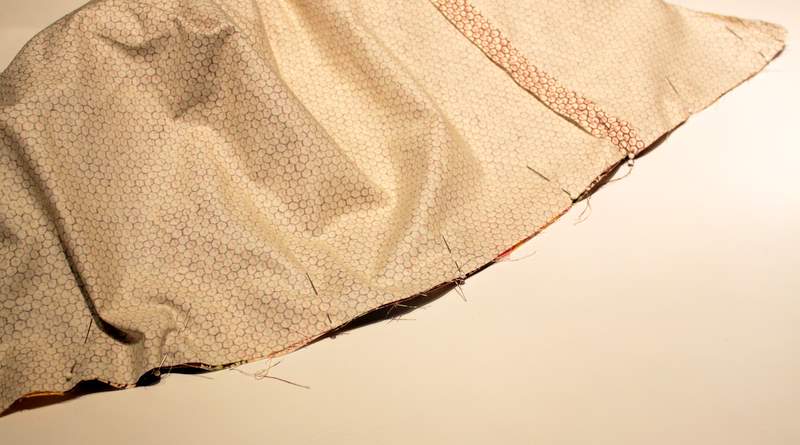
Notice how I have left a 3″ – 4″ opening at the bottom of the top. Pull the rest of the dress through this little opening. Again, it’s going to feel a little strange, but trust me.
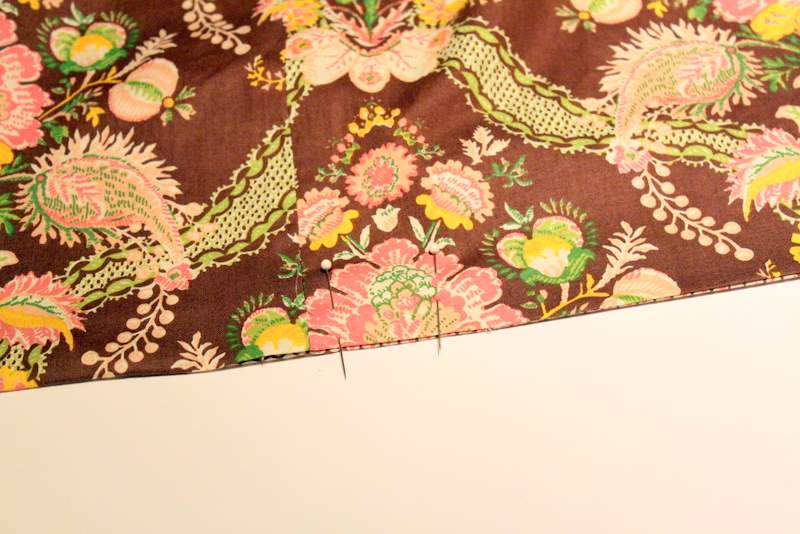
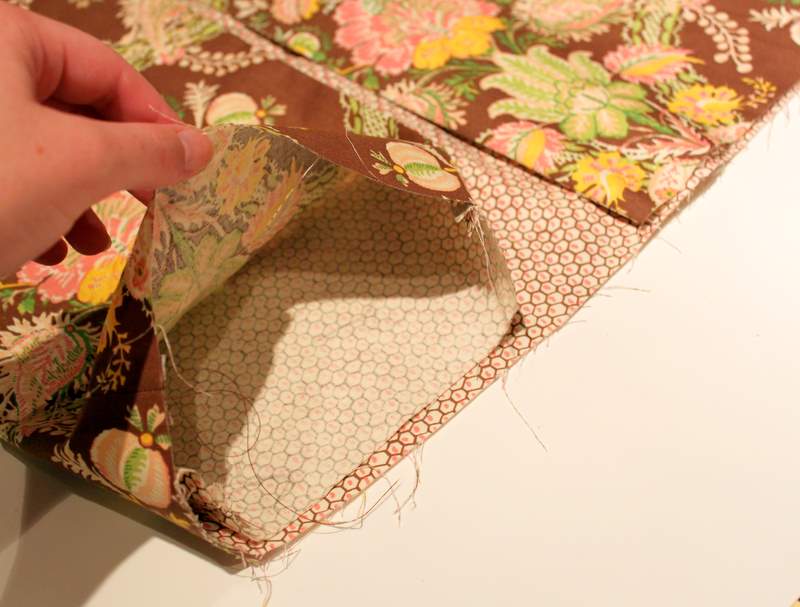
Now that you have pulled the top through the opening, press the bottom seam. You will have a 3″ – 4″ opening so you need to make sure to press that under to line up with the bottom of the top. Place a few pins to hold it in place.

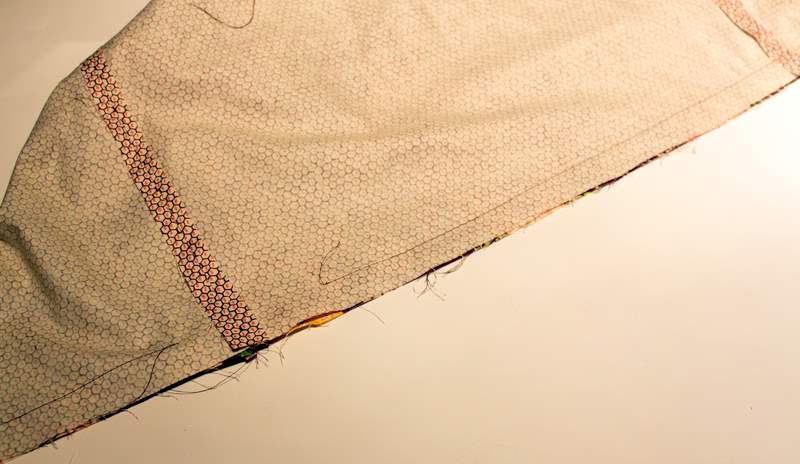
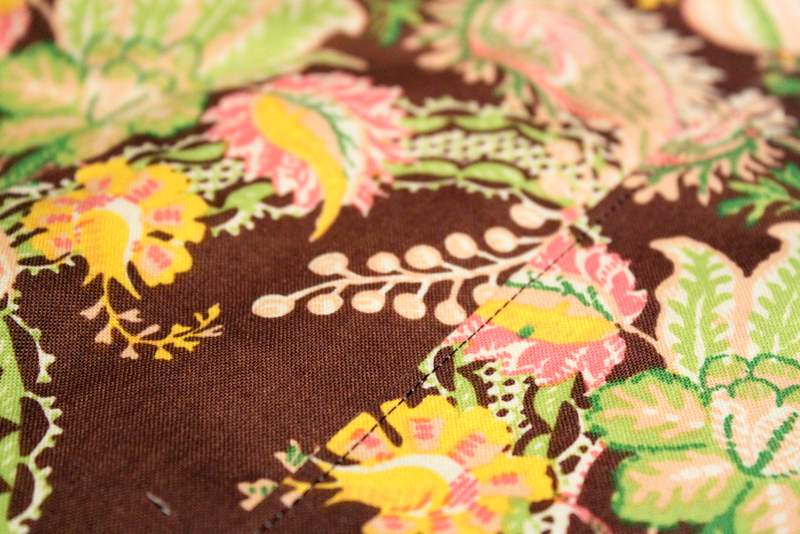
Next, top-stitch around the entire bottom using a 1/8″ seam allowance. This will catch the opening and make it so the entire bottom is closed. You can use this technique to make garments reversible as well. Personally, I fell that it ensures that the bottom of any garment is nice and neat and the bottom seam is perfect. Again, you can totally ignore me if I lost you along the way………if so, just follow the instructions in the pattern for a more typical way to hem.
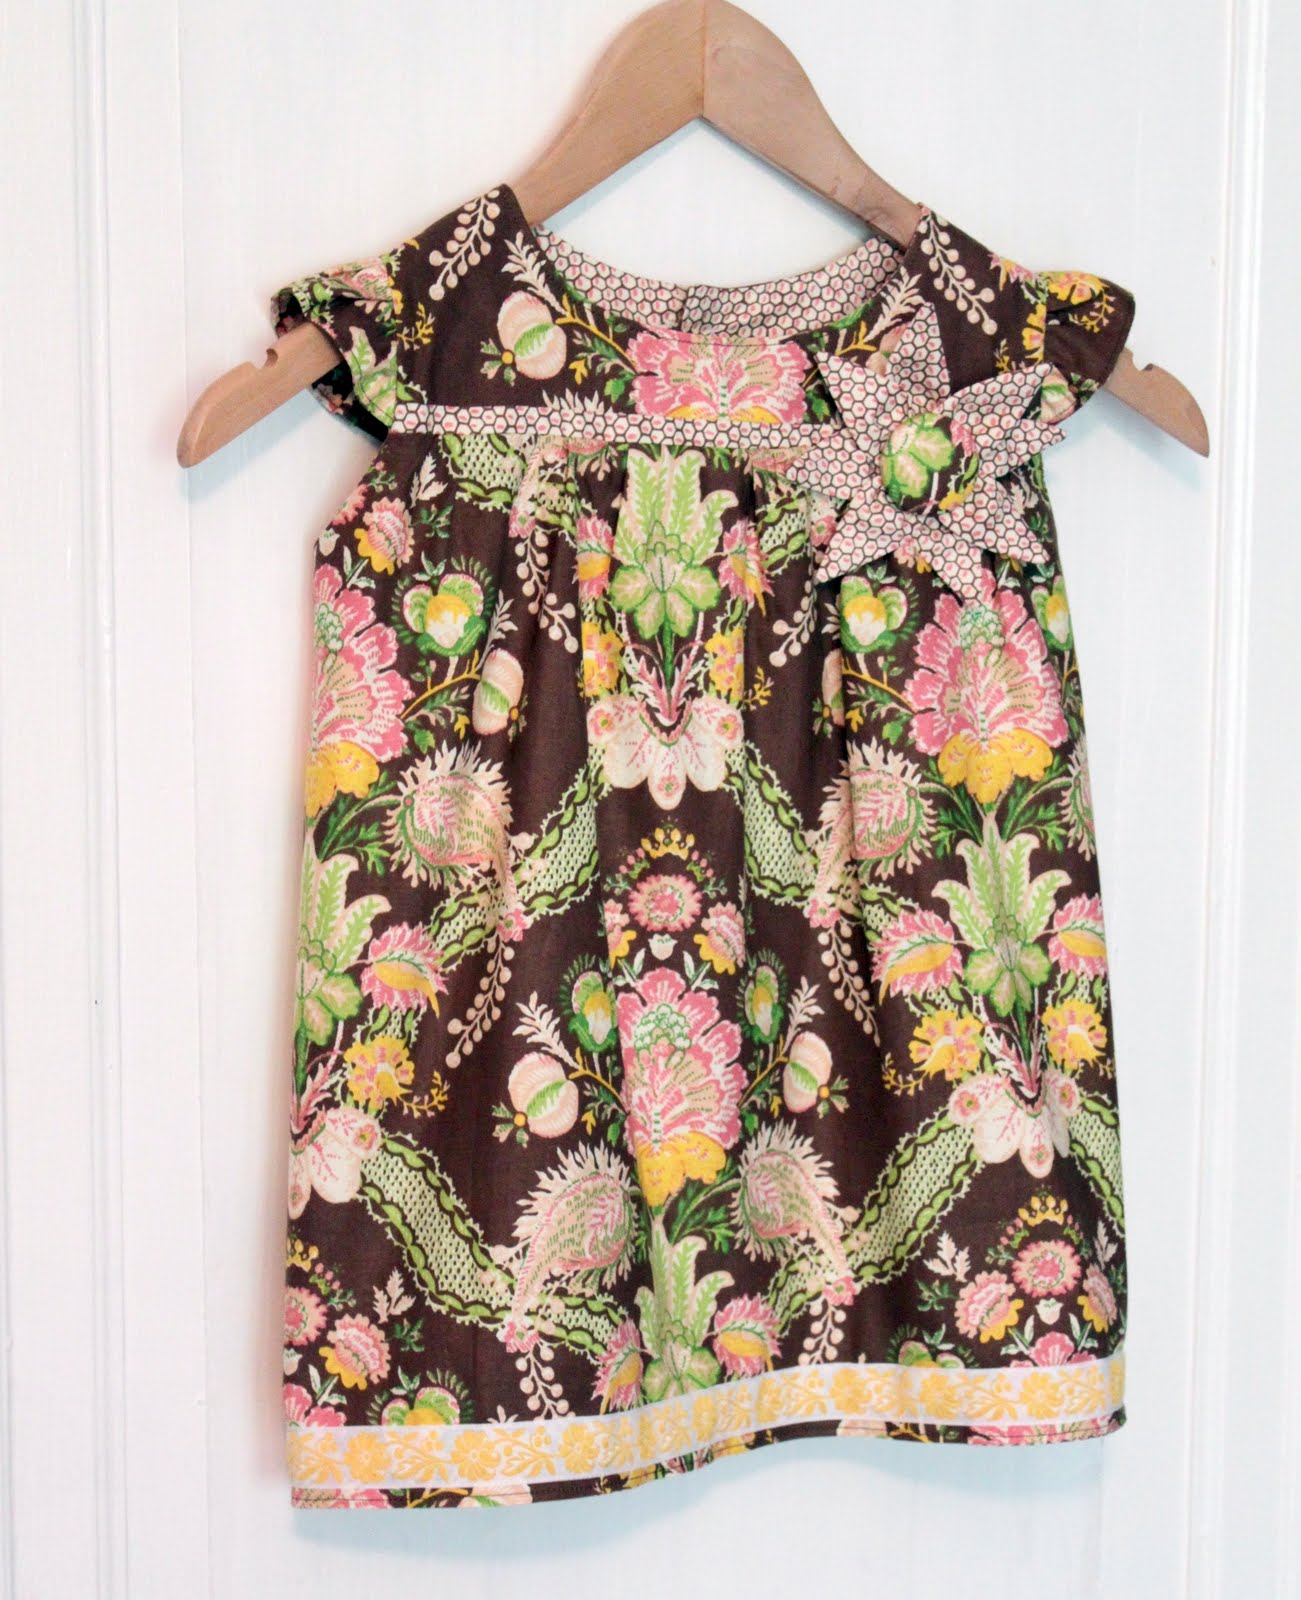
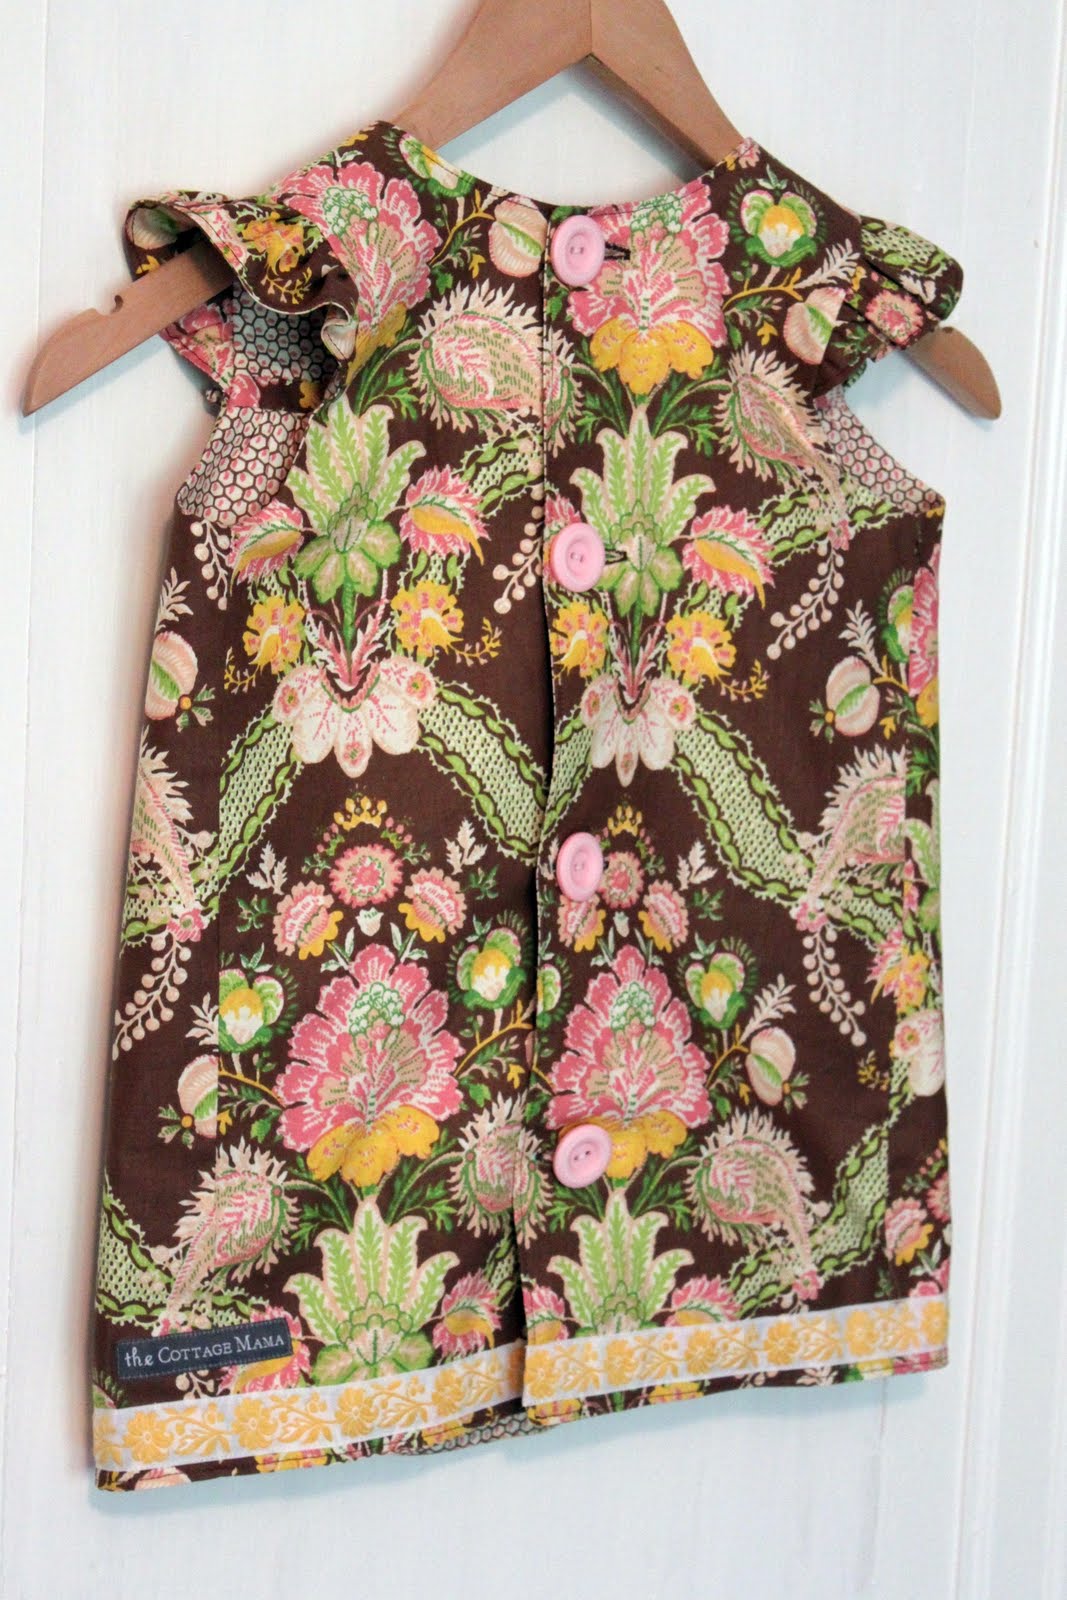
The pattern now instructs for some additional top-stitching and button holes. Again, the button hole placement didn’t seem to given exactly, so on the size small, I opted to do four buttons spaced about 4.5″ apart. But you can do them however you would like.
I’m not going to go into details in regards to making button-holes since everyone’s machine is different. I use a button-hole foot attachment with my machine that pretty much does all the work for me.

After you’ve sewn your button holes, open them with your seam ripper. I place a pin at the end of each hole so as to make sure I don’t rip through the entire thing. I’ve been VERY thankful several times that I took the time to take this extra step.
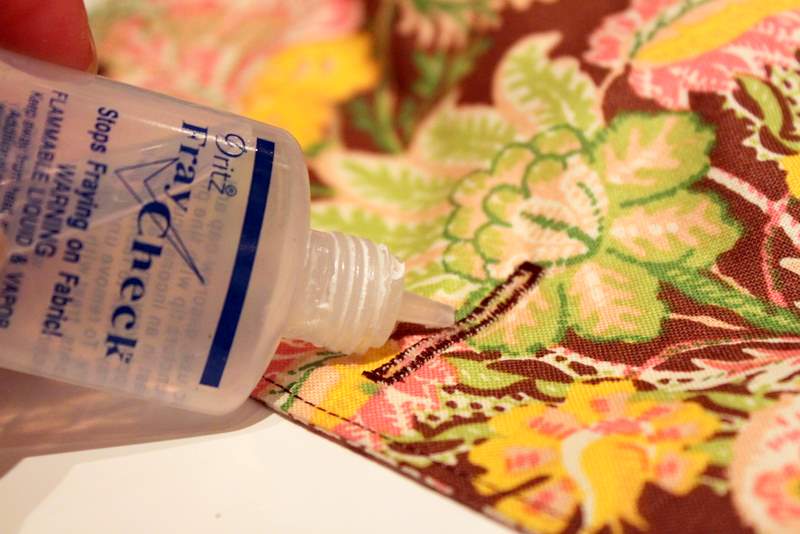
Finally, finish your button holes with fray check or other sealer so that you prevent any additional fraying in the wash.


 Lindsay Wilkes is the owner and designer behind The Cottage Mama. She creates timeless, vintage inspired sewing patterns for children’s clothes. She is also a fabric designer for Riley Black Designers / Penny Rose Fabrics, author of the book ‘Sew Classic Clothes for Girls’ and can be seen teaching nationwide and online in her video series ‘Lessons with Lindsay’ sponsored by Baby Lock Sewing and Embroidery machines.


What is a good online store that you recommend for trims (whip stitch/piping/rickrack) and ribbon? Thanks! Ordered my pattern last night and will be starting late, so I can’t wait!!!! Happy sewing!
Natalie, I would try etsy and search under “supplies”. I buy my trims wholesale from the manufacturers. You can always check fabric.com too and see what kind of selection they are carrying. But your best bet will be etsy for something unique!
Very cute. Makes me wish I had sewn more when my daughter was littler. Love it.
I’m not as far as you yet, but what size buttons did you use? It doesn’t say on the pattern.
Thanks,
Mary
Natalie,
Have you tried viewing THERIBBONRETREAT.COM website. They seem to have tons of stuff.
I was really intimidated when I started this, but it has been so easy! (so far) I think it’s the great directions with pics! Thanks Lindsay, can’t wait to finish!
I used pretty big buttons – I think 1″, but you could use any size. With the bigger ones I only did 4, so with smaller ones I would do more.
Yes, I think having pictures is really helpful. I toyed with doing illustrations in my patterns that are coming out, but I’m more comfortable with photographs so that’s what I’m including with my instructions. Can’t wait to see your completed looks!!
I finally got my ruffle sleeves put on, but am confused about the next step. Could you explain it a little better.
Thanks,
Mary
This dress is so beautiful. I am not quite as skilled as you are but I am trying….
Question: where do you make the little signs with your label on it?
I’m not 100% sure if I’m reading the question right. Are you asking about my hang-tags from my clothing? Those are printed through my graphic designer. My garment labels are purchased through Fancy Weaver on Etsy. Hope that answers the question. Let me know if I mis-understood. Thanks so much for commenting!!
Lindsay
I finished the button holes yesterday. Turns out I’ve never made button holes with this sewing machine which I’ve had for probably 10 years. The button hole maker was still in its original packaging! This has been a great adventure for me.
NICE TIPS. I WAS FOLLOWED YOU ALREADY NO.2437. PLEASE FOLLOW ME TOO. THANK