
It’s day 2 of the Carina Gardner “Playdate Outfit” sew along and today we are going to be working on the top or dress. The dress is made in the exact same way as the top, but just cut a little longer. So for the purpose of this post I will refer to this as “the top” instead of dress.
Whenever you start sewing with a pattern it’s a good idea to read through the pattern several times before you begin. Check all the instructions, make sure you’ve cut all your pieces and pay careful attention to the seam allowances given for each step. Generally, there is a 1/2″ – 5/8″ seam allowance for most pieces, but you always need to double check and see…..the fit of your garment depends on it!
Sometimes I have to read things three times just to wrap my head around what the designer intended us to do during a certain step. It’s not that an instruction is poorly written, it’s usually that we all have different ways of understanding how a garment comes together. On a rare occassion, I will take things into my own hands and do it “my way”, but that’s only if I feel really strongly about the garment construction or I have absolutely no idea what they are talking about.
Let’s get started……….
The Top/Dress:
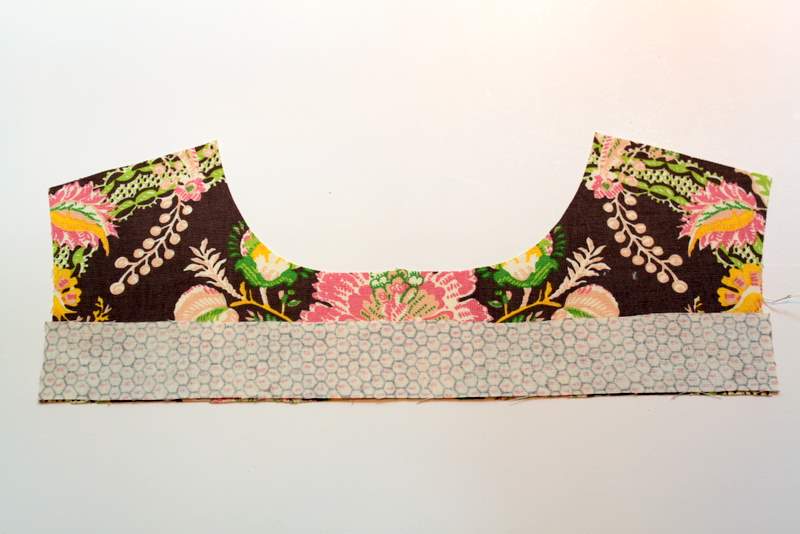
The first step in the pattern is to assemble the bodice. We’ve got to insert the accent piece of fabric into the exterior and interior of the top. Place right-sides together and stitch along the raw edge. Do this for both front bodice pieces (exterior and lining).
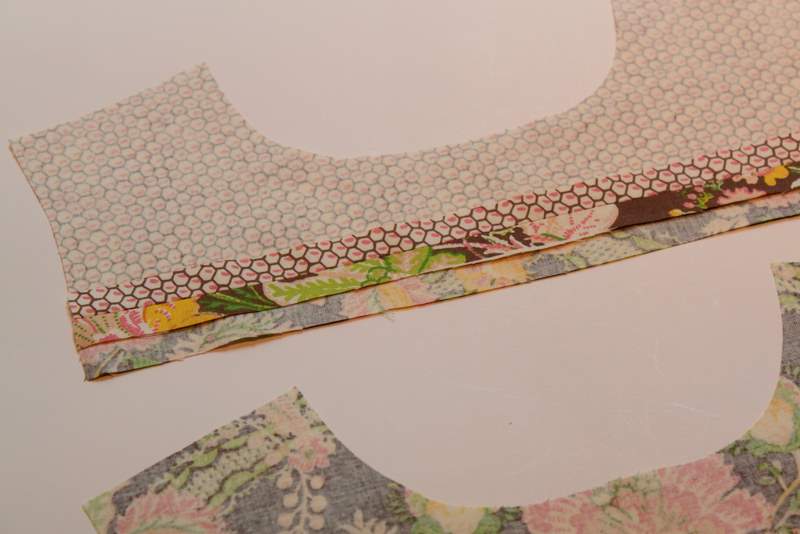
A serger is not a necessary tool, it just makes the stitching move a little quicker, adds a nice clean edge and makes garments very durable.

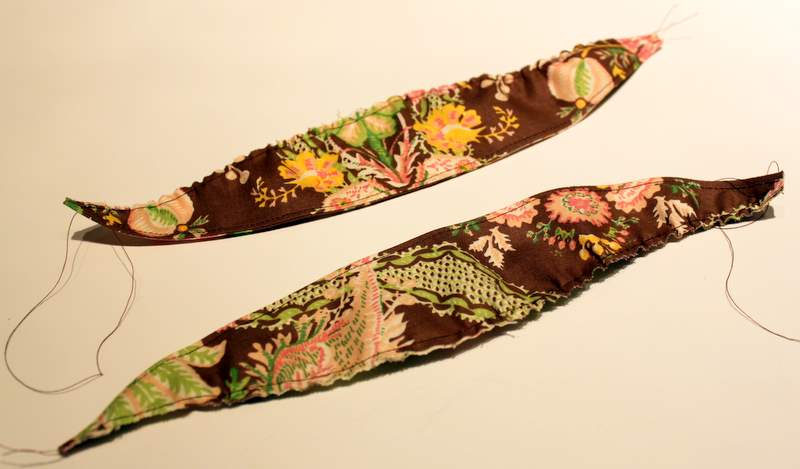
Now we need to set up our machine to run a gathering stitch along the other front piece of the top. Set your machine to the longest stitch length (mine is 5.0). Stitch along the entire top of the piece, but make sure NOT to back-stitch at the beginning or end (otherwise you won’t be able to gather). Stitch using about an 1/8″ seam allowance.
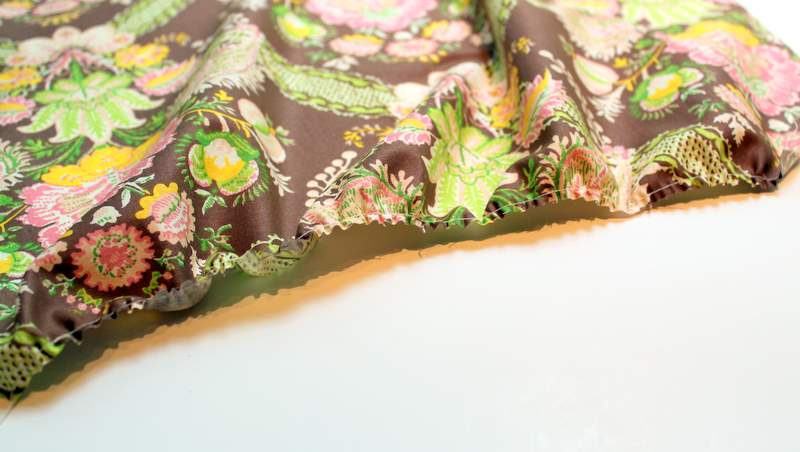
Above is what the gathered piece will look like after you’ve run your gathering stitch. It will be somewhat gathered, but not quite enough…..which is where you come in.
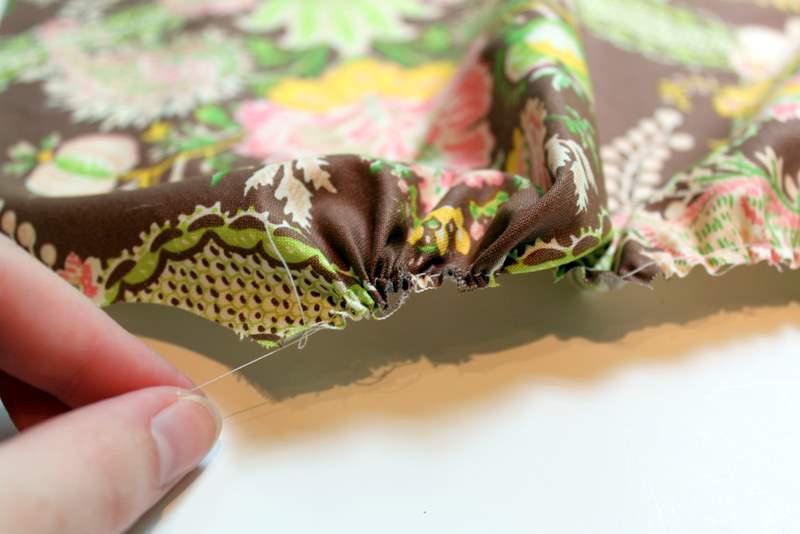
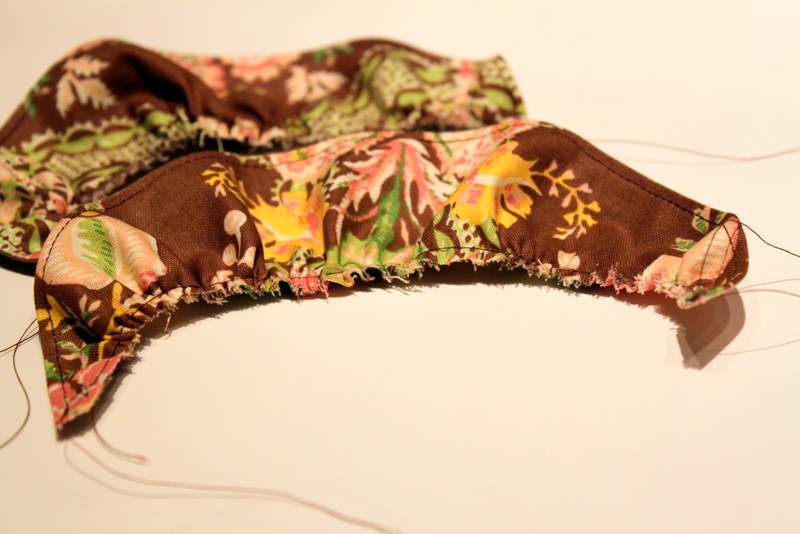
Pull the bobbin thread (or the top thread) to gather the fabric. I like to gather from both sides because it makes things go a little faster. You want to gather your fabric until it lines up with the upper front bodice piece. Space your gathers out evenly.

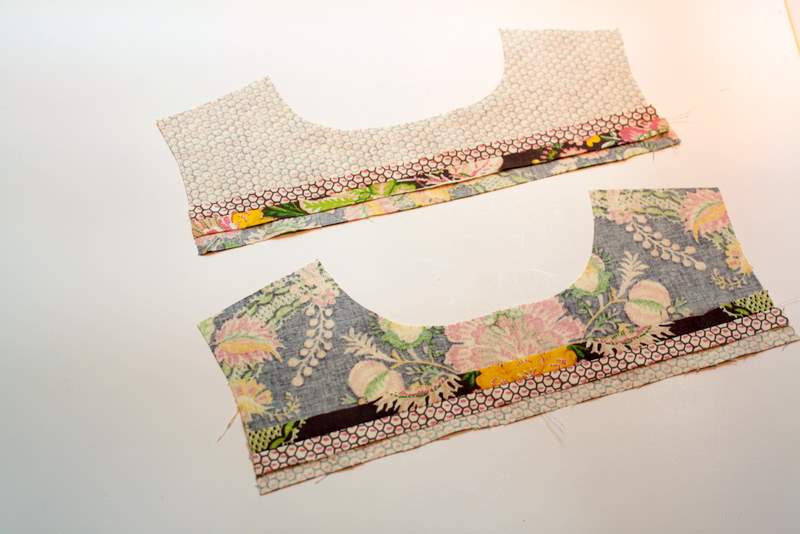
Repeat and do the exact same thing with the lining pieces.
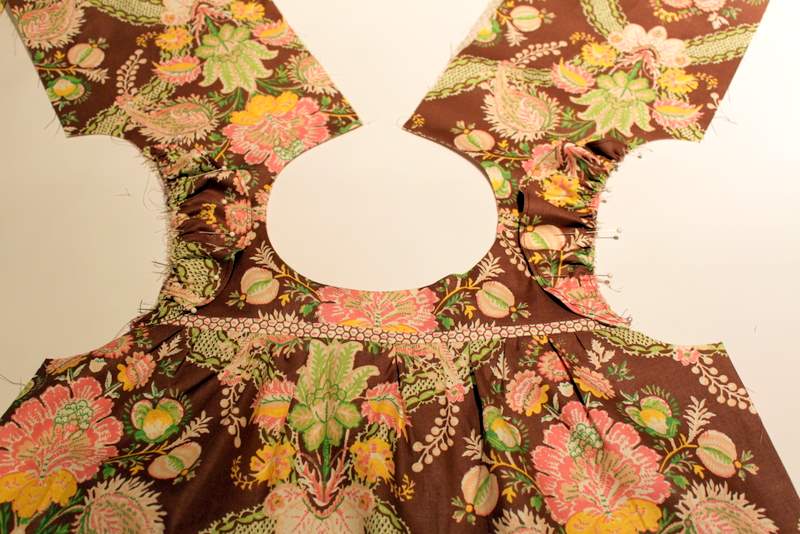
Next we need to sew the shoulder seams of both the exterior of the top and the lining. Line up the back pieces with the front pieces, right sides together, and stitch in place at the shoulder. Press seams open.
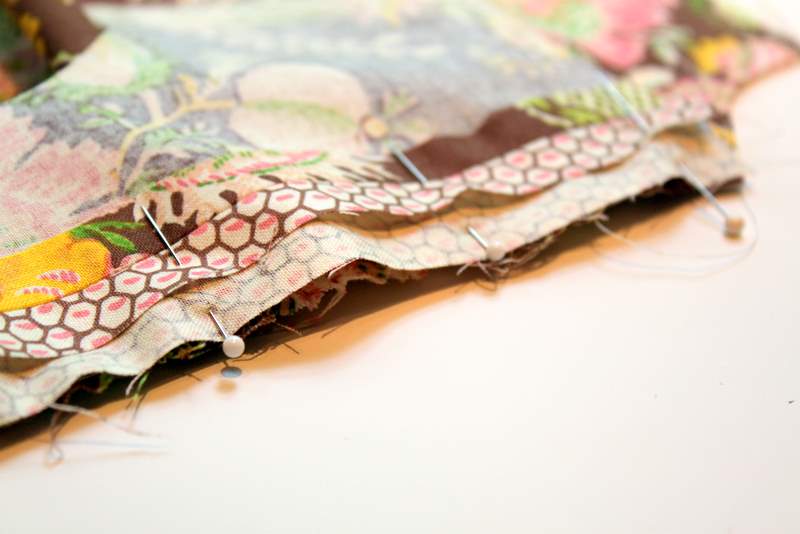
Now to sew around the neck-line. Place the exterior fabric and the lining fabric, right sides together. Pin around the neck-line. Stitch all the way around.
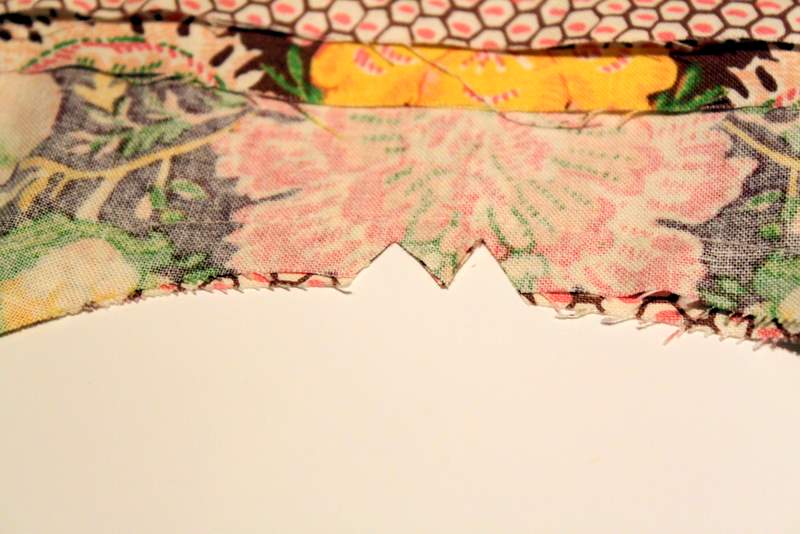
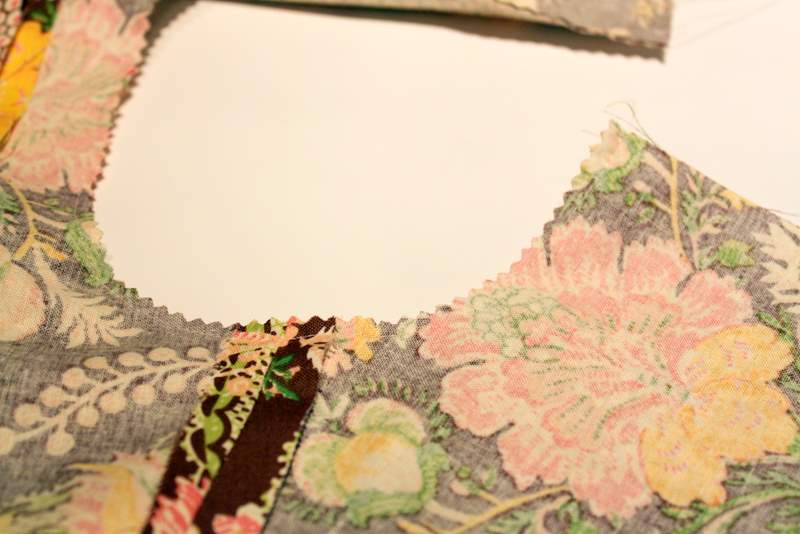
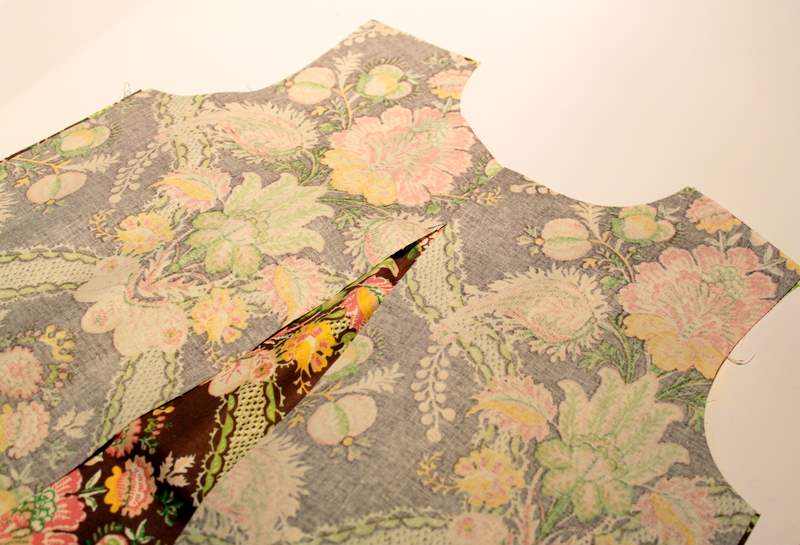
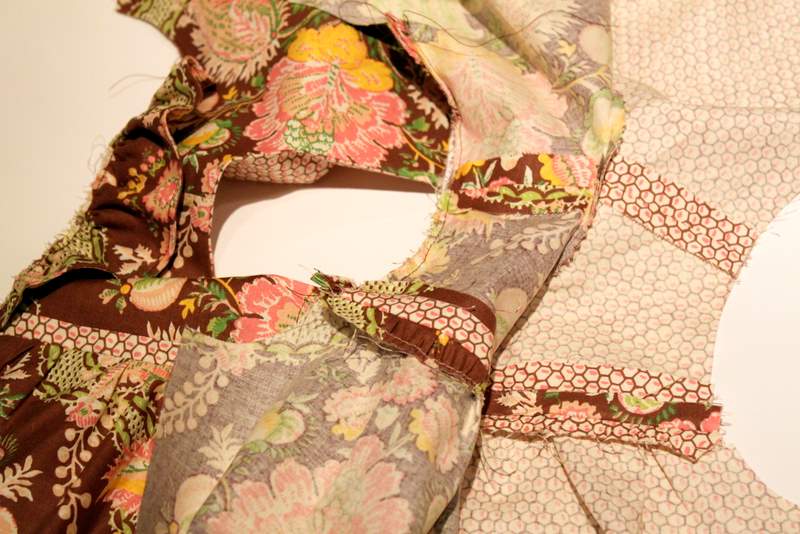
Next you need to notch out the collar in order to make sure it lays nice and flat. You could do traditional notching as I’ve shown in the first picture. Or you could do my “cheater” version that I’ve been doing a bit lately and use your pinking shears to cut around the collar. I find this notches out a wider neck-line just enough to make it lay flat. Turn right side out and press, making sure to get the seams nice and flat.

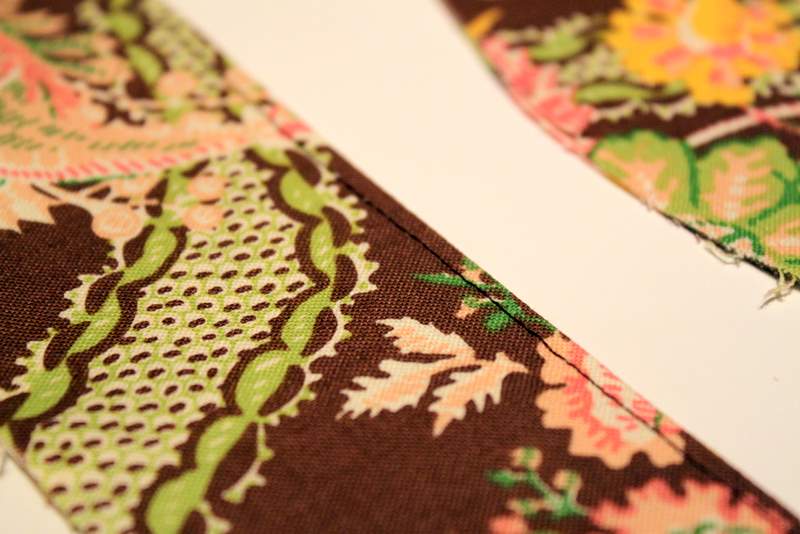
After you’ve pressed the shoulder ruffles, run them back through your machine with a 1/8″ seam allowance and top-stitch. Top-stitching adds a really nice finished look to an edge and is also great for increasing the durability of clothing due to the wear and tear a child can have on their clothing.
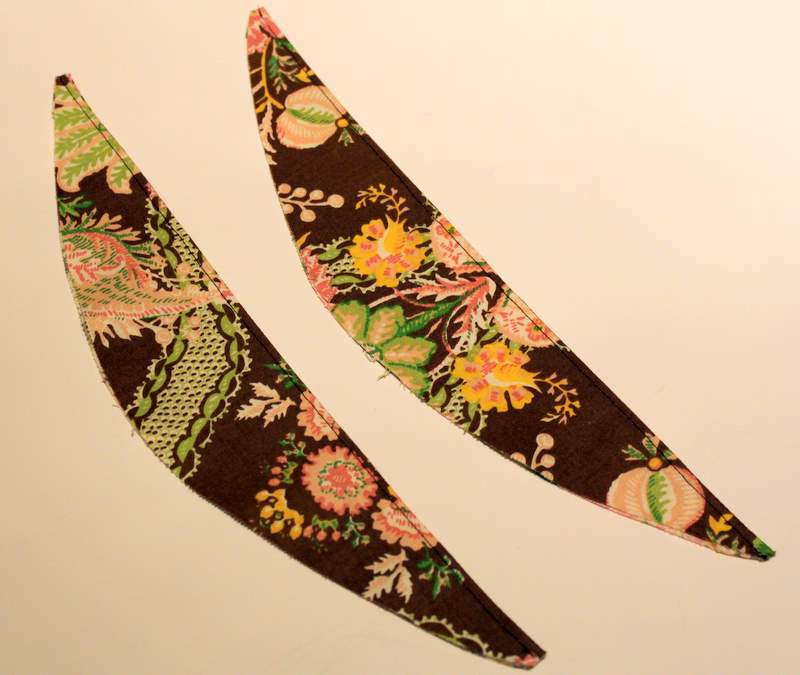
Now run a gathering stitch along the curved edge of the shoulder ruffles.

Gather the ruffles until they have reached your desired length. I started mine right where the accent fabric piece started on the front of the bodice and ran it about halfway down the back bodice arm hole. Run a basting stitch along the edge. A basting stitch is just a stitch length a little longer than your normal stitch to hold things in place – I usually do mine at 3.0.
Baste the shoulder ruffle ONLY to the exterior fabric. You’re going to have to pull the lining away so you don’t catch it in your stitches.
Ok, so this next step might have confused some of you or it might not have. I’m very used to doing arm holes this way since a lot of my garments in the shop are fully lined and this is my favorite way to achieve that nice look. Pull your two arm hole pieces apart from one another. Pull the exterior fabric over the top of the garment and pull the lining fabric underneath. Pull both pieces to the other side so they will now be right sides together.

You are going to scrunch the other arm hole pieces in so you can have the pieces you just pulled over from the other side with their right sides together. Make sure to bunch the other arm hole pieces up so you don’t catch them in your seam. This is also why we used our basting stitch earlier so that we don’t have to worry about the shoulder ruffle shifting.
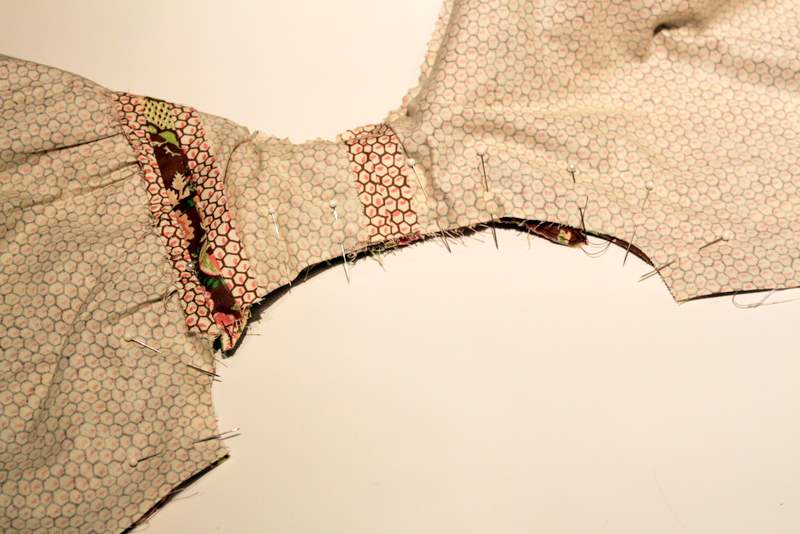
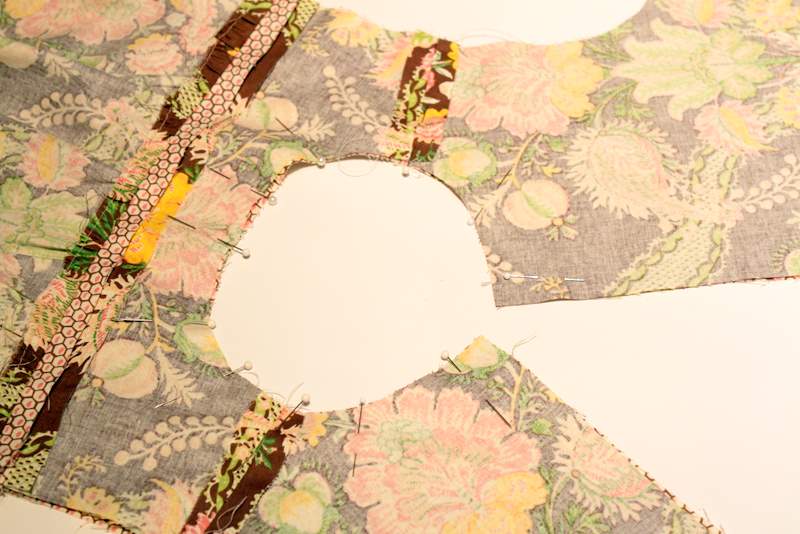
Once you have scrunched the other arm hole piece up inside this arm hole piece, you’ll want to pin it in place. Stitch according to given seam allowance. Clip around the curved seam so it lays flat. Pull the fabric through the stitched arm hole and repeat on the other side.

Here’s how your shoulder ruffle should look in the arm hole once it is complete.


 Lindsay Wilkes is the owner and designer behind The Cottage Mama. She creates timeless, vintage inspired sewing patterns for children’s clothes. She is also a fabric designer for Riley Black Designers / Penny Rose Fabrics, author of the book ‘Sew Classic Clothes for Girls’ and can be seen teaching nationwide and online in her video series ‘Lessons with Lindsay’ sponsored by Baby Lock Sewing and Embroidery machines.


My sewing window has closed for today and I did not get as far as you did. I’ll have to play catch up tomorrow. But I’m just doing the dress so I’m not worried. Having a great time sewing this dress!
i too have a misprint on my waistband, im glad you caught that. i’ve never done something where everything is lined, this is a bit different.
Question about the capris…the pattern says there is a lining and one of the headings in the instructions references a lining, but that must be a misprint. Only the top is lined, correct??
Had a little trouble getting started, but finally got started sewing the dress. It looks cute so far, only got the front and lining gathered. Hopefully I can work on it more later or tomorrow. Can’t wait for my daughter to see it, it’s a surprise.
Yes, I believe only the top is lined. I found that a little confusing as well whether or not the pants were lined or not. Sometimes when you are following a pattern you just have to go with your gut and do what you think is right 🙂
Got this far… I love that technique for the sleeve, it turned out so well! Starting to love this little pattern!
My teenage daughter helped me figure out how to put the sleeve in before sewing around it. It was really cool because I’ve never done that before. Just need to finish up the sides for the dress and then do the buttonholes. It looks really cute so far.
I’m making a girls lined dress with a yoke that’s finished with piping. I’m having a hard time getting it to look professional especially the hand sewing which is the last step on my pattern instructions. Is there a way to do this using my machine instead of hand sewing?