
Pasta is the go-to meal in our house. It’s quick, easy and inexpensive. My husband and I love spicy food and have always had a fondness for cajun flavors. Cajun Sausage Pasta is a delicious, easy weeknight meal that will have your family begging for more.
Cajun Sausage Pasta
SERVES 4
Ingredients:
1 pound dried linguine
1 large onion, diced
1 pound andouille sausage, sliced (I use the chicken kind from Trader Joe’s)
2 tablespoons butter
1.5 cups heavy cream
1 teaspoon cajun seasoning
1/8 teaspoon cayenne pepper (more if you like more spice)
1 tablespoon fresh thyme (if you don’t have this, that’s ok)
1/4 cup Parmesan cheese, plus more for garnish
Olive oil
Salt and pepper, to taste

Directions:
Cook pasta according to package directions making sure to add salt to your pasta cooking water.
Preheat a large saute pan to medium-low heat. Add a drizzle of olive oil. Add onions and saute until translucent. Add more olive oil if the pan gets dry. Add in sliced sausage and saute for 3-5 minutes. I use the chicken andouille sausage from Trader Joe’s which is already cooked, it just needs to be heated through.
Add butter, heavy cream, cajun seasoning, cayenne pepper and thyme, and a sprinkle of salt and pepper to onion and sausage mixture. Turn up the heat to medium high. You want the cream to thicken. Cook for 10 minutes or until the cream has reached a silky and medium consistency. You may need to adjust your heat. If the cream looks like it’s going to bubble over, just reduce it a little. Or vice-versa, if your cream is not bubbling, increase the heat.
Before you drain your pasta, scoop out 1/4 cup of the pasta cooking liquid and add it to the cream sauce mixture. Drain pasta and add pasta to sauce mixture. Add in Parmesan cheese and toss to combine.

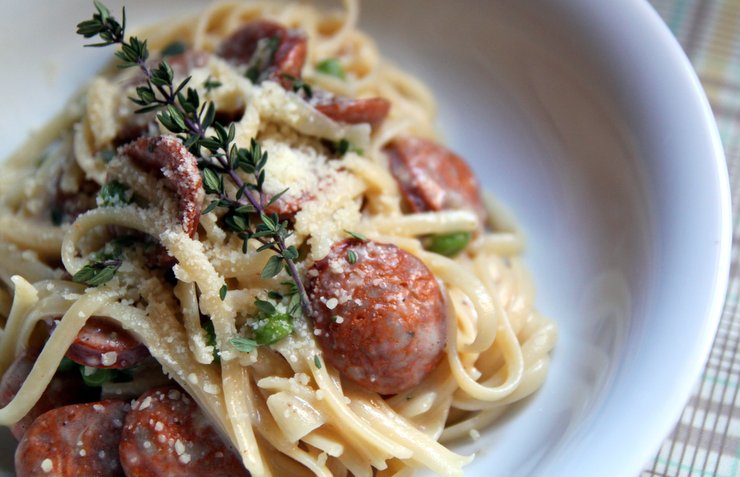
Serve with a sprinkling of Parmesan cheese and fresh thyme. If you have leftover thyme, garnish the top of the dish with a sprig of thyme.


 Lindsay Wilkes is the owner and designer behind The Cottage Mama. She creates timeless, vintage inspired sewing patterns for children’s clothes. She is also a fabric designer for Riley Black Designers / Penny Rose Fabrics, author of the book ‘Sew Classic Clothes for Girls’ and can be seen teaching nationwide and online in her video series ‘Lessons with Lindsay’ sponsored by Baby Lock Sewing and Embroidery machines.


