Hi, my name is Anh-Chi from SewLoveLe, and I am super excited to be doing a guest tutorial for the Cottage Mama. When I first started seriously sewing a couple of years ago, I drew my a lot of my inspiration from the tutorials and helpful sewing information on Lindsay’s blog. She also gave me my first ever pattern testing opportunity and I cannot say enough wonderful things about her kindness and generosity in teaching others about sewing. That’s why, when this opportunity came along, I jumped at the chance to be able to contribute something for her.
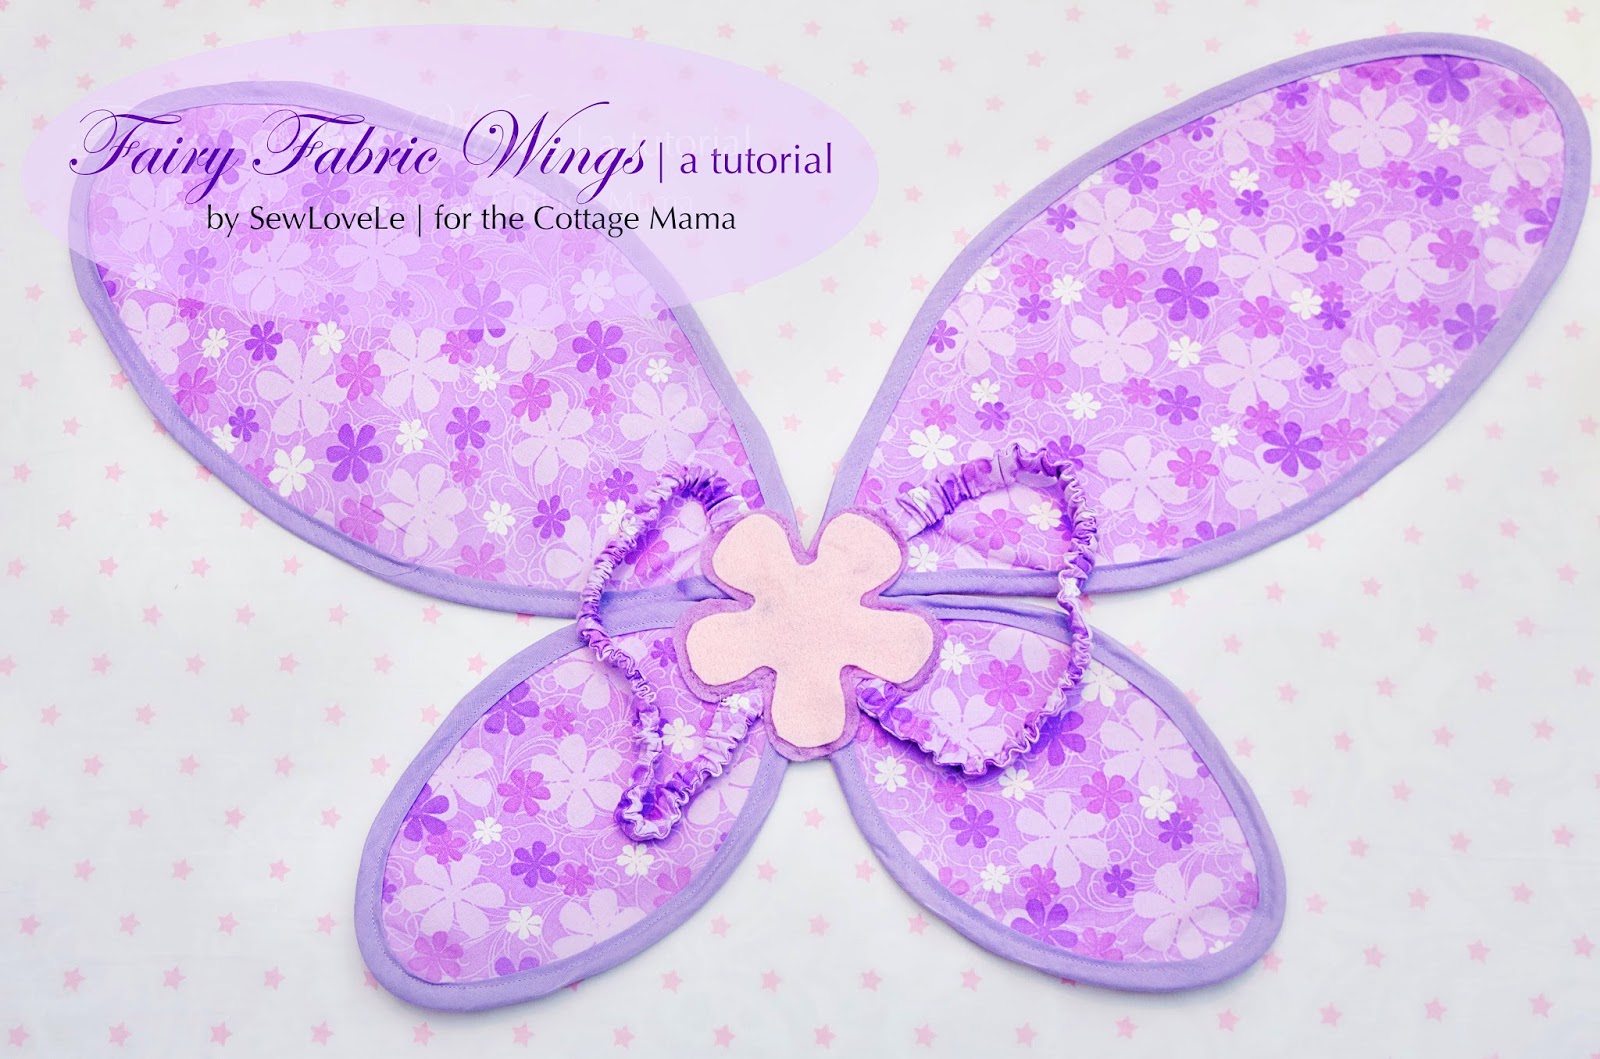
Since Halloween is just around the corner, I know costumes are on a lot of people’s minds. Who doesn’t have a little girl who wants to be a fairy or just have some wings to play with at home? I bought many wings in the past, and they are all lovely, but I have never seen any wings that are made from cotton fabric. If you google wings tutorial, you will mostly find how to make wings with a wire hanger and a pair of stockings. The following tutorial shows you how to make wings using floral wire and a few fat quarters. Happy Sewing!
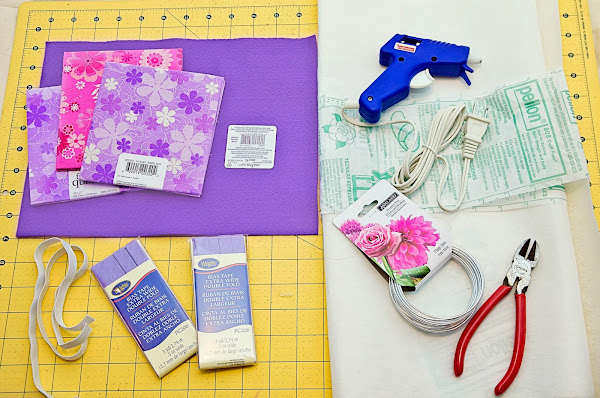
SUPPLIES:
- fat quarters (3)
- 9×12 felt (2)
- 1/2″ elastic – 13″ long (2)
- extra wide double fold bias tape, 3 yards (2)
- heavyweight fusible interfacing (3/4 yard)
- 12 gauge floral wire, 5 yards (1)
- wire cutter
- small hot glue gun
- pattern (click here)
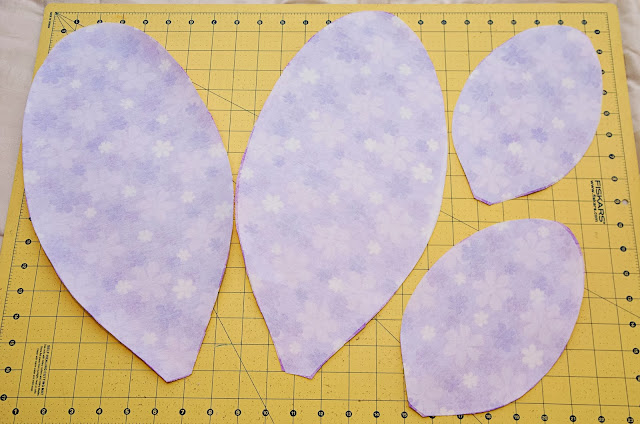
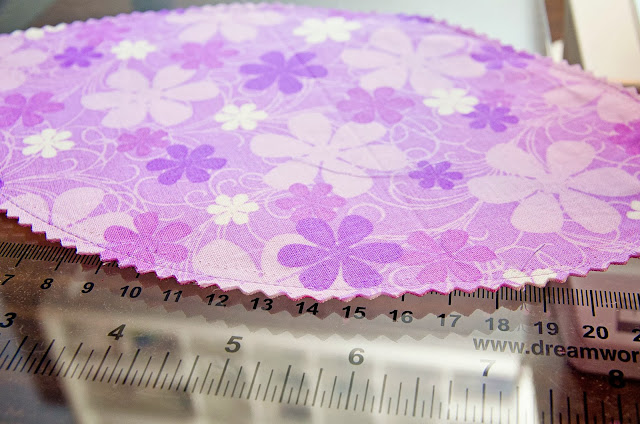
Step 1: Using the pattern provided in the link above, cut out the large and small wings on fabric and interfacing. (note: use a little of the spray adhesive on the flower pattern to position on felt, easier than pinning, see inset)

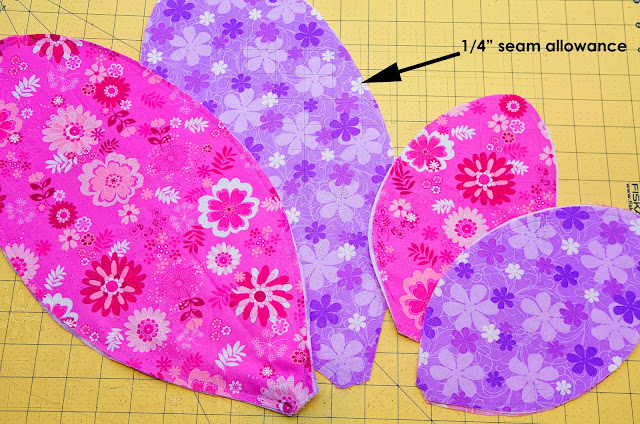
Step 3: Pin the interfacing side to the wrong side of the contrasting fabric and sew together with a 1/4″ seam allowance.
Step 4: Use pinking shears to trim off half of the seam allowance on all the wing pieces.
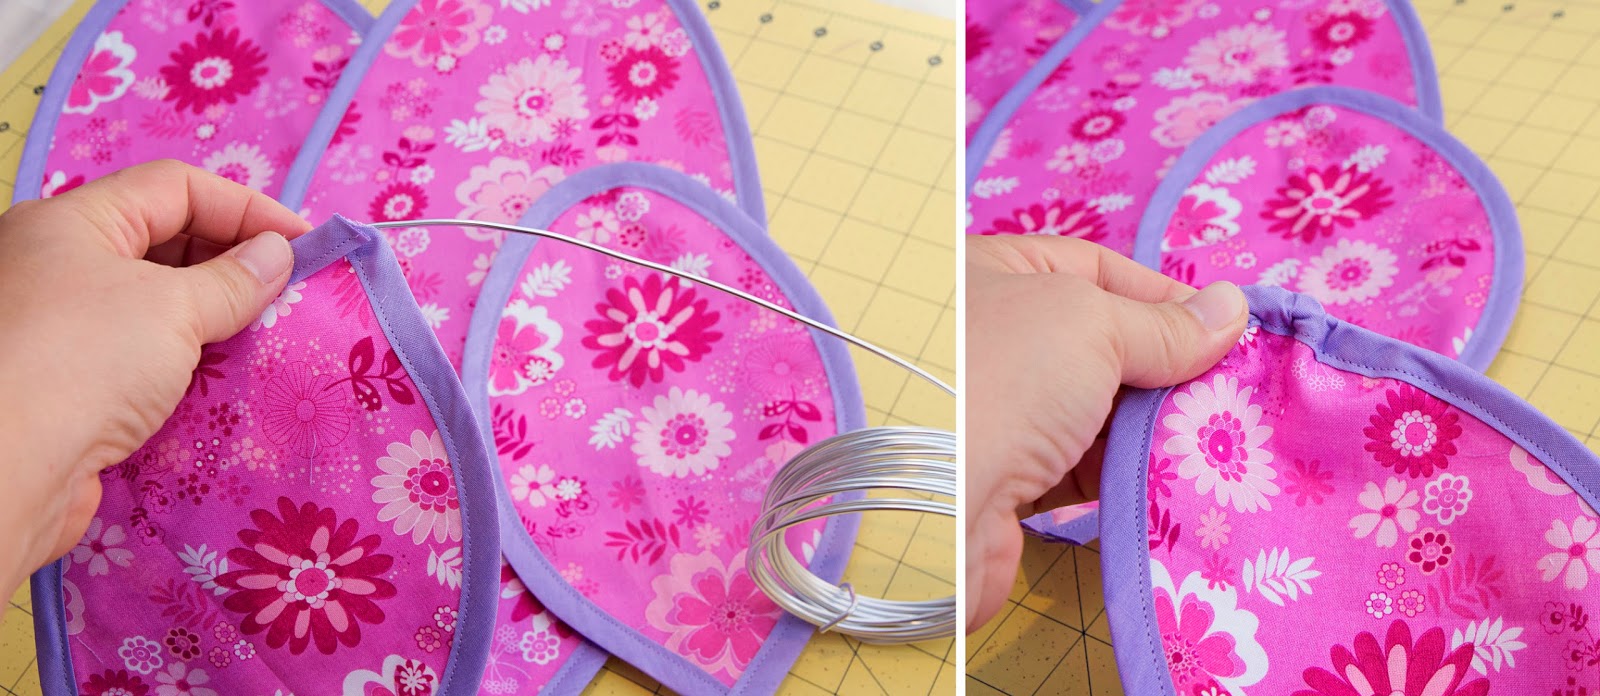
Step 5: Sew bias tape onto the edges of the wings. Do NOT attach the bias tape as shown in A below. It will bunch up and the wing will not lay flat. Work the wing into the bias tape and sew as shown in B below. Use a stiletto tool to ease binding into fabric around curves as shown in C.

Step 6: Carefully work floral wire into the bias tape casing of the wings. Bend the wire as you go and scrunch up the fabric to ease wire around curves.
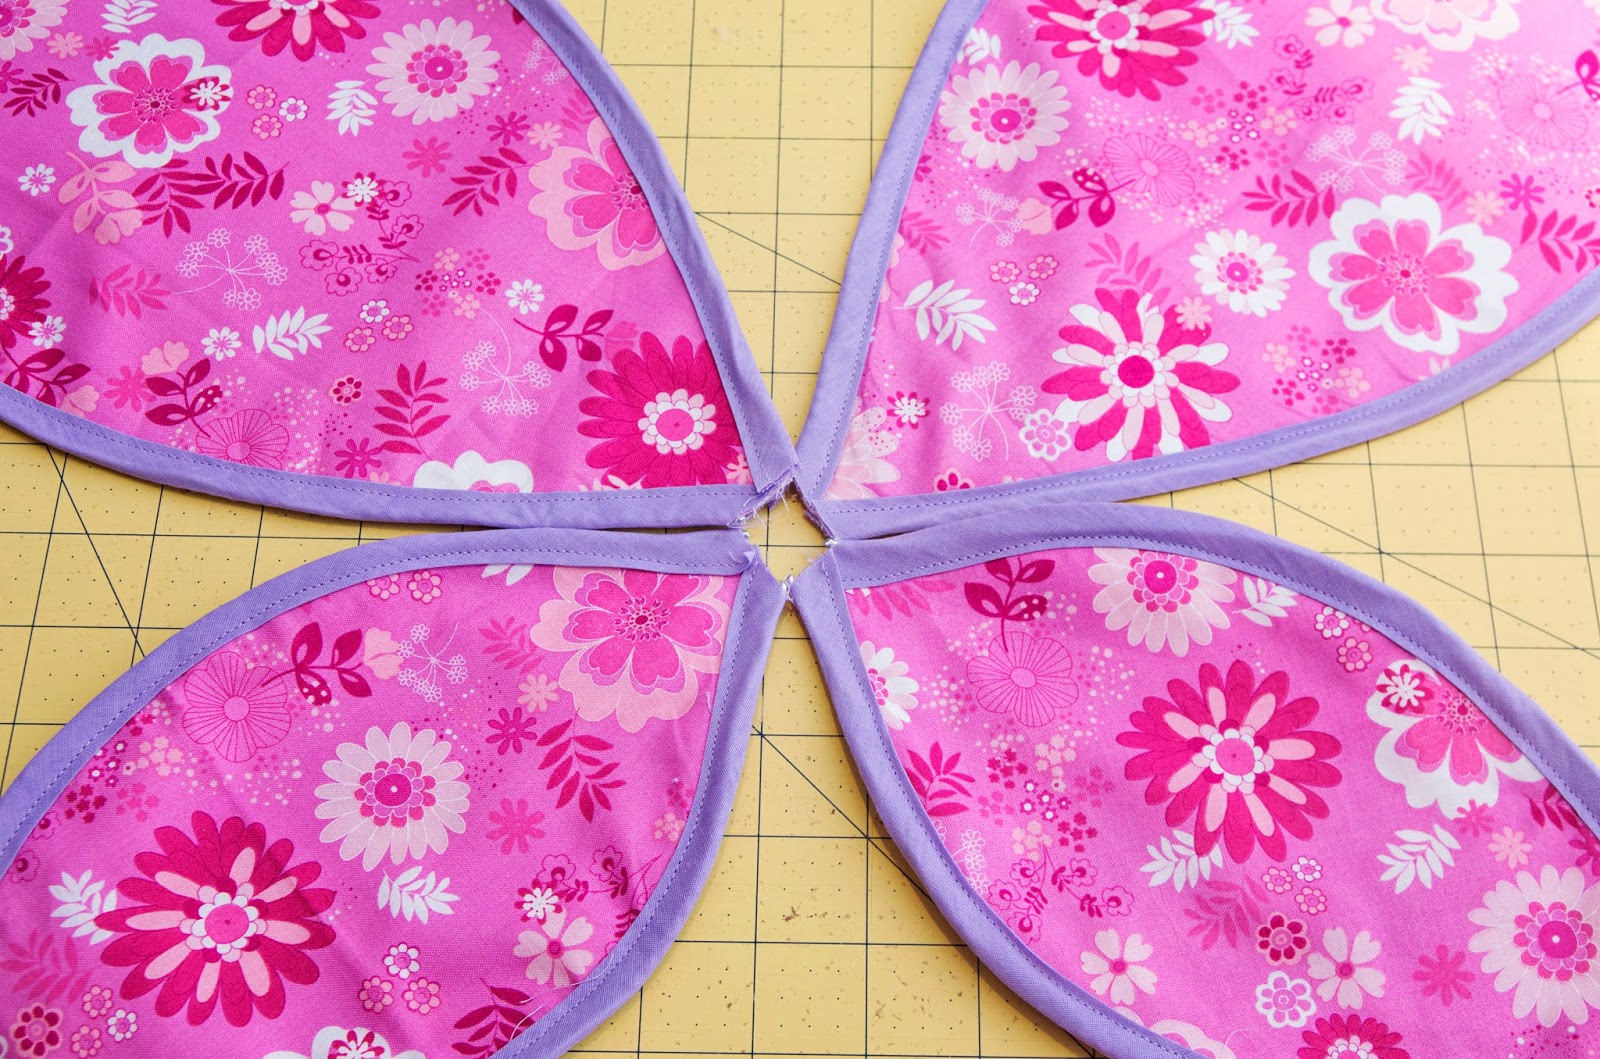
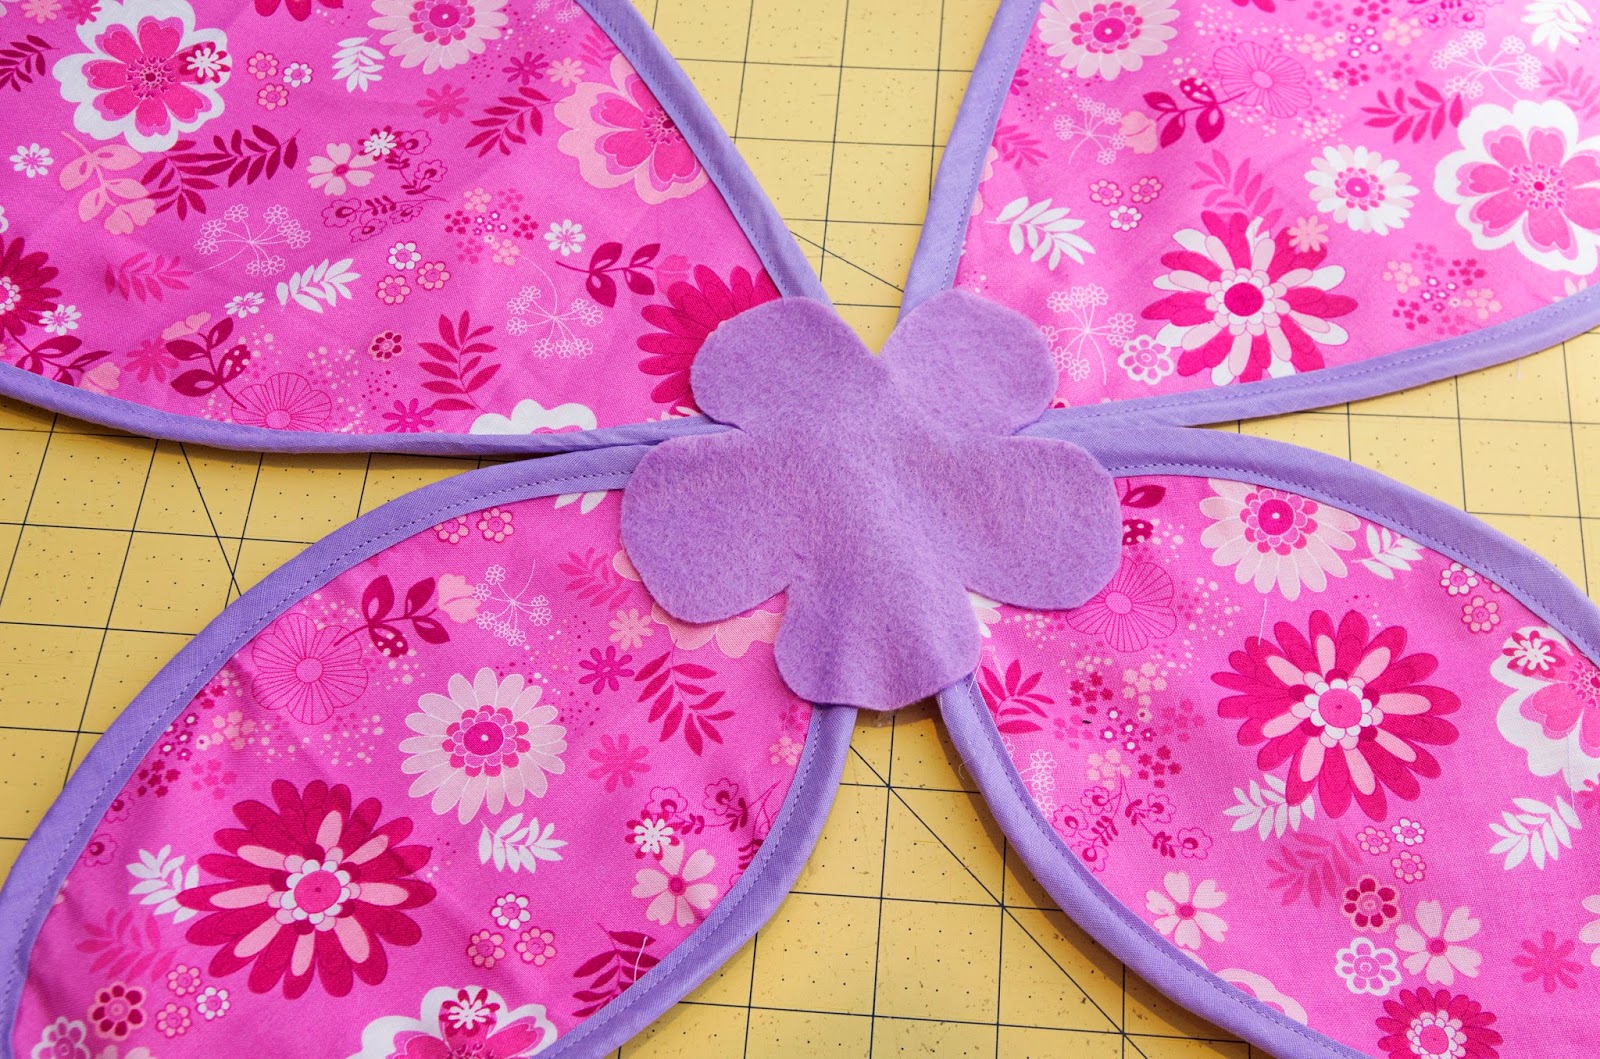
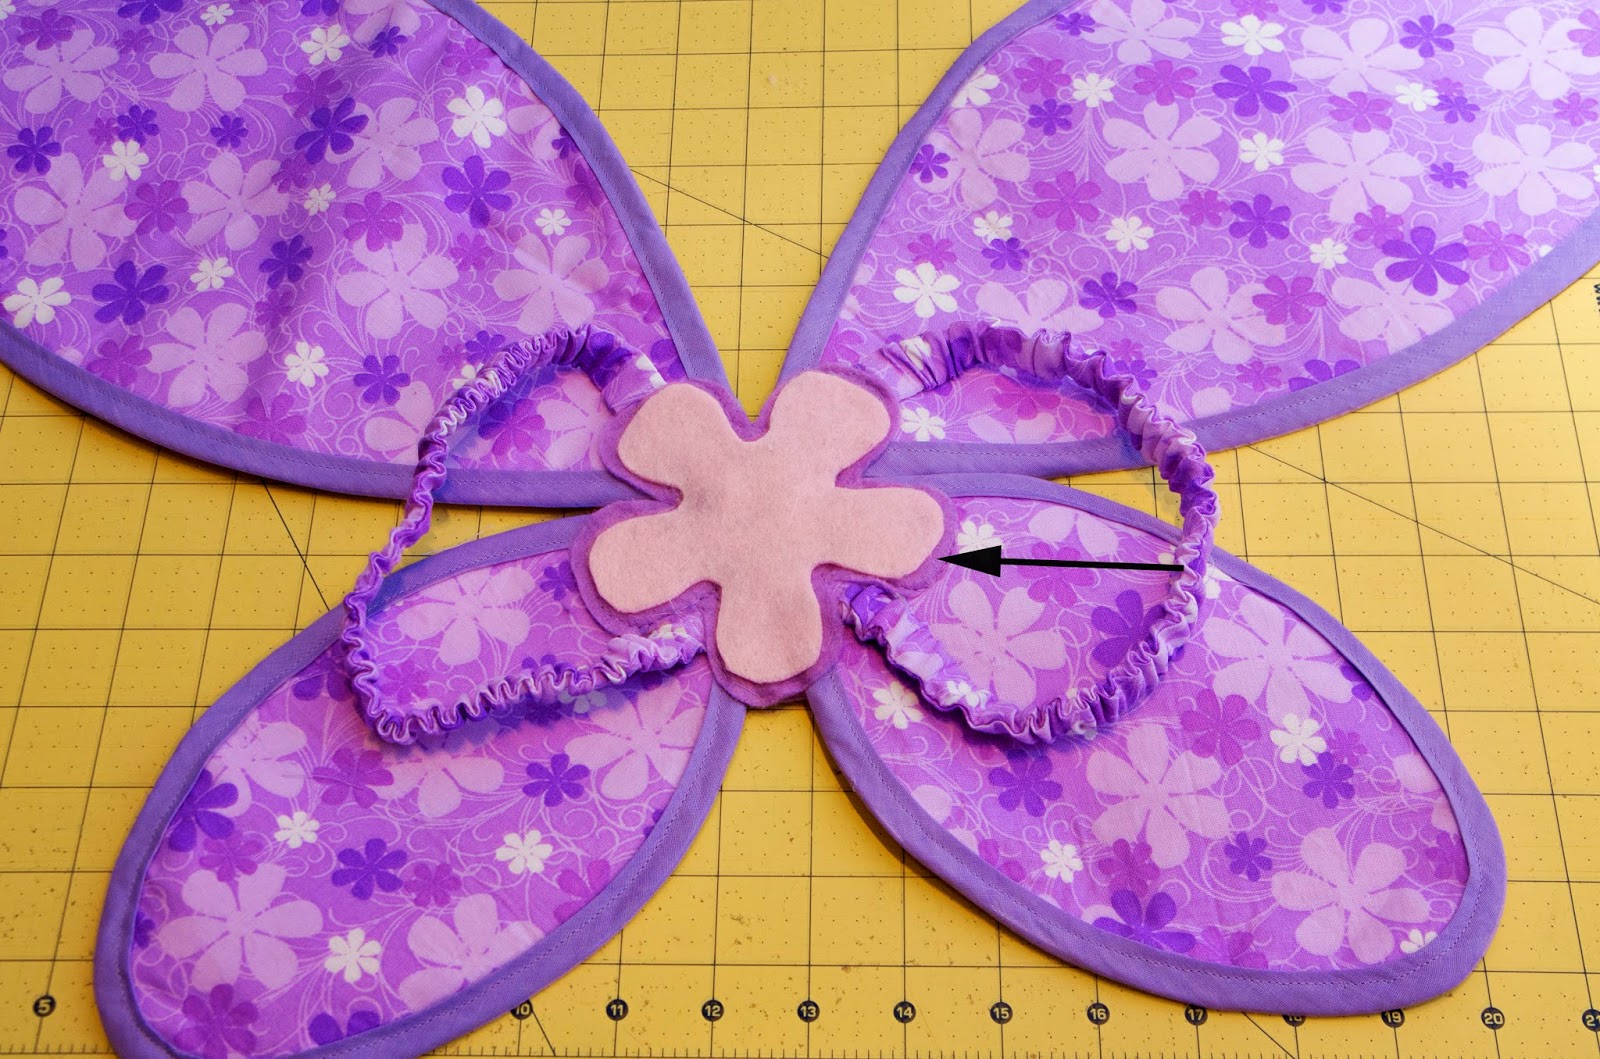
Step 7: Arrange wings to form a diamond in the middle as shown below.
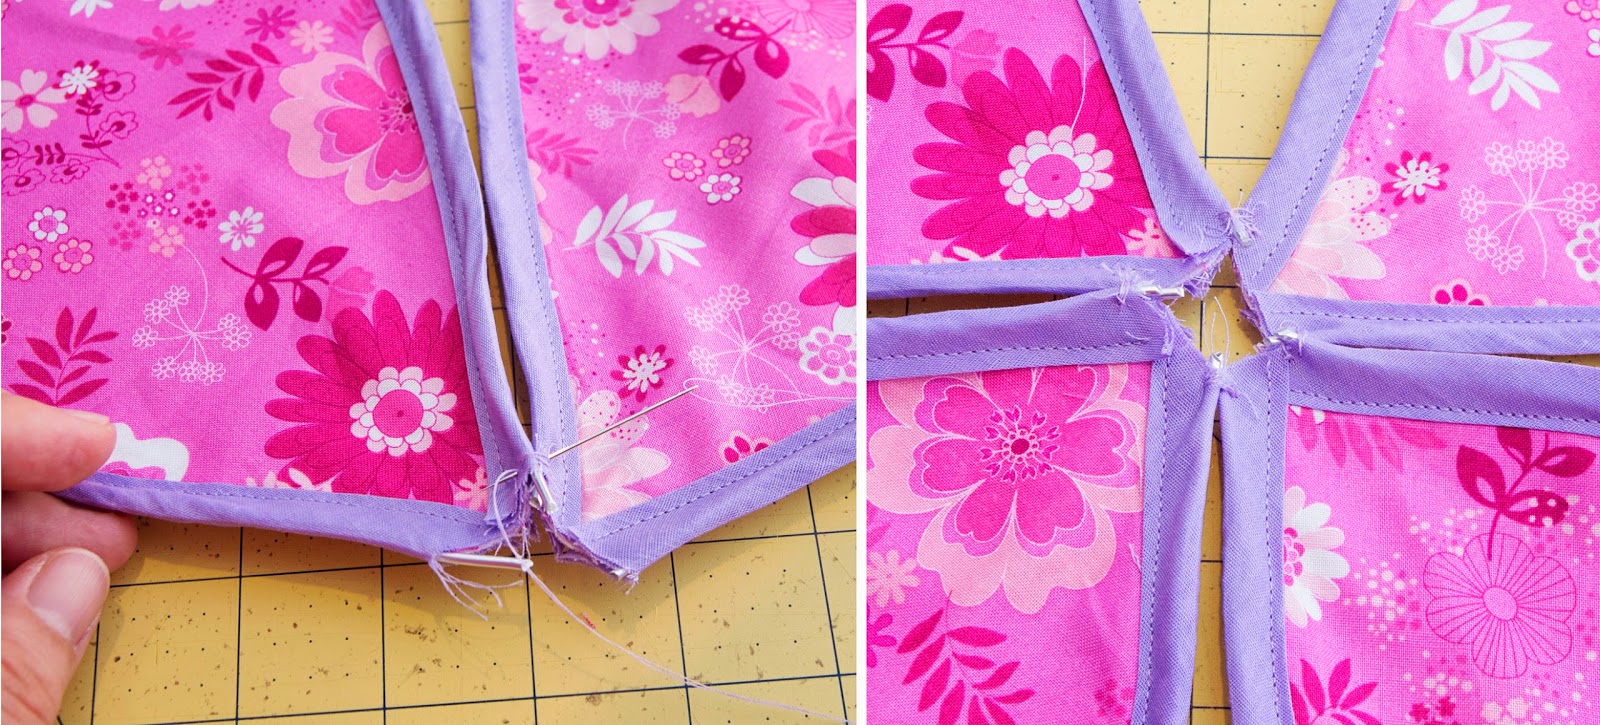
Step 8: Use a needle to hand sew wires at the edge of the wings together as shown below.
Step 9: Set the wings aside and prepare the arm straps. With right sides together, sew the edges together with a 1/4″ seam allowance. Use pinking shears to trim off half of the seam allowance.
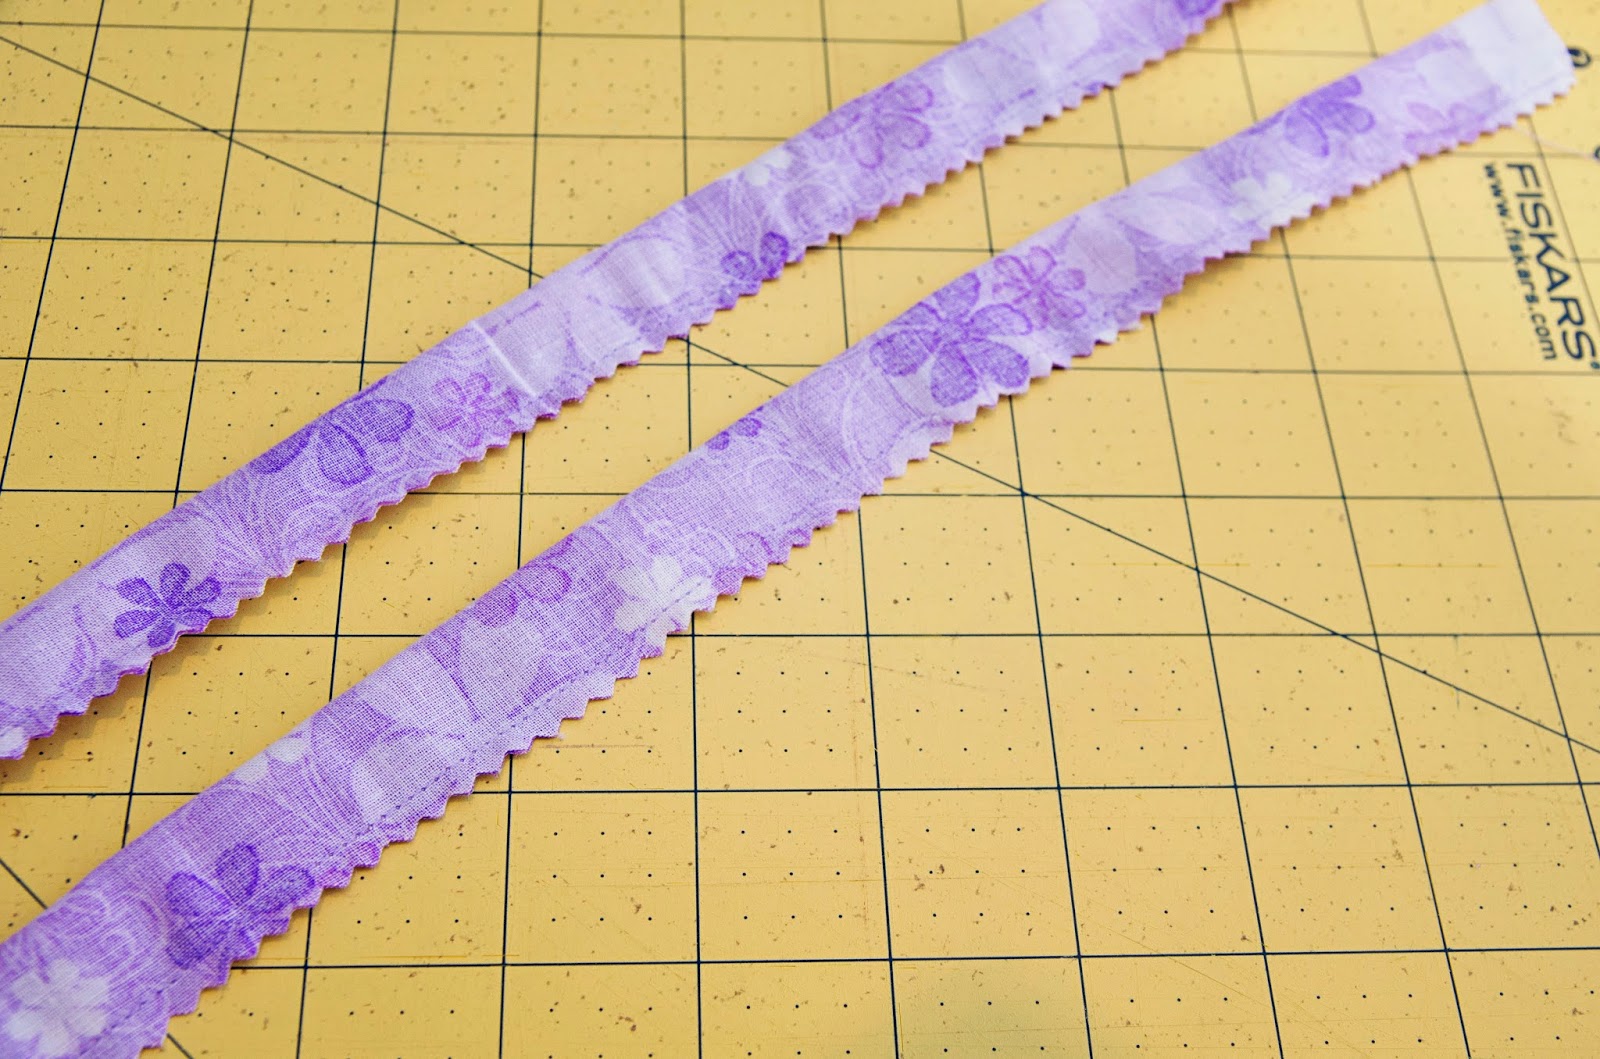
Step 10: Use your favorite turning tool to turn the straps inside out.
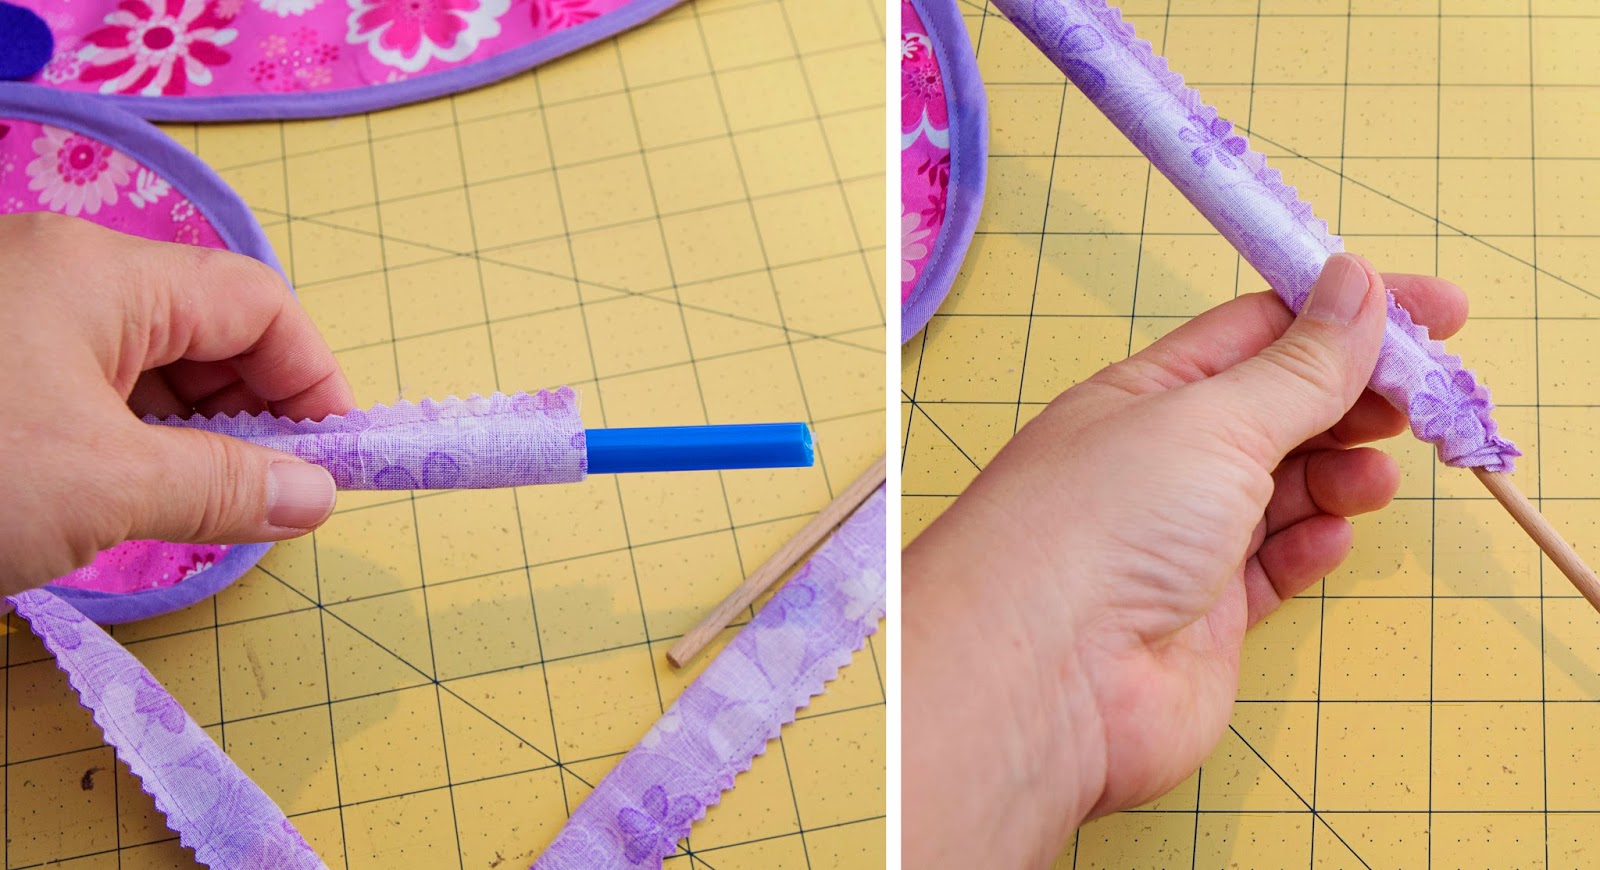
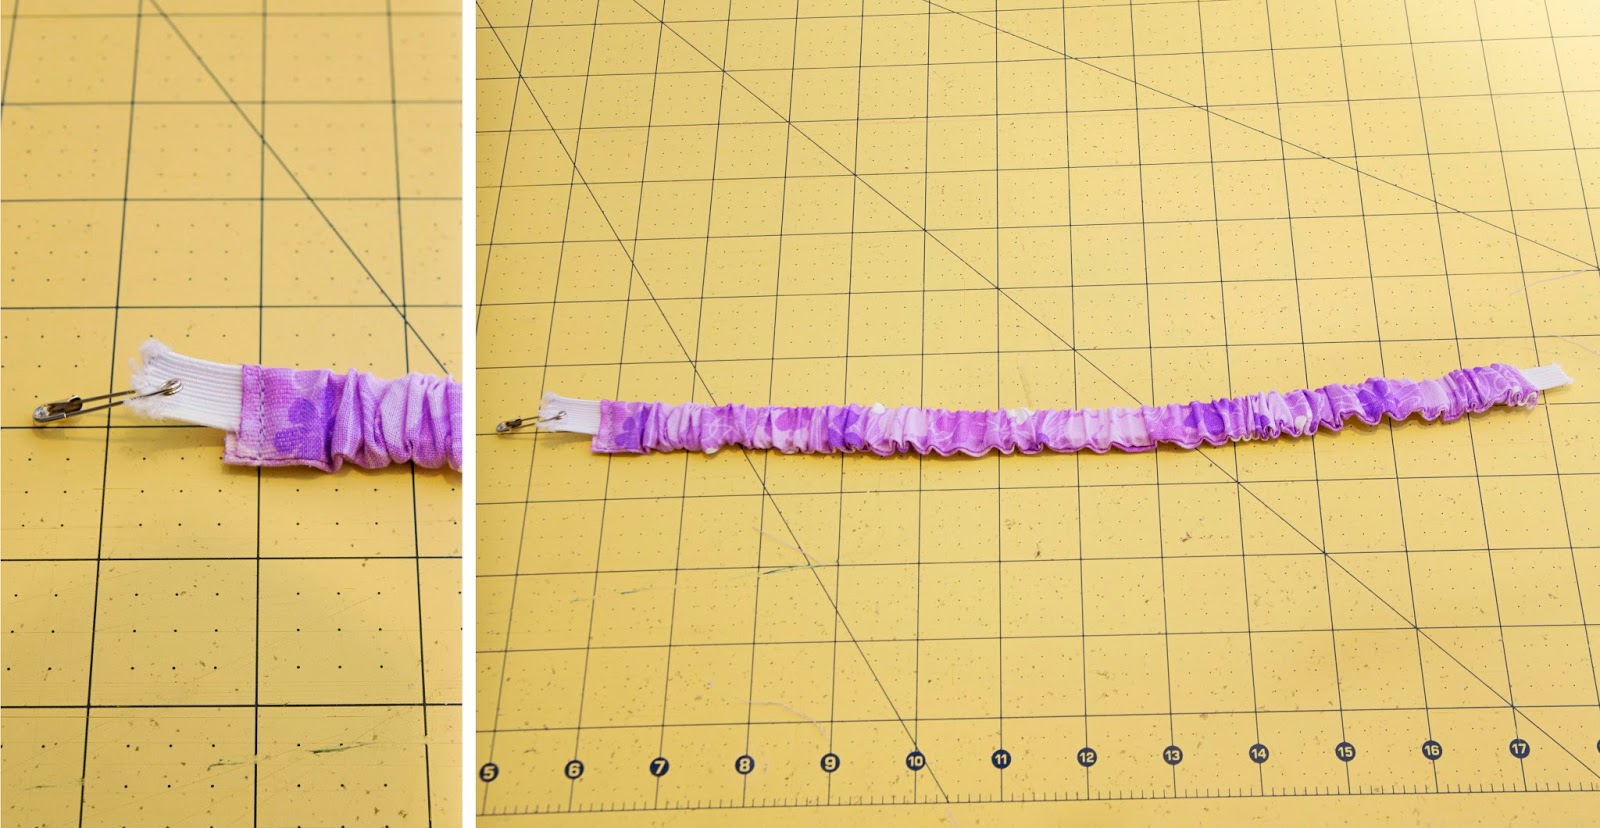
Step 11: Use a small safety pin to thread elastic through the arm straps. Pull through about 1/2″ on each end and sew a few lines to secure.
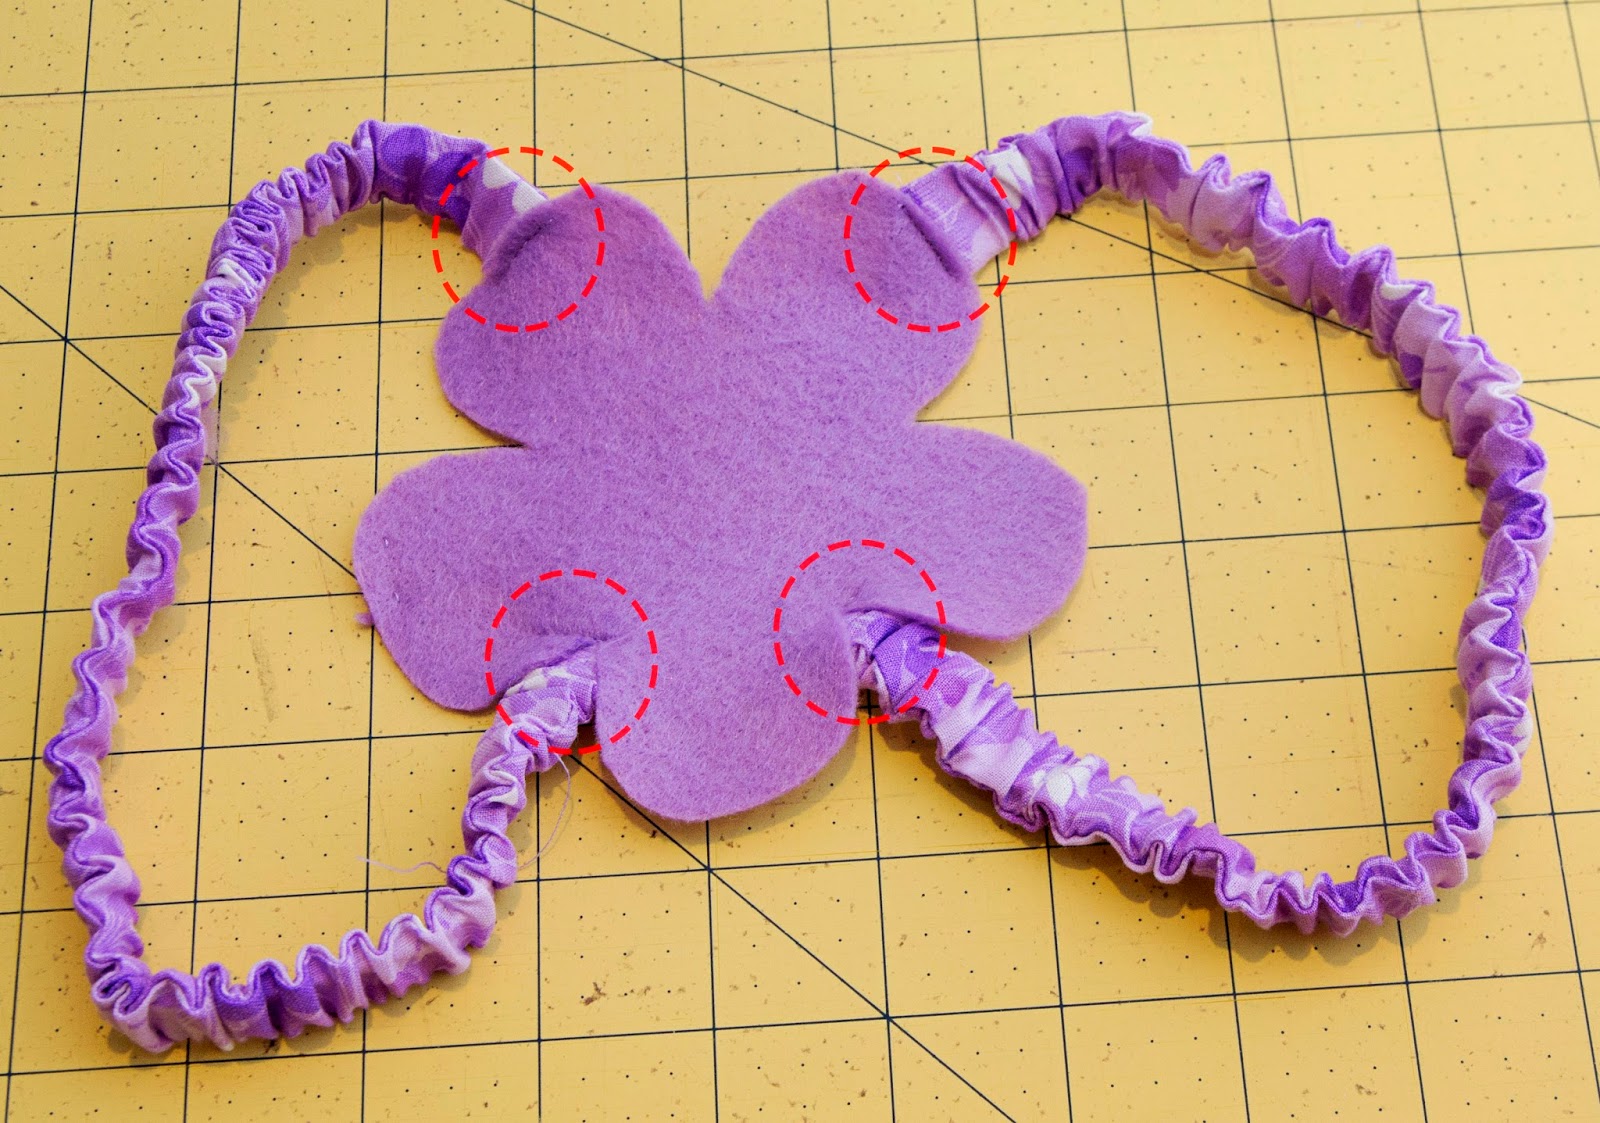
Step 12: Sew elastic straps to felt flower at the four points shown below.
Step 13: Apply hot glue to the back of the felt flower with elastic straps and carefully position onto the wings as shown below.
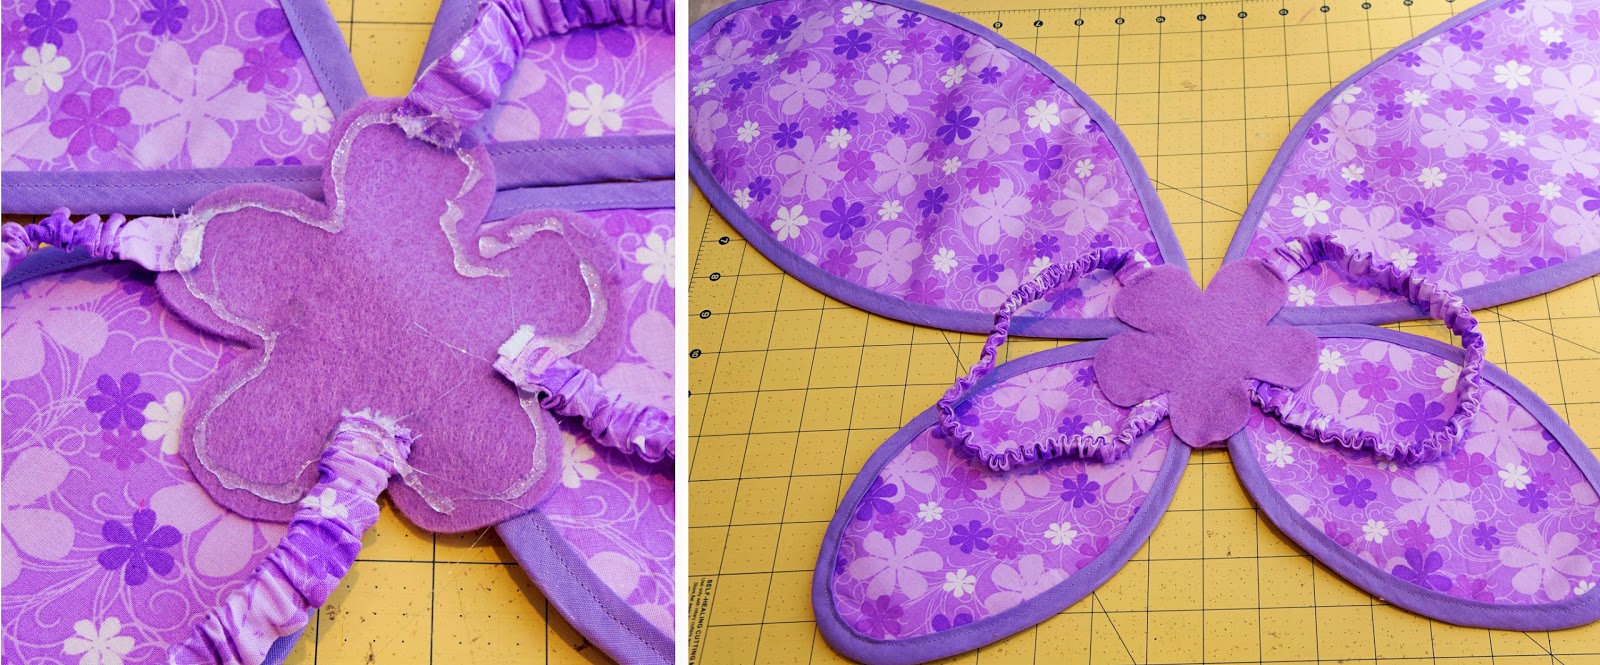
Step 14: Apply hot glue to second piece of felt and carefully position on the other side of the wings, making sure it matches the flower on the strap side.
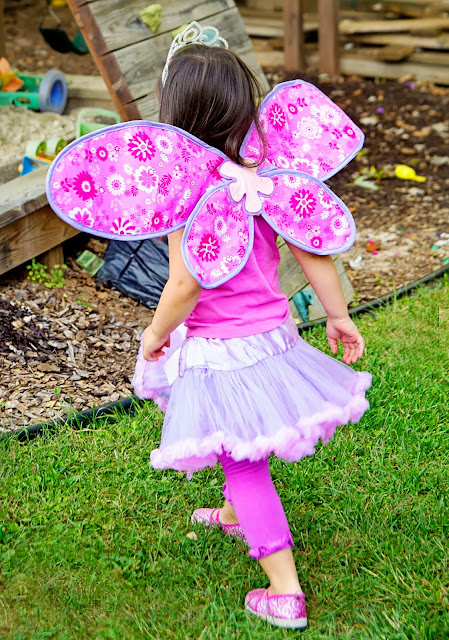
Step 15: Carefully sew the two flower pieces together. Sewing the flowers together is tricky and you will have to go very slowly. When you reach a wire, lift the presser foot and position the needle over the wire. You could also try hand sewing the felt pieces together. Apply the inner flower to both sides with a hot glue gun.
Your fabric fairy wings are now complete. Last but not least, put it on your little fairy princess and let her enjoy! Big thanks to Lindsay for letting me stop by!!


 Lindsay Wilkes is the owner and designer behind The Cottage Mama. She creates timeless, vintage inspired sewing patterns for children’s clothes. She is also a fabric designer for Riley Black Designers / Penny Rose Fabrics, author of the book ‘Sew Classic Clothes for Girls’ and can be seen teaching nationwide and online in her video series ‘Lessons with Lindsay’ sponsored by Baby Lock Sewing and Embroidery machines.


What a beautiful project! Thank you for sharing this tutorial.
Thanks so much for stopping by!!
I’m sorry but when I click on the pattern there is none? It’s just empty.
Not sure why that is…..when I click on it, it’s there. Maybe try again or try using a different internet browser. Thanks!