Archives for May 2011

Semi-Handmade Spring Wardrobe Series: Part 4

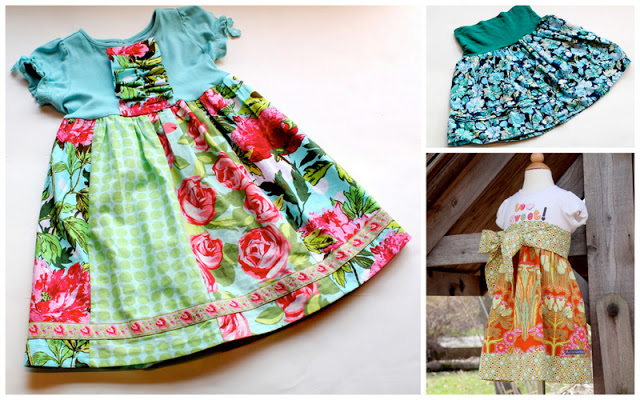
I hope you’ve liked what you’ve seen so far in my Semi-Handmade Spring Wardrobe Series and today I am revealing two fun little dresses and a super-easy skirt. 
All three of these looks were created from different store-bought shirts.  They were transformed into something new with the addition of some new fabric, pretty trim, and large ruffles.
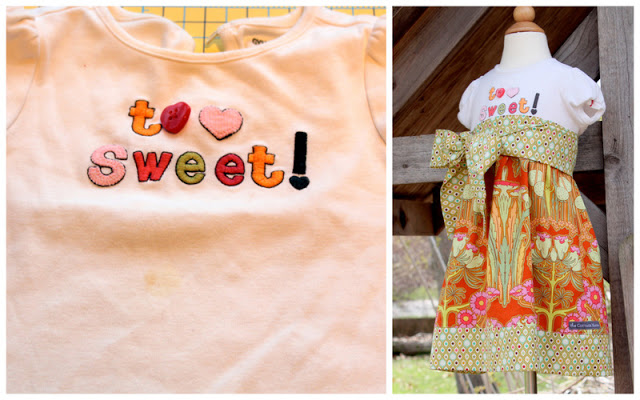
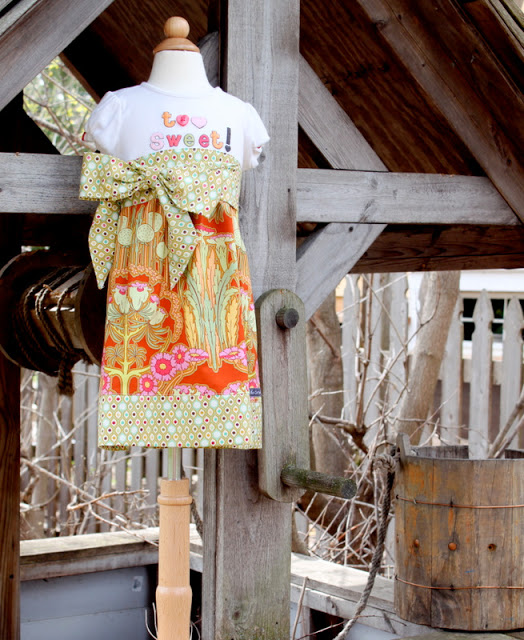
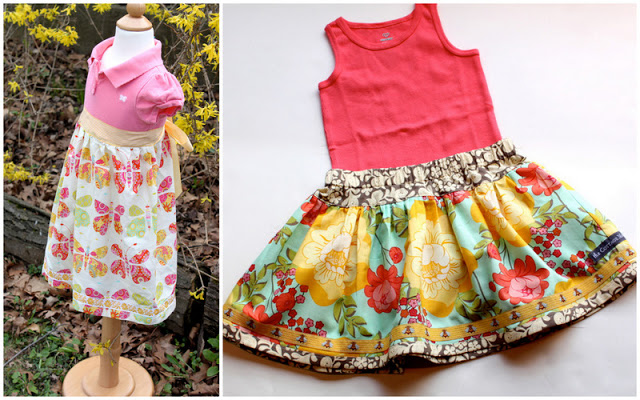
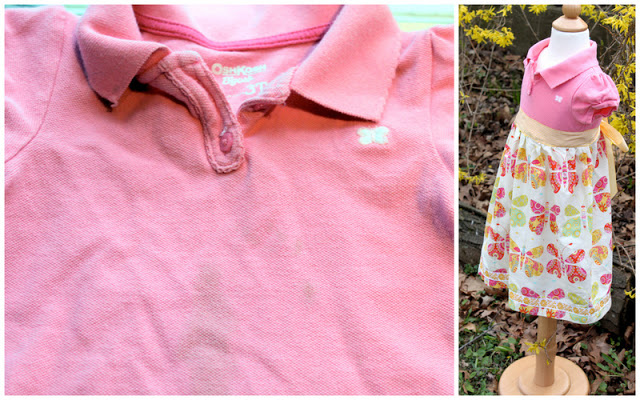
I think this dress looks like a high-waisted skirt, but it’s actually a dress.  Again, I had another cute t-shirt that needed some new life and a few stains cut off.  So I cut off the stained portion of the shirt (the bottom) and added this pretty skirt and bow.
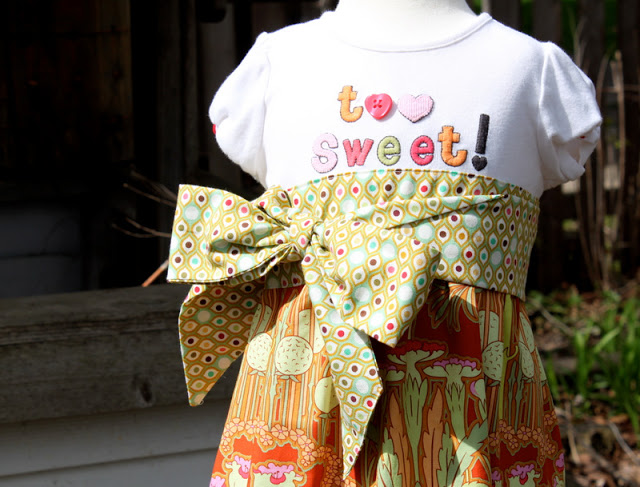
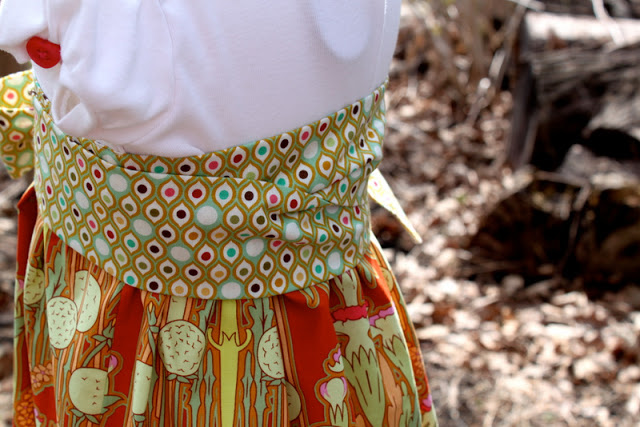
The wrap around bow is my favorite part of this dress.  It’s really wide and is definitely a statement piece.  I stitched the sash to the front of the dress all the way to the side seams.  The sash is wrapped to the back, then to the front and finally tied in a large bow off to the side.  You could make this look without the sash or just have it tie in the back if you would prefer something less dramatic.
In order to have the sash tie off to the side, you will need to make your sash a little bit longer on one side than the other.  Just play around with it until it looks like you want, then pin it in place and sew.
The fabrics used in this dress are from two different designers.  The main skirt fabric is from Amy Butler’s “Soul Blossom” line and the small accent fabric is from Tula Pink’s “Parisville” line.  I think these fabrics are a little different for a little girl, but they really work with the colors in the shirt.
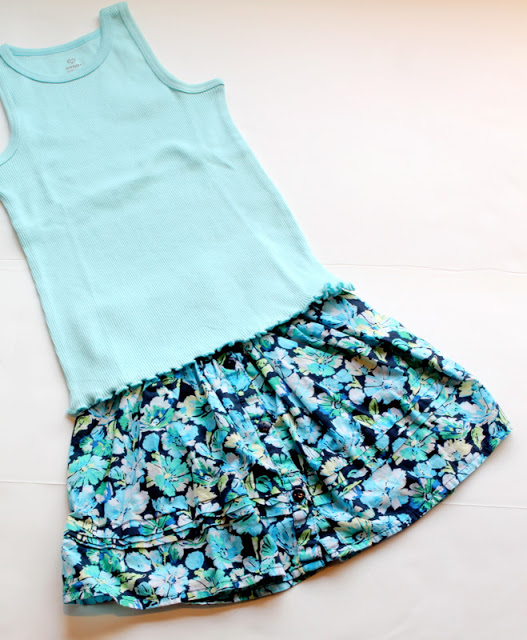
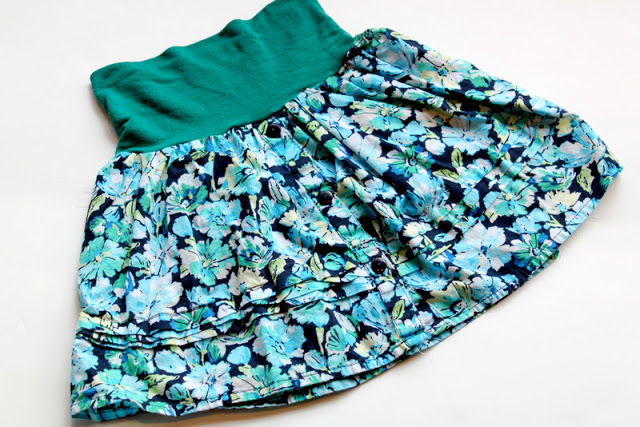
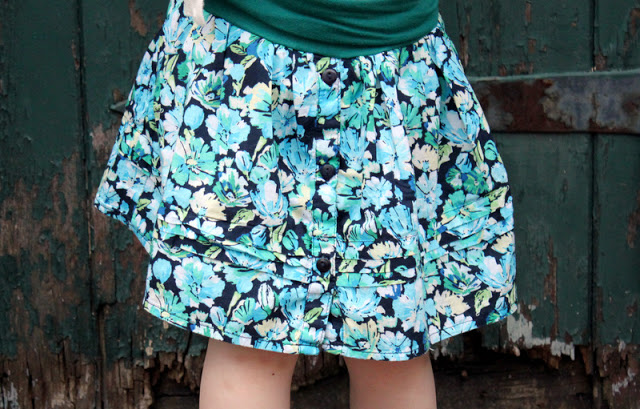
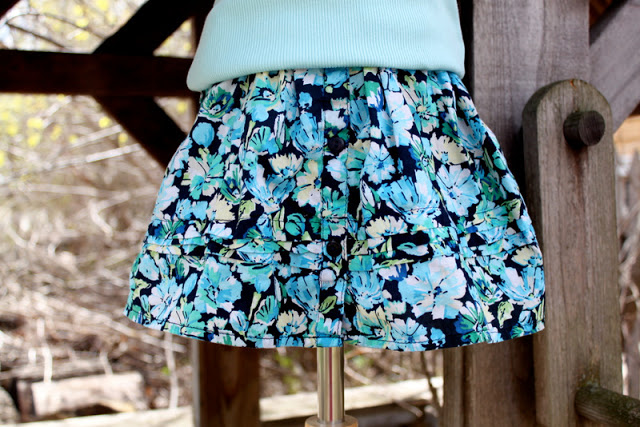
The yoga band skirt was created from the bottom of the shirt I used when creating my Empire Waist Maternity Dress (see post HERE).  I think a little “Mommy and Me” is pretty cute, so you may find the two of us sporting matching looks this summer.
I purchased a matching blue tank top from Old Navy for her to wear with this skirt.  Plus this tank will coordinate with some other play clothes she has for this summer.
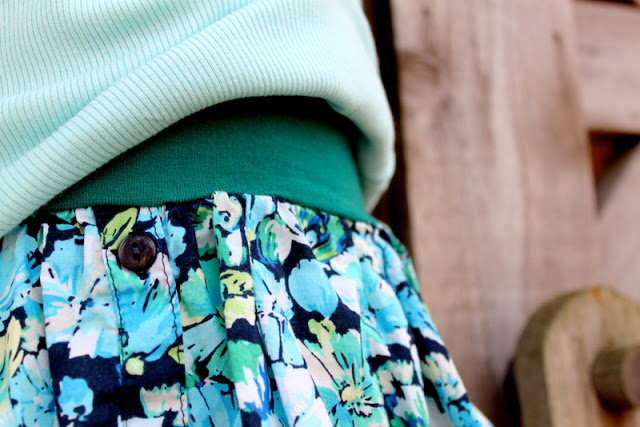
The skirt is only made of two pieces – the bottom of the shirt used for the maternity dress and a super-stretchy jersey knit.  This jersey was SO stretchy that I cut the waistband only 17″-18″ (Savannah’s waist is about a 21″-22″).  The reduction in waist size made this skirt fit perfectly and there is no worrying about it falling down.
I ran a gathering stitch along the top of the skirt piece and added it to the folded waist-band that I created with the jersey spandex knit.  The waistband is extra wide for this skirt, but you could follow the waistband instructions for my “Easy Bubble Skirt” tutorial as well (found HERE) but just make it much wider.
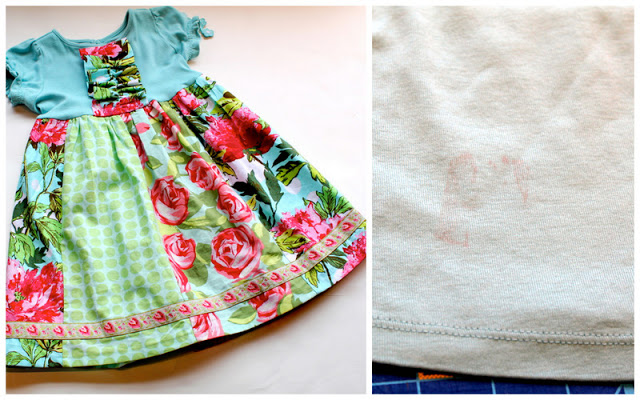
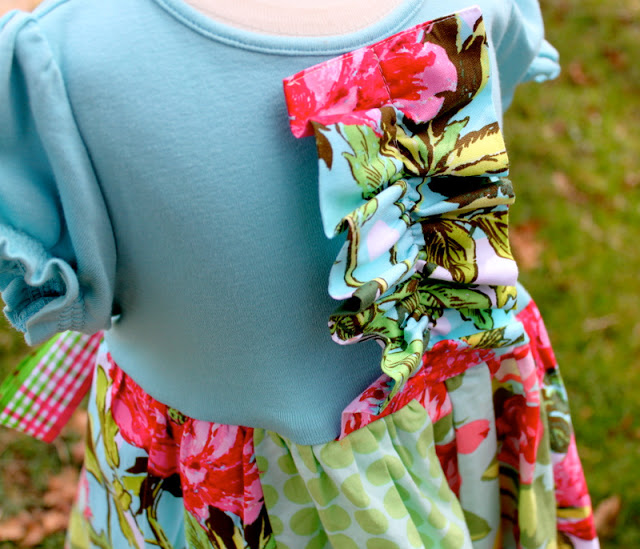
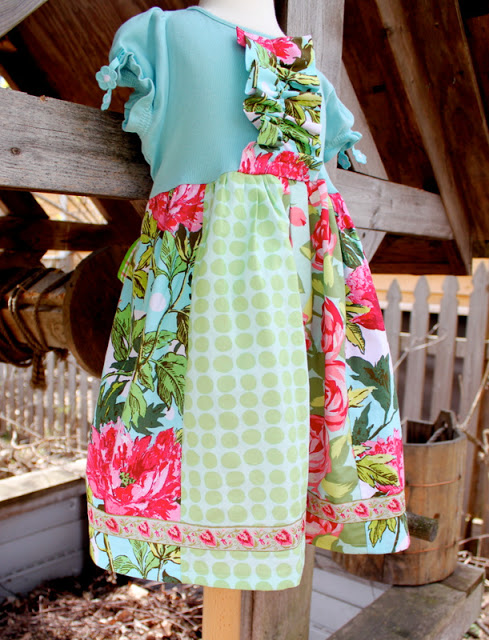
For my final look, I created a party dress made from another worn-out t-shirt.  I simply cut off the t-shirt, added a skirt and made a giant ruffle to go down the top.
Savannah wore this dress to a recent birthday party.  We paired it with a cardigan and tights because it was a little chilly that day, but I will put it with just a simple pair of sandals when the weather warms up.
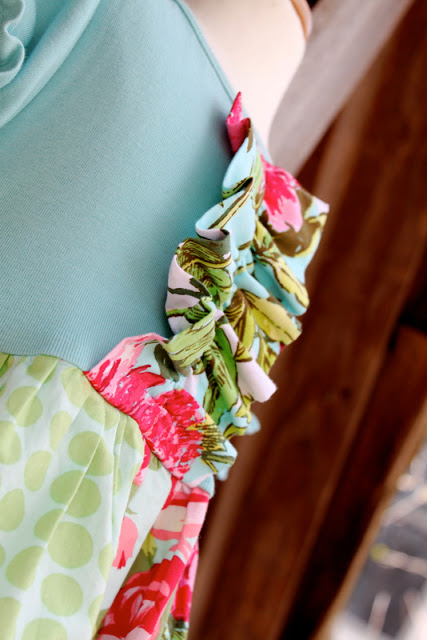
The large ruffle down the front was created by cutting a large piece of fabric, folding it in half (wrong-sides together), stitching down both long sides and one short side.  Then I turned it right-side out and pressed it.  The open end is hidden in the seam between the shirt and the skirt.  I ran a gathering stitch down the ruffle and then stitched over it again to secure it to the shirt.
I also wanted to do something a little more exciting with the skirt on this dress.  I used three different prints that I thought went well together.  Two of them are from Amy Butler “Love” and the other is from Amy Butler “Soul Blossoms”.  I just cut wide strips of fabric and then sewed them all back together in a width that was about 46″ wide.
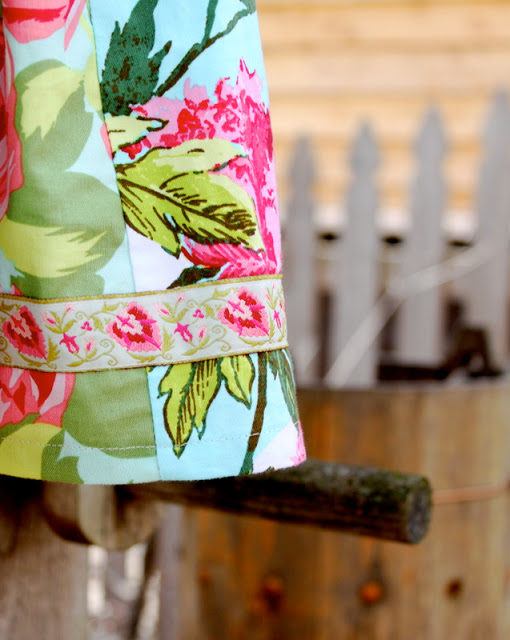
The trim is my favorite part on this dress – I think it ties it all together.  It is a woven jacquard trim that has been stitched on the top and bottom to secure it to the dress.
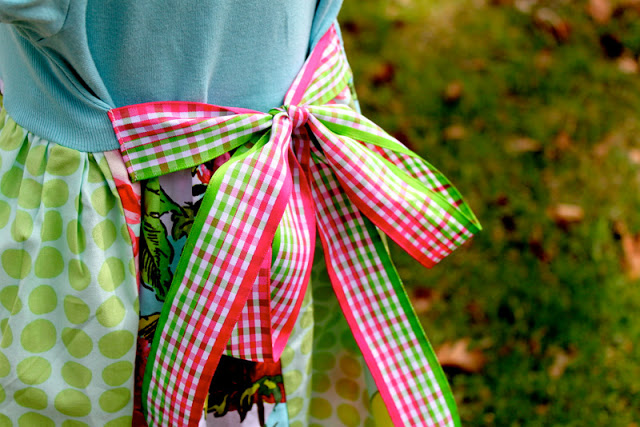
After I finished the dress, I felt it was a little wide (this shirt wasn’t super-fitted), so I added a coordinating ribbon to define the waist-line a little bit more.  Plus it adds some interest from the back.
Whew, so those are my final three looks in my Semi-Handmade Spring Wardrobe Series.  Tomorrow I will do a recap of Savannah’s Spring wardrobe.  Thanks so much for following along with me – it’s been a lot of fun sharing with you all!

Semi-Handmade Spring Wardrobe Series: Part 3

Today I am revealing two semi-handmade looks that are so super-simple.  Even if you are a beginner sewer, you can definitely feel confident tackling these two projects.
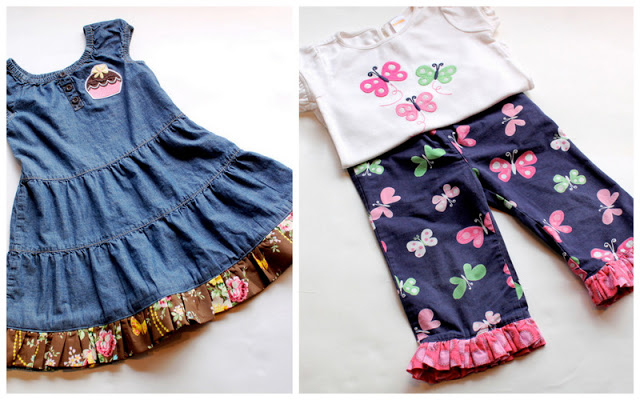
Both of these looks, the cupcake dress and the ruffle capris, started off as two very basic clothing pieces and were transformed into something a little more special through the use of ruffles and fun fabric.
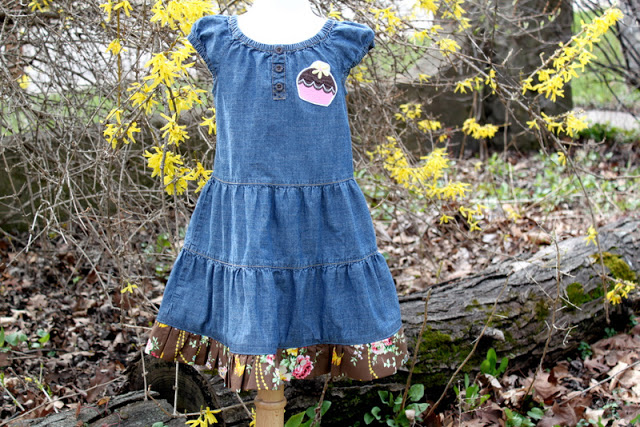
For the cupcake dress, I started out with a basic peasant style denim dress that was purchased from target.  Savannah got a lot of wear out of this dress last summer, but unfortunately it was just getting a little too short for her.
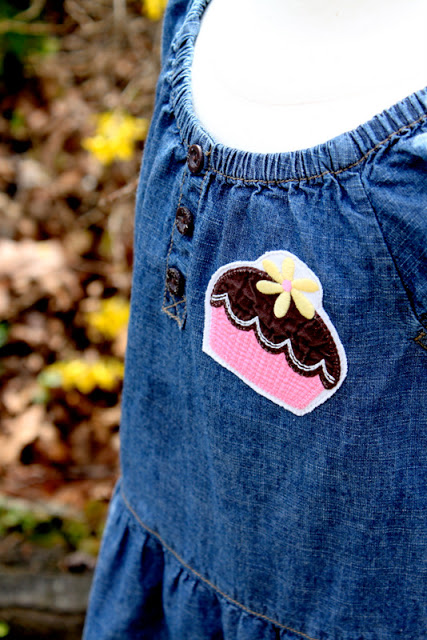
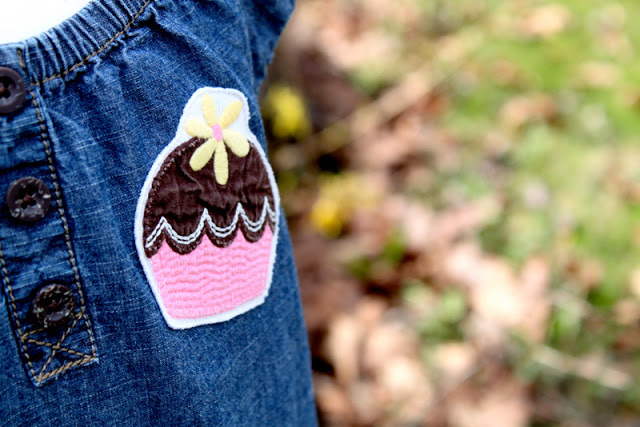
For the cupcake applique, I simply cut out the cupcake piece from the badly stained Gymboree shirt that we had.  I thought this cupcake was adorable, but the shirt had seen better days.  All I did was straight-stitch around the edge of the applique to secure it to the dress.
I chose a fabric that coordinated with the cupcake to extend the length of the dress through the use of a ruffle.  The ruffle was cut to be 2.5 times the entire bottom measurement of the dress.  I had to join two pieces together in order to make it long enough.  I wanted to add about 2 inches to the dress length, so I cut the ruffle 4 inches wide because it is folded in half (which means no hemming!).
The bottom of the dress is top-stitched (1/8″ seam allowance) to make sure the ruffle stays down after washing.  Plus, I always like top-stitching, it gives it a more finished look.
I’m so happy we are going to be re-using this dress for the next several seasons.  I loved it before, but I love it even more now!
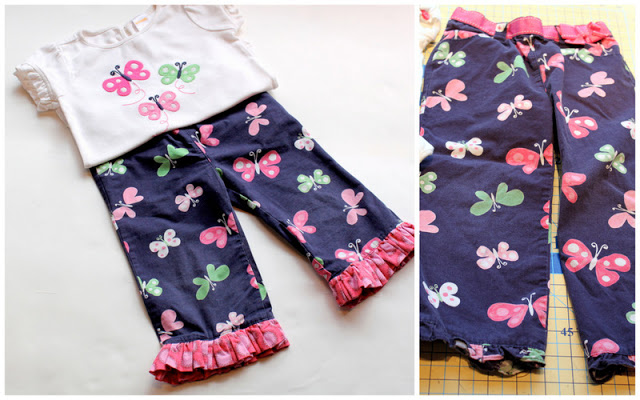
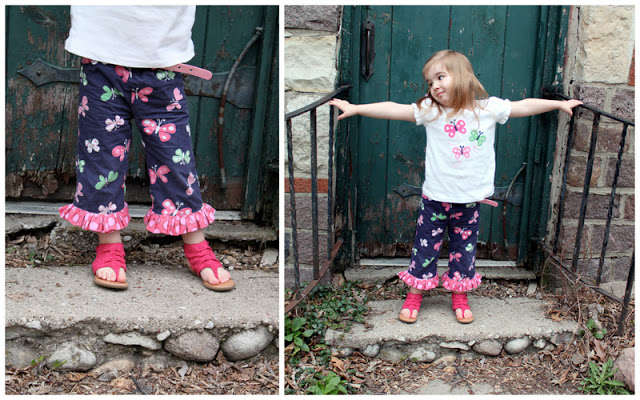
I typically wouldn’t cut up a perfectly good pair of pants, but here was the one exception.  The ruffled capri look was created because I loved these little pants but the fit was sort of odd for the size.  They are actually a size 2T (Savannah wears a 4T) – the length was definitely a 2T, but the waist was more like a 4T/5T.  So we never got too much wear out of them because by the time the waist fit, the length was just a little too short.
This was the quickest look out of all to create……it took longer to measure and cut for the ruffles than the actual sewing portion.  I just cut the pants off and added a ruffle.  How easy is that?  I did top-stitch (1/8″ seam allowance) around the bottom of the pants to make sure the ruffles didn’t flip up after washing.  My mother-in-law purchased this coordinating shirt for Savannah (not knowing we already had these pants) in a size 4, so we have the perfect shirt to go with these cute little capris.
You could do this with any pair of pants.  You can either make them into capris (like I did here) or extend the length of them to make the pants longer for the next size up.  My children are averaged sized, but I would imagine this could work really well if you have a thin little string-bean on your hands.

So there you go, two easy, totally new looks with the addition of some ruffles!  What do you think?  Have any pants or dresses that you would like to extend the life out of or make just a little bit more special?  I challenge you to pull them out and make it happen.  And when you’re all finished, add your pictures to The Cottage Home flickr group so we can all see your amazing work!
Tomorrow I will be revealing two little dresses and a fun, easy skirt – see you then!

Semi-Handmade Spring Wardrobe Series: Part 2

So today I am revealing the first two looks in Savannah’s new semi-handmade spring wardrobe.
Both of these outfits just shout spring to me.  One of these outfits was made from a repurposed shirt and the other one was from cotton fabric that I had in my fabric stash made to match a store-bought shirt.
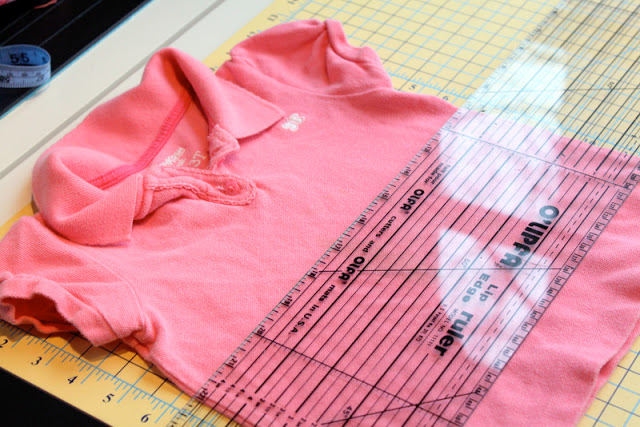
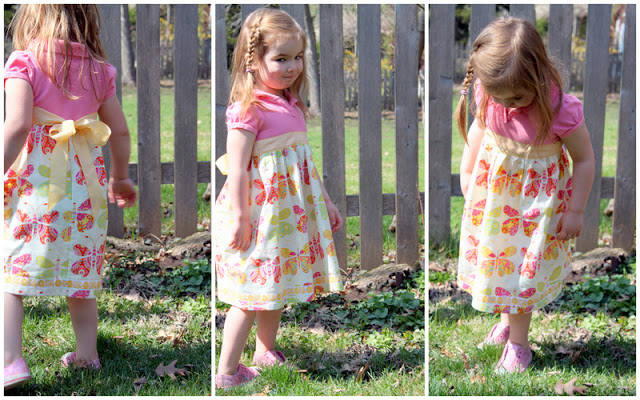
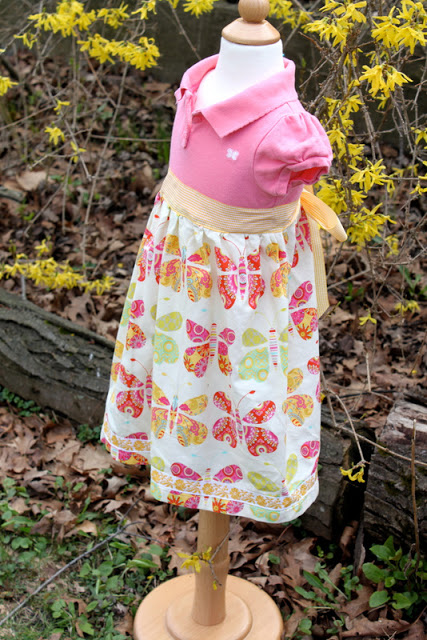
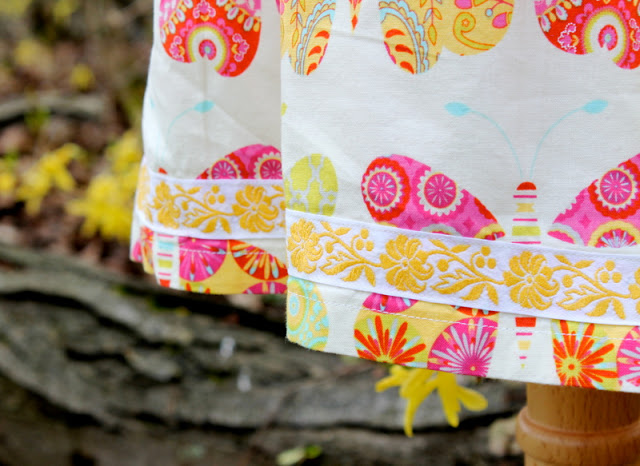
The first dress, what Savannah likes to call her “Beautiful Butterfly Dress,” is made from a terribly stained polo shirt.  I really loved the fit of this shirt and I’m not quite sure what spilled all down the front, but it is definitely not wearable anymore……until now…….
This dress took no time at all to make.  I simply cut off the shirt and added a skirt with a ribbon tie.  I wanted it to be a little more empire waisted, so that is how I based how much of the shirt to cut off (not to mention that I needed to cut off all the stains).
I love that this dressed can be dress-up or down.  Here I have Miss S. in the dress with her pink glitter sneakers which are perfect for running around outside.  But pair it with some tights, dress shoes and a cardigan and we’ve got a perfect look for Sunday Mass.
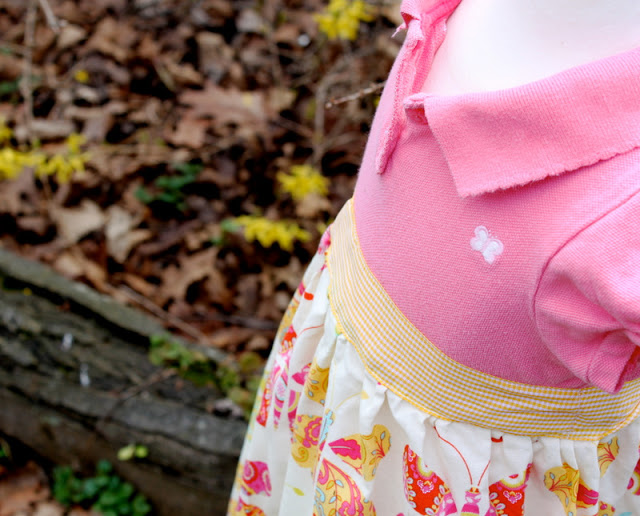
I thought this butterfly fabric was just perfect for this little dress.  The polo shirt already had a sweet butterfly and the fabric contained just the right shade of pink to compliment the shirt.
I used a gingham ribbon that I happened to have to make the sash for this dress.  The yellow was the perfect shade. You could certainly make a sash out of fabric, but this ribbon made very quick work of creating one.  I stitched the ribbon to the front of the dress and all the way to the side seams and left it loose in the back.
I think the trim is what makes this dress special and unique.  Again, the yellow was just the right shade to match the fabric and the ribbon sash around the waist.  I stitched it all the way around the bottom of the skirt piece before attaching the skirt to the shirt.
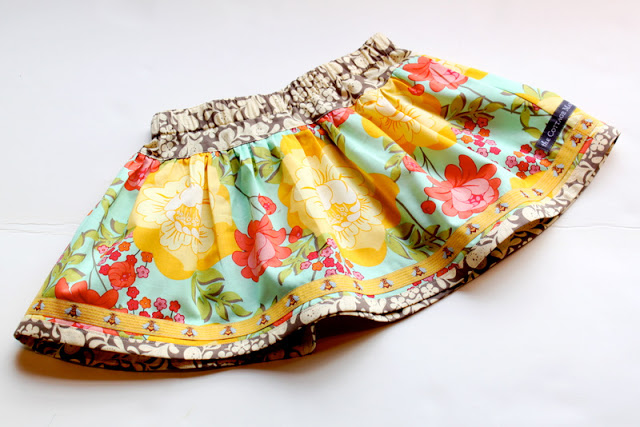
I actually created this bumble bee skirt to go with a tank top that I purchased from Old Navy.  I purchased three of the same solid color tank tops to mix and match with different outfits for Savannah.  The rose-ish, pink-ish top that arrived in the mail was a unique color, but I was really excited when I saw that it was just the right match for Sandi Henderson’s “Meadowsweet 2” fabric line.
I made the top of this skirt more narrow and then added a gathered skirt to it.  Sometimes I find too much gathering up top makes the skirt look really bulky on a little girl.  This skirt is somewhat fitted through the hip and flares out.  Perfect for twirling! 
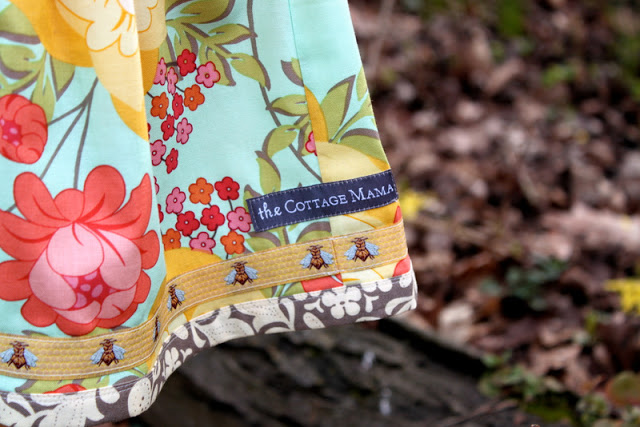
I used a woven bumble bee trim around the bottom of the skirt to add a bit of whimsy.  Then, rather than do a normal hem, I used fabric to bind the lower edge.  Basically this is just like creating double-fold bias tape and attaching it to the bottom.  The only difference is that it doesn’t have to be cut on the bias because you aren’t stitching around any curves.
Both of these looks were created just by using my daughters measurements.  The first dress was so simple because I just needed to know how long to make the skirt piece.  And for the second look, that really was just a basic skirt and you can make that whatever length you like!
So, that’s it for Part 2 of the “Semi-Handmade Wardrobe Series” – I hope you enjoyed it.  Get ready because tomorrow I will be revealing some super-cute capris and my cupcake dress.  If you have any questions, please don’t hesitate to ask!

Semi-Handmade Spring Wardrobe Series: Part 1 – Introduction

Savannah Rose has been growing like a weed.  It’s like overnight she grew 1″-2″ and the poor girl was in serious need of some new clothes.  Now, it is impossible (or just not feasible) for me to hand-make all of my children’s clothes.  With my etsy shop taking a lot of my sewing energy and projects for the blog, sometimes the girls get the short end of the stick………but not this Spring!  I’ve taken a little time away from the etsy shop to focus more on my girls.

I was inspired by Jessica from Me Sew Crazy when she came up with a spring wardrobe for her girls.  Granted, she handmade all of her collection, but it was the inspiration I needed to get sewing for Miss Savannah.  I decided I wanted to give her a boutique style wardrobe, but wanted to re-use and re-purpose a lot of her old clothing that would otherwise be discarded.

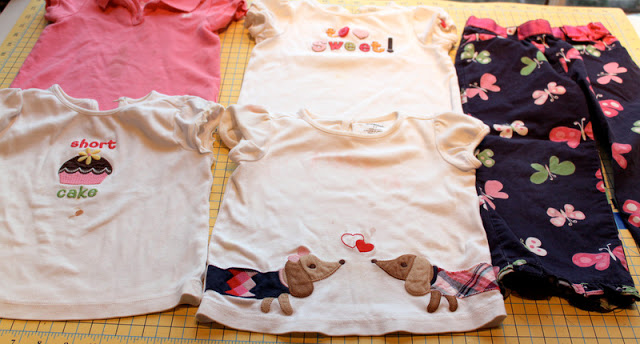
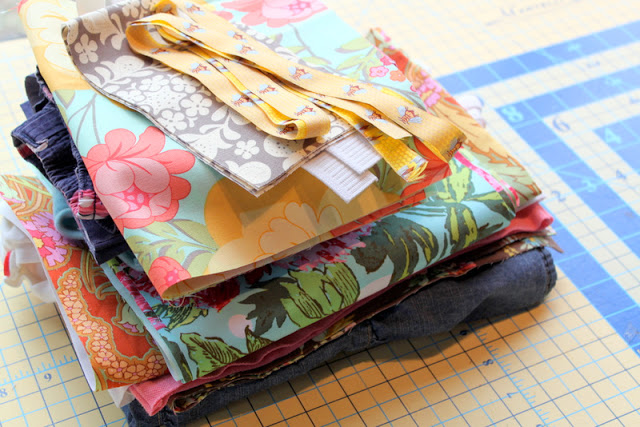
So here are some of the old clothing pieces I started out with for the spring wardrobe.  Most of these shirts have been so badly stained that I wouldn’t consider saving them for Matilda to wear – they were headed to the trash.  Now most of these clothes are from Gymboree, which I love, and the thought of throwing them away made me really sad.  Not to mention the fact that they were so cute.

As you can tell, I was obviously a naive new mom when I bought this clothing – who puts a 2-3 year old in white?  I won’t be making that mistake again…..especially now that I’m expecting a boy!

So to accomplish the task of creating a semi-handmade boutique wardrobe, I did what I usually do when I have a lot of sewing to get done.  I cut all of my pieces for each of the different items.  That includes trim, bias tape, elastic and fabric.  If I’m going to use buttons or zippers, I pull those at this time as well.  I group all of the pieces that go together and fold them all in a neat pile.  I stack them on top of each other and I work from the top of the pile down to the bottom.

Designing and choosing fabrics is a tedious task for me.  It is my favorite part, by far, but I definitely take my time picking the right fabrics and coordinates.  I find if I do all of the planning and cutting work ahead of time, then the sewing part is really a piece of cake.

So, what do you think?  Have any ideas what that pile of fabric, old clothes and trim might turn into?  I cannot wait to show you.  So dig out some of those old shirts that have been stained or the clothing that got all funny in the wash and let’s make it into something new and fabulous.

This is going to be a week long series with a post each day and I’m looking forward to sharing my creations with you.  I hope I inspire you to create a semi-handmade wardrobe of your very own.  And who knows, if you like it, maybe I’ll have to redo Matilda’s wardrobe too!

Spring Cleaning – $100 Visa Gift Card AND Libman Spray Mop Giveaway

I know this is going to sound very strange, but I actually like spring cleaning.  Do I love the everyday picking up of toys, crumbs and other surprises that my girls leave around?……well, not so much.  But I have to admit that a good deep cleaning around this house feels really good (while it lasts, that is).

Click HERE to check out my spring cleaning tips and enter to win $100 Visa Gift Card AND the new Libman Freedom Spray Mop!