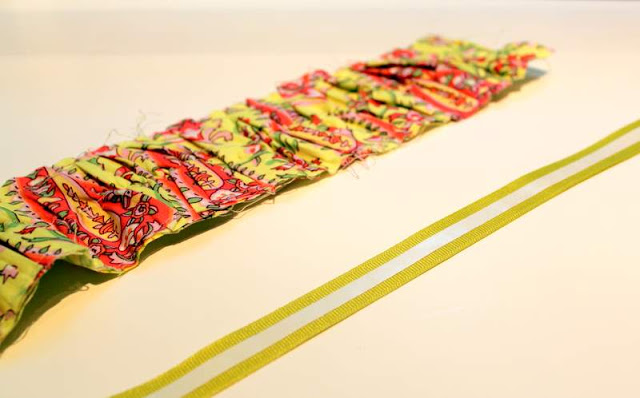
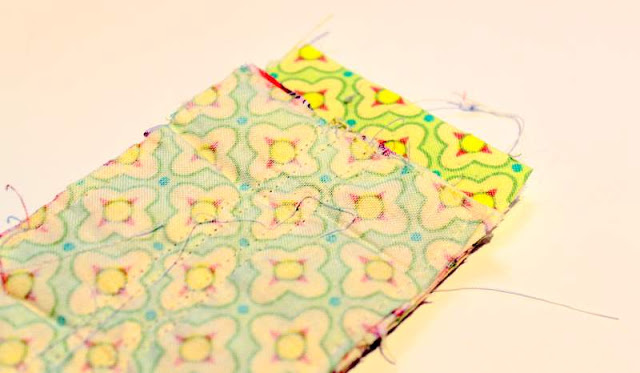
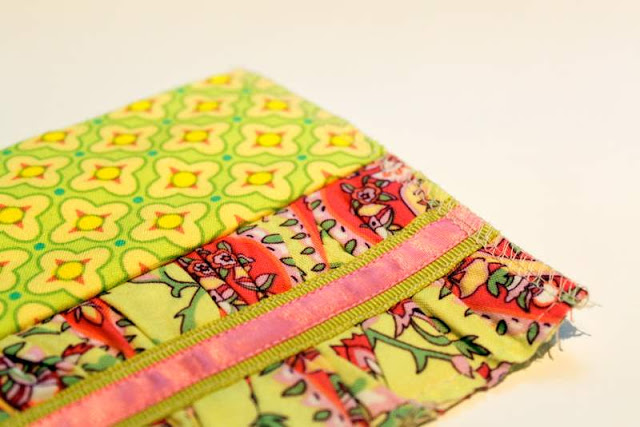
First off, I just have to say thank you! Your emails and comments in regards to my camera strap cover “show and tell” post were amazing. I absolutely love hearing from you guys. And because so many of you asked for it, here is a tutorial on how to make your very own, Gathered Camera Strap Cover. Make one for yourself, for a friend, or make multiple to coordinate with every outfit, or how about one for each season or holiday……shoot, the options are endless!
Gathered Camera Strap Cover Tutorial
36 Comments
Trackbacks
-
[…] found several tutorials but the one I liked best was this one at The Cottage Mama. I changed a couple of things, just to make my like […]














 Lindsay Wilkes is the owner and designer behind The Cottage Mama. She creates timeless, vintage inspired sewing patterns for children’s clothes. She is also a fabric designer for Riley Black Designers / Penny Rose Fabrics, author of the book ‘Sew Classic Clothes for Girls’ and can be seen teaching nationwide and online in her video series ‘Lessons with Lindsay’ sponsored by Baby Lock Sewing and Embroidery machines.


LOVE IT! esp the ruffles, AND that you can slide it on. I’ve been looking at cute camera straps, but not loving the ones you have to take apart your strap for. THIS is perfect! I’d love it if you stopped by Topsy Turvy Tuesdays! http://imtopsyturvy.com
Adorable!!! Not sure if my husband would ever use the camera again, but I love it!
My hubby will use our camera after I make your cam strap with the animal print I selected. Love this, dahling!
Hi Lindsay, I tried this out. Thanks for the inspiration and tutorial. I love your blog and reading your posts. That bonnet you made on Blue Cricket was absolutely adorable.
http://letsgoflyakiteuptothehighestheight.blogspot.com/2010/08/camera-strap-rhymes-with-hemostat.html
I made one of these today, and it turned out beautifully! It took me all day, because I’m a novice seamstress, but it was well worth the effort! I plan on taking some photos, and will link here as soon as I do! Thanks again for your tutorial!
Love it!!! But I notice that in your original camera strap post the ends of the strap are tapered… I would love to do that… how did you do it?
Love it! So beautiful!!
Thank you so much for the tutorial! I just whipped one up & love it!
Thanks for such a thorough tutorial. As a novice, I was able to create a pretty amazing strap cover in less than 5 hours. =)
http://chroniclesinthekitchen.blogspot.com/2011/01/accessorizing-my-new-toy.html
Thanx for this awesome tutorial! I whipped up my first 2 of these earlier this week! I hope to blog about them in the next couple of days!!
Hi Lindsay! This tutorial is WONDERFUL and the strap just adorable. I wrote all about it in my blog today and linked back to your tutorial! http://mygreenbraecottage.blogspot.com/2011/03/ruffled-camera-strap.html
We should do a linky party with all of our versions!
Fabulous tutorial! It’s time I made a strap for my camera! Thank you for sharing!
Jo-Anna
Thank you so much for this tutorial! I just made one for my sister-in-law and it turned out SO cute – and less than 2 hours with the cutting and everying. I am so excited to give it to her
I just wanted to say thank you for this tutorial! I have made 2 for myself and I just LOVE THEM! I get so many compliments on them! I have 2 boys and so in this house of manly things it was fun to make me something totally frilly and pink!!!
So glad that I found your blog today. I found you with a google search looking for fabric organization for my sewing room. Your camera strap tutorial is wonderful. I will be using this to make my daughter a strap for her birthday coming up in early July. thanks, I look forward to following your blog.
Hey..your blog is very amazing, I love to visit everyday..
Don’t forget to visit my blog too DigitalCamerasReview.us
Thank you
Love your tutorial!! It worked out perfectly :0)
http://abasketofstrawberrypi.blogspot.com/2011/07/gift.html
What a fabulous tutorial! Thanks so much! I plan to create a camera strap cover using it and will post (linking back to your instructions) when it is completed. Thank you again. :o)
Sincerely, Trish
What a great tutorial. So easy to follow and clear, concise directions. Thank you for that!
Here’s my question? Could I hire you to make me one? I love your work and since you know what you’re doing it would only make sense to have you create one and I pay you. My sewing machine is broken and would love to have one b4 early September when I do a couple of large vendor events. Let me know if you’d be interested.
I love that you added a bit of padding, and the ruffle is so cool on yours and not over the top like some I’ve seen.
I’m really one that does’t go for much color and am thinking of taupes/blacks/browns/ivories for colors. I love the shabby French style and muted down aqua is a color I do love too (think aqua Ball glass jars). Let me know if you’d consider doing this?
Thanks!
Gretchen Schaumann
http://mimitoriasdesigns.blogspot.com
gretchen.schaumann@comcast.net
Fantastic tutorial – thank you so much Lindsay!
http://princesspursesandpearls.blogspot.com/2011/07/july-20-2011_31.html
Thank you so much for the tutorial! I finally got around to making one for myself this morning and it turned out beautiful.
What a great and quick tutorial! It was very easy to follow along. Thanks for all the great pictures. I did mine today and it turned out fabulous! Thanks again!
I made one of these for a Christmas gift, it turned out great! Here’s the link: http://www.thebarefootseamstress.com/2011/12/handmade-christmas.html
Now, I’m going to make one for myself
Thanks Cottage Mama! I made this today and I can’t belive it. Trust me…I’m NO seamtress. But I love it and it was pretty easy because of your step by step with pics.Thanks!
Oh yea…http://labgc.blogspot.com/2012/01/first-diy-of-2012.html
Thank you so much! I made one today and am very impressed with myself- super cute!
great publish, very informative. I’m wondering why the opposite specialists of this sector don’t notice this. You should proceed your writing. I am sure, you’ve a great readers’ base already!
Bali Natural Bamboo Roman Shade – Free Shipping, 41×74
I just got my DSLR camera and one of the first things I want to do is make a strap cover. I binged ‘camera strap cover tutorials’ and came up with a list – you were on it! I was so excited to see one from someone I ‘know’!! LOL! I don’t follow many sewing blogs – it’s always kind of like I’m not learning anything I don’t already know and I don’t stick with them. But yours I love and I’ve been following you for awhile now. I can’t wait till you have time to post more about your business journey and I love that you are so willing to put the info out there to help out the rest of us. I’m trying to decide what direction I really want my business to go if I try to grow it. What do I really want to make, what do I really want to market and sell.
Also, thanks for the info on your tags – I will be checking out that site. I’ve been using printed ribbon and just cutting it between each name and using some fray block. It’s been great but eventually I want some tags that are ready to go without cutting and fray blocking. Blessings to you – I hope to get a camera strap made this week!
My daughter and I made one of your camera strap covers today and I LOVE it!!! Just wanted to say thank you so much for the tutorial it was absolutely wonderful!!
I just made a camera strap using this tutorial! I needed the actual strap (not just a cover) and wanted long enough to go cross body so I did some tweaking to the ends but loved how it turned out!!! Thank you so much for the awesome tutorial and pictures!
Excelent tutorial . I just made my first strap and I am a beginner , so if I can do it anyone can , thanks so much for your tuts , now I am making a tablet cover and some other straps for friends
this is wonderful!! I am so glad I came across this tutorial, people have been asking me to make them one, but i forgot how I made mine and I have to say, yours is so pretty!! Will be making one today:) Thanks for posting, can’t wait to try it!!
XOXO
April
I read many tutorial os strap, but yours is the best! Good explanation & clear photos with important details. Thank you for sharing.
I just finished this strap. I made one using the measurements in the tutorial and it turned out great. After putting it on my camera I decided that I wanted one a bit longer and wider just for my comfort. So I put the first one on my 35mm that I don’t use as often. I then cut another one just a bit wider and longer and changed the back fabric to minkyfor softness and added a pocket for the lens cap. I love the gathered detail it just adds that little something special. Thank you for sharing this project.
Thank you so much for this awesome tutorial! I’m very new to sewing, so I followed your instructions to make my own camera strap, and found it to be fairly simple. I think with a little more experience, this will become an easier process, but that can be said about everything in life, right?!
I blogged about making this camera strap cover this morning, with a link back to your blog. I hope that you’ll read it, if you have a chance
Thanks again!