Archives for December 2009

Fabric Covered Button Magnet Tutorial

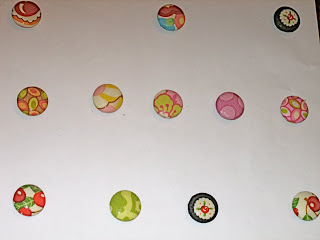
Recently I have been accumulating large bags of fabric scraps since I have been sewing my little heart out over the last several months.  Some of the fabric is just gorgeous, but what to do with the little scraps?  So I decided, what better way to enjoy the fabric that I love so dearly then to make fabric covered button magnets and have these little gems on my fridge year-round.

I’ve seen these for sale on etsy.com, so I thought I would give it a go at making my own.  There are many tutorials out there on the web for making these, but I thought I would show you how I went about making mine.
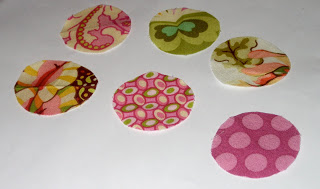
Fabric Covered Button Magnet Tutorial
Supplies:
Covered Button Kit (7/8″)
7/8″ uncovered buttons (aka 36)
Fabric Scraps
Pliers
Craft glue
Plain round magnets
Directions:
Cut circles of fabric according the the cardboard template that comes with the covered button kit.
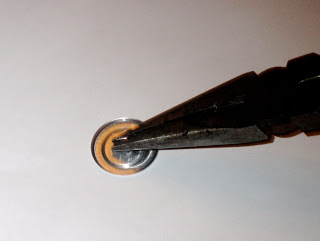
Remove the shank from the back of the button with pliers.  You will remove this because you will need a flat surface to adhere your magnet.
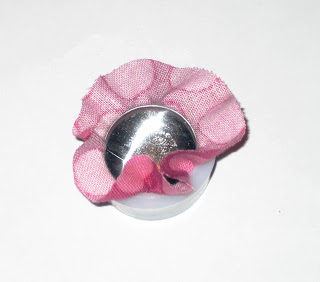
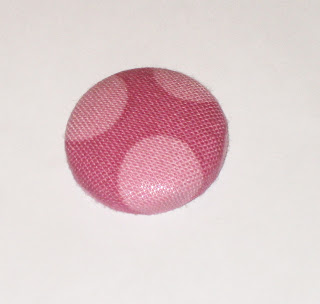
Cover your button.
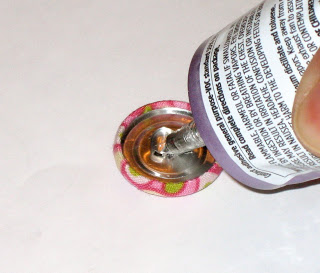
Place a dab of strong craft glue onto the back of the covered button.
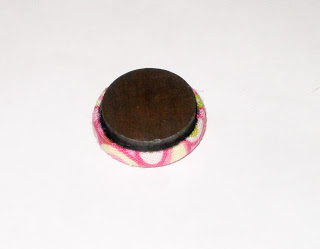
Place magnet on top of glue and allow to set overnight.  As you can see, the 7/8″ buttons work perfectly with your standard round magnets!
Now you have a beautiful set of custom covered button magnets for your fridge or anywhere else in your home that has a magnetic surface. Enjoy!
Cottage Mama’s Note:  To give these as a gift, use coordinating designer fabric.  I used Heather Bailey’s “Freshcut” and Mary Engelbreit’s “Recipe for Friendship” for two separate sets.

Classic Sugar Cookies

Today I baked Christmas sugar cookies with my two girls.  Well, mostly with my older daughter, Savannah.  Matilda (my 5-month old) sat in her boppy chair and watched us – she was there for moral support.

I wasn’t quite sure how this was going to go.  I liked the idea of doing something Christmasy with Savannah, but when I say she is my older daughter……she’s not that much older at only 21-months.  Anyway, I thought we would give it a whirl – if things started to go south, I would just abort the mission – no harm done.

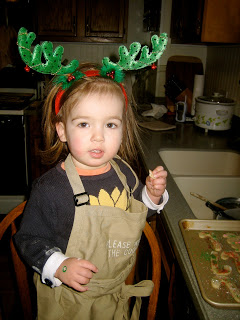
I made the sugar cookie dough while the girls napped and let it chill in the fridge for a couple hours.  Then I rolled out the cookies and off we went.  To my surprise, Savannah did AWESOME!!  I showed her how to use the cookie cutters and she followed my instructions perfectly.  Then I showed her how to use sprinkles which she thought was great fun!  As each batch came out of the oven, she had to try a cookie to make sure we didn’t have any faulty batches – even more fun!!!  All the while, shouting, “yay, yay”!!  She had a blast and so did I.  Here’s my little budding chef in the kitchen:

She had to try one of her cookies!!  I just think she looks adorable in her apron – it says “Please Kiss the Cook!” – how could I not kiss that little face!?
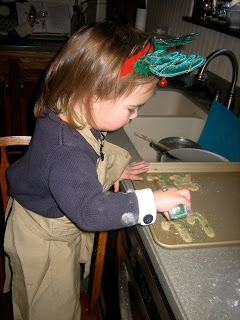
Very precise with her decorating.
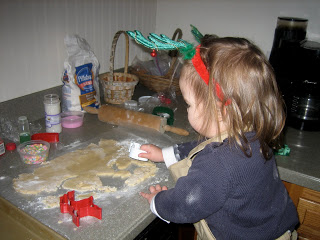
Using the snowman cookie cutter (that was her favorite)!

I had such a great time teaching her the ways in the kitchen and I can’t wait to do it again!  I’m not sure if you have a great sugar cookie recipe, so if not, here is my Classic Sugar Cookie recipe (comes from The Chopping Block Cooking School in downtown Chicago):

Classic Sugar Cookies
Ingredients:
2 cups flour
1 tsp baking powder
1/4 tsp salt
5 ounces (10 tbs) unsalted butter
3/4 cup sugar
1 egg
1 1/2 tsp vanilla extract
Directions:
Combine the flour, baking powder, and salt with a whisk.  In a separate bowl, beat butter and sugar with an electric mixer until creamy.  Add egg and vanilla.  Add flour mixture until combined, then divide the dough into 2 disks and chill 2 hours or overnight.
Roll dough and cut into shapes.  Bake on un-greased cookie sheets in a preheated 350 degree oven until edges are golden, about 7-9 minutes.  Cool on sheets for 5 minutes, then transfer to racks to cool completely.  Decorate as desired.
Makes 2-3 dozen cookies.
Cottage Mama’s Note:  If you plan to decorate your cookies with colored sugars (like we did) then brush the top of the cookies with egg white before adding sugar (do all of this prior to baking).  If you plan to decorate with frosting, wait until cookies have fully cooled.

Fleece Fish Tutorial

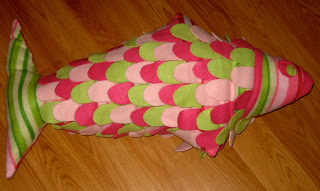
My daughter loves fish – she particularly loves “Dorothy” (that’s Elmo’s fish……for those of you that don’t know).  I haven’t seen too many plush fish on the market, so I decided that I would make her a giant stuffed fish for Christmas.

This fish is made entirely from fleece.  A lot of this project involves free-hand drawing.  It is very easy (beginning sewing) – it just takes some patience due to all the fish scales that you will be sewing on the body (but that’s what makes it cool!).  Remember, the raw-edges of fleece doesn’t fray, so that’s why this is the perfect material for this fish!

I made this a girly fish, but you could change the colors around to make it more primary for a boy or more realistic by using blues, greens, and browns.  Let your imagination guide the way!!

Fleece Fish Tutorial

Supplies:
4 different colors of fleece (1 for the body and 3 different colors for the scales)
Scissors
Sewing Machine
Straight Pins
Fiberfill (or whatever stuffing material you choose)
Thread
Hand Sewing Needle
 
Directions:
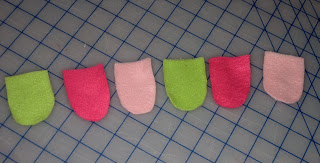
Cut out scales.  I drew these free-hand and used about 1/4 yard of each color fleece (so that would be 3/4 yard total) for my large-sized fish.
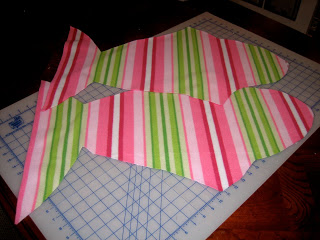
Draw (free-hand) your fish onto fleece.  You can make it big or small – mine was about 36″ long. Cut out 2 fish from fleece (one for front and one for the back).
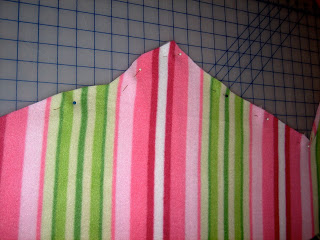
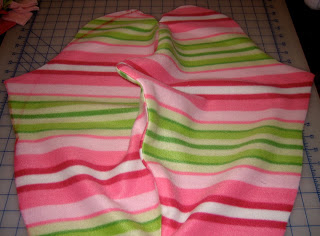
Pin the top of the right sides of the fish together and sew the top. Turn right-side out (the sides and the bottom of the fish will still be open).
Open up your fish.
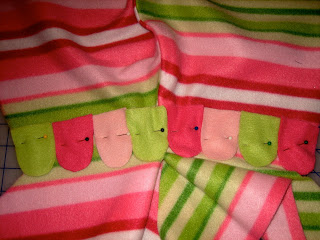
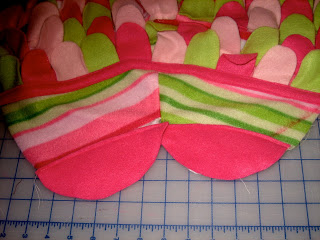
On the right side of the fish, pin your scales all in a row, alternating colors.
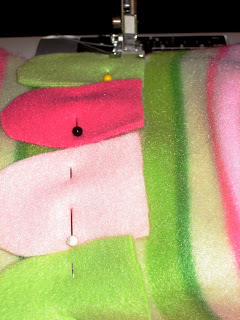
Stitch scales in place (1/2″ seam allowance).
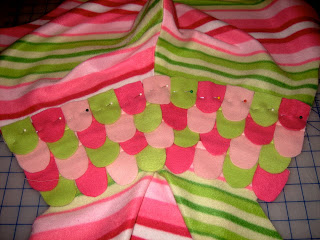
Layer next row of scales on top, covering about half of the previous row and stitch in place (1/2″ seam allowance).
Continue to do this until your fish is completely covered up towards the face.  I chose to leave the top and bottom fin as well as the tail without scales – you can cover them or not – it’s up to you!
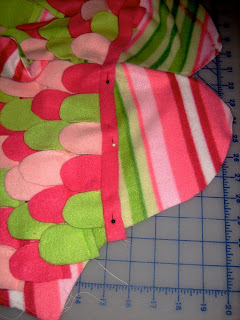
Then cut a strip of fleece to finish your final row of scales (about 3/4″ wide).  
Stitch the long piece of fleece on top of the un-finished edge of the final row of scales.
Cut out two half circles for the mouth (draw freehand). Pin and sew.
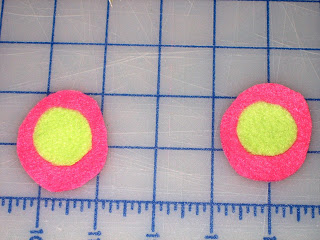
Cut out eyes (draw freehand). Pin and sew.
 
Now turn fish inside out so that the wrong sides are together and stitch around the entire fish – 1/2″ seam allowance (leaving about a 6 inch opening – I left part of the tail open).
 
Turn fish right side out.
 
Stuff fish.
 
Close opening by hand sewing.
 
Now your happy fish is complete!!
Cottage Mama’s Note:  If you have any questions about this tutorial, feel free to leave me a comment or send me an email!

Three Things

“I’ve learned that you can tell a lot about a person by the way he/she handles these three things: a rainy day, lost luggage, and tangled Christmas tree lights.” 
-Maya Angelou


This is one of my favorite quotes.  So simple, yet so true.  There are so many people in this world that get upset over such little things in life.  And I often wonder, are those that sweat the small stuff truly happy?  If one is able to let themselves get so frustrated, angry and upset over little things, perhaps there are bigger issues at hand that are manifesting themselves in small day to day activities.  


I’ve lost my bag (and our carseat) several times while traveling and yes, it is frustrating, but I know that no one intentionally tried to have me lose my bag…….sometimes things happen.  Is it really worth ruining someone’s day over something so small and trivial as lost luggage?  I mean really the person at the baggage claim wasn’t the one that actually lost the bag.  They are just there trying to help remedy a situation where someone else made a mistake.


So this holiday season, I ask you this…….before you sweat the small stuff in life, ask yourself, is it really worth it?

Cloth Baby Doll Diaper Tutorial

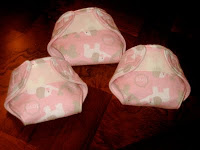
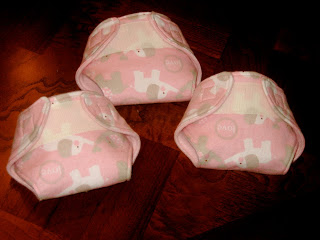
I have had several requests for a cloth baby doll diaper tutorial.  These were the diapers that I recently made for my daughter’s friend Ava’s 2nd birthday.  So ask, and ye shall receive!!

The diapers were incredibly simple to make, so if you are just a beginner sewer, go ahead and give these a whirl – you will definitely be able to handle this project.  If you have a little girl (or boy) in your life, these would make a perfect Christmas gift!!

I used the cloth diaper template from Skip to my Lou (www.skiptomylou.org ), but then just did things a little differently to make them adjustable.  Here is the link to the Skip to my Lou template:  http://www.skiptomylou.org/wp-content/uploads/2008/09/baby-doll-diaper-11.pdf


Supplies:
Fabric (yardage depends on how many diapers you plan to make – 1 yard of each would make plenty of diapers)
-Outer fabric: Snuggle Flannel
-Inner fabric:  Fleece
Skip to my Lou pdf template
Velcro
Matching Thread
Sewing Machine
Straight Pins
Scissors
Iron

Directions:
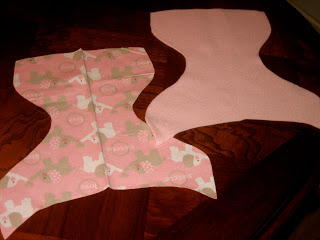
Print out baby doll diaper pattern (pdf link above).  Pin pattern on fold of fabric.  Cut 2 diapers (one from the outer fabric and one from the inner).

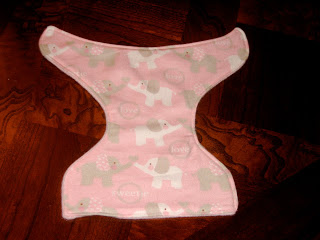
Pin the two pieces of fabric (right sides together) and stitch (1/2″ seam allowance) almost all the way around, but leaving about a 2″ opening.  Turn diaper right side out (through the 2″ opening) and press with an iron.

Then top-stitch (meaning stitch around entire diaper 1/4″ from the edge).  This will close the 2″ gap you left open that was needed to turn the diaper inside out.  Press with iron again after top-stitching.

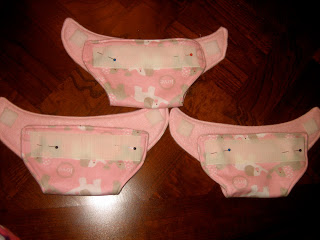
Pin velcro in place.  Use a long strip of velcro (the rough part) across the front of the diaper (on the flannel side).  The long strip of velcro will allow these doll diapers to be adjustable to fit many different sized baby dolls.  Pin two small squares of velcro (the soft part – one on each side) for the tabs (on the fleece side).  Stitch all velcro in place (1/4″ seam allowance).

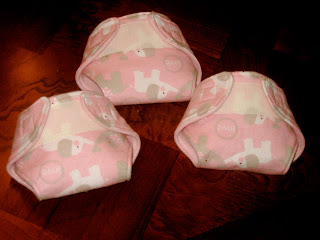
Now your diapers are complete!!  Wasn’t that simple?  I made these diapers in about an hour and you can too!

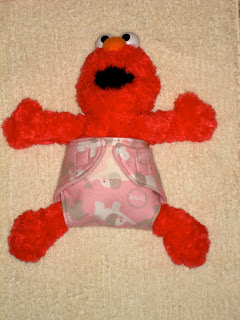
Then get out your baby doll and make sure they are a good fit – we had to try Miss Ava’s baby doll diapers out on Elmo.
Yep, a perfect fit!!

Baby Doll Kit

Today was my daughter Savannah’s friend Ava’s 2nd birthday party and we had such a great time!  It just so happens that the playgroup we attend is pretty much dominated by boys, so it’s really nice for Savannah to have a girlfriend here and there.

Savannah has known Ava since she was 4 weeks old and Ava was about 4 months old, so pretty much 95% of her life :-).  Ava is such a sweet girl.  She is tiny, petite, a little on the shy side, beautiful and very smart.  I’m so happy that Savannah has Ava as one of her first “girlfriends”.

I was trying to decided what to make sweet, sweet Ava for her birthday.  I had two ideas; one was a baby doll kit (all the accessories for her baby dolls) or a dress up princess box (i.e. tutu, wand, crown, ect.).  Savannah recently had a “girls only” play date with Ava and I realized that at 2 years old all they want to do is be “Little Mommy’s” so the baby doll kit was the winner!

I had so much fun making all of these little things.  I got my inspiration from the most recent Potterybarn Kids catalogue.

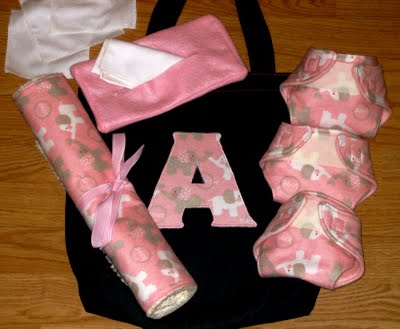
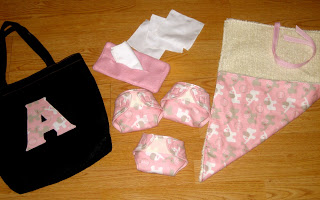
The baby doll kit consisted of:

-Three cloth diapers with velcro closure (flannel outside and fleece interior).  I used a large strip of velcro across the front so they would fit multiple size baby dolls.  We had to try them on Elmo to make sure they fit properly!!

-Chenille changing pad that rolls and ties with a ribbon (one side is flannel and the other chenille)

-Wipes case (made of felt) with white, flannel cloth wipes.

-A bag with an appliqued “A” for her to carry everything in.

I really hope Miss Ava enjoys her gift (I think she will!).  I am absolutely in love with anything that helps children pretend play – I think that is the gateway to true adult creativity and imagination.  I know Ava is going to be such a good “Little Mommy”!!

Happy Birthday Miss Ava!!

Cottage Mama’s Note:  If you would like a tutorial on how to make any of these items, please leave me a comment or send me an email and I will be happy to post one!

Garlic Shrimp Scampi

I LOVE shrimp – I mean love, love, love shrimp.  It is my most favorite food in the world.  If there is a shrimp item on a dinner menu, 9 times out of 10 that is what I will order when we are out.  However, ordering shrimp in a restaurant can be a bit pricey at times so when I find shrimp on sale at my grocery store, I always try to snatch it up.
About a week ago I made this delicious shrimp scampi for my husband and I for dinner.  Now I know it was good because my husband said it about 3 times and coming from him that means my recipe was a hit!!  The shrimp were on sale – only $5.00 per pound (down from $15.00 per pound), the angel hair pasta was maybe .99 and all the other ingredients are always in my pantry.  So I made a huge amount of shrimp scampi for two for maybe around $6.00-$7.00 (which would have cost around $16.00 or more per serving in a restaurant).
So here’s my recipe for Garlic Shrimp Scampi.  The key to this recipe is perfectly cooked shrimp.  Do not overcook them – I repeat, do not overcook.  Take them off the heat once they turn pink and just start to curl.  I hope you enjoy this recipe as much as I do!!
Garlic Shrimp Scampi

Ingredients:
1 lb. raw shrimp (deveined and shells removed)
1 tablespoon garlic, chopped
1 teaspoon red pepper flakes
1 tablespoon olive oil
5 tablespoons butter
1 lb. angel hair pasta

Directions:
Cook angel hair pasta according to package directions.  Meanwhile, heat large sauce-pan over medium heat.  Add olive oil and 1 tablespoon butter.  Add garlic and red pepper flakes and saute 3 minutes, until garlic is cooked, but not brown.  Add shrimp and cook until pink.  Add remaining butter.


Serve buttery garlic shrimp scampi over angel hair pasta.  Enjoy!!

Cottage Mama’s Note:  If you don’t have angel hair, use linguine, spaghetti, or fettuccine.  Even serving this delicious dish with a nice loaf of bread (that you can dip in the buttery sauce) instead of pasta is good too. Also parsley, thinly sliced lemon, and lemon zest make a wonderful garnish for this dish.

Sew Mama Sew Giveaways

I love the Sew Mama Sew blog!  Right now they are doing their big annual giveaway days.  There are tons of crafters and craft suppliers that are giving away items.  You can enter to win either supplies or handcrafted items or both.  All you have to do is click on the crafter’s link and leave a comment on their blog – it’s that easy!!  Head over to Sew Mama Sew and check it out – you’ll also be amazed how many talented artists are out there!

I actually just won a giveaway myself on Sandi Henderson’s Portabellopixie blog.  I am so excited – I never win anything!!  I won this darling handmade snowman ornament and pin from Pinks and Needles.  Check out Pinks and Needles for more wonderful handmade items!

Hope you win!!