Archives for April 2013

Patchwork Pillow Pattern and Tutorial

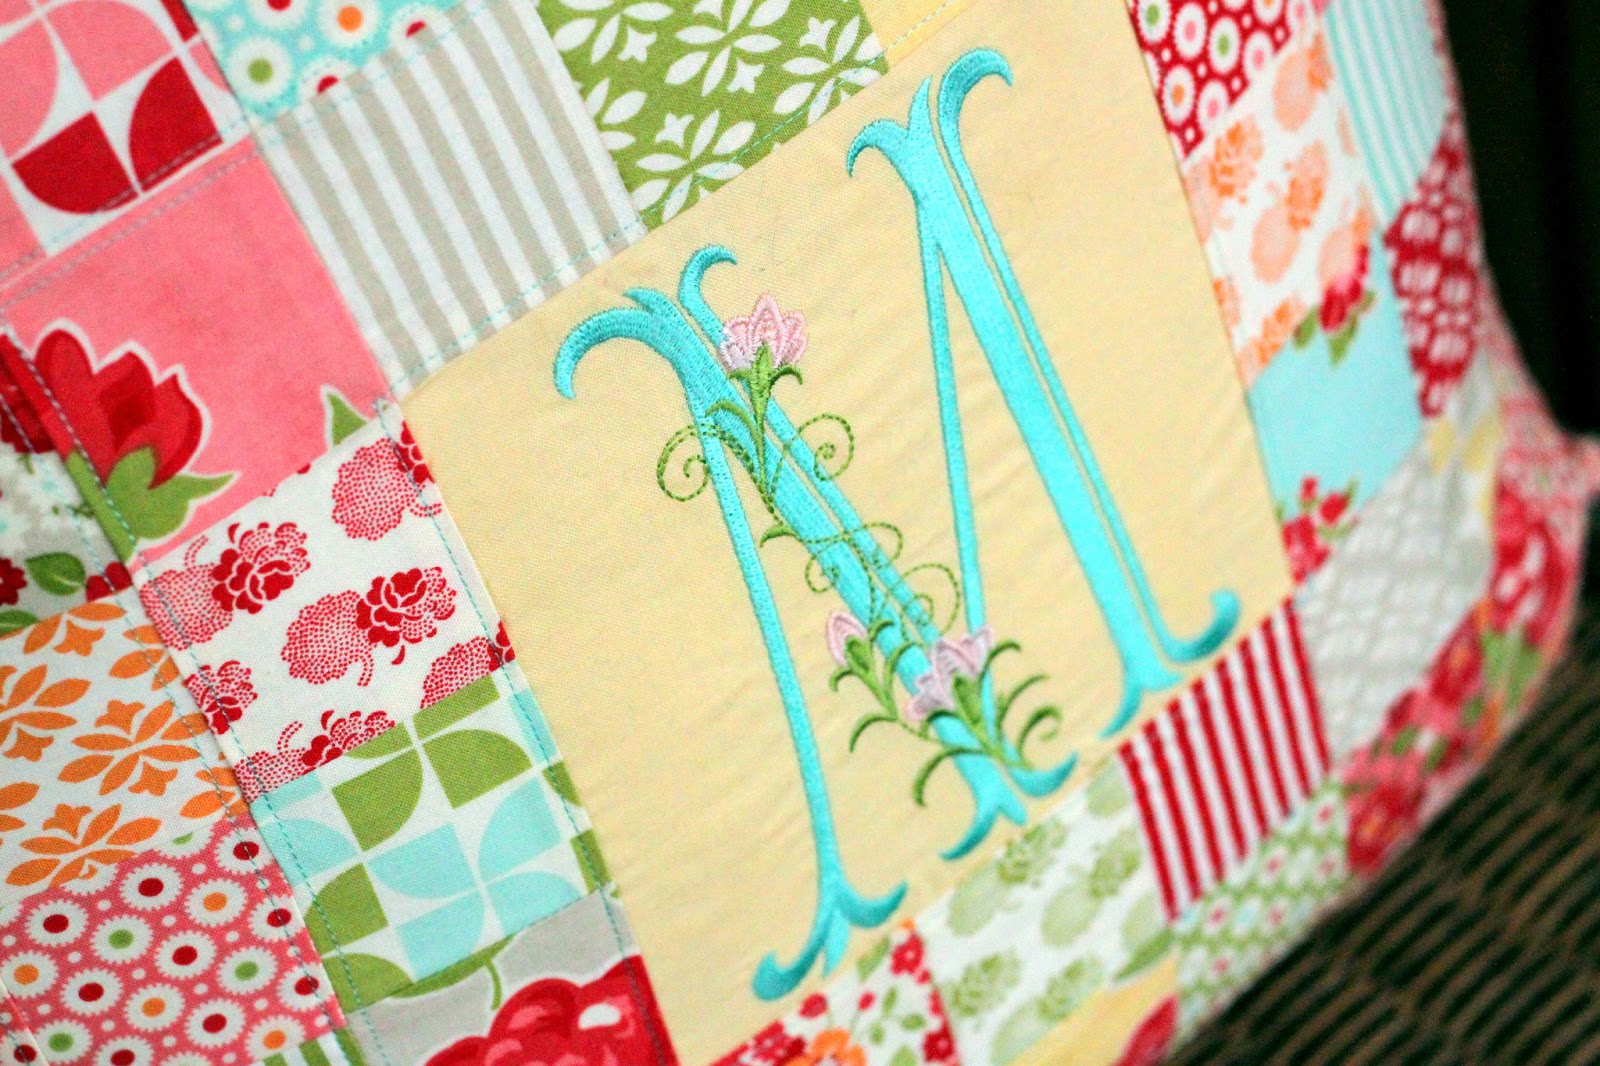
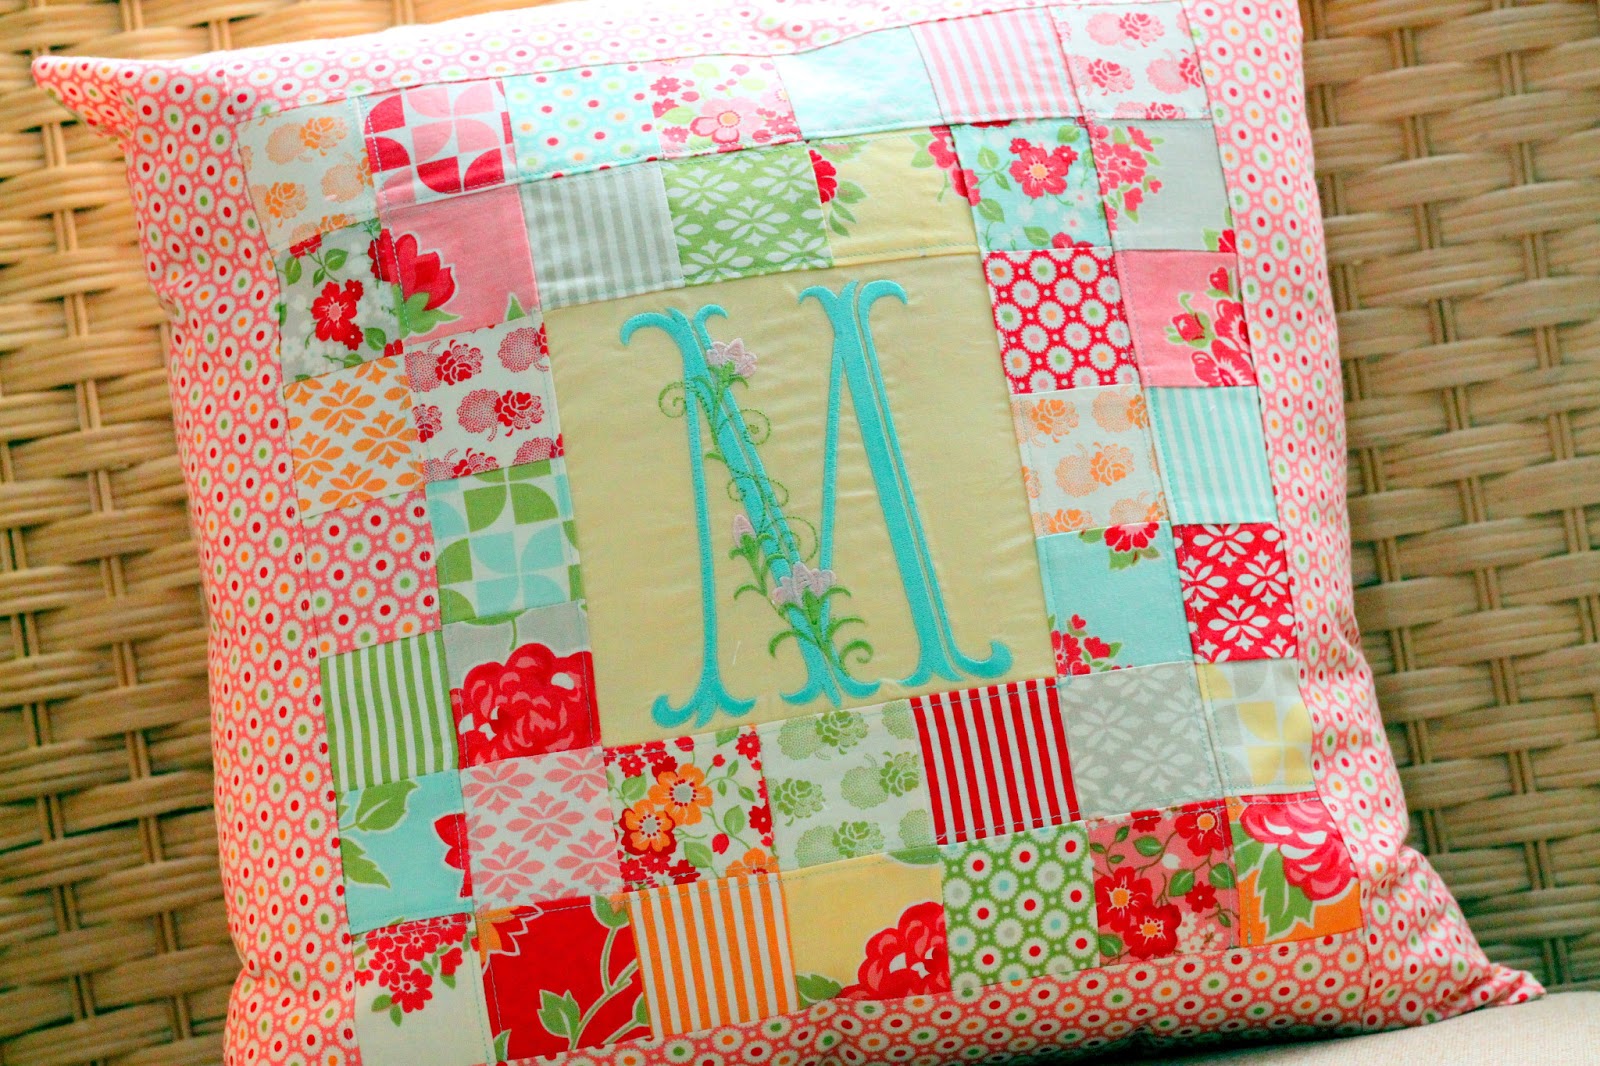
My mom’s birthday was last month. She and Savannah actually share the same birthday, March 5th…..it’s pretty special. Mom always comes to visit for the kids birthday and I wanted to make her something special for her birthday this year. She has really been into quilting lately and we share the same love of patterned fabric. I came up with this pretty patchwork pillow for her to put on the couch in her sewing studio. The ‘M’ is for Mom or her last name, ‘Michel’.

The pattern I created for this pillow makes a fairly large pillow (20″ x 20″), but you could certainly make it smaller by not adding the sashing around the edges or using smaller squares of fabric. Also, I used machine embroidery on a solid color fabric for the center panel, but if you don’t have machine embroidery just use another patterned fabric or consider doing some hand embroidery.

Patchwork Pillow Pattern and Tutorial
by Lindsay Wilkes from The Cottage Mama
Supplies:
40 (2.5″) squares of fabric in coordinating prints
1/2 yard fabric for sashing
Fat quarter or fabric scrap for center panel
3/4 yards fabric for pillow backing, cut 20″ x 20″
1 20″ x 20″ pillow form or fiberfill for stuffing

Instructions:
 

Step 1: Cut the pieces according to the graphic pictured above. If you are planning on using embroidery on your center panel, do that prior to cutting out your square so you have plenty of extra fabric to place in your hoop.

Center Panel (Cut 1): 6.5″ x 6.5″
Small squares (Cut 40): 2.5″ x 2.5″
Top and Bottom Sashing (Cut 2): 14″ x 3.25″
Side Sashing (Cut 2): 3.25″ x 20″
Pillow Back (Cut 1): 20″ x 20″

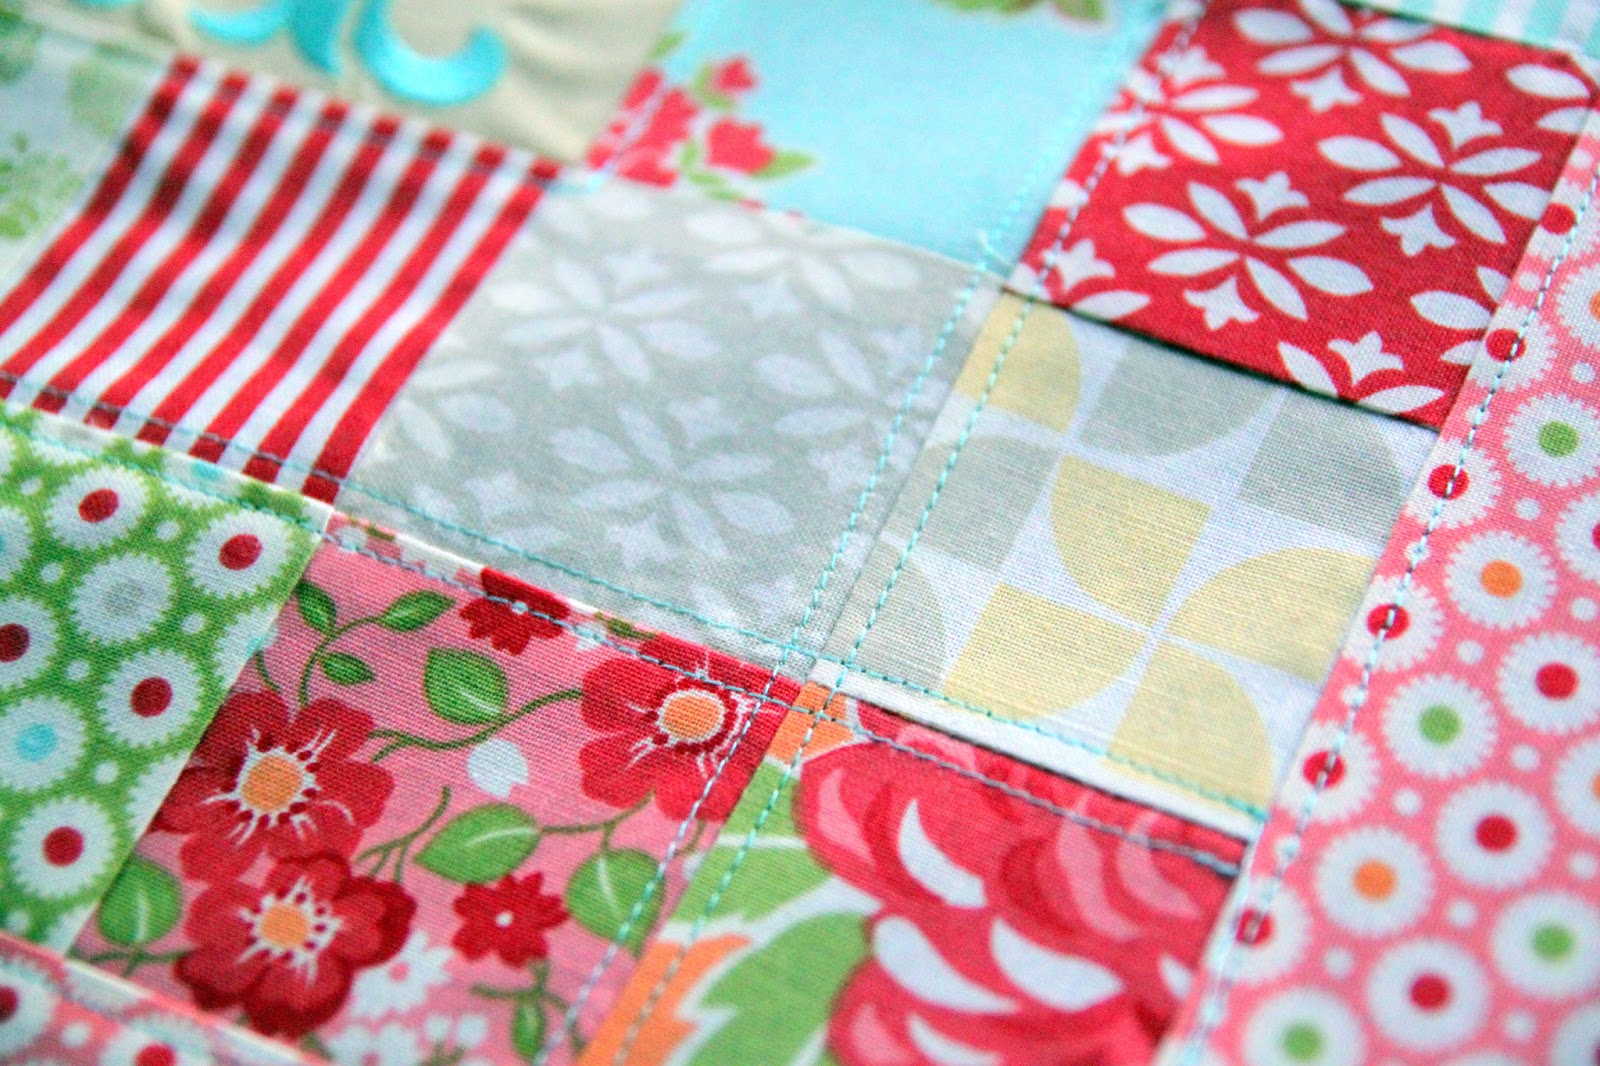
Step 2: Sew the pieces together. Look at the pattern graphic pictured above. I tried to color coordinate each step of sewing the pillow together. You will sew from the inside outward. The actual patchwork will not all be in the same color, but the colors above are for visual reference. Make sure you press as you go.

**All Seam Allowances 1/4″, unless otherwise noted**

-Sew the pink squares together, then attach them to the center panel.
-Sew the blue squares together, then attach them to the center panel.
-Sew the yellow squares together, then attach them to the center panel (which will already have the pink and blue squares attached).
-Sew the green squares together and attach them to the center panel.
-Attach the bottom and the top row of sashing to the center panel.
-Attach the two side sashing pieces to the center panel to finish piecing the pillow top.
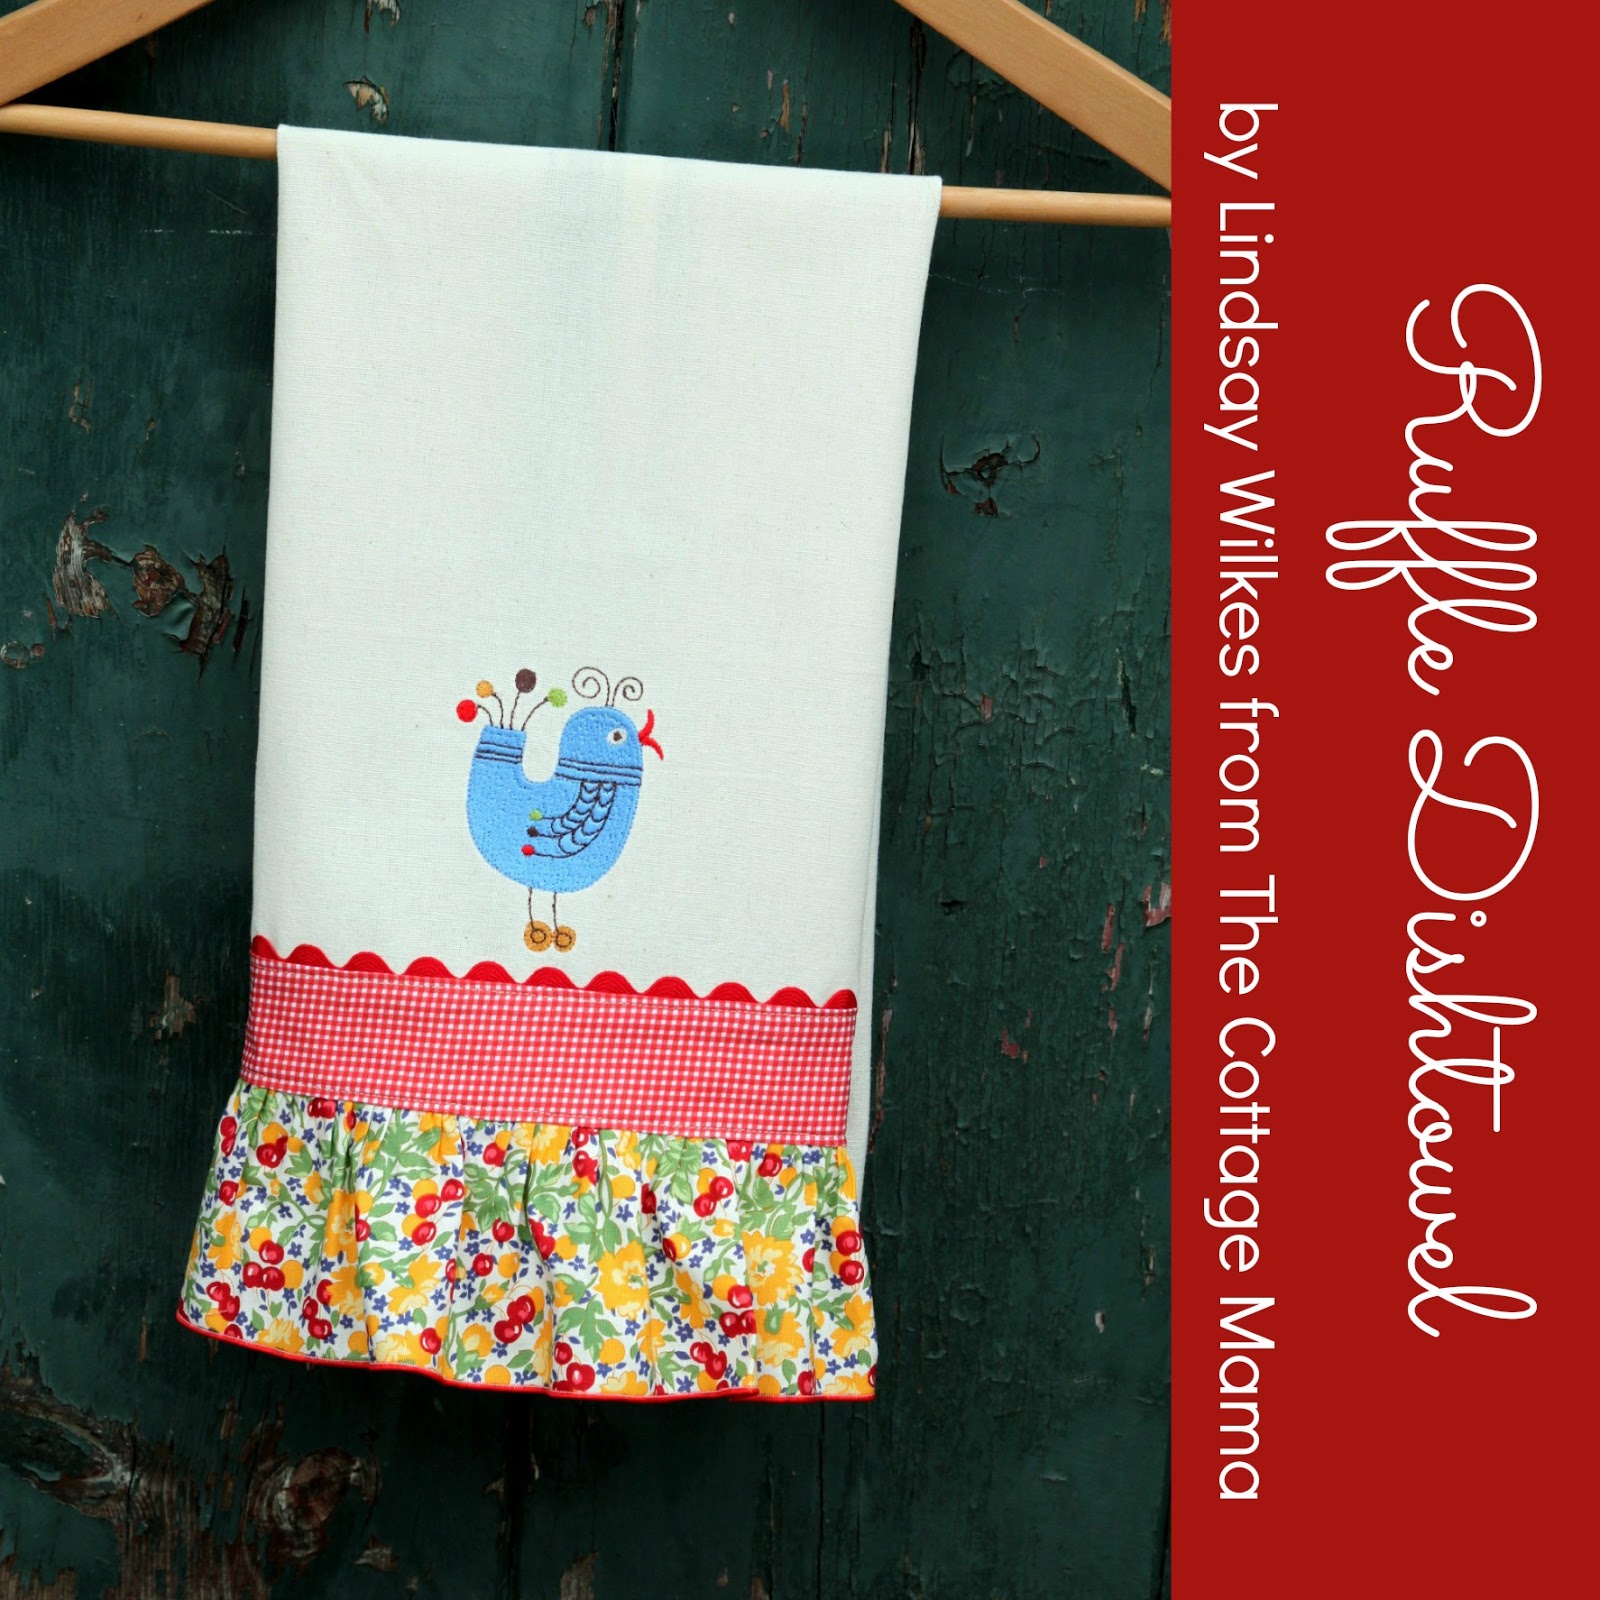
The picture above is what your pillow front will look like once you have pieced the entire thing together.
Step 3: Topstitch the pillow front. Feel free to get creative with this part of your pillow. I simply ran a line of stitching on either side of each seam on the patchwork section using a 1/4″ seam allowance. And did one row of topstitching on the sashing around the border of the patches also using a 1/4″ seam allowance. You could definitely add batting to the back of the pillow top to give it a more quilted look; however, I did not use batting for this particular pillow.


Also, since this stitching was purely decorative, I used aqua embroidery thread that coordinated with the machine embroidery. Just remember, you don’t want to use embroidery thread in your seams, but it’s great for decorative stitching because of the lovely sheen!
Step 4: Attach the pillow front to the pillow back using a 1/2″ seam allowance. Place the pillow front and the pillow back with their right sides together and sew around three of the four sides. Clip the corners to remove the bulk, turn right side out and press. Make sure to press out the corners with a point turner or a chopstick.
Press the edge that you left open under by 1/2″ towards the wrong side of the fabric (this will make hand sewing the pillow close much easier in the following step).
Step 5: Insert the pillow form and close the pillow. My favorite closing stitch is a blind stitch because you don’t see any of the stitching, but you can use any stitch you like.
If you’ve never done a blind stitch before, you should give it a try! My Grandma Peggy taught me how to sew one quite some time ago and I love it. My blogging friend Amy from Positively Splendid has a great tutorial found here for exactly how to sew a blind stitch. Also, if you would prefer an envelope style back (so you can wash the pillow cover), you can check out my friend, Delia’s blog, for a 20″ Easy Envelope Pillow Tutorial.
Now look……your pillow is complete!
A few other notes:
The ‘M’ design was a built in embroidery design on my Baby Lock Unity Sewing and Embroidery Machine. The colors for embroidery were all Gutermann Embroidery Thread with the colors being 7165 (aqua), 8595 (green), and 5136 (light pink). I just started getting into machine embroidery so I don’t have a huge thread preference yet, but I think these turned out very nicely. I also used a tear-away stabilizer on the back of the fabric prior to embroidering.
The fabric I used was a 2.5″ square mini-charm pack of “Marmalade” by Bonnie & Camille for Moda Fabrics. The sashing and backing were both cut from yardage of the same line of fabric. Several blog sponsors here at The Cottage Home carry this line of fabric and you can find the fabric store sponsors in the right side bar of the blog.
Thanks for stopping by!
I hope you have a wonderful week!

Easter 2013

I know it’s a little late, but I wanted to share some Easter pictures with you all and fill you in on what we’ve been up to the last couple weeks.

 The girls in their Easter dresses.

For Spring break / Easter we went to visit my mom (aka Grandma Jane) and Pepo down in Texas. It was just the breath of fresh air that I needed getting away from the cold, dreary Chicago winter. It gave me a glimpse of what’s to come in the next few months weather-wise here at home. Oh, how I love warm weather and sunshine! I don’t think most of the folks down there thought it was warm, but for us, 70 degrees was just perfect.

 Savannah loved the Easter bunny this year.

I flew down with the three kids by myself (yes, I know, I’m crazy) and then my husband met us down there about four days later. The kids did such a great job on the airplane. I’m not going to lie, I was nervous (I mean very nervous) about how this would go all by myself. It’s one thing to travel with three kids, but three kids age five and under is an entirely different beast.

I got some really great advice from a lot of you over on The Cottage Mama fan page, so I really appreciate all your great tips and tricks. I made sure I had all of our electronic devices (LeapPad, iPad, iPhone), some treats the kids don’t normally have at home and some board books for the little man. Caspian sat on my lap the whole flight and never tried to get down (thank goodness). I just tried to stay one step ahead of him and what he might need. I knew what trick (or treat) I would be pulling out each time he got a little antsy. And the biggest relief was that no one needed to go potty or needed a diaper change on the plane. Woooohooo!

 Caspian and Pepo (aka Grandpa)
 Caspian’s first real egg hunt.
 We tried to get a picture with all the grand-kids, but this is as good as we got.

We had such a lovely trip. We took the kids to the children’s museum, the Houston zoo, Chuck E. Cheese (they had never been before), played outside in the yard, played with bubbles and gardening tools. My mom’s husband, Pepo, is a top-notch golfer. They had little toy golf sets for the kids and he taught them a thing or too when it came to golf.

 Most pictures of Caspian look like this these days……he’s always on the move.

The Easter bunny came to visit us in Houston. We attended my mom and Pepo’s church and had a fantastic brunch and Easter egg hunt at their Country Club. It had an incredible spread of food and I love to eat, so I was in total heaven. There was every kind of salad you could think of, tons of boiled shrimp, smoked salmon, an omelet station, pancakes, waffles, biscuits and gravy, fruit, pastries, fancy cheeses, all kinds of fruit, pork loin, crab stuffed fish, roasted lamb, sliced beef, broccoli gratin, wild rice, roasted potatoes, cheese grits, roasted vegetables. Oh and the desserts…….red velvet cupcakes, pecan pie, tres-leche cake, coconut cake, chocolate cake and so on. Did I make you hungry? Can you tell I like food? I’m hungry just thinking about it all!

 Savannah’s Easter Dress
 Savannah’s Easter Dress
(Pattern: Children’s Corner ‘Mallory’)

 Caspian and Daddy 

We really just had such a great time. I felt so happy in Texas. Every time I leave my mom, my heart hurts. Do you know what that feels like? It is my dream to live close to her someday. It just seems like life is so short that it saddens me that we don’t get to spend more time together. I don’t know if it will ever happen as life has us drawn us in different directions. But maybe it’s true, absence makes the heart grow fonder? I’m sure that’s true. But I’m sure my heart would be just as fond, if she were right down the street. Who knows? Maybe it will work out someday, but for now I cherish every visit I get to have with her. She is truly the best mom and friend that I could ever imagine.

I hope you all had a wonderful Easter and got the chance to spend some time with loved ones that are near and dear to your heart!

Sponsored Giveaway: Violette Field Threads 10 Sewing Pattern Bundle

We have quite a few new sponsors here at The Cottage Mama. Some of you probably don’t click over to the blog very often, if you subscribe in a reader or by email, but I’m finally getting around to introducing some of the wonderful new sponsors to you all that can be found in the right side-bar on the blog.

First up is the lovely Violette Field Threads. This duo team, Ericka and Jessica, are fellow paper and PDF pattern designers just like myself. I absolutely love being able to promote other designers to you all. Why? Well, because there are so many incredibly talented designers out there and we all create something unique and different. And maybe I don’t have certain pattern or design that you are looking for, but another company might have just the right thing, so I’m happy to point you in the right direction. My goal is to inspire you to sew, whether that be with my own sewing patterns / tutorials or with someone elses…….it’s all about being able to create!

Violette Field Threads offers a wide variety of gorgeous patterns in PDF and a selection of their patterns are also available in printed paper form.

Here are some of my favorite patterns from Violette Field Threads……..

 And last, but not least, the latest pattern from Violette Field Threads…..
I have this pattern and definitely plan on sewing this one for my girls for summer. To me, this is the perfect spring / summer play outfit!
So guess what? Today Violette Field Threads is giving away a 10 pattern bundle (you choose either PDF or paper) valued at $129.50 (paper pattern bundle) and $109.50 (PDF pattern bundle). I think this is a fantastic prize and I hope you do too!
To enter the giveaway please use the rafflecopter below and leave a comment on the blog telling us why you love ‘Violette Field Threads’ and also become a fan of Violette Field Threads and The Cottage Mama over on Facebook. That will give you three entries into the giveaway (you can do just one or all three)!

Also, Violette Field Threads is offering 20% off your entire purchase with the promo code: COTTAGEMAMA. So head over to their shop to pick up some of these adorable patterns!

a Rafflecopter giveaway

National Serger Month: Ruffle Dishtowel Tutorial

Did you know that April is National Serger Month? My wonderful machine sponsor, Baby Lock Sewing and Embroidery Machines, has decided that the serger needs to be celebrated with a month dedicated to all things serger and I am in total agreement! There are very few things that I sew where I don’t use a serger, even though I try to do projects on the blog where you don’t need a serger. A serger is one of those tools that you might think you don’t need, but then once you get it, you will be saying, ‘Where have you been my whole life?’.

I am lucky enough to sew on the gorgeous Baby Lock Evolution serger and was asked by the folks at Baby Lock to share an easy project using one of my favorite features on a serger, differential feed. I chose to create an easy Ruffle Dishtowel. Throughout the month of April you can check out the National Serger Month website to check out a bunch of free projects made with sergers, learn more details about what they can do and enter to win your very own serger. And let me tell you…….Baby Lock sergers are the BEST!


Differential feed is a really fun component of your serger that you may not have thought about much…….until now. Your serger is set up with two sets of feed dogs; the differential feed dogs are in the front and the other set of feed dogs are in the back. When you are doing a regular 3 or 4 thread overlock stitch, your differential feed is set in a somewhat neutral position (N), meaning the feed dogs at the front are moving at the same pace / speed as the feed dogs in the back.

 
When you adjust your differential feed up and down, it will change the speed in which the differential feed dogs push the fabric through the machine. Increase the differential feed and your machine will push your fabric through at a quicker rate, causing it to ruffle!
 
Generally for a nice ruffle, I set my differential feed up to 2.0 (it is normally set a N). However, if you don’t want to gather your fabric as much, then you could set it at 1.8 or 1.5. Different weights of fabric will gather differently, so it is always important to give your adjustments a test run before actually sewing on your project.
 
The Ruffle Dishtowel is an easy, everyday project to add that special touch to that regular kitchen dishtowel you have hanging around. These also make great gifts!
 
 
Ruffle Dishtowel
By Lindsay Wilkes from The Cottage Mama
for Baby Lock Sewing & Embroidery Machines
 
Supplies:
1 standard dishtowel
1 strip of fabric 2.5” wide x width of the dish towel + 1”
1 strip of fabric 4” wide x 2.5 times the width of the dish towel
1 piece rick rack trim as wide as the dish towel
Coordinating thread
Embroidery thread (optional)
 
Instructions:
 
Step 1: If you would like to embroider a design on your dishtowel, now is the time to do so. Follow the instructions for your sewing machine in regards to the design you have selected. The bird design (seen here) is a built in machine design on the Baby Lock Unity. You definitely do not need to do an embroidery design, so it’s up to you if you would like to add that detail or not.
 
Step 2: Prepare the strips of fabric. Cut the fabric that is not being ruffled at 2.5” wide x the width of your dishtowel + 1”. Cut the fabric that is going to be ruffled 4” wide x (2 – 2.5 times) the width of your dishtowel.
 
Step 3: Prepare your serger for a rolled edge according to your machines instructions. On the Baby Lock Evolution, you should remove the left needle, set the stitch selector to D, the stitch width at 4 and the differential feed in the N position. I like to use Bulky Nylon on the upper looper for a fuller rolled edge. You do not need to do this but it adds a nice edge. Leave all other threads the same.


Step 4: Run the fabric that you plan to use for your ruffle through the serger to make a rolled edge on one side.
 
 
Step 5: Prepare your serger for gathering. This is where our differential feed will come into play. Every serger is different, but on the Baby Lock Evolution, you want to re-insert your left needle because both needles are used for gathering.  Set your stitch selector to A, your stitch length to 4.0, your width at M – 7.5 and the differential feed at 2.0.


For this project I decided to use my gathering foot on the serger, but the settings are just the same if you aren’t using the gathering foot. To use the gathering foot, place the fabric to be ruffled with the right side up underneath the foot, place the fabric that is not being ruffled on top with the right side down. Slide the fabric through the middle of the foot. I like to use the hand-wheel a couple of times to make sure I’ve caught both fabrics with the needles, before I start sewing.


Begin serging. Your fabric on the bottom will gather and attach to the fabric on top. For tighter gathers, add a little tension to the top fabric by pulling ever so slightly. If you’ve only cut your fabric to be ruffled 2 times longer than the fabric not being ruffled, you probably don’t want to add any tension to the upper fabric. If you would prefer to have more ruffles, cut the ruffle fabric 2.5 times longer and you should be able to achieve a tighter gather. Always test before sewing on your actual project. It’s better to have too much fabric when gathering, than not enough…..you can always square it up if there is too much.

 
If you are not using the gathering foot, just run the fabric to be gathered through the serger and it will gather it for you based on the settings I gave you above. Then you will have one more additional step and need to attach the ruffle to the non-ruffle fabric using a ½” seam allowance. Place the two fabrics with the right sides together, lining up the raw edges and sew together on one long side.


Step 6: Add the rick rack trim. Using a medium size rick rack trim, line up the edge of the rick rack with the raw edge of the non-gathered fabric. Sew rick rack to fabric using a ½” seam allowance. Fold the rick towards the wrong side of the fabric and press.
 
Step 7: Serge or zig-zag stitch both raw sides of the rick rack, ruffle piece. Fold the raw edges towards the wrong side of the fabric making sure that they are the same width as the dishtowel. Sew both sides.
 
Step 8: Attach the ruffle piece to the dishtowel. Line up the ruffle piece so that it is straight and hangs below the edge of the dishtowel. This is going to be different for everyone depending on the size dishtowel you have selected. You just want it to look nice and straight.
 
Step 9: Sew all the way around the non-gathered fabric using a ¼” seam allowance.


Once you have sewn your ruffle piece to the dishtowel, just trim up any stray threads and your dishtowel is ready to go!
If you get a chance, definitely go check out the Baby Lock National Serger Month website, it is really a great resource for anything and everything about sergers. Plus while you are there, you can download a really nice printer-friendly version of this tutorial!