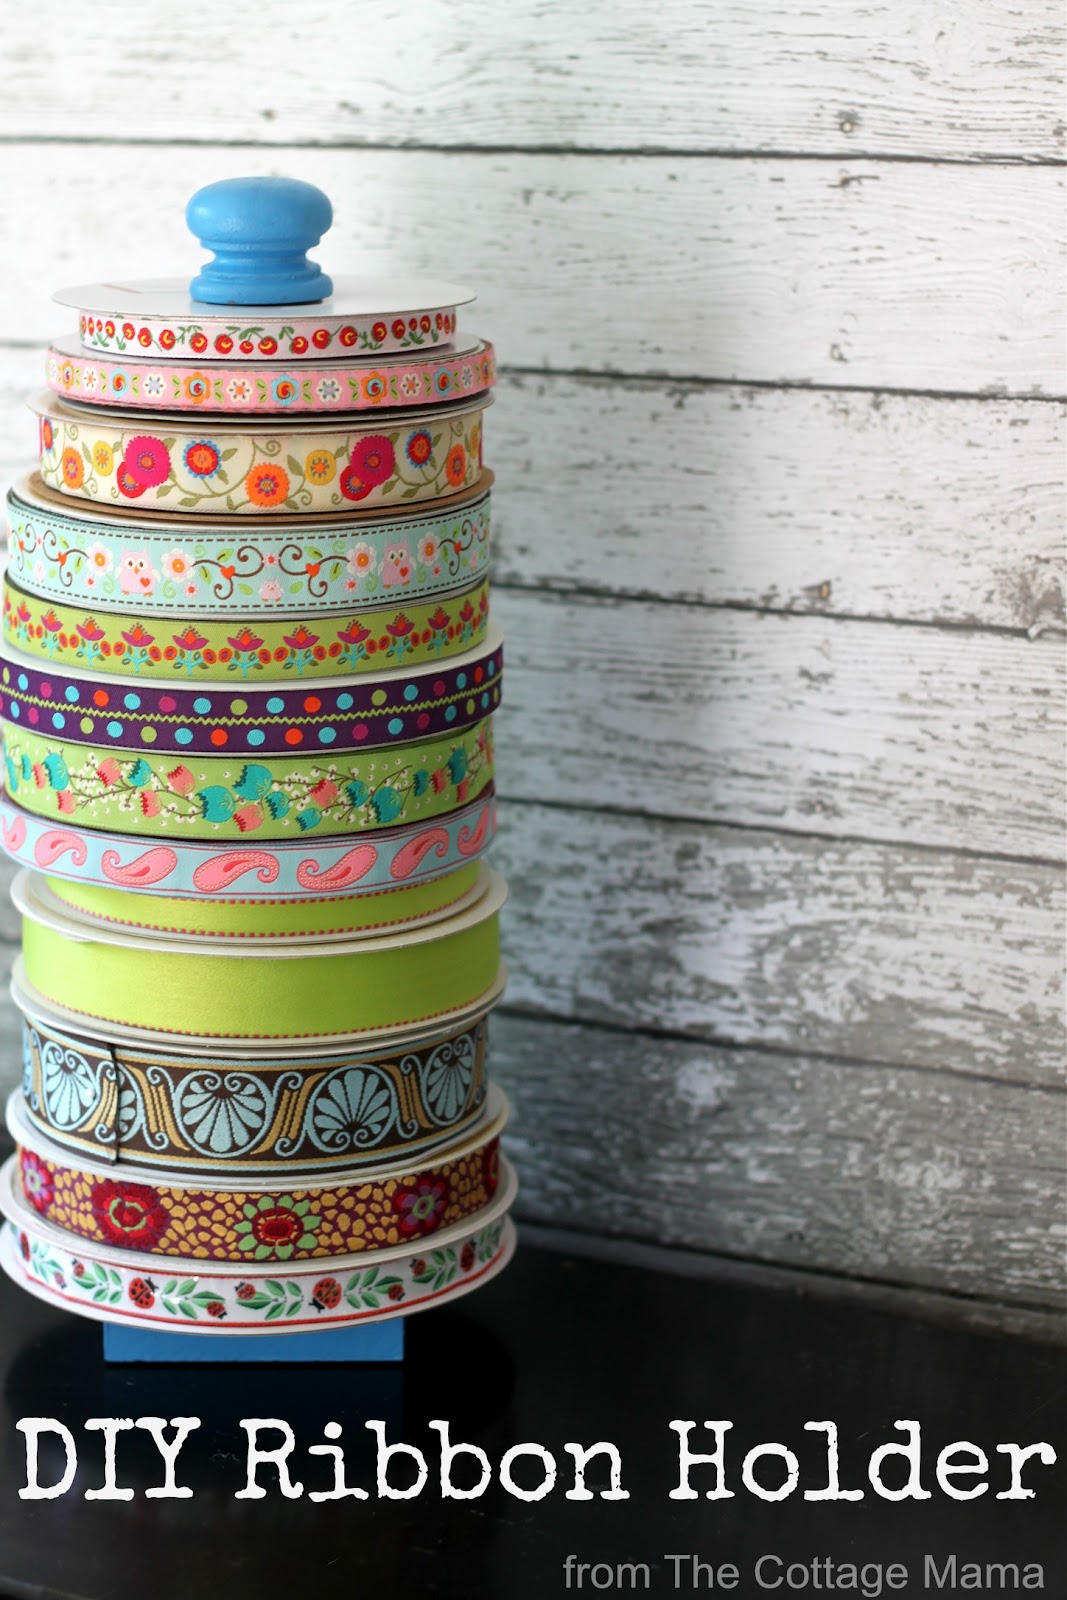
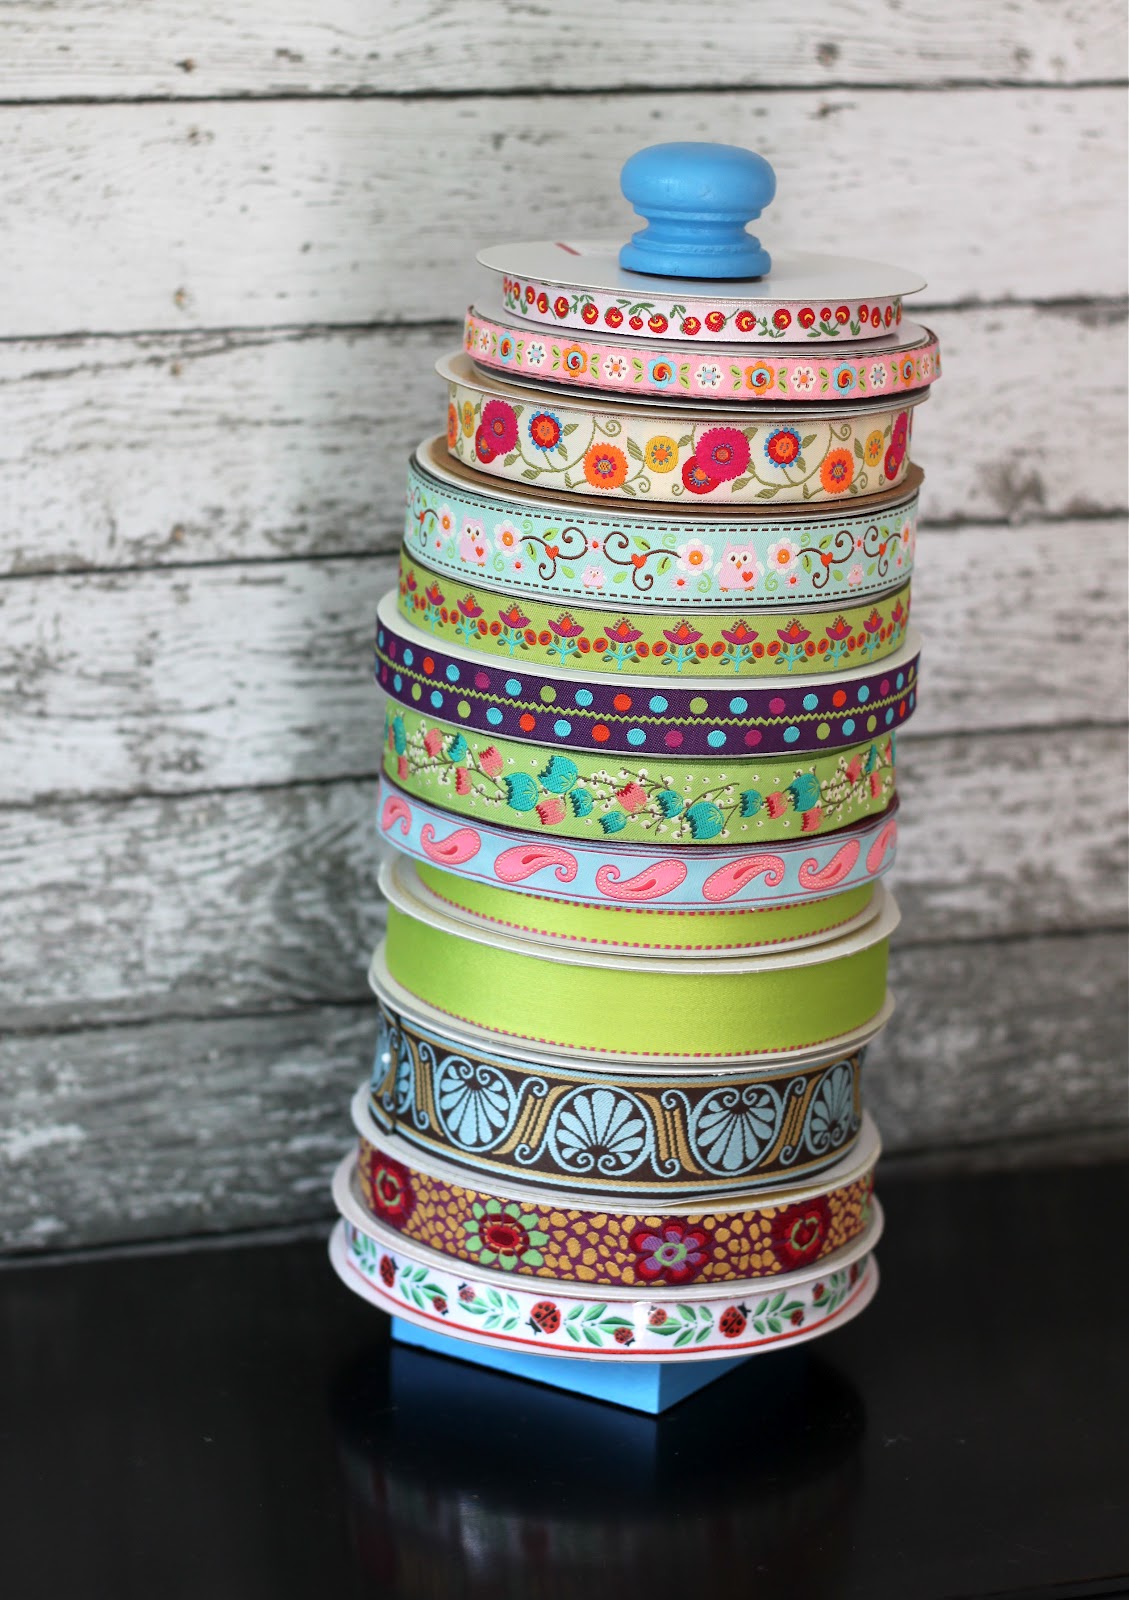
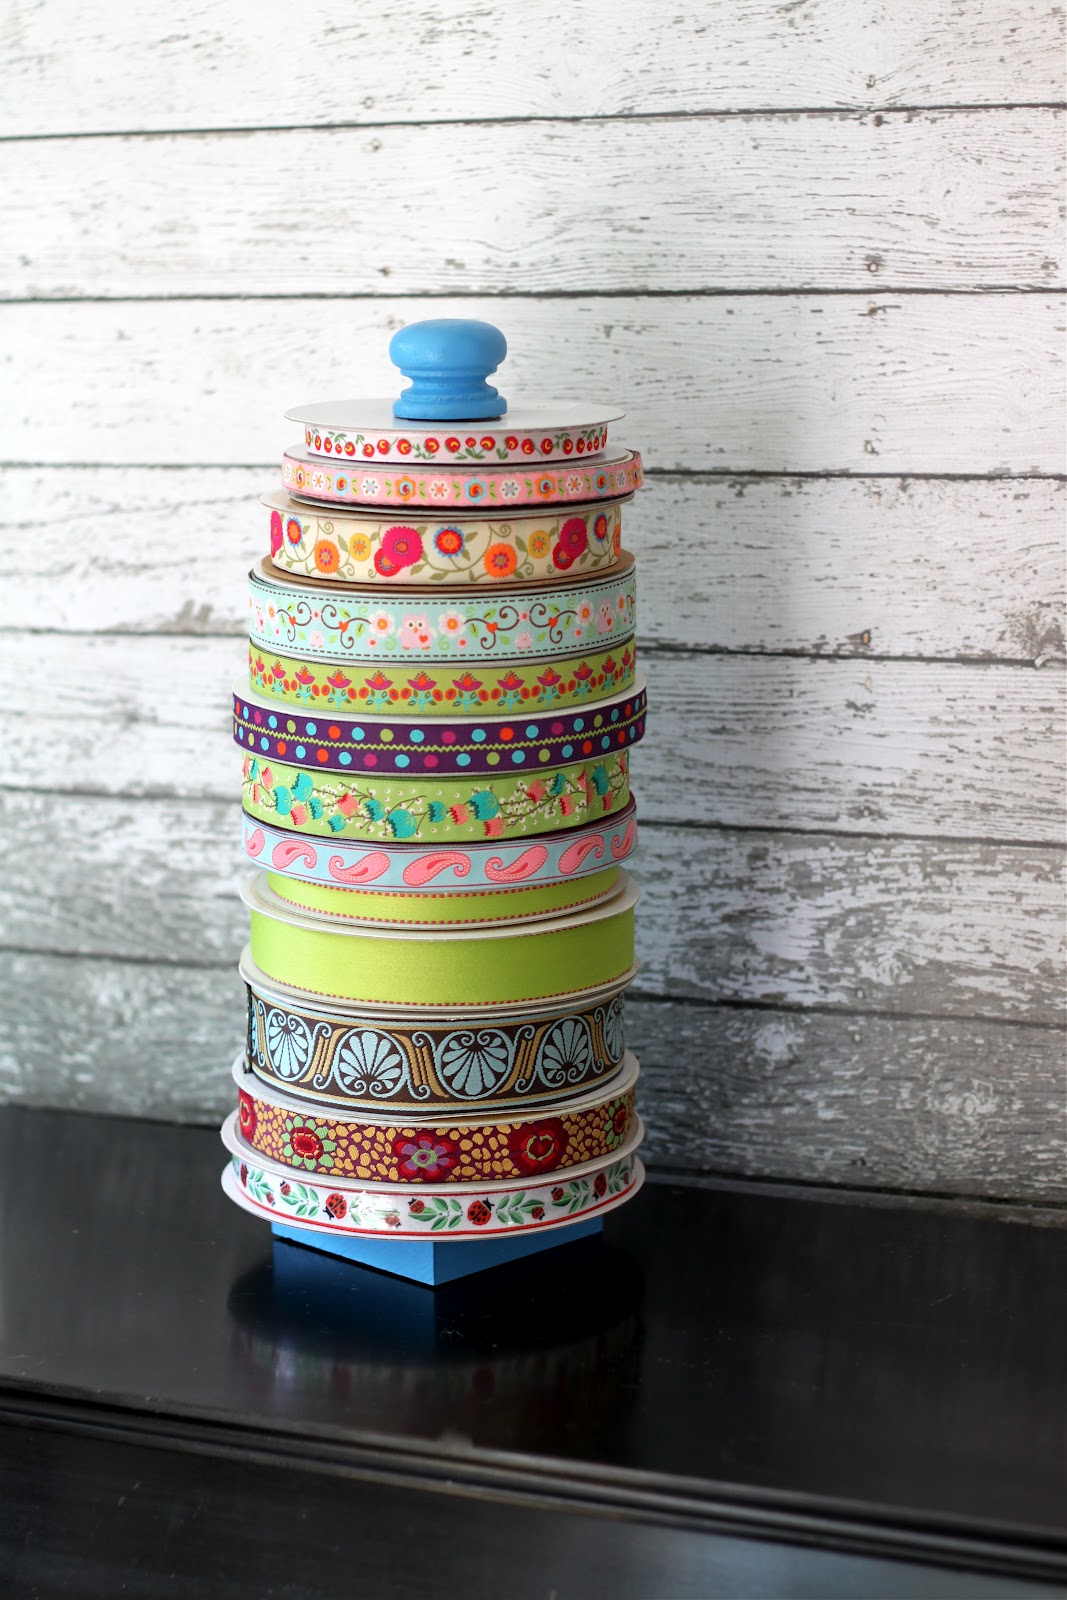
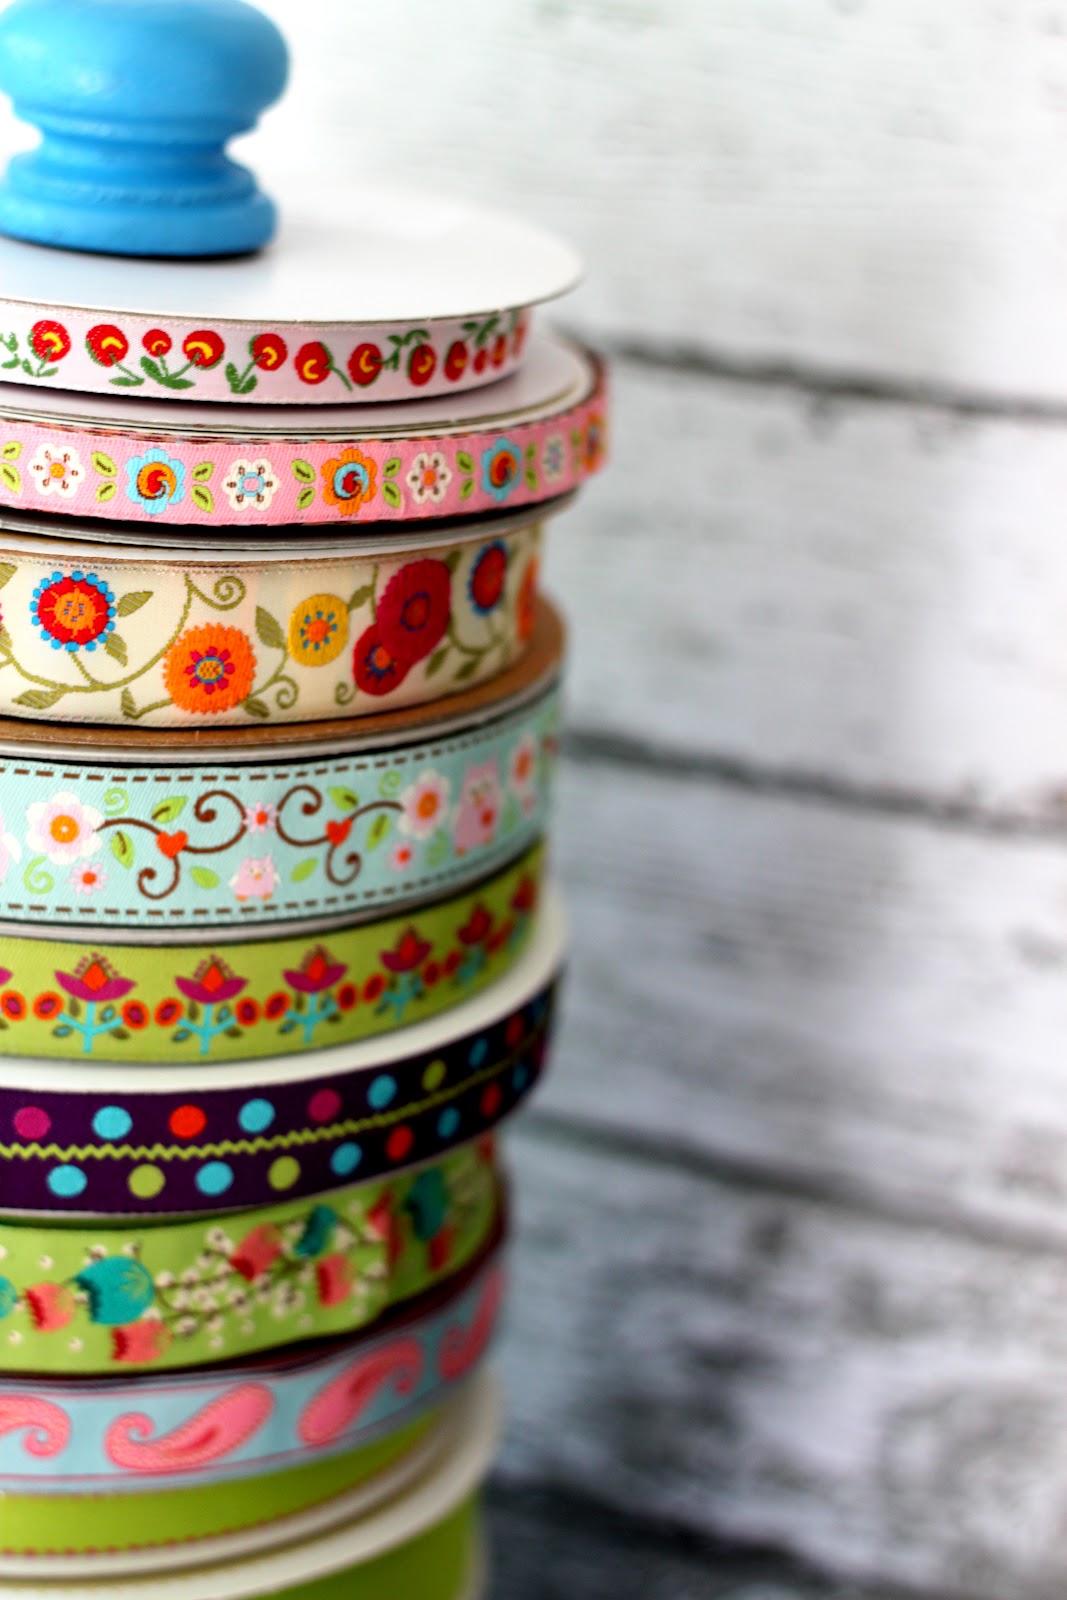
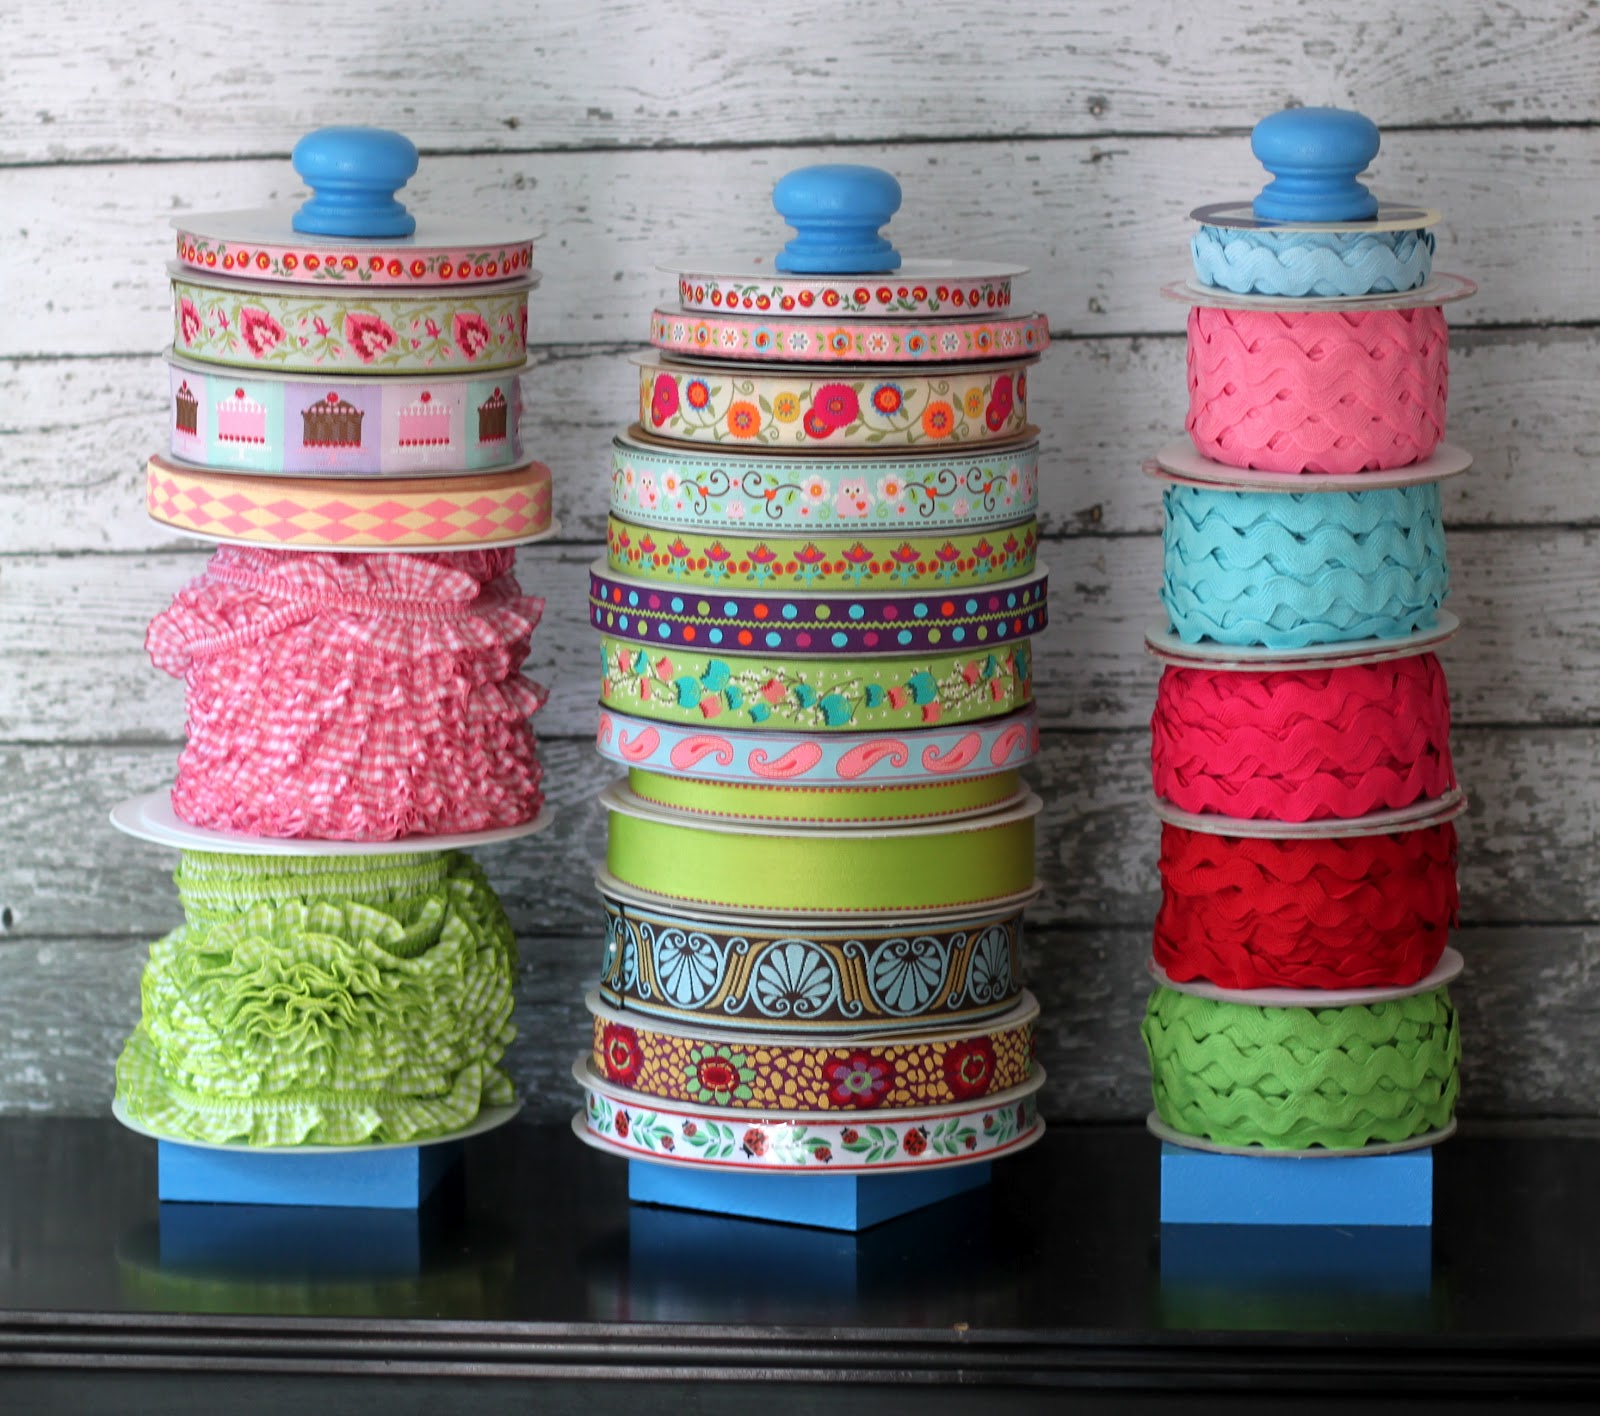
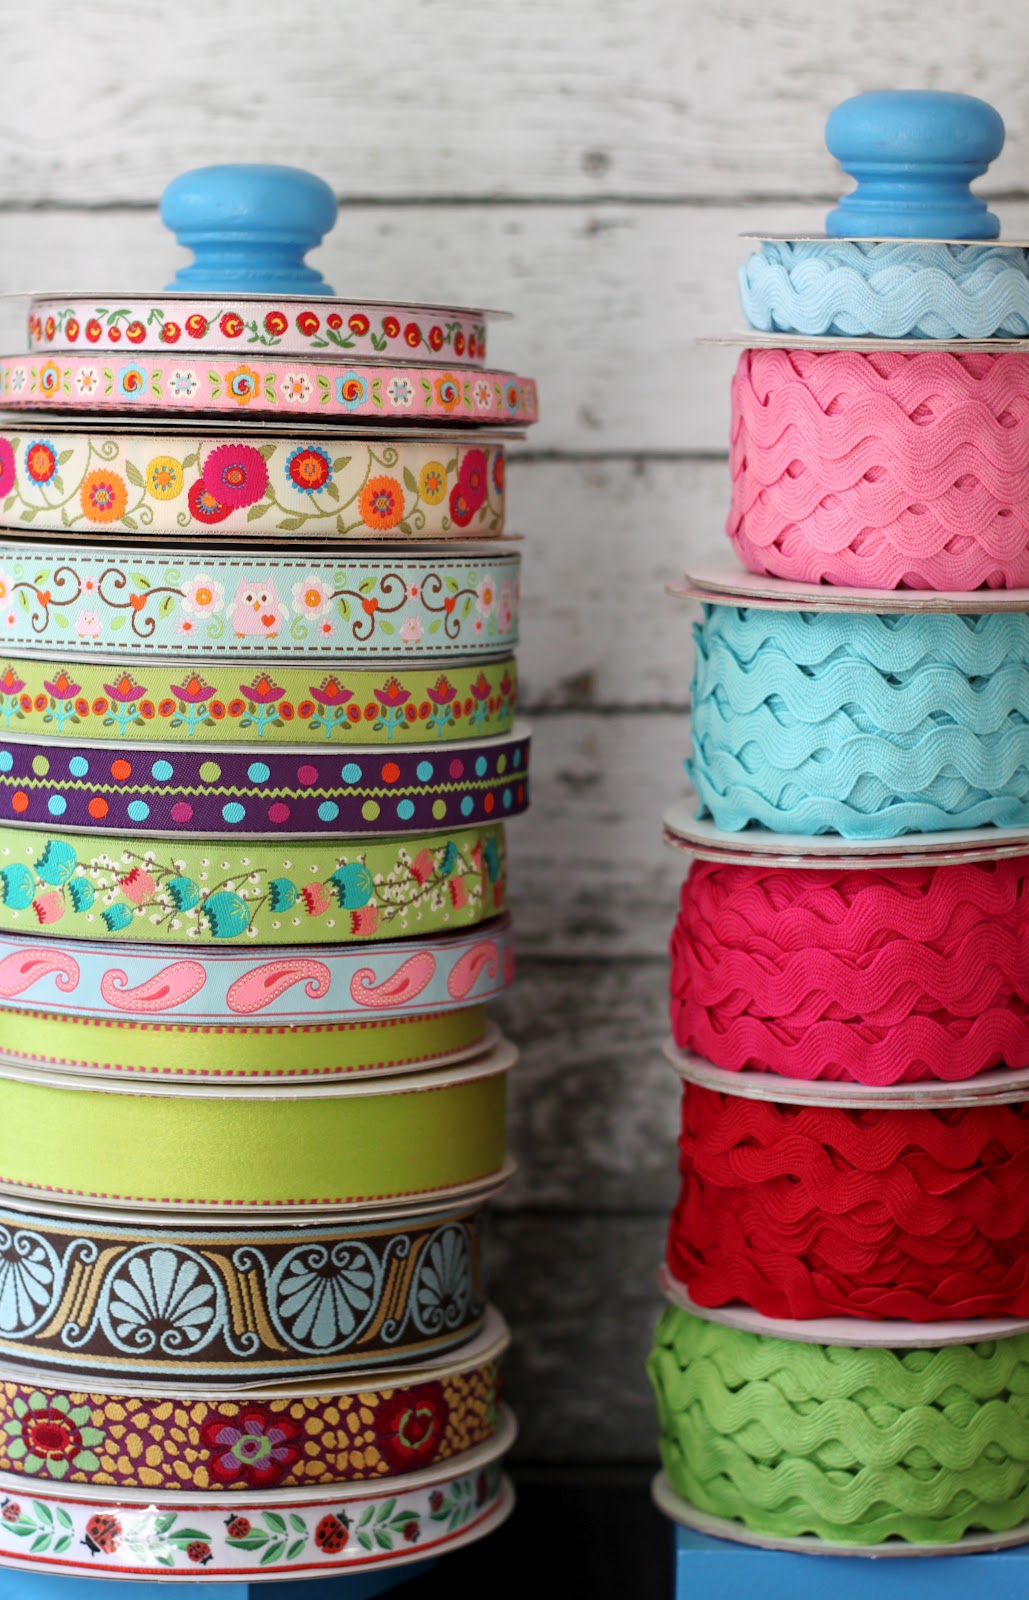
I have a lot of trims and I mean a lot! As a designer I like to see everything I have to work with when I am creating new garments and projects. I usually start out with fabric selection, but it’s the trims and ribbons that really bring a garment together. I wanted to create some easy, inexpensive ribbon holders so that I can have all my trims displayed out in my studio when I’m working. Also, I love looking at all these pretties, they make me so excited to get creative!
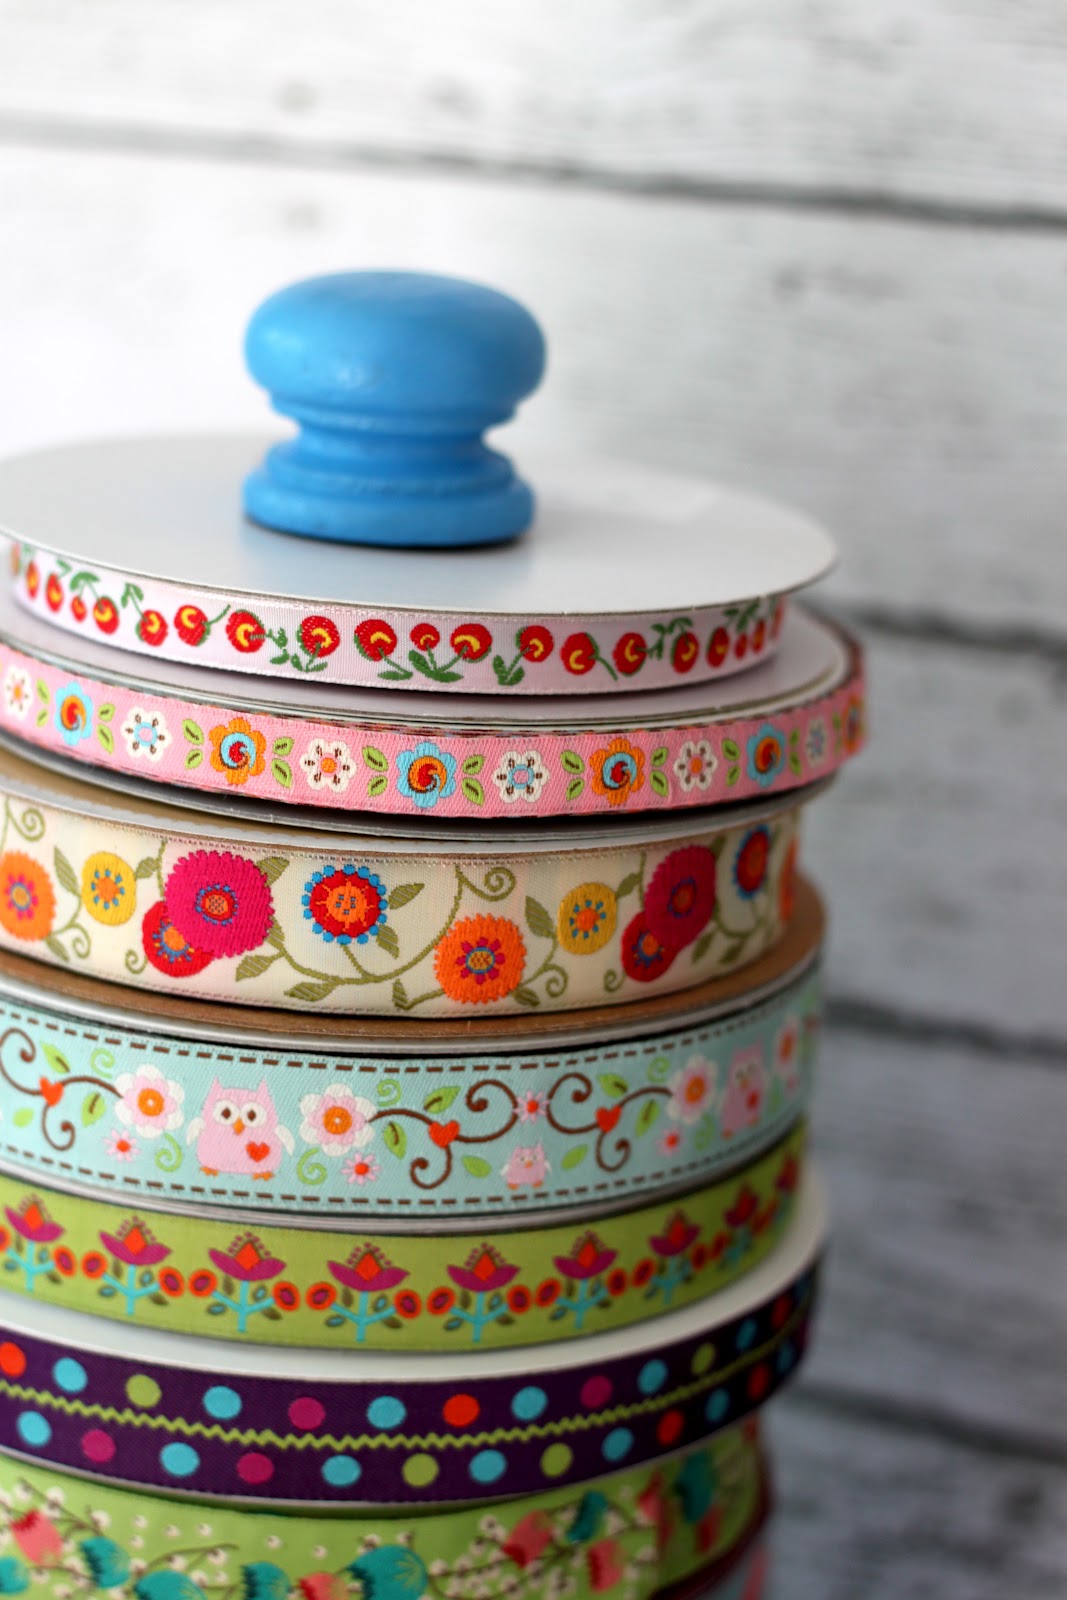
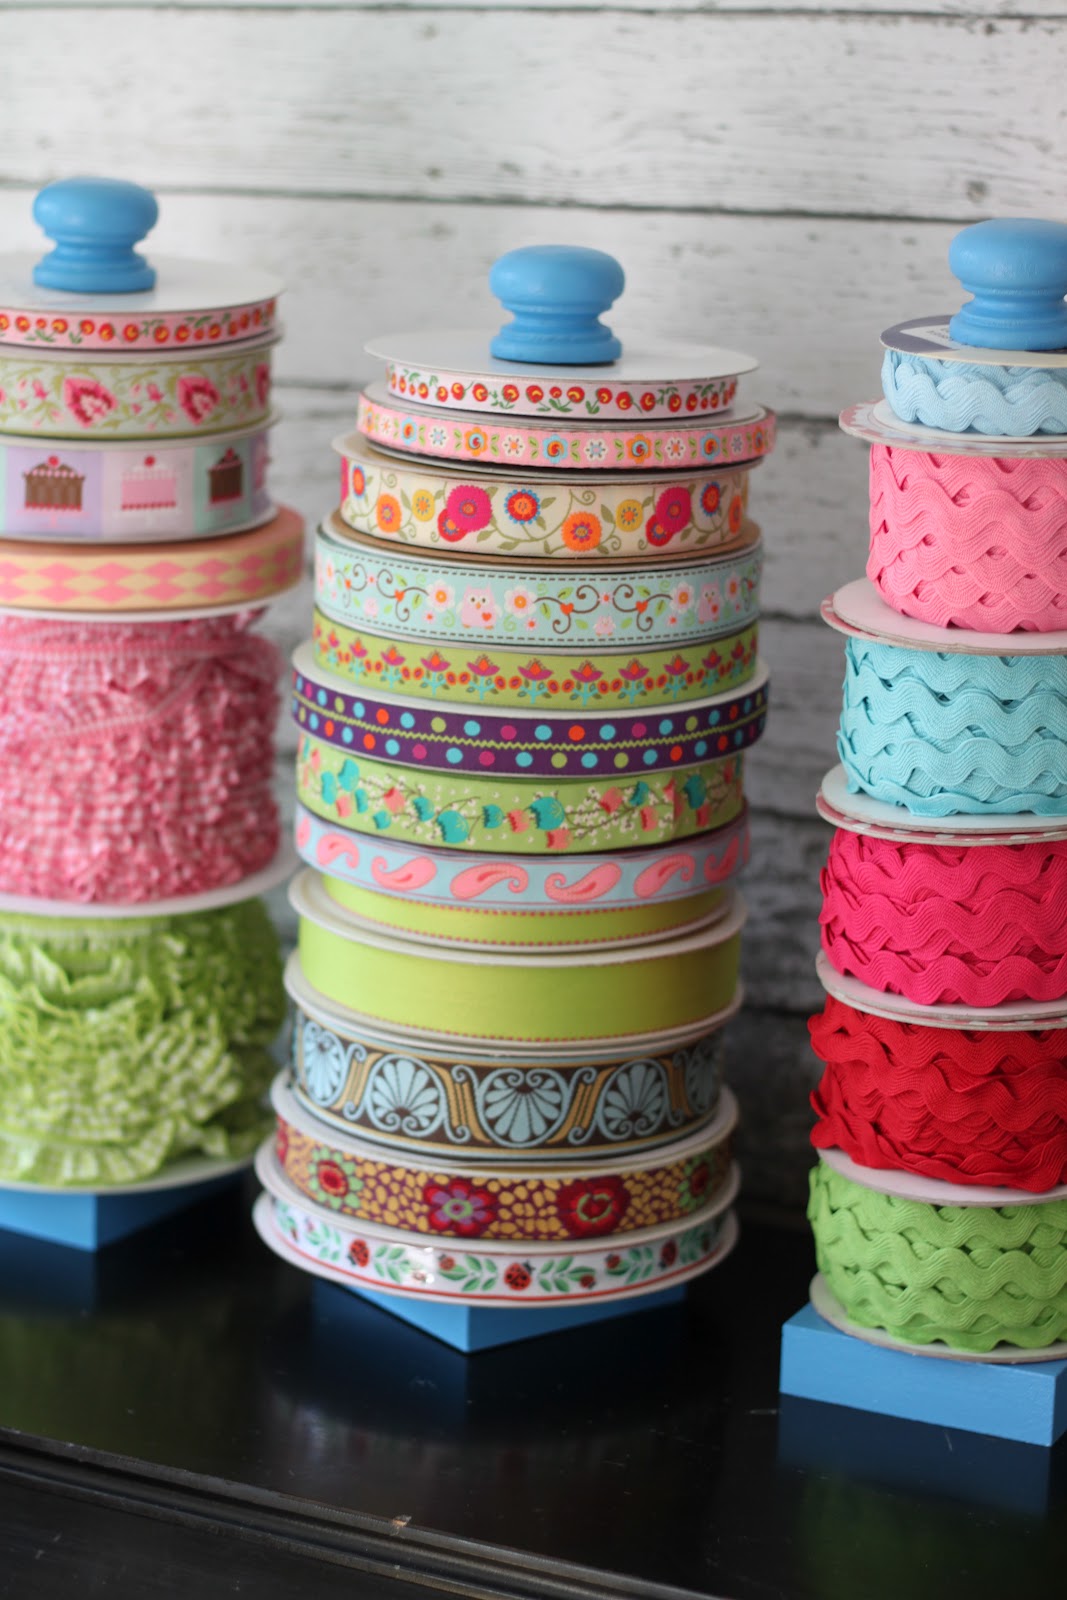
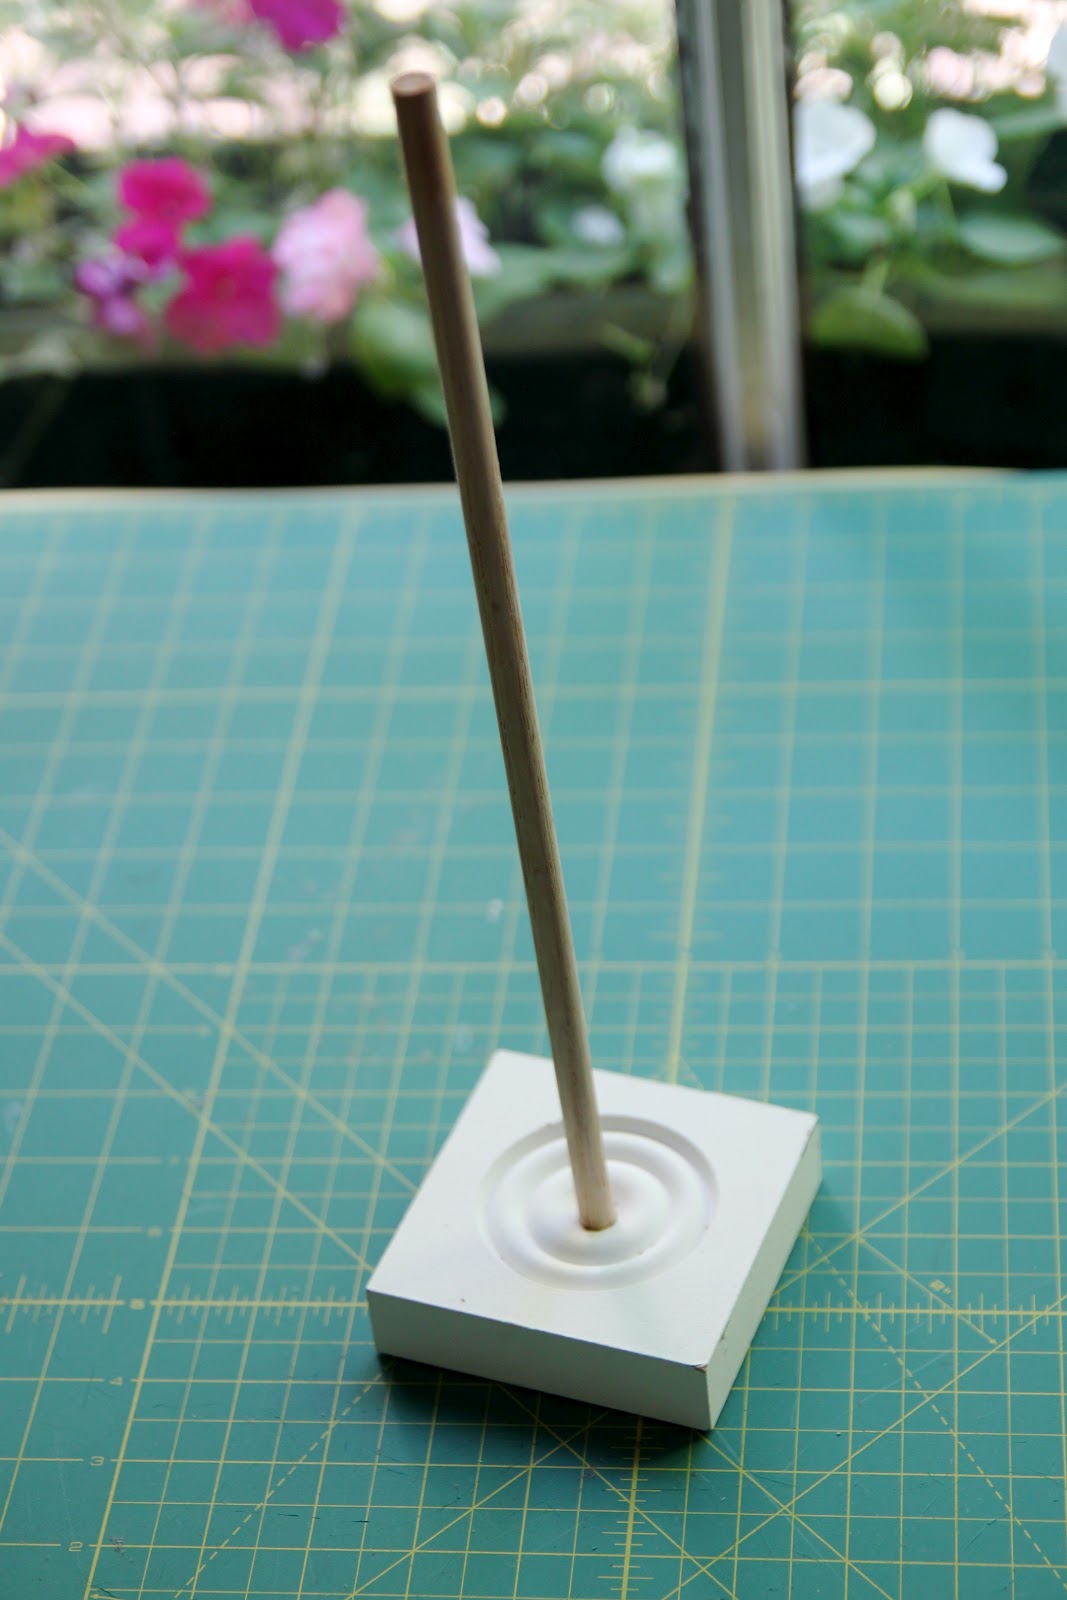
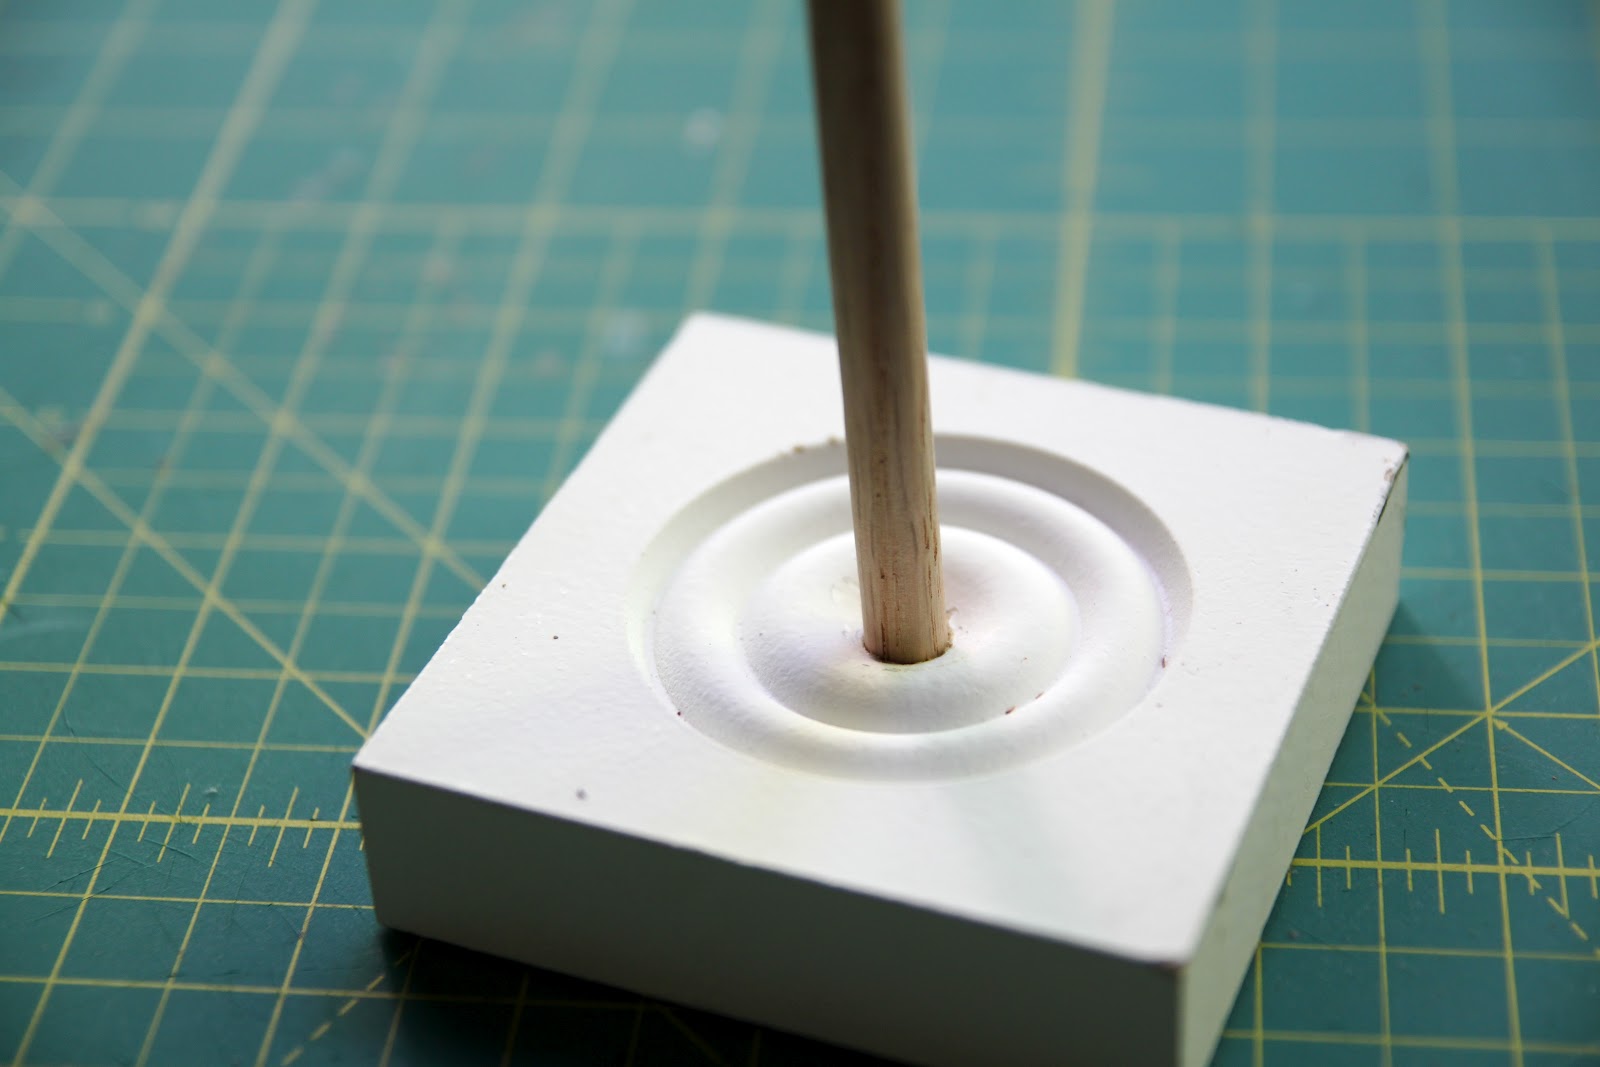
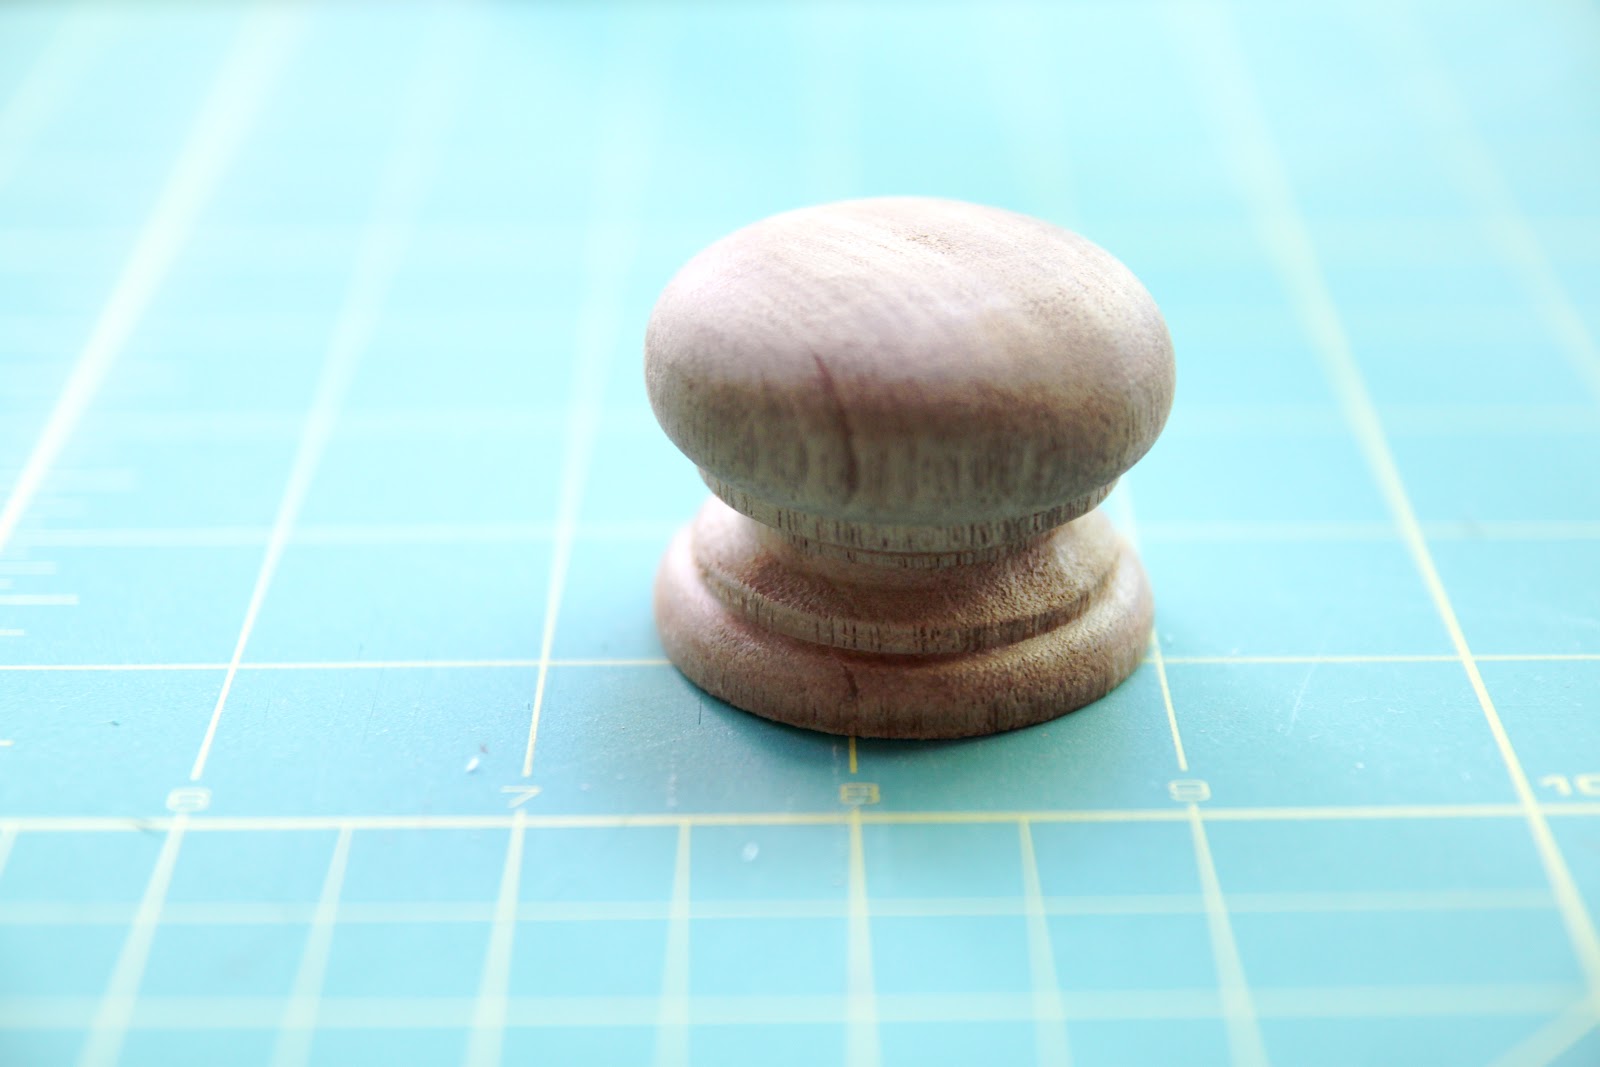
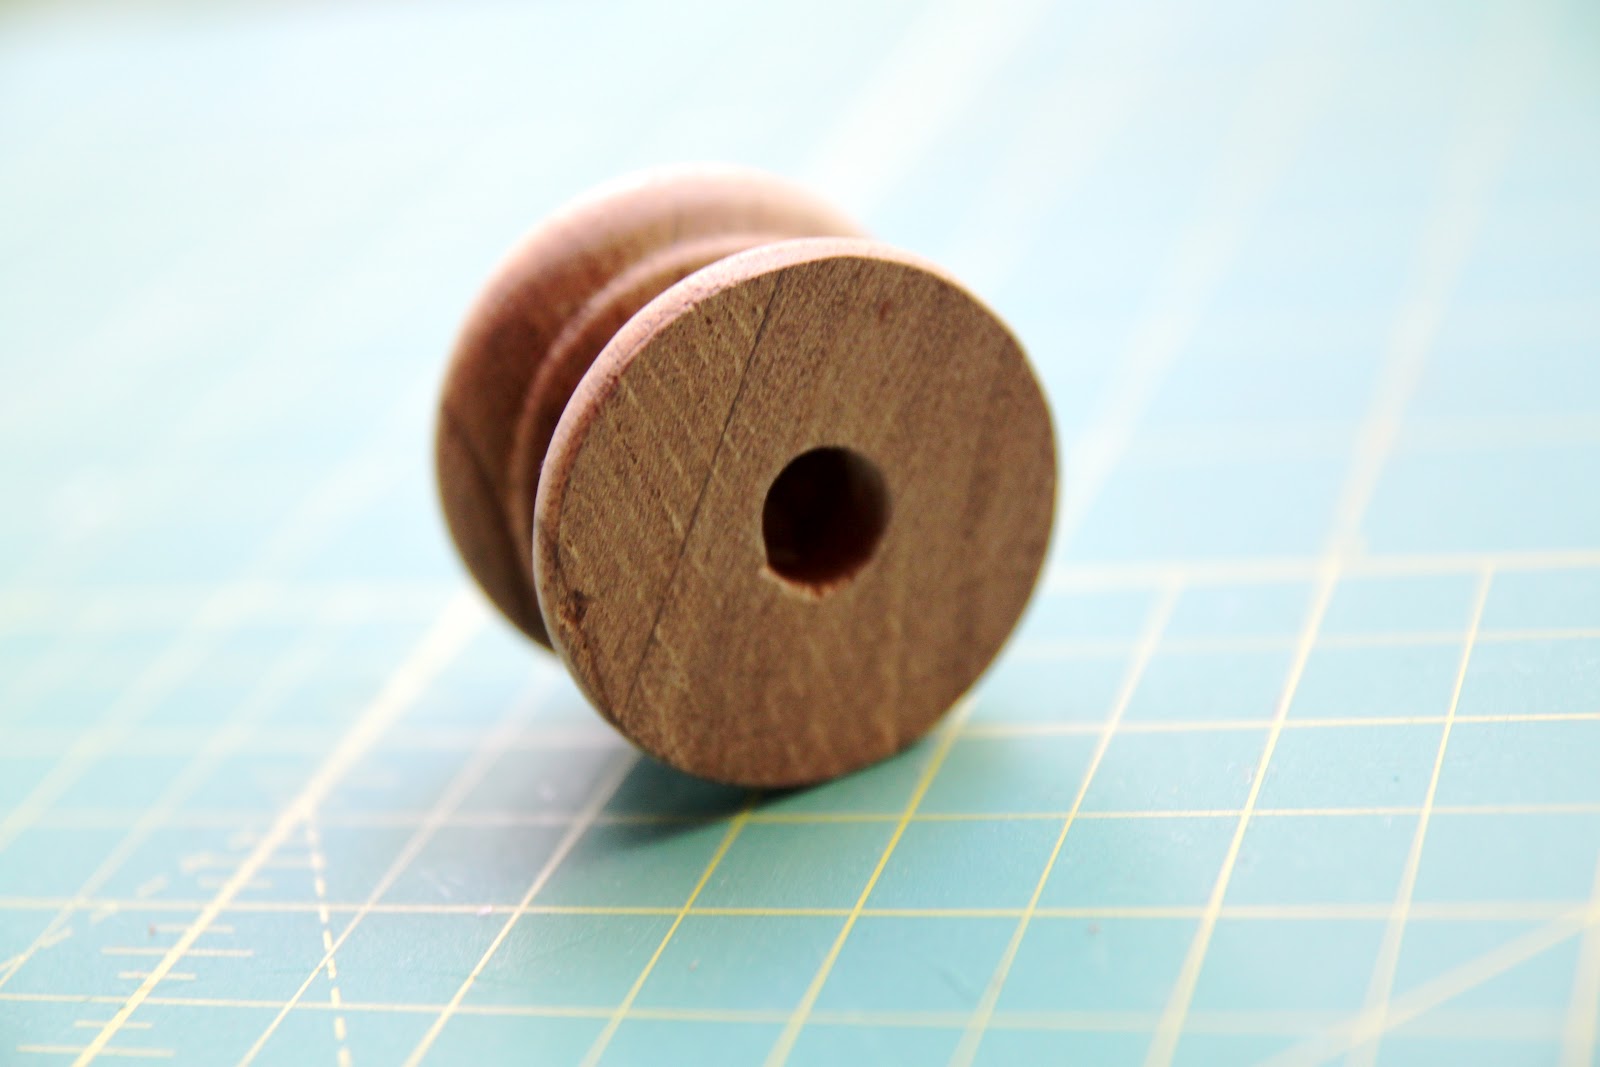
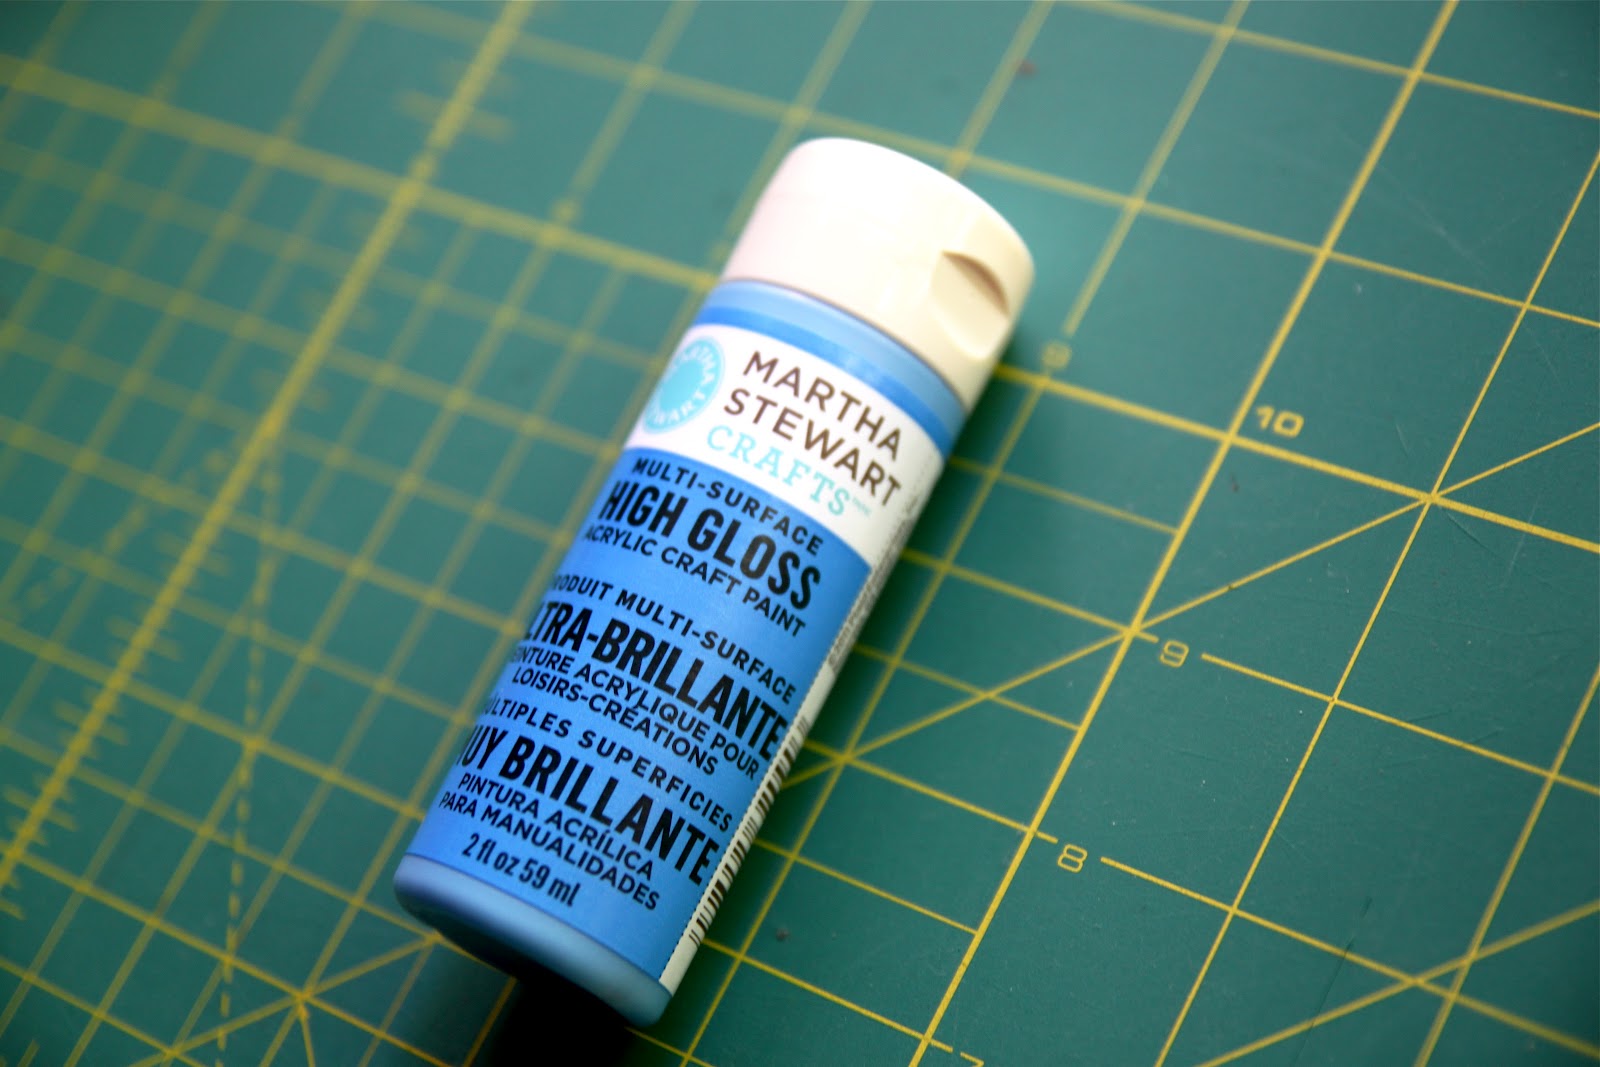
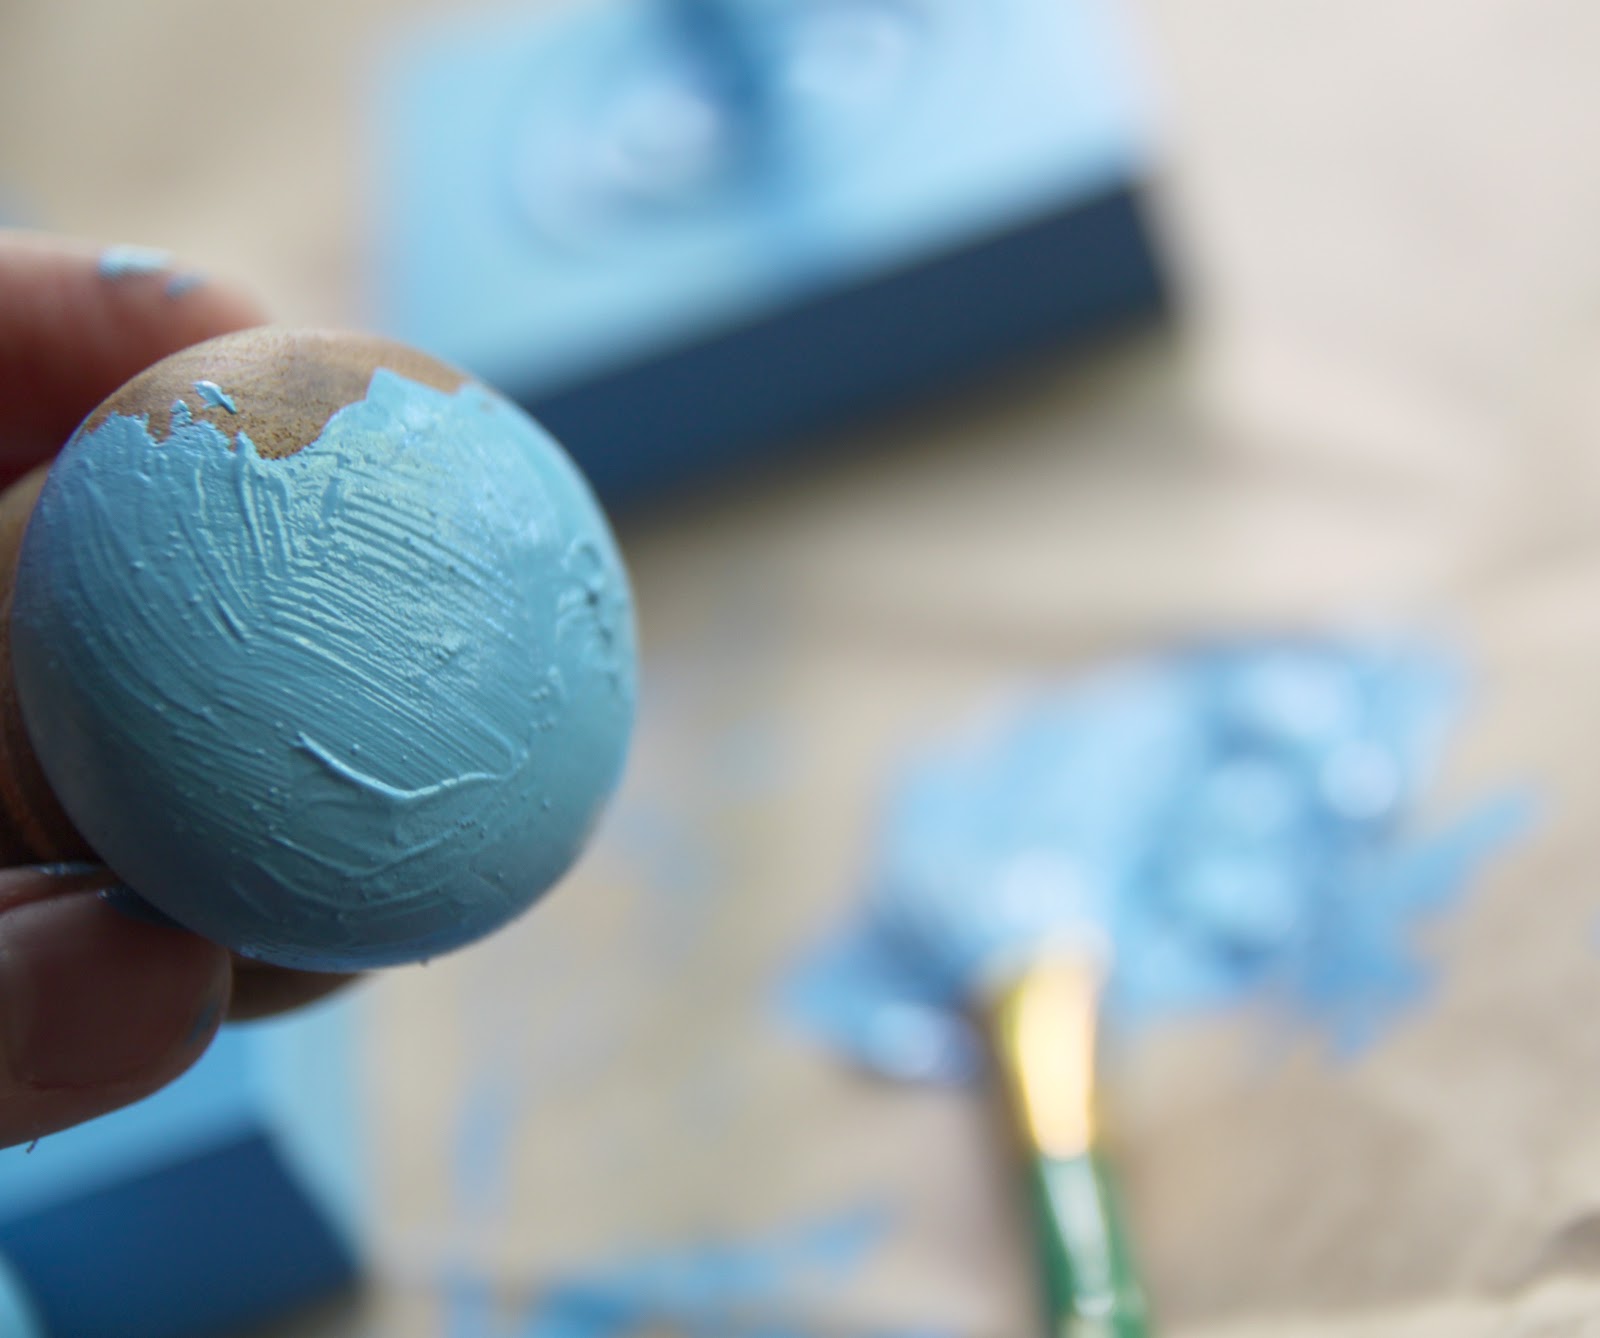
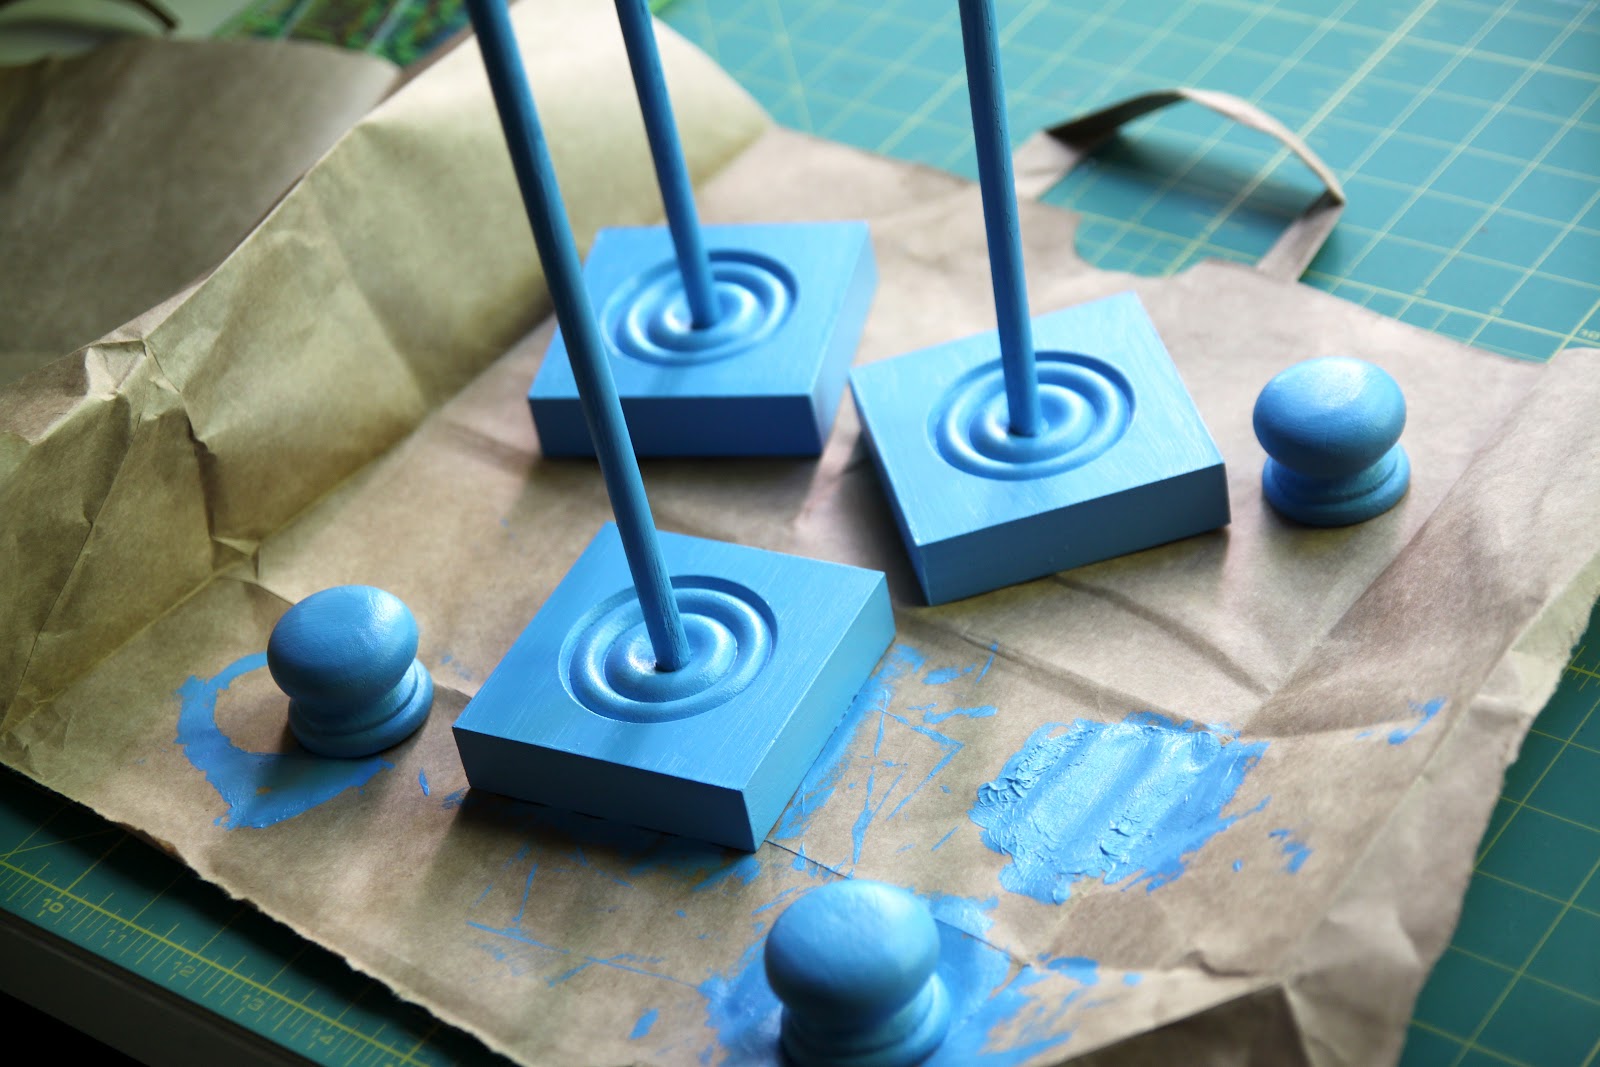
You can create these holders for your sewing trim or even use them for your gift wrapping ribbons. All of these supplies (aside from the craft paint) were found at our local hardware store. They only cost a few dollars each, so you can make as many as your heart desires! My hubby helped me by drilling the holes, so you may need to enlist the help of a drilling aficionado.

Supplies:
Directions:


 Lindsay Wilkes is the owner and designer behind The Cottage Mama. She creates timeless, vintage inspired sewing patterns for children’s clothes. She is also a fabric designer for Riley Black Designers / Penny Rose Fabrics, author of the book ‘Sew Classic Clothes for Girls’ and can be seen teaching nationwide and online in her video series ‘Lessons with Lindsay’ sponsored by Baby Lock Sewing and Embroidery machines.


I love your ribbon holders, so cute and colorful! Thanks for the tutorial, I’ll definitely be making a few myself!
Terrie @ HearthandWhimsy.com
This is GREAT! Thank you for sharing it with us!
This is great!! I was just looking at my spools of grosgrain ribbon and trim overflowing from the box I keep them in and was thinking I needed a new system. I will definitely be enlisting the hubby’s help to make these! Thank you so much for a great idea and tutorial 🙂
Lindsay what a perfect solution, I love them so much so I might make some for each color family in my stash. I must say while I love the holders and I think I LOVE the ribbon even more!!! So pretty.
Gorgeous!! I keep seeing dowel-type ribbon holders for sale and every time I think, I’ve got to DIY that! But I haven’t gotten around to it yet. Love this, Lindsay! Thanks for the inspiration!
Very very cool idea! Thanks!
These are so gorgeous! I love the color, too. You have inspired me to re-paint my white scroll framed mirror too 🙂
I loved this idea. Thanks!
Your inspiration is very timely! Thanks so much!
This is such a great idea! All of my ribbon is currently in a diaper box! ha! So much for organization…so I need to do this soon! Thanks for the great tip! 🙂
What a great idea! They are pretty too. They almost look like fun, colorful cakes!
These are gorgeous!!! Thanks for the tutorial. They are definitely going on my list of projects to do!
Love them! I was just thinking I need a better way to hold my ribbon considering its all in a plastic grocery bag! How do you hold the ends of ribbon so neatly in place once you start using the spool?
Oh my gosh… I love this idea. Thank you for sharing.
Also, I love your ribbons, they are SO adorable.
Super cute idea Lindsay. Thank you.
Thank you so much for this post. I want to let you know that I posted a link to your blog in Creative Busy Bee Craft Inspirations, under the Page 2 post on Aug. 18, 2012. Thanks again.
That’s such a wonderful idea! Love your ribbons. You don’t happen to remember where you got the cherry ribbon from? I kinda have a thing for them. :o)
Lindsay,
This tutorial (as well as your blog) is amazing! Thanks so much for sharing. I have linked to the tutorial from my blog at Sew Sweet Peanut.
-Jamie
How cool is that….I pin this to my pintrest too….thanks for the tutorial….awesome holder….
Going to take my “shopping” list and head to Home Depot!
I love this… I am making them today. Thanks for sharing
I love your idea. I have a paper towel holder for a huge roll of lace, but the holes on the ribbon rolls are too small to fit on a paper towel holder. I’ve been wondering what I can put all my ribbons on and you have a wonderful idea. Thank you for sharing!!!!!
Fantastic idea and very beautiful. Pinning immediately!
<3 Christina @ I Gotta Create!
Wildly Original link party is open.
So cute! I have my ribbons in glass jars. This is much more space saving! Thanks!
what a fabulous idea! thank you for sharing
I used inexpensive plaques from Hobby Lobby when I made mine. The knobs are a nice touch.
Hanks for the tutorial. I do love your fancy smancy ribbons too. Where do you get most of them?