This year is going to be about some serious organization here at The Cottage Home. With having three children under the age of 4, I sometimes feel like certain spaces in my home are spiraling out of control. Well, no more! I’m taking action and going to try my best to gain some control over the clutter that seems to come with having small children.
Now, I know there will be messes and chaos from time to time, but I’m going to try to implement some systems for our family to make life a little more orderly. And hopefully help me keep my sanity. I don’t know about you, but when things in my home and life are in order I can accomplish SO much more.
“A Place for Everything and Everything in it’s Place”
One of my friends over on The Cottage Mama Facebook page chimed in with this quote recently when I was asking about tips for kids toy organization and I just love it. To some this might sound somewhat sickening, but I like it and plan to keep in in the forefront of my mind this year.
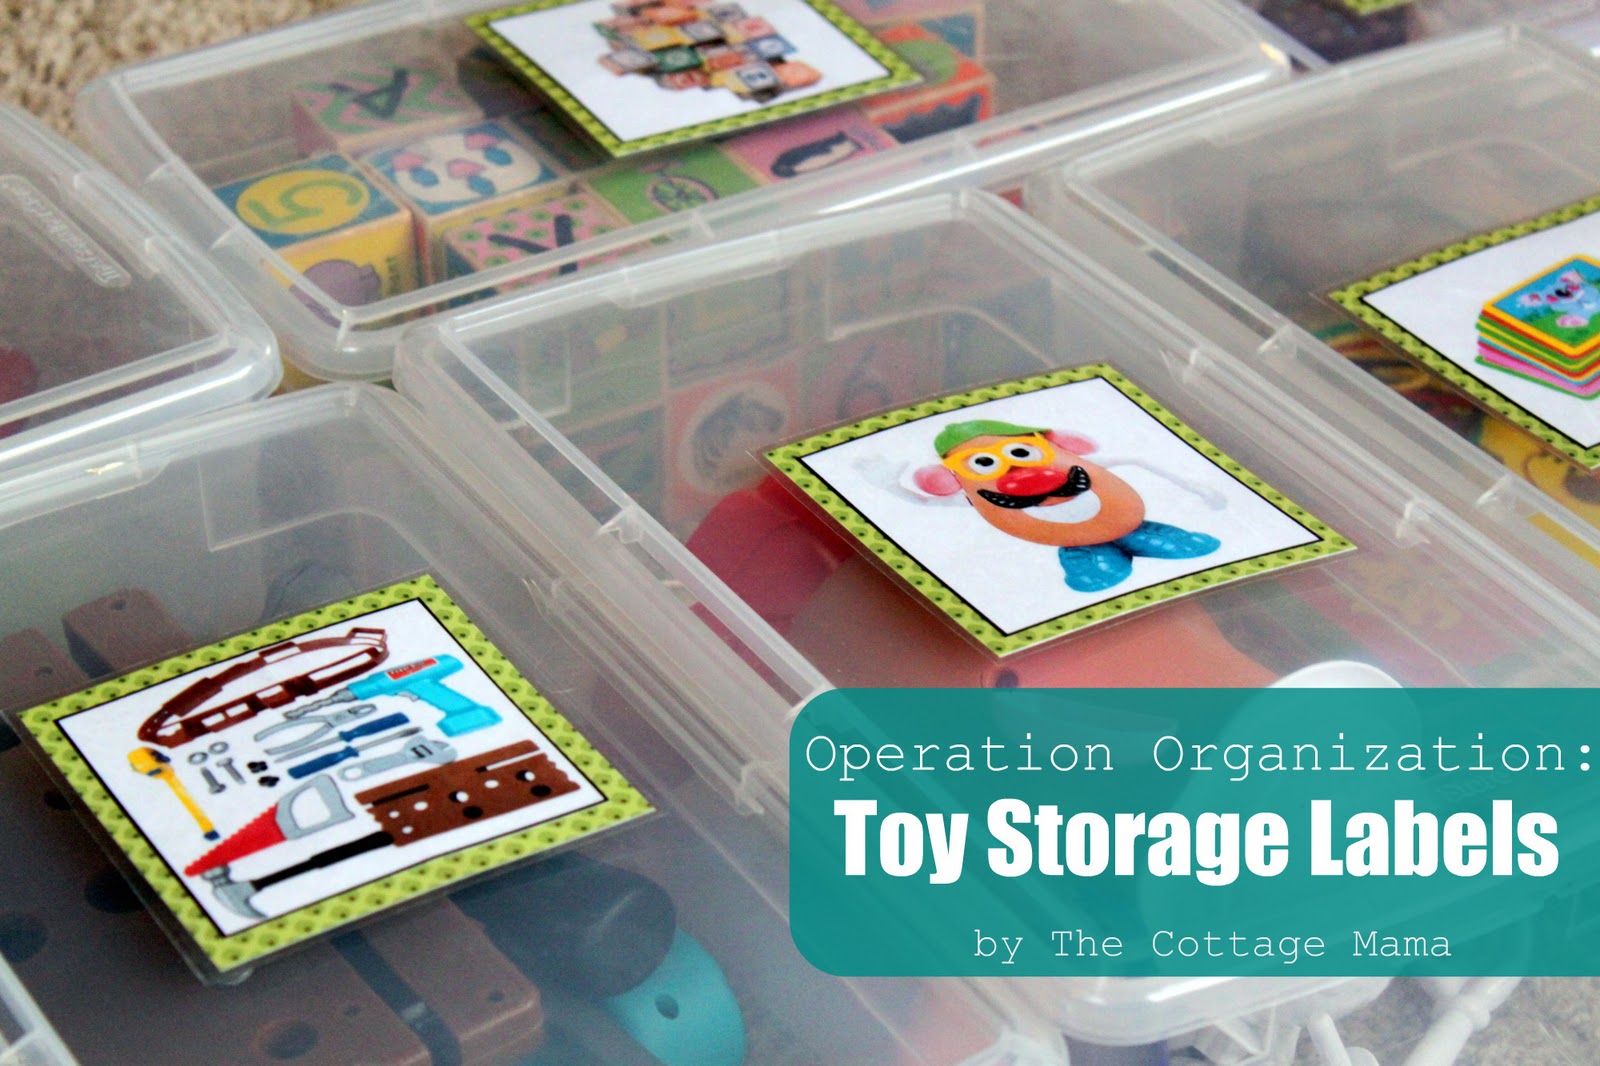
My girls toys have been out of control lately. There are so many pieces to so many different toys and they just kept getting all jumbled up. I spent four hours one day just reorganizing the kids toys, only to have them turned into a jumbled mess two days later. I thought, “oh my gosh, what a waste of time!” But then I realized that I can’t expect my kids to know where things go without me showing them. This was definitely a ‘duh’ moment. I am a big fan of my label maker, but it doesn’t do much good for those that can’t read my labels.
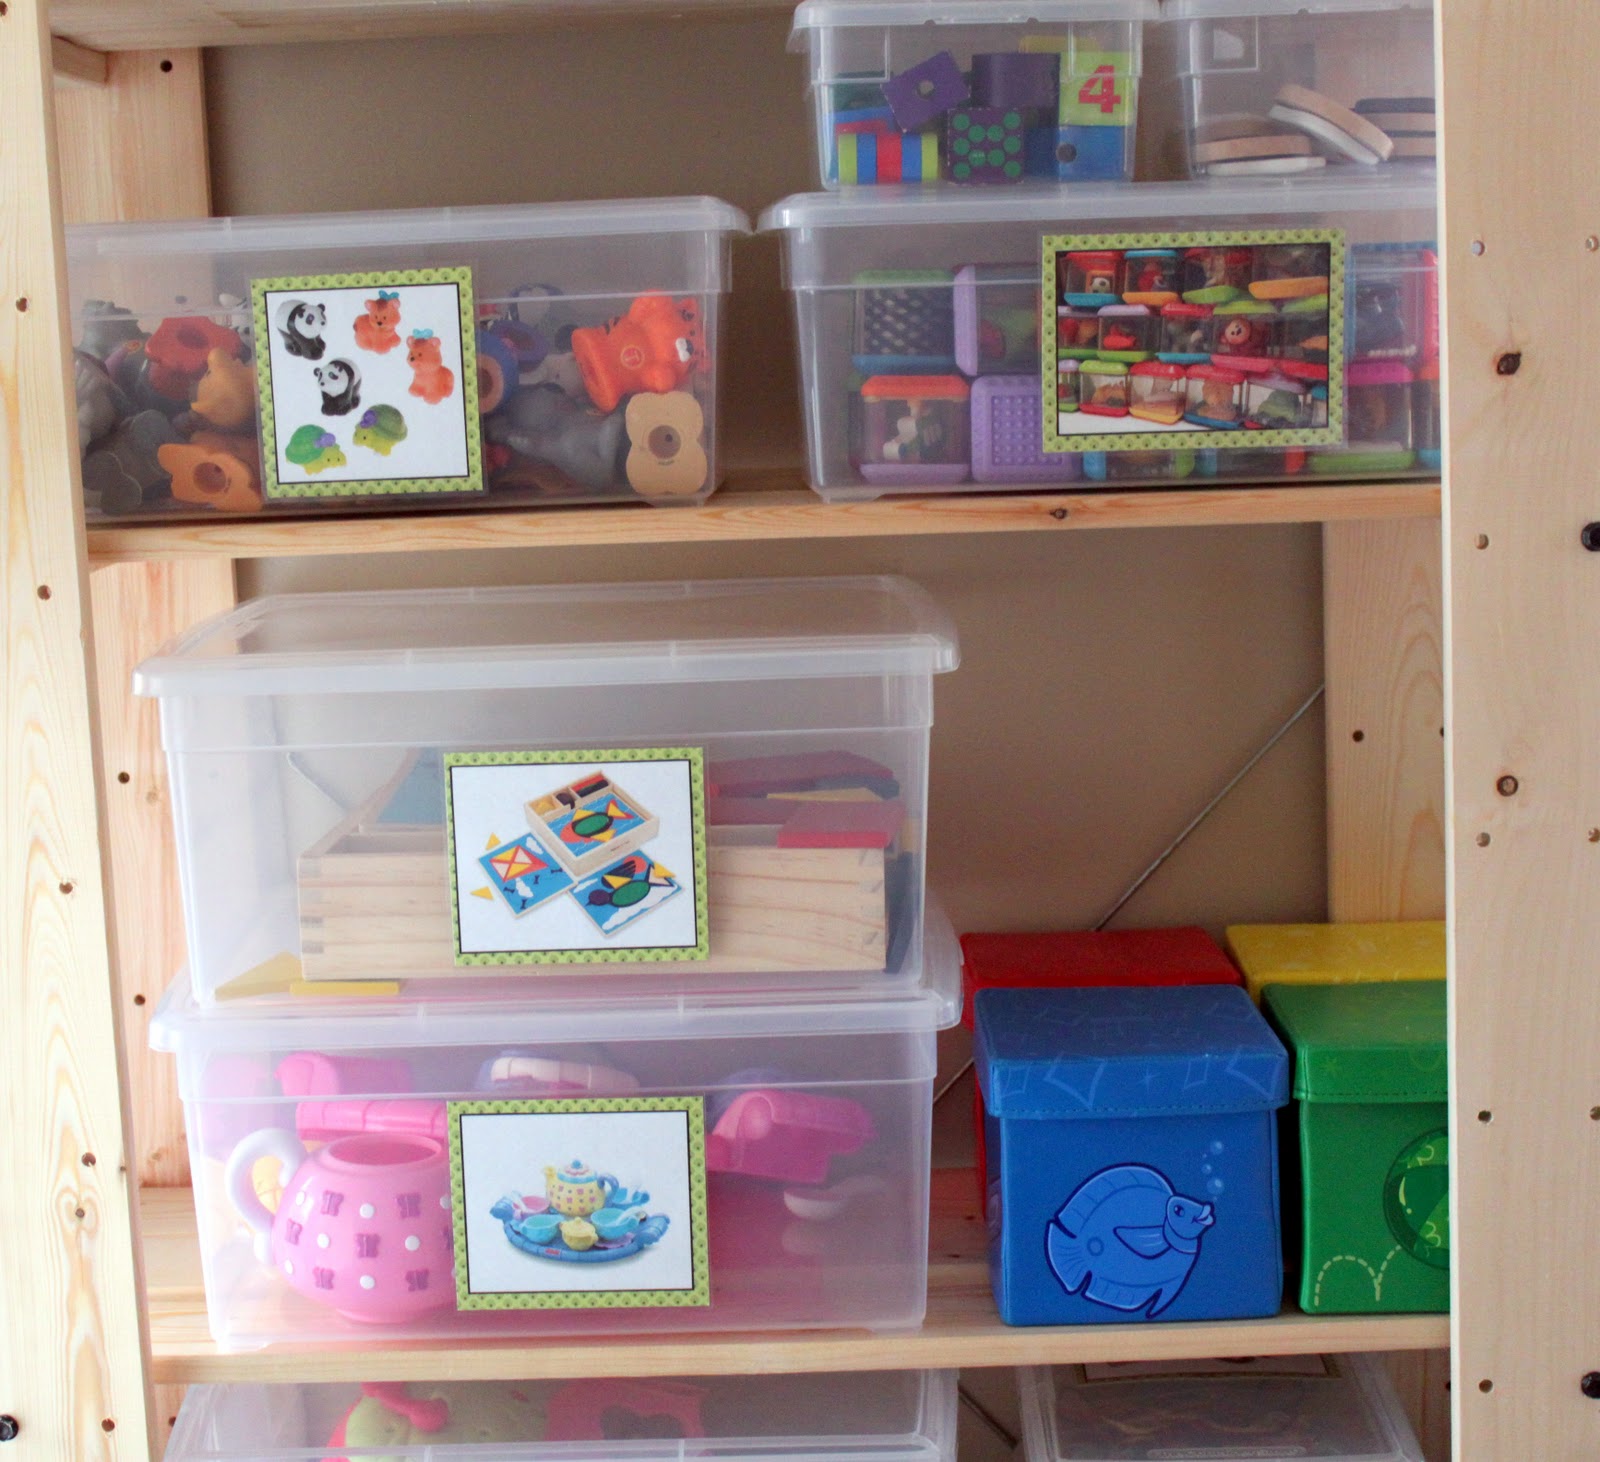
This lead me to try a new tactic for our toy organization ~ Velcro Toy Picture Storage Labels. Why didn’t I think of this sooner? IKEA was having a great sale on these bookcases, only $9.99 each! So I bought several. One for the play room and three others for the ‘Cottage Mama’ storage loft conversion that is taking place in our house as well (more on that at a later time). Then my in-laws gave me a gift certificate to The Container Store for Christmas, so I bought a bunch of clear storage containers to get this project underway.
Want to make your own Toy Storage Labels? Here’s the ‘how to’……..
Operation Organization: Velcro Toy Storage Labels
Supplies:
A computer and printer
Cardstock or thick scrapbook paper
Laminating Sheets
Sticky Velcro
Scissors
Paper cutter (optional)
Instructions:

Take inventory of the toys you would like to contain. I pretty much used containers for the toys with lots of pieces. The larger items are still being stored in our woven cube storage system. Once you know what toys you need to store, google the name of the exact toy and save a picture of it on your computer. Print out the pictures at a reasonable size to fit on your containers.

Cut out the pictures of all the different toys. There were only one or two toys where I couldn’t find the exact picture, but try to make sure you come as close as possible to the correct toy ~ this will make it much easier for your little one to clean up. I also added a black border around each picture, just because I liked the way it looked.

I matted each picture onto a thick scrapbook paper or cardstock to add some durability and body to the labels. I put a little piece of scotch tape on the back of the picture (just to hold it in place) and then cut a mat out with my paper cutter. You could also use a ruler and scissors as well.


Once your pictures are matted, you will want to laminate them to keep them looking nice. You can buy self-laminating sheets at your local office supply store. I don’t think a lot of people know you can laminate things at home without a fancy machine, but you can! It’s really easy and they look really nice.
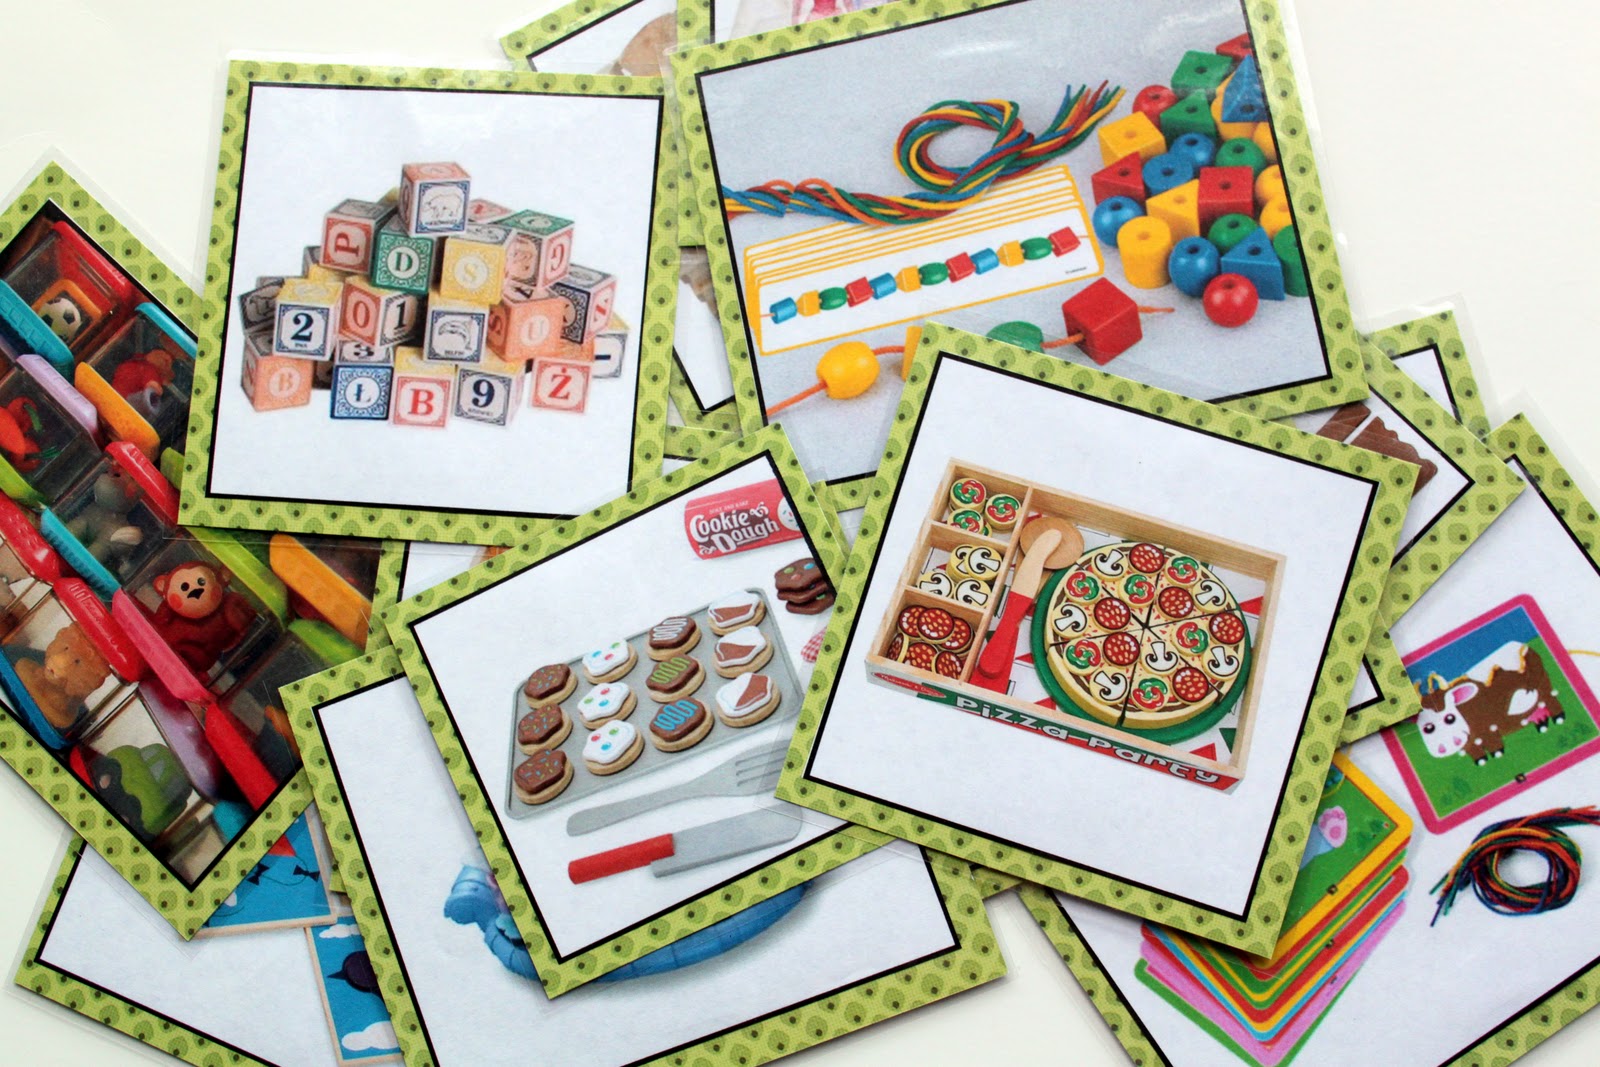
The laminating sheets are generally the size of a regular sheet of paper, so you will need to cut out each label after laminating.
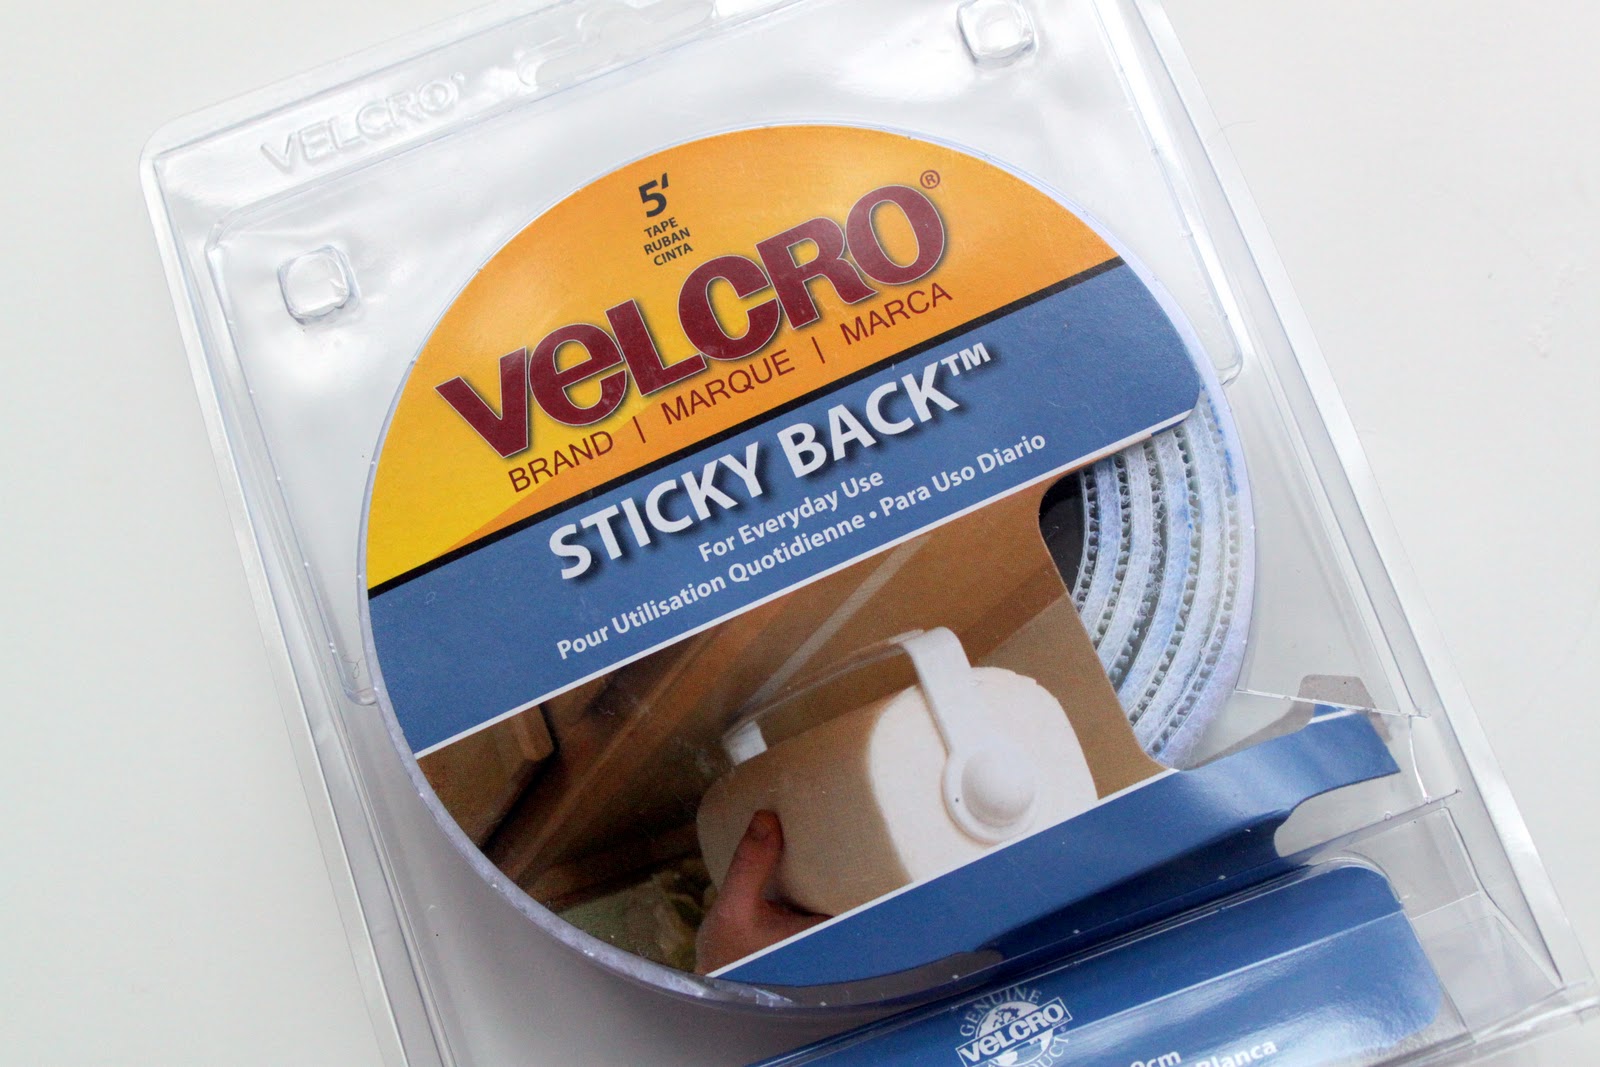
Next we are going to add velcro to the back of each label. Why, you might ask? Because this way if we ever want to store something different in the box, we can simply replace the label without damaging the box. Also, if you decided to re-organize or add to that certain, specific toy, you can change it to another box and still use the label.
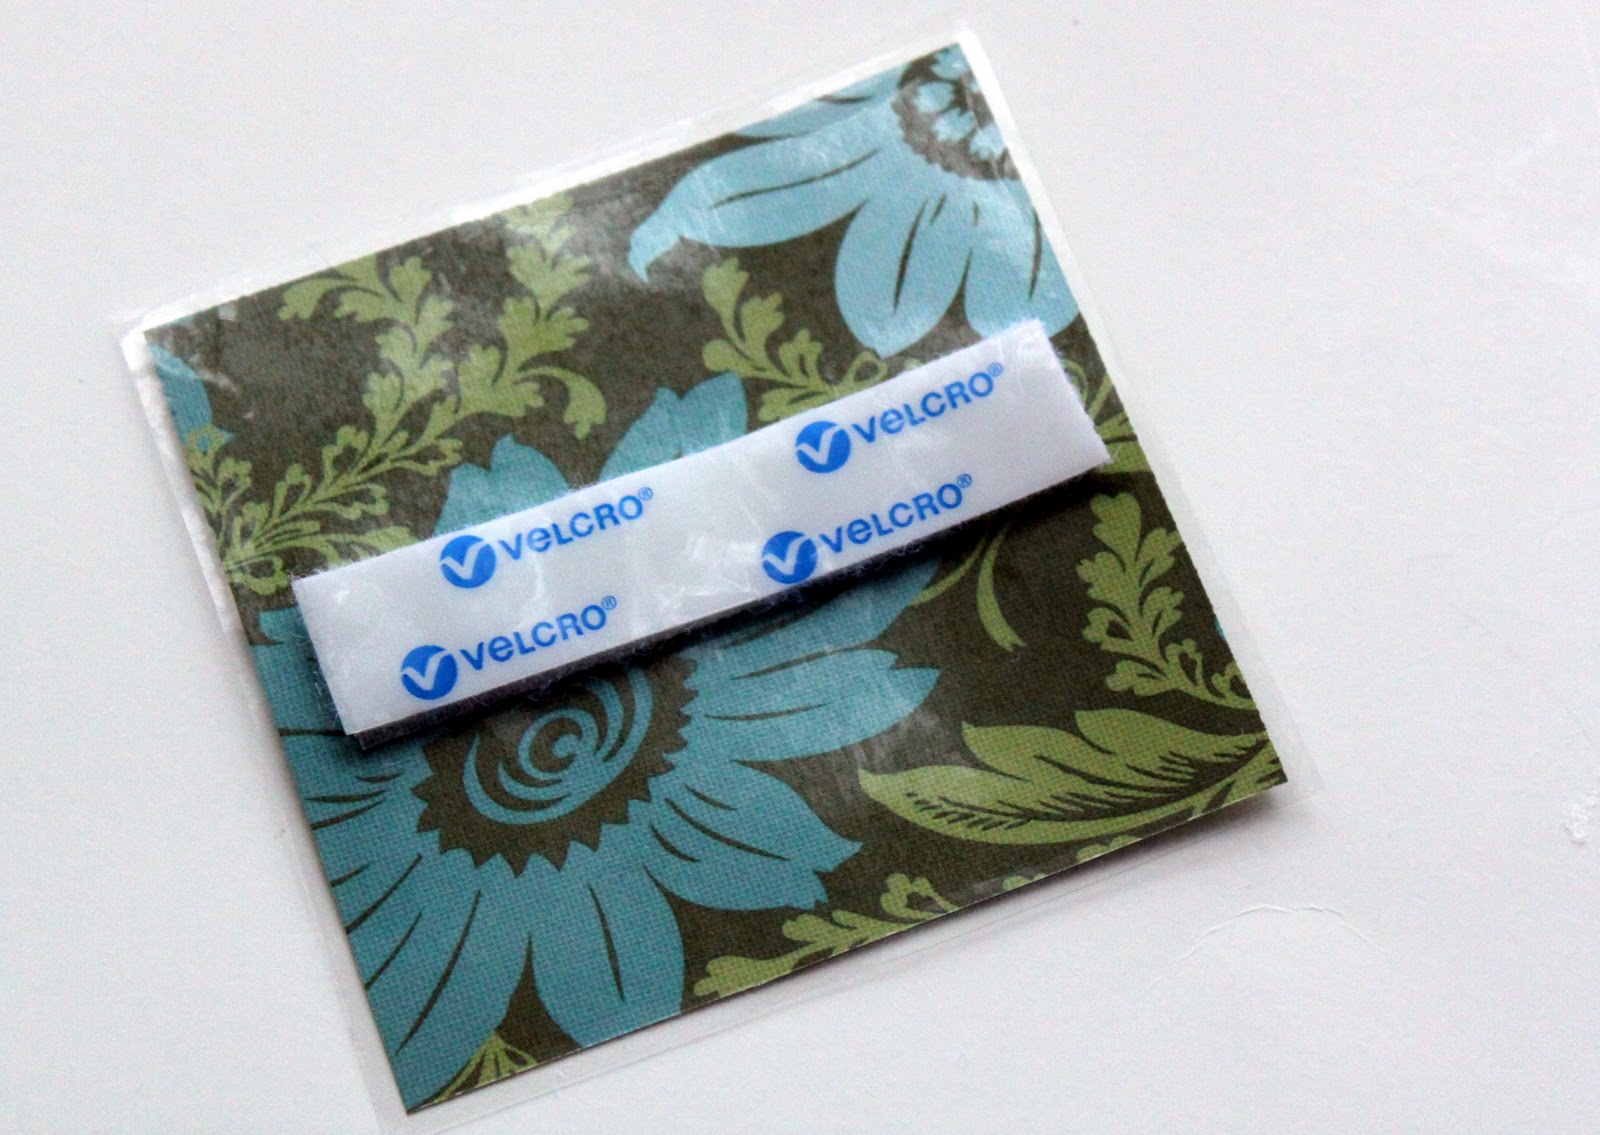
Cut a piece of sticky back velcro and stick to the back of each label. The card stock I used happened to be double-sided, so that’s why there is a different print on the back.

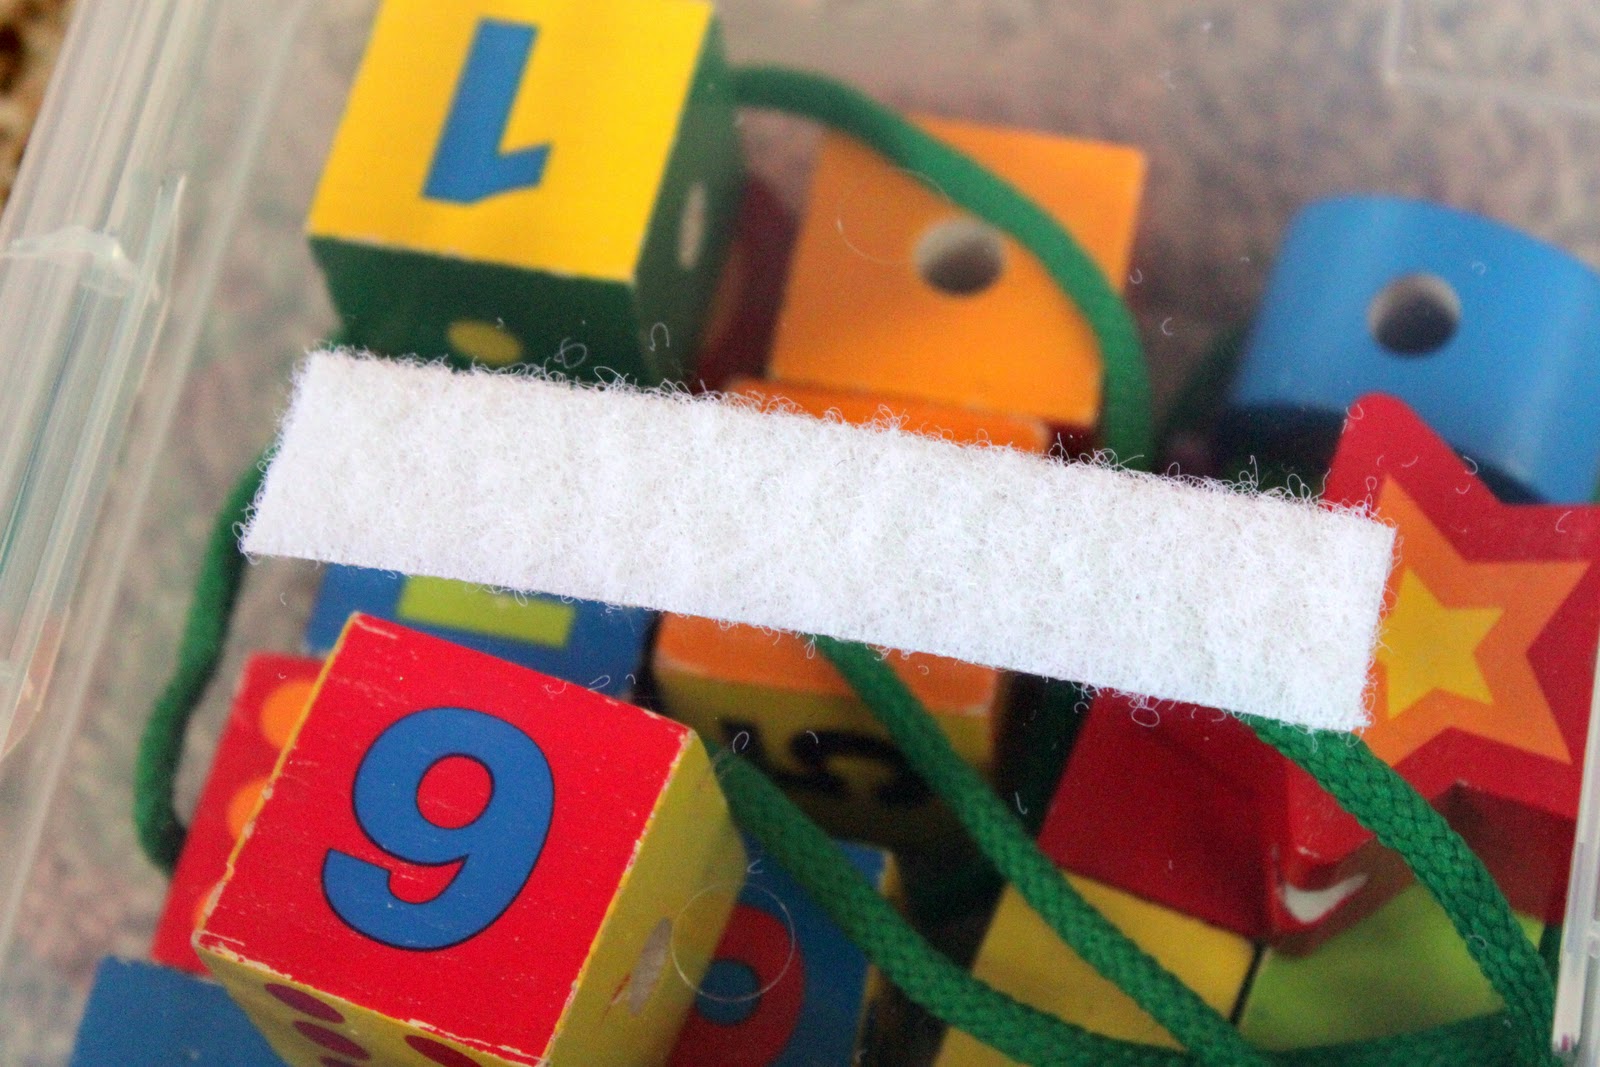
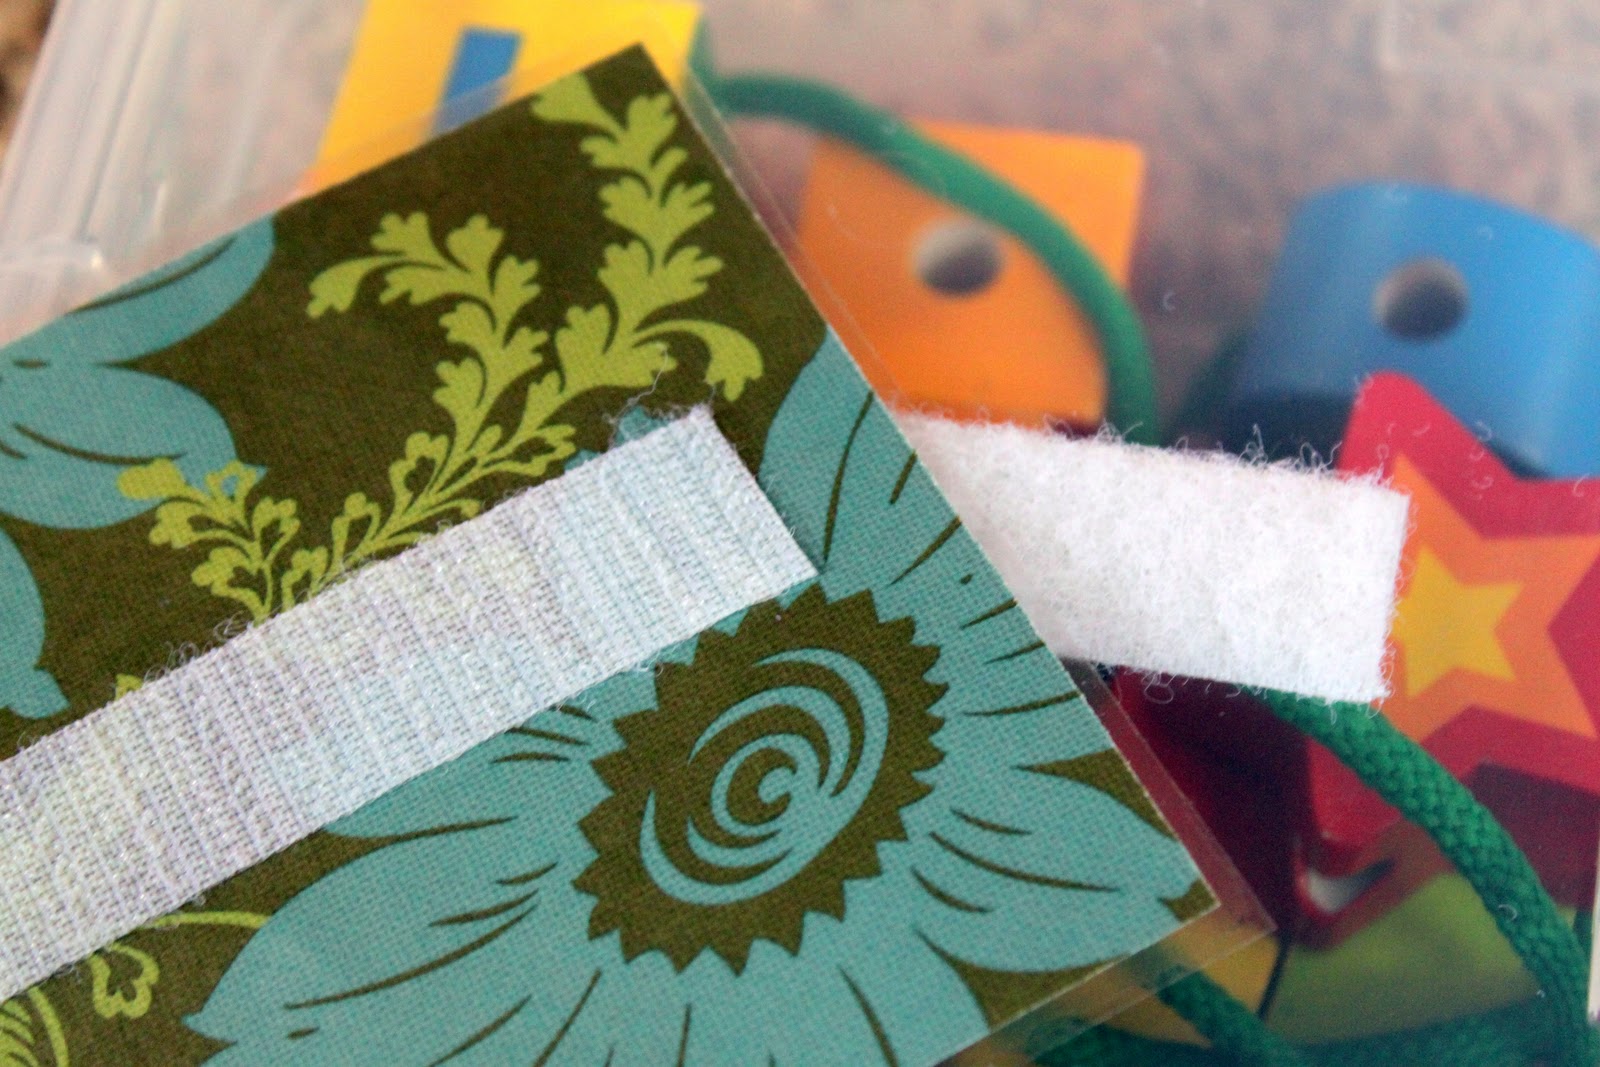

After you’ve secured your velcro to the label, you will peel off the other side and stick it to your container. There are some boxes where I secured it to the lid (as the box was too small to place it on the container portion), but for the larger boxes I place it on the actual container.


Once you’ve got the velcro applied to all your containers, begin to organize and sort all the toys. You can have your little ones help you with this. My girls love to help organize (now if I can just teach them to stay organized) and they get a little more excited about the new organization in the playroom if they feel they were part of the project.


Once you’ve got all your toys contained, place them on the shelves. I decided to place the toys that the girls have free range to access without me on the lower shelves and the ones where I want them to ask me before using up higher. I think this is also a great method for when you have a little baby around. You might not want your older children to have certain toys out when baby is around because of choking hazards, so this will give you some control over that. That way the older children can play with the ‘big kid’ toys when baby is not around or napping.
We are also really, really going to try to make sure the girls clean up one toy before getting out another. I don’t mind all the dress up and pretend play things being out because I want to foster and encourage that kind of play at all times, but for the toys with lots of pieces, I think a good clean up is definitely necessary before moving onto to the next toy.
Also, I think if you are a really visual person (as I am), making some picture labels would be good in an adult space too. I can see these being really helpful in my studio, so that I don’t have to read a bunch of labels that all look the same, I can simply have the picture jump right out at me.
I originally wanted to paint my super great deal IKEA bookcase black, but my husband said he liked the raw wood. So we’re going to live with it for awhile and see, but I still may paint it…….
I know I can’t have everything in my life be organized, but I think we all strive to have some type of order in the everyday. I feel much better knowing that we are off to a great start on the road to organization for 2012!
Be on the look-out for more ‘Operation Organization’ posts to come this year.
What aspect of your life are you trying to organize this year?
Anyone else’s kids toys taking over their space?


 Lindsay Wilkes is the owner and designer behind The Cottage Mama. She creates timeless, vintage inspired sewing patterns for children’s clothes. She is also a fabric designer for Riley Black Designers / Penny Rose Fabrics, author of the book ‘Sew Classic Clothes for Girls’ and can be seen teaching nationwide and online in her video series ‘Lessons with Lindsay’ sponsored by Baby Lock Sewing and Embroidery machines.


