
It’s really starting to feel like fall here in the Midwest. We still have our occasional warm day, but for the most part fall is upon us. Fall is my favorite time of year with all the fun festivals, pumpkin patches, apple orchards…….I truly value the beautiful seasons each year.
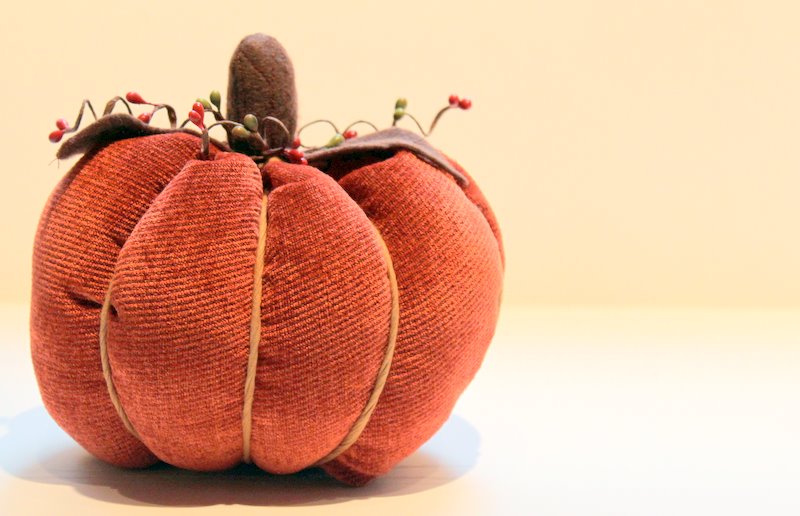
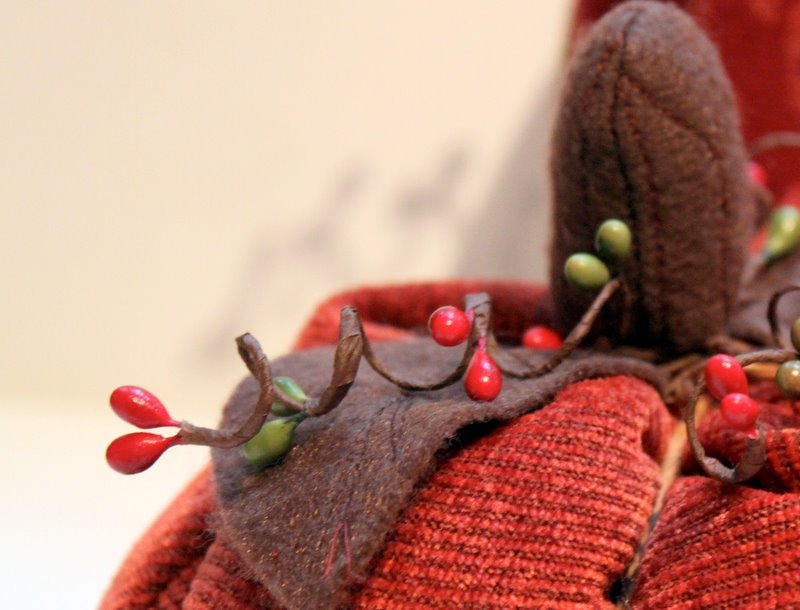
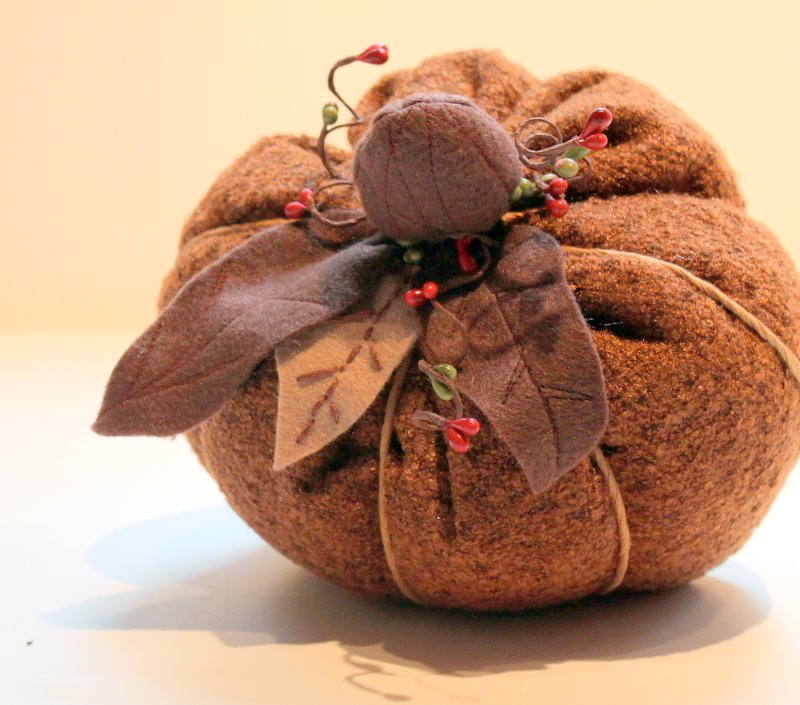
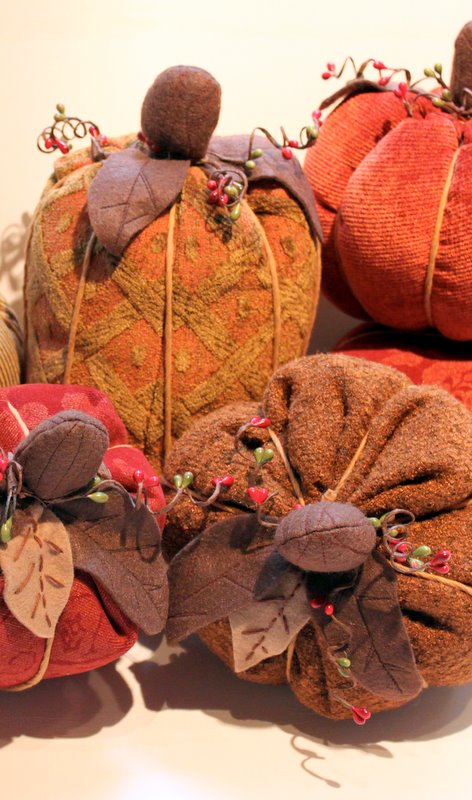
Since it finally feels like fall, I think it’s time to get out some decorations for around the house. I wanted to make something for our home that tied in with the season as well as our decor. Though I tend to use bright colors in my clothing design, my home is decorated in more rich tones….think deep red, green, mahogany and cherry wood. I came up with these chubby fabric pumpkins and can’t wait to put them around the house. I thought you might like to make some too………so here’s the “how to”:
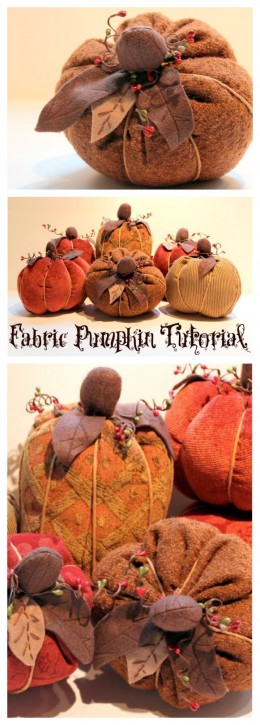
Fabric Pumpkin Tutorial
Supplies:
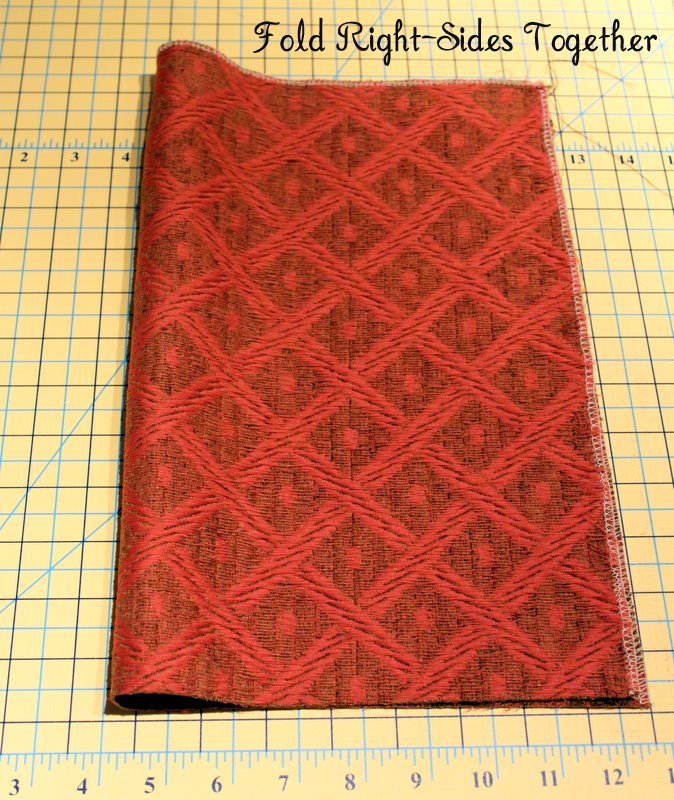
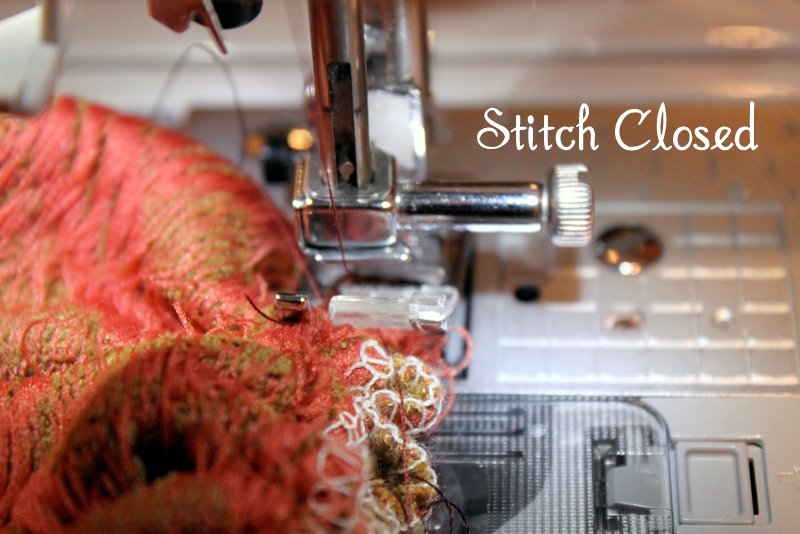
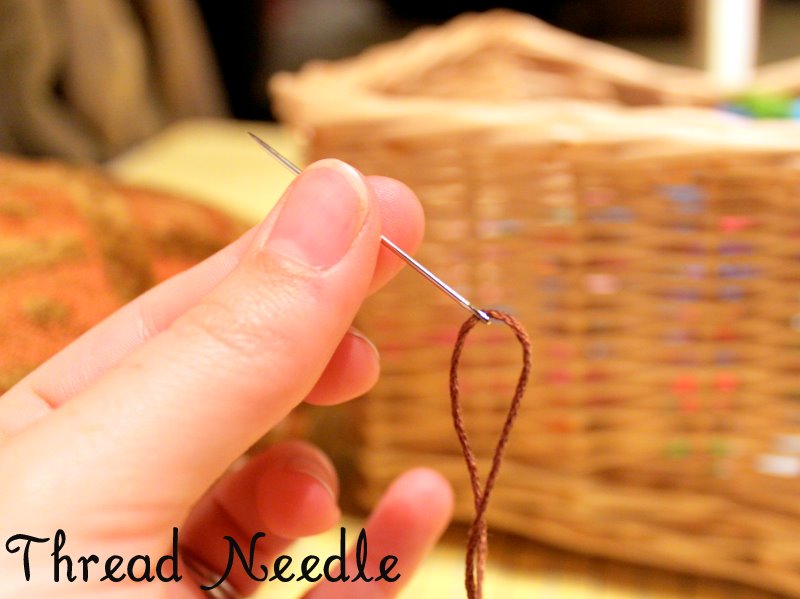
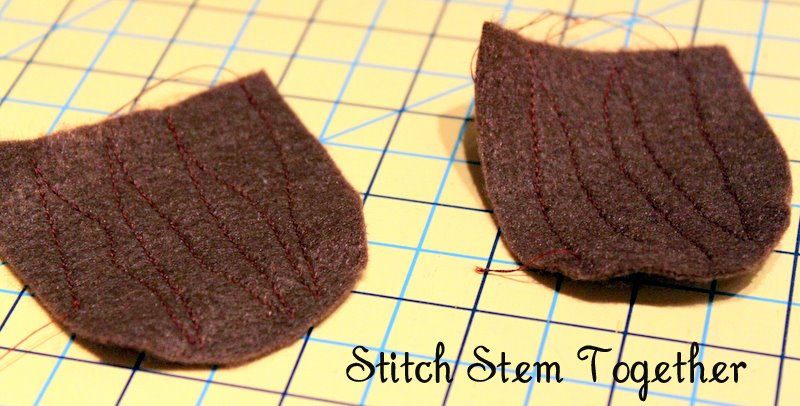
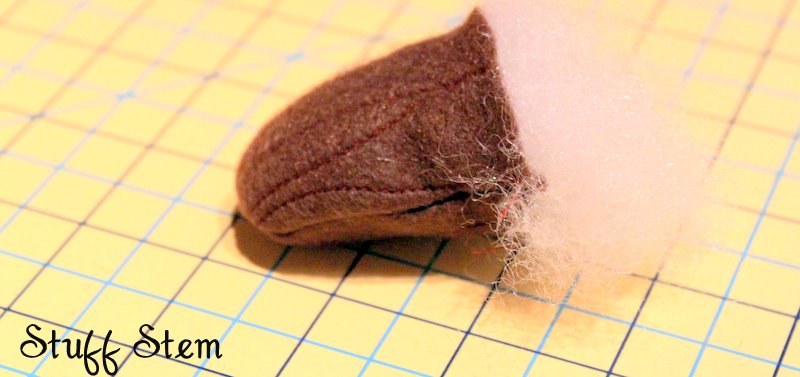
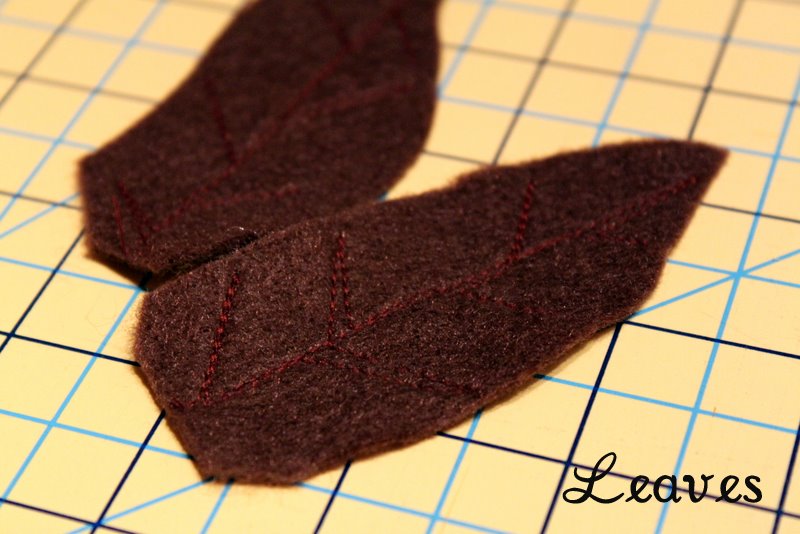
Directions:


 Lindsay Wilkes is the owner and designer behind The Cottage Mama. She creates timeless, vintage inspired sewing patterns for children’s clothes. She is also a fabric designer for Riley Black Designers / Penny Rose Fabrics, author of the book ‘Sew Classic Clothes for Girls’ and can be seen teaching nationwide and online in her video series ‘Lessons with Lindsay’ sponsored by Baby Lock Sewing and Embroidery machines.


Those are adorable! I love it, but I’d rather buy them than make them. =)
I ADORE them… Pumpkins make me sooo HAPPY!
LOVE these! So cute! What a fabulous idea. Would love to make one as a cute little pincushion too! 🙂
Ralna
housebynumbers.blogspot.com
These make me so happy! I have some leftover fabric that would be PERFECT for these! Thanks for the tutorial.
These are great!!! Awesome tutorial! Thank you!
What I great idea! Love it.
http://cupcakesandscissors.blogspot.com/
Lindsay, fantastic tutorial. I love the fabrics you chose, the pumpkins look so substantial and the little berries and twists are a sweet touch.
love these pumpkins! so cute and the fabric is just perfect for them. 🙂
I love the tutorial…very clear and the pumpkins are absolutely adorable 🙂 Fall is my favourite time too.
These are really, truly cute. Great job, and very creative!
I was looking for something just like this! Thanks for the tutorial! Now I’m going to go through my fabric stash for something pumpkin-y
Jenifer
http://www.CantaloupeCorner.blogspot.com
These are so cute! I love the colors and fabrics you used! They feel so nice a fallish and the pumpkins are just cute as they can be! I just started a blog and I really enjoy yours.
PS- I’m your newest follower 🙂
These are adorable and I love the leaves and garland you added. This is a project I will have to try.
Hugs, Sherry
Those turned out ADORABLE- super cute!
I love the upholstery material you used in these pumpkins. They are gorgeous! rich and textured! I am featuring these at somedaycrafts.blogspot.com
Thanks so much for the tutorial. I am definitely going to try making these out of some extra fabric.
Tracy
http://www.cutorcopyandpaste.blogspot.com
These are wonderful. Thank you so much for sharing the tutorial. I used to have a pattern for similar but cannot find it. Your choice of decorator fabrics for these was just perfect! I have signed on to get the updates to your blog. Great ideas.
I love these – they are so adorable! And I must say this is one of the most put together tutorials I have ever seen, thank you so much for all the detail and showing each step – your pictures are amazing! Great job!
These are so awesome! My Joannes had a bunch of those $2 clearance fabrics but I only eyed them from the cutting table because I couldn’t think of a reason I needed them! Thanks for sharing!
I absolutely love these! I featured your pumpkins on my blog today:
http://oopsey-daisy.blogspot.com/2010/09/pumpkin-patch-at-oopsey-daisy.html
Thanks for the inspiration!
~Alison
I am new to blogging and enjoy all that I have found so far- I was introduced to your site through my daughters blog- love the pumpkins!
LOVE the fabric textures you chose. So very huggable!!!
What a great tutorial, these are so cute. I like your attention to detail.
I like the way ..That how beautifully you create this lovely pumpkin….The fabric and the design is so creative i like the way of yours….its superb…..
Love these! I’m going to make them with the kids this weekend!! Yay!!
I love these!!! Thanks for sharing this tutorial!!
Just fabulous! Love those pumpkins. Following, found you through New Friend Friday.
These are TOO cute! I love the textures! I made some similar ones that I posted about on my blog today too : )
These are sooooo stinkin cute…hoping it gets cooler here on the coast soon! Hope you have a FUN weekend!
Blessings,
Linda
First, I want to say thank you for stopping by my blog! I’m coming over from Tatertots too…I just love these pumpkins and the fabric is gorgeous. Great tutorial.
Take care,
~Karen~
Super cute! I love your use of upholstery fabric and I also love the stitching on teh stems…a must.
Those are so beautiful! I love them! 🙂
I’ve seen many different tutorials for fabric pumpkins this fall and I have to say I think yours are the cutest. Can’t wait to make some of my own with fabric scraps I have lying around.
I just started a new thing on my blog called “Feature Friday” and you were my first showcased project: http://forsuchatimeasnow.blogspot.com/2010/10/feature-friday-fall-fabric-pumpkins.html
Thanks for the inspiration!
Lovely!! Thank you for this great idea!!!
Laura
Thank you so much for this wonderful tutorial! I am starting to learn to sew and found this to be such a great project! I just finished making my adorable pumpkin!
Hi Lindsay, Thanks for sharing this darling tutorial. I can’t wait to make mine. I was just realizing last night that I don’t have hardly any fall decorations, so these will be great! I will be posting a link on my blog ziggycrafts.blogspot.com Thanks!!
These are by far my favorite fall decorations. They are darling. I hated to take them down last year. You are so talented. I was just googling a tutorial for fabric apples for some back to school decorations, and I thought of your pumpkins and I was dying to know if you’ve ever thought of creating fabric apples. I’d LOVE to see what you’d come up with. Thanks for all your wonderful ideas!!
I love these!! Cannot wait to give them a try this year, thanks for the tutorial!
I love your pumpkins. I featured them today at So Creative. http://soverycreative.blogspot.com/2011/09/fall-roundup.html
These are great and I have a whole box of the samples!
So fun! I’ve linked this tutorial to my fall decor round up http://bethannecreates.blogspot.com/2011/11/talking-more-than-turkey-day.html
I posted a craft almost just like yours! Here is my link:
http://marcy-beth.blogspot.com/2011/11/fabric-pumpkins.html
These look great! Thanks for this tutorial. I know it takes time to put it all together. I want to make some of these for next fall… always have to plan early, LOL.
This is so stinking cute! I am in love! I featured it on my blog this morning at http://iamonly1woman.blogspot.com/2012/09/pumpkin-crafts-ideas.html
I love them very much!!!!!!!!!
Anna from Italy
They are so cute and autumnal!!! Thank you for sharing this tutorial. I´ll try it right now!
i made some for my mom and myself 🙂 love them! http://www.pinterest.com/pin/230387337161486456/
LOVE them but sure wish there was a print icon for us to print this off by………PDF of this would be great!!