
I love coffee. Now, it is VERY rare these days that I allow myself to purchase a Starbucks coffee. Being a stay-at-home Mom means being on a strict budget which, of course, is SO worth it being able to spend all day with my two little ladies. However, I know many, many of my friends and family that love to have their daily coffee fix from their local coffee shop.
When you purchase your coffee it comes with the cup, the lid and the cardboard coffee sleeve. My goodness – that is a lot of waste for one coffee drink! So, I thought maybe we could help eliminate some of the waste by creating a reusable coffee sleeve. Just a small little sleeve that you could slip in your bag or briefcase and use when you buy your coffee.
I have seen so many of these for sale on etsy.com. They are super-cute, but they looked easy enough to make, so I thought I would try my hand at making one myself. If you know someone who is a coffee-shop addict (or you are one yourself), make them one of these reusable coffee sleeves and help our environment by eliminating waste.


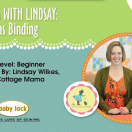
 Lindsay Wilkes is the owner and designer behind The Cottage Mama. She creates timeless, vintage inspired sewing patterns for children’s clothes. She is also a fabric designer for Riley Black Designers / Penny Rose Fabrics, author of the book ‘Sew Classic Clothes for Girls’ and can be seen teaching nationwide and online in her video series ‘Lessons with Lindsay’ sponsored by Baby Lock Sewing and Embroidery machines.


I gave up the gourmet coffee when become a SAHM, too! These would make great gifts for my friends, though. Thanks for sharing the great tutorial 🙂
I love this…sew cute! I can’t wait to make some of these. Your blog is a highlight to my day!
Very cute! drinking coffee in style! 🙂
Thanks!
I have a great
‘not a paper cup’ needing this sleave! thanks
awesome! this would make an amazing gift
This is super cute! I love the big button it, so fun!
Really cute! Makes me want a caramel latte right now!
This is fantastic! I’m going to whip up a bunch this summer and use them as stocking stuffers. What a fantastic way to use up fabric scraps and fun vintage buttons (or ones that go with clothing you no longer have). Thanks for sharing!
If you’re looking for other fun, “green” DIY projects or great budget friendly recipes, check out my blog.
These are such a great idea. My husband and I normally just reuse them as long as we can, but this is great.
Hey Lindsay! I’m excited to try this! It’s teacher appreciate week and I’m going to make these for my son’s teachers along with GCs to Starbucks. 😀 I googled and yours was the first site that came up. As soon as I opened it I thought, HEY I know who this is! 😉 Hope you’re having a great day!
Thanks for the great tutorial! 🙂
I’m going to make a couple of these for my two little girls so they can hold their Icees without their hands freezing, LOL!!!
This tutorial is so cute! I always consider buying some when I go to the store or shop online, but I think
I’m just going to make my own now. 🙂
I also featured your tutorial on my blog: http://ohthatscrafty.blogspot.com/2010/10/reusable-coffee-sleeve.html
Thank you!
Hi Lindsay, when you said “clip the corner and curves”, what do you use as the clip?
sorry I have asked an obvious question, i am a beginner 🙂
“Clipping the corners and curves” – To clip the corners, cut off the corners (but be careful to not get too close to the stitching. This will make your corners nice and smooth when you turn them right-side out (it removes the extra bulk). Clipping the curves means to cut little slits along the extra seam allowance so when you turn it, the curve will be nice and smooth. Does that make sense? If not, just let me know and I’ll try to explain it better!!
Lindsay
I like this post so much.
That is a very useful idea. It is a very artistic coffee sleeve. I think it is a great idea to have something like that in a cup of coffee. It will make your coffee break more fun.
This was a very user-friendly tutorial! I’m a beginner, this was my second project and I felt very confident following these directions. My coffee sleeve is adorable – I’m so excited to use it!
I love that fabric! Do you remember what it is?
No, sorry Megan – I know I got it at Joann’s, but I’m not sure who makes it.
http://honeybeeinspired.blogspot.com/2011/07/christmas-in-july.html
LOVE this idea annd LOVE your blog!!!!
why is it important to use the interfacing?? Does it make it sturdier? could you do without it?
I too would like to know why the interfacing is an important step. I’ll be making a bunch of these for stocking stuffers…picked up the fabric today!!! 🙂
The interfacing does stiffen it up a little and will make it easier when putting it on the cup.
I can’t wait to try this!! I have some extra fabric from making a computer case for my mom and I think this would be GREAT!! 🙂
this is great, but eliminating the whole paper cup is even more environmental;)
Thanks so much for sharing this! I linked this up on my blog here: http://www.vixenmade.com/2012/05/10-mothers-day-diy-gifts.html
What a great idea and wonderful tutorial! I am featuring this tonight in a blog post about Mother’s Day gift ideas. Thanks for sharing!
Maggie
http://www.thehellonheelshousewife.blogspot.com
Wonderful tutorial! I featured you on my tutorial roundup! Thanks for sharing!
Caroline
Cold Hands Warm Heart Crafts
http://www.coldhandswarmheartcrafts.com/2012/05/tutorial-roundup.html
Hi just stmbled upon ur blog! Cute! Coffee cuff. I made some for my mummy friends for mother’s day. So we can fancy up our homemade coffee. I used felt for mine. Yours are lovely! Greetings from Australia
Thank you so mich for this tutorial! I am new to sewing and this was a fun first project to try! Eventually I’d like to try to make one of those cute skirts for my daughter! Thanks again!
I’ve just discovered you blog thanks to pinterest…so I’m learning a lot!! (just theoretically)…but I mean to make/do some of your projects…especially the girls dresses. I ahve an eight-year-old boy, and pregnant to a baby girl =)…so, I’m looking for projects for her =)
thanks a lot for being a very conscious mother and share for free your creativity and craftiness.
Hugs from Chile
Thank you so much! I <3 the umbrella fabric -- bought it myself a few months back, not knowing what to make with it, but knew I just had to have it. Now I know! ;o)
Megan, I still have mine: CP21590 umbrellas, c Springs Creative Products Group, LLC. I too bought mine at Jo-Ann Fabrics.
Will this work for coffee mugs? Or is there another pattern for those?? I would love to make them for Christmas!
Cute idea! Any problems with it staying up or does the elastic keep it tight enough? I was wondering if some of that stuff they use to make the feet for pj”s would act as a gripper on the inside. Hmmmmmm…. Might have to do some experimenting. Yes..I’d imagine you need the interfacing to hold it stiff, and you want some insulation, too. (Mind running, mind running..). How ’bout using some fabric scraps to piece a flat square of fabric and cut from that….. So many possibilities!!!!! Or even some commercial quilted fabric for the outside piece to add insulation.
I made your coffee sleeve for week 9 of my Craft Challenge 2014…thank you so much for the tutorial!
http://kiwisandkrauts.blogspot.de/p/kreativ-challenge-2014-craft-challenge.html