Archives for December 2009

New Year’s Resolutions

It’s resolution time again and this year (in no particular order) I will………

1.  Be more present in the moment instead of always looking to the future (I guess that’s the planner in me).

2.  Sew most of my children’s clothing (aside from some of the basics like socks and onesies, ect) and try to stay away from Gymboree as much as possible.

3.  Attempt to buy more organic/locally grown produce.

4.  Open my etsy shop (The Cottage Mama) to sell my handmade girls clothing.

5.  Organize my office and turn it into my crafting room – might need the hubby’s help for this one (wink, wink, if you are reading this, dear husband of mine).

6.  Follow through and finish all the projects I start.

7.  Continue to only give handmade gifts whether I make them or support others who craft handmade goods.

8.  Go outside more and enjoy nature with my family.

9.  Continue to blog.

10.  Learn to live on less.

11.  Remain focused and centered on my number one job;  being a truly good wife and mother.

Cottage Mama’s Note:  Ok, so now I’ve put all of my resolutions out there for the world to see.  Hopefully this will help me to hold myself more accountable and really stay focused this next year.

What are some of your New Year’s resolutions?
I wish all of you a very happy and healthy 2010!!
Happy New Year!

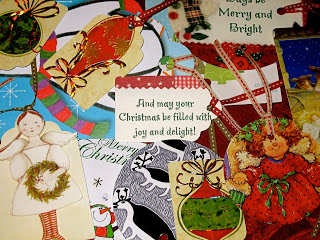
Christmas Tags from Old Christmas Cards

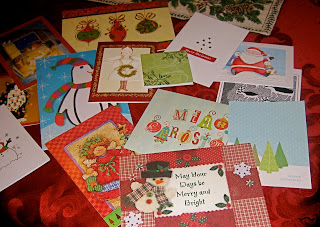
Over the last month I have certainly enjoyed all of the wonderful Christmas cards we have received in the mail from our friends and family.  It’s so nice to see what everyone has been up to and how the little ones have grown.  But now that Christmas is over, what do we do with ALL of those holiday cards?

Well, you could recycle them, that would be one option.  Lately I have really been into repurposing items, so rather than get rid of your cards, why not turn them into something useful?  Why not turn them into gift tags for next year?!  That’s what I did!

My Grandma Peggy had given me this idea several years ago, but I have finally decided to put it into action.  Thanks Grandma!!  All you have to do is gather up all the holiday cards you have received (personally I don’t cut up the ones with family pictures – those are still on the fridge for display).  Cut out whatever shape you like (circles, squares, hearts, tag shape) out of your cards, punch a whole in your shape, thread a ribbon through and presto – you have your gift tags for next year!

Completed Gift Tags

I love not being wasteful and this is a great way to use up all of those beautiful cards.  And better yet, when you are doing your holiday gift wrapping next year, you can look at the tags and think of your loving friends and family.

Community Supported Agriculture – CSA Programs

One of my top New Year’s resolutions this year is to incorporate more organic food into my family’s diet.  I feel like I have fallen off the wagon lately when it comes to what we are putting into our bodies.  The more I hear about what the effects of pesticides and growth hormones are having on us, I feel it is my responsibility as a mother, and as the main cook in our household, to take charge of what my family is putting into their bodies.

Are you familiar with the Community Supported Agriculture (CSA) programs in your area?  Or have you heard of CSA?  I have tried in the past to incorporate as much organic into our diets as possible, but sometimes those cheaper prices get me.  Organic produce, meat, and dairy is often quite a bit more money in our regular supermarkets; however, there are ways to save on these items.  This is where CSA programs come into play.

Here’s how it works:
With a CSA program, a local farm offers a specific number of “shares” to the public for the growing season.  You buy into the farm by purchasing a share (which will feed a family of 4) or you can purchase a half-share, if you are not sure about the level of produce you will be using.  Each week (or every other week if you are doing a half-share), you go to the farm to pick up your box of organically grown produce.  Some farms have other designated pick-up spots, if the farm is not in your exact town.

Most CSA’s are geared towards vegetables; however, some include flowers, herbs, and a little fruit.  A share is somewhat equivalent to a paper grocery bag full of vegetables.  You can also purchase fruit only shares through some farms and add-on organic eggs and chicken to your weekly pick-up.

Through the CSA you will get to know your specific farmer and exactly where your food is coming from.  I know that, if I am going to be spending a little bit more money purchasing organic food, I would prefer to know that my money is going to support our local farmer’s.  Most farms encourage families to come out for a visit.  This is a wonderful way to educate your children on the workings of a farm and to show them where the food they eat comes from.  Additionally, if you have a picky eater, they may be more likely to eat the produce they have seen harvested first-hand.  Some farms have volunteer opportunities and gatherings for CSA members as well.

I highly suggest you check out the CSA programs in your area.  Most farms are taking CSA applications for the 2010 growing season right now – if you are interested, sign-up as soon as possible because shares fill up quickly and you might miss out.  Go to www.localharvest.org/csa or click here to find out more information.


Cottage Mama’s Note:  When searching for a farm in your area, do no disregard farms that my be an hour or so away – check them out because they may have an additional pick-up spot in your area.  Also, consider going in on a “share” with another family if you aren’t sure exactly how the CSA program will fit into your current lifestyle and eating habits.
CZQJSS42F347

The Snowy Cottage Home

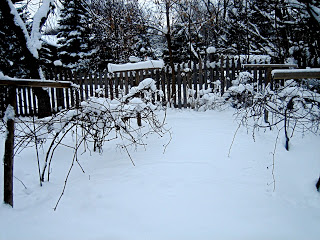
We got almost a foot of snow here yesterday at The Cottage Home!  I guess this is what you would call a white Christmas.  I just had to post this picture of our house all snowy and white.  I usually prefer our home in the Summer months with all the greenery growing up the side of the house, but as I was outside taking this picture, I was in awe of what beauty the snow has brought us.

I love old homes – our cottage home was built in 1934.  I cannot foresee my family and I ever living in a newer home, my husband and I feel that the older the better.  There is something so comforting about living in a home that you know has a history, that has been around since before you had even set foot on this earth.  I feel so blessed that we have been given the opportunity to make this house our home.  Here are a few more pictures of our Snowy Cottage Home.

The vineyard my husband planted on our property – we make our own wine.
Well on our property – no longer working, but charming nevertheless.
Side-View of The Cottage Home
Cottage Mama’s Note: One of these days I will post some interior photos of what we have done with our home.

Olive Cheese Bread

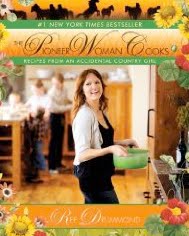
I feel the need to shout this from the roof-top – I LOVE OLIVE CHEESE BREAD!  This recipe is out of my Pioneer Woman Cooks cookbook that I got about a month or so ago.  I’ve been dying to try this recipe and I decided Christmas Eve would be the perfect opportunity.  And, oh my gosh, was it good!

Now this is definitely not a figure-friendly recipe, but when you are looking to indulge a little bit (such as around the holidays), you cannot go wrong with this bread.  I served this with our Christmas Eve meal – we had a barbequed turkey, potatoes gratin, cornbread stuffing with bacon, and sauteed garlic spinach.  In retrospect, the bread would probably be better served as an appetizer or a meal by itself as it is so filling, but I am in love and so is everyone else who tried it.

I apologize in advance – I do not have a picture of my completed bread.  I wasn’t a hundred percent sure it would be “blog-worthy” (as my husband and I say) so I didn’t snap a shot.  And then before I knew it – poof –  the bread was gone.  That’s the magic of this recipe – it is so delicious that you will blink and it will disappear!

So here is the Olive Cheese Bread recipe from The Pioneer Woman Cooks :

Olive Cheese Bread

Ingredients:
One 14.5 ounce can black olives, drained
One 6 ounce jar pimento-stuffed green olives, drained
2 green onions
1/4 pound (1 stick) of butter, softened
1/2 cup mayo (real mayo, no substitution)
1 pound Monterey Jack cheese, grated
1 loaf crusty French bread

Directions:
1.  Preheat the oven to 325 degrees.
2.  Roughly chop black olives.
3.  Roughly chop green olives.
4.  Slice green onions, then roughly chop.
5.  In a large bowl, combine the butter, mayo, cheese, olives and green onions.
6.  Stir until thoroughly combined.
7.  Slice French bread in half, lengthwise.
8.  Spread the olive-cheese mixture in an even layer on each half.
9.  Bake for 20-25 minutes until the cheese mixture is thoroughly melted and beginning to turn light brown and bubbly.  Cut into diagonal slices and serve immediately.

Cottage Mama’s Note:  The Pioneer Woman says you can make this bread a head of time and freeze it for up to 6 months.  Also trying substituting other ingredients for the olives and Monterey Jack – for example, chopped sun-dried tomatoes and mozzarella or artichoke hearts and parmesan.

The Pioneer Woman Cooks is an amazing cookbook with beautiful photography and a wonderful story.  If you like good southwestern, southern comfort food, you must check it out.  It is available on Amazon  right now for only $11.50 (regularly $27.50)!

Tutorials Featured – Someday Crafts

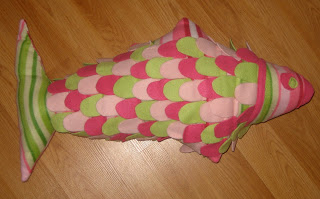
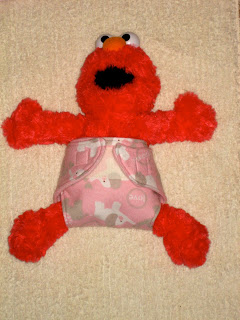
My giant stuffed fleece fish and cloth baby doll diaper tutorials are being featured on Someday Crafts.  Head over to Michelle’s awesome blog and check it out (www.somedaycrafts.blogspot.com )!!

Hope everyone had a very Merry Christmas!

Christmas Stockings

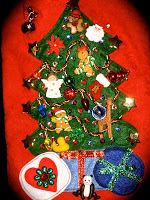
I have always loved my Christmas stocking.  My Mom had a beautiful velveteen stocking that her Grandmother (my Great-Grandmother) made for her.  It was beautiful – with all the hand-sewn bead work – you could definitely tell a lot of time, effort and love went into making that stocking.

When I was a young child, my Mom decided to make my brother, Dad, and I a version of her stocking.  It was SO exciting to have our beautiful stockings with all the special ornaments sewn onto the Christmas trees.  And even to this day, there is something so comforting to me about reaching way down into that velveteen stocking on Christmas morning……it just feels like Christmas.

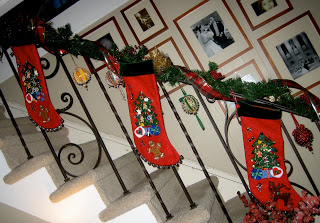
So this year my Mom made a version of my stocking (and her stocking) for Brett, Savannah and Matilda.  They are gorgeous!  Again, you can see the love that was sewn into the stockings!  And I plan to keep this tradition alive and hope to make stockings like these for my Grandchildren someday.

Brett, Savannah and Matilda’s New Stockings
(we will be having their names embroidered on the top)

Some people don’t care much about stockings, they just purchase one and don’t think much about it.  But to me, it is one of the really special parts about our Christmas morning.  Every time I see my stocking, it makes me think of my Mom and my Great Grandma and I feel comfort, love and joy!

My Original Stocking
(made by The Cottage Mama’s Mama)

Handmade Christmas Gifts

Ok, there’s still time!  We have four full days until Christmas, so if you don’t have all your Christmas shopping done – why not go handmade?  Handmade gifts are a wonderful way to show people how much you care about them.  I love handmade because as I am working on a gift, I am constantly thinking about the person I am creating for, imagining how they will enjoy the gift and often reflecting on my relationship with the person.

While there is nothing wrong with purchasing a gift, by all means, I have purchased some gifts this holiday season, but if you have the time (and trust me, some of these things don’t take too much time), try going handmade.  I guarantee you will get SO much more satisfaction out of giving rather than receiving this holiday season.

Since we just had our first Christmas celebration (of three) I can reveal some of my handmade goodies.  So to inspire you – here are some of the things I have crafted over the last month for some special people in my life (more to come after Christmas #2 & #3)!!

Modern Baby Booties (for Savannah’s Godparents little guy, Luca)
For these baby booties, I used the pattern from Amy Butler’s: Little Stitches for Little Ones book.  I used wool suiting material for the exterior and a nice soft brown cotton for the interior lining.  The booties fasten with a velcro closure.
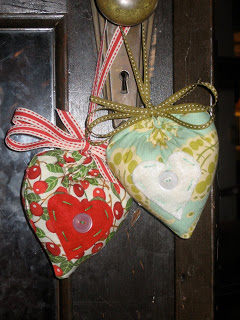
Ornament, Decoration or Pin Cushion (for my Mom and good friend Lara)
I LOVE how these turned out – SO cute!  These can be used as a decoration hung over a door knob anywhere in your home.  Or they can be an adorable Christmas tree ornament or they can even be hung on your bobbin winder and act as a pin cushion.  Here is the pattern for these cutie little hearts (www.thepatchworkorange.com) – the pattern is on the right side-bar.  This is a great pattern for a beginner sewer.  There are no curves in the sewing (all straight lines).  The heart is formed by the ribbon.  If you are new to sewing – give it a try!!
Pillow for the Cottage Mama’s Mama
This pillow was made from Mary Engelbreit’s fabric (Recipe for Friendship).  I used a fabric yo-yo to embellish the pillow.  This pillow will make a great accent in my Mom’s new sewing studio!
Picture (for my father-in-law)
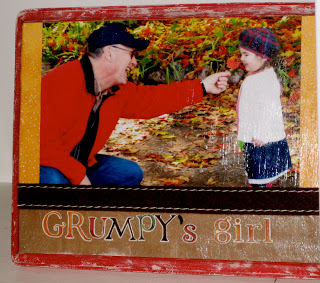
I got this idea from a blog I read (Little Birdie Secrets).  I love this picture and was trying to think of something creative to do with it – when I saw this idea, I knew this was it!  I used an unfinished wood plaque and painted it.  I then added scrapbooking papers and the picture with Mod Podge. The letters are stickers that I Mod Podged over and I then used a strong craft glue to ahere the felt ribbon.  I am posting this now because I’m quite sure my father-in-law doesn’t read my blog (so don’t show him this Gigi, if you are reading).
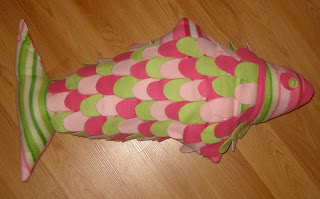
Giant Fleece Fish (for my daughter, Savannah)
This was an original idea I had.  I was searching around the net and didn’t see many stuffed fish.  My daughter loves fish so I thought I would make her this neat one with lots of scales.  Fleece doesn’t fray, so this works perfect because you don’t have to finish the edges.  If you would like to make this fish for your little one, here is my tutorial: (www.thecottagemama.com/2009/12/fleece-fish-tutorial/ ).
Cottage Mama’s Note:  If you would like a tutorial for anything you see here (that I haven’t already posted), please email me or leave me a comment and I would be happy to give you a “how to”!!

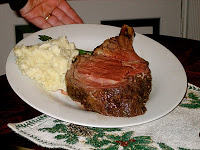
Prime Rib

My Mom, Allen, and brother (Ben) were visiting this past weekend to celebrate an early Christmas.  As my Mom says, “Christmas is not about the day, it’s about the season.”  And yes, this has already been a magnificent holiday season for us and there still is lots more fun yet to come!  We had a wonderful time during my family’s visit – we ate, drank, and had lots of laughs.  For our “Christmas” day dinner we decided to make my Mom’s recipe for Prime Rib.

Many people find prime rib to be an intimidating dish to prepare; however, my Mom’s recipe is fool-proof and is some of the best prime rib I have ever had.  I prepared this last year when we hosted my in-laws on Christmas Eve and they loved it as well.  It is excellent served with homemade horseradish sauce.

My brother, Ben (the professional chef in the family)

So if you are looking for a really special dish to prepare for your family during this holiday season, here is my Mom’s recipe for Prime Rib with Horseradish Sauce:

Prime Rib
Serves 6-10 (depending on roast size)
Ingredients:
2 minced garlic cloves
1 teaspoon salt
2 teaspoons dried thyme
2 teaspoons ground black pepper
2 teaspoons olive oil
5 lb. – 7lb. standing rib roast
Directions:
Preheat the oven to 325 degrees.  Mix all of the first 5 ingredients and make a paste.  Place rib roast in a roasting pan with the fat side up. Spread the paste on the top and sides of the roast.  Cook for 20 mins. per pound of meat.  Your meat will be finished cooking when the meat thermometer reads approximately 150 degrees (for medium-rare).  Allow the meat to rest after cooking for 30 minutes (remember: the meat will continue to cook as it rests).
Horseradish Sauce
Directions:  Combine 3/4 cup sour cream, 1 tablespoon horseradish, a few drops of Worcestershire sauce, and salt and pepper to taste.  Serve chilled.
Cottage Mama’s Note:  We served our Prime Rib with mashed potatoes (click here for link to my recipe), roasted asparagus, and a really nice cabernet sauvignon.

He Makes Me……..

………….want to be a better person.

Now that I am a mother, it is so important for myself and my husband to set a good example for our two little girls.  They may be small, but our oldest picks up on EVERYTHING.  She does the things I do, she says the things I say, she dances the way I dance……..so I mean everything.

As I go about my day to day life I quite often end up in certain situations where there ends up being two paths: the high-road or the low-road.  It would be so easy to take the low road sometimes, but I find myself saying…….”What would my husband (Brett) think?” or “What would Brett do” or “Brett wouldn’t approve if I did (blank)”.  And these thoughts have made me realize that my husband makes me want to be a better person.  He holds me to a higher standard than sometimes I even think I hold myself, but yet I am continually rising to meet his expectations.  If he weren’t in my life, would I be the person I am today?  I would hope so, but I don’t know, because like I said, he challenges me to be the best person I can be; thus bringing out the best in me.

My wish is that everyone has a person like Brett in their life.  Someone that brings out the best in you, someone that challenges you to be the best you, you can be, and someone who you love and respect so much that you constantly are wanting to make them proud.  We should all be so lucky to find someone like that in our lifetime.

So thank you my dear, sweet husband for bringing out the best in me and helping me to be the best for our girls.  You are my “it” and I am so thankful to have you in my life!