I’m so excited to have one of my fabric prints included in the most recent designer low volume collection from Riley Blake Designs called Hush Hush 3. Riley Blake is currently hosting a Shine Together Quilt Along with their FREE Shine Together Quilt Pattern. During the Quilt Along, Hush Hush 3 designers will be individually sharing new and colorful 6″ quilt blocks using Hush Hush 3 and POParrazi. Today I’m sharing a free 6″ block pattern that can be used in the free Shine Together Quilt Pattern in place of the 6″ star block included in the pattern. You can head over to the Riley Blake Designs website to check out more free 6″ block options over there.
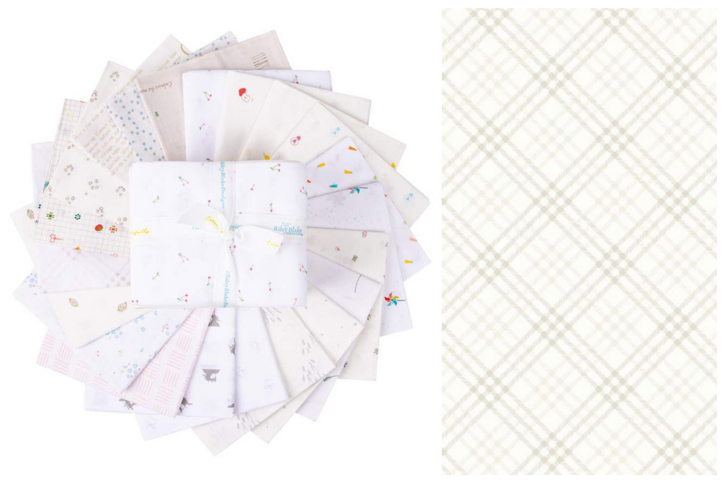
Hush Hush 3 includes 21 different prints from 21 different Riley Blake Designers. My print is a plaid that was found in my Christmas Joys collection but has been recolored into soft neutral colors. There are tons of other super cute prints in the entire Hush Hush 3 line!
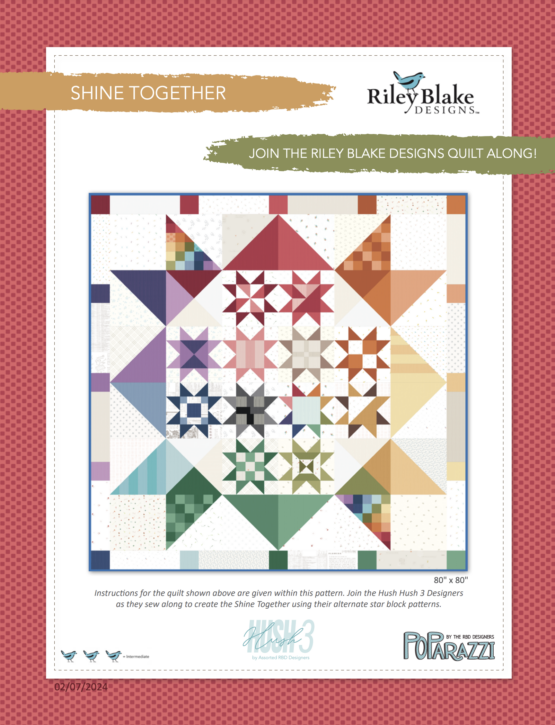
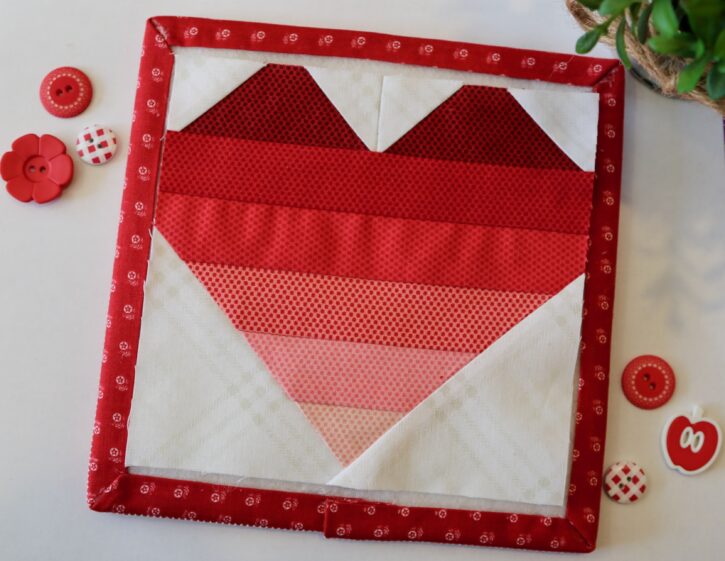
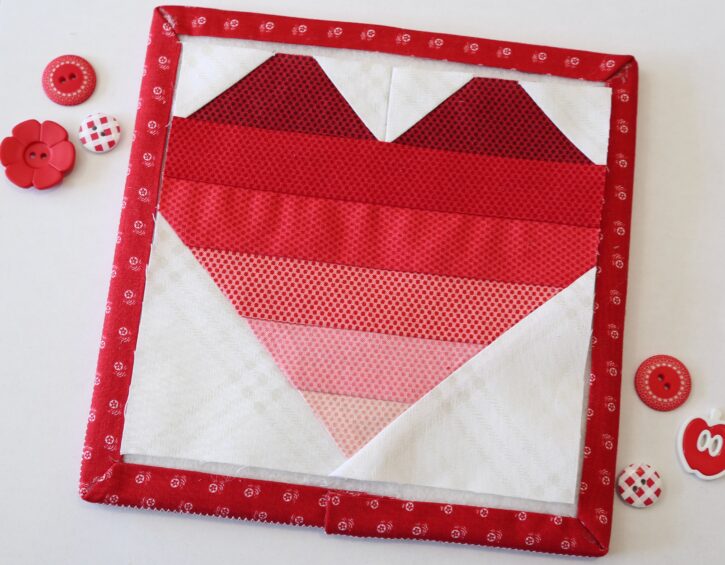
In the photo above you can see the completed Shine Together Quilt. So what I’m sharing with you today is an alternate block to put inside the star blocks. We all like options, right? I’ve created a simple heart block using a series of reds from the POParazzi fabric collection by Riley Blake Designs along with my plaid print from Hush Hush 3. Let’s get sewing…..
Cutting Instructions:
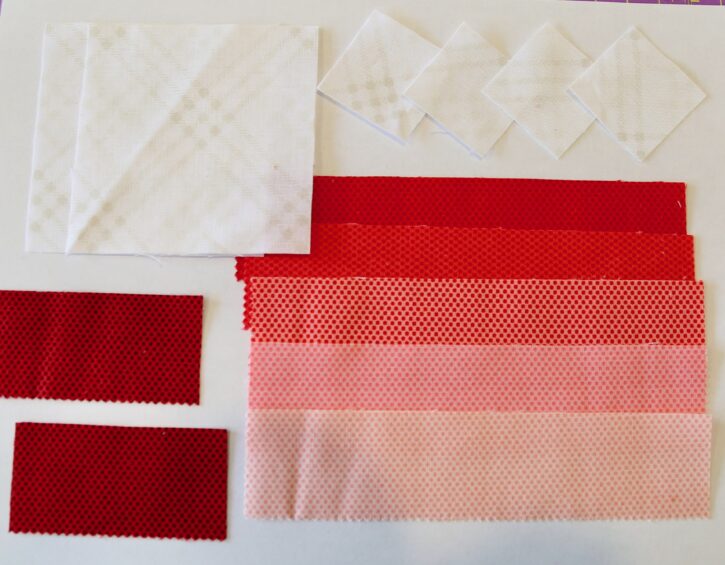
Cut the following from your low volume fabric (shown in Hush Hush 3 Plaid):
4 – 1.5″ x 1.5″ squares
2 – 3.5″ x 3.5″ squares
For the heart portion (shown in POParazzi), cut these each from a different print:
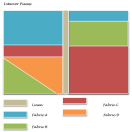
5 – 1.5″ x 6.5″ strips (choose five different prints – 1 strip each print)
2 – 1.5″ x 3.5″ (cut both of these from a different print than the 5 strips, but they should be the same)
Directions:
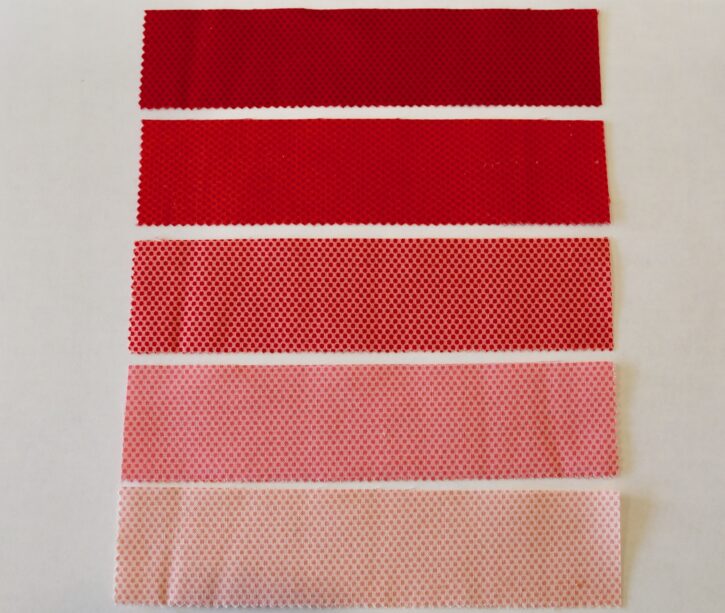
Step 1: Sew the 5 strips of fabric together. I put them in order from light to dark, but you could certainly do a more collage look or different colors of fabrics. Place them each right sides together and sew down the long side.
Step 2: On the wrong side of the fabric, draw a diagonal line down the 1.5″ squares and the 3.5″ squares with a fabric marking pen.
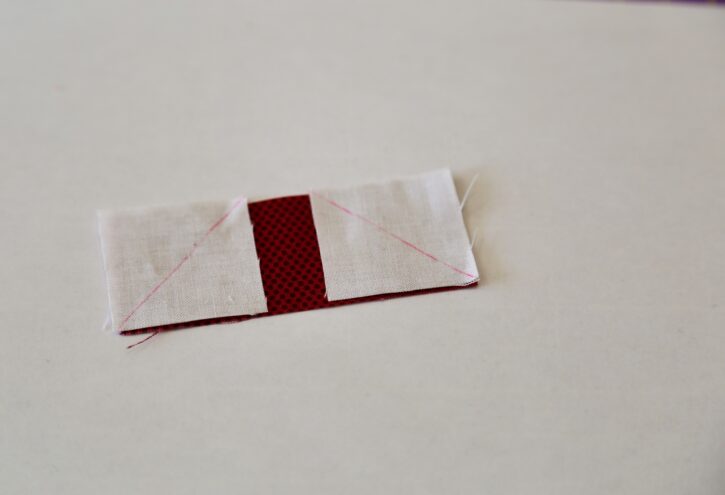
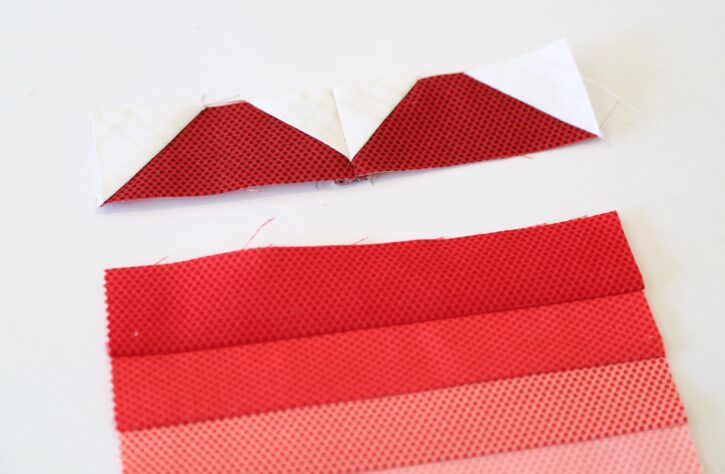
Step 3: Place 2 of the 1.5″ squares on top of the 1.5″ x 3.5″ strip of fabric, right sides together (as shown above). Sew on top of each diagonal line. Do the same for the other 2 of the 1.5″ squares and 1.5″ x 3.5″ strip of fabric.
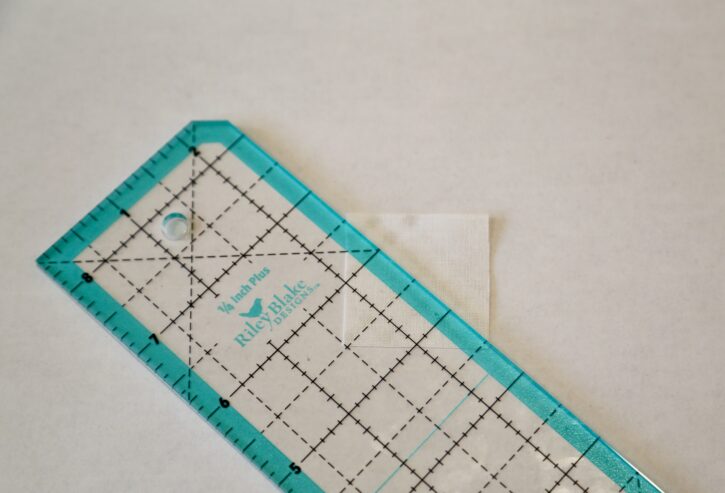
Step 4: Trim the excess fabric (as shown above) and press seams to the dark side of the fabric.
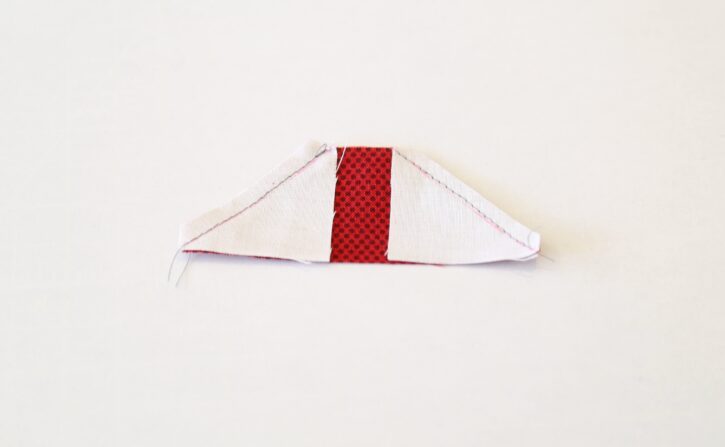
Step 5: Sew the two pieces you just made in the previous two steps together by placing the right sides together and sewing along one of the short sides. Press the seam open or to one side. This will create the top of the heart.
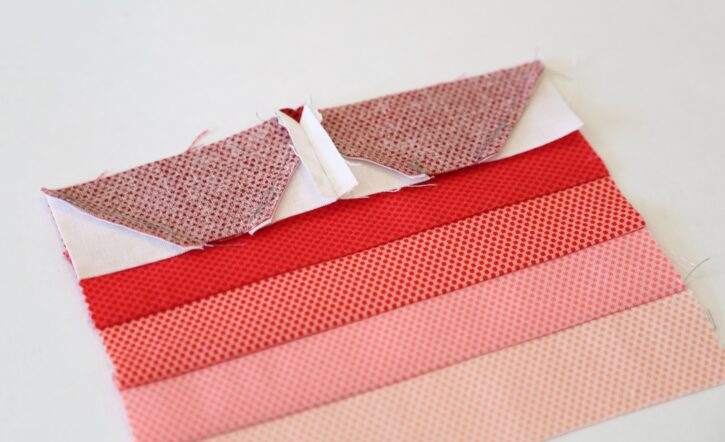
Step 6: Sew the top of the heart to the top of your 5 strips of fabric. Place right sides together and sew down the long side. Press seams towards the darker fabric.
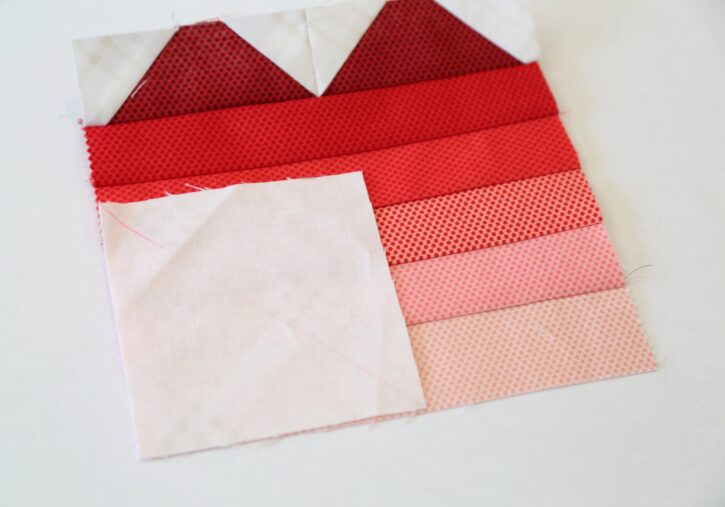
Step 7: To create the bottom of the heart. Place one of the 3.5″ squares towards the bottom of the 5 strips (right sides together) and sew down the diagonal line. Cut off the excess fabric (just like you did for the top of the heart) and press the seams to one side. Do the same with the other square of fabric on the other side, but the diagonal should be going the opposite direction (the diagonal lines should make a V).
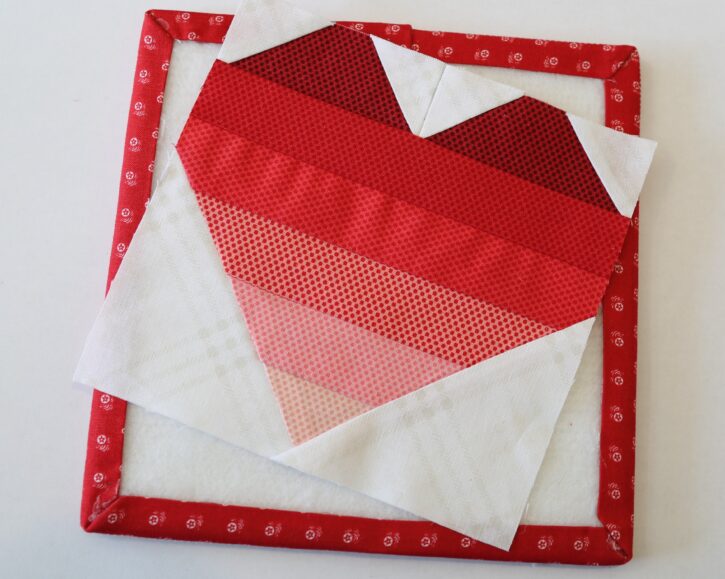
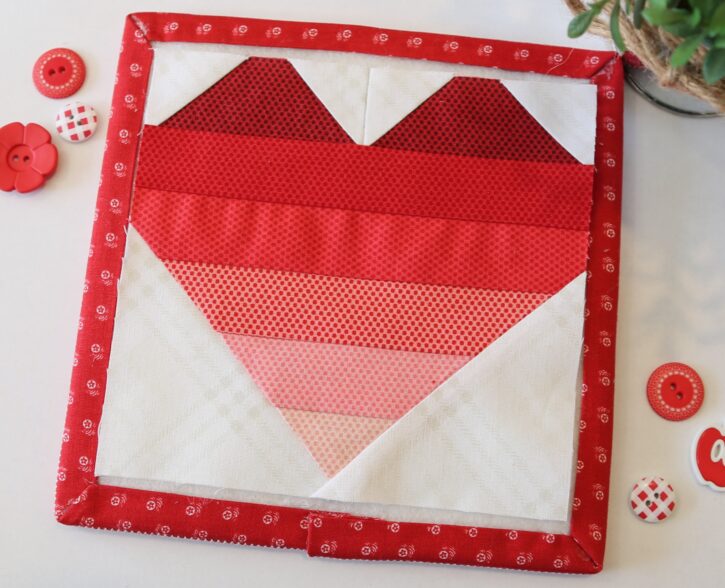
Now you have your completed 6″ heart block!
I think this block would be so fun to do in different colors for a rainbow style quilt. Or maybe in just pinks and reds to theme the Shine Together Quilt Pattern into a Valentine’s Day quilt. There are so many options!
I hope you enjoyed this tutorial!
You can find the Shine Together Quilt Pattern HERE and more of the weekly sewing along HERE.

 Lindsay Wilkes is the owner and designer behind The Cottage Mama. She creates timeless, vintage inspired sewing patterns for children’s clothes. She is also a fabric designer for Riley Black Designers / Penny Rose Fabrics, author of the book ‘Sew Classic Clothes for Girls’ and can be seen teaching nationwide and online in her video series ‘Lessons with Lindsay’ sponsored by Baby Lock Sewing and Embroidery machines.


Is there a PDF file for the pattern? Can’t find it, if there is one.
Thanks.
I was also trying o find a PDF if there is one?
Hi there! No, this is just a free tutorial. The instructions can be found here in the blog post. Thanks!
Hi there! No, this is just a free tutorial. The instructions can be found here in the blog post. Thanks!
I too am unable to find a PDF of this block. I haven’t tried it yet, but possibly open on computer and “print” to a PSF? For now I pinnned to my Pinterest.
Hi there! There is no PDF. The directions are within the blog post. Thanks!