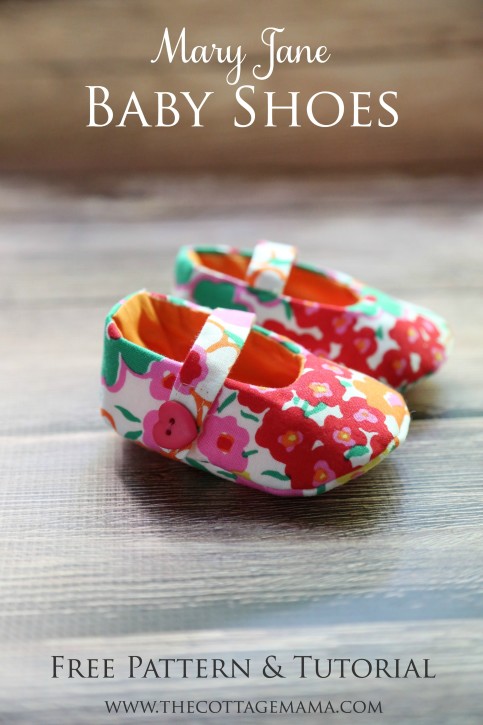
It’s National Sewing Month and today I’m partnering up with Joann Fabric and Craft Stores for their #sewyourstyle blogger campaign and contest sponsored by Joann’s and Pellon. Today I have a free Mary Jane Baby Shoes Pattern to share with all of you as part of this series. We are due to have our fourth child, a sweet baby girl, in about 4 weeks from now so I’ve been busy nesting and sewing a few things for the new little miss. I came up with these Mary Jane Baby Shoes and have the pattern available for you for free here in size 6 – 12 month (this is a simple, hand-drawn pattern).
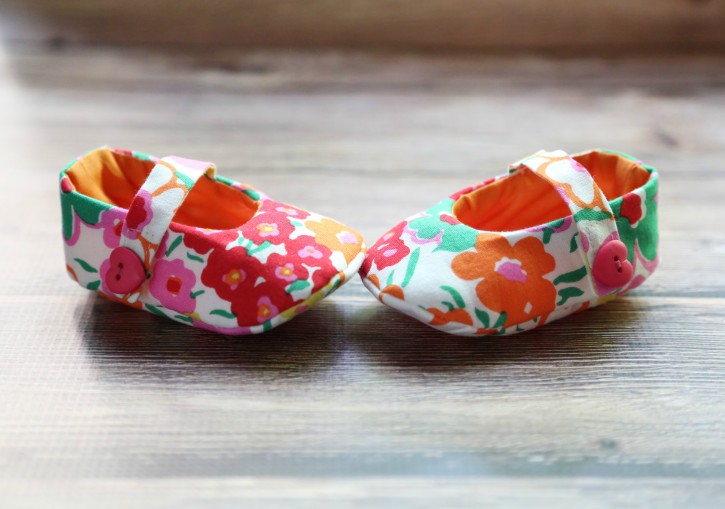
Joann Fabric and Craft Stores wanted us to pick a quilting cotton and use it for a non-quilting project. Well, I’d say that was a piece of cake for this girl since I use quilting cotton on almost every project and it’s usually not for a quilting. I think quilting cotton is so beautiful for clothing, accessories, home decor, baby items and more! I chose this really girly print from Jennifer Paganelli’s new line for Joann’s called ‘Jenny Eliza‘. If you would like to enter the #sewyourstyle contest you can click over to Joann’s to find out all the details.
So let’s move on and get sewing these sweet little baby shoes………
Mary Jane Baby Shoe Pattern
You can print your free pattern by clicking HERE.
Supplies:
1/4 yard exterior fabric
1/4 yard lining fabric
Pellon Fusible Fleece
Lightweight single-sided fusible interfacing (optional)
2 small pieces of velcro
2 small buttons
Basic sewing supplies
Instructions:
ALL SEAM ALLOWANCES ARE 1/4″, UNLESS OTHERWISE NOTED.
SEAM ALLOWANCES ARE INCLUDED IN PATTERN PIECES.
Please note, that you can reduce the shoe size for a 3 – 6 month baby size by reducing the shoe sole all the way around and the exterior curve and back straight edge of the main shoe piece by 1/4″. Any additional sizing changes will need to be through trial and error.
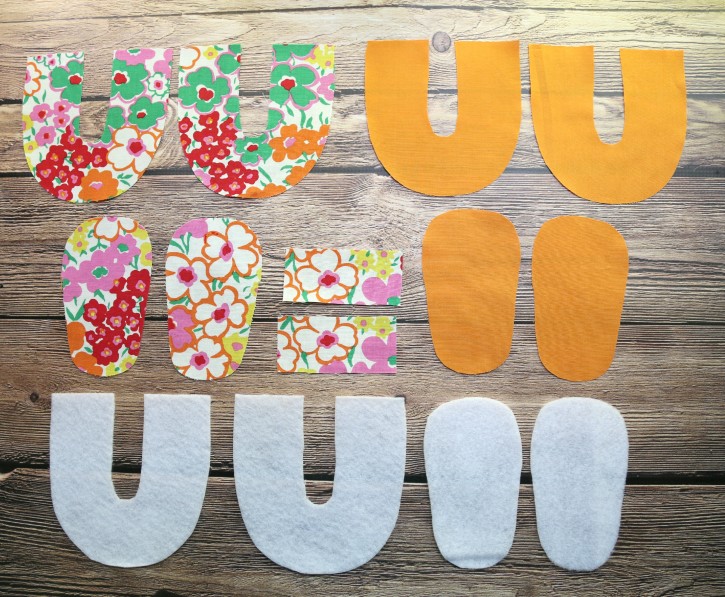
Cut out all of your pieces (again, you can get the free pattern HERE). You will need to cut the following:
Exterior Fabric:
2 shoe soles
2 main shoe pieces
2 shoe straps
Lining Fabric:
2 shoe soles
2 main shoe pieces
Fusible Fleece:
2 shoe soles
2 main shoe pieces
Single-Sided Fusible Interfacing (optional / not shown):
2 shoe soles
2 main shoe pieces
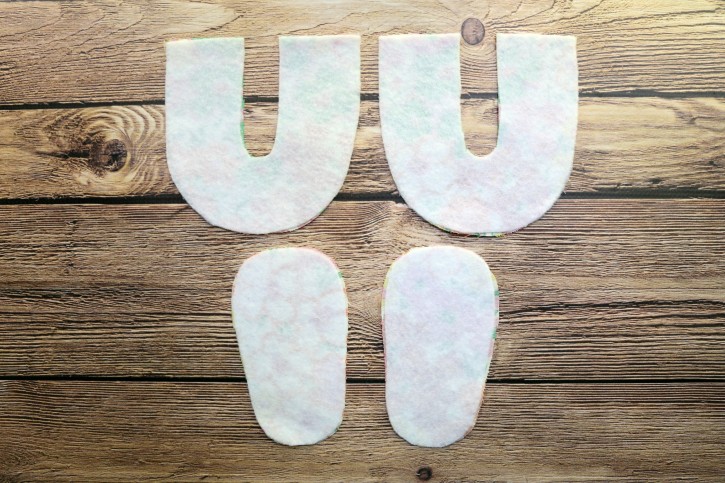
Apply the fusible fleece to the wrong side of the exterior pattern pieces (except the shoe straps). Follow the package instructions. Also, if you would like to add some additional body to the lining pieces, add your single-sided fusible interfacing to the wrong side of the lining pieces at this time.
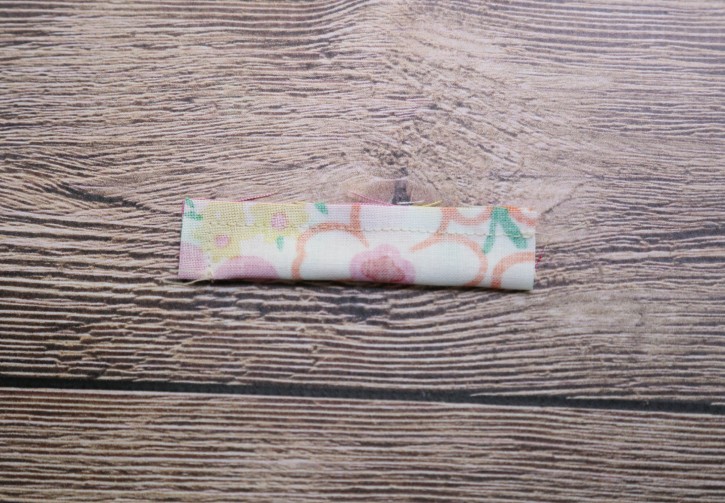
Make the strap for both the shoes. Fold the rectangle pattern piece in half, lengthwise, with right sides together. Sew one short end and down the long side.
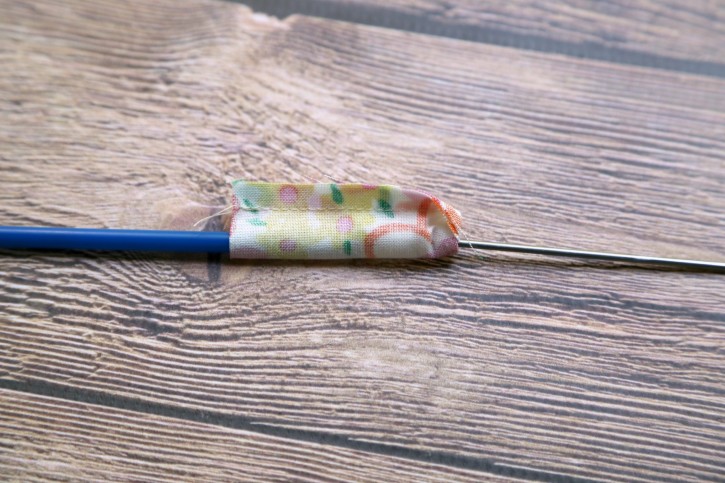
Clip the corners, turn right side out and press. You can use a chopstick or a tube turner to make quicker work of turning the little straps.
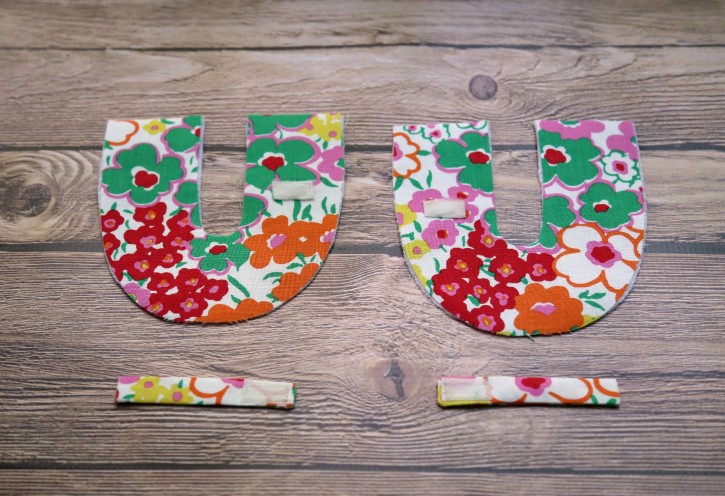
Sew the velcro to the straps and the main shoe pieces according to pattern markings. Sew all the way around the rectangle velcro piece. Pay careful attention to sew them on opposite sides since you will want the shoes to open and close in the opposite direction. Refer to the image above. Sew the straps to the main shoe piece with the velcro side up. Place the strap directly across from the velcro marking on the pattern piece. Line up the raw edge of the interior curve of the main shoe piece and the raw edge of the strap.
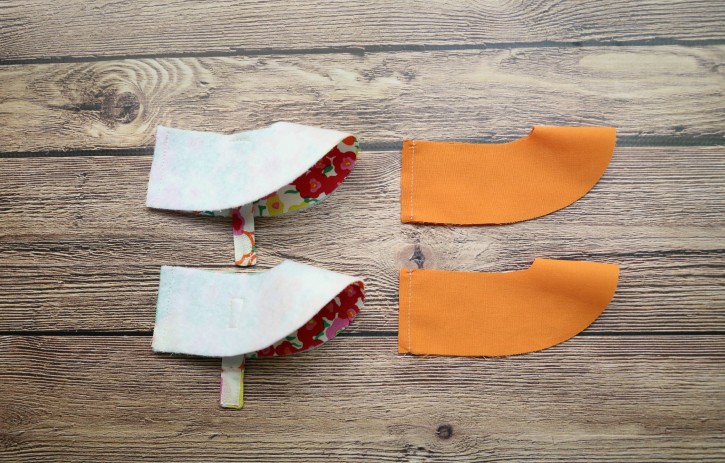
Sew the back of the main shoe piece for the exterior and the lining: Fold the main shoe piece in half, right sides together, lining up the back short, straight edge. Sew along the short edge for all four pieces (2 exterior and 2 lining).
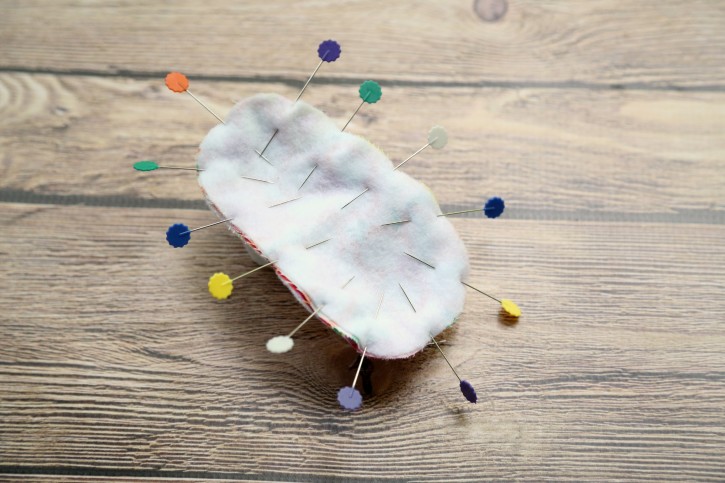
Pin the shoe sole to the main shoe piece, right sides together, lining up the front and back of the sole and main pieces according to pattern markings. Sew all the way around the shoe sole. Do this for all four sets of pieces (2 exterior and 2 lining).
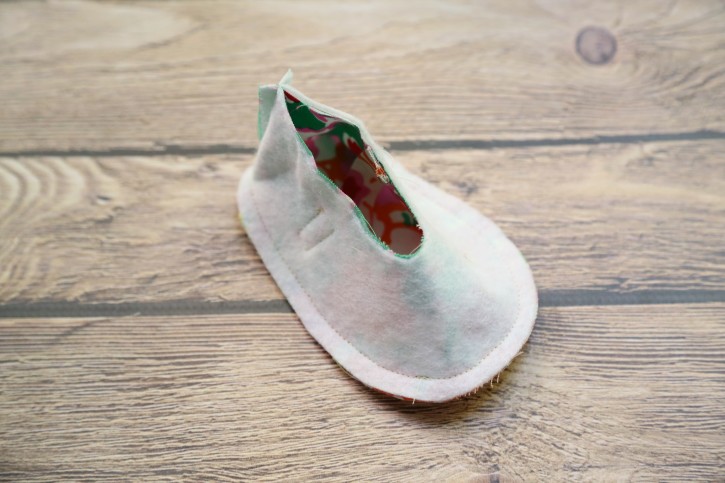
Here is what it will look like after you have attached the shoe sole to the main shoe piece. Cut down the seam allowance using pinking shears, if you have them, or notching the curves to remove bulk so that your shoe will lay nice and flat when you turn it right side out.
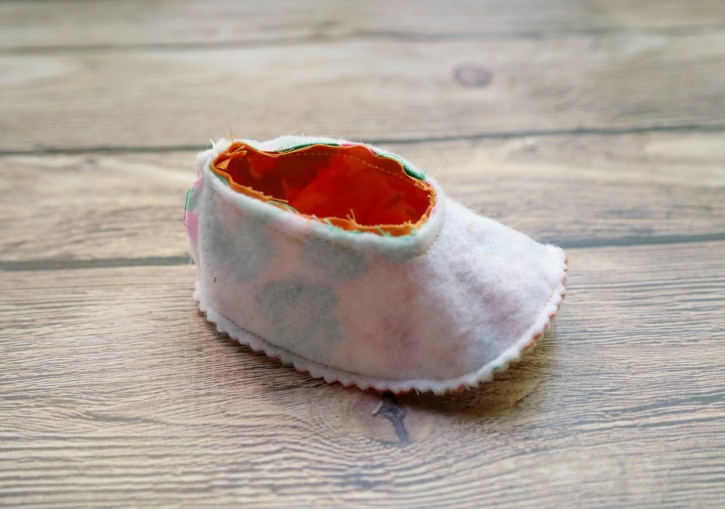
Place the shoe lining inside the shoe exterior with the right sides together lining up the top raw edges. Sew all the way around the top of the shoe, leaving a 1″ opening for turning along one of the straighter edges. Clip the curves, turn right side out and press. You will then be tucking the lining back into the exterior of the shoe. Press really well so that the inner curve of the shoe looks nice and professional. Do this for both shoes.
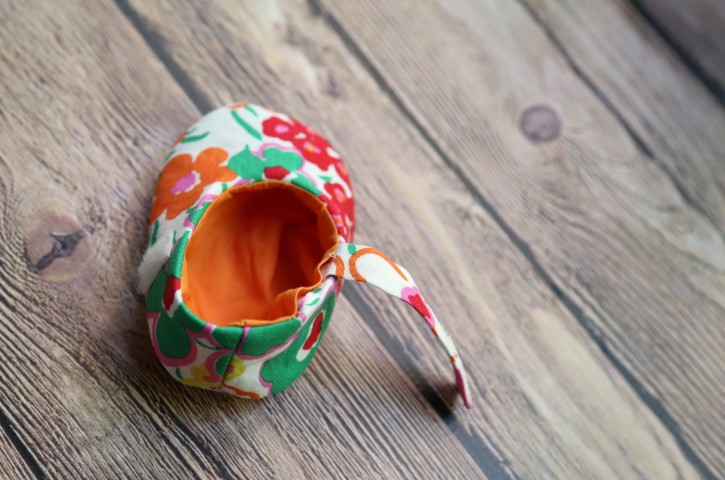
Close the 1″ opening by hand sewing it closed. Use small stitches so that you don’t see the stitching.
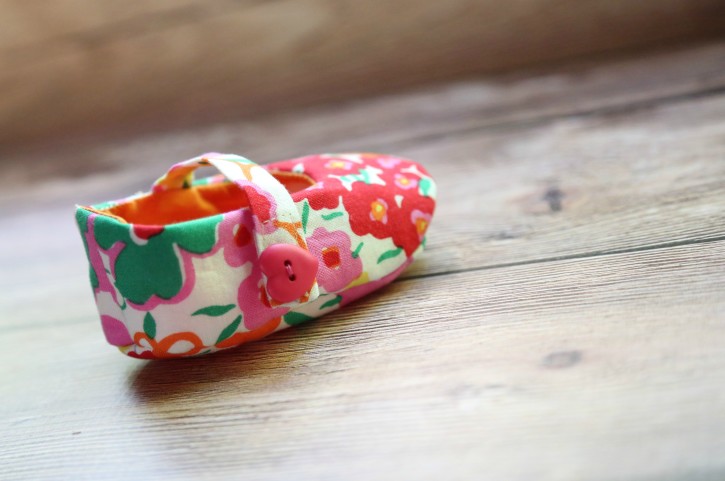
Hand sew your little button in place on top of the velcro on the strap. Make sure to secure it very well. If buttons make you nervous on baby items, then simply leave it off.

And there you have it……..a sweet pair of baby shoes, perfect for a sweet little baby!
Happy Sewing!


 Lindsay Wilkes is the owner and designer behind The Cottage Mama. She creates timeless, vintage inspired sewing patterns for children’s clothes. She is also a fabric designer for Riley Black Designers / Penny Rose Fabrics, author of the book ‘Sew Classic Clothes for Girls’ and can be seen teaching nationwide and online in her video series ‘Lessons with Lindsay’ sponsored by Baby Lock Sewing and Embroidery machines.


Thank you so much for the tutorial. They are adorable!
Wishing you a speedy delivery and early congrats on the soon to arrive baby girl!
Donna
Thank you so much, Donna! We are very excited to meet her!! Have a wonderful day, Lindsay
Thank You for taking the time to make such a great tutorial. Can’t wait to try it out – for the next baby!
Ok so now I’m at work and I want to be at home making baby shoes…not sure for who but Oh My Goodness these are ADORABLE!
Oh my, these are SO adorable!! I’ve got a Craft Gossip post scheduled for tomorrow evening that links to your free pattern:
http://sewing.craftgossip.com/free-pattern-baby-mary-janes/2014/09/23/
–Anne
OMGosh!!! These are adorable!! Thank you for the tutorial and pattern… 4 of my friends are expecting and a pair of these would be perfect with a quilt and bibs!!
These are so gorgeous! You realize how small those little feet will be when you see the picture of the sole with the pins in it! Unless you’re using super-large pins, of course.
Thank you so much for sharing these wonderful baby shoes, they are so cute.
Thank you for this beautiful pattern. I live in South Africa, but I am going to becoming a grandparent for the first time to my son and daughter in law who live in Germany. I am 71 years old so the easier the pattern the better. These bootees are a definite. Thank you for sharing your pattern with others. God Bless.
OH, MY! Cute-as-can-be “Mary Jane BABY SHOES tutorial” sewn for your expected newborn daughter. BRIGHT colorful floral fabric s ideal to coordinate with most “girlie” colored outfits. I love the pink small heart button as the strap closure on each cloth shoe. LOTS OF MOM’S LOVE sewn into these for the tiny feet. Thanks for sharing your shoe pattern. Post a few photos with your baby wearing these shoes as I’m anxious to see her. I’m sure this tutorial will be an INSPIRATION for many MOMS to sew similar little shoes. Sarah in Minneapolis
So precious!! Can’t wait for that sweet baby girl to arrive
For some reason the pattern download link isn’t working for me. I love these little Mary Jane shoes! How can I get the pattern? Thank you in advance and have a great day!
Downloaded the pattern, followed the instructions, made the cutest shoes (yeah!) but alas the sizing is not for 6 to 12 months, more for 3 to 6 months. Any ideas on how to increase the pattern size so my next pair will fit my 7 month old Granddaughter? Thank you.
These are super super cute! I wanted to make one for my 6 month old to match a dress I made for her. I made one shoe and it was SOOO cute I couldn’t wait to try it on her. I put it on and it was way way to small!! ugh I was so sad! This is definitely for a 3-6 month old instead! No way will it fit a 12 month old! Really cute though!!
Help!! Any hints for stitching the lining…the hole is so tiny!!
I had problems at first,too. If you clip the curve very LITTLE it works a little easier. After a while it gets much easier!
I love these shoes and made them (I’ve just finished one) for my 6 weeks old daughter. I’ve scaled the pattern a bit down, but now the shoes fit perfect in length, but they are way to wide for her. Maybe I’ll redo them, because they are cute.
They are SOOOOO adorable!! thanks so much for the free pattern!!
Jessica
just a note though…it makes a size suitable for for newborn to 3 months. Dont make them smaller or they wont fit
I would like to know if there is a pattern to go by for Mary Jane Shoes, I have only been able to obtain the instructions and I am needing the physical pattern.
Hi, I love these shoes! I was hoping to make some for 0-3 months any suggestion on how much to take off of this pattern?
I just made these and they *just* fit my 6 month old. You might want to make them the size she drafted, if you want them to fit the baby for a couple of months. Maybe just sew 3/8 inch or 1/2 inch seams to make everything a tiny bit smaller?
Thankyou so much for share this tutorial. I just made it for my little cousin. It`s not as neat as you made it, but I`m glad I`ve tried
I made these for my 6 month old this weekend and am very excited about it! I don’t usually do “3-d” sewing… I usually stick to quilts and things that lay flat, so I was a little bit nervous about how these would turn out. But I am really happy with the end result! Thank you for the tutorial!
Hi! First of all thanks so much for share this tutorial. I love this shoes and i’ll try to do it for my twins that will be born in march. I also love the fabric. I guess you buy it near your home, but, just in case, do ypu know any shop on line where i can buy such as lovely fabric?
Thanks!!
So glad to see this pattern. Thank you very much. I’m gonna try this one tomorrow.
Thanks, Lindsey!! I love your patterns and now to add a great accessory in time for Easter dresses! Thanks again!!
Terri Miller
SE TN
I love these and want to make some for a friend but I don’t have access to the fleece material (I live out in the African jungle), can I make them without please?
Un tout grand merci pour ce modèle. Je vais l’essayer pour mon petit fils qui va bientôt naître et pour ma petite fille qui a 2 ans.
Thank you so much for the adorable Mary Jane shoe pattern with instructions. I’ve made 6 pairs of them so far, I gave 4 pairs of them to my 3 month old NEW granddaughter. They all came out perfect, most people don’t believe I made them, I’ve gotten sooo many compliments on them.
Sweet!