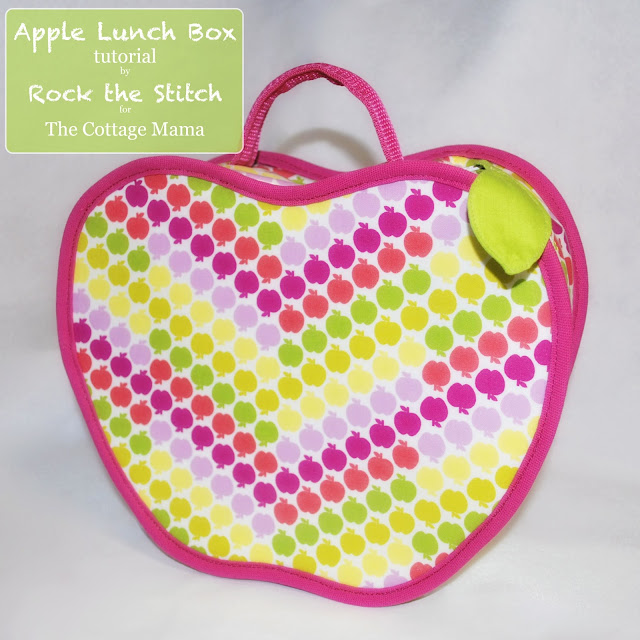
Now that school is back in session so begins the never ending battle for lunch boxes. My kids seem to always leave theirs at school, or buried deep in their closet, or who knows where. But, since I am such a loving mom, I tend to always be loaning out my lunch box (a cheapo given to me free by my workplace) and am constantly left with nothing more than a grocery bag to carry my food in. Well, here is my solution to remedy that problem: a super cute apple lunch box!
This tutorial will guide you through, step by step, how you can make your own insulated apple lunch box. It features a cotton laminate fabric for the exterior (I found this cute Greenhouse Laminate by Erin Morris for Free Spirit at QuiltHome.com), a durable Peltex interfacing, an Insul-Bright thermal insulation layer, and a nylon lining (I prefer Rip-Stop nylon) that is easy to wipe clean.
- Print pattern at 100% (no scaling) and cut out all pieces as directed. *Tip: Cut apple piece from Peltex first an you will have a durable shape to trace onto other fabrics. Again, you can find the pattern here: Apple Lunch Box Pattern
- Lay your Peltex apple piece, fusible side down, over your laminate, right side down, and fuse together with iron. Repeat for other side.
- With laminate side of apple still facing down, lay Insul-Bright on top with shiny side up. Then lay your nylon lining over those and align all layers.

- *Tip: Holes in laminate and nylon will be visible. “Pin” layers together with paper clips to avoid unnecessary holes. Other common household items suitable to “pin” with include hair clips, bag clips, and fridge clips.

- Edge stitch to secure all layers together. Repeat for other side.
- Set apple shaped pieces aside. We will now assemble the top and zipper panels. Start with your 3″ wide zipper panels first. Layer your pieces over each other and align one long raw edge in this order: Insul-Bright shiny side up, nylon lining, zipper right side up, laminate right side down. Sew together with 1/2″ seam allowance.

- Trim seam allowance to 1/4″ with out clipping through zipper. Fold layers away from zipper and topstitch 1/4″ away from zipper.
- Repeat steps 5 and 6 for the 1.5″ zipper panels. *Tip: If using a zipper that is longer than your panels you can unzip it all the way to the end before sewing. This will place your zipper pull out of the way when attaching panels.
- If you used a longer zipper, secure it near the panels short edge and trim excess.
- Align your top panel pieces over one short edge of your zipper panel in this order: Insul-bright shiny side up, nylon lining, zipper panel, laminate right side down. Sew together using 1/2″ seam allowance. Trim seam allowance to 1/4″.
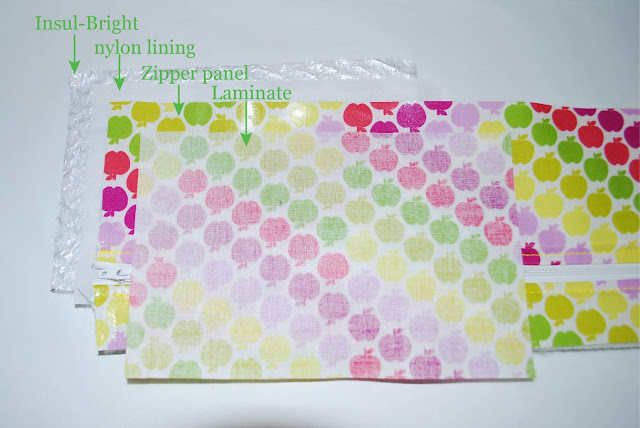
- Fold top panel pieces away from zippered panel and topstitch in place.
- Align raw edge of top laminate panel with raw edge of zipper panel with right sides together. Your zipper panel should now be folded to make a loop with the top panel. Push the folded/looped end to the side and pull your Insul-Bright and nylon lining layers of the top panel up to match raw edges. Stitch raw edges with 1/2″ seam allowance. Trim seam allowance back to 1/4″.
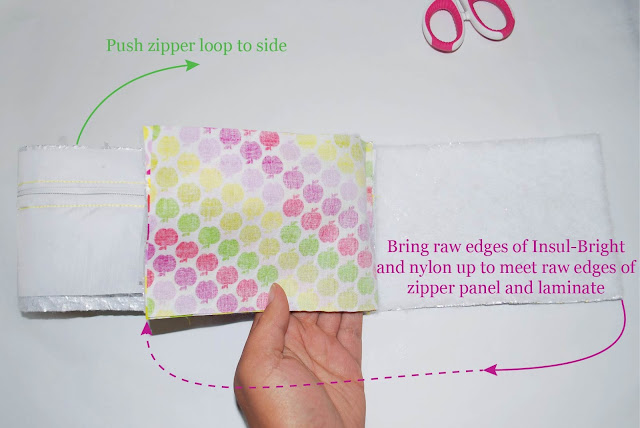
- Flip panels so all layers are right side out. Topstitch the top panel 1/4″ from seam we just made.
- Align cording down center of one Nylon webbing strip.

Place second webbing strip over the top, sandwiching the webbing between. Stitch near ends of cording to hold in place. Then stitch along the long edges.Attach the handle near the top panel seams.
Your top and zipper panels are complete! Now let’s start putting it all together.
- To find center of top panel fold it in half lengthwise, matching seams where they attach to zipper panel. Mark center point on both raw edges.
- Align center point of top panel with top center of apple shaped piece with nylon sides together. Pin in place. Continue to pin all the way around apple piece. Baste together using scant 1/4′ seam allowance.
- Repeat for the other side.
- Set aside the lunch box. Press bias strips to make tape as follows: fold in half lengthwise and press, open up fold and turn long raw edges in to meet at center and press, fold in half lengthwise again and press.
- Open up folds at short ends and align with right sides together. Sew
together using 1/4″ seam allowance. Press seam open. You should now have a
continuous bias tape loop. - Repeat steps 18 and 19 for other bias strip.
- Place bias tape over raw edges of lunchbox. You should have to
stretch it slightly. This will help it lay flat around the curves. Sew
bias tape in place. Repeat for the other side.
- **Optional** To make leaf shaped zipper pull simply lay leaf pieces over each other, right sides together, aligning all edges. Sew together with 1/4″ seam allowance, leaving opening on one flat side of leaf for turning. Trim seam allowance to 1/8″. Turn leaf right side out, fold under opening, and press. Topstitch close to edge around entire leaf.
2. Loop stem through zipper pull. Fold end under 3/8″ and then fold another 3/8″ and secure to stem


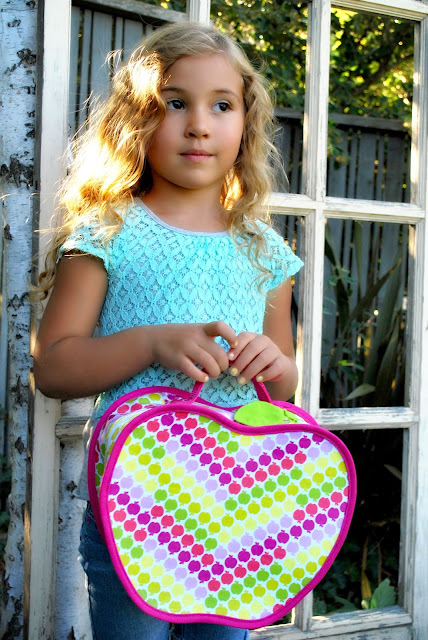


 Lindsay Wilkes is the owner and designer behind The Cottage Mama. She creates timeless, vintage inspired sewing patterns for children’s clothes. She is also a fabric designer for Riley Black Designers / Penny Rose Fabrics, author of the book ‘Sew Classic Clothes for Girls’ and can be seen teaching nationwide and online in her video series ‘Lessons with Lindsay’ sponsored by Baby Lock Sewing and Embroidery machines.


Super cute! Thanks for sharing! Its a must make freebie!
Thanks so much for stopping by!
WOW, Rebecca! Super cute and an awesome tutorial! Great job!
Thank you for stopping by! I think Rebecca did a fantastic job too!
Very good idea, and so nice! thanks for sharing!
Thank you for taking the time to comment! Have a great day
How sweet this lunch box is!! I will hop on over to Rebecca’s blog right now!! Thanks so much for sharing the loveliness!
Yes, please go visit her……she does a fantastic job! Thank you for commenting and have a great day!!
So stinkin’ cute!
Thanks, Ayelet! Didn’t she do a great job with this tutorial? I think my girls each need one for sure!
I love this so much! Awesome, Rebecca!
Like all the projects on your site…just lovely! I think this Auntie will be whipping some of these up for her favorite kiddos!
That is SOOOOOO cute!!! I’ve linked to your tutorial over at Craft Gossip:
http://sewing.craftgossip.com/free-pattern-apple-lunch-box/2013/09/18/
–Anne
Awesome! Rebecca definitely “Rocks” the stitch!
This was so much fun. Thank you for having me Lindsay. And thank you everyone for your sweet comments. You have all made my day!
How much fabric is required for the laminate fabric?
It would take 3/8 yard of 44″ wide fabric, or it could be made with 1/4 yard of 60″ wide fabric. The yardage is the same for each of the different fabrics: Laminate, nylon, and Insul-Bright. The Peltex is only 20″ wide so it also requires 1/3 yard.
Ahh! This is so adorable! I love this! Thanks for posting!
Thank you so much from France. It’s just what my daughter needs.
bonjour
très beau ce petit sac, mais quand même un souci par moyen d’avoir le patron , il est dit que le chargement est trop important.
Alors comment faire pour l’obtenir ? j’ai hâte de faire ce modèle
merci pour la réponse
cordialement
lydie
Bon je n’ai pas terminé de regarder cependant je repasse dans la journée
Je pense que ce post va aller sur un blog personnel
How do you stitch the binding on sew perfectly? Mine is a flat out mess LOL
I love this! Thank you, Thank you.. Making this for my daughter.. She’s going to love it..
Hi Lindsay. Found this project on Pinterest. I love that its so easy I guess my nieces could try making this for Christmas gifts. We are having a “DIY Christmas Present” tradition in our family starting this year so I’m helping them compile a good list of sewing projects. They have been sewing for almost a year now so I think they can make this one with my help of course. TFS:)