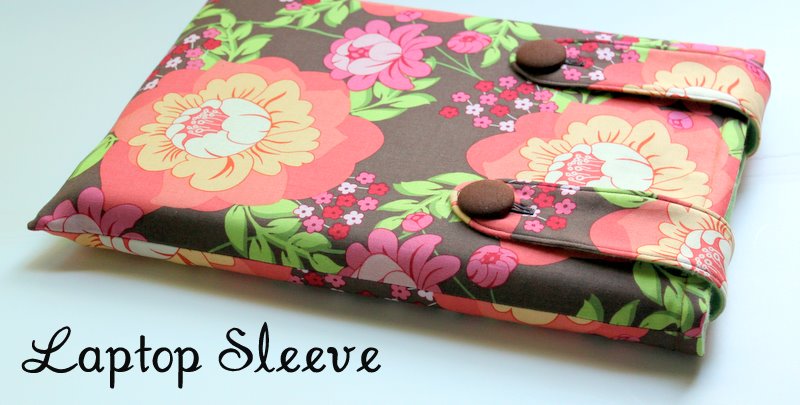
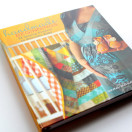
In case you missed my tutorial in Delish Magazine, I wanted to share my Laptop / Kindle/ I-Pad Sleeve Tutoiral with you. Gift giving season just around the corner and what better way to show someone you care than with a custom laptop sleeve.
This pattern can be made for any size laptop, Kindle, or I-Pad by adjusting the measurements accordingly. I used girly fabric here, but you could definitely make this more “manly” by using a more masculine print or perhaps even some wool suiting material.
Supplies:
Cotton fabric for exterior
Fleece fabric for lining
2 buttons
Sewing machine
Seam-ripper
Thread
Iron
Ironing board
Fray Check (optional)
Fabric marking pen, chalk or pencil
Instructions:

1. Gather your supplies.
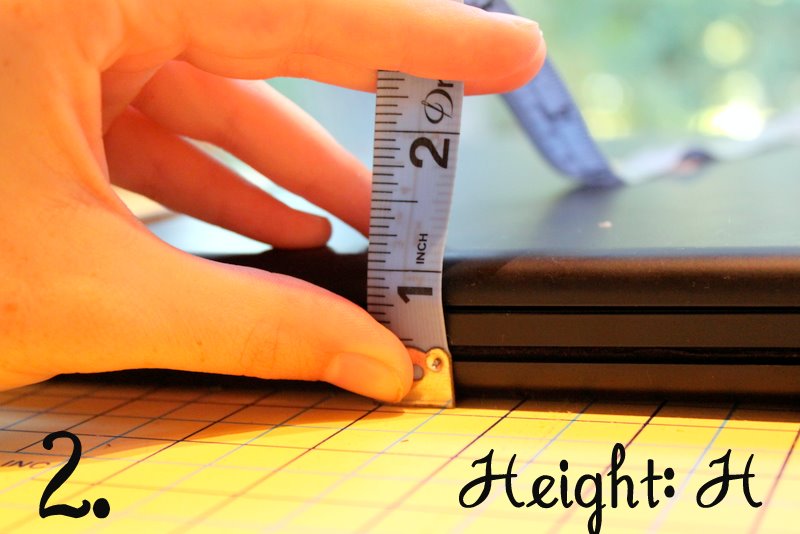
2. Determine the sizing for your laptop sleeve. First, measure the height of your laptop.

3. Next measure the length.

4. Finally measure the width.
Once you have these measurements you can determine your pattern size. Here is how you calculate your dimensions for the large fabric pieces (interior and exterior): (L + H + 1) X (W + H + 1). For example, my laptop was 9 inches wide (W), 12.75 inches long (L), and 1.25 inches tall (H), so my calculation was (12.75 + 1.25 + 1) X (9 + 1.25 + 1) = 15 X 11.25. I cut my interior and exterior fabric pieces 15″ X 11.25″ (4 pieces total).
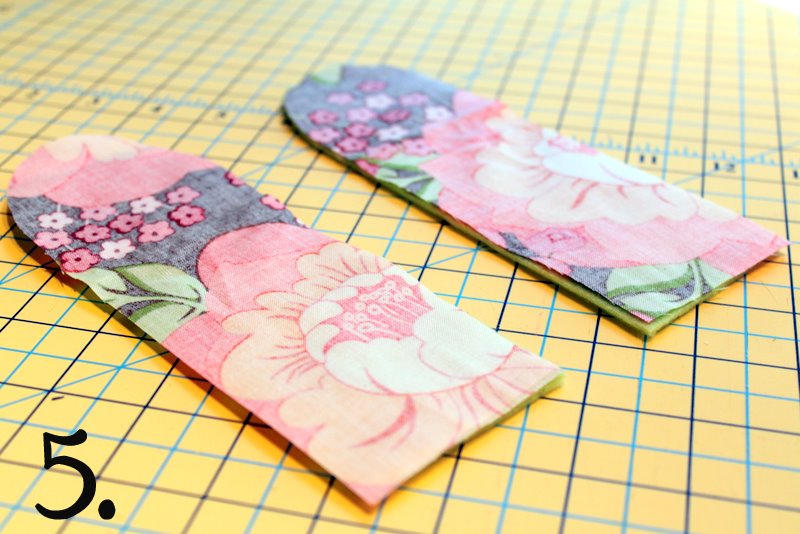
5. For the straps, draw a pattern for yourself (freehand) on a piece of paper and use this as a template. These straps are 2.5 inches wide by 7.5 inches tall (up to the very top of the curve). Cut two from the exterior fabric and two from the fleece (lining). Place exterior fabric right-side down on top of your lining (fleece).

6. Stitch along both long sides and the curved top, leaving the bottom open (1/4″ seam allowance).

7. Here are both of your straps after stitching them together.

8. Trim the excess fabric off around the curve. This will help it to lay nice and flat.
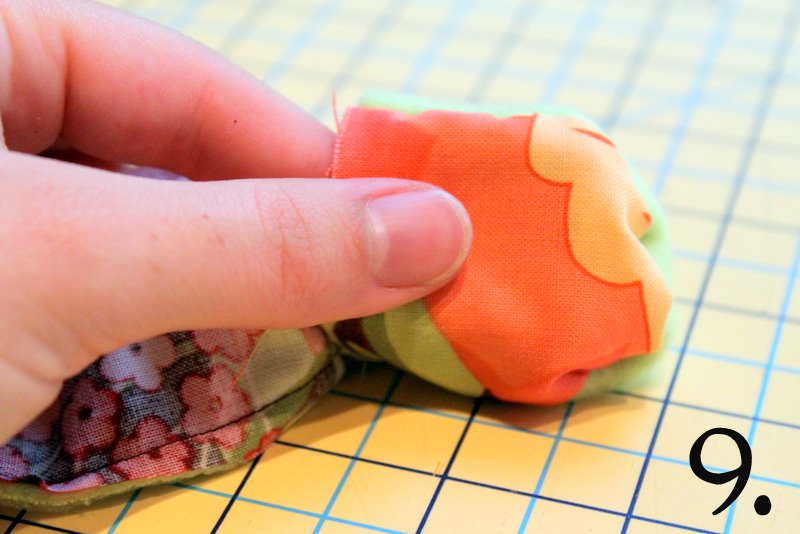
9. Turn both straps right-side out.

10. Press with a hot iron.
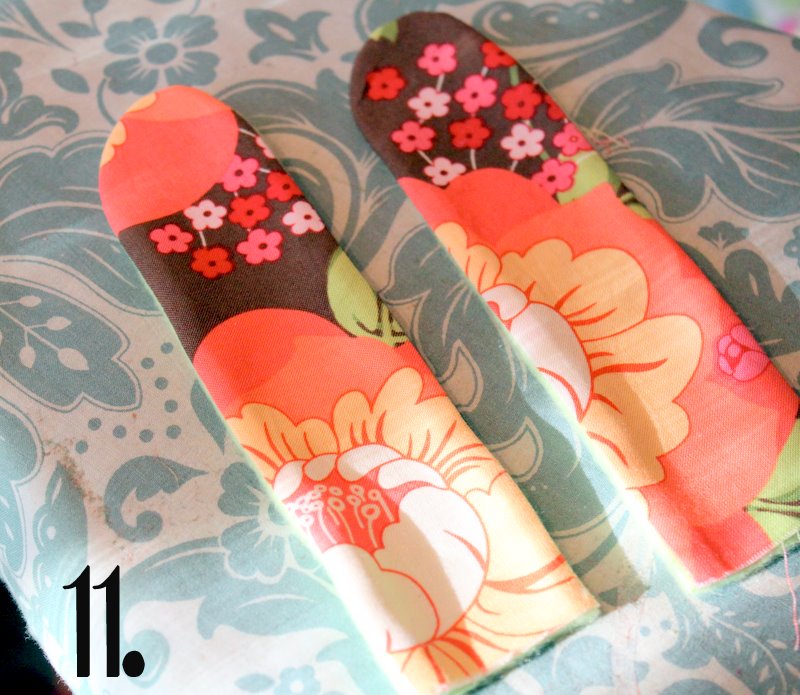
11. Here are both straps after pressing.
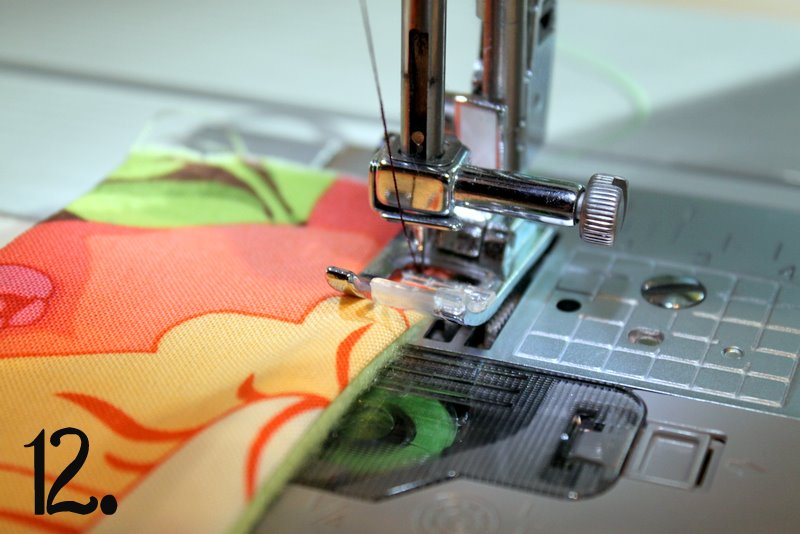
12. Top-stitch on both long sides and the curved top (1/8″ seam allowance). Do this in a coordinating thread.

13. Here are both straps after top-stitching.

14. Attach the button hole foot to your sewing machine.

15. Prepare to sew a button hole in each strap (according to your machines directions). Start button hole 1/2″ from the end of the strap. Make it as big or as small as you need, depending on the buttons you have chosen to use.

16. Here is the completed button hole.
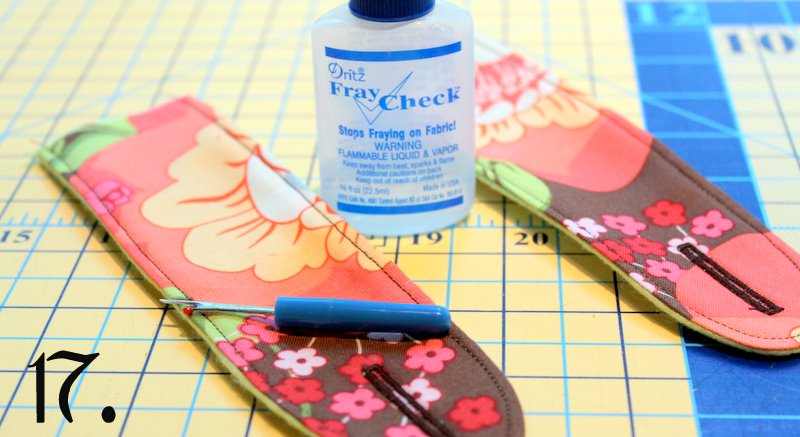
17. Now it’s time to open both button holes.
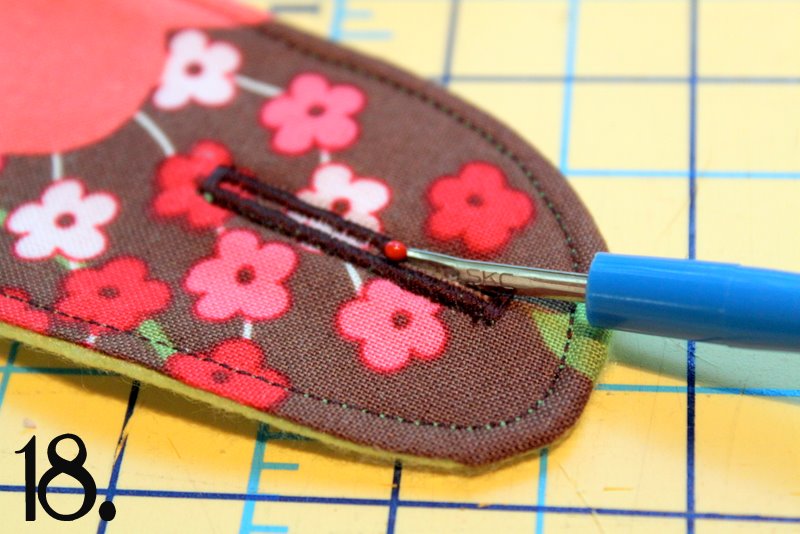
18. Take your seam-ripper and open the inside of both button holes.

19. Use Fray Check on each button hole after opening. This is entirely optional, but it really helps to prevent any additional fraying.

20. Pin both sides of your exterior fabric right-sides together. Pin the two long sides and one short side.

21. Stitch all three sides (1/2″ seam allowance)
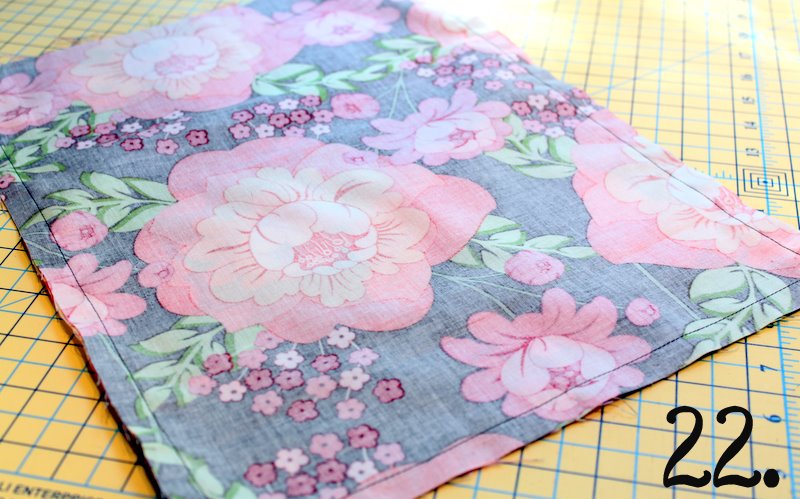
22. Here is your exterior fabric after sewing all three sides.
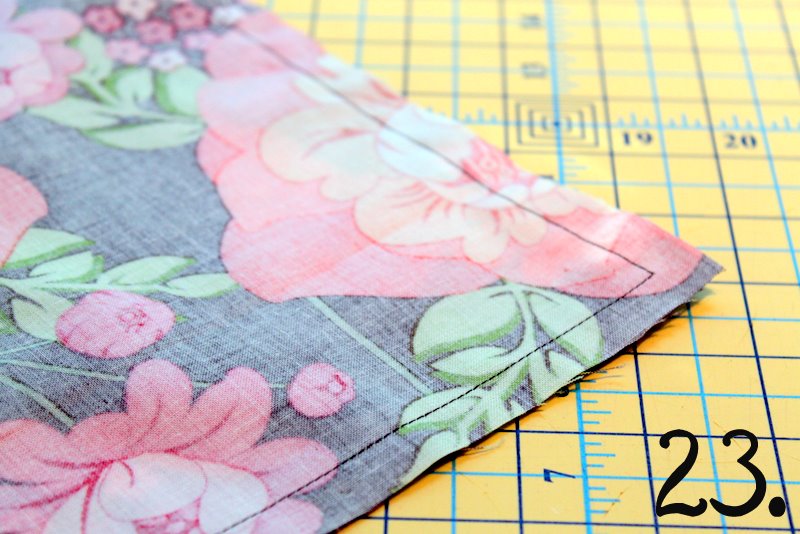
23. It is important to remove the extra fabric in the two corners.

24. Clip both corners to remove any extra bulk from the fabric.
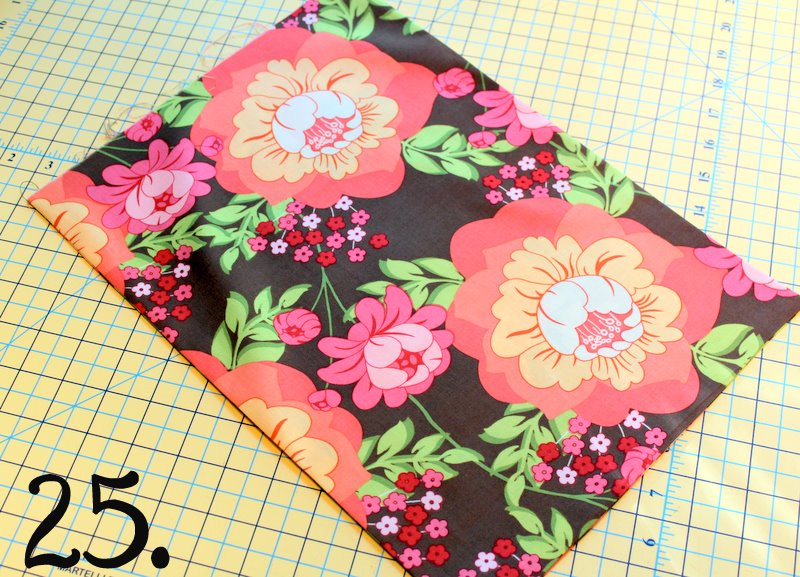
25. Turn right-side out and press.

26. Pin the straps into place. Line up the raw edge of the strap with the raw edge of the exterior fabric. Measure in approximately 1.5″ on each side.

27. Baste straps into place. Set machine stitch length to 3.5 and stitch along the edge (1/4″ seam allowance).

28. Pin both long sides of fleece (lining) together.

29. Stitch down both long sides (1/2″ seam allowance). Stitch part of one short-side together, but leave an opening in the middle.

30. Make sure to only stitch in about 1/3 of the way on the short side of the fleece. The opening needs to be in the middle for you to be able to turn the laptop sleeve later. Clip the corners to remove bulk.

31. Feed the exterior fabric in through the hole in the fleece.
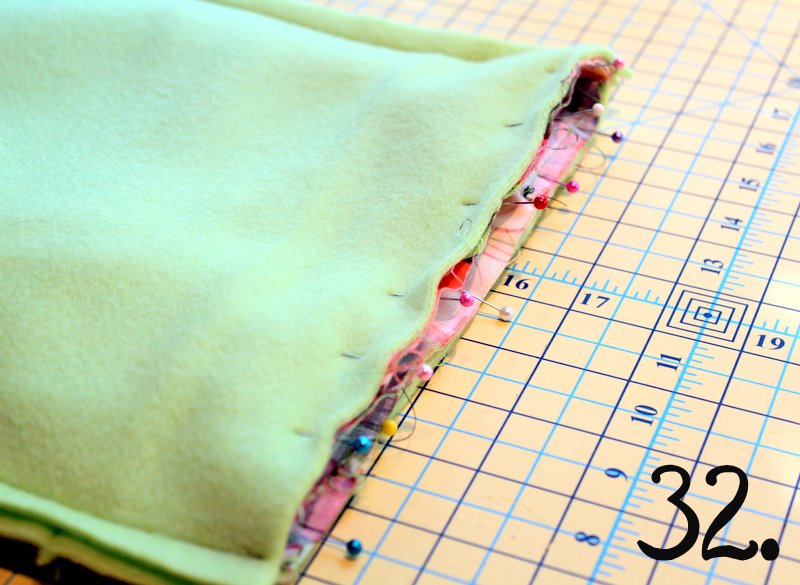
32. Line up the raw edge of the exterior fabric and the raw edge of the fleece. Pin in place, right-sides together.

33. Stitch around the top (1/2″ seam allowance).

34. Here is the laptop sleeve after you have stitched around the top.
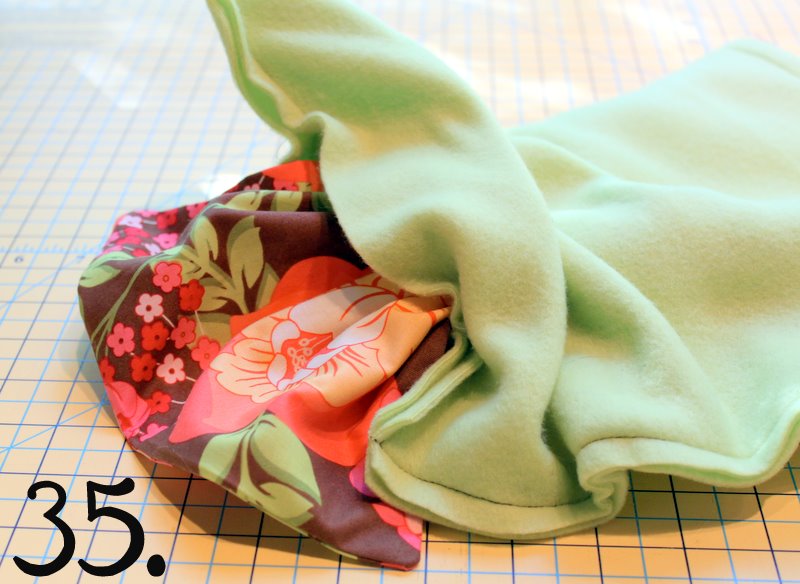
35. Now pull the exterior fabric back through the hole you left open in the fleece.

36. Turn the fleece right-side out as well.

37. Here is the hole that was left open in the bottom of the fleece lining.

38. Close the hole by slip-stitching it closed by hand.
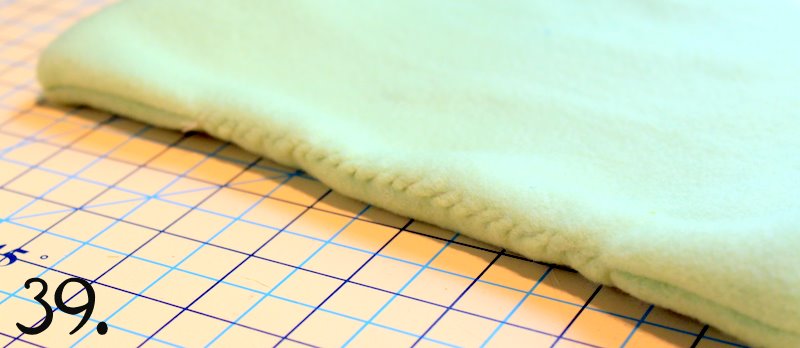
39. This is the lining completely closed. Tuck the lining into the exterior fabric. Work the corners from the interior and exterior fabric into one another.

40. Top-stitch around the top opening. Use a coordinating thread (1/2″ seam allowance).

41. If you would like to sew on your personal clothing label, do so at this time. I placed mine on the back-side in between the two straps.
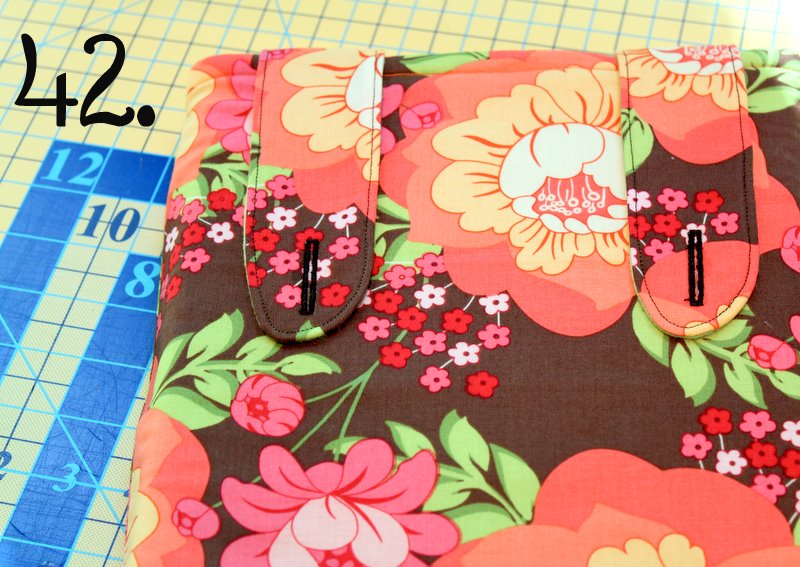
42. Fold over both straps.

43. Using a fabric marking pen, chalk or pencil, mark your button placement. Stitch by machine or hand-sew buttons into place.


 Lindsay Wilkes is the owner and designer behind The Cottage Mama. She creates timeless, vintage inspired sewing patterns for children’s clothes. She is also a fabric designer for Riley Black Designers / Penny Rose Fabrics, author of the book ‘Sew Classic Clothes for Girls’ and can be seen teaching nationwide and online in her video series ‘Lessons with Lindsay’ sponsored by Baby Lock Sewing and Embroidery machines.


This is the cutest thing ever! Love it 🙂
Ohhh, I’ve been hunting for a laptop case tutorial but haven’t found one I liked yet – this is perfect!!! Great job and I heart the button details!
A fantastic tutorial!!!
What a GREAT idea – thank you for the tutorial, I see lovely Christmas presents in some iPad owner’s future…
So happy I stumbled on your site!
I have been looking for a laptop cover for ages but never found anything I liked….alas, I dont sew! Ill bookmark this and perhaps get a sewing machine for christmas!! too cute!
Olá, Lindsay.
Eu adorei esse tutorial.
Além de parecer muito fácil de fazer, ele também é muito versátil, pois do mesmo passo a passo podemos fazer também uma capa para o celular ou para o game.
Perfeito !
Obrigada por compartilhar.
Em breve pretendo colocar um link em meu blog direcionando para o seu tutorial, ok ?
Beijos.
great tutorial, thanks for sharing. I have added it to me ‘Christmas Gifts to Sew’ round up post, I just wanted to let you know.
Jo
http://jojoebi.blogspot.com/2010/10/lots-of-gifts-to-sew.html
simply wonderful! and wonderful blog! love it!
Thanks for this great tutorial! I am a new sewer and this was an easy to understand pattern. I feel so accomplished now that I have a pretty new laptop sleeve.
Thanks again!
Wow, I might be able to tackle this! Thanks for the inspiration!!
The number one reason why people buy laptops is because they can take it anywhere. If you constantly have to go on trips, a laptop will be very useful. Your own laptop will have all your e-mail, software’s, presentations, sales material etc.
I love this project. I made one for my new mini laptop but I measured over and it is way too big. I guess I should have followed your directions more closely. Thanks for the great inspiration.
This is such a great tutorial! Thanks so much. I featured you on my blog:
http://aworldofcrafts.blogspot.com/2010/11/laptopipad-sleeve.html
Awesome tute! Love the cover – it is absolutely perfect and very sweet!
I definitely need to make one of these! I carry my laptop everywhere and a cute cover is a must 🙂 Now, I just have to learn how to sew, ha!
Hello! I love this idea. And your tutorials are great. I featured it on my blog today! Love if you stopped by! And if you don’t mind – while your there clicking on my widget. Each click we get P&G is donating 1 days worth of water! Thanks!
Amanda
todaystoptwenty.blogspot.com
your tutorial is great! I am going to make this for a dear friend for Christmas! Thanks so much for sharing 😉
lindsay~awesome tutorial but what is the floral fabric that you used?!!! I LOVE IT!
Thank you so much for posting this tutorial. I’m helping out a family member with a christmas gift. Gorgeous photos and clear steps. Thanks a million!
I’m making this for my aunt for Christmas! Thank you for the very clear instructions. The only one I don’t understand is #35 – does the outer fabric have to go through the tiny opening in the bottom of the lining? Why can’t it just go in through the top?
Thanks again and I can’t wait to make it!
Sarah,
Yes, you got it – the exterior fabric is pulled through the opening you left in the bottom of the lining (so make sure not to make the opening too small). I left about 3-4 inches open at the bottom.
Amy – The fabric is from Sandi Henderson’s “Meadowsweet” line.
Oops!! I typed wrong – I meant step #31, where you have the exterior fabric being fed through that opening in the fleece before being sewn along the top edge. Does it not work to just set it into the fleece from the top?
Sorry! I see why the whole thing has to be turned through that opening in step #35 🙂
Hey Sarah. I put my fabric through the top and it didnt make a difference. Thats what I was confused about but tried it and it worked. 🙂
Wow! Thank you for the great pictures and details. I love it.Wonderful job of explaining the whole project.
Sue K.
Too cool! I need to make a laptop sleeve for the new-to-me laptop I received to use for my embroidery designs. This tutorial is exactly what I have been looking for! Thank you.
~Kimberlee
http://www.TheSpunkyDiva.com
Great tutorial!!! I made one for my mother for Christmas and she loved it!!! I am a new sewer and didn’t realize until the last minute that I didn’t have a buttonhole foot for my machine to I sewed on “Faux” buttons and just used velcro for closure. I’ll have to fix it as soon as I learn to make buttonholes. This was great and so easy to follow!!! Thank you,
Becky
OMG i love, love, LOVE this tutorial so much so that i included it in my 5 favorite laptop covers
Please feel free to grab the i’ve been featured button from here
Thanks for sharing xoxo
This is the cutiest sleeve I already see’s..
Im already imagining what kind of fabric and design I would love to built..
Even if Im not that good in sewing procedure Im inspired to do a handmade sleeves for my ipad..
And I’ve already got a informational details from you..
It was going to be the best gift most probably in a birthday occasions or any other occasions who would love to receive this kind of sleeves from their ipad..
Thanks for this wonderful tutorial!..
Pat
ipad sleeves
This step-by-step info is so great for a beginner like me! I recently made a Kindle case for my boyfriend, and your photos and breakdown really helped me figure out what I was doing. I didn’t make this exact style case, but I made sure to link you as this was definitely a big help:
http://www.tizzielizzie.com/?p=432
Thanks!
Hi Lindsay!
Thank you for sharing such a beautiful and detailed tutorial. I love your work and your blog!
I mentioned this tutorial in one of my blog posts: http://oohleela.blogspot.com/2011/02/i-have-new-computer.html
I hope you have a wonderful day! Isabela/Ooh Leela!
I’m so glad I found your blog. This is gorgeous!! I need to make a sleeve for my new laptop.
Exactly the pattern I was looking for! An exceptionally well done tutorial, as well. Thanks so much for sharing this project!
A buttonhole-cutting tip for you–Put a pin perpendicular to the buttonhole, just before the bar at one end, before you cut. That way, if your seam ripper slips, it’ll hit the shaft of the pin and stop, rather than cutting through the bar of the buttonhole.
Lovely project.
I finally made one for my best friend’s birthday and it turned out so cute and everyone was impressed with my sewing talents! The tutorial was great, especially for a newbie sewer like myself. Thank you!!
thank you, thank you, thank you!! This tutorial was so easy to follow, especially for a new sewer like me. I now have a lovely new laptop case and can’t wait to go out on the town with it!!!!
thanks so much- this is lovely!
Thanks for this great tutorial. I blazed through making one of these for my new netbook thanks to your clear instructions and all those detailed pictures. I really appreciate people sharing great resources like these for free!!
Thanks so much for the great tutorial Lindsay! The day after finding this (i linked over from ‘Less Cake More Frosting’) I was out buying material to make one for my Ipad. I ended up making three! I’m a newbie blogger, and I’ll be linking to you when I post pics of the ones I made. Again, thanks for this and other great tutorials!
Marsha
I’ve now made two Kindle covers using this tutorial. One was for myself and the other for my son. I’ve now got friends asking me to make them one too, they think that it’s really difficult to make but with your instructions it’s so easy to follow. Thank you so much.
Hi !
Thank you so much for this great idea and for taking time to post the instructions. I did a sleeve for my laptop today, and even thought I did not precisely follow the tutorial I was very inspired by your work.
I love the result (which I posted here by the way : http://www.zakouf.com/?langswitch_lang=en) and it is all thanks to you !
I’m promoting and indexing your tutorial on Sewing Tutorials Library today! Thank you so much for your great instruction and fun project!
So pretty.Love the button details.
I just used your tutorial for the construction of a sleeve for a touch pad! Thank you so much for sharing! You can check out my “masterpiece” at my blog – kploquilts.blogspot.com
This is not the first time I have beeen to your site, but it is the first time I have ever left a comment. This is a great tutorial and I will be using it very soon. Thank-you for the trouble you have gone to to share. Mimi
hanks much for the great guide Lindsay! The day following finding this kind of (my spouse and i related above from ‘Less Wedding cake Much more Frosting’) I used to be away purchasing content to make one for my own Apple ipad tablet. My spouse and i wound up making 3! I’m a novice writer, and also I shall be connecting to you after i article photos of the types My partner and i created. Yet again, appreciate your this along with other excellent courses!
I used your great tutorial to make a bag for my granddaughter’s new tablet. It’s much smaller than yours and I made a few changes, but it turned out great. Thanks so much for the pattern.
http://threadsofmine.blogspot.com/2011/12/stashbusting-2011-52.html
Great tutorial! the pictures really helped, and the directions were very clear for me! I made a Kindle sleeve for my daughter. Thanks!
What a great tutorial! After I read this one I just had to click over and read all of the others. I love the way you number the steps and show great close up photos. I have quite a few friends who got Kindles and e-Nooks for Christmas so I’m headed to my stash to make some of these as a Happy New Year’s gift for them! Thank you!
It’s pragmatic! Really a creative design!
I made one of these today during nap time!! Thank you!
http://joyfullyseeking.blogspot.com/2012/02/nap-time-project.html
Thanks for the great tutorial! It is very extensive and well described. I made a sleeve myself this week, see http://molenweg83.nl/?e=627 (sorry, in Dutch)!
You are so very talented. I have done many of your tutorial and you make me feel like a successful seamstress! Thank you so much for all of your great ideas!
Beautiful! I found your blog today and was stunned by the wonderful tutorials. The detail and close up images make them so easy to follow. Thank You so much for sharing your knowledge with us.
Just made a vintage effect one for a friends mum for mothers day, such a great pattern and really well written. Thank you much for sharing x
Wonderful Tutorial…..so easy to follow and the pictures are great. Thank You so much… the sleeve is just the cutest I love it!
This tutorial is amazing! I have never understood how to do something with a lining, and have therefore never tried. Your instructions, however, are so clear and your pictures are so helpful, I am anxious to try this right away! I am going to make one for my notebook and my Kindle Fire! Thanks!!!
I love this idea 🙂 Thank you for the tutorial!
This is such a wonderful tutorial! Thank you for sharing. My husband has an iPad. I might just make this for his birthday. (Using “manly fabric” of course..haha). I am a new follower of your blog and added your button to mine. I would love it if you considered sharing this at my linky party this week http://www.artistic31mama.com/2012/03/fabulous-fridays-5-03-30-12.html Thanks!
This is an amazing tutorial with really clear instructions and pictures. I love all the fabric you use in all your tutorials in fact. In Australia, it is really hard to find foam core padding and reasonably priced batting, so fleece for a lining and padding is a really clever, thrifty idea. I have linked you over on my blog here (http://mel-allwrappedup.blogspot.com.au/p/link-love-to-amazing-free-craft.html).
Mel@allwrappedup
Thank you so much for this. Just made my Kindle a new handbag cover. It has a beautiful leather cover for going on holidays but it’s heavy.
I just found your blog when I was looking for this exact tutorial. Something seemed familiar about it…when I scrolled down to the bottom I realized that I have been here a while ago before and used your gathered camera strap tutorial. Love your site!! Thank you for the great ideas 🙂
Just finished making my own laptop cover with your tutorial. No sewing machine, so it took me all weekend, but looks lovely and fits really well. Thank you!
So cute, just finished making mine only took about three hours while watching Dr. Zhivago (confusing movie but great music). Thank you for sharing this pattern.
I have recently come across this tutorial and it’s amaaazing! I have just finished my sleeve. Thank you so much for sharing!
Angie
I just finished making this for my new laptop, and it is a great pattern! I will post a picture as soon as I can get one 🙂 Thank you!
Jenna
callherhappy.com
I made one for my husband’s iPad, this was great! I couldn’t get the buttonhole feature on my sewing machine to work so I used velcro and I added a little handle but other than that I followed your great tutorial step by step!
Great tutorial! I wanna try this sometime soon! Glad I came across your blog, following you on GFC now!
Cheers,
Summer
http://www.ahappymum.com
Great tutorial! Made this for my boyfriend but with one large strap with two buttons! Love how it turned out! Thank you so much!!
Awesome tutorial! I want to sew a lined sleeve and this is perfect. But could anybody give me an hint on how to add a front pocket? Thanks in advance!
I’m not a seamstress or anything, but I’ve made a few covers similar to this one. Mine always have exterior pockets for things like pens, small note pads, cell phones/ipods, chargers, etc.
I make the exterior pocket just as you would on a pair of jeans. When I make them I often use an old pair of jeans. (I’m partial to old “upcycled” denim jeans because their so durable, cheap, and readily available.) You would sew the pocket on to the face of the panel before you sew the two exterior sides together.
Also, just another thought – I’ve been known to use old belts for straps/handles.
Muy buena idea. Gracias. http://mispuntosyotrascosas.blogspot.com.es/
What a great tutorial with wonderful pictures and instructions. I’m gonna give this a try for my mom for Christmas! Thanks!
The step by step instructions are great!!!
very good post
The 1.3GHz processor seems fine most of the time, additional demanding games aside, and played downscaled 1080p video perfectly adequately. It really is certainly a faster experience than past year’s Chromebook, letting you’ve much more windows open at once and swap between them easily. Benchmarking wasn’t readily available, and wouldn’t be comparable to a Windows laptop or iPad anyway.Dell Inspiron 1464 Battery
Dell Inspiron 1564 Battery
Dell Inspiron 1300 batteryApple macbook a1181 Battery
Apple macbook A1185 Battery
Apple A1175 Battery MacBook
Apple A1189 Battery MacBook
Nice Idea dear. Thanks for sharing with us. I will definitely try it.
Embroidery Digitizing
very great and useful!
I linked to your tutorial on my blog – thanks for sharing!
doro K.
Thank you so much for this great tutorial :). This Laptop Sleeve is beautiful – who needs to buy boring, factory-made stuff when what you can make yourself is that much nicer?
Patent Lawyer
Good Day to You ,,,
Thank you for sharing such a beautiful and detailed tutorial. I love your work and your blog!
laptop offers Dubai,tablets offers Dubai
To find daily best offers, Deals / Promotions on all types of Electronics, Laptops, Tablets, Apple I pad, I phone, Mobiles, Smart LED TVs,Digital/ DSLR / Video Cameras, Home Appliances and Gaming Consoles at your Favorite Stores
in Dubai – UAE.
you get a mention here: http://moniquedalli.wordpress.com/
I just finished making my third laptop sleeve, thanks for this great tutorial! It’d be cool to incorporate a pocket feature on the front – I can jimmy rig one up but it doesn’t look very snazzy. Just a thought! Thanks again.
Aww this is so cute. I love this laptop cover for my laptop. Great work.
I just love how thorough you are with your tutorials. I am just rekindling a sewing habit and will definitely give this one a try. Thank You.
Thanks for the tutorial <3
Just finished mine!!! Thanks for the great tutorial.
so cute, thanks for tutorial, may i try ^_^
When someone writes an piece of writing he/she maintains the idea of
a user in his/her brain that how a user can know it. Therefore that’s
why this post is amazing. Thanks!
Wow! So easy, love this! Thanks for sharing!
LOVE IT! I made one today and it looks GREAT 🙂 I might make it again but with straps instead of the buttons so I can carry it. Here is the link if you want to see mine 🙂 https://fbcdn-sphotos-c-a.akamaihd.net/hphotos-ak-xap1/t1.0-9/10484135_10154299658945083_791498683348287868_n.jpg
Perfect tutorial! I especially love the fabric pattern and the finishing touch. Thanks for sharing! 😀
Fabulous for gifts to love ones. will try to make it and post a photo of my Country colors.