
With summer fast approaching, I’ve been trying to get some things sewn up for my girls to complete their summer wardrobes. Today I’m sharing this easy Ruffle Shorts Tutorial with you all that I think you might want to make for some of the little girlies in your life. I’ve seen some similar shorts from several boutique clothing brands and, though I’ve been very tempted to purchase some, I just can’t justify spending over $30.00 on one pair of shorts. I knew I could whip some of these up for a fraction of the cost, plus then I could customize the fit for my girls.

These Ruffle Shorts are perfect to wear with tops or can be layered under a skirt or dress. I don’t know about you, but my girls are 4 years old and 6 years old and we are still trying to teach them the concept of sitting like a lady. And until they can fully grasp that concept, I prefer to have them wearing something underneath their dresses and skirts. These shorts will take you about an hour from cutting to finishing and will probably go even faster if you work on them assembly-line style. And they will cost you around $4.00 per pair depending on the knit you’ve chosen to use. I’m also giving you the measurements for size 12 month – size 14 but you will be creating your own pattern. Ok, now don’t be scared of knit…….let’s face your fear together, I promise these are easy. Let’s get started…….
Ruffle Shorts Tutorial
Supplies:
1/2 yard – 3/4 yard jersey knit fabric (depending on size) – you want a knit with a good amount of stretch that has spandex or lycra in it, if you can, but stretch jersey works great!
Sewing machine needle for knits (I used a Jersey Stretch needle or ball point needle)
Polyester sewing thread
Wash Away Wonder Tape (completely optional)
Ruffler foot (completely optional)
Scissors
Straight Pins
Instructions:
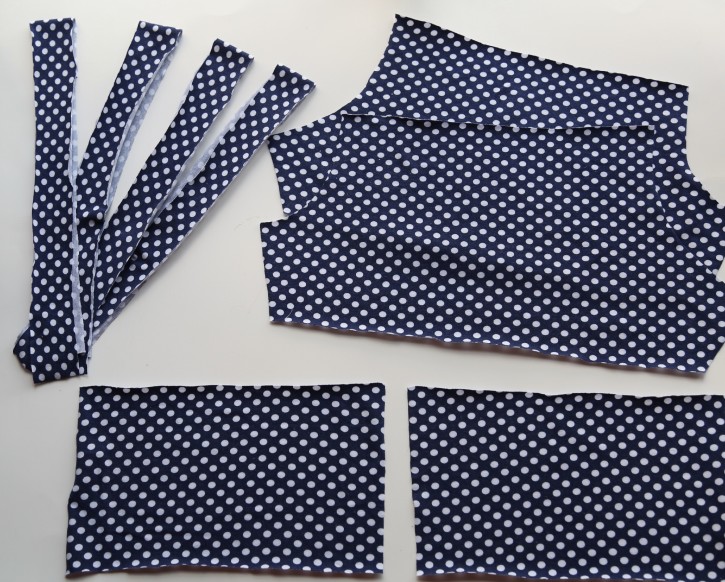
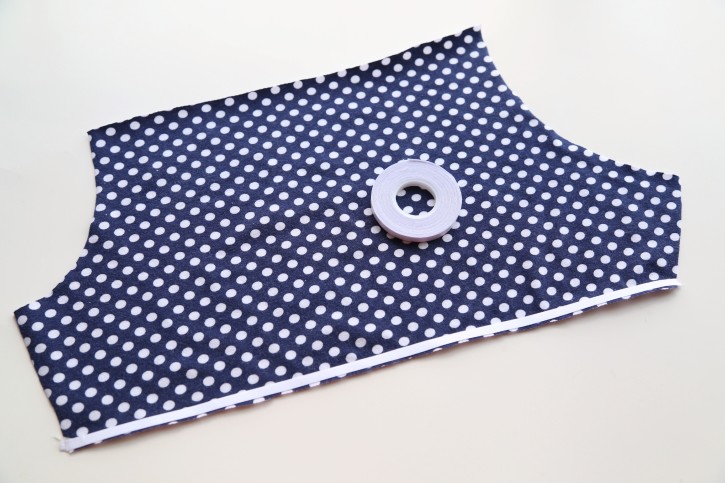
Ruffle Shorts Pieces
(Two main shorts pieces, two yoga waistband pieces and four ruffle pieces)
Step 1: Create your shorts pattern. All you need to create your shorts pattern is any legging pattern you may have or any ready made pair of leggings that you know fits your child well. I used a pattern that I have drafted for my girls. If you are going to use a ready made legging to draft your pattern, make sure to add in a seam allowance when you trace around it (I prefer to use 1/2″). Once you have your legging pattern selected, you will need to cut it to shorts length.
Here are the inseam measurements (meaning the length for the inside of the leg):
Size 12M: 2 1/4″
Size 18M: 2 3/4″
Size 2T: 3 1/2″
Size 3t: 3 3/4″
Size 4: 4″
Size 5: 4 1/4″
Size 6: 4 1/2″
Size 7: 4 3/4″
Size 8: 4 3/4″
Size 9: 5″
Size 10: 5 1/4″
Size 11: 5 1/4″
Size 12: 5 1/2″
Size 13: 5 3/4″
Size 14: 6″
I made a size 7 for Miss Savannah since she is a really tall little lady. I also opted to add a yoga waistband because she prefers that for comfort. If you would like to add a yoga waistband to your shorts, you will need to measure your child’s waist to figure out the proper sizing. Savannah’s waist measurement was 21″, then subtract 3″, so my total was 18. Divide 18″ in half which equals 9″. 9″ will be the width across measurement for your yoga waistband.
To decide on the length of your waistband, you will need to decide how wide you would like it to be. I cut the waist band 5″ long because I wanted it to a 2″ wide finished waistband. Are you confused yet? So, because you will be folding the waistband in half (you’ll see in later instructions), the 5″ will be cut in half to 2.5″ and then when you take the seam allowance into account, the finished waist band measurement ends up be 2″.
So my final waistband measurement was 9″ wide x 5″ long and you will need to cut TWO pieces (one for the front and one for the back).
For the ruffles, those will simply be 2 times as long as the bottom of the shorts. I cut each ruffle 1.5″ wide but you can make your ruffles smaller or larger depending on the style that appeals to you. Cut 4 ruffles (two for each leg).
If you are using a legging pattern that uses four leg pieces instead of two, you will need to sew each front and back piece together at the side seams in order to follow the rest of the tutorial. Basically you will just be turning those four pieces into two so that adding your ruffles will be nice and easy.
BEFORE YOU START:
Now you have all your pieces ready so we can get sewing. Make SURE to change out your sewing machine needle to a needle made specifically for knit fabric. I used a jersey stretch needle specifically, but something called a ball point needle would work for you as well. It’s very important to do this so that your knit fabric moves smoothly through your machine. Also, if you have a stretch stitch on your machine, you can use that for most of the seams or I just like to adjust my stitch length up to 3.0 because that allows for more stretch. Feel free to use your serger as well!
For the purposes of this tutorial all seam allowances are assumed to be 1/2″. If the pattern you are using calls for a different seam allowance, you can adjust accordingly. The edges of the knit ruffles are left raw because knit doesn’t fray. You could finish the edges of the ruffles with a rolled edge on your serger, if you would prefer that look.
Step 2: Make your yoga waistband – Place your two yoga waistband pieces with the right sides together. Sew down both shorter sides. You can use a serger or you can use your regular sewing machine.
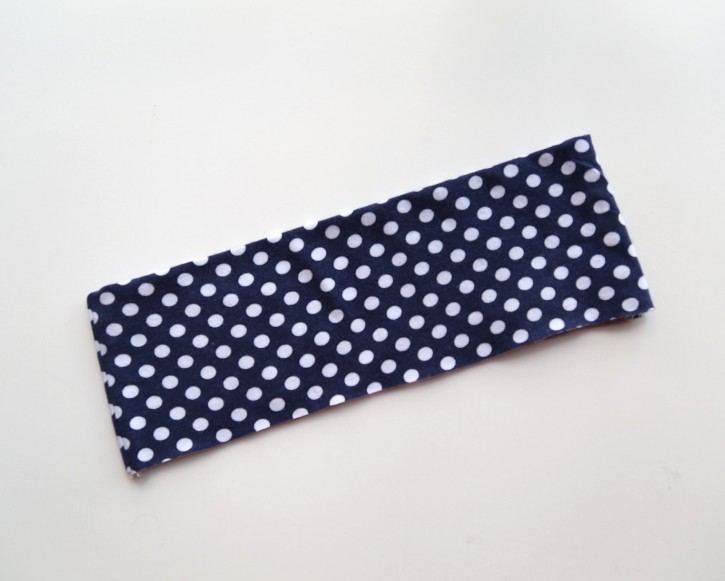
Step 3: Press the side seams and then fold the waistband in half so that the raw edges are lined up.
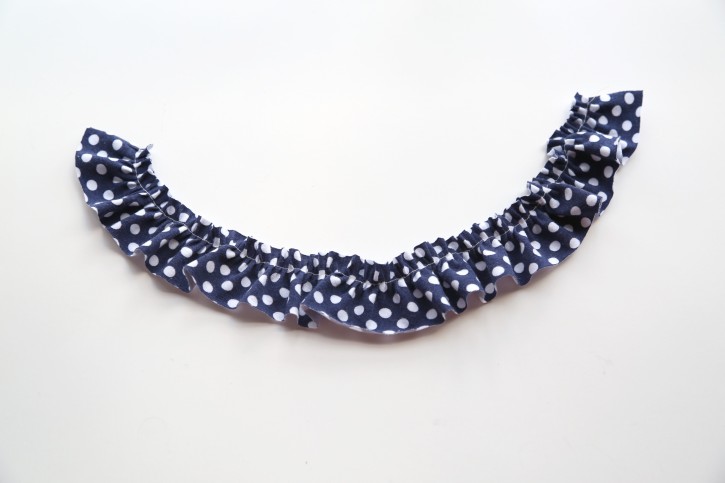
Step 4: Create the ruffles – Set your stitch length to the longest length possible (mine is 5.0) and turn up the tension on your machine as high as it will go (mine is 9.0). Sew a row of stitches about 1/2″ away from the top edge of the ruffle, making sure not to backstitch at the beginning or end (backstitching will cause the ruffle not to gather). Normally I would tell you to run two rows of gathering stitches, but I only want one row for these shorts since you are going to see the stitching a little bit. Pull the bobbin thread to begin gathering and gather the ruffle until it is the same length as the bottom of the leg of your shorts. Do this for all four ruffles.
The picture below is a ruffler. A ruffler is a completely optional tool for this tutorial, but I wanted to show you what one looked like in case you weren’t familiar with this sewing machine foot. This is my Baby Lock Ruffler that goes with my Baby Lock Unity Sewing and Embroidery machine. It’s looks kind of scary, but it’s an easy foot to use…….it just snaps on like your other machine feet, but it’s a pretty amazing accessory to have in your collection.
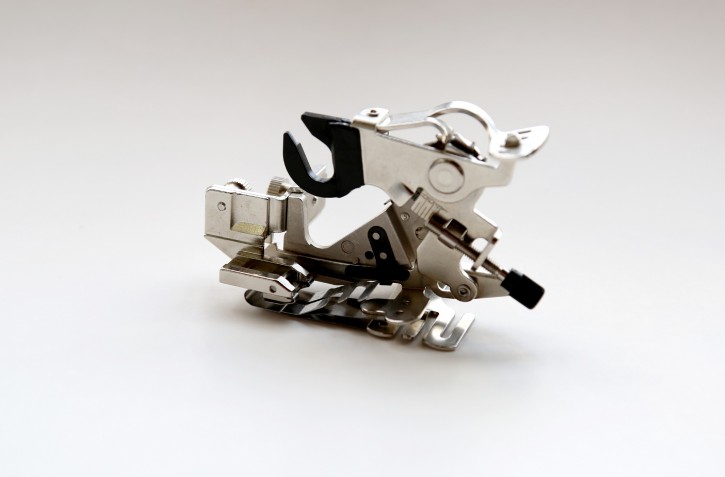
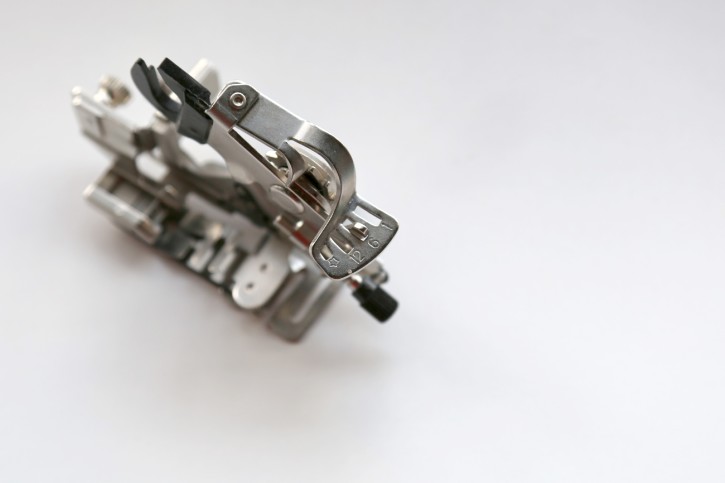
On the top of the ruffler, there are different number markings 12, 6, 1. These numbers tell the ruffler that you want a ruffle every 12 stitches, 6 stitches or 1 stitch. There is a screw in the back of the foot that you can make tighter or looser and this tells the foot how deep to make each ruffle. I’m not going to go into every detail about this foot (we can save that for another day if you are interested in a full tutorial on this foot), but I just wanted you to know a little bit about how it works. I used it to create the ruffles for these shorts, but if you don’t have one, you’ll just gather using the traditional method as stated in the beginning of this step.
Step 5: Attach the first row of ruffles – So if you’ve been reading this blog for any length of time, you know my love for Wash Away Wonder Tape. It’s a double sided sticky tape that disappears upon washing and won’t gum up your needle. I absolutely love it and use it for all kinds of things. You do not need this tape to attach your ruffles, but if you have it, it will make your life easier. You can purchase yours HERE!
Apply one row of tape to the bottom edge of the shorts. Peel off the paper backing and stick down your ruffle lining up the stitching with the middle of the tape. If you are not using the tape, pin your ruffle in place.
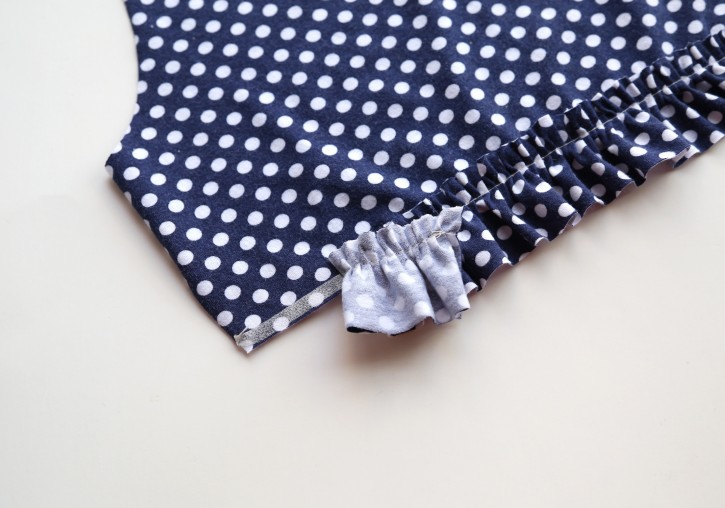
Here is what the bottom row of ruffles will look like when attached using the tape. Once you have taped or pinned your ruffles in place, run a row of stitching on top of your gathering stitches to secure in place. Do this neatly as the stitching will show.
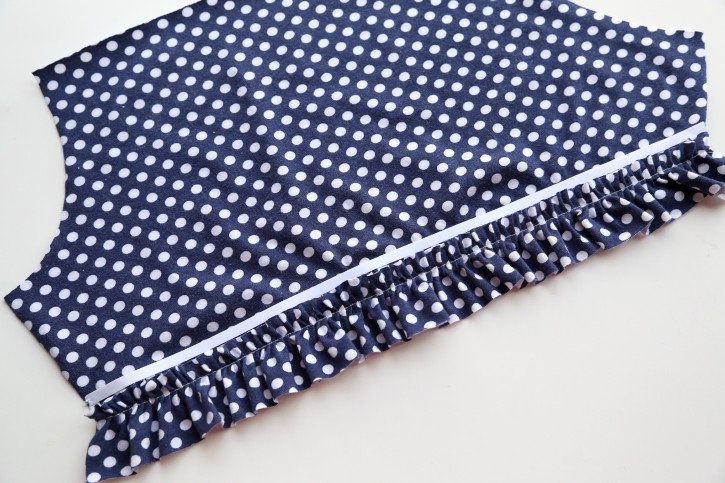
Step 6: Attach the second row of ruffles – Place another piece of Wash Away Wonder Tape right above the top of the first ruffle, peel off the paper backing and stick the second row of ruffles in place lining up the stitching with the center of the tape. Or simply pin in place, if not using tape. Run a row of stitching on top of the gathering stitches to secure in place. Apply the first and second row of ruffles to both shorts pieces. You will be attaching four ruffles to the shorts.
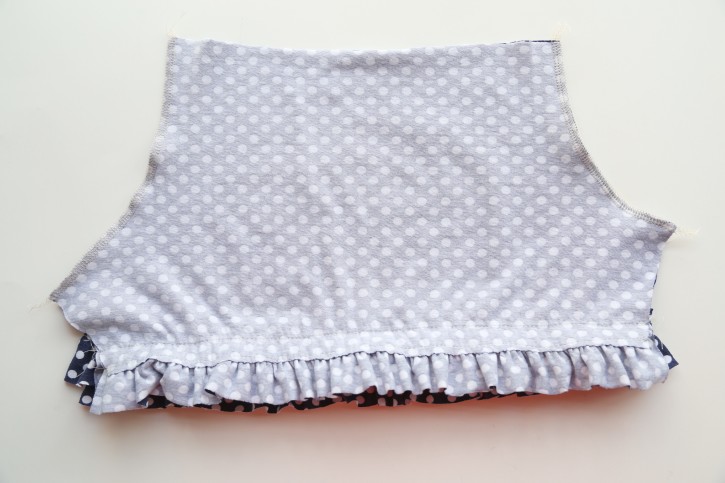
Step 7: Sew the front and back seams – Place both shorts pieces with their right sides together, sew the front seam and then the back seam on your sewing machine or serger. Press seams.
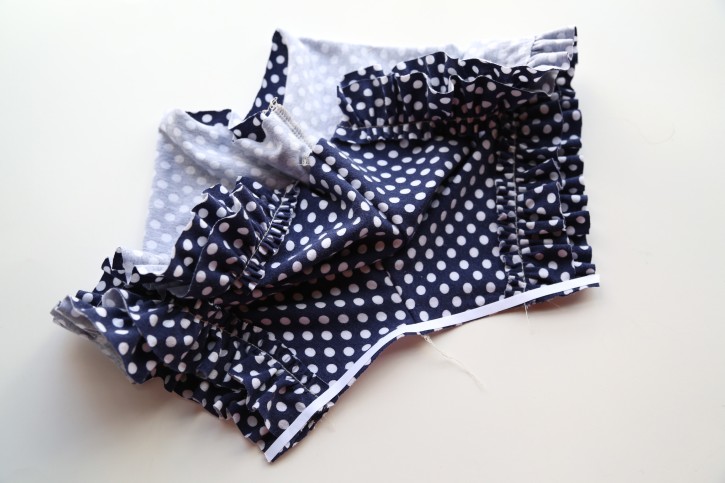
Step 8: Sew the crotch seam – Here is where I’m going to use my tape again. The reason I like to use the tape in the crotch seam is because it helps me achieve greater accuracy when lining up my ruffles with each leg. If I don’t use the tape, sometimes the machine will feed the two layers of fabric a tad differently and my interior leg ruffles won’t line up just perfect. Again, you can certainly use pins, but if you have the tape, use it! It’s also great if you are trying to line up stripes. Place a piece of tape across one side of the shorts on the right side, peel off the paper backing and stick down the other side of the shorts making sure to line up your ruffles just right. Now your crotch pieces are right sides together. Sew in place on your sewing machine or serger.
Step 9: Attach the yoga waistband – Fold the yoga waistband in half again (pictured above) to find the center front and center back of the waistband. Mark this with a straight pin. Find the side seams of your shorts and mark those with a straight pin as well.
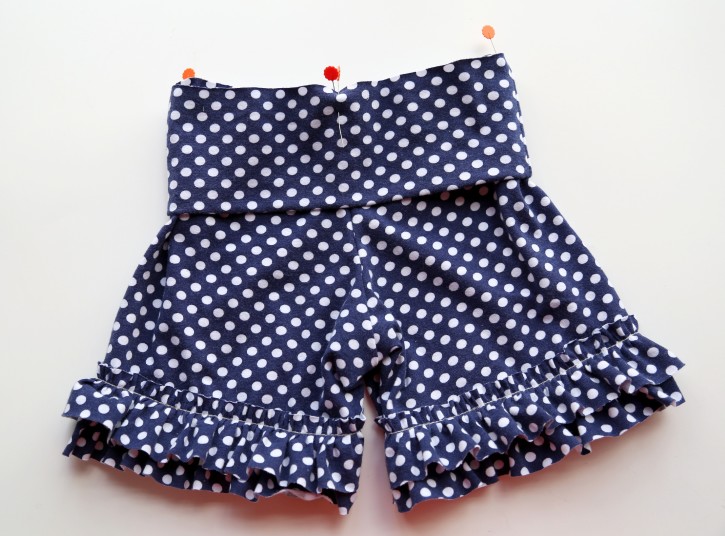
Pin the center front of the waistband to the center front seam lining up the raw edge of the waistband with the raw edge of the shorts. Do the same for the back and side seams as well. The yoga waistband will be smaller than the top of the shorts. Sew the waistband to the shorts by stretching the waistband as you go so that it lines up with the top of the shorts. Having the four different points marked on the waistband and shorts, ensures that you are stretching evenly as you sew. Once you’ve sewn the waistband, press the seam down towards the shorts and the waistband up.
You can certainly do a casing at the top of the shorts and use elastic in the waistband. I just think the yoga waistband is so nice and comfy and much easier than dealing with elastic. But these are your shorts, so feel free to make them just as you would like!
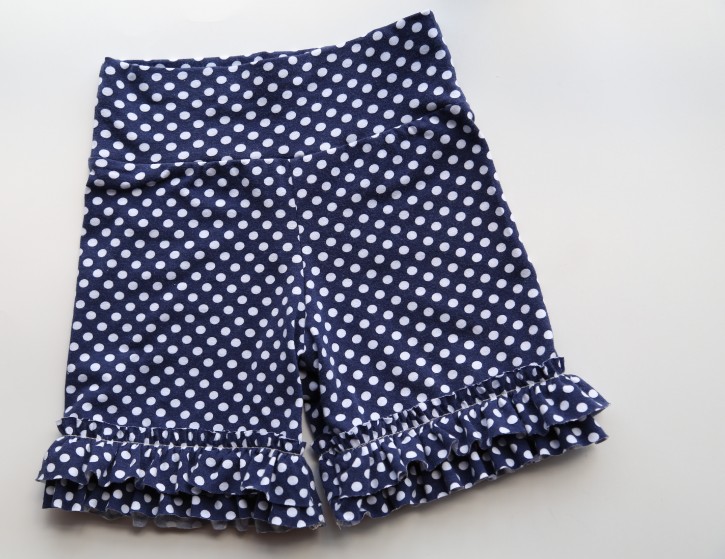
Now your ruffle shorts are complete! That wasn’t so hard, was it? I made three pairs of these for Miss Savannah and I have more on the cutting table for Miss Matilda.

Here’s a picture of the back of the shorts. I’m really pleased with the fit and the rise. I added a ‘Cottage Mama’ label to the center back of the shorts because I like to label everything I make for the kids (more info on The Cottage Mama clothing labels found here). I’m so happy Savannah loves these little shorts. I think she will get lots of wear out of them this summer!
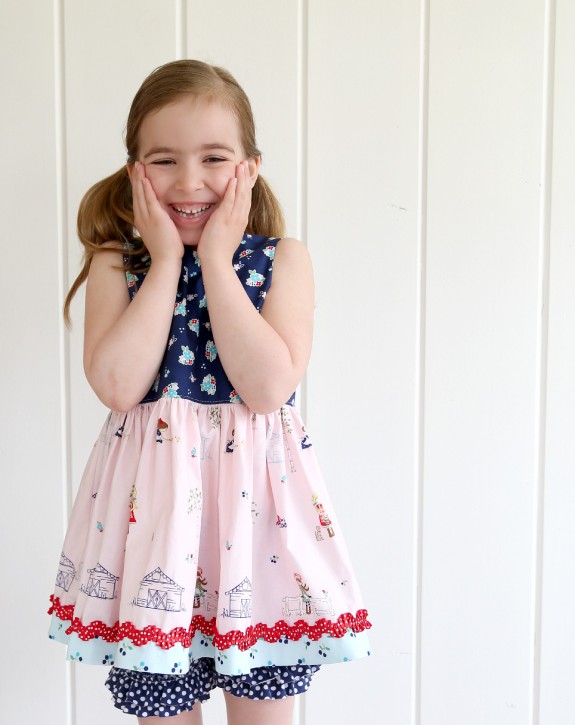
And here’s Miss Savannah wearing her shorts with a new top I made for her. More details on this top and an outfit for Matilda coming later this week on the blog. I hope you enjoyed this tutorial!

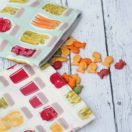
Fabrics Used: Riley Blake Jersey Knit and Euro Girls Boutique Small Dots
Sewing Machine Used: Baby Lock Unity
Serger Used: Baby Lock Evolution
To check out more sewing product and recommendations, you can click HERE!


 Lindsay Wilkes is the owner and designer behind The Cottage Mama. She creates timeless, vintage inspired sewing patterns for children’s clothes. She is also a fabric designer for Riley Black Designers / Penny Rose Fabrics, author of the book ‘Sew Classic Clothes for Girls’ and can be seen teaching nationwide and online in her video series ‘Lessons with Lindsay’ sponsored by Baby Lock Sewing and Embroidery machines.


Love the tip about using wash away wonder tape to hold the ruffles in place! I need to use that stuff more often. I often use the purple Elmer’s glue stick for zippers and trims, but I think the tape would hold a ruffle on better.
Thank you for the great tutorial. I love your book and patterns.
So many good things in this post. Love the shorts and the wonder tape. And yes, please a tute on the ruffle foot. I bought one but it came with such limited instructions that I don’t know where to start.
Sooo cute!!! I’ve got a Craft Gossip post scheduled for this evening that links to your tutorial: http://sewing.craftgossip.com/tutorial-girls-ruffled-legging-shorts/2014/05/05/
–Anne
these turned out so so cute!!
Hi, there! So happy to discover your blog!! I love the tutorial for these shorts. I’ve been working on a very similar pattern. I was wondering where you found your cute knits. I have such a hard time finding cute and good quality knits (wholesale). Would you mind sharing? Also, does your pattern provides a regular waistband as well? thanks in advance if you’re able to help! I really admire your work!!
Embracing Girlyhood,
Rachel Loomis
Thanks so much! The links to the knits are at the bottom of the post. I appreciate your kind words. Thanks for taking the time to comment!!
I love the long sleeveless long shirt that you paired with the shorts. What pattern is this? Adorable, and I cannot wait to make these shorts!!!
Thanks! I’ll be giving more details about the top on Wednesday! Have a great day, Lindsay
Those are so cute! I love them. I need to make a pair–or three–for my girls!
Was wondering if you change your server needle to a ballpoint or specialty knit needle? Thanks!
Was wondering if you change your serger needle to a ballpoint or specialty knit needle? Thanks!
HI Beverly,
No, I don’t change out my serger needles, but you certainly could. For some reason those move through the fabric just fine!
Have a great day,
Lindsay
I’m looking forward to trying this out! What number setting did you use on the ruffler foot when you did your ruffles? I would love a ruffler foot tutorial if you were thinking about doing one! Thanks Lindsay!
Hi Arden,
I set the ruffler to ruffle every 1 stitch and have the depth set to about 5 to get about a 2:1 ratio when gathering. I hope that helps!
Thanks so much for stopping by,
Lindsay
I’ve never tried to sew with knit fabric before. But I think I must try it. This shorts are cute. Thank you for sharing.
Thanks for the spectacular tutorial! I made a pair for my niece, and linked to it on my own blog 🙂
So excited to make these for my daughter and our friend’s little one! Thank you for a great informative tutorial.
I gave this tutorial a shot – I’m not experienced in sewing knits. I did use a ball point needle, and set my stitch length to 3 when attaching the ruffles. It doesn’t seem to provide any stretch at all. It feels like the thread will snap if it gets stretched at all. I also tried a stretch stitch and a zig zag stitch. They all seemed to have that same tightness. Am I doing something wrong? I sewed the seams and attached the waistband using my serger. Those seem great, but I’m unsure about my ruffles being attached. It just doesn’t seem correct. Any tips? I also looked for a jersey stretch needle, but the only needles I could find said jersey OR stretch. Which needles are you using?
Thanks so much for the great tutorial and all your help! 🙂
Hi:) I can’t believe that I’ve just found your personal blog after keeping up with the last four seasons of project run & play! Oh my! I am loving looking around at your online home and am so glad to have found this cute tutorial… I really want to make my little girl some ‘ modesty pants’ for summer and these are perfect! I may just use this idea for my next sew-along challenge:) Thanks sew much 😉
Love these, can’t wait to try! How do you finish the edges of the ruffles? I haven’t worked with knots that much, do they hold up well, or fray without a hem? Thanks so much!
Sorry I meant knits not knots.