Archives for November 2012

DIY Beaded Fabric Necklace ~ Easy, Snappy Holiday Project

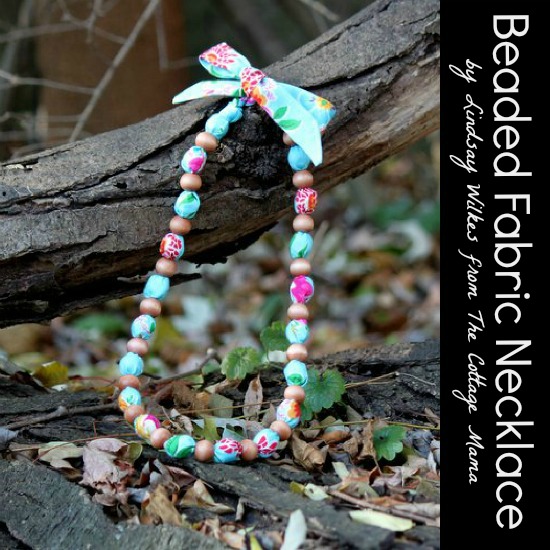
I was so honored when Baby Lock Sewing and Embroidery Machines invited me to be part of their Snappy Holiday Snappy-Sew Round-Up. Each of the featured bloggers was supposed to come up with a quick and easy holiday gift that you could put together with just a moments notice. I came up with the Beaded Fabric Necklace.

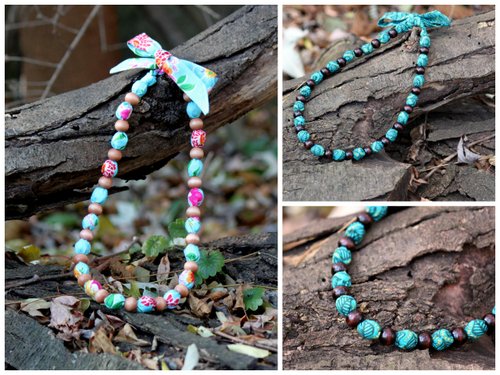
The Beaded Fabric Necklace is a quick-sew gift that is perfect for any of the lovely ladies in your life. You can make these necklaces to suite all types of occasions depending on your fabric selection. Consider using pearl beads or even spray painted wooden beads to change up the look. Whatever you choose, these necklaces will take you no more than 20 minutes each and your gal pals will absolutely adore them!

Beaded Fabric Necklace
by Lindsay Wilkes from The Cottage Mama
Click HERE for printer-friendly pdf instructions.

Sewing Skill Needed: Basic / Beginner

SUPPLIES:
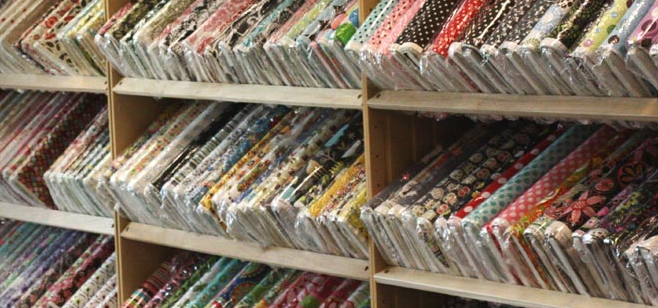
1 strip of fabric (cut 2” x 43”)
39 Wooden craft beads
Basic Sewing Supplies

INSTRUCTIONS:

1. Cut one long fabric strip 2” x 43” long.

2. Cut both ends to a point.

3. Fold fabric in half lenghwise with the right sides together. Sew using a ¼” seam allowance starting at one point and sewing all the way down to the other side. Leave the other end open.

4. Clip the corners of the one pointed end that you sewed closed.

5. Turn right side out. Use a chopstick or pencil to make this step a little easier.

6. Tie a knot approximately 10” down on one side. Once your knot is tied, you should have about 8.5” of fabric on top of the knot.

7. Place one bead through the opening into the tube and slide it all the way down to the knot. For the second bead, thread the fabric through the bead and slide it all the way down to the first bead. For the third bead, place it through the opening into the tube and slide it all the way down to the other bead. Continue this pattern until you have threaded or inserted all beads.

8. After all the beads have been used, tie a knot on this other end.

9. Since you have threaded the open end through many of the beads, it might have gotten a little shredded looking, but don’t worry, that is fine. Just trim of the frayed end.

10. Tuck in the raw edges of the open end and topstitch to close the opening. Topstitch on the other side as well so they both match. You could also choose to close the opening by hand sewing it closed using a slipstitch.

11. To wear the necklace, simply tie the fabric in a bow. The size bow that you tie will determine how long or short your necklace will be. You could definitely tied the fabric in a knot, if you are not the bow type of person.

You will be able to make approximately three necklaces from ¼ yard of fabric and one value-sized bag of beads. To view more sewing and craft ideas, please visit the official blog of The Cottage Mama over at The Cottage Home: www.thecottagehome.blogspot.com.
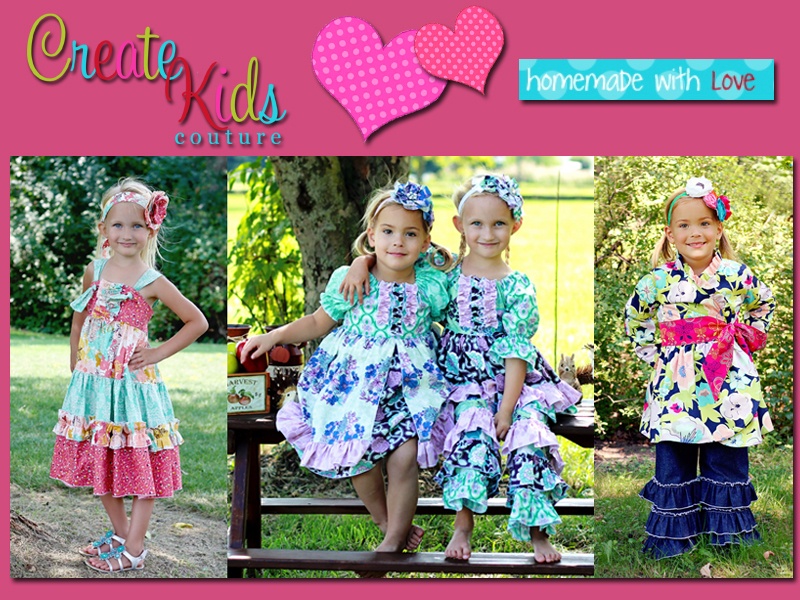
Visit Baby Lock’s Snappy Holiday Snappy-Sew Project Round-Up to print a PDF of this tutorial and as well as the tutorials from six other fabulous bloggers!
Baby Lock's Snappy Holiday Quick-Sew Project Round-Up
Here is a list of all the participating bloggers sites so you can visit them and check out their Snappy Holidays Projects:
Lindsay Wilkes (me):  http://thecottagehome.blogspot.com
Heather Valentine:  http://thesewingloftblog.com
Thanks again to Baby Lock for inviting me to be part of their fun holiday series!

Cyber Monday Giveaway Day!

Today is Cyber Monday Giveaway Day at The Cottage Home. Our lovely sponsors have come up with some fabulous prizes for the readers of The Cottage Home blog and I am so excited to share them with you today. I know all bloggers probably think that their sponsors are the best, but I don’t know…………this line up is pretty darn spectacular!

The Cyber Monday Giveaway Day is going to be a little different. Today is a winner take all giveaway. One winner will take home ALL of the prizes. Talk about a fabulous holiday gift, right? At the bottom of the giveaway post you will find a little widget where you can enter to win. For each item that you do, you will gain an extra entry and increase your odds of winning these incredible prizes.

So without further ado, here are The Cottage Home blog sponsors………


No matter why you love to sew, Baby Lock understands. Everything that we do is to make your time sewing at your machine as enjoyable as possible. Baby Lock’s main goal has been to enhance the love of sewing since our very beginning, over 40 years ago.


BABY LOCK GIVEAWAY: Zundt Embroidery Designs

(Retail Value: $300.00)

Swiss embroidery from the St. Gallen area is known around the world for exquisite designs and utmost quality. The artists at Zundt have carried on this tradition, and now Baby Lock is offering three of Zundt’s collections. With this pack you’ll receive Butterflies Cutwork, Lace in Vogue, and Yukata Art. These collections are ideal for creating elegant apparel, giving home décor a lacy touch, embellishing quilts, and more.


Quilt in a Day has everything you need to make a quilt – books, patterns, free block patterns, notions, fabric, rulers and videos. Quilt in a Day was founded in 1975 by “Hall of Fame” quilter, Eleanor Burns. Through out her career, Eleanor has published over 100 “How-to” quilt books, developed an Eleanor Burns Signature Pattern Collection and designed a variety of specialty rulers all produced to aid the quilter in successfully and easily completing their quilt. Her Quilt in a Day TV series began airing on PBS and is still broadcasting nationwide and abroad.


Quilt in a Day GiveawayWin a Free Eleanor Burns 2013 Block Party Membership: 


(Retail Value: $94.00)


Join Quilters Hall of Fame Inductee, Eleanor Burns, in the comfort of your own home with her 2013 Block Party. Receive a 16 page pattern every month. Follow along with Eleanor in classroom LIVE via Webinar. Each pattern and webinar is unique  – you never know what you are going to learn or see! One thing is for sure, every pattern is easy with step-by-step techniques pioneered by Quilt in a Day. If you are not able to attend the Webinar, you can still sew at your convenience with a video available for viewing on our website. 


Fabricworm brings you modern fabrics for the modern sewist! We feature a large collection of designer fabrics specializing in modern, retro, organic, and children’s fabrics. Please note our extensive Japanese Import section as well as Custom Coordinated Bundles available in Half Yards and Fat Quarters to suit all of your crafting and quilting needs.


FABRICWORM GIVEAWAY: A fat quarter bundle of Camp Sur by Jay-Cyn Designs for Birch Organic Fabrics.


Also, Fabricworm is offering their ongoing coupon code “linus5” which gives you $5 off any order of $50 or more.

Fat Quarter Shop works to bring you the latest fabric collections and sewing notions, all with a touch of great customer service.  Visit our shop to find out about our exclusive kits and clubs, BOMs and more!  To celebrate Cyber Monday, we are giving away a Fat Quarter Bundle of Seascapes by Deb Strain for Moda Fabrics!  The bundle includes 29 fat quarters, all of which will have you daydreaming of a day at the beach. 

FAT QUARTER SHOP GIVEAWAY: Fat Quarter Bundle ‘Seascapes’ by Deb Strain (29 Fat Quarters)

(Retail Value: $97.50)

Fat Quarter Shop is offering 25% off your entire order with code “jingle” until Thursday the 29th at midnight CST.  


Crafter’s Vision prides itself as having first class customer service with excellent prices, free shipping and top notch products. We would like to take this time to thank all our customers for trusting Crafter’s Vision with your shopping needs through the years and wish all of you a blessed holiday season. 

You will not want to miss shopping with us on Cyber Monday! Save an additional 50% off our list prices for all fabrics in ouSALE section! In addition to this, all orders shipping in the USA over $30 will qualify for FREE SHIPPING!


CRAFTER’S VISION GIVEAWAY: $50 Gift Certificate to Crafter’s Vision


Create Kids Couture is a PDF and paper pattern company. CKC is co-owned by Shannon and Tiffany and they specialize in boutique children’s clothing sewing patterns. They are giving away a 3 pattern pack of your choice; choose from over 90 PDF patterns on their website: www.CreateKidsCouture.com


CREATE KIDS COUTURE GIVEAWAY: 3 Pattern Bundle Pack

In celebration of Cyber Monday, Create Kids Couture is also offering 30% off your entire order. 

Use code CYBERMON at checkout on their website only.


a Rafflecopter giveaway

Holiday Cards

So have you started shopping for holiday cards yet? I know, I can’t believe it’s almost that time of year either. Time is flying by. Well, I have been browsing around online checking out some different designs for our family. I’m thinking I will be using our favorite family picture from this year…….

I have found some really beautiful designs over at Minted.com and I wanted to share a few of my favorites with you.

Aren’t these all so fun? I don’t even think I got through all the pages of the Minted holiday cards (there was something like 34 pages). Anyway, I just wanted to send some inspiration your way in case you haven’t ordered your cards yet. I always love getting photo cards from our family and friends.

Right now minted is offering 15% off a purchase of $150 or more with the code: FALL150 and 10% off a purchase of $100 or more with the code: FALL100. Plus, they will address the cards to your recipients for free with every card purchase ~ now that’s a time saver!

Have a great pre-Thanksgiving week!

Modern Designs for Classic Quilts ~Book Review & Giveaway

Today I am very excited to introduce a brand new quilting book that you are sure to want to add to your Christmas wishlist. Modern Designs for Classic Quilts is written by Kelly Biscopink and Andrea Johnson and is complete quilting eye candy. I met Kelly as an Editor through my publisher and was absolutely thrilled when I found out she had written a book of her own!

At quilt market in Houston, TX last month, my mom (aka Grandma Jane) and I went out dinner with Kelly and Andrea and we. had. a. ball. We laughed so hard we cried. I’m telling you, these are my kind of girls. So I’m going to try hard to write an un-biased review, but it always helps to know that the authors behind a book are truly wonderful people. And it helps when they’ve written a truly fabulous book!

I absolutely adore the concept of this book as I feel it is very similar to how I view sewing children’s clothing. The book has some of the most traditional, classic quilt styles, yet they are taken to a whole new level through the use of modern patterned fabrics and bold solids.

This Spider Web Quilt, called Effie’s Web, might be my favorite in the book. I love how much color and movement you can see throughout the quilt. Look at it one way and you see one thing, look at it another and you see something else. Also, it’s a great way to use up scraps of fabric and with all the clothing I sew, you know I have a lot of scraps.

Although, I love Effie’s Web, it’s a pretty close call between that one and the cover quilt called the Urban Cabin. First of all, how cute is that name? It is a traditional log cabin style quilt, but the way in which the fabrics are placed is so totally modern. Brilliant!

Check out some of these quilt patterns included in the book that use beautiful solids incorporated into their designs. As much as I love patterned quilting cotton, sometimes I think solids can bring the beauty out in a quilt design like nothing else.

The overall tone of Modern Designs for Classic Quilts is very friendly and welcoming, just like Kelly and Andrea. The techniques section is beautiful with very clear photographed instructions. They include everything from cutting, sewing and pressing to how to match seams, sewing curved seams and paper piecing. There are also non-quilting techniques included such as installing a zipper, ruffling and raw edge applique that are used for some of the smaller projects included in the book.

Kelly and Andrea have done such a wonderful job bringing together two worlds of quilting together in one book; modern and traditional. Who says you have to be defined as a modern quilter or a traditional quilter? No one. And these ladies show that you can have it all……a little modern, a little classic and a whole lot of beautiful.

So guess what? Not only did Kelly and Andrea send me my very own copy of this book for this review, they sent a copy for one of you! 

Would you like to win a copy of Modern Designs for Classic Quilts?
Well, this one is easy, just leave a comment on this post telling us why you would like this book. 
One entry per person. Giveaway will be open until Monday, November 19, 2012 at midnight (CST).
To check out more reviews of Modern Designs for Classic Quilts, please visit some of these other wonderful blogs on the book tour:
Tuesday, Nov. 6             (Lindsay, CraftBuds)
Wed., Nov. 7                 (Jill, Darling Jill Quilts)
Thursday, Nov. 8           (Faith, Fresh Lemons)
Friday, Nov. 9               (Generation Q)
Saturday, Nov. 10         (Angela, Quilting is my Therapy)
Sunday, Nov. 11            (Shannon, Stitch Craft Create)
Monday, Nov. 12           (Laurie, Scarlet Fig)
Tuesday, Nov. 13          (Kaysie, KZJo’s Studio)  
Wed., Nov. 14               (Jessica, A Little Gray)
Thursday, Nov. 15         (Mary, The Tulip Patch)
Friday, Nov. 16             (Deborah, Whipstitch)
Saturday, Nov. 17         (Lindsay, The Cottage Mama)
Sunday, Nov. 18           (Jenny, Sew Kind of Wonderful)
Monday, Nov. 19          (Carla, LollyQuiltz)
Tuesday, Nov. 20         (Thomas, Thomas Knauer Sews)
Wed., Nov. 21              (Brenda, Pink Castle Fabrics)
Thursday, Nov. 22        (Lindsay & Liz Rea, CraftBudsInspire Me Grey)
Friday, Nov. 23             (Sarah, The Last Piece)
Saturday, Nov. 24         (Cara: Cara QuiltsAndie: AndieJohnsonSews, Kelly: Stitchy Quilt Stuff)

Also, you can keep up to date with these lovely ladies over on their blogs: 
Kelly at Stitchy Quilt Stuff and Andrea at Andie Johnson Sews.

DIY Cabochon Jewelry

As much as I love sewing, sometimes I get the urge to do something a little different. I’ve been planning some of my DIY Christmas gifts this year and I thought it would be really fun to make some pretty jewelry for friends and family.

Flower cabochons have always had sort of a vintage feel to me and I find them to be really beautiful. You can buy them from many different sources online (here are a ton sold on Etsy) and they are really reasonably priced. Basically they are just molded resin and are really lightweight and easy to work with when crafting. You can attach them to just about anything, but this year I decided to make rings, earrings and hair pins.

If you get these going in assembly line style, you will have plenty of jewelry in no time!
DIY Cabochon Jewelry
by Lindsay Wilkes from The Cottage Mama
 
Supplies:
Flower cabochons (found here)
Blank bobby pins, rings or earrings
E6000 or other industrial strength glue
Instructions:

Gather up all of your supplies for this project.
Like I said above, you can purchase some really gorgeous cabochons via Etsy.com. I ordered all different shapes and sizes so I would have a wide variety of different styles and colors.
As far as the blanks go for bobby pins, rings or earrings, I purchased the earrings and bobby pins online and found the rings at our local Joann super-store. You will have more of a selection if you order online, but you should be able to find all of these at your local craft store. Our lovely blog sponsor, Crafter’s Vision carries some different blanks as well.
I bought adjustable rings because I’m not sure of everyone’s ring size. Just make sure the blank portion of the ring is smaller than your cabochon (or at least the same size). The square rings (that came in this variety pack) didn’t really work for this project since the blank was too big.
E6000 is a great glue to have in your stash of craft supplies. It’s super strong and dries clear. You can find this at your local craft supply store. If for some reason you can’t find this, then just look for another industrial strength glue. Jewelry gets a lot of wear and tear, so you don’t want it falling apart.
So this project is really simple. Take a dab of glue and place it onto the blank jewelry, then press your cabochon on top. Leave them upside down to dry for at least 24 hours.
For the smaller pieces, like the earrings, I just put a dab of glue on some paper and dipped the top of the blank part of the earrings and pressed them to the cabochons.
These make great gifts for girlfriends, teenage girls and teachers.
Package these pretties up and you are good to go!

Cajun Sausage Pasta with Cream Sauce ~ Recipe

Pasta is the go-to meal in our house. It’s quick, easy and inexpensive. My husband and I love spicy food and have always had a fondness for cajun flavors. Cajun Sausage Pasta is a delicious, easy weeknight meal that will have your family begging for more.

Cajun Sausage Pasta 
SERVES 4
Ingredients:
1 pound dried linguine
1 large onion, diced
1 pound andouille sausage, sliced (I use the chicken kind from Trader Joe’s)
2 tablespoons butter
1.5 cups heavy cream
1 teaspoon cajun seasoning
1/8 teaspoon cayenne pepper (more if you like more spice)
1 tablespoon fresh thyme (if you don’t have this, that’s ok)
1/4 cup Parmesan cheese, plus more for garnish
Olive oil
Salt and pepper, to taste
Directions:
Cook pasta according to package directions making sure to add salt to your pasta cooking water.
Preheat a large saute pan to medium-low heat. Add a drizzle of olive oil. Add onions and saute until translucent. Add more olive oil if the pan gets dry. Add in sliced sausage and saute for 3-5 minutes. I use the chicken andouille sausage from Trader Joe’s which is already cooked, it just needs to be heated through.
Add butter, heavy cream, cajun seasoning, cayenne pepper and thyme, and a sprinkle of salt and pepper to onion and sausage mixture. Turn up the heat to medium high. You want the cream to thicken. Cook for 10 minutes or until the cream has reached a silky and medium consistency. You may need to adjust your heat. If the cream looks like it’s going to bubble over, just reduce it a little. Or vice-versa, if your cream is not bubbling, increase the heat.
Before you drain your pasta, scoop out 1/4 cup of the pasta cooking liquid and add it to the cream sauce mixture. Drain pasta and add pasta to sauce mixture. Add in Parmesan cheese and toss to combine.

Serve with a sprinkling of Parmesan cheese and fresh thyme. If you have leftover thyme, garnish the top of the dish with a sprig of thyme.

International Quilt Market Fall 2012

Oh quilt market, how do I love thee? Let me count the ways…….

Ok, so a little bit cheesy, but seriously, ever since we (my mom and I) started attending International Quilt Market in Spring 2011, I just can’t miss it. I know I explain this every time I post about market, but just in case you are new here to the blog……International Quilt Market is a trade show and is not open to the general public. Most of the ordering that goes on at market is for wholesale purchasing. Every fall it takes place in Houston, TX and every spring it rotates around the country (this spring will be in Portland, OR). Quilt Market is where many of the designers and manufacturers introduce their new fabrics, notions, sewing tools, sewing and quilting machines and trims.

So you might be wondering, why does Lindsay (aka The Cottage Mama) go to Quilt Market? Well, we go for many different reasons. Originally, we started going to open up wholesale accounts to start purchasing fabric by the bolt as well as large quantities of buttons and trims. But market has become so much more than that to me at this point in my career.

I love meeting people in person. Meeting someone face to face always solidifies a relationship and it’s so nice to put a face with a name after you’ve been emailing back and forth. There were so many people that I needed to meet with and touch base with about all kinds of things business related as well as placing fabric, button and trim orders. But really, it’s the people that make market so much fun!

So enough chit-chat, how about some pictures? Yes, there are a lot…….I hope you enjoy them and find as much inspiration in these new fabric designs as I do!

Splendor 1920 ~ Bari J. for Art Gallery Fabrics. 
Oh. My. Goodness. Probably one of my favorite lines at market. Modern with a big vintage twist. 

Color Me Retro ~ Jeni Baker (from In Color Order) for Art Gallery Fabrics
She was just as cute as a button and was a great new addition to the Art Gallery Fabrics design team.

There were a few vintage trim and button booths that were actually selling things at market. I didn’t end up buying anything as it was a little pricey for me, but they were still fun to check out.

Melody Miller for Kokka

All of the japanese import fabrics are always SO adorable at the Seven Islands booth.

One of the most fun meetings we had was going out to dinner with Kelly Biscopink and Andrea Johnson, authors of the new ‘Modern Design for Classic Quilts: 12 Traditional Patterns Made New‘ (which I will be reviewing and giving away soon). I actually met Kelly when she was working at my publisher (she has since gone back into working in theater), but it was SO great to see her again in person and meet her co-author, Andie!

Kelly and Andie during their book signing for their new book.

Amy Butler’s booth was gorgeous, as usual, and she came out with a new line of woven trim. You all know how much I love trim, so I was completely in love!

Salt Water by Tula Pink

Here are a bunch of pieces that I sewed for the Birch Organic Fabrics booth. It was so much fun seeing them in person and on display. And what was even more fun was that my buddy, Shannon from Luvinthemommyhood sewed a bunch of pieces as well. Here is one of her amazingly adorable creations……..

Dress designed and sewn by Shannon from Luvinthemommyhood for Birch Organic Fabrics.
Tiffany and Shannon from Create Kids Couture
They are one of our new blog sponsors here and it was so great to get to meet them in person. Their patterns are absolutely adorable. This was their first time exhibiting at market and they did an amazing job on their booth.

The Moda Fabrics booth never disappoints. Their booth display was gorgeous. A big theme this market seemed to be playing color off of white and so they had paint sticks that had been dipped in all different colors of paint for a rainbow effect. It was beautiful.

Above are a few of the adorable displays at the Riley Blake Designs booth. I had dinner with their crew and designers again this market and they are always such a joy to be around.

David Butler (Amy Butler’s hubby) always has the coolest booth. It’s so manly and different from everything else you see at market. His fabric brand, Parson Gray, is such a breathe of fresh air!

Last, but not least, mom and I had to make a stop over at one of my distributors booth to see if they had my patterns out. Yep, they sure did!
Whew! That was a lot of pictures. I hope you got a little sense of the market experience. This was probably 1/20th of what was on the floor of market. There are tons of traditional quilting fabrics, quilt patterns, long arm machines, batting companies, tons of different thread manufacturers and so much more. But these are the types of booths that I am drawn to, so I thought you would enjoy seeing some of these pictures.
If you are a small, handmade business, I encourage you to consider whether or not you are at a place where it might be time to start ordering your fabric and supplies wholesale. If so, International Quilt Market is a great event to check out to meet the right people and get you moving in the right direction. You do not need to have your accounts already set up in order to attend. Please let me know if you have any questions and I’m always happy to help!

Mason Jar Soap Dispenser ~ Tutorial

I have a thing for mason jars. Big, small, new, old……..but the ones that really grab my heart are the blue jars. I have quite the collection these days. Some of them I got from my Grandma Peggy and some of them I have picked up here and there from garage sales, flea markets and thrift stores. The blue glass is just so pretty and soothing……I absolutely love them!

I have been wanting to turn several of the old blue jars into soap dispensers for about the last two years. I’ve seen some mason jar soap dispensers for sale and always thought they would go so perfectly with our cottage-style home. A couple months ago I finally mentioned my interest in this project to my husband thinking I could have him help me by drilling the hole in the top of the lids. But sometimes, I just get so impatient that I decided to take things into my own hands. A girl’s got to do what a girl’s got to do, you know?

So, with that being said, there is probably a more correct way to do this project if you really know how to use a drill and a metal drill bit, but if you would prefer to just use basic tools, this tutorial is for you! Plus it will only take you 10 – 20 minutes.

Mason Jar Soap Dispenser
by Lindsay Wilkes from The Cottage Mama
 
Supplies:
1 blue mason jar and metal lid
1 soap dispenser top
Phillips head screw driver
Needle nose pliers
Safety glasses (optional)
Scissors
Sharpie or other marker
Instructions:

Mark a hole with a sharpie in the center of the metal lid where you would like to put your soap dispenser.

The inside of the old metal lids have a ceramic lining inside. You need to remove this in order to make the hole for the soap dispenser. To remove the ceramic insert, just pound on it really hard with your screwdriver until it cracks. Once it cracks, the pieces come out really easily.

During this step I would recommend wearing safety glasses because the little ceramic pieces can fly up in the air and get into your eyes. But again, that is totally optional. Rinse out the inside of the lid once you have removed the ceramic pieces.

Now this next step is a little wild. You are going to take your screw driver and pound down on the little black mark that you made in the first step. I pounded about 4-6 times and then pushed down with all my might. You could also be a little less crazy and just take a hammer and hammer down on top of the screw driver to drive it through the center of the lid.

In the picture above, you can see how nicely the screwdriver will go through the top of the lid.

As you can see, the hole that was made from the screwdriver is not big enough to accomodate my soap dispenser, so I needed to make it larger. This soap dispenser top was from another store-bought hand soap bottle that we already had in the house. You could buy a fancier one or buy a plastic one at your local craft store.

If you are using a top from a bottle you already have, just make sure to pump out the soap and wash it out really well with warm water.

To make the hole in the metal lid larger, take your pliers and peel back the metal. This step is surprisingly easy. Just pull back the metal and check and see if your soap dispenser will fit. You want the fit to be very tight so that the top does not move around, so make sure you don’t pull back too much metal before testing the fit.

This step could also be done with a drill and a metal drill bit, but again, you want the fit to be very tight so make sure you don’t use a bit that is larger than the soap dispenser.

Fit your soap dispenser into the metal lid. Again, I can’t say it enough, but you really want to have to work the soap dispenser into the lid so it’s really tight. Since we pounded so much on the lid, you may just need to pop the top of the lid back out a little bit.

Now you need to cut the plastic tube from the soap dispenser to fit your jar. Use the scissors and cut it to size. It should be close to the bottom of the jar, but not touching.
Fill the jar with your favorite hand soap, put the lid on top and enjoy!
These mason jar soap dispensers would make lovely gifts for the holidays or as a housewarming gift. I made these two in about 20 minutes, so it is a very quick and easy project. Plus it’s kind of fun to get out the tools!
Mason Jar Soap Dispenser from The Cottage Mama
Cottage Mama’s Note: You could probably do this project with a regular store-bought mason jar, but you would need to make sure you attached the center lid insert to the outer ring really well. Also, I’m not sure how easy that metal is to poke through with your screw driver (the old metal was pretty easy), but if that’s what you have, then give it a try!

Winners ~ Holly Designs and Riley Blake Designs

The winners of the Holly Designs Gift Certficate and the Riley Blake Designs Fat Quarter Bundle are the following lucky ladies………

Holly Designs:

Riley Blake Designs:

Congratulations to you both! If you could please email me at thecottagemama[at]gmail[dot]com with your contact information, we will work to get you your prizes as soon as possible. Thank you so much to everyone who entered!

Chicken, Avocado and Grape Salad ~ Recipe


The other day I had some avocados that I needed to use up and I decided to make myself something yummy for lunch. This is a quick and easy recipe, but is so tasty you could certainly use it for entertaining or for a wedding or baby shower.


Chicken, Avocado & Grape Salad

by Lindsay Wilkes from The Cottage Mama
SERVES 2-3
Ingredients:
1 large, ripe avocado
1 large bone-in chicken breast, cooked or roasted
1/2 cup grapes, quartered
1/2 fresh lemon
1/4 teaspoon garlic salt
Extra Virgin Olive Oil
Salt and Pepper, to taste
French or Italian crusty bread
Directions:
Remove avocado from skin and remove pit. Dice or cube avocado into bite sized pieces. Sprinkle with garlic salt. Shred chicken from chicken breast. You can roast one in the oven seasoned with salt and pepper or you can shred part of a store-bought roasted chicken.
Combine the avocado, chicken and grapes in a mixing bowl. Fold to combine. You do not want to break up the avocado too much as you still want it to be in chunks, so be careful not to smash it. Squeeze the juice of half a lemon on top of the chicken, avocado and grape mixture. Season with more salt and pepper and a drizzle of olive oil. Fold again to combine.
To serve, spoon salad mixture on top of a toasted piece of sliced Italian bread or half of a french baguette. To finish, drizzle with olive oil and another squeeze of lemon. You could also serve this on top of a bed of leafy greens with a simple vinaigrette.

ENJOY!

Chicken, Avocado and Grape Salad Recipe. This simple recipe is SO healthy and delicious!! From The Cottage Mama.