Archives for March 2011

Tortellini with Lemon Cream Sauce

Sometimes the most delicious dishes only contain a few ingredients.  My tortellini with lemon cream sauce is one of those.  So simple, yet indulgently delicious.  
Tortellini with Lemon Cream Sauce
Ingredients:
1 package fresh cheese tortellini (8 oz.)
3 tablespoons butter
1.5 cups heavy cream

1/4 cup grated Parmesan cheese
1 lemon
Salt and pepper, to taste

Directions:
Begin cooking fresh tortellini according to package directions.

In a large pan, melt butter over medium heat.  Add in heavy cream and bring to a boil.  Once you’ve reached a boil, reduce the heat to medium.  Add in the juice of one lemon, Parmesan cheese, salt and pepper.  Taste the sauce to check for salt and pepper.  I like a lot of pepper in my cream sauce and if it doesn’t taste savory enough, it probably needs more salt.

Allow the sauce to bubble lightly until it reaches your desired consistency.  Once you are happy with the thickness of your sauce, reduce the heat to low until your tortellini is ready.

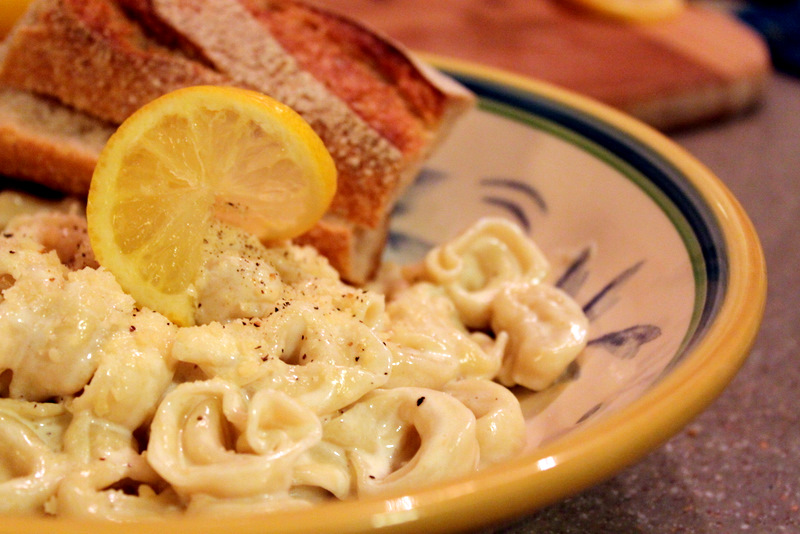
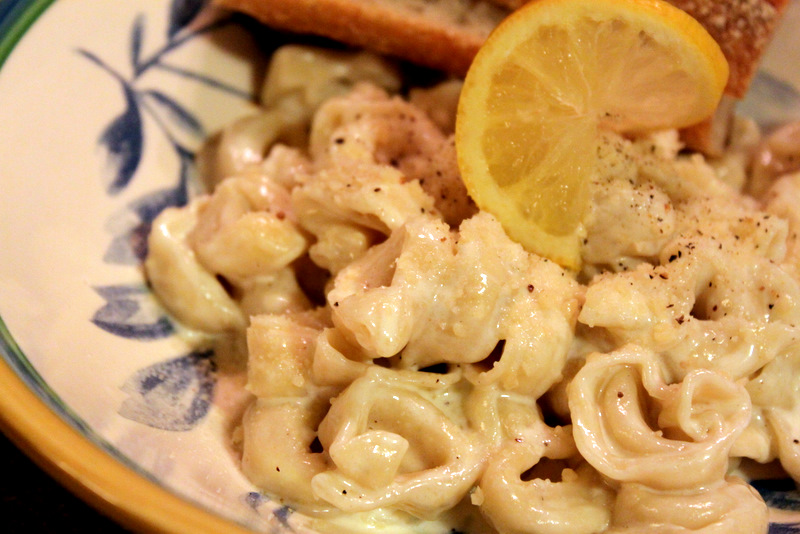
Drain tortellini and add to the large saucepan.  Toss to coat.  Serve with a sprinkling of Parmesan cheese, freshly grated black pepper and a slice of lemon.

Enjoy!

New Sponsor and Pattern Giveaway – Fairytale Frocks & Lollipops

I am so excited about the newest sponsor of The Cottage Home blog –
This online shop is full of amazing sewing patterns, fabrics and notions.  Today, owner Terri, is giving away one sewing pattern of your choice from her amazing shop for TWO readers.  
Click HERE to read more about this exclusive giveaway for The Cottage Home readers and enter to win.  Also, find out why I love Fairytale Frocks & Lollipops and why you will too!

Burlap Covered Lamp Shade Tutorial

I’m definitely in full-on nesting mode now and have been tackling all sorts of home improvement projects. I have been working on bringing more texture into our home lately.  While I love bright, fresh fabrics for little girls clothing, I much prefer a warm, earthy palette for my home decor.

I love looking through the Potterybarn and Ballard Designs catelogues for ideas and inspiration.  Both of these stores are a little out of my budget these days, but I think they do such a wonderful job of putting rooms together with color, texture and natural elements.

 image via Ballard Designs

I have been eying these burlap covered lamp shades in the Ballard Designs catelogue lately, but at $35 – $50 per shade, I just can’t justify the splurge.  So what is a girl to do?  How about a DIY version for only $1.50 per shade?  Now, that’s more like it!

 Burlap Covered Lamp Shade Tutorial
Materials:
1 solid color lamp shade (any size)
1-2 yards burlap (more yardage for bigger shades)
Spray adhesive
Heat n’ Bond
Glue gun
Iron

Clothes pins
Scissors

Directions:

Grab your lamp shade.  This was an IKEA shade that I’ve had for quite some time.  I covered two of these and one much larger shade.  I like the shape of this shade, but I never loved the fact that the light looked so white coming through it.  I knew the burlap would help fix that problem and warm it right up.

Make sure you choose a solid color shade.  Any patterns will show through the burlap and the shade will lose it’s earthy look.

I purchased my burlap at my local Joann’s.  It was $3.99 per yard, but I had a 50% off coupon, plus an additional 25% off coupon – got love coupons for fabric!

Turn your lamp shade on its side and trace it (by rolling it along your burlap).  Leave an inch or two allowance on the top and bottom.  It’s hard to see my markings in the picture above, but I just used a pink highlighter.

Cut out your pattern.  Most angled shades will look like the shape above.  If you are using a drum shade (meaning round), you will have a less curved pattern.

Spray your entire lamp shade with spray adhesive.  Do this outside since the fumes can be a little overwhelming.  You can find spray adhesive in most craft stores and hardware stores.  Wrap your burlap around the shade, smoothing all the bumps as you go.

Cut off any excess burlap from the top and the bottom of the shade.  The burlap should not extend past the top or bottom of the shade.

Now to make the finished edge or binding.  Measure around the top and the bottom of the shade.  You will want a long enough length of burlap to cover these two measurements plus and extra inch or so.  Cut the burlap 2 inches wide.  Grab your Heat n Bond for the next step.

Iron the Heat n Bond (paper side up) down the middle of your long burlap strip.  Once it has cooled remove the paper backing.

Next you will fold in both sides and press.  This will secure the two raw edges of the burlap.  Do this all the way down the entire strip.

Heat up your glue gun.  Turn the outside raw edge of the burlap under and glue in place down the back of the shade.

Take the binding and hot glue it to the top and bottom of the shade.  This will hide any raw edges.  Trim any excess burlap that might be poking above or below the binding.

I used clothes pins to hold the binding in place.  Because of the angled shape of this shade I really had to work to get the binding to lay flat since I did not cut it on the bias.  This step will be a lot easier with a round drum shade.  The clothes pins really helped me here, so I highly recommend using them during this step.  Once the glue has cooled, remove clothes pins.

When your lamp shade is complete, place it on your lamp base and enjoy this beautiful, natural look!  This lamp base is also one I have had for many years from IKEA.

I considered using bias tape for binding the top and the bottom of the lamp shade.  You certainly could give that a try if you want to skip the step of making your own burlap binding.  I think brown, cream or natural would look really nice.  Or if you are feeling a little wild try blue, green or red.

Here’s the extra-large shade that I covered for the lamp in our playroom.  This shade was a hand-me-down and had a little hole in it that drove me nuts.  But the size was so wonderful, that I couldn’t bare to part with it.  With the burlap on the shade, you would never know it ever had a hole.

Three lamp shades for a total of $4.00 – sure beats three shades for $105 – $150, don’t you think?  Granted they would be a little more if you don’t have all the supplies (I only had to buy the burlap), but still, I think it was well-worth taking the time for a little DIY!

Homemade Veggie Cream Cheese

Now that my morning sickness seems to be entirely gone (knock on wood), I’ve been getting back into cooking.  I love flavored cream cheeses, but my favorite varieties are the savory ones – veggie, onion, sundried tomato, ect.  There’s nothing better than making your own flavored cream cheese.  It’s a fraction of the cost of the store-bought variety and is twice as yummy!
Make several different cream cheeses for a brunch party or keep a couple in the fridge to please your whole family.  This is my savory variety, but you could certainly make your own sweet flavored cream cheese such as honey walnut, raspberry or strawberry.
Veggie Cream Cheese
Ingredients:
2 packages cream cheese (8 oz. each – light or regular), softened
1 carrot, peeled
1 stalk celery
3 small green onions (or two large)
Salt and pepper, to taste
Directions:
Grab your veggies.  Use whatever you like – if onions don’t speak to you, then omit them.
Finely dice your vegetables.
Place all finely diced vegetables in a medium-sized mixing bowl.
Mix in softened cream cheese and add salt and pepper to taste.  Be sure to mix the cream cheese and the vegetables thoroughly.
Slice and toast your favorite bagel – mine happens to be Sesame with an Everything bagel following close behind.
Spread your cream cheese on top.  Be generous, you want to make sure you get in all your veggies!
Place cream cheese in a food storage container and refrigerate.  I find the cream cheese to be even better once it has had some time for the flavors to come together in the fridge.
Try this cream cheese on a whole wheat pita pocket with fresh turkey, cucumber and tomato for a healthy lunch option or spread it on some crackers for a tasty little snack for the kiddos.  The options are endless!

Brett’s Irish Soda Bread

You know I love hearing from you guys – it makes me feel all warm and fuzzy inside.  Well, a bunch of you either commented or emailed regarding the Irish Soda Bread that my husband made for our St. Patrick’s Day celebration.  I thought, surely I posted the recipe last year, but apparently I didn’t.  The fact that I had yet to post this is surprising because it is such a big part of our St. Patrick’s Day tradition. 

Sorry for being such a tease – I posted pictures of something yummy and didn’t give you the recipe?  How rude of me.  So here’s the recipe you’ve been waiting for…………and believe me, it’s the best soda bread I’ve ever had and I’m not just saying that because it’s my hubby’s family recipe! 

Brett’s Irish Soda Bread
(1 loaf)
Ingredients:
2 cups flour
3 tablespoons sugar
2 teaspoons baking powder
1 teaspoon baking soda
1/2 teaspoon salt
3 tablespoons butter, softened
1 cup buttermilk
1 handful currents or raisins 
1 tablespoon of melted butter (for brushing)
Directions:
Preheat oven to 375 degrees.
Blend dry ingredients.  Cut in butter.  Add buttermilk.  Add currents or raisins.  Turn out on floured board and kneed for 1 minute.  Make dough into ball.  Press a floured knife into a cross shape on top of dough (don’t cut the dough, just make an indention). 
Bake for 40 minutes.  Brush with melted butter when you remove the bread from the oven.
Serve bread with butter, preserves, or plain.

Guest Post on "No Big Dill" – Dick and Jane Inspired Dress

Today I’m guest blogging over on “No Big Dill” for Katy’s “Once Upon a Thread” blog series.  This creative blog series is geared towards coming up with a look based on your favorite children’s storybooks and I’ve come up with a “Dick and Jane” inspired look.

This dress was created from the $1.49 sheet that I found last week on my thrift store hunting adventure – it doesn’t really look like a sheet anymore, does it?  I’m sharing a tutorial for the embellished bodice on this dress.  So head on over to “No Big Dill” and say hello!

Happy {Belated} St. Patrick’s Day

Happy {belated} St. Patrick’s Day to you all!  We had a great day yesterday enjoying our Irish heritage.  It finally thawed out enough here in Chicago for us to be able to go outside and explore the yard.

We went hunting for sticks and rocks around our yard and boy were there a lot!  We have tons of trees around us, so once the snow melts, there are plenty of great sticks to be found.

This was Miss Matilda’s main look the entire time we were outside.  She was in amazement of so many things – especially the wind-chime that we have hanging from a tree.  It is so amazing to see the world through your children’s eyes – it really made me appreciate all that we have and the area in which we live.

We went to look for our favorite ducks (we live right next to a very large river), but I don’t think it is quite warm enough for them to make their appearance yet.  They were probably staying on shore for the most part, but I bet in a couple weeks we will see them.  There’s a really cute male and female duck that walk around our neighborhood every year – they seem so in love – it is very sweet to see.

My mom made these sweet St. Patrick’s day dresses for the girls.  I love how they turned out with all the ruffled ribbon and grosgrain ribbon trim – too cute!

My husband made two loaves of his family recipe for Irish Soda bread.  It is delicious every single year!

Brett (The Cottage Papa) typically doesn’t get home from work until later, but for St. Patrick’s day he made a special effort to be home early so we could have a family dinner.  I was in charge of the corned beef, cabbage and potatoes and they turned out mighty good, if I do say so myself.  I make my corned beef in the crock-pot.  I just stick it in there with the seasonings – no water or anything and about 6-8 hours later, cooked on low it is ready.  I have this thought every year on St. Patrick’s day – Why we don’t eat corned beef more often? – it is so yummy.

So, that’s our St. Patrick’s Day recap.  It was a truly great one.  Did the girls really like their dinner?  Not really.  Did they even eat the soda bread?  No, they preferred the butter on top.  But it’s the tradition of it all that I hope we are instilling in our children.  Someday they’ll like it…….someday.  
It’s another sunny day here in Chicago and I can just feel spring approaching.  I hope you all had a wonderful holiday and TGIF!

Twin Boy and Girl Onesie Tutorial

I’m back with a tutorial!  It’s about time, right?  Well, a couple months back I was contacted by an old friend who asked if I could do a custom order for her brother and his wife who are expecting boy and girl twins.  Of course I said sure and this is the little set I came up with for the soon-to-be parents.  I thought you all might enjoy making this set or just one of the onesies – it seems like there are lots of babies expected over the next six months around here!
Click HERE to print the applique pattern pieces.
Supplies:
Two onesies
Two coordinating fabrics
Fusible interfacing (such as steam-a-seam lite or wonder-under)
Several yards of coordinating ribbon (for ruffle booty on girl onesie)
Ric-Rac
Thread
Embroidery thread (optional)
Wonder-Tape (optional)
Tie and Ruffle Top pattern pieces (click HERE to print)
Directions:
Select your two coordinating fabrics.  I chose these two from Sandi Henderson’s “Meadowsweet 2” line.  I thought these were perfect for spring and so cute for little babes.
You will need some fusible interfacing for this project.  Use whatever brand you like, but make sure you choose the lightest version available.
Place your pattern pieces on one side of the fusible interfacing to gauge how much to use.
Peel back one side of your fusible interfacing and iron it to the wrong-side of the fabric (meaning the side that is intended to be the back).
Lay your pattern pieces on top of the fusible interfacing and trace your pattern.  I like to use washers from the hardware store to weight down all my patterns.

Next, cut out your pattern pieces and remove the paper backing from the interfacing.  Place your pattern where you would like it on the onesie.  To make sure it is centered, measure both sides of the tie from both sides of the onesie – make sure they are even.  Iron your tie in place.

Do the same process with the pattern piece for the girl onesie.  You can make this pattern piece much larger if you are making this shirt for an older child.  I just didn’t want the ruffle top to overwhelm a 3-6 month old baby.

Iron bib pattern piece in place on girl onesie.

Cut your fabric for the ruffle out of coordinating fabric.  I cut my ruffle 2.5″ wide x 18″ long.  If you decide to alter the bib pattern piece and make it larger (say for a 2, 3, and 4 year old), cut your ruffle 2-2.5 times as long as the outside of the bib.

Fold the ruffle piece in half with the wrong-sides together and sew both ends.

Once both ends are sewn, clip the corners to remove bulk and turn the ruffle piece right-side out. Press ruffle piece in half.

Next, run a gathering stitch down the ruffle piece on the raw edge of the fabric.  Make your stitch length as long as possible (mine is 5.0) and stitch all the way down the ruffle.  Do not back-stitch or the ruffle will not gather.

Gather your ruffle by pulling on the bobbin thread.  Once gathered, pin your ruffle in place around the bib.  You could certainly serge or run a tight zig-zag stitch along the edge of the ruffle to clean it up a bit.

Stitch ruffle in place.  I really should have started on the other side, but oh well.  It takes some work getting your onesie all situated under your presser foot, but just work with it and you’ll get it.

Next grab your ric-rac.  Cut enough to cover the edge of the ruffle – about 9″.  Peel off one side of the paper backing on your Wonder-Tape and apply to the back of the ric-rac.  Wonder-Tape is probably one of my most favorite sewing products EVER.  I won’t go into it too much, but basically it is a double-sided tape that disappears in the wash.  It doesn’t gum up your needle and makes holding trim in place a breeze.  It is found in the notions section of your sewing store.  If you don’t have this, you can certainly use pins, but trust me, this will make your life much easier!

I used Wonder-Tape for my “Little Love Bug” outfit for the Project Run and Play Valentine’s day challenge.  It held my ric-rac in place nicely down the center of the jumper.

Peel off the other side of the Wonder-Tape and place ric-rac over the raw edge of the ruffle.  Make sure to tuck under both ends of the ric-rac.

Stitch ric-rac in place with coordinating thread.

If you plan to add the ruffles to the booty of the girl onesie, measure the back of the onesie and cut your ribbon 2-2.5 times as wide as the booty.  Turn the ends under and stitch in place.

Run a gathering stitch down the center of each piece of ribbon (as described when making the bib ruffle).  Gather by pulling on the bobbin thread.

Pin in place and stitch down the center of each ribbon.  Make sure to back-stitch well that the beginning and end of each ribbon.

For the tie onesie, you want to zig-zag stitch around the entire outside of the tie to prevent any fraying.  Test out your stitch on another piece of fabric to check for the size of the zig-zag that you prefer.  I like to use embroidery thread for my main thread on applique.  I find it lays nicer and has a little bit of sheen that looks really good.

Stitch around the entire top piece including across the center of the tie to give the applique more definition.

If you have any trouble with your zig-zag stitches not laying flat, check your tension and reduce.  Additionally, I have to stitch fairly slowly on my machine in order to have uniform stitching when doing applique.

Add zig-zag stitching across the top of the bib on the girl onesie as well.  This will prevent any additional fraying and will secure it in place nicely.

I added a set of three burp cloths to this gift set.  These are simply rectangles of fabric that are backed with white minky dot fabric and are serged on the edge with coordinating blue thread.

Add your labels to the gift set to finish each piece.  If you don’t have some, I highly recommend purchasing some – see post HERE where to purchase.  Wrap up your gift set and you are all set for the arrival of boy and girl twins!

Cottage Mama’s Note:  You can use any onesies you like – look for them at Walmart, Carter’s, Target, ect……..any one will do.

If you end up making either of these onesies (or any projects from tutorials on the blog), I would love if you would add them to The Cottage Home Flickr Group:

The Art of Thrifting

I had a wonderful “day-off” on Saturday.  My husband was judging a beer brewing competition and my in-laws took the girls for the entire day and offered to keep them overnight.  So, I was left with a WHOLE day to myself (aside from the brief meeting with our accountant to finish up our taxes).  What to do?  What to do?

I chose to spend my day leisurely thrift store shopping around my area.  This is something I rarely get to do and there were some shops in the area that I had never even checked out before.  My number one priority was to find a comfy wing-back chair to re-upholster.  I have been searching for one of these for some time now.  And while I was searching for my chair, I happened upon lots of other fun treasures that were just screaming my name.

I ended up finding these three vintage sheets (all at different stores).  Sheets are great to use as fabric.  I bought these with the intention of making dresses out of them, but if you come across any other great sheet patterns consider using them for window drapes or pillows.

This was my favorite one, by far.  It cost me $2.00 and I just love the border around the entire top of the sheet.  It has this beautiful floral print and the embroidered scalloped edging.  I can just see this as a hem for a sweet, spring dress.  The rest of the sheet has little flowers that will also be great for dress fabric.

I thought this sheet was fun and whimsical.  It was only $1.50 and is full-sized (which is a lot of fabric).  It has all different little animals and trees on it.  Fun for a little girl, I think.

And this one, well this one, I bought with my daughter Matilda in mine.  It just looks like her to me – sweet and feminine.  I think it will make a really sweet smocked dress for her and it was only $1.50.

I don’t know about you, but I don’t have a ton of disposable income to fix up my house these days.  With having two little girls and another one on the way, we are definitely on a budget.  I found these inexpensive frames and have an idea for a little wall-decor project with them.  I’m planning to spray paint them all to match.  These frames can be pretty expensive if you bought them new, but these were just a couple dollars.  And of course I will share with you once I get my project complete.

And this was a really fun find!  Someone had donated all these designer upholstery books to our local thrift store and I scooped them up for .99 cents per book.  I also got all these great seperate pieces of fabric as well – some are square and some are quite large (they are folded up in the picture).  I can see some serious pillows being made from these – and it was $5.00 for all of this fabric.  I don’t know if you remember, but I made my Fall Pumpkins from home decor fabric remnants and they turned out great.

I can see these remnants making something really great for Christmas – maybe an advent calendar or a patchwork stocking.  Oh, the possibilities are endless!

And finally, my chair!!  I actually found my chair!  I couldn’t believe it, but all the lines were just what I was looking for and the chair was super-comfy as well.  The legs are all carved and, it’s hard to tell in the picture, but there is some carving up around the top of the back of the chair as well.  I LOVE it and I got a wonderful deal on it too.  I plan to recover it in a much more updated, modern fabric.  I don’t know if you can envision it, but I can, and I think it’s going to be great!

Tips for Thrifting:

  • Bring a List:  Make sure you know what you are looking for.  It’s much easier to go into a store with some sort of direction.  You may find other treasures on the way, but if you don’t know what you are looking for, you may get overwhelmed by the whole experience.
  • Don’t Bring Children:  If you are really treasure hunting, this is best done on your own.  Children are too distracting and you may miss that diamond in the rough trying to keep them happy.  And it’s just so much more fun to browse leisurely, then have to worry about when your child is going to melt-down.
  • Be There When the Store Opens:  If there is a store that you know carries what you are looking for, be there right when they open.  Most furniture goes very quickly and the good stuff is gone early Saturday morning.  Make sure you don’t miss out!
  • Think Outside the Box:  Look at things from a different perspective.  What could this be used for other than its intended use?  If you get creative, you might find some really great deals and be able to create something truly fabulous.
  • Don’t Be Afraid to Ask:  If you don’t see what you are looking for, don’t hesitate to ask the sales staff.  I was once looking for 100% wool sweaters and finally asked about them.  The lady took me to this back room where they had been holding over 200 sweaters for a woman, but they had lost her name and number and said I could have any I wanted for $1.00 each – SCORE!!  Also, ask if they know of any other thrift stores in the area – they might know of some that aren’t well advertised.
  • Do Some Research:  If you are looking for a bigger ticket item, such as a chair or dresser, make sure you get an idea of what is a reasonable amount of money to spend.  Some thrift stores can grossly over price these types of items.  I had done some looking on craigslist and ebay for wing-chairs, so when I came across mine, I knew I had found a great deal.
  • Negotiate:  Especially in used furniture stores – it never hurts to try.  All they can say is no.  And you are even better off if you have cash and are prepared to walk away with the item right then and there.
  • Have Fun:  View this as a treasure hunt.  The hunt is almost as fun as the find and if you don’t come away with anything, that’s ok, there will always be new treasure to find in the future.

I hope these tips will help you find some unique treasures.  You don’t have to spent a lot of money to have fabulous things, you just have to be a little creative.  It’s probably going to take me awhile to get around to recovering my chair, but I can’t wait to share that project with you – it’s going to be an adventure!

What has been your best thrift store find?

I’m Finally Letting the Cat Out of the Bag

So, I’ve finally decided to let the cat out of the bag.  Remember last week when I told you that I had something else in the works?  Well, it’s not blog related and it’s not Cottage Mama related, it’s much bigger than that – about the biggest thing I’ve been working on in the last year and a half……..

I’m Pregnant!!
Wow, this has been one heck of a secret to keep from you all – I’ve been wanting to tell you guys for SO long.  But I like to wait until I’m through the first trimester to tell most people – I had an early loss in between Savannah and Matilda, so it just makes me feel better to wait.
So yes, I was in the throws of my 1st trimester during Project Run and Play and over the last several months.  Some days I didn’t know if I would be able to get through it with all my nausea and sickness, but I did.  Luckily, the 1st trimester yuckies seem to have disappeared as of two weeks ago and I definitely have my normal large appetite back. 
If you’ve been wondering why there has been less than normal tutorials and sewing things on the blog, that is why.  I just haven’t felt up to it.  It’s enough for me to get through the day chasing around a 3 year old and 19 month old and keeping up with custom Cottage Mama orders.  So, I hope you’ll forgive me.  I’m praying my normal energy level comes back one of these days, but without my beloved coffee, I just don’t know.  But you understand, right?
The Cottage Baby #3 is due early September.  We will be finding out what we are having in about 6-7 weeks, so I will keep you updated.  We are SO excited to add another little one to our family and can’t wait to find out if it’s a he or she.  Savannah thinks it’s another sister, but she keeps saying the baby in my belly is “Baby Jesus”………..I guess that’s the baby she is most familiar with.  I would be mighty shocked if she was correct.  I think I’d have a ticket straight into heaven for sure if that was the case!
Whew, so glad to finally let you all in on my little secret.  Thanks so much for reading and I’m sure there will be more baby related posts in the future (I won’t be able to help myself).
What do you think?  
Will it be Sugar and Spice and Everything Nice or Snakes and Snails and Puppy Dog Tails?