Archives for August 2010

Fabric Giveaway From Me to You

I don’t do a whole lot of giveaways here on The Cottage Home. So, today I’m changing it up a bit and I’ve got a little giveaway from me to you.  It’s not much, but just a little token of my appreciation to all of The Cottage Home loyal readers.  I love your emails, your comments, and you seriously make blogging such an amazing experience for me.

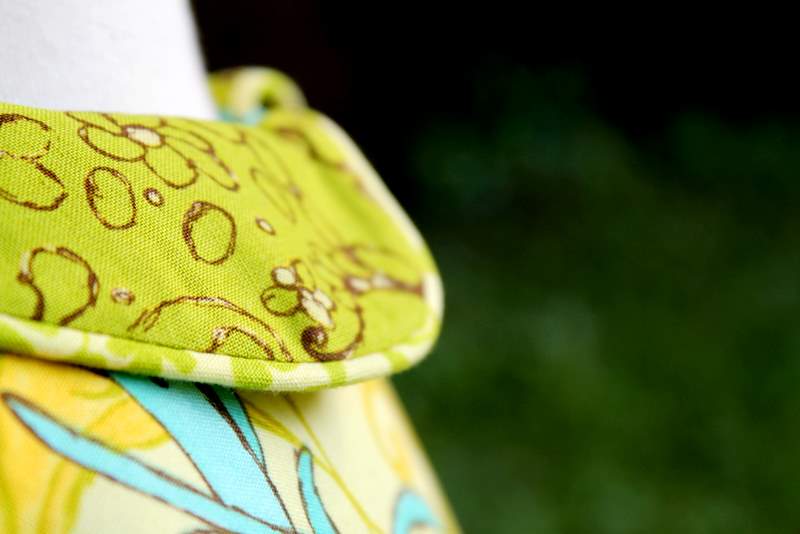
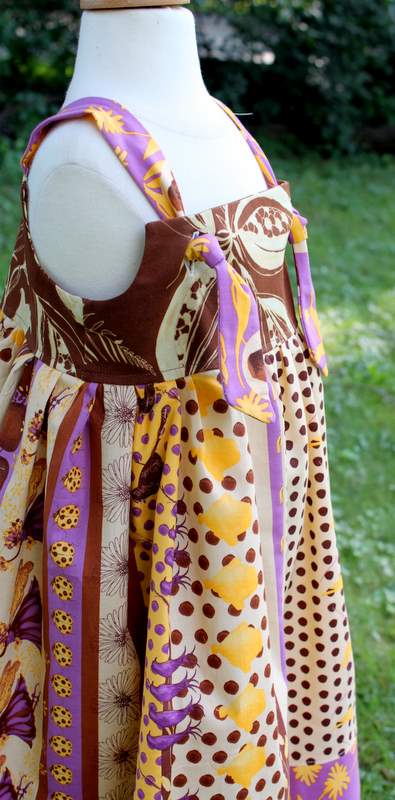
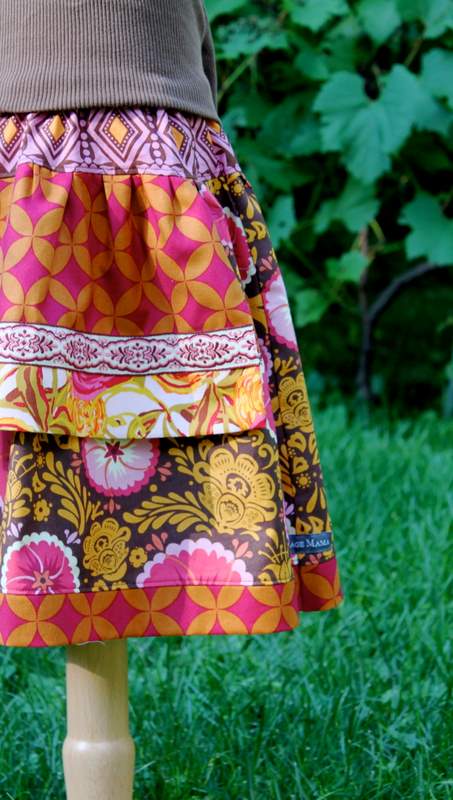
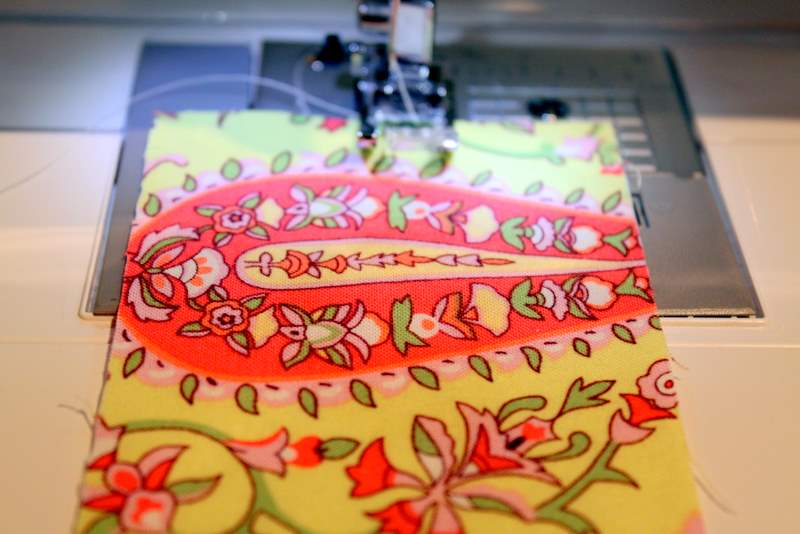
So, enough with the touchy-feely stuff and onto the giveaway.  Today you have a choice of two 5 yard fabric bundles.  You can choose from these two fabric lines Art Gallery “Sugar” or David Walker “Robots”.  If you are the winner, I will be sending you 1 yard cuts of each of the 5 prints from whatever line you choose – that’s 5 yards total!

Here are your two bundle choices:

Pat Bravo for Art Gallery Fabrics “Sugar”:

David Walker for Free Spirit Fabrics “Robots”:

So you can enter this giveaway three times (three chances to win), here’s how:

1. Leave a comment (with your email address) and let me know which bundle you would like and what you might make.

2. Become a follower and let me know you’re following.  If you are already a follower (thank you), comment and simply let me know.

3. “Like” The Cottage Mama” on facebook.  Click here to become a fan.  Come back and leave a comment to let me know you’re a fan.

This giveaway will be open for the next week and will close next Tuesday, September 7th at midnight (US Central Standard Time).  I will use random.org to select the winner.

Again, I want to thank you all so, so much for reading my little blog.  It hasn’t even been a year yet that I started The Cottage Home, but I feel like I’ve known some of you for much longer. 

Have a great day!

Change Up Bag Lunches with Tortilla Roll-ups

My Mom always did a great job packing our lunches while we were in school.  And yes, I was one of those kids whose Mom packed their lunch up until their very last day of high school – thanks Mom!

As most kids do, I went through phases of liking certain things more than others.  Only wanting turkey sandwiches with nothing but turkey and bread (how boring!) and loving peanut butter and jelly (minus the jelly).  But I always got excited when my Mom would change it up a bit with something new and Tortilla Roll-ups were definitely a pleasant surprise.

Now while I don’t have school aged children yet, we had a playdate this week with a good friend and her little ones, so I decided to whip up some of these roll-ups for the occasion.

This is my grown up version of Tortilla Roll-ups (with lots of yummy things inside), but my girls love them, so your kiddos probably will too!

Tortilla Roll-ups
Serves 3 (big kids) – 6 (little kids)

Ingredients:
1 block cream cheese
1 can diced green chiles
1 small can sliced black olives
1 tablespoon fresh chives (or one green onion, sliced)
6 slices of ham
6 flour tortillas

Directions:
Set cream cheese out on kitchen counter for 30 mins. or so to allow it to soften.  Meanwhile, drain black olives and give them a rough chop.  Slice green onions or chop chives (both are tasty so use what you like best).  Place green onions (or chives), roughly chopped black olives, and canned green chiles into a large mixing bowl.  Stir to combine.

Add your cream cheese to the green onion, olive and green chile mixture.  Work the cream cheese into the mixture with a wooden spoon.  Mix until the cream cheese is completely combined.

Now for the roll-ups.  Using a spatula, spread 1/6th of the mixture evenly on top of a flour tortilla and place a piece of ham on top.  Roll up your tortilla.

Pack two tortilla roll-ups (or one for an elementary age student) for lunch by wrapping them in plastic wrap.

If your little ones (or bigger teen ones) prefer little finger foods, slice tortillas and pack in a small tupperware container.

The sliced version make a wonderful appetizer or a finger food dish to bring to a party.

And hey, grown-ups love these things to, so even if you don’t have kids, make some of these for yourself for lunch – you will love them – deeeelish!

Change Up Bag Lunches with these Easy Tortilla Roll Ups from The Cottage Mama. www.thecottagemama.com

Cottage Mama’s Note:  If your children prefer are more simplistic recipe, just make these with plain cream cheese and ham.  It will still be something different than their regular sandwich.

Sew Basics: Applique

Applique is a great way to add detail to your favorite sewing project.  I define applique as a piece of fabric sewn on top of another piece of fabric (though some might consider embroidered patches as applique as well).  You can add applique to quilts, shirts, blankets, onesies, bibs, burp clothes and the list goes on and on.  Applique is very simple and is a great project for the beginning sewer.

Here are the supplies needed for basic applique:

Double-Sided Fusible Interfacing
(such as Wonder-Under or Steam-A-Seam Lite – these are the two I use)
Scissors
Pencil (if drawing your applique)
Sewing Machine
Thread
Iron
Ironing Board

To demonstrate the applique technique, I will walk you through a couple items I made recently for my etsy shop, The Cottage Mama – an appliqued “tie” shirt and a basic square applique “Little Red Riding Hood” onesie.

First you need to cut out your pattern.  You can be as detailed or as basic as you like.  For basic applique, as seen above, cut your pattern out of fabric AND cut the same pattern out of your fusible interfacing.  If your design is very detailed, I might recommend fusing your interfacing onto a larger piece of fabric first and then cutting out your pattern (it will just make your life easier that way).

Double-sided fusible interfacing will have a paper backing on both sides.  For the next step you need to remove ONE side of the paper backing.

Next place your fabric (right-side up) on top of the side of interfacing WITHOUT the paper backing.  This is the side that you just removed the paper backing from in the previous step.  Use a hot iron and iron the fabric to the interfacing.

Now your interfacing is fused to your fabric applique pieces.  One side is fabric and the other side will feel like paper (because it still has the paper backing on).

Remove the paper backing from the wrong-side of the fabric.  You will notice that there is a thin layer of interfacing that is now fused to the fabric.

Place your applique piece where you would like it to be position, in this case, on the front and center of a onesie.

For the tie, there are two pieces, so place the first piece in position and then the second.

At this point you can play around with your applique pieces and move them around until you get them positioned just right.

Once you have them positioned, use your hot iron to fuse the applique to your other piece of fabric (again, in this case a onesie and a t-shirt).  After ironing, your applique will pretty much be secured in place.

I prefer to take it a step further and stitch around the applique piece.  For the tie, I did a very tight zig-zag stitch (almost resembling a satin stitch).  To do this, set your machine on a regular zig-zag stitch and reduce the stitch-length almost as low as it will go (I set mine on .3).  It’s always good to do a test run before actually stitching on your applique (trust me, I learned this the hard way).

If you have trouble getting your machine to feed the fabric on such a low stitch-length, try setting it a little higher and try again.  Like I said, always test it out to see if the stitch meets your expectations.

I like to set my stitch-width to 3.0 or 2.5 for this type of applique, but again, that is all personal preference.  Make sure to stitch along the very edge of the applique piece.  This will ensure a clean line and no fraying after washing.

For the Little Red Riding Hood Onesie I used a longer stitch-length as I wanted to be able to see the zig-zags.  I also used a little bit narrower stitch-width as well.

After stitching around the applique, I added additional detail by doing some hand embroidery on the trees as well as around the border of the applique.  I think this attention to detail makes this onesie truly special!

I just love the simplicity of this appliqued onesie.  I used a Japanese import (linen/cotton blend) fabric for the main applique.  The onesie is made from organic cotton and recycled polyester and is amazingly soft.

Here are a few other examples of some past applique techniques:

I don’t know if you remember my Dress Shirt Sleep Sack Tutorial, but here I used a basic flower applique.

I used fusible interfacing and applied it to a large floral fabric (Church Flowers from “Nicey Jane” by Heather Bailey).  After applying the interfacing I cut more detail around the flower.  I found it much easier to cut once I already had the interfacing applied.

Then I ironed my applique piece onto the sleep sack.  To stitch this applique, I simply used a straight-stitch around the border.

For my Sleepover Pillowcase Tutorial, I applied fusible interfacing to a large square of fabric.  I then hand-drew these letters for the monogram and cut them out.  Then I removed the final paper-backing, ironed them on the edge of the pillowcase, and used a zig-zag stitch to finish the applique.

Here is a onesie from my etsy shop.  On this “tie” onesie I used a straight-stitch to finish the applique.  In this case, I thought a slightly frayed edge would be really hip and cute for a little boy.  If you do not like the frayed look, then I would not recommend using a straight-stitch.  I apply Fray-Check to the edge of all of my straight-stitch appliques.  I think this helps make the edge fray slightly, but not look sloppy.

And finally, this is Savannah’s “S” pillow that I made for her big girl room.  I used a heavier interfacing for the “S” because I wanted it to stand out a bit more.  The fabric used here is Heather Bailey’s “Freshcut”.  For most applique work, I use Wonder-Under or Steam-a-seam Lite, but there are some instances that I just like an interfacing with a little more body.

Cottage Mama’s Note:  If you have any questions in regards to my “Sew Basics” series, please don’t hesitate to email ([email protected]) or comment and I’m happy to help.

DIY Laminated Alphabet Flashcards

My 2.5 year old daughter, Savannah, is really into her alphabet lately.  She loves to sing the ABC song and can identify most of her letters (I’ll take credit for the song, but I really think Sesame Street has helped her along her way with the letters).  I thought I would take advantage of this little ABC phase she is going through and make her some fun little flashcards.

Jill from Homemade by Jill posted these adorable Alphabet cards on her blog as a free printable.  When I saw this post pop up in my reader, I knew I must do something for Savannah with these cutie little cards. 

So I decided to print the alphabet cards, laminate them, cut them into flashcard size and put them all on a big binder ring.  Did you know that you can laminate things yourself at home?  Well, you can and it is SO easy and fun!!

This is the product I bought from my local Office Max store.  These are self-laminating sheets for laminating things at home.  You just peal off the back of the laminating sheet, then you place your sheet of paper or whatever you are trying to laminate on top.  Then peal off the back of another sheet and place it on the opposite side of whatever you are laminating.  It was ridiculously easy and a fraction of the cost of what it would have cost me to have these all laminated at Kinko’s or some other store.  Plus I have a bunch leftover for other projects!

After I laminated each sheet of paper, I used my handy paper cuter to cut each card to size.  If you don’t have a paper cutter, I would highly recommend you get one.  You can use it for so many different things, it also makes perfect cuts, and definitely makes your projects move much quicker than using traditional scissors.  Look for a 40% off coupon to Joann’s or Michael’s and they end up being very reasonably priced.

After I cut each card, I punched a hole in the left-hand corner and slid them all onto a binder ring.

Now we have a lovely set of alphabet flash cards ready to use!  I’m hoping the laminating will make them last longer.  Also, I think keeping them on a binder ring will save my sanity.  We have some other sets of flashcards and they end up all over the house which drives me crazy – hopefully this will keep them all together in one place!!

Thanks, Jill, for putting together this wonderful printable!


Cottage Mama’s Note:  These would be great for an infant learning their first words too.  Then, when they get a little older, they can focus on learning their letters.  I think I will be making a set for numbers and a bunch of other learning topics.  So fun and easy!

The Cottage Mama’s Favorites: Sewing Books

Sewing books and cook books – two of my most favorite things!  It might sound totally dorky, but give me a glass of red wine and a good sewing book to dive into and you’ve got my idea of a great evening!  I will never have too many nor ever get tired of looking at either of these genres of books.  They are so incredibly inspiring and constantly compel me to create.

Luckily for me, my local library does a great job of keeping up with the newest book releases in sewing and crafting.  Sometimes it might take me a few weeks to get my hands on a new release (or a few months if it’s Martha Stewart’s Encyclopedia of Sewing and Fabric Crafts), but usually the wait is not too long.  Though I am a huge fan of the library (you can find us there weekly), sometimes there are books that you just want to own.

I thought I’d share some of my favorites with you.  These are my go-to books, the ones that I refer to time and time again.

Seams to Me by Anna Maria Horner.  I love this book for several reasons.  One, I think it has an amazing amount of basic information for the beginning sewer, but it also has new tips and tricks for even the advanced sewer.  I am constantly using this book as a reference (it’s on my night-stand as we speak).  And two, the photography is gorgeous.  I love looking at all the fun projects (which include organization, home decor., clothing, fashion, baby items) made from gorgeous fabrics.  There are super-simple projects to advanced projects and some really great out-of-the-box ideas.

One Yard Wonders.  This book is FULL of projects (over 100) and they all take one-yard of fabric or less.  I don’t think I have ever seen so many projects or ideas in one book.  The book includes pattern pieces for all the the projects (which like I said, is a lot!).  Such a fun book for someone who is looking to get into sewing.  Would be a really great gift for a teenager or young-adult as many of the projects are fun and hip.

Weekend Sewing by Heather Ross.  This is a book that I love, but I do not own.  I am constantly checking this one out of my local library.  I love it (don’t ask me why I haven’t purchased it yet).  The projects are for beginning to intermediate sewers.  Most of the projects are small on the amount of time that they take to complete (hence the title of the book), so if you are what I like to call, a “finisher” (those that wish they enjoyed the process of sewing, but really just like to see the end result), you will love this book!  Heather uses some of the most gorgeous fabrics and the photos are serious eye-candy.

Next to Anna Maria Horner, this is my other go-to reference book.  Bend-the-Rules with Sewing by Amy Karol has a wealth of information for the beginning sewer.  Everything from understanding different types of fabric, to sewing needles, embroidery stitches, how to sew on different types of buttons, making your own bias tape, and the list goes on!  My only issue with this book is that is does not include pattern pieces.  In the back of the book there are pictures of pattern pieces, but she instructs you on how large to blow them up and you have to get them printed somewhere………not my favorite.  But I still use this book a ton as a resource and for inspiration.

 
Sew Darn Cute by Jenny Ryan.  I am in love with this book!  It has some of the most adorable little projects I have ever seen.  As most of you know, I love vintage inspired things, so this book has it all.  It’s got tons of vintage inspired projects that incorporate modern fabrics and have exceptional attention to detail with little buttons and fun trims.  If you are a fan of rick-rack, bias tape, fabric yo-yo’s and all things vintage, you must buy this book!

These are my two favorite serger books (The Complete Serger Handbook and Ready, Set, Serge).  I don’t know about you, but the manual that came with my serger (Brother 1034D) really did not tell me much.  I taught myself how to sew and I taught myself how to serge. 

I really think these two books have been my saving grace in regards to learning all there is to know about how to serge and the capabilities of my machine.  I seriously starred at my serger for days before I actually touched it for fear I would mess something up.  These books got me through and they can help you too!


Cottage Mama’s Note:  I have a couple other sewing books that should be arriving in the next week, so if I love them, I’ll be sure to let you know!

I do have two Amy Butler books, In-Stitches and Little Stitches for Little Ones and these are two I would not recommend unless you are an advanced sewer.  I find some of the instructions to be confusing and the projects use a TON of supplies (i.e. different types of interfacing, lots of fabric, ect.).  The pictures are beautiful, but I haven’t found the projects to be worth the time and effort.  In my opinion, I would check these out from the library first to see if they work for you and your sewing style.

What are some of your favorite sewing books?  What’s on your wish list?

The Cottage Mama Studio

I find seeing others creative spaces to be so inspiring, don’t you?  It’s neat to take a peak into someone else’s world.  Not everyone is able to have a craft room or studio, but it doesn’t have to be much, even an armoire or closet that is all your own can do the trick.

Lately, I have been very busy with my handmade children’s clothing business, The Cottage Mama.  I am preparing to launch my fall line as well as a few new items that I think will round-out The Cottage Mama.  I feel so blessed to have my own little corner of the cottage and I thought you might like to take a peak into where The Cottage Mama creates.

So here it is – The Cottage Mama Studio.  This is a small room with french doors off of our dining room.  This is what it looks like as you enter from the dining room.

Here is another angle looking into the studio.  I don’t love the chair I currently have, but it works for now.  I’m dying to get something more vintage looking.  I do, however, love that this chair has wheels – it makes it very easy to move from the computer to my sewing machines.

These are two very long tables that come together in the corner.  I love them.  They are from IKEA and were very affordable.  They are a great height for me and the white looks very clean in this room.

What sewing machine and serger do I use?  Well, here they are.  They are nothing fancy, but I love them.  Both are Brother machines which I think are incredibly user-friendly.  My sewing machine is a Brother CS 6000i and my serger is a Brother 1034D.  I would highly recommend both of these machines!

I have both of my pedals labeled just so there is no confusion between my serger and sewing machine.  I also just love my label maker and use any opportunity to label things.

This large galvanized, metal container is filled with trim, piping and bias tape.  Some new and some vintage.  I ended up at a fabric store that was trying to get rid of old stock and these were all 5 for $1.00 – it was a super-deal and a very exciting day!!

I keep my cutting mat (the yellow piece on the table) out at all times since I am usually cutting patterns daily.  This mat fits perfectly and is 36″ wide, which is perfect for an entire yard of fabric.

In the corner I have a bunch of my trim (i.e. piping and rick rack) that I use frequently in this fun tiered metal basket.  I got this in the kitchen section of a local home store and thought it would be perfect for the studio.

Underneath the two long tables I have these great metal baskets that slide in and out.  I got these at IKEA too, but they were found in the closet department.  They had something very similar in the office department, but the ones in the closet department were much more inexpensive.

In the bottom two drawers I keep scraps from fabrics that I am currently working with.  That way if I need to grab some fabric for a button or a fabric yo-yo, I have it right there next to my machines.

In the drawer, second from the top, I keep all of my vintage linens that are waiting to be turned into something.  I have many pillowcases that will someday become dresses and lots of hankies.  I find most of these linens at antique stores and my Grandma Ethel has sent me some wonderful linens as well.

I keep the things that I reach for most often in the top drawer.  My sewing scissors, a variety of thread, my clothing labels.  I keep the matching thread to my clothing labels in the same bag.  That way when I need to sew on a label, the thread is right there.

Also, I made myself a little hand-sewing kit and covered button kit.  The hand-sewing kit is great because I can just grab it and take it in the other room to easily sew on buttons or whatever else.  It contains thread, a little pair of scissors, and hand-sewing needles.  The covered button kit has all of the pieces I need to make fabric covered buttons in all sizes.  Both of these little kits definitely make life easier.

The other sliding bins are filled mainly with shipping and packaging supplies.  I have large spools of grosgrain ribbon, teal tissue paper, clear plastic bags, twine, ect…….all for making sure The Cottage Mama packages arrive in style.

This is my cricut expression.  I keep this stored underneath the tables and pull it out whenever necessary.  I don’t use it too often, so I didn’t feel it needed to be on top.  I need to do more with this great machine, so I think I will be coming up with a few projects for this one soon!

On the other end of the long table is my computer.  I use a Mac and I love it!!  I use to be a PC user, but my husband is in advertising and got us a Mac when we needed a new computer.  I really think, “once you go mac, you never go back”.

On the right side of the computer are most of my supplies.  My father-in-law built me these shelves and I think they are so wonderful (thanks Jeff)!  I love being able to see what I have to work with and it is inspiring on a daily basis.  It definitely helps me in developing some of my designs and just looks so pretty.

All of my fabric is arranged by color.  I thought about arranging it by collection or designer, but I think this is much more pleasing to the eye.  It also helps me to see coordinates from other lines that may work together.

Most of my cotton fabric is stored on these fabric organizers.  I have seen and heard of some DIY versions of these, but personally these are my favorite.  They have tabs that secure the fabric, they are very light-weight and they keep the fabric from becoming wrinkled.  Each one can hold up to six yards of fabric.  You would not have believed how much room my fabric was taking up before I discovered these organizers – it was a mess!

There are two different sized organizers – large and small.  The small is perfect for storing different trim and smaller pieces of fabric.

So, what’s in my stash? Lots of things…….mostly girly stuff (after all, I’m a Mama to two little ladies).  I’ve got Art Gallery “Sugar”, Art Gallery “Girly Girl”, Heather Bailey “Nicey Jane” and “Freshcut”, Anna Maria Horner “Garden Party”, Amy Butler “Love” and “Midwest Modern”, Sandi Henderson “Meadowsweet”, Riley Blake “Wheels” and “All-Star”, a little Alexander Henry, Tina Givens, Jennifer Paganelli, David Walker, Tanya Whelan, some Japanese imports and a bunch more!

I’ve got about 25 yards of Art Gallery’s new “Paradise” (August release) and 40+ yards of Amy Butler’s new “Soul Blossom” (September release) that should be arriving sometime in the next month – wooohooo – can’t wait!

In the red boxes, I keep my interfacing, fusible fleece and oil cloth.  I use interfacing quite a bit so this is handy to have close by.

On the shelf above the fabric I store my buttons.  I use fabric covered buttons on almost every garment.  So here I have them arranged by size.  I just use little tags from the office supply store to label each jar.  Also the lids are the same ones I made in this tutorial.

On the other end of the shelf, I have some other supplies.  Glue, size labels, blank note cards, and lots of trim.  If you are ever at your local fabric store, just ask them if they have any empty trim holders – they are always happy to give me the empty ones.

I also keep my tags ready to hang on my garments.  It’s so much easier to thread a ton of them all at one time, that way I can just grab one when I need it.

Way at the top of my shelves I keep some blue vintage jars that I just love.  These jars were given to me by my Grandma Peggy.  The wire baskets below are meant for produce storage, but I thought they worked just great to store scraps that I use less frequently.  I try to keep more bold scraps (reds, yellows, orange, bright green and blue) in one and pastels in the other.

This little room already had a deep closet, so I use these shelves to store things I don’t need all of the time.  I have a whole box of knit fabric, some of my chenille and minky.  Also things like some of my serger thread, craft supplies, scrapbooking supplies, iron, hole punch, kids art supplies, spray adhesive…….and the list goes on and on……. are all stored in these shelves.

Above these shelves I have three embroidery hoops with fabric pieces from designer Heather Bailey’s “Nicey Jane” fabric line.

On the wall next to the deep shelves is my thread rack, ironing board, and white boards (I use these for taking pictures).  Hopefully my father-in-law is going to help me install an ironing board that folds down from the wall.  I think this will save a lot of space and be more practical than this giant one.

Here is some of my thread that is all arranged by color.  To be honest, I haven’t really found one thread to be better than another – I use both Gutermann and Coats and Clarks.

I store some of my spools of ribbon on a pants hanger that is hung on the door knob of one of the french doors.

And one of the best things that was installed in my studio was this baby gate.  It enables me to keep all of my sewing supplies out (machines, rotary cutters, scissors, pins) and use my hot iron without having to worry about my girls getting hurt.

I hope you enjoyed this little peak inside my studio.  I don’t have a huge space, but it’s a space I can call my own, and for that I feel very blessed.

Here are a few of the new pieces that have been completed for fall:

Fall Knot Dress

Modern Little Lady Coat
Swing Dress
Pretty Bird Dress and Ruffle Pants
Boy Knee Patch Pants
Henrietta Apron Skirt
Cottage Mama’s Note:  There will be many more fall items to come!  A few of these items have been listed in my etsy shop, The Cottage Mama. If you have any questions about anything you’ve seen in my studio, please feel free to leave me a comment or email ([email protected]).  Thanks so much for reading!

White Pizza from the Cottage Garden

The tomatoes in our garden have finally started to ripen (yipee!) – it seems like they have taken forever this year!  Last night we had three medium-large fresh tomatoes and a bunch of basil ready to use up, so what did I make?  White pizza! 

Basically white pizza is defined as pizza without tomato sauce.  Sometimes you will find the tomato sauce substituted with an alfredo sauce or pesto sauce or just with no sauce at all.  So here is my easy, white pizza recipe and I have to admit, this was so good.  Best to make this recipe when tomatoes are truly in season – it takes the flavor to a whole new level.

White Pizza Recipe
Serves 4 (or 2 very hungry adults)
Ingredients:
1 ball of fresh pizza dough (store-bought or your favorite recipe)
3 medium-large fresh tomatoes
1 large bunch fresh basil
1 small red onion, thinly sliced
2 cups mozzarella cheese
1/2 cup Parmesan cheese
Olive Oil
Garlic salt
Freshly ground pepper
Red pepper flakes (optional)
Directions:
Preheat oven to 350 degrees and gather all of your ingredients.
Drizzle a little olive oil onto your cookie sheet and roll out pizza dough.  Don’t worry about the way it looks, just stretch it out as much as possible.  I actually prefer a more rustic, organic shaped pizza.
Drizzle a little more olive oil on the pizza dough.  Sprinkle with garlic salt and freshly ground pepper.
Slice your fresh tomatoes and lay them out on top of your dough.  Season with a little more garlic salt and pepper.
Now layer your sliced red onion. 
Next sprinkle 3/4 of your mozzarella cheese evenly over the top of the pizza.  Place fresh whole basil leaves on top of the cheese.  Finish the top by sprinkling the remaining 1/4 of mozzarella and all of the Parmesan.
Bake on 350 degrees for 15 minutes or until crust appears to be golden brown.
To serve, sprinkle with Parmesan, red pepper flakes, and a tiny drizzle of olive oil.  Enjoy!!


Cottage Mama’s Note:  I used store-bought pizza dough from Trader Joe’s (.99 for one ball of dough), but you could also visit your favorite pizza restaurant and ask for some dough – many of them will sell just a ball of dough.  Or what would be even better, is if you made your own.  Whatever works for your lifestyle and schedule will be perfect!

Gathered Camera Strap Cover Tutorial

First off, I just have to say thank you!  Your emails and comments in regards to my camera strap cover “show and tell” post were amazing.  I absolutely love hearing from you guys.  And because so many of you asked for it, here is a tutorial on how to make your very own, Gathered Camera Strap Cover.  Make one for yourself, for a friend, or make multiple to coordinate with every outfit, or how about one for each season or holiday……shoot, the options are endless!

Gathered Camera Strap Cover Tutorial
Supplies:
Two coordinating fabrics (1 for main body and 1 for ruffle)
Fusible fleece
Trim (ribbon, woven trim, ect.)
Sewing machine
Thread
Iron
Ironing board
Directions:
Gather all of your supplies.  This camera strap cover will fit a standard DSLR camera strap.
Cut the main strips for your camera strap.
-Cut 2 strips 2.75″ x 27″ – this will be the main body of the camera strap cover
-Cut 2 strips 3″ x 33″ – these two strips will be sewn together to make your ruffle
Cut your fusible fleece – you will need one piece 2.75″ x 27″.  Fusible fleece is great for adding extra body or padding to any of your sewing projects.  You can usually find fusible fleece in the notions section of your local sewing supply store near the fusible interfacing.
Place your two ruffle strips of fabric, right-sides together and sew.
Sew both strips together along the 3″ end (1/4″ seam allowance).
Press open your seam.  This will make your long ruffle strip which is now approximately 3″ x 65.5″.
Next apply your fusible fleece to one of the main body pieces of fabric.  Apply according to package directions.  You will iron the fleece to the wrong-side of the fabric (the side without the pattern).
Press with your iron on both sides.  This is what your fabric will look like after you have applied your fleece.
Next, set your sewing machine to the longest stitch length (on my machine it is 5.0). Stitch down the center of your long ruffle strip – DO NOT back-stitch at the beginning OR the end of the strip – I repeat, DO NOT back-stitch.  If you back-stitch you will not be able to gather your fabric to make the ruffle.  By setting your machine on the longest stitch length this will begin to ruffle the fabric.
This is what your long strip of fabric will look like after you have run your long (gathering) stitch down the center.  See how it has begun to look like a ruffle?  Well, we need to ruffle it even more!
If you look closely you will notice that there are two threads at the end of your strip.  You will need to pull the bobbin thread (which is the thread on the bottom) in order the gather your fabric.
Do you see how my finger is on the bottom of the two threads?  This is the bobbin thread.  Pull this thread to gather your fabric.  There is one at the beginning of the strip and one at the end of the strip.  Pull both and slide the fabric along the thread to make the ruffle 27″ long.
You need the ruffle to be 27″ long to fit perfectly along the top, main body, strip of fabric.
Place your ruffle on top of the main body strip of fabric and pin down the center (this is the piece WITHOUT the fleece).  The edges of the ruffle may be a little wider than the main body fabric, but that’s ok.
Here is what the ruffle looks like after you have pinned it down the center onto the main body strip of fabric.
Next, press your ruffle on both sides with a hot iron.  I highly recommend a steam iron.
This is what the ruffle looks like after it has been pressed.
Now we are going to baste the ruffle in place.  Basically we just want to do a little stitching to hold the ruffle in place.  So set your stitch length to 3.5 and baste into place (1/8″ seam allowance).  Sew down both sides of the strip of fabric.
Now that we have secured our ruffle in place it is time for the trim.  You can use any trim you like.  On my last post, I used a woven, vintage trim, however, this time I decided to use some grosgrain ribbon layered with a thin satin ribbon (it’s always fun to change things up).  But use whatever coordinates with your fabric.
If you recall from my piping tutorial, I talked about Wonder Tape.  Well, here I am using it again – yes, Wonder Tape is WONDER-ful!!  Run your tape down the center of your trim and tape into place.  If you don’t have Wonder-Tape, just pin in place.
Tape your trim straight down the center of the ruffle covering the center stitching.
Stitch your trim into place.  Stitch as close to the edge as possible with coordinating thread.  Wonder-Tape is amazing at holding trim in place.  You can find it in the notions section of your sewing supply store.
I decided to double-layer my trim.
I taped my satin ribbon into place down the center of the grosgrain ribbon and stitched it into place.
Next trim off any ruffle that is wider than the main-body strip of fabric.  We cut the ruffle strip fabric a little wider just to make sure it would reach the edge of the main body fabric after being ruffled.  But now we want everything to line up for the next step.
Place the ruffle fabric on top of the main body fabric (that has the fusible fleece) – right-sides together.
Stitch down one-side – 1/4″ seam allowance.
Here are your two strips sewn together on one side.
Press open the seam.  I used my serger to clean up the edge (and because this was for a customer).  However, feel free to leave this edge raw.
Fold over both ends 3/4″, press and pin in place.
Sew two rows of stitching.  First, sew with a 5/8″ seam allowance and then move over and sew a 1/4″ seam allowance.  Do this on both ends.  This makes a nice finished look.
At this point, if you plan on using your own labels, stitch them onto the side with the fusible fleece.
Pin the other side (fabric right-sides together) and stitch closed (1/4″ seam allowance).
This is what the other side will look like after you have stitched it closed.
Trim off any extra fabric and fleece.  Cut fairly close to the seam, but be careful not to cut through the stitching.
Turn your fabric strap cover right-side out.  This will take some time and effort, but trust me, it can be done – just keep working it.
After you have turned it right-side out, press to finish and your gathered camera strap cover is complete!
Now slide your DSLR camera strap into the cover.  Again, you may have to work it a little to get in in there, but you want it to be snug so it doesn’t slide around.
I have had several of you ask me where I purchase my woven clothing labels.  I purchase them from Fancy Weaver on Etsy.  They do a fabulous job and are very reasonably priced for a text only label.  They do take 3-4 weeks to arrive after your order is placed, so just be aware of that before placing your order.
By the way, if you ever have any questions about things related to my business, The Cottage Mama, please don’t hesitate to ask – I’m always happy to help!
The fabrics used in this camera strap cover were Amy Butler “Love” (ruffle) and Heather Bailey “Pop Garden” (main body).
If you end up making this super-cute camera strap cover, send me a picture – I would love to see!!
Cottage Mama’s Note:  Tutorials and patterns on The Cottage Home are for personal use only.  If you are interested in using any of the patterns or tutorials seen on this blog for resale, please contact The Cottage Mama at [email protected] to discuss licensing agreements.

Maple Pecan Coleslaw

So the title of this recipe may not sound 100% appealing to all of you; however this is one of my favorite coleslaw recipes of all time.  Even if you don’t like coleslaw, I think you will find this one to be a winner.  The following recipe is my adaptation of a Nigella Lawson coleslaw recipe.  It’s the perfect mix of sweet and savory.  A superb accompaniment along-side some smokey barbecue ribs or try it on top of a pulled pork sandwich – deeeeelish!!

Maple Pecan Coleslaw
Serves 8-12
Ingredients:
1 medium-size head of cabbage
4 carrots
3 stalks celery
6 green onions
1.5 cups mayonnaise
4 tablespoons maple syrup
4 tablespoons apple cider vinegar (you can use white wine vinegar or rice vinegar too)
1 cup pecans, chopped
Salt and Pepper, to taste
Directions:
Shred the cabbage.  You can do this with a knife or use your food processor.  You could also purchase pre-shredded coleslaw cabbage (though buying a head of cabbage is much more economical).  Place shredded cabbage into a large mixing bowl.
Wash and grate carrots.  Dice celery.  Slice green onions (white and green parts).  Place carrots, celery, and green onions in the bowl with the cabbage.
In a smaller mixing bowl combine mayonnaise, maple syrup and apple cider vinegar – stir to combine.  Pour dressing over the top of the cabbage, carrot, celery, green onion mixture and toss to combine.  Add chopped pecans and salt and pepper, to taste.  Toss again to combine.  
Allow to chill in the refrigerator overnight or for at least two hours to allow flavors to come together.
Cottage Mama’s Note:  This is another recipe from Matilda’s Summer Garden Party.  We used this slaw to top our pork sandwiches at the party – YUM!

Grilled Corn Salad

It’s corn season – yipppee!!  I love a fresh, sweet ear of corn on the cob in the summer.  Here’s another recipe from Matilda’s Summer Garden Party.  This grilled corn salad can be changed up with the addition of different herbs and vegetables, but the base always stays the same – amazingly delicious grilled corn!

Grilled Corn Salad
Serves 8
Ingredients:
6 ears of corn
1 jar of roasted red peppers
4 green onions, sliced
1/2 cup chopped fresh parsley
1 lemon, juiced
4 tablespoons olive oil, plus a little more for brushing corn
1 teaspoon sugar
Salt and pepper, to taste
Directions:
Remove the hull and silks from corn and wash thoroughly.  Brush with olive oil and sprinkle with salt and pepper.  Place corn on grill for approximately 8 minutes or until corn appears to be a medium brown.
Allow corn to cool.  Once cooled, remove kernels from cobs and place in a large mixing bowl.  Add one jar of roasted red peppers, chopped, sliced green onions, 1/2 cup chopped fresh parsley
In another small mixing bowl, mix olive oil, lemon juice (you can add some zest too if you really like lemon), and sugar – add salt and freshly ground pepper to taste.
Pour dressing over corn mixture and toss to combine.  Taste and adjust seasoning.  Like I’ve said before, if the pop of flavor isn’t quite there, add more salt and pepper and taste again.  You can always add more salt, but you can’t take it away.
Cottage Mama’s Note:  I just made a variation of this salad that was great as well.  I used cherry tomatoes (halved) from our garden instead of roasted red peppers and I used cilantro instead of parsley.  This went perfectly with our beef and avocado tacos!!
PS:  So many of you emailed and asked for a tutorial on the Gathered Ruffle Camera strap that I will be putting one together for you in the coming week.