My mom, Grandma Jane, is back with another one of her wonderful quilting tutorials!
Take it away, Mom……..
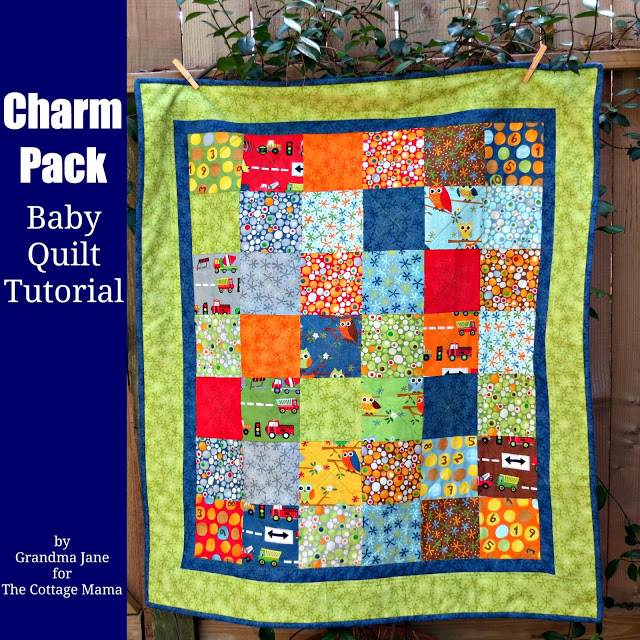
Guess Whooo Loves You?
I don’t know about you, but there are lots of sweet little babies making their appearance in my world these days! Every time I turn around a young person at work (or my husband’s office), nieces, nephews, friends of my children—someone is having a baby! Love it. (Notice how I said “young” person at work—what happened to me being that “young person” at work?)
Anyway…the easiest ever little crib-sized quilt is made with one charm pack and some yardage for the borders, backing and binding. So easy—you already have the colors and designs of fabric figured out for you and the charms are a breeze to chain-stitch together. My niece, Maggie and her husband, welcomed sweet little Owen into the world a couple of weeks ago. Owls were their decorating theme in the nursery so when I saw “Ten Little Things” by Moda at my local quilt shop; I scooped up a charm pack and some matching yardage.
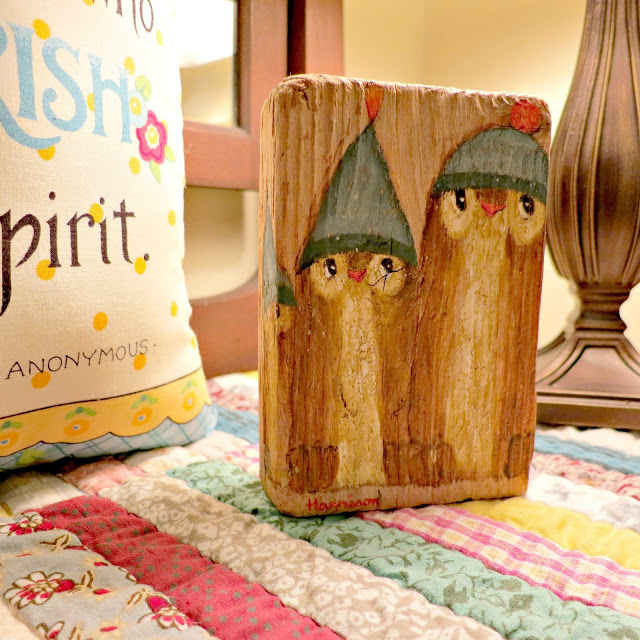
Speaking of owls,–back in the 60’s and 70’s—the owl motif was a popular one. I had owl shaped candles, incense burners, and several little ceramic owls. Funny how so many things come back around! My mother was an artist and was even painting owls during that time! Pictured above is one of the paintings she did on a small piece of driftwood of an owl family—a treasured possession of mine that will always represent to me our own little happy family.
For this easy little quilt which measures approximately 36” x 40”you will need:
Supplies:
1 Charm pack –42 squares
¾ yard for small border and binding
½ yard for wide border
1½ yard for backing
44” x 48” piece of batting
Instructions:
I mentioned chain-stitching above. If you don’t do this with your quilting projects when you can, you are missing a big time-saver.
• Arrange your charm squares in 7 rows of 6 charms each with the color placement you like.
• Here’s the easy way to organize the rows for stitching. (Thanks to Elizabeth in my quilting group for showing me this.) Turn the second charm from the left on each row right side down on the first square in the row.
• Now pick those two squares up and stack the rest of the squares in the row underneath them as you move left to right across the row.
• Mark this row as one.
• Do the same for the second row. Second charm from the left, right side down on the first square, and stack the rest, moving left to right.
• Repeat for all seven rows and mark your rows with painters tape.
• Take the first three stacks to your machine. I like to place mine to the left of my machine.
• Pick up the first two charms from Row One, which you have already placed right sides together. Stitch a ¼ inch seam down the right side of the two squares.
• When you get to the end of the squares—don’t cut the thread. Take the first two charms from Row Two (which are right sides together), place close to the edge of the first two squares—still on your machine, and stitch a ¼ inch seam down the right side of the squares. Repeat for the first two charms from Row Three.
• Now you have three sets of squares chain-stitched and connected to each other by a little tiny piece of thread.
• Don’t cut the thread in between the squares.
• Open up the first two charms on Row One and pick up the next charm in the Row One stack.
• Place right sides together with the second charm in Row One and stitch your seam.
• Don’t cut the thread.
• Open up the charms in Row Two. Pick up the next charm in the Row Two Stack, place right sides together with the second charm in Row Two, place close to the edge of the seam you just stitched and stitch your seam. Don’t cut the thread and repeat for Row Three.
• See what we are doing? Moving down the rows, you are picking up the next charm in the stack and sewing the seams without cutting the thread until you are down to the bottom of row three.
• When you are finished, you will have three rows of 6 charms each sewn together. These three rows are still connected to each other by little bitty pieces of thread. Don’t cut the thread.
• Take these three rows of charms to the ironing board and press seams to opposite sides in each row. Row One and Row Three – seams to the left. Row Two – seams to the right.
• Now flip Row One right sides together (RST) with Row Two, matching and pinning seams, and stitch the two rows together. The little bitty threads help you guide the matching seam step. No need to cut the threads. Isn’t this easy and quick?
• Repeat for stitching Row Two and Row Three together. Press seams towards the top.You now have three rows of 6 charms stitched completely together.
• Repeat for Rows Four to Seven. You will have Four Rows of 6 charms stitched together.
• Stitch Row Three and Four together and in almost a blink of an eye—your charms are all stitched together.
• Add a narrow border (strips cut 1 ½ wide) and a wide border (3 ½ inch strips) and your quilt top is finished and ready to be sandwiched and quilted.
• I did easy diagonal quilting lines through the squares, stitch in the ditch around the narrow borders and a couple of lines in the wide border.
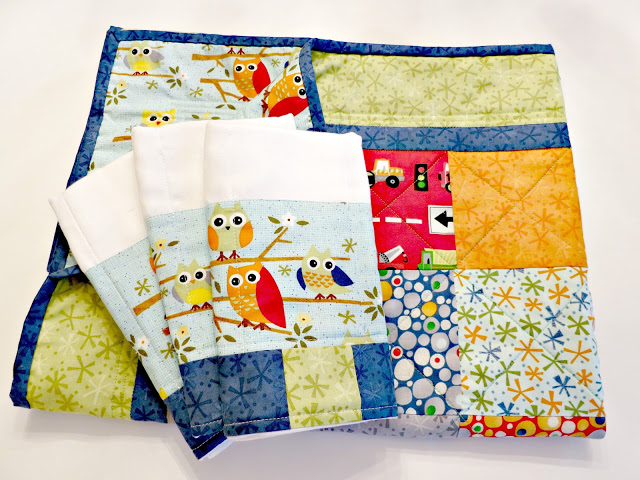
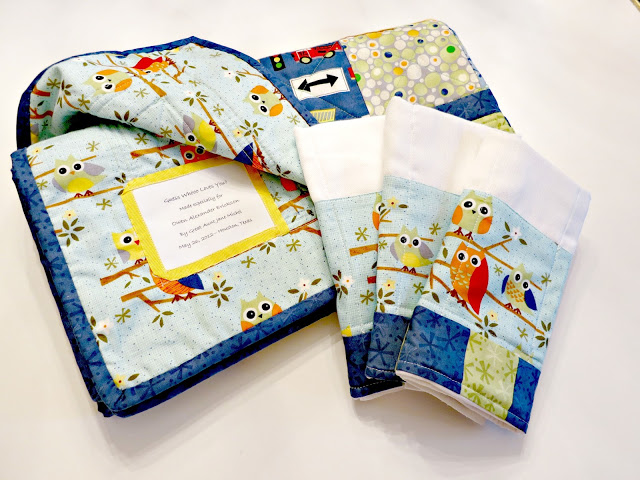
• I had enough scraps to do three cute burp cloths.





 Lindsay Wilkes is the owner and designer behind The Cottage Mama. She creates timeless, vintage inspired sewing patterns for children’s clothes. She is also a fabric designer for Riley Black Designers / Penny Rose Fabrics, author of the book ‘Sew Classic Clothes for Girls’ and can be seen teaching nationwide and online in her video series ‘Lessons with Lindsay’ sponsored by Baby Lock Sewing and Embroidery machines.


I’ve just finished making a quilt for bub4 who arrives in 5 weeks. Using this exact line did the same with the charm pack then addded a orange border and red binding and grey backing then quilted with free hand quilting all over…just love how it turned out. great fabric line!! will use your tutorial when I make my next quilt using ‘Jungle Bungle’ by Moda charm pack. Seems a bit easier then doing each row individually.
I love it! Grandma Jane, you are so awesome
This is great! Thanks for sharing! Time to hit the stash and make a couple of these.
Love this, and Grandma Jane, you are awesome!
Super cute. I too love that fabric. Thank you Grandma Jane.
What a super neat way to sew these rows! Thanks for all the pictures as well. Going to remember this great tip for sure!
This is adorable! I have never tried quilting before…but you make it look so easy! Today WalMart had some jelly rolls on clearance for $3..I think I need to run back and get one or two…I’m thinking Christmas gifts!!!
I would love to win the fat quarter bundle but cannot figure out where to place my comment!! Hard to figure out what you mean here. But I would make a tote or two if I won and some other cute items. Love the blog as well. Thanks.
Shoot me know! Where has this been my whole life????
What a lovely quilt! I am wondering if it is necessary to pre-wash your fabrics beforehand, and if so, how do you wash a charm pack without it unraveling?
Nice Article! Thanks for sharing with us. Jungle Cottage
Just looked at your first tutorial—it is wonderful!!! I was losing my zip for quilting/sewing…you
ve inspired me so much–thanks