
Today, I’ve got a really fun, whimsical pincushion that I hope you all love as much as I do.
I was inspired to create the Woodland Cottage pincushion by our home. We live in a 1930’s cottage style home and it has been a great source of inspiration for me in a lot of my design and sewing projects. Here is our home……

So today we will be making an adorable Woodland Cottage pincushion from Riley Blake Designs ‘Woodland Trails’ fabric line. Even if you don’t want to use it as a pincushion, you could hang it somewhere in your home or even on your Christmas tree, but for me, mine will be sitting right next to my sewing machine!
Let’s get started……….

Woodland Cottage Pincushion
by The Cottage Mama
Website: www.thecottagemama.com
Free Printer-Friendly Woodland Cottage Pattern Pieces
(Click HERE to print)
Materials:
Fat 1/8th of 4-5 different coordinating fabrics
1/2 yard Riley Blake Designs rickrack trim
1/4 yard Riley Blake Designs crochet trim
Embroidery floss and needle
Fiberfill or stuffing
Basic Sewing Supplies
Instructions:
Print your pattern pieces and cut all pieces.
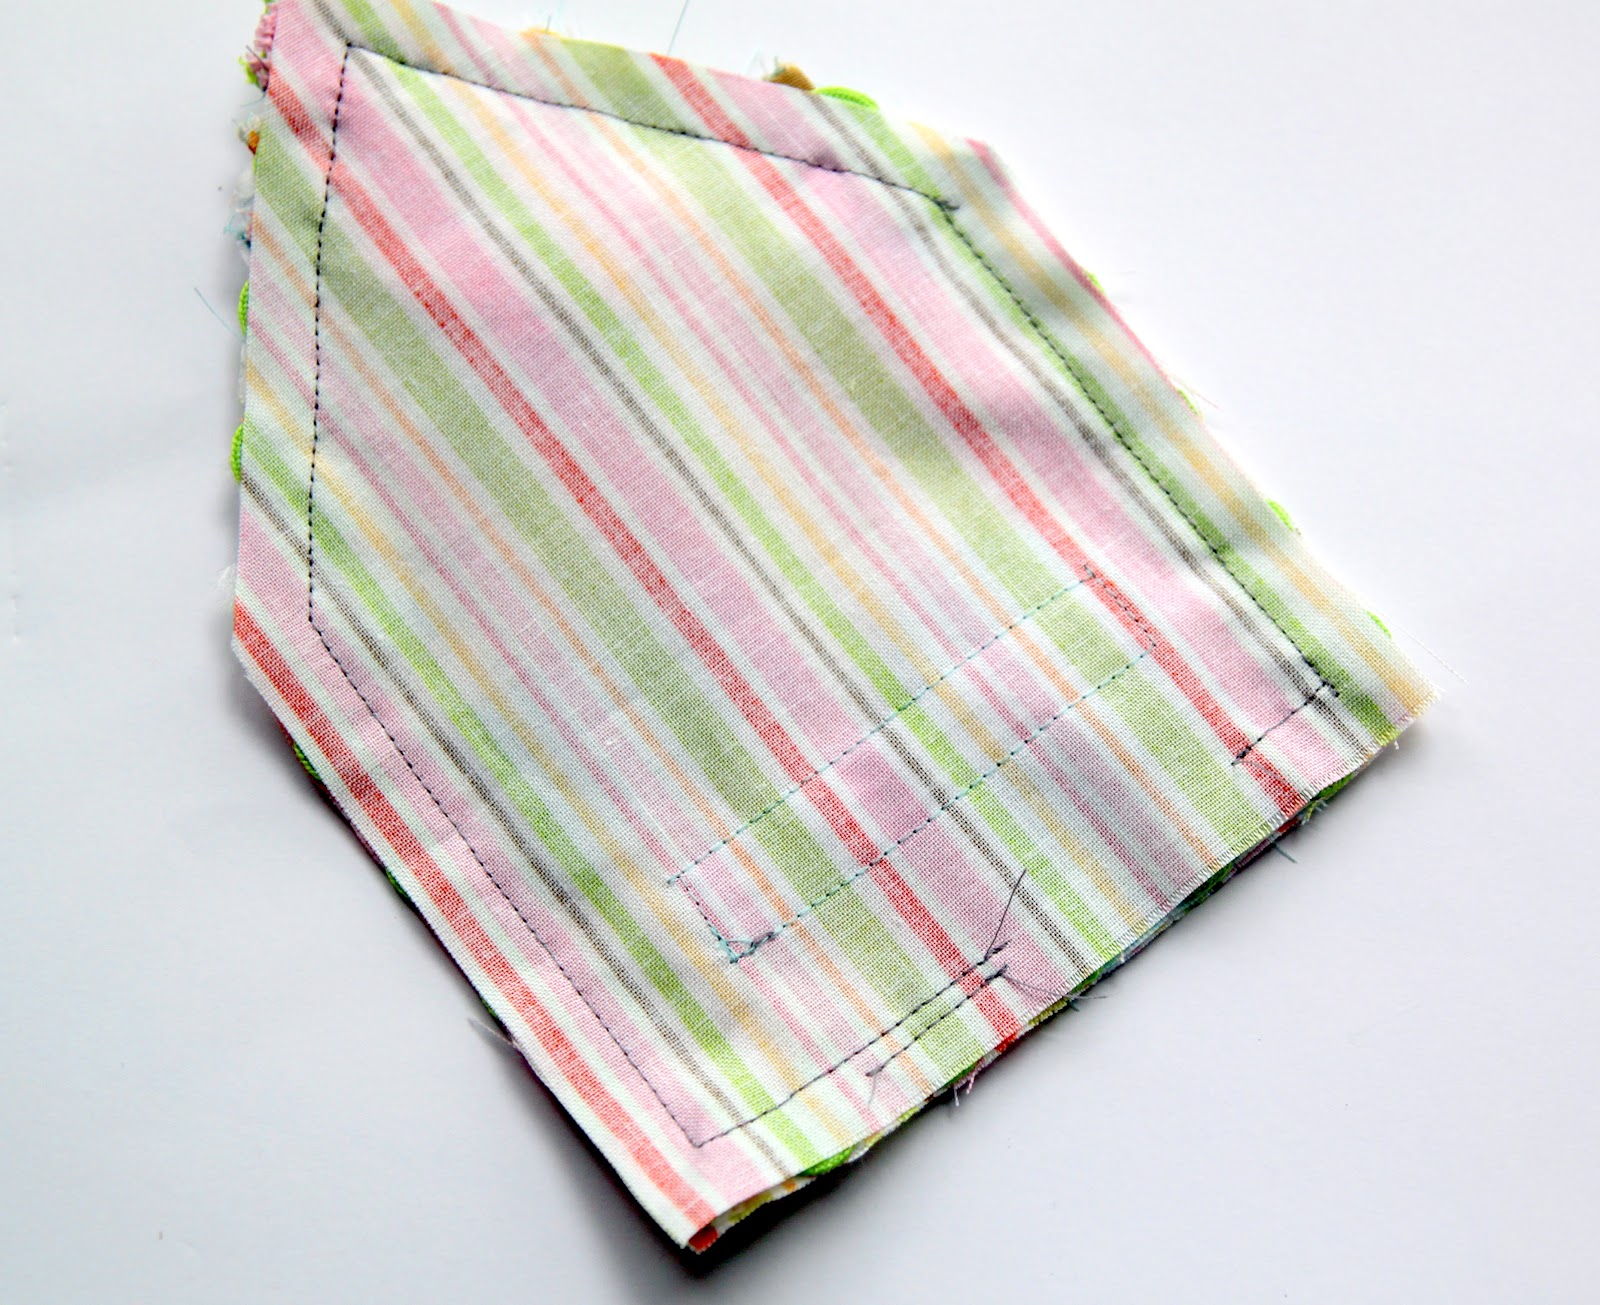
Main House: Cut 2
Door: Cut 2
Window: Cut 2
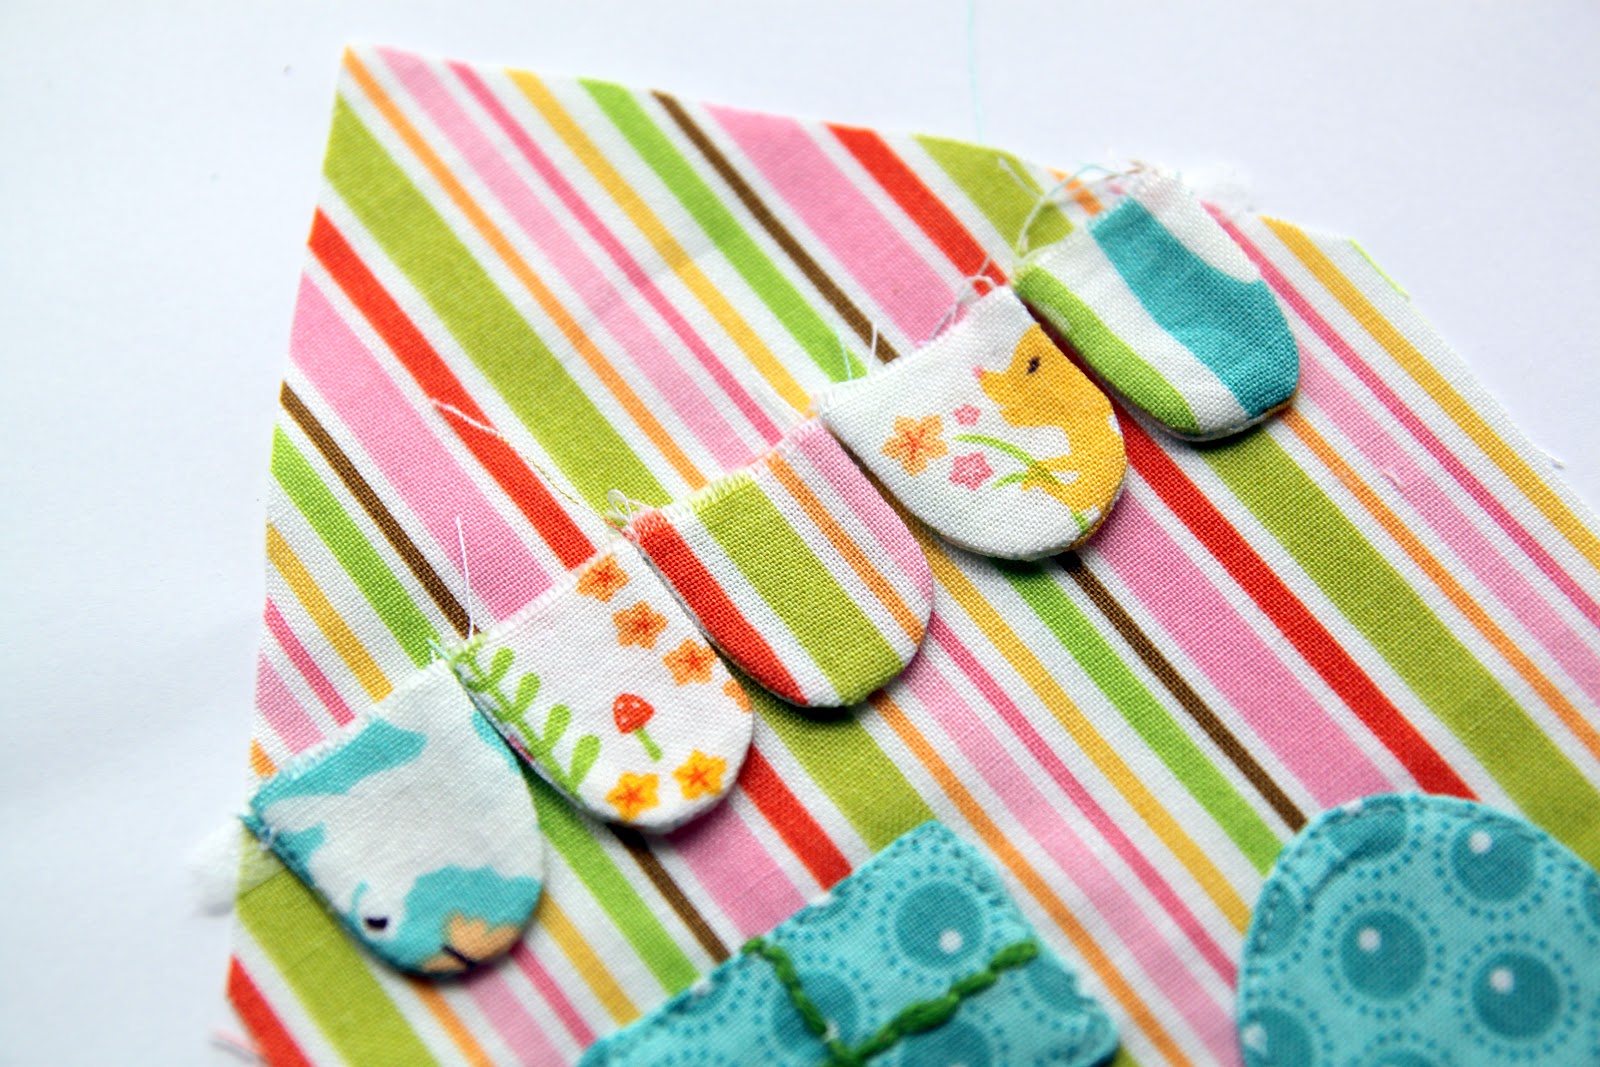
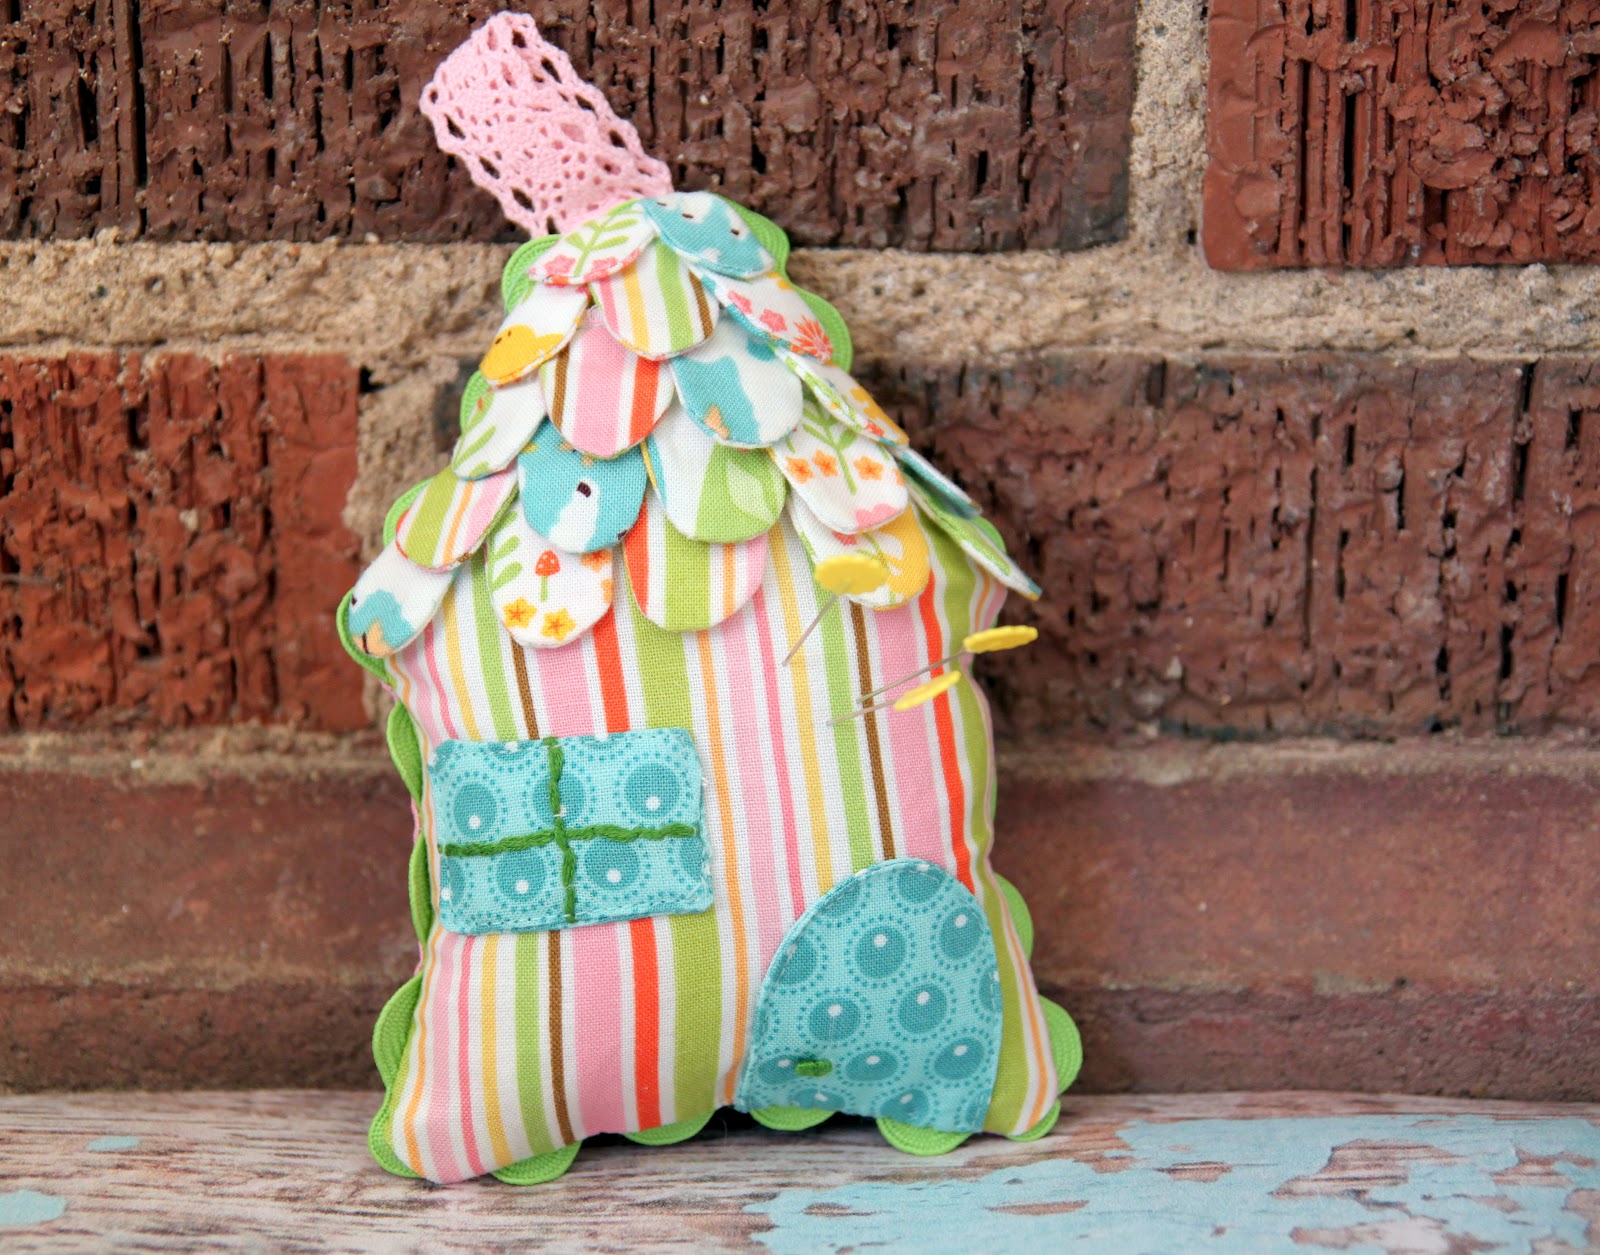
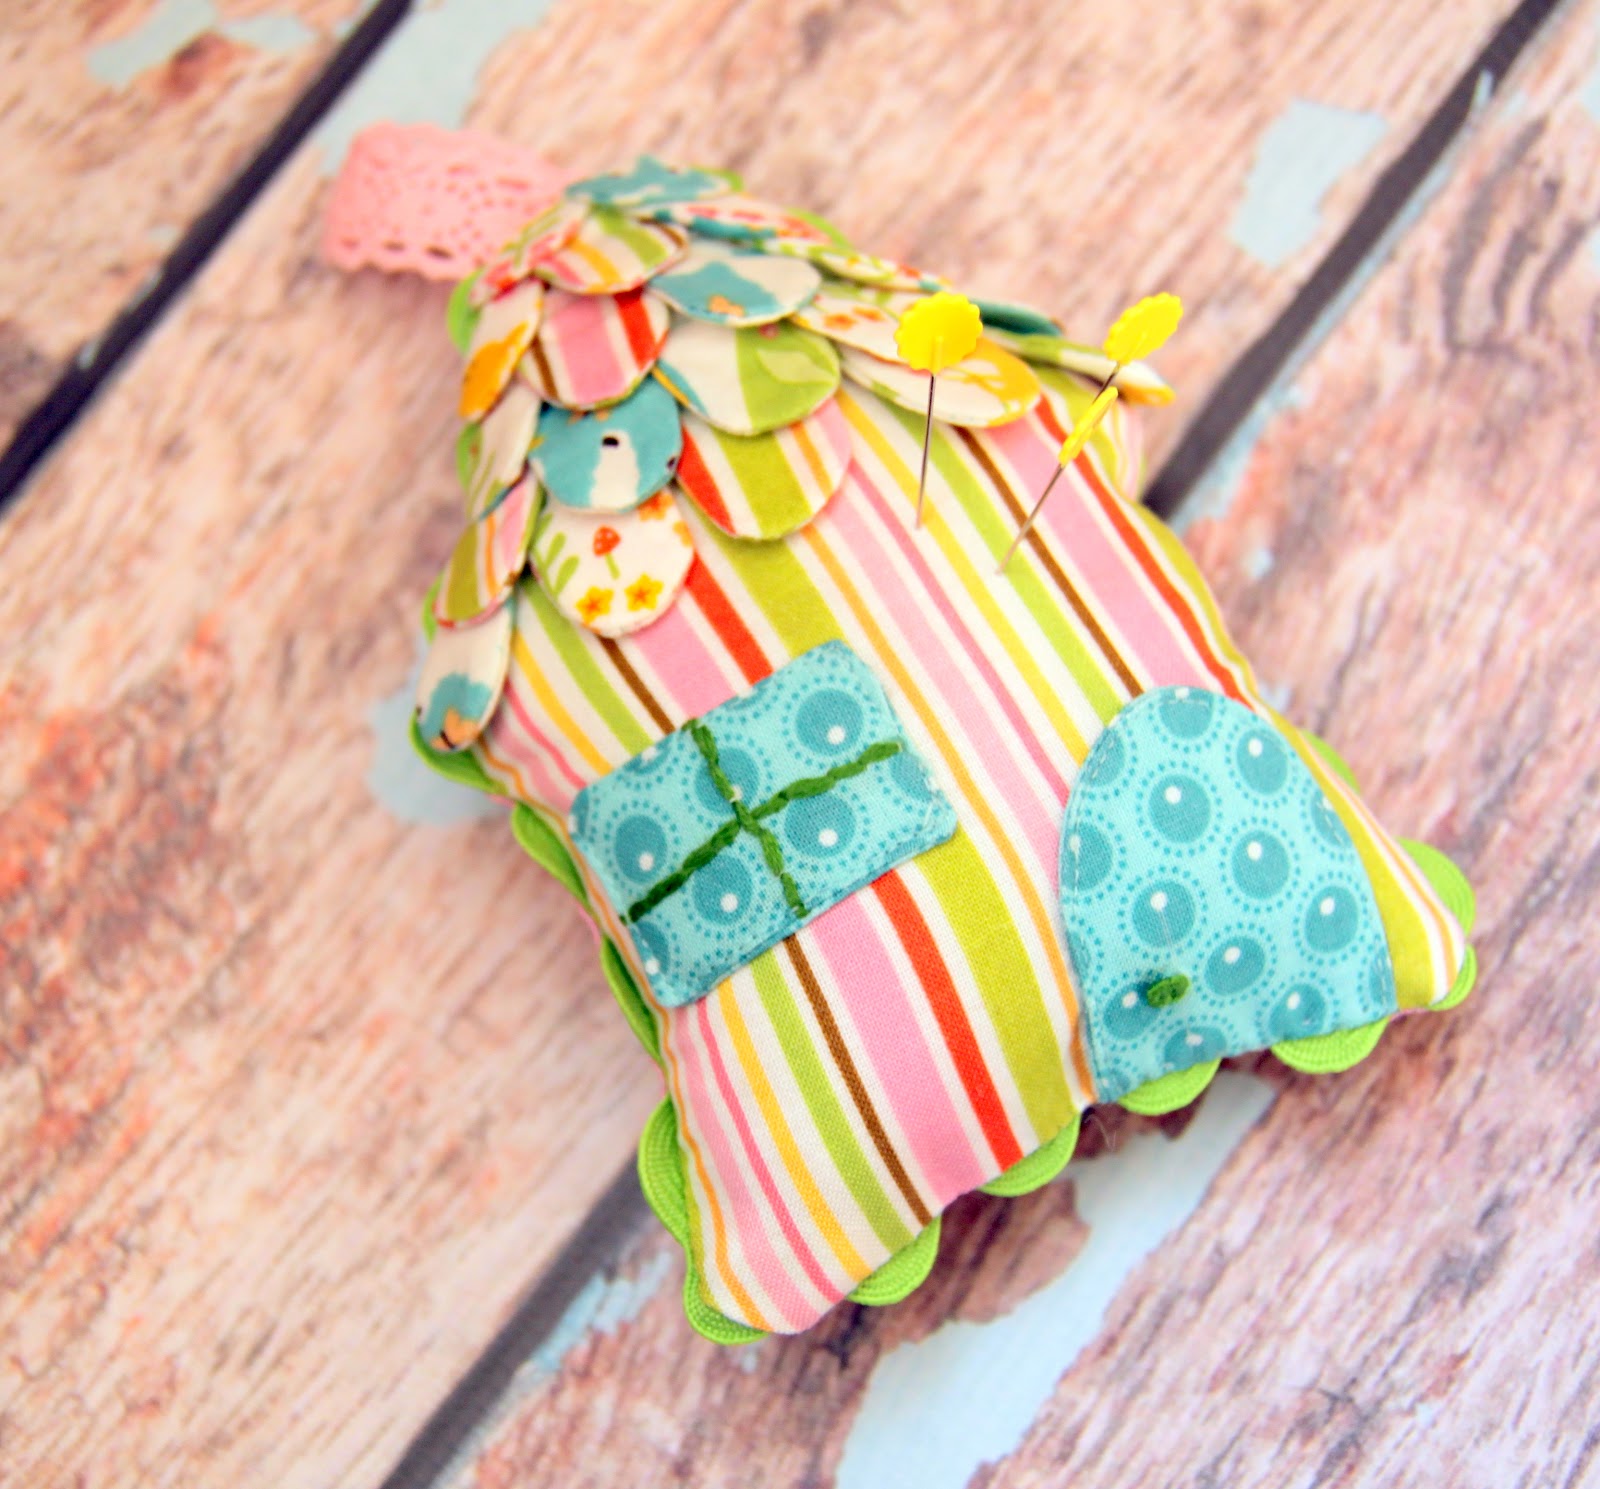
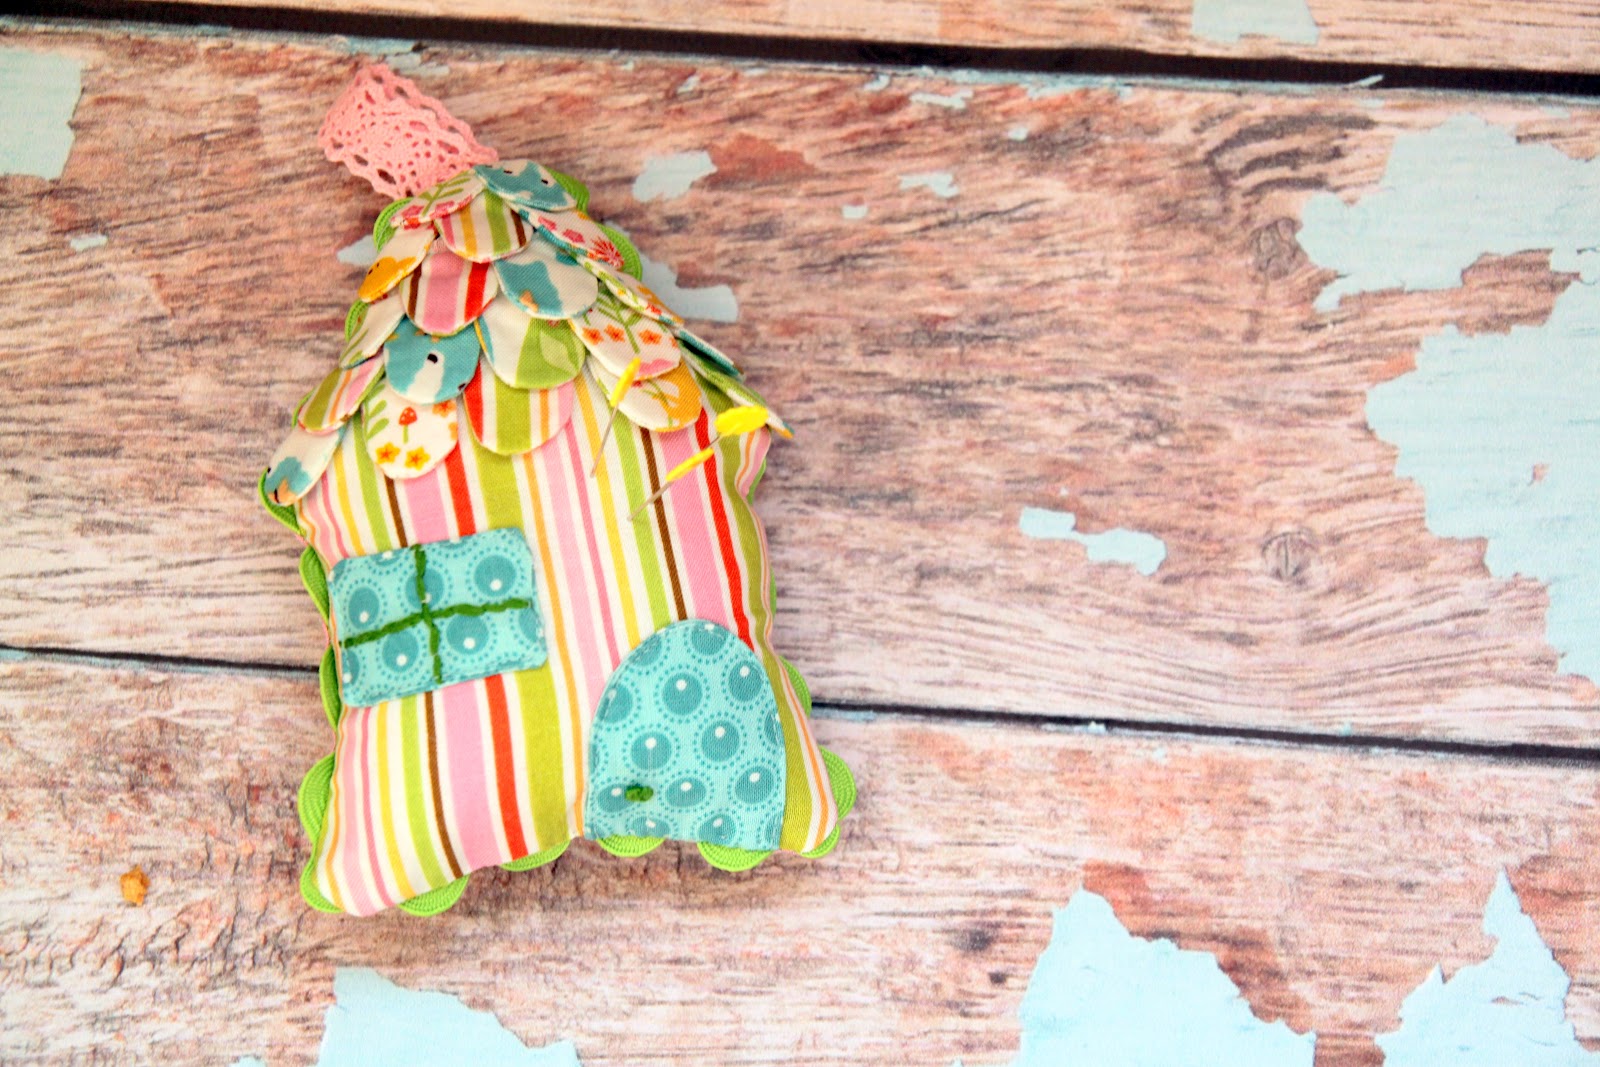
Shingles: Cut 38
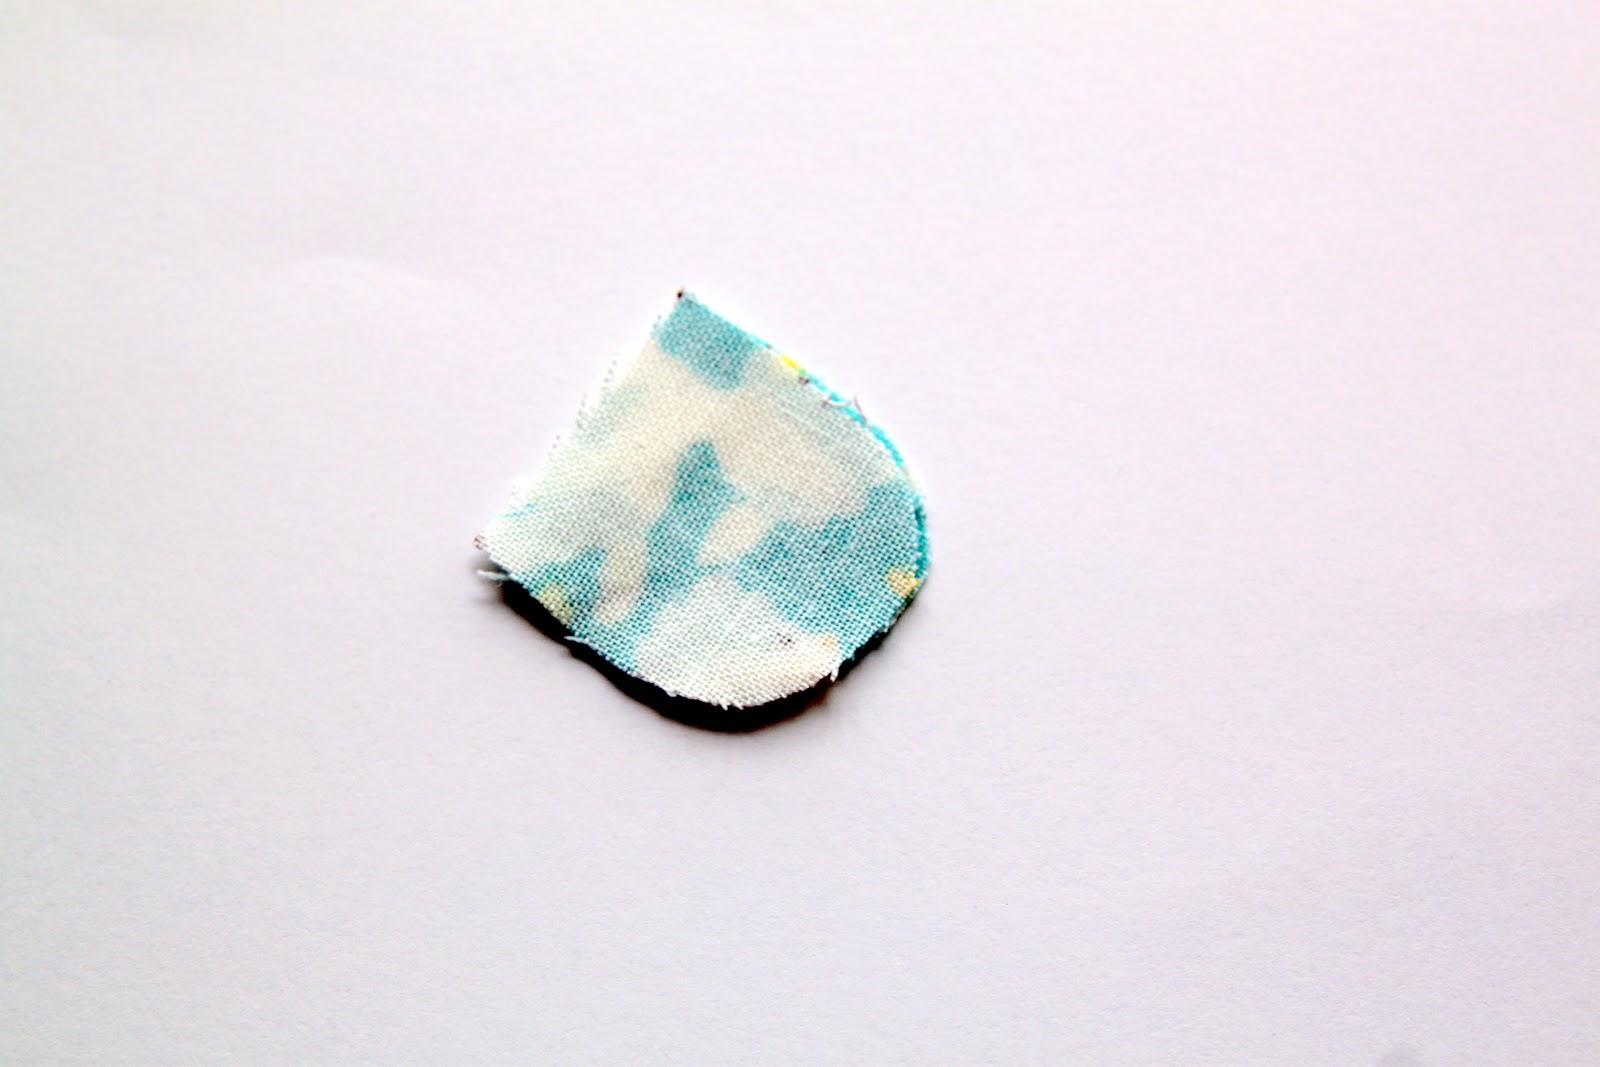

Using a 1/4″ seam allowance, place the shingle pieces with the right sides facing and sew around the curve. Turn the shingles right side out and press. You may need to trim the curves a bit to get them to lay flat. You will end up with 19 completed shingles. This is the most time-consuming part of this pincushion, but it’s what gives it some charm. So turn on some music and take your time.
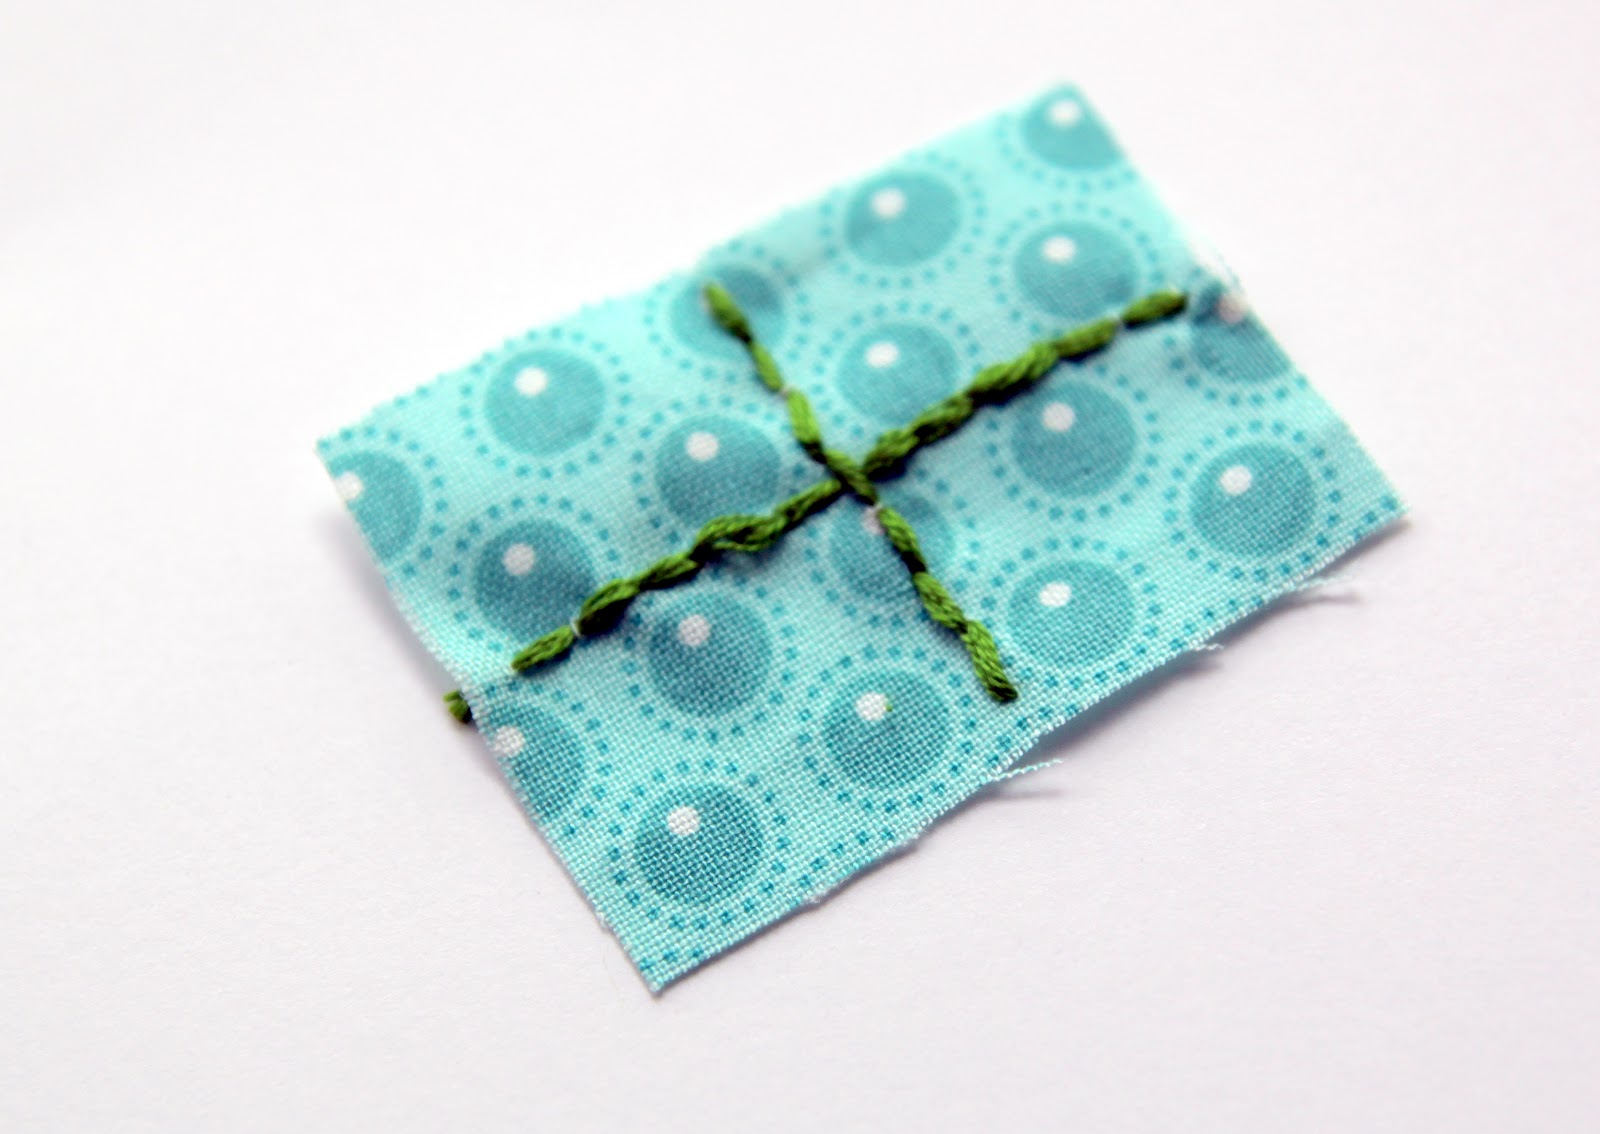

Add some embroidery to the window and door. This does not need to be perfect as imperfections add character. Even if you don’t know how to embroidery, just go for it. I did a basic backstitch on the window and a large french knot for the door knob.
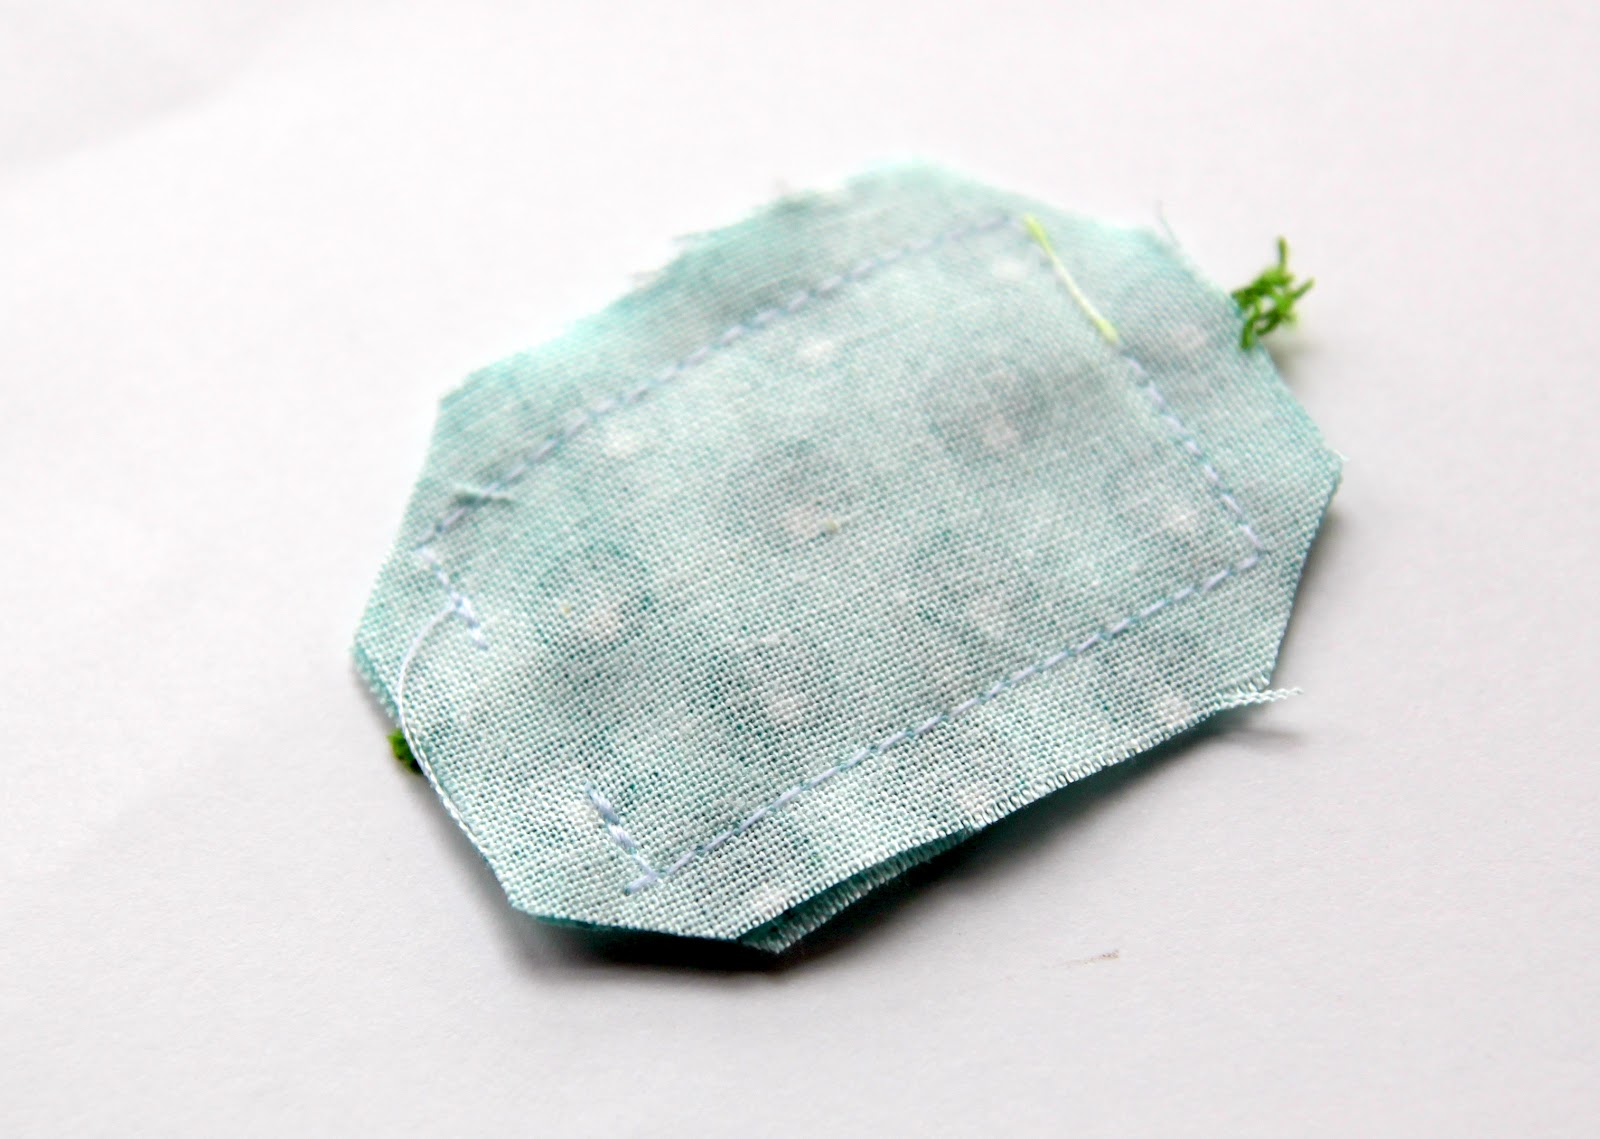
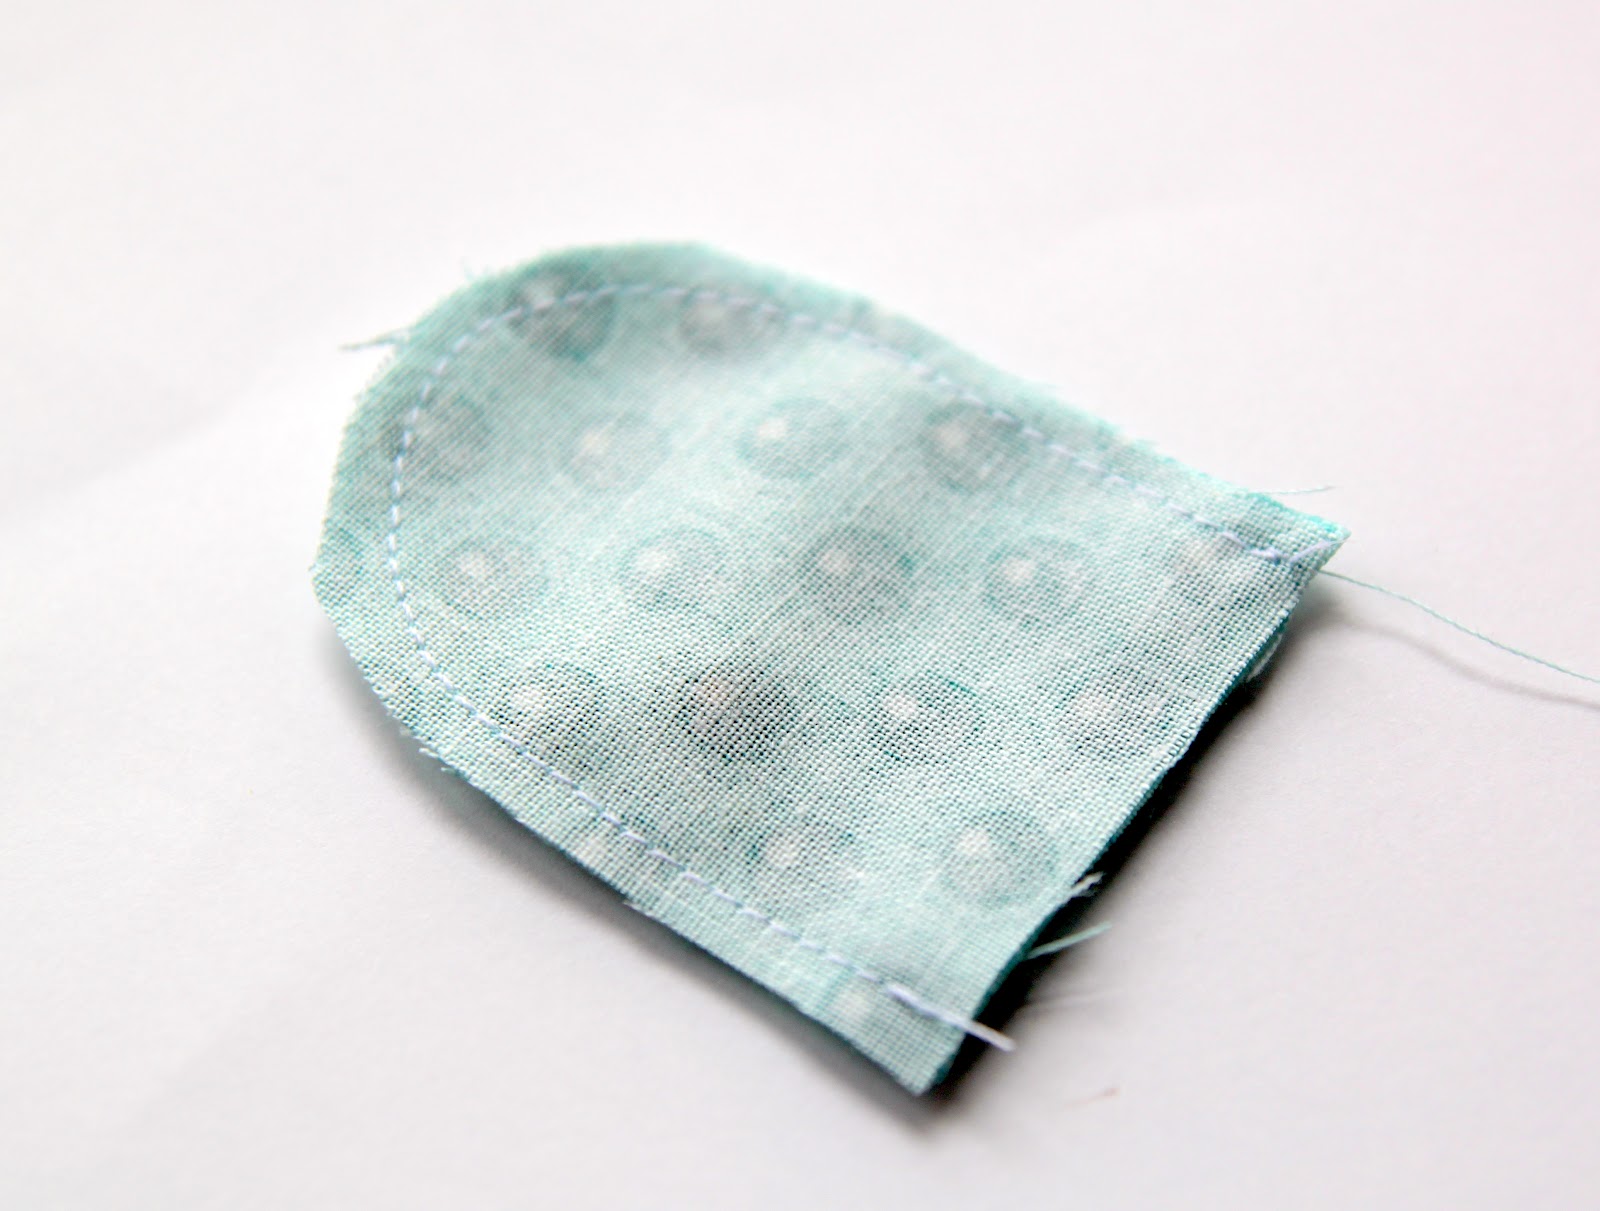
Place the window and door pieces with their right sides together. For the window, you will sew all the way around the square, but leave a little opening for turning your window right side out. For the door, sew around the curve and turn right side out through the bottom opening. Press the seams out for both the window and door.


Pin the window and door in place. You can eye-ball this step. Just place them where you think they look nice. Make sure to line up the raw edge of the door with the raw edge of the main house piece. Edgestitch these to the main house piece (this will catch the little opening left in the window).

Now for the fun part, the shingles. I like to use Wondertape for this step because pinning in straight lines can be a little tricky with such small pieces. Wondertape is a double sided tape used in sewing and quilting and will disappear when washed. I use it a TON when working with trims. If you don’t have this, you can try pinning or using a quilting basting glue.
Lay your first line of tape 1/4″ up from where the roof and the house join. Pull off the paper backing and lay your shingles with the straight edge in line with the tape. Stitch 1/8″ from the edge to secure the first row of shingles in place.

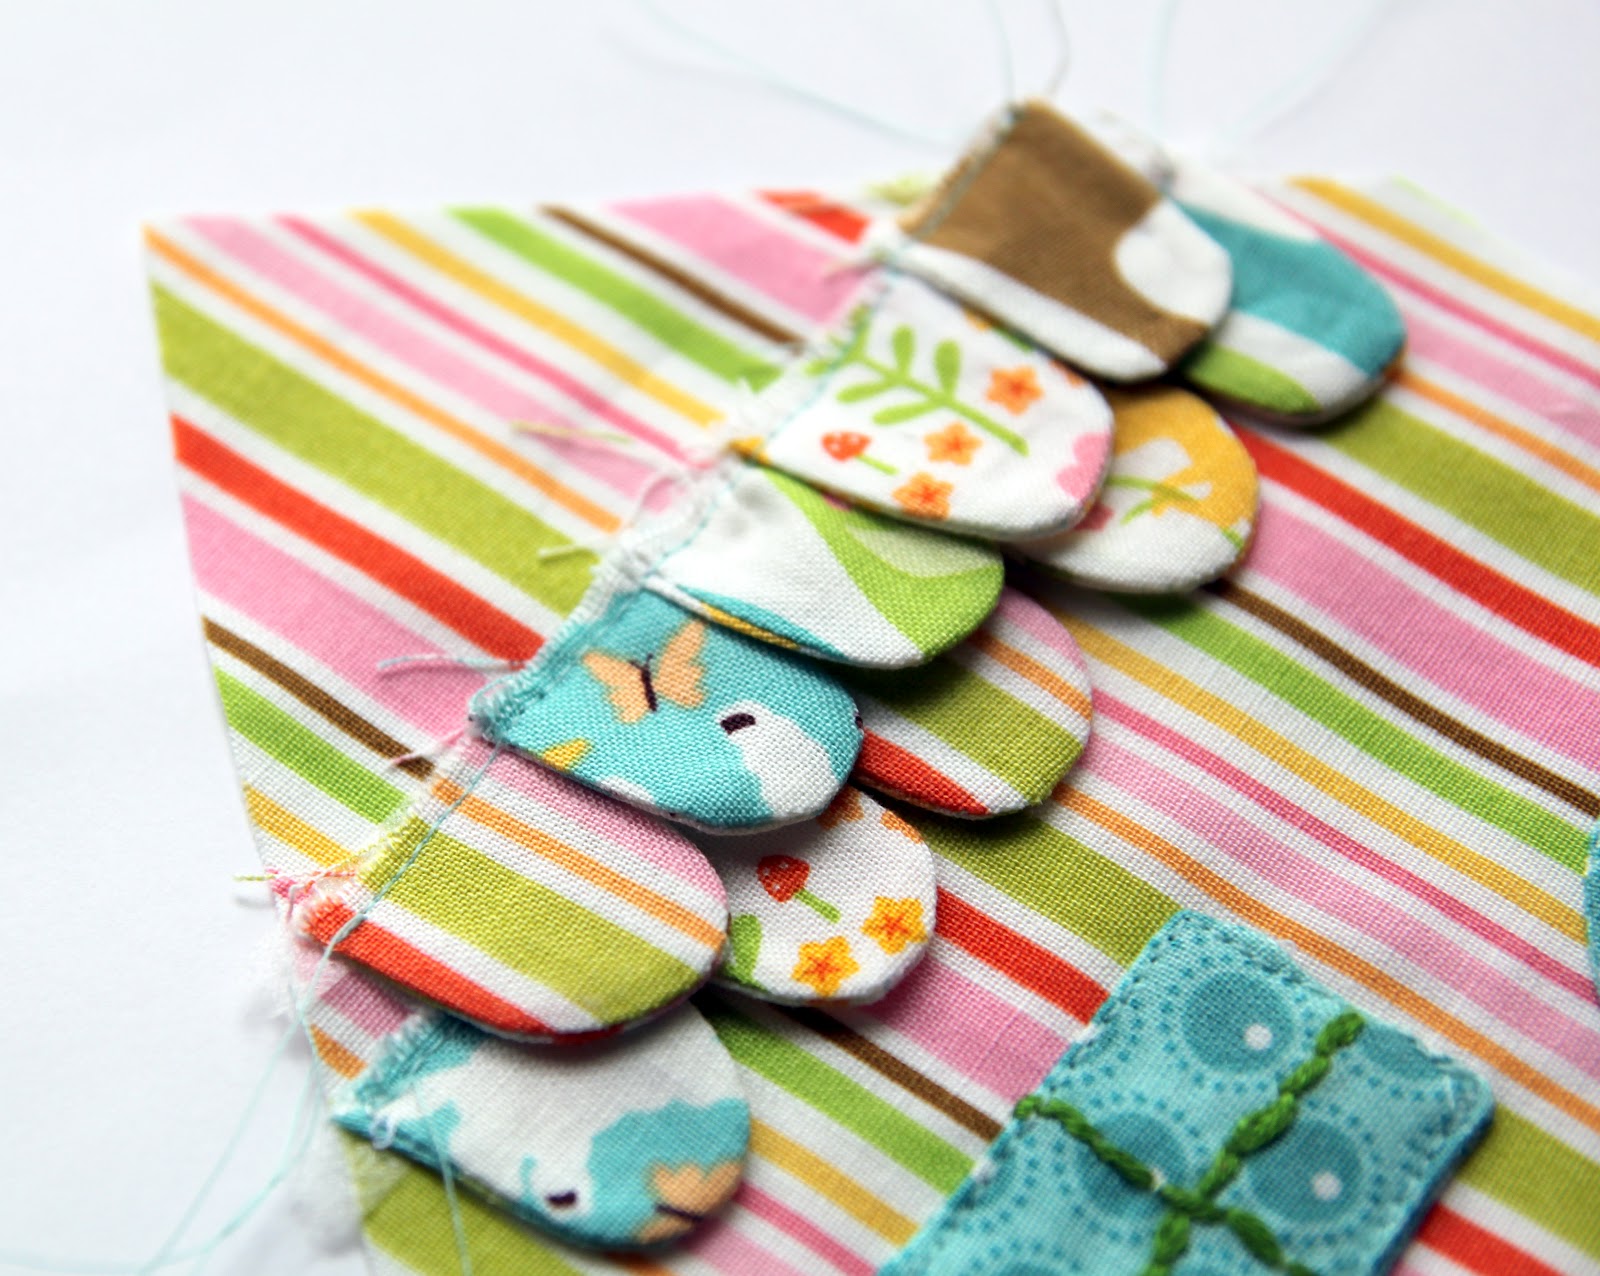
Measure up 1/4″ from the first row of shingles and put down another row of tape. Pull off the paper backing and lay another row of shingles. Stitch in place. Continue to do this same technique until you reach the top of the roof and it is totally covered with shingles.

You should end up with two shingles at the top of the roof of the house.
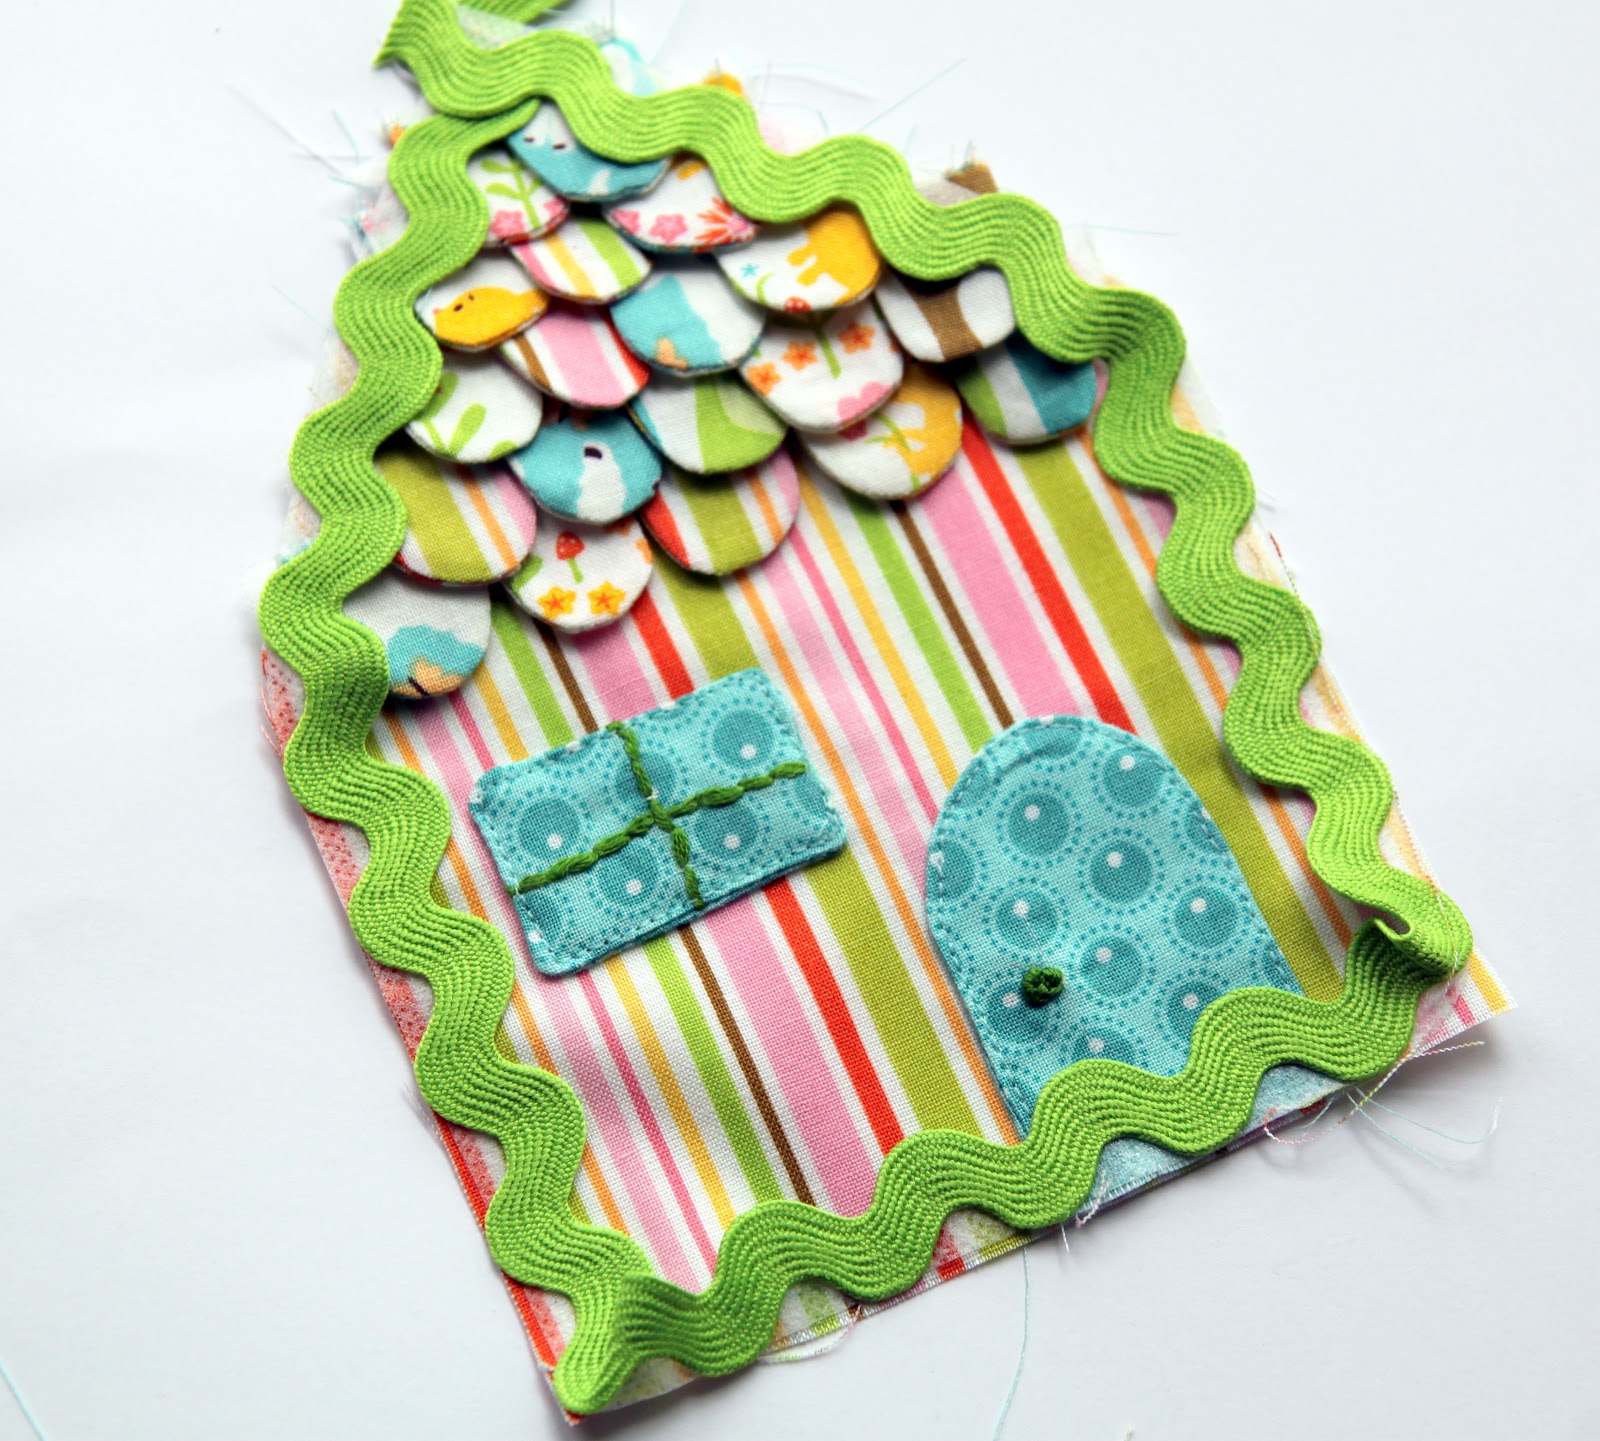
Now if you would like to add some rickrack, just line it up with the edge. Again, I used my Wondertape (yes, I am obsessed), but you could certainly pin it. At this point baste the rickrack in place 1/4″ from the edge. If you use a smaller rickrack or larger you will need to adjust your seam allowances to make sure only a little part pokes through.
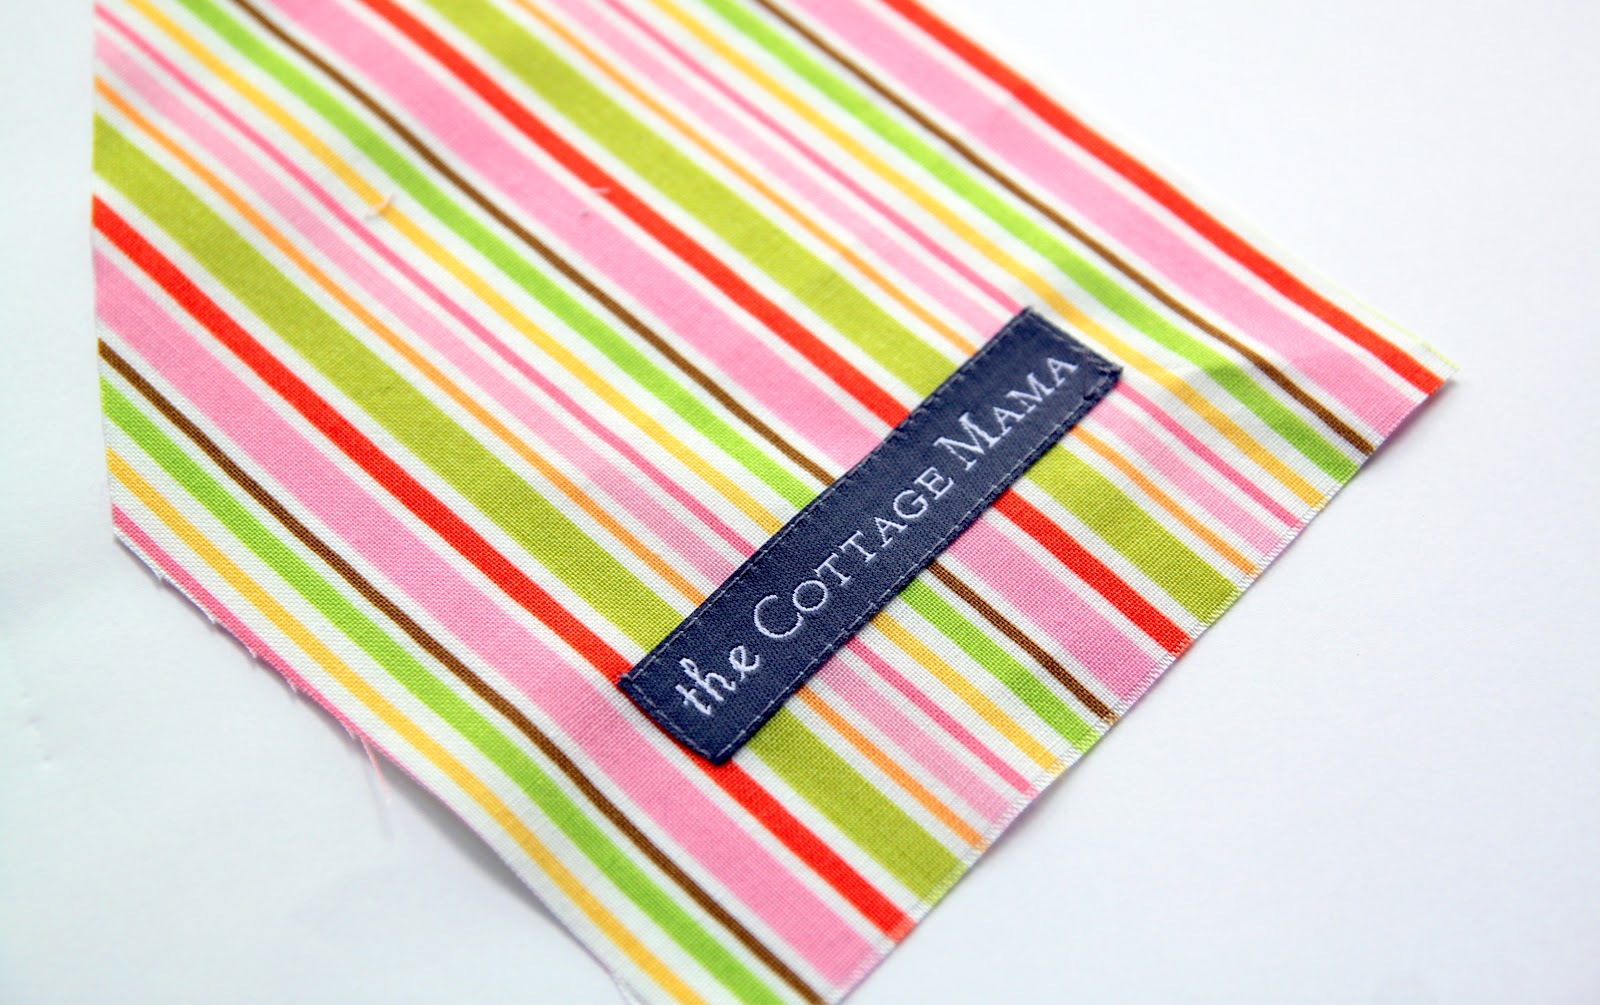
At this point, if you have a label for yourself or your business, sew it onto the back of the main house.

Also, I used a piece of Riley Blake Designs crochet lace to kind of look like a chimney coming off to the side of the house. You could omit this piece or make it larger for a nice hook to hang your cottage over a door handle or even on a Christmas tree. Sew the crochet lace in place by lining up the raw edge of the lace with the top of the house.
Place the cottage front and cottage back with the right sides together. Stitch all the way around using a 1/4″ – 1/2″ seam allowance (depends on the size trim you are using). Leave a 1″-2″ opening at the bottom. Clip the corners to remove bulk and turn the cottage right side out by pulling it through the opening in the bottom.

Next, grab some fiberfill and stuff your pincushion. Make sure you fluff the fiberfill as you go and really get it tucked in nicely to the corners. Close the bottom by hand sewing with coordinating thread.
And, you’re finished!
Now step back and admire your adorable Woodland Cottage Pincushion!


Fabric Line: Woodland Trails by Sheri McCulley for Riley Blake Designs
Happy Sewing!

 Lindsay Wilkes is the owner and designer behind The Cottage Mama. She creates timeless, vintage inspired sewing patterns for children’s clothes. She is also a fabric designer for Riley Black Designers / Penny Rose Fabrics, author of the book ‘Sew Classic Clothes for Girls’ and can be seen teaching nationwide and online in her video series ‘Lessons with Lindsay’ sponsored by Baby Lock Sewing and Embroidery machines.


So cute Lindsay!!! I love the scalloped roof and lace! Definitely would make a great gift for the sewist in your life 🙂
that is so sweet. love the roof. great idea.
Wow, that was alot of work! But oh so cute….great job!
Totally love this, Lindsay! Fantastic idea, lovely design!
So Cute!!Great gift idea….
I adore this, you always brighten my days…♥
Really nice and the details around the roof of your little cottage are very effective.
Julie.C