
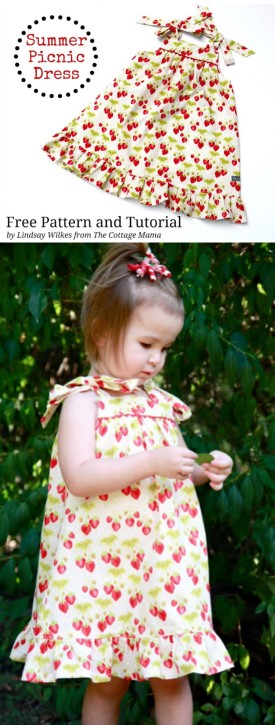
If you are a beginner sewer and would like to try your hand at garment sewing this is the perfect pattern for you to try. There is a little bit of gathering, which is a great skill to learn, but other than that it’s really straight-forward sewing. I’ve graded the pattern from size 12 Month through Size 4. For the patterns I sell, I typically do more sizes, but since this one is free, I just kept it to four sizes. Feel free to adjust the pattern up for larger sizes.
Also, I usually have someone that helps me digitize my patterns for printing, but this time I decided to take the plunge and digitize this pattern myself. I’m not going to lie and say it was easy………it was a steep learning curve for me. And it’s probably not perfect, but there is something so satisfying about learning a new skill and program. I digitized this pattern in Adobe Illustrator and I just barely know the basics now. I can tell that Illustrator could be amazing if you really knew what you were doing. But baby steps, right? Anyway, I’m very proud of the digitized version of this pattern (even though it took me forever to get it done).
So without further ado…….
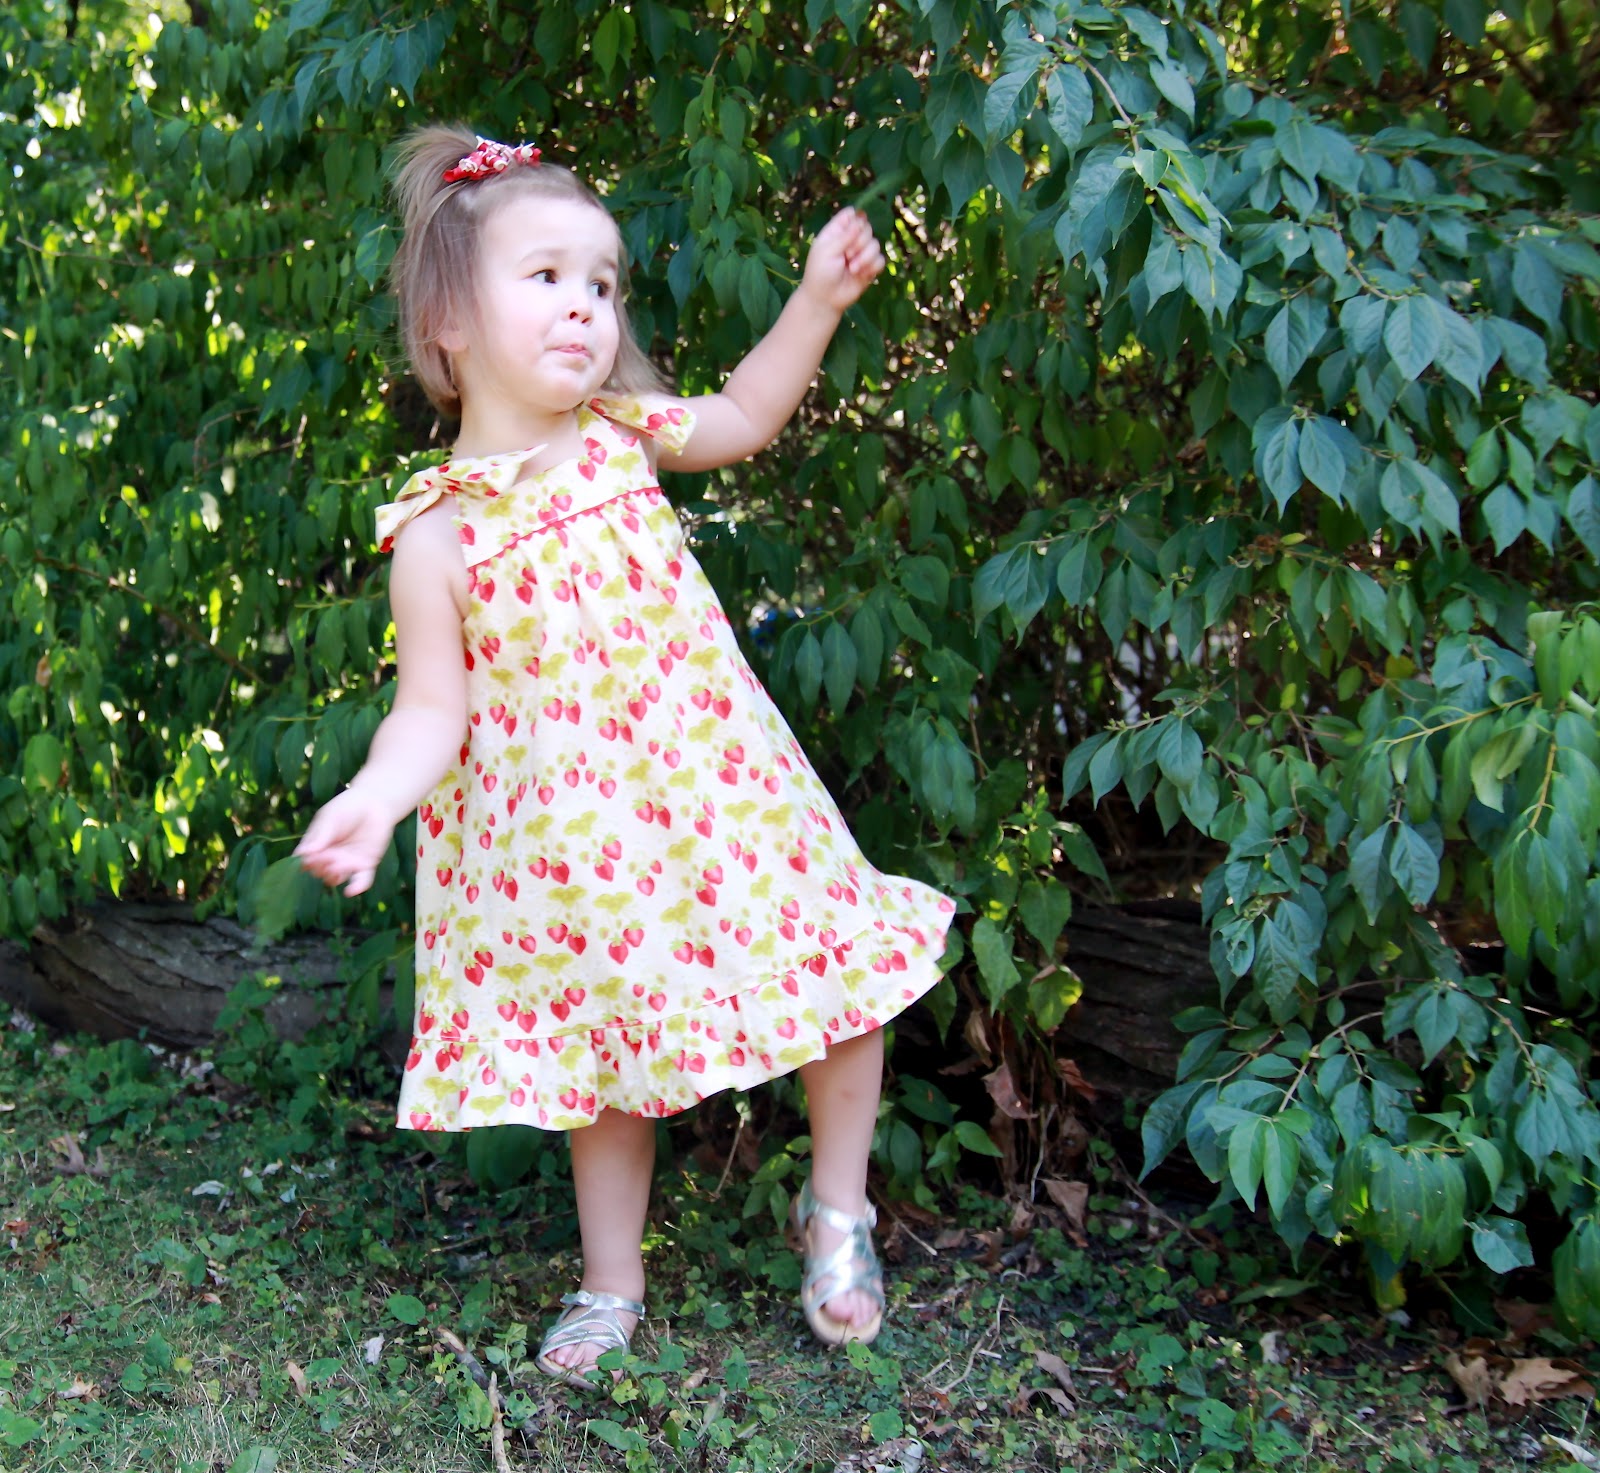
Summer Picnic Dress

At the end of the rectangle strap pieces cut them into a point, kind of like an arrow (pictured above). Just eyeball it, but make sure all four are the same.

Fold the strap pieces in half with the right sides together and sew down the long side and to the point. Do this for all four straps.

Leave the short, straight bottom end of the strap pieces open for turning.

Clip the corners before turning right side out.

Turn right side out and use a point turner or chopstick to work out the corner points of each strap. Press to finish. You could also top-stitch each strap, if you so choose.

Now we will prepare the bottom ruffle. Place the two ruffle pieces with their right sides facing each other and sew together at both of the short ends. This will make one big long, circular piece.

Hem the ruffle. Turn it up towards the wrong side 1/2″ and then another 1/2″. Sew in place using a 1/2″ seam allowance.

Gather the ruffle piece of fabric. To do this, set your machine stitch length to the longest length possible (mine is 5.0) and increase the tension on your machine to about 8. Run a stitch along the non-hemmed edge of the ruffle making sure NOT to back stitch at the beginning or the end. The proper way would be to run two lines of stitching about 1/4″ apart from each other, but I was doing this tutorial pretty quick.
Also, you will notice that I have a serged edge along the raw edge of my fabric (the side where I did my gathering stitch). I always serge any raw edges because I don’t like fraying and find it has a more finished, professional look. You can use a zig-zag stitch if you don’t have a serger or simply cut the edge with pinking shears after you have sewed your ruffle to the dress.

To gather your fabric, pull on one of the threads to start the gathering. You will be gathering the ruffle piece so that it lines up with the bottom of the main dress piece. But let’s hold off actually gathering the ruffle until a little later……

Since we are talking about gathering, run a gathering stitch along the top of both of the main dress pieces.
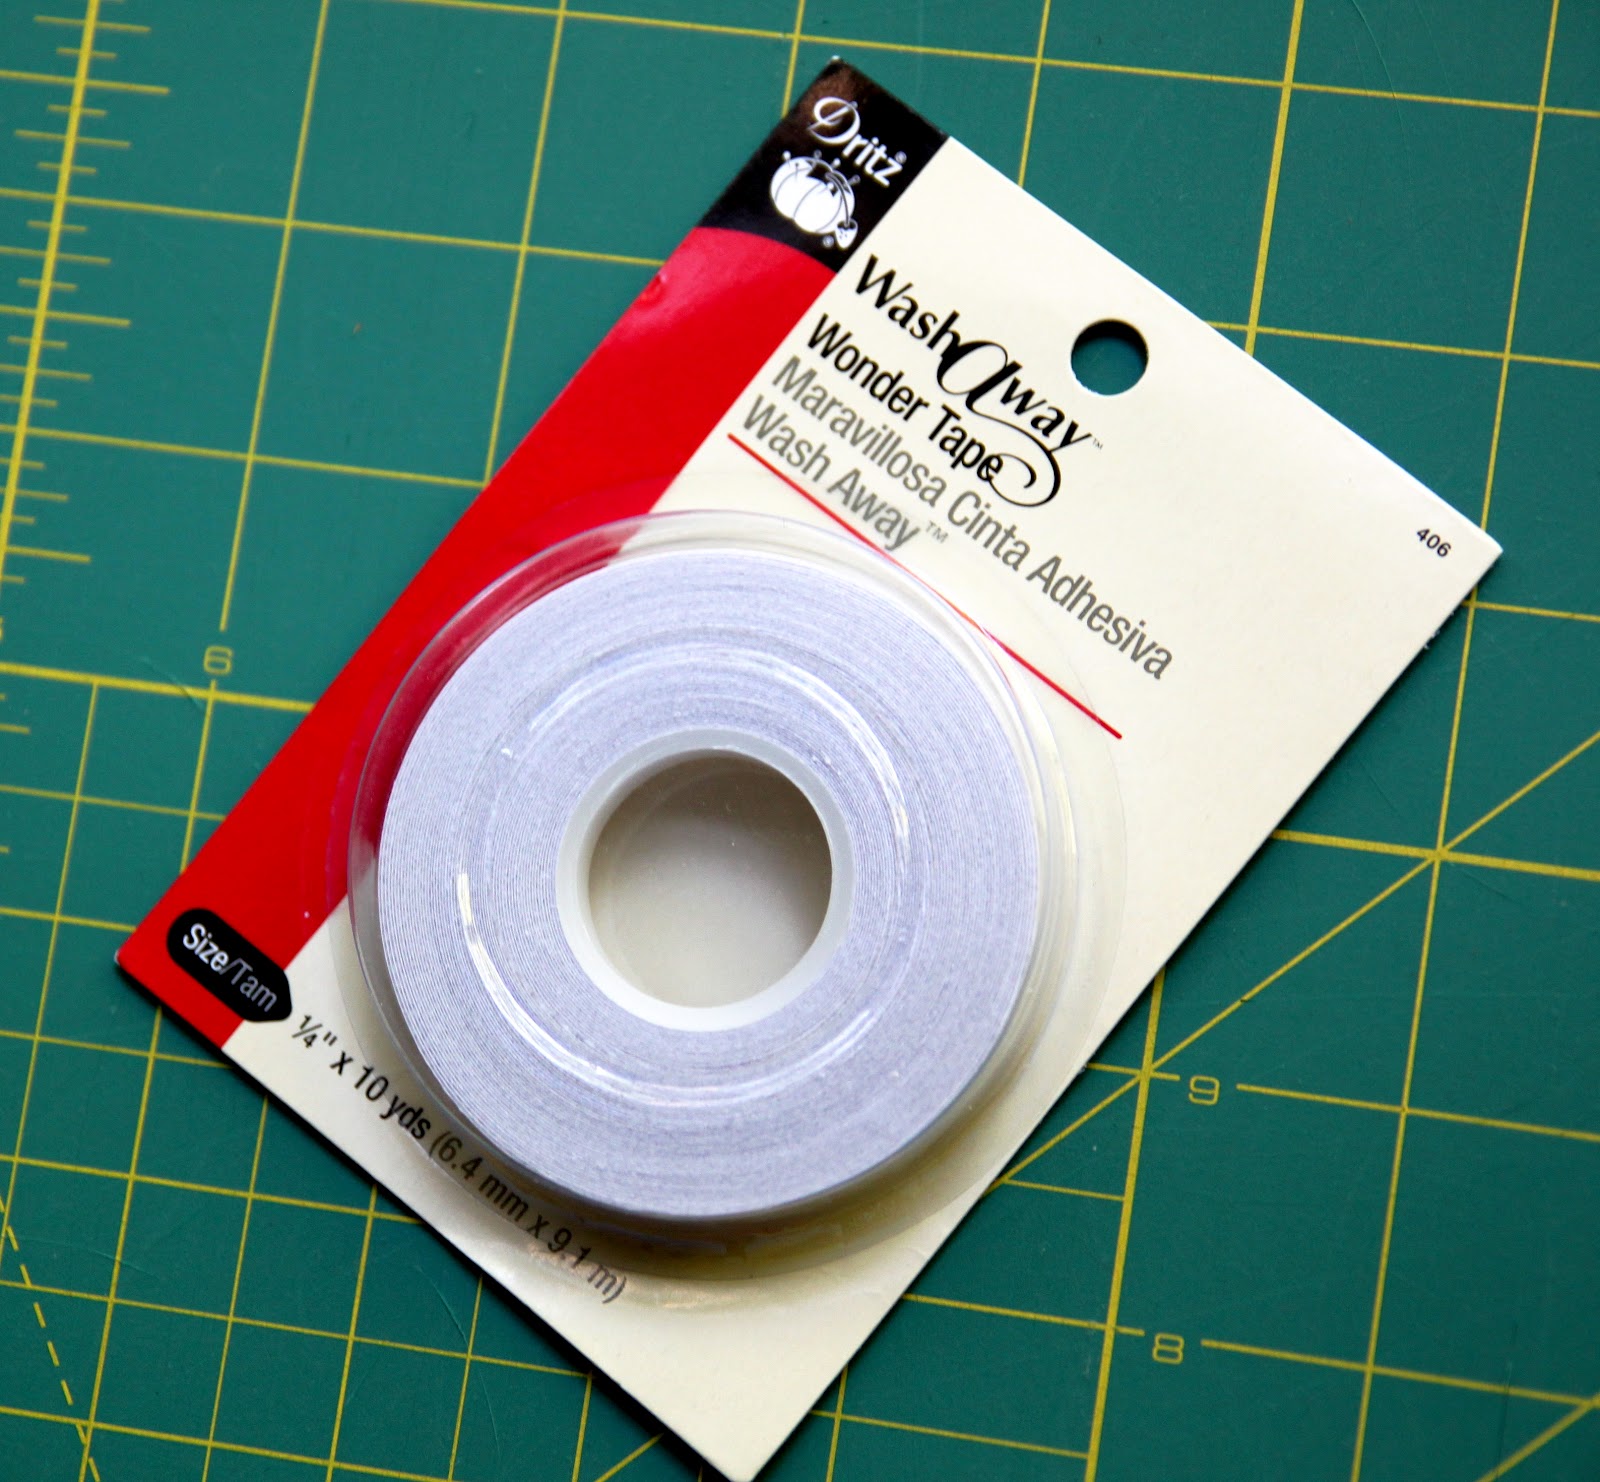
The next step is optional, but if you would like to add trim in between the yoke and the main dress, then this next step is for you. Above is one of my most favorite sewing tools…….Wonder Tape!

Cut the rickrack a little bit longer than the bottom of the yoke of the dress. Apply Wonder Tape to the back of the rickrack trim.

Peel off the paper backing from the Wonder Tape and line up the edge of the rickrack with the raw edge of the yoke. If you don’t have Wonder Tape, I would suggest basting your trim in place before the next step.
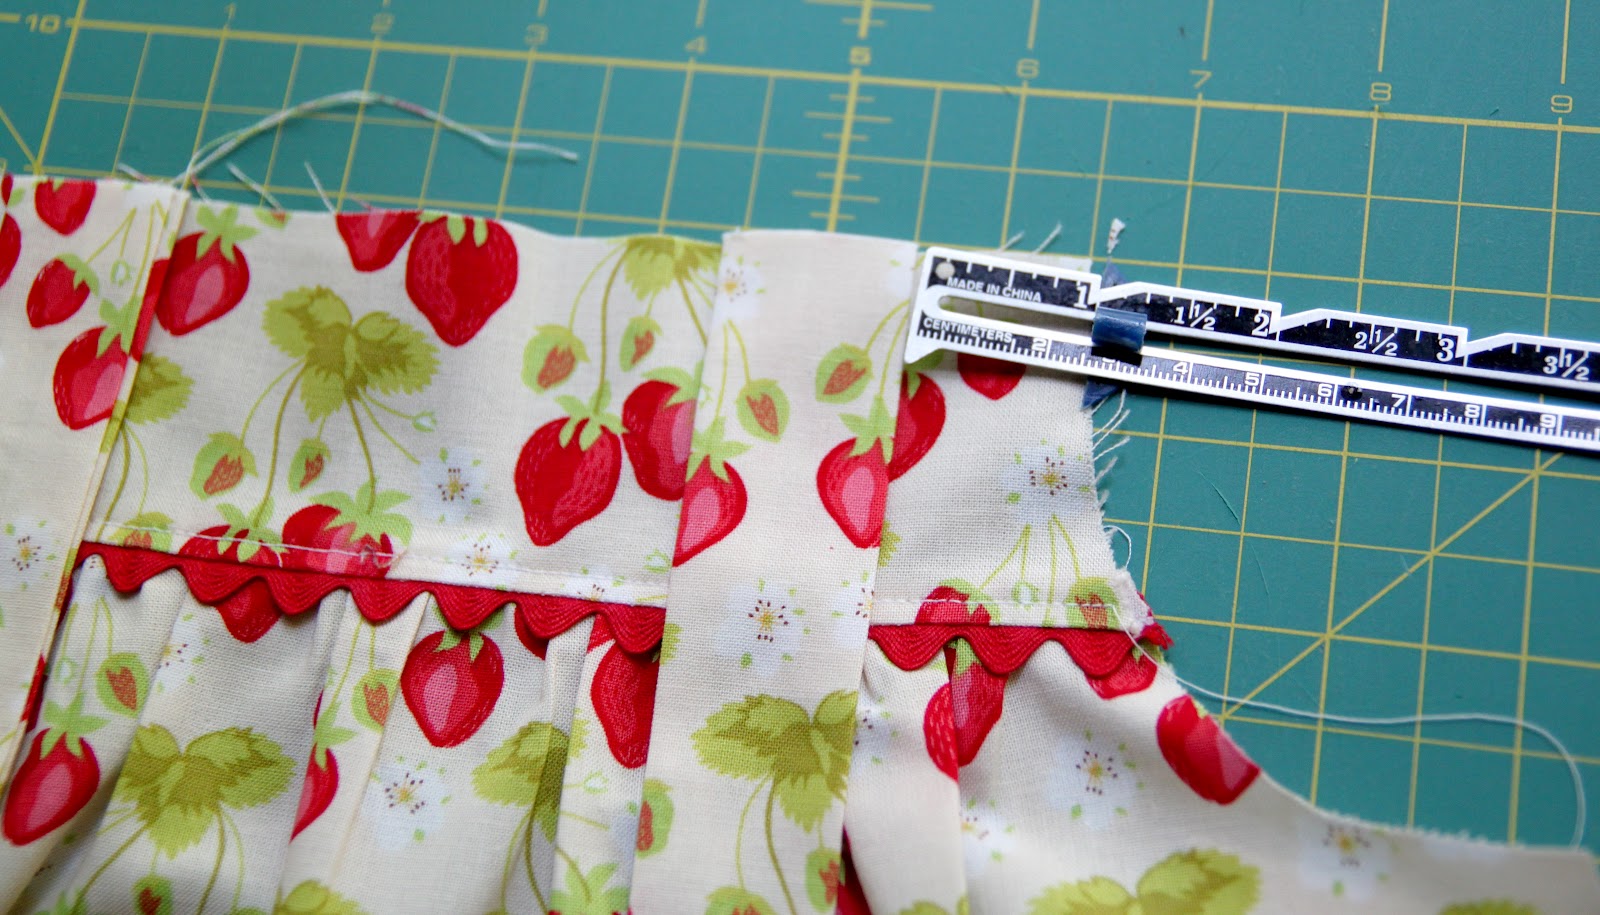
Gather the top of the main dress piece so that it lines up evenly with the yoke of the dress. Place the yoke (with trim) and the main dress together, right sides facing and sew together. You may need to adjust your seam allowance for this part depending on the size trim you are using.

After you have sewn the main dress and the yoke together, press the seam open and topstitch or edge stitch along the bottom of the yoke.

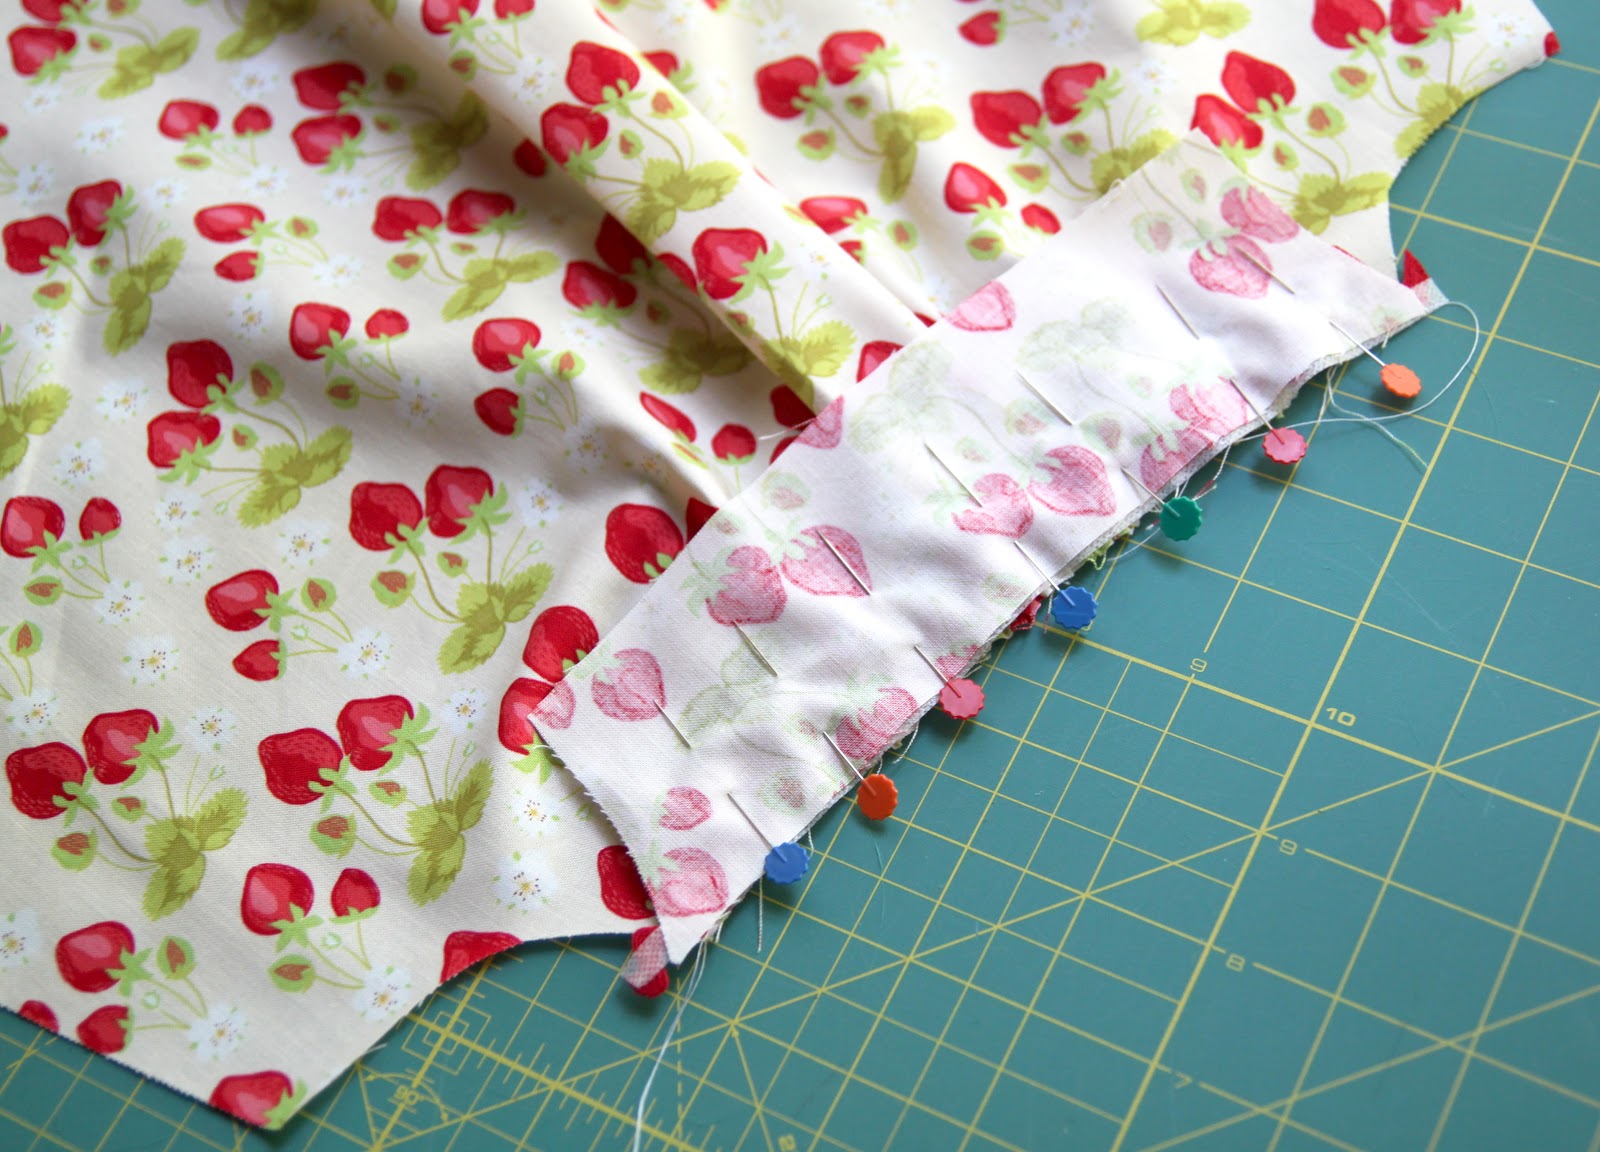
Measure in 1″ from each side of the dress for the strap placement. Baste straps in place. If you don’t have a hem gauge, I recommend you pick one up. I use mine for all sorts of things and you will love having it around!

Place the facing and the dress with the right sides together and sew around the underarms and top, making sure to catch the straps in the top seam. If your main dress piece and your facing don’t line up perfectly, do not worry. Just trim your main dress piece and make sure it lines up just right with the facing.
Again, you may notice that I have serged the raw edge of my facing. Again, this is not necessary, but you can always add a more finished look by using a zig-zag stitch, cutting with pinking shears or turning under the raw edge by 1/4″ and sewing in place. That part is totally up to you.

Clip the corners and curves, turn right side out and press.
Do the same steps above for both the front AND the back of the dress.


Now we will sew the front of the dress to the back of the dress. Turn up the facing and pin down the side of the dress starting at the top of the facing all the way down to the bottom. Stitch down both sides of the dress.

In the picture above, I have sewn down one full side of the dress.
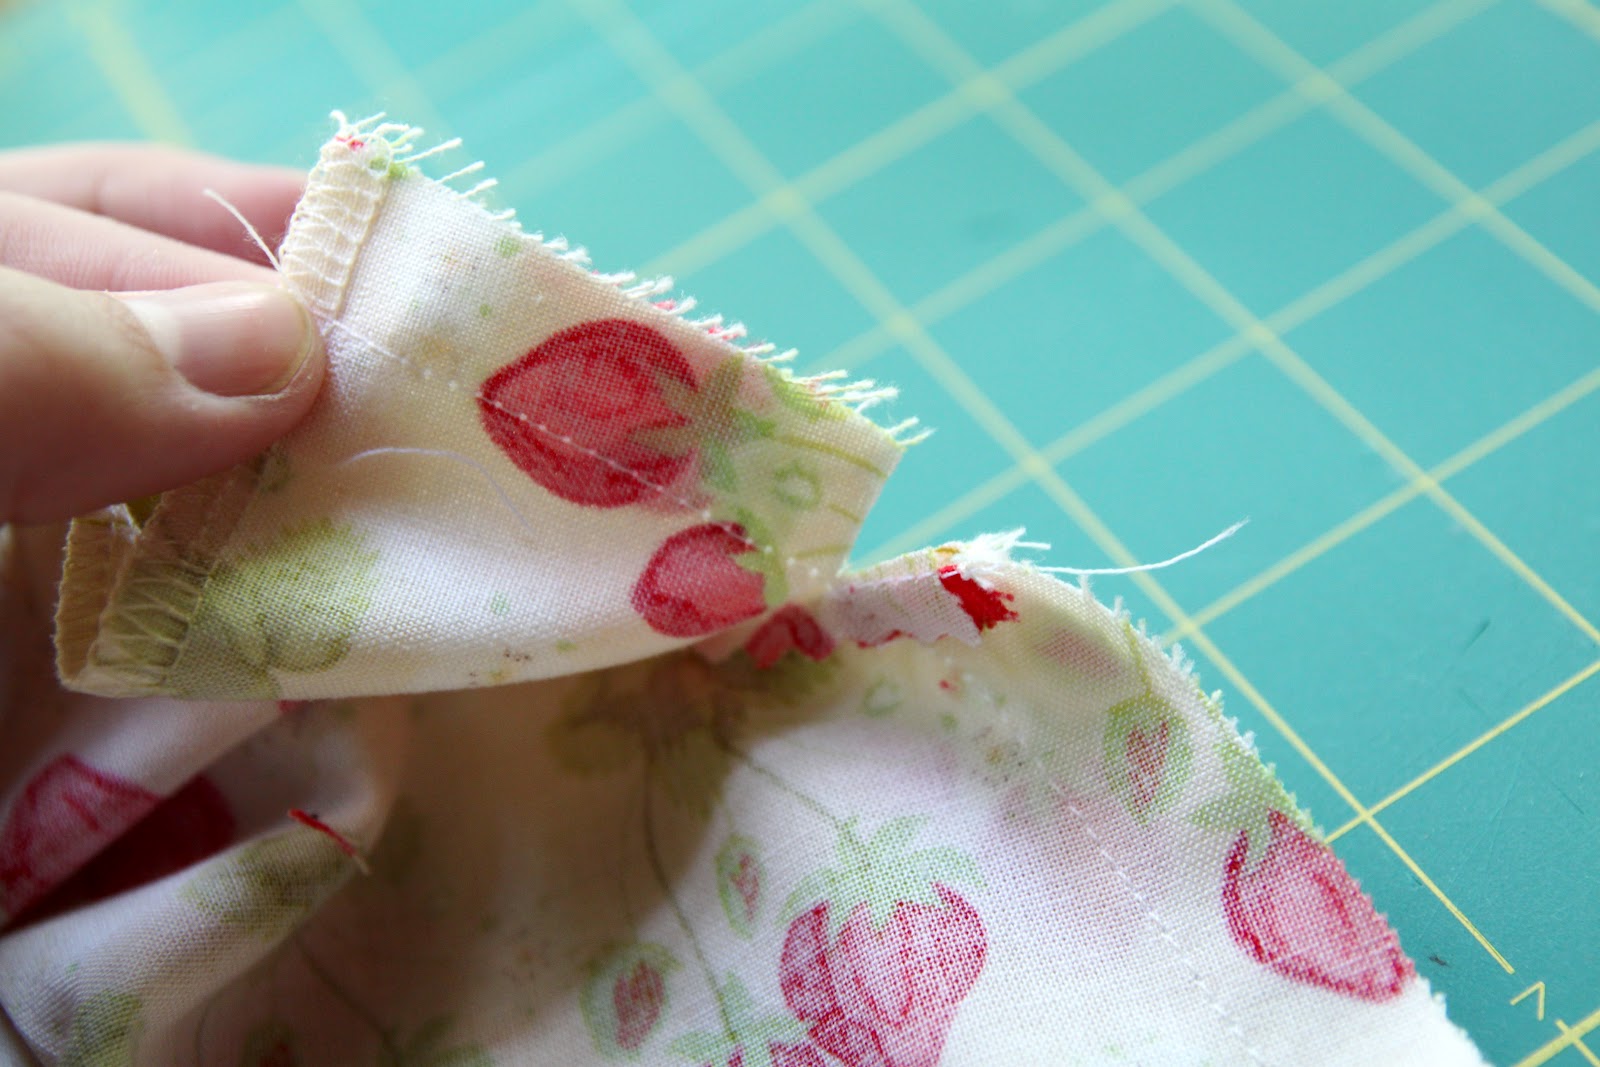
Where the facing and the main dress pieces come together under the arms, I like to cut a little slit so that the arm pit will lay a little more flat. Cut as far down to the stitching as possible, but do not cut through it. Press seams open, turn right side out and press.

Now for the final step, attaching the ruffle. Gather your ruffle so it matches up evenly with the bottom of the dress. Pin in place and sew together all the way around the bottom.


 Lindsay Wilkes is the owner and designer behind The Cottage Mama. She creates timeless, vintage inspired sewing patterns for children’s clothes. She is also a fabric designer for Riley Black Designers / Penny Rose Fabrics, author of the book ‘Sew Classic Clothes for Girls’ and can be seen teaching nationwide and online in her video series ‘Lessons with Lindsay’ sponsored by Baby Lock Sewing and Embroidery machines.


Adorable little model and the dress is so cute! Thanks for sharing!
You’re welcome!
Beautiful tutorial!
Love, love, love it! Thanks so much for all your work in putting this together. I think my friend’s little girl is going to be getting a new dress!
Lindsay, you make it all look so easy!
Michelle, that might be one of the best compliments I’ve ever gotten. That’s my goal…….I want everyone to feel like they can sew!
I love the strawberry fabric. It’s so cute and classy. Where did you find it?
I guess I should have included that info ~ sorry about that. It’s Sandi Henderson ‘Meadowsweet’ Strawberry Print……you should be able to find it on Etsy.com in the supplies section or check with some of the sponsors here on the blog and they may have it as well.
Oh, I should have known it is Sandi Henderson’s. I just love her stuff. Thanks again!!!
Beautiful dress and excellent tutorial. Thanks!!
María
thanks so much for the free pattern and tutorial. it’s precious.
so cute! thanks!
What a sweet dress, thank you for the tutorial and pattern. 🙂 I love the strawberry fabric you chose.
Thank you for the free pattern, it looks really cute and the instructions look very straight forward. Might give it a try while the kids are napping this afternoon!
I love the simpleness of the pattern – or maybe the strawberries. Thank you.
Thank you very much Lindsay. That is an awesome tutorial and the pattern is perfect. Thank you for the size box on the pdf, even though I know you had someone else do that part because it’s hard to know if a pattern actually printed correctly without that. I’ve seen quite a few patterns that don’t have that so it is scary to spend all that time making something only to find out it wasn’t printed correctly after you spent all the time and fabric etc.
I love your daughter in those pics. Too funny! What a clown. LOL
Thank you! Can’t wait to try this pattern out for my daughter.
I think my Grand Daughter is going to need several of these sweet little dresses!!!! Thank you for sharing your time and talents with us!!!! :O) <3
Gorgeous fabric and dress, and, of course, the model makes the entire thing :oD
Am I the only one having trouble printing the pattern?
Are you downloading it as a PDF and opening it in Adobe? It worked fine for me on this end. Maybe you can let me know what the problem is……?
Dang – totally want to print, but it doesn’t want to let me. I would love it for my two girls. Another adorable Cottage Mama creation!
Really cute and summery. Love the fabric u used.
OK, this cheery little dress makes me want to run right to my sewing room – and I don’t even have any little girls in my circle. I’m making some of these anyway to add to my “someday grandchildren” collection. Thanks for the free pattern!
Thank you so much for offering this pattern to us. You are beyond sweet! Its such a cute little dress. I am excited to make one for my daughter!
I’m already making this for a friend….so is the ruffle suppose to be 3 1/2 inches wide or after unfolding it …is it 7″ ????
No, the the ruffle will be 2.5″ after hemming it……the long measurement is the length.
Love your patterns can’t wait to sew this one . Thanks for sharing!!!!
Thanks so much for the pattern and tutorial. I love the dress and your pretty little model. If I wanted to make it in a larger size are there basic guidelines for enlarging the pattern? Thanks
So cute! Thank you for the pattern. I’m going to try it this weekend for my granddaughter – Alice Matilda!
Thank you so very much for sharing. I have been wanting to make my first dress for my 1 yr grand daughter. I’m just a little excited…
So cute! THANK YOU!
Too Cute! Thanks so much for sharing!
I love this! So pretty!
Adorable! Time to find some fabric!! 🙂 Thanks for sharing Linds!
So cute! Thank you! I had never heard of Wonder Tape and it sounds, well, wonderful! Thanks for sharing that tip and for the pattern!
Thank you for the wonderful tutorial for the dress. I am putting it at the top of my sewing list! Thank you for sharing. 🙂
I love it! I made it over the weekend and it turned out great! Now I need to get to work making one for my other two little girls.
This comment has been removed by the author.
This dress is so cute. I think I’m going to make it for my daughter’s 1st birthday.
Could you possibly tell me how much fabric I would need for a 12month?
Thanks!
This is so cute!
I’m just curious about the 12 month size. Is it supposed to be a 6-12 month size or 12-18 month size? Thanks.
Oh my gravy. That is the cutest dress and such a darling model!I love her funny faces.
Katie
I have spent 3 hours trying to download as a PDF file it wont let me it keeps taking me to scribd to download. Help I love this dress.
Me too
This dress is so adorable! I love it. It’s just like my mother’s favorite dress to sew for little girls. And I love the rickrack trim!
Thank you so much again for this free pattern and tutorial Lindsay – so many sizes!!! You are very generous with your talent.
It is being featured as a top pattern today on SewSet.
Thanks again!
– Jess
So darling!! 🙂
Am going to make this for my new granddaughter who just happens to be named Matilda!!!
Lindsey
I would really love to have this pattern but Scribd wants money for it
is there anything else I can do
would you possibly be able to email it to me
[email protected]
thanks
Willie
hi there I too am very interested in this pattern but cant seem to download it.
could you email it to me also 😀
My goddaughters 2nd birthday is coming up and I would really really REALLY love to make this for her.
My email is [email protected]
thank you thank you thank you
tiffany *
Just emailed you!
This comment has been removed by the author.
Hello
i can not download the pdf file . please uplod it to other site so we can download it
thanks
Help I love this dress.
oh I cant dowload it either it keeps going to scribd and asking for money to download it Kerry
I would love to make this darling dress! It keeps asking for money to download. Is there somewhere else to get the pattern? Thanks!
Lindsey – I have just discovered your blog and love it. I would love to make the summer picnic dress for my granddaughter but cannot download it without subscribing. Wonderful tutorial and your “model” is precious! My email address is: [email protected]. Thanks, Sharon
I would also love a copy of the pattern
I would love to make this dress for my little ones. Would you mind emailing it to me at alanicr99 at yahoo dot com? Thanks
Ditto to the people above – I’d be willing to pay *you* for the pattern (been looking for one like this in the fabric store, with no luck), but not Scribd – and I’m not sure about my abilities at hand drawing it to scale. Could you host it elsewhere (Google docs?), or could I ask for a copy by email? Thanks!
Oh my! This little dress is so adorable! I need to make this for my little miss. Thanks for sharing 🙂
CUTE, BEAUTIFUL,LOVE,LOVE,LOVE!!!
Love your pictures, amazing floral designs.
discount kids clothes online
Hi I would love to make this dress for my girl friend’s little girl for her birthday is there any chance you could email me a copy as I can’t download it. My email is mountaingoats AT hotmail DOT com thanks so much,
Regards Jenna
Hello I’m trying to print this pattern but Scribd is asking for a membership fee!
Can you please email this pattern to [email protected] thanks 🙂
Sorry for the difficulties with Scribd. I did not have to pay for membership, but maybe they have changed it. We will be redesigning the blog this year and hopefully you will be able to have instant downloads and I won’t have to use these outside sites. Again, so sorry about this. If anyone can’t access the pattern, please email me directly at thecottagemama[at]gmail[dot]com and I will send it to you as an attachment. Thanks! Lindsay
Thank you so much for this free tutorial! I made my first dress today! It was easier than I thought! Great detailed instructions. I’m so proud of myself for making this, and I can’t wait to see what it looks like on the little girl that I made it for. It’s for her second birthday. 🙂
I’ve been enjoying using your tutorials to relearn some sewing skills and to also learn some new ones. I just wrote in my blog about some your patterns that I’ve used and linked back to your tutorials. Next time I make the summer picnic dress I will try the new Knot tie version. Thank you for the inspiration! http://granniemsgarden.blogspot.com/2013/02/winter-sewing-projects.html
Hello! I just finished sewing the Summer Picnic Dress for my daughter. I’m excited: the tutorial is very clear and easy to follow and the model fits perfectly.
If you want to see it you find it here:
http://cosedikaty.blogspot.it/2013/03/vestitini-stoffe-epittura.html
As you will see in the same post you find also a revisiting version of the Janey Jumper. I made it based on your photos. I’m Italian and I do not write very well in English. Sorry for the mistakes and thanks for your nice blog!
I can’t wait to try this pattern out!! Thank you for this tutorial! I am a proud new follower of your blog!
shannahrenee.blogspot.com
Hi, I cannot seem to DL the pattern. Would you please email it to me at [email protected]
I am currently making one of these for a very close friends daughter who’s turning 1 soon. I am a little confused as to how to cut the ruffle. it says to cut on the fold. Which side am I supposed to cut on a fold? the long side? or a short side? or do I just cut 2 pieces that are 3.5×18 not on a fold? I see someone else asked about this also but the answer still didn’t specify which side is supposed to be on a fold.
Thank you for sharing this adorable pattern! I only have one question because I am new at this computer thing! How do I make the pattern work for me after I have printed off? The way it is now it might fit a doll! Please help! Thank you so much!
comfy and poretty, just perfect for spring. I featured this tutorial here:
http://sewprettysewfree.blogspot.com/2013/04/summer-picnic-dress-free-pattern-and.html
I just made this dress! Here’s the post:
http://creative-outpour.blogspot.com/2013/05/katie-new-dress.html
Even though you did this up last year, I hope you don’t mind still hearing about it. I just found it and am going to make it for my granddaughter right now! Thanks!
hello from Egypt
I really liked it
I am gonna make it for my cousin ISA
Thank you so much for the pattern and the tutorial! It is so beautifull !
Marie from Belgium
I love this! Thank you for sharing it with us. Do you give permission to sell items made from this free pattern? If not, I’ll make it for an auction donation but I’d like to know if I can offer it to my customers as well. Thank you!
My daughter is 4 and, theoretically, should be wearing 4T. However, she wears a 6-7 in pants and an 8 in tops/dresses when I buy her clothes. She wears a 5-7 usually when I make the dress, and that depends on the pattern. Are you going to extend the sizes available for this pattern? Or, do you have any suggestions for how I can do that myself? I’m still learning as far as sewing goes. So, please be gentle with your instructions. lol
Thank you Lindsay for this adorable free pattern! Love it! Although my dd is out the size range, I would still make it as gift or if I have enough time , I will size it up! My 8 yr old would love this dress 🙂
Found the pattern yesterday and made the dress. My sweet great niece will recieve this for her first birthday present from Aunt C. I really enjoyed making it and thought it turned out great!
Yesterday I finished two sundresses following your pattern and instructions. Each sundress has a matching cloth doll wearing the same fabric. The instructions were very clear and easy to follow. The dolls and sundresses will be packed into two shoe-boxes for Operation Christmas Child. Thanks so much for this free tutorial!
New to sewing, all new vocabulary and meanings!! I’m sweating! But, this is a promise to myself , that “one day” is here, and I must give it a try! Sewing for my daughter’s first baby, due any day now. We wait!
well, I finish this adorable dress, and I am very pleased how it turned out. You made me look like a pro!!
Thank you so much for your generous gift of tutoring and pattern. By the way, my model, Our grand daughter was born April 16th. Thank you !!!
Thank you for the tutorial. It’s a sweet little dress! I just printed it out, and even though the testing square is 1″ the pattern pieces are too small. This dress would fit a doll. Would you please send me the pattern and I will see if that will print the proper size. Thank you !
Hello! They look tiny to me too but they are “on fold”. I just finished a dress to my baby girl and it fits great!
Hi zz. I have printed pattern on a4 paper is that right? It looks tiny x
Love the pattern and tutorial!! Thank you! My granddaughter looks cute in her dress!
Lovely pattern and tutorial. Really enjoyed making this dress. Don’t know how to send you a pic but would if I could. Thanks for the pattern.
Thank you Lindsay for sharing this dress pattern! It’s so sweet, as is your little model!! I’m going to make a few of these dresses for my great granddaughter and niece’s little girl.
So very sweet – I love it! I am not the best seamstress, but I am hoping I can sew this for my granddaughter! Your tutorial looks very helpful and the pictures should help, ha, ha. Cute little model too! Thanks so much for sharing!
I like the dress very much, however, you don’t explain which pattern pieces to tape together. Surely the entire dress pattern does not get taped together and then cut out as one whole piece which is how your pattern suggests. For a beginner like me who needs a more step by step instruction, this tutorial FAILS. Sorry to inform but not everyone is a great seamstress and to ASSume that someone just knows, well. . . you know the old saying.
Also, forgot to add that you don’t specify if your 1/2 inch seam allowance is included in the pattern or do we have to add the half an inch when we are cutting. If you are going to teach something, do it right.