Applique is a great way to add detail to your favorite sewing project. I define applique as a piece of fabric sewn on top of another piece of fabric (though some might consider embroidered patches as applique as well). You can add applique to quilts, shirts, blankets, onesies, bibs, burp clothes and the list goes on and on. Applique is very simple and is a great project for the beginning sewer.
Here are the supplies needed for basic applique:
Double-Sided Fusible Interfacing
(such as Wonder-Under or Steam-A-Seam Lite – these are the two I use)
Scissors
Pencil (if drawing your applique)
Sewing Machine
Thread
Iron
Ironing Board
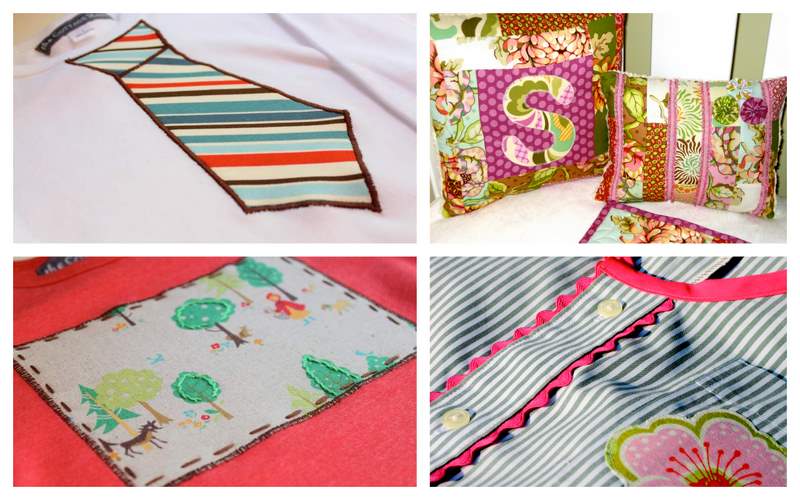
To demonstrate the applique technique, I will walk you through a couple items I made recently for my etsy shop, The Cottage Mama – an appliqued “tie” shirt and a basic square applique “Little Red Riding Hood” onesie.

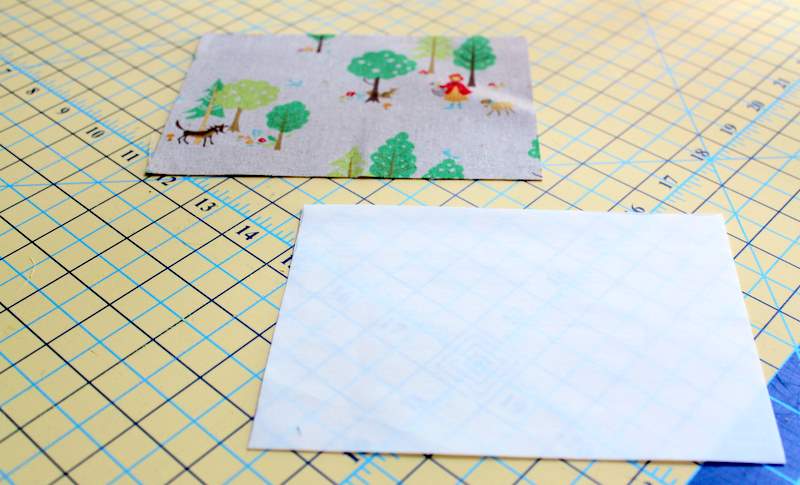
First you need to cut out your pattern. You can be as detailed or as basic as you like. For basic applique, as seen above, cut your pattern out of fabric AND cut the same pattern out of your fusible interfacing. If your design is very detailed, I might recommend fusing your interfacing onto a larger piece of fabric first and then cutting out your pattern (it will just make your life easier that way).
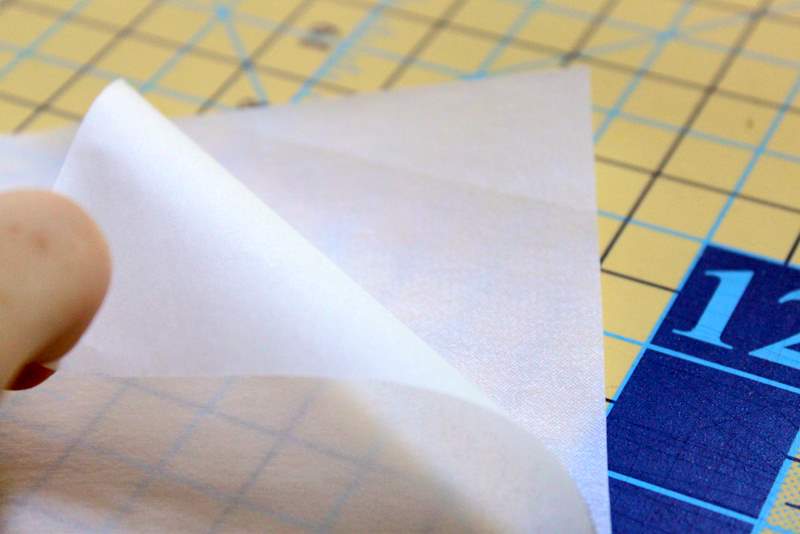
Double-sided fusible interfacing will have a paper backing on both sides. For the next step you need to remove ONE side of the paper backing.

Next place your fabric (right-side up) on top of the side of interfacing WITHOUT the paper backing. This is the side that you just removed the paper backing from in the previous step. Use a hot iron and iron the fabric to the interfacing.

Now your interfacing is fused to your fabric applique pieces. One side is fabric and the other side will feel like paper (because it still has the paper backing on).
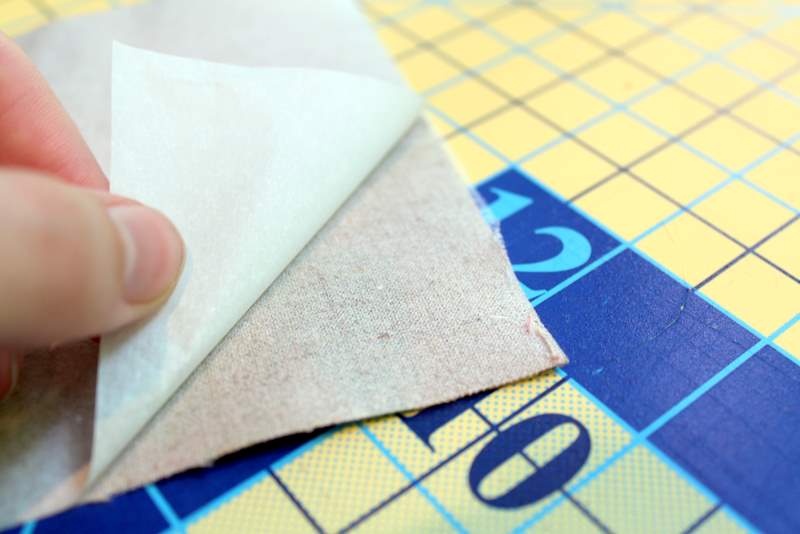
Remove the paper backing from the wrong-side of the fabric. You will notice that there is a thin layer of interfacing that is now fused to the fabric.

Place your applique piece where you would like it to be position, in this case, on the front and center of a onesie.

For the tie, there are two pieces, so place the first piece in position and then the second.

At this point you can play around with your applique pieces and move them around until you get them positioned just right.

Once you have them positioned, use your hot iron to fuse the applique to your other piece of fabric (again, in this case a onesie and a t-shirt). After ironing, your applique will pretty much be secured in place.
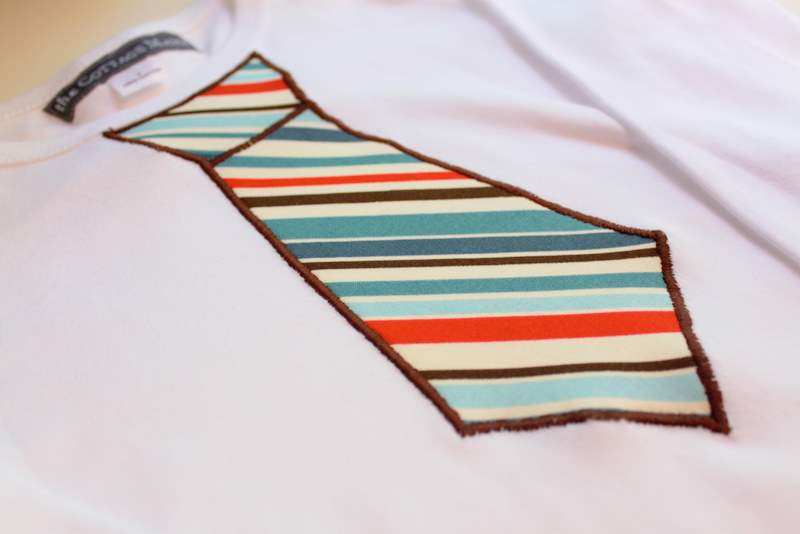
I prefer to take it a step further and stitch around the applique piece. For the tie, I did a very tight zig-zag stitch (almost resembling a satin stitch). To do this, set your machine on a regular zig-zag stitch and reduce the stitch-length almost as low as it will go (I set mine on .3). It’s always good to do a test run before actually stitching on your applique (trust me, I learned this the hard way).

If you have trouble getting your machine to feed the fabric on such a low stitch-length, try setting it a little higher and try again. Like I said, always test it out to see if the stitch meets your expectations.

I like to set my stitch-width to 3.0 or 2.5 for this type of applique, but again, that is all personal preference. Make sure to stitch along the very edge of the applique piece. This will ensure a clean line and no fraying after washing.

For the Little Red Riding Hood Onesie I used a longer stitch-length as I wanted to be able to see the zig-zags. I also used a little bit narrower stitch-width as well.
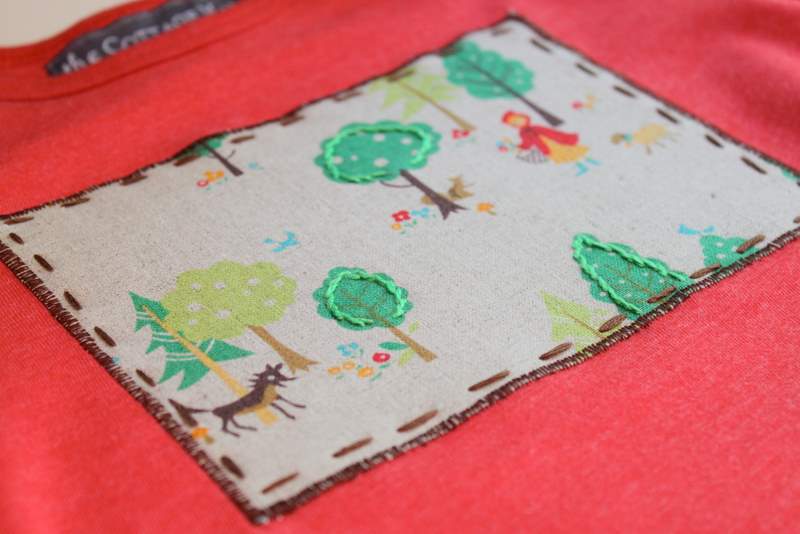
After stitching around the applique, I added additional detail by doing some hand embroidery on the trees as well as around the border of the applique. I think this attention to detail makes this onesie truly special!
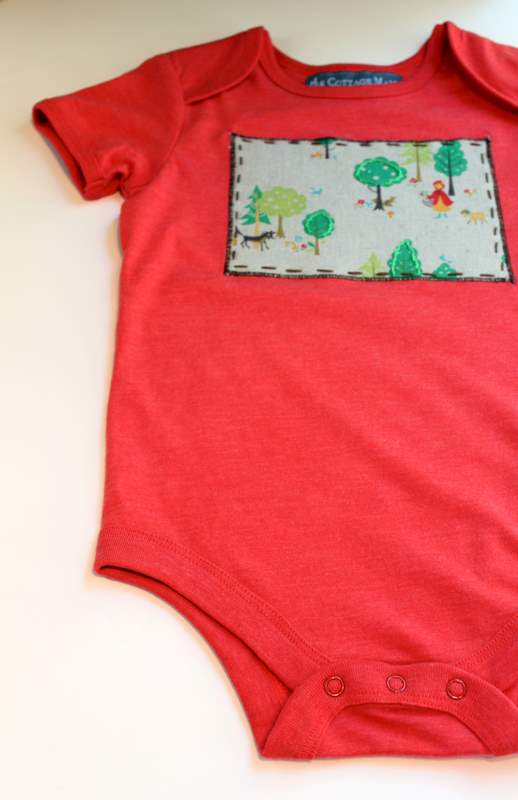
I just love the simplicity of this appliqued onesie. I used a Japanese import (linen/cotton blend) fabric for the main applique. The onesie is made from organic cotton and recycled polyester and is amazingly soft.
Here are a few other examples of some past applique techniques:
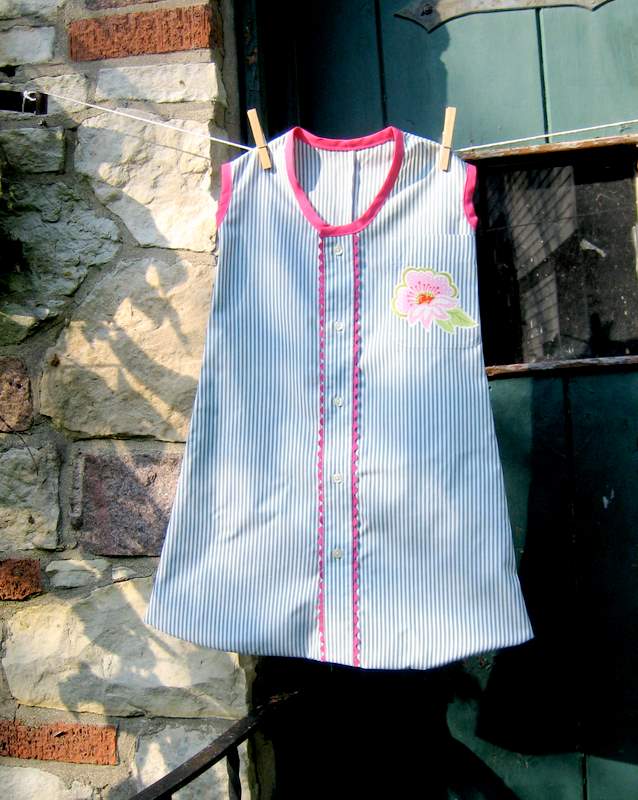
I don’t know if you remember my Dress Shirt Sleep Sack Tutorial, but here I used a basic flower applique.

I used fusible interfacing and applied it to a large floral fabric (Church Flowers from “Nicey Jane” by Heather Bailey). After applying the interfacing I cut more detail around the flower. I found it much easier to cut once I already had the interfacing applied.

Then I ironed my applique piece onto the sleep sack. To stitch this applique, I simply used a straight-stitch around the border.


For my Sleepover Pillowcase Tutorial, I applied fusible interfacing to a large square of fabric. I then hand-drew these letters for the monogram and cut them out. Then I removed the final paper-backing, ironed them on the edge of the pillowcase, and used a zig-zag stitch to finish the applique.

Here is a onesie from my etsy shop. On this “tie” onesie I used a straight-stitch to finish the applique. In this case, I thought a slightly frayed edge would be really hip and cute for a little boy. If you do not like the frayed look, then I would not recommend using a straight-stitch. I apply Fray-Check to the edge of all of my straight-stitch appliques. I think this helps make the edge fray slightly, but not look sloppy.


And finally, this is Savannah’s “S” pillow that I made for her big girl room. I used a heavier interfacing for the “S” because I wanted it to stand out a bit more. The fabric used here is Heather Bailey’s “Freshcut”. For most applique work, I use Wonder-Under or Steam-a-seam Lite, but there are some instances that I just like an interfacing with a little more body.
Cottage Mama’s Note: If you have any questions in regards to my “Sew Basics” series, please don’t hesitate to email ([email protected]) or comment and I’m happy to help.


 Lindsay Wilkes is the owner and designer behind The Cottage Mama. She creates timeless, vintage inspired sewing patterns for children’s clothes. She is also a fabric designer for Riley Black Designers / Penny Rose Fabrics, author of the book ‘Sew Classic Clothes for Girls’ and can be seen teaching nationwide and online in her video series ‘Lessons with Lindsay’ sponsored by Baby Lock Sewing and Embroidery machines.


VERY well done! I have done applique but continue to be intimidated by it for some reason. I enjoyed this “refresher”, but I know that a newbie could understand it perfectly as well. Good job and thanks!
Fabulous! I especially love the tie!!! Thank u for this.
Thank you so much for sharing this – I’ve always wanting to give applique a go but wasn’t sure the technique to stop the edges fraying – will give it a go 🙂
Nice 🙂 I’ll have to give this a try sometime! My other excursions into applique haven’t gone so well!
I have a ‘young’ blog and we are doing our first giveaway this week. We make and sell bags, BUT we are giving away 2 bags this week. Just wanted to invite you over 🙂 Found you on Blue Cricket. Love that bonnet!
Julie
vibrant-designs.blogspot.com
Thanks for the applique info. I’ve been working up the courage to try it, and this will be very helpful. I love the detail you added to the Little Red Riding Hood applique.
Thanks…I’ve been wanting to give applique a go, but didn’t have any guides how to do it, so this was super! Really love the cushions in particular!
Becky
http://oldheadonyoungshoulders.blogspot.com
I love the lettering!
This is great!! I had tried the tie before, but I’m doing something wrong because it put’s little holes in the shirt where I do the stitching around the stitching around the tie. Can you tell me what I’m doing wrong?
Allison,
I would try using a ball-point needle or one specifically designed for knits……I bet that will solve your problem!
Thanks so much everyone,
Lindsay
Thankyou from the bottom of my beginners heart for posting this! I had to learn ‘the hard way’ on which needle to use! Would you happen to have a picture of the fraying that occurs with just a straight stitch? I was hoping to make a few tie onesies for a baby shower gift and have finished 2 with just the straight stitch (couldn’t figure out my zig zag-ness at the time). Thanks again!
Your projects turned out really cute! I recently tried decorating some onesies for of my grandbabies but did it with paint pens and they turned out pretty cute. Would love to be able to do the appliques! Your method looks simple enough I could try. I bought some no-sew HeatnBond ultrahold iron-on adhesive that says it’s for appliques, but was wondering if this will work the same as the double-sided stuff you use. Any tips? Thanks!
Do you use a stabilizer underneath the cotton knit onesie when appliqueing on it? What kind of needle do you use? Thank you, Stephanie