Archives for July 2012

Friday Share: Sew Beautiful, Where Women Create and Other Stuff

I’ve had some things I wanted to share with you guys for awhile, but just haven’t had a chance to get them up here on the blog.  So I thought I would take this opportunity to share with you all………..

Have you seen the most recent issue of Sew Beautiful Magazine?
It’s the July/August issue that is on newsstands now.  
And guess who has a five page pictorial in this issue?  
The Cottage Mama!

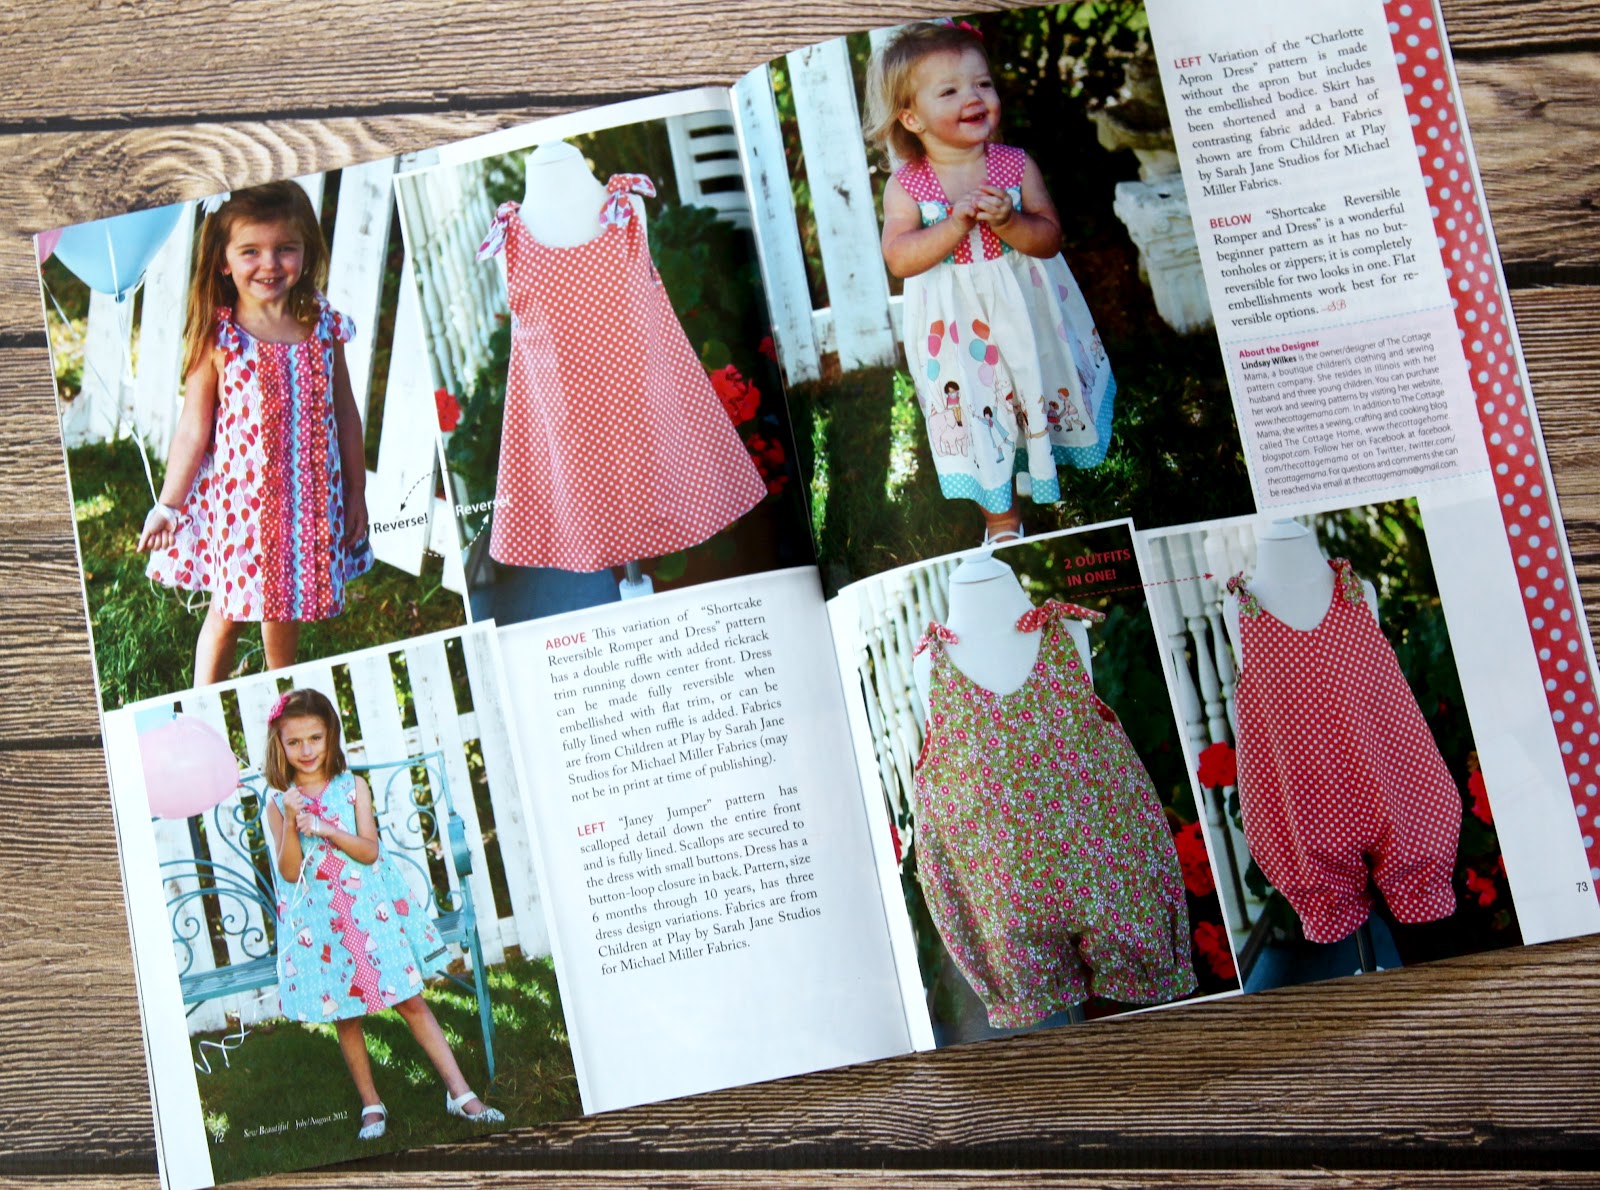
I was so thrilled when Kathy Barnard (Editor, Sew Beautiful) contacted me asking if I would be interested in them doing a pictorial featuring my sewing patterns.  Of course I said yes!   I sewed this collection of clothing almost a year ago for this pictorial using my sewing patterns.

I primarily used the fabric line from Sarah Jane Studios ‘Children at Play’ for most of the garments.  But did include a little Anna Griffin and Heather Bailey in there as well.

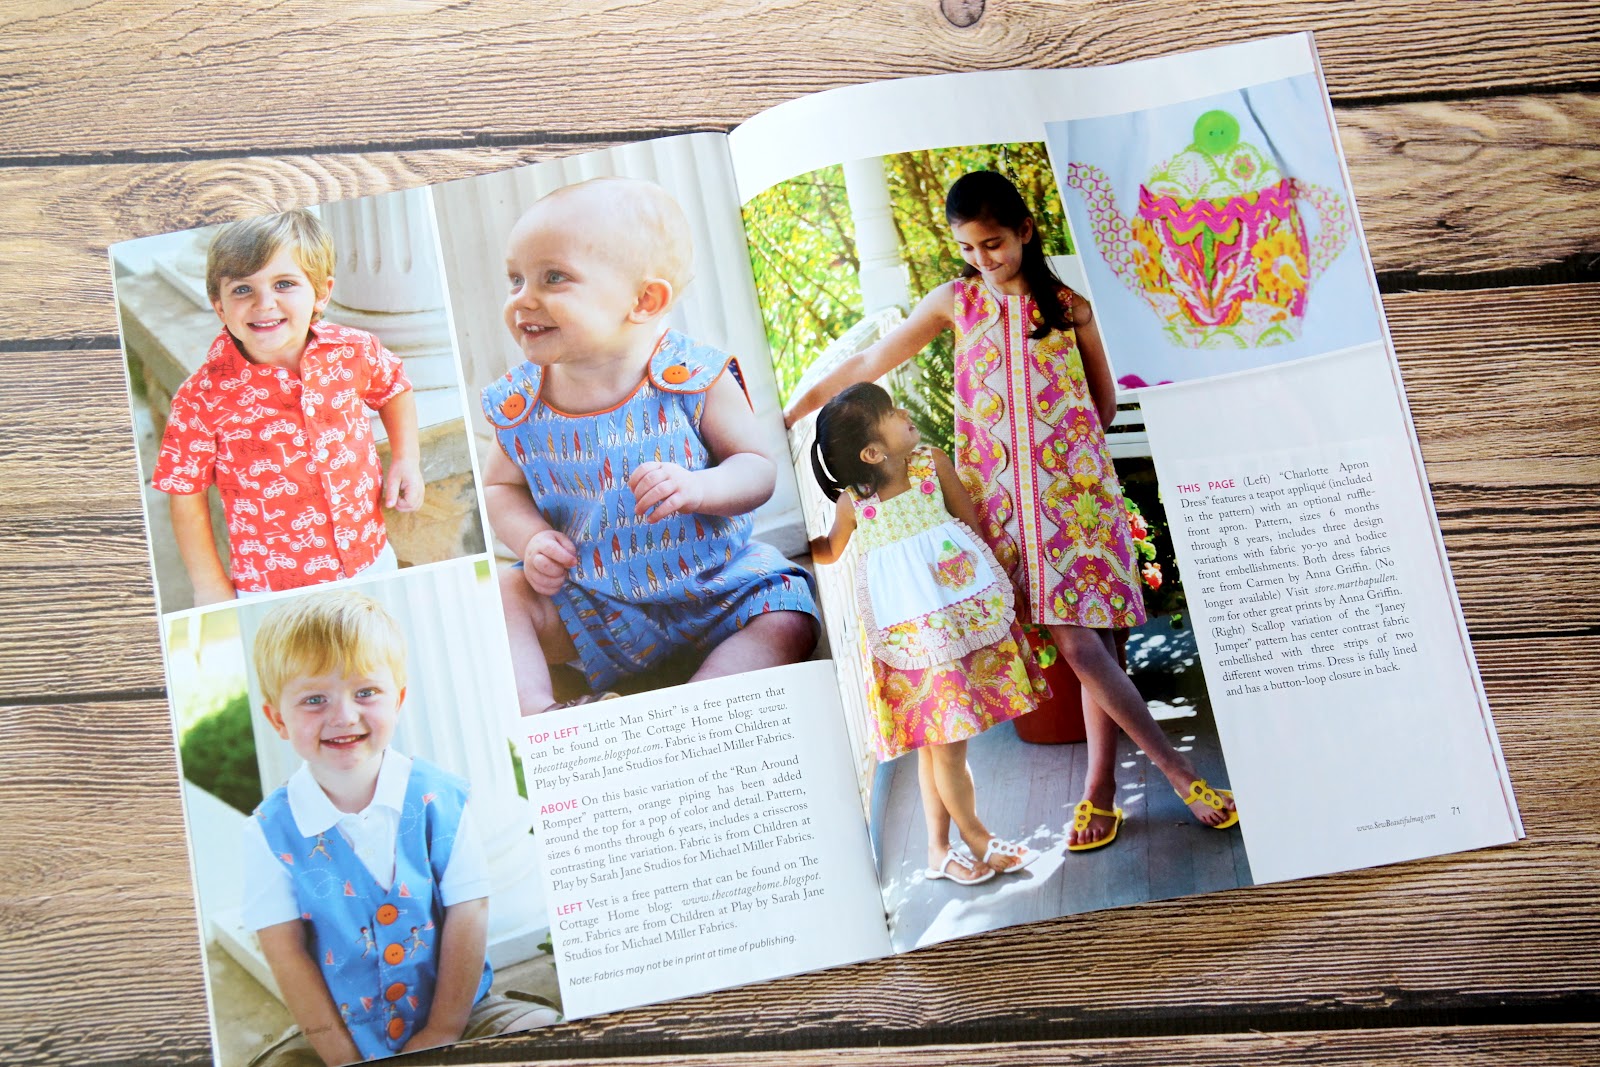
Aren’t those boys just darling?  Both the shirt and vest pattern / tutorials (free) will be making an appearance on the blog soon so be on the look out for those.

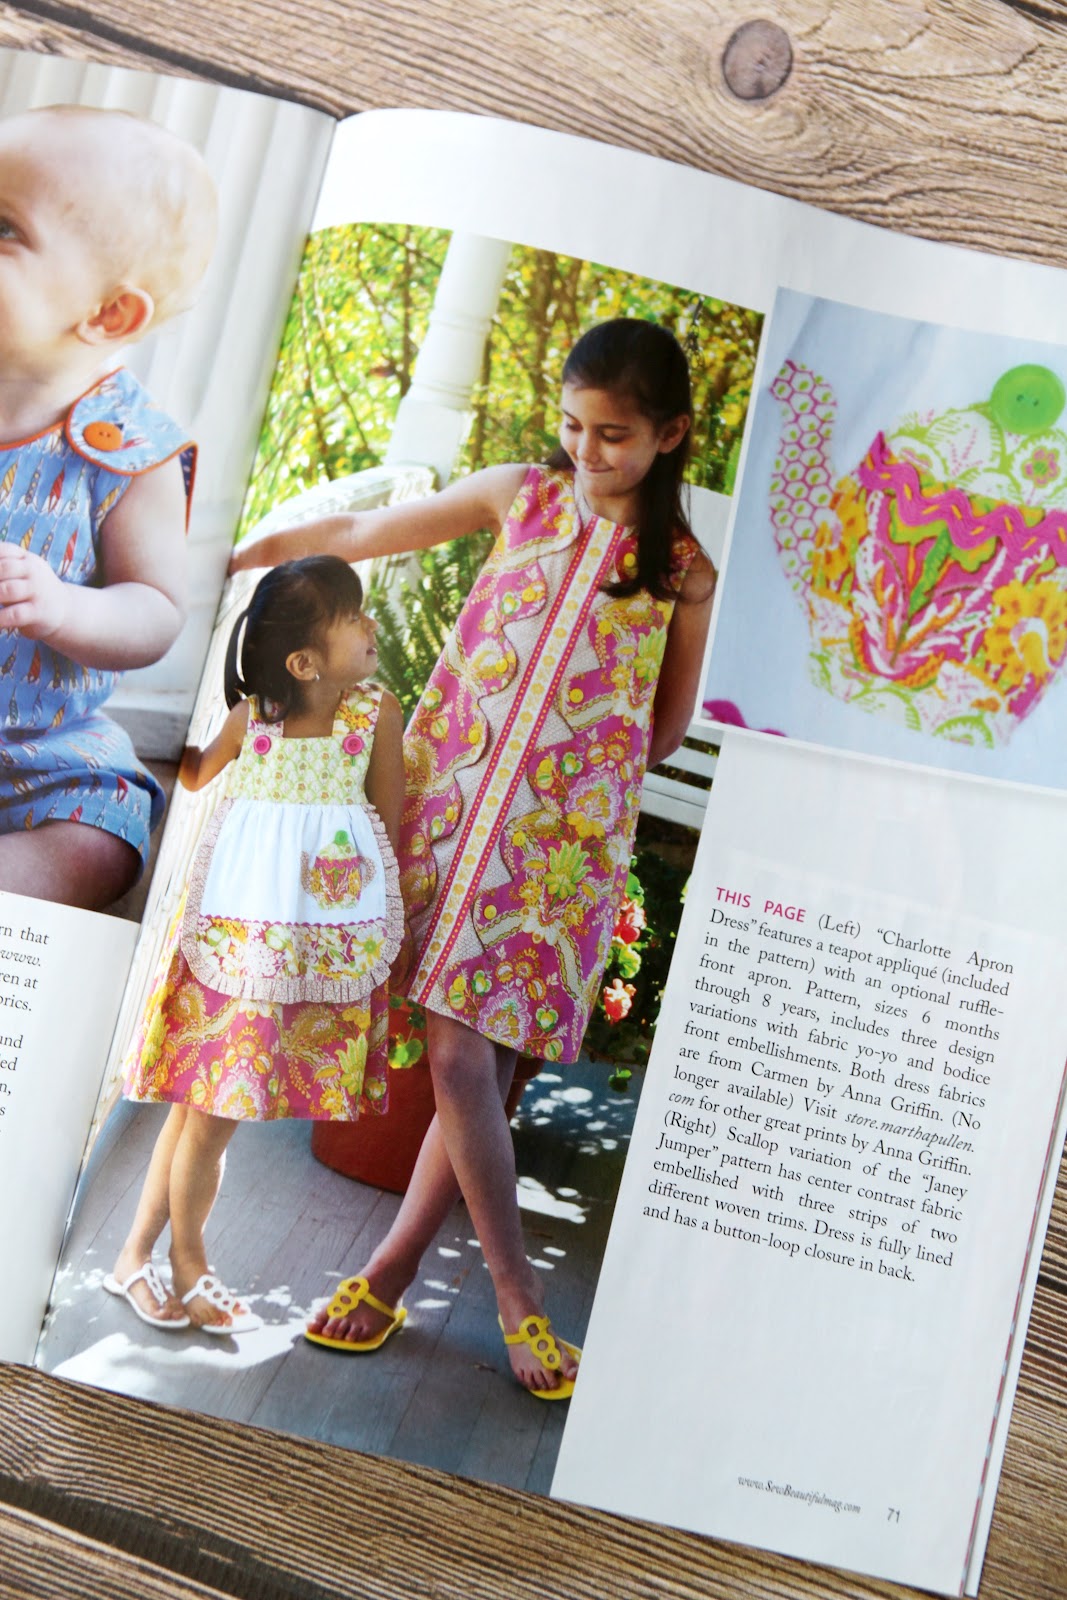
I did not take any of these pictures.  I sent the entire collection of garments to Sew Beautiful and they used their own photographer to should the pictorial.  I love the shots they got of all the kids wearing these garments.  So perfect!

 
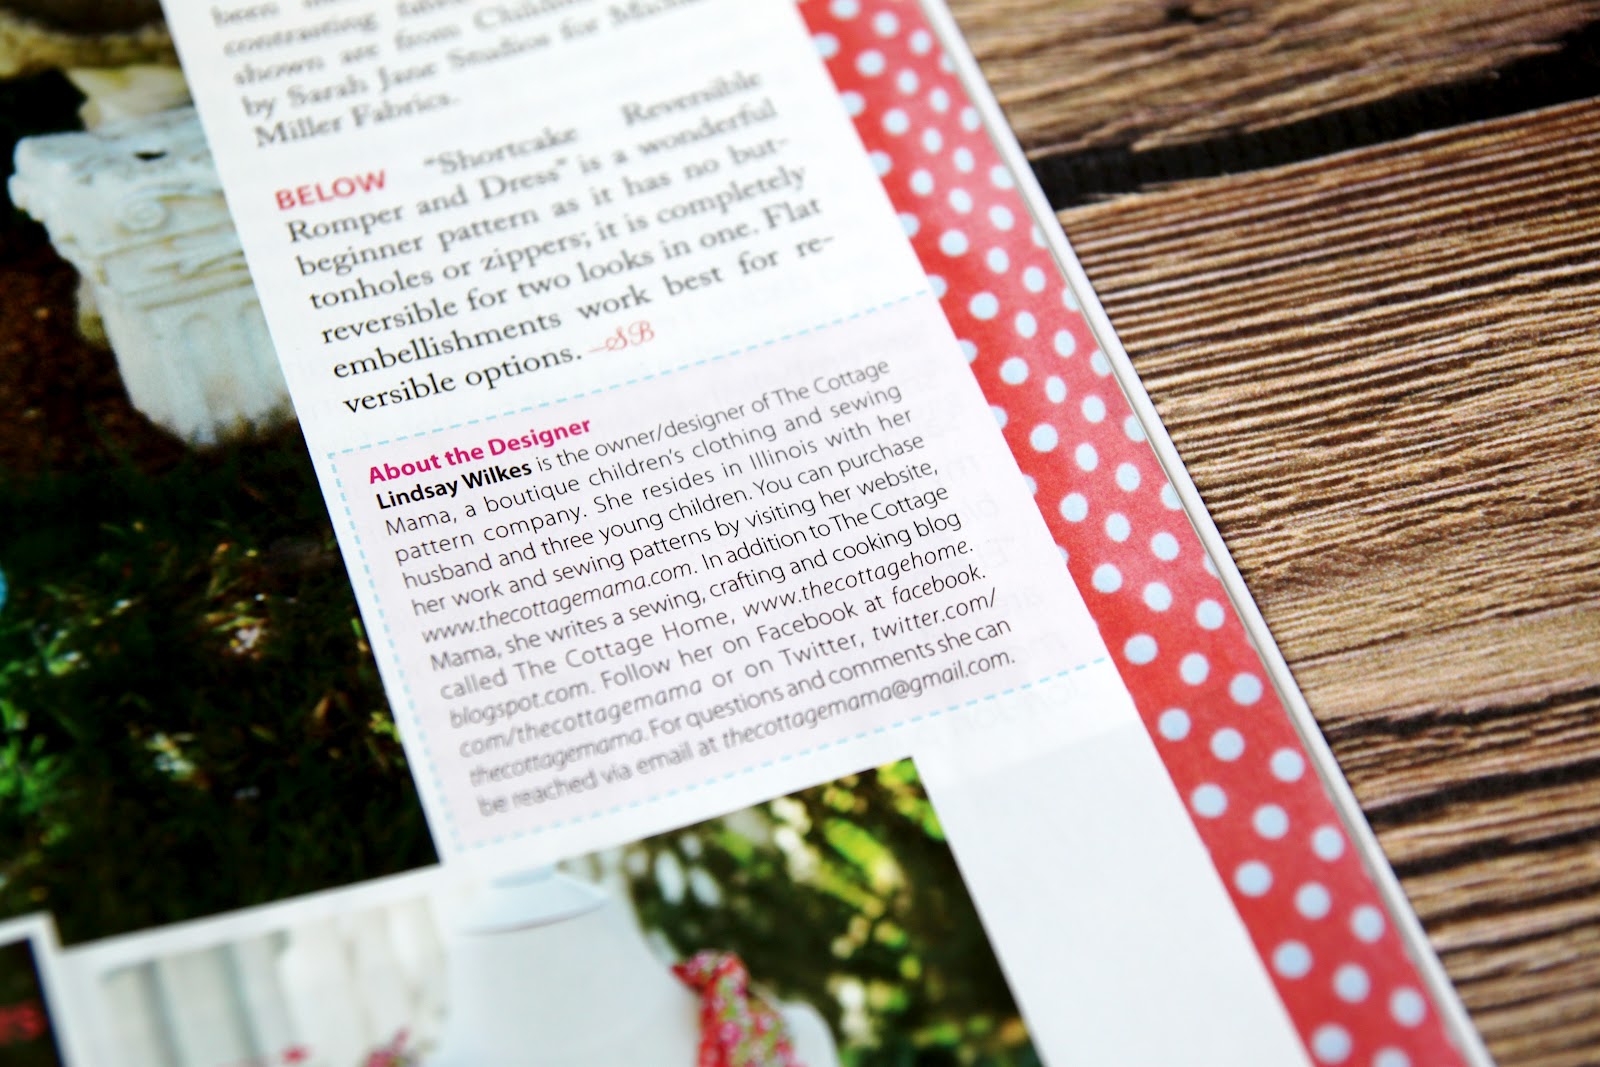
It is truly an honor to be featured in Sew Beautiful Magazine.  So many pattern designers that I admire have been featured in the pages of this publication over the years, so I am really flattered to be included in such good company.

If you have never picked up an issue of Sew Beautiful, it is a magazine dedicated to heirloom sewing.  Most of the articles are geared towards children’s clothing, but there are a few adult pieces and accessories  here and there.  While the magazine is still incredibly traditional and classic, they are starting to feature some more modern fabrics and sewing.

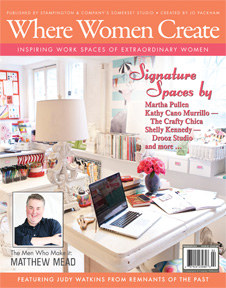
Another recent publication feature was in the Summer 2012 issue of ‘Where Women Create‘ magazine. The Cottage Home Blog was named one of the Top 25 Inspirational and Educational Blogs.  Pretty neat.  My mother-in-law introduced me to this magazine several years ago and I couldn’t believe my eyes when I saw my blog mentioned in this beautiful, inspiring publication!

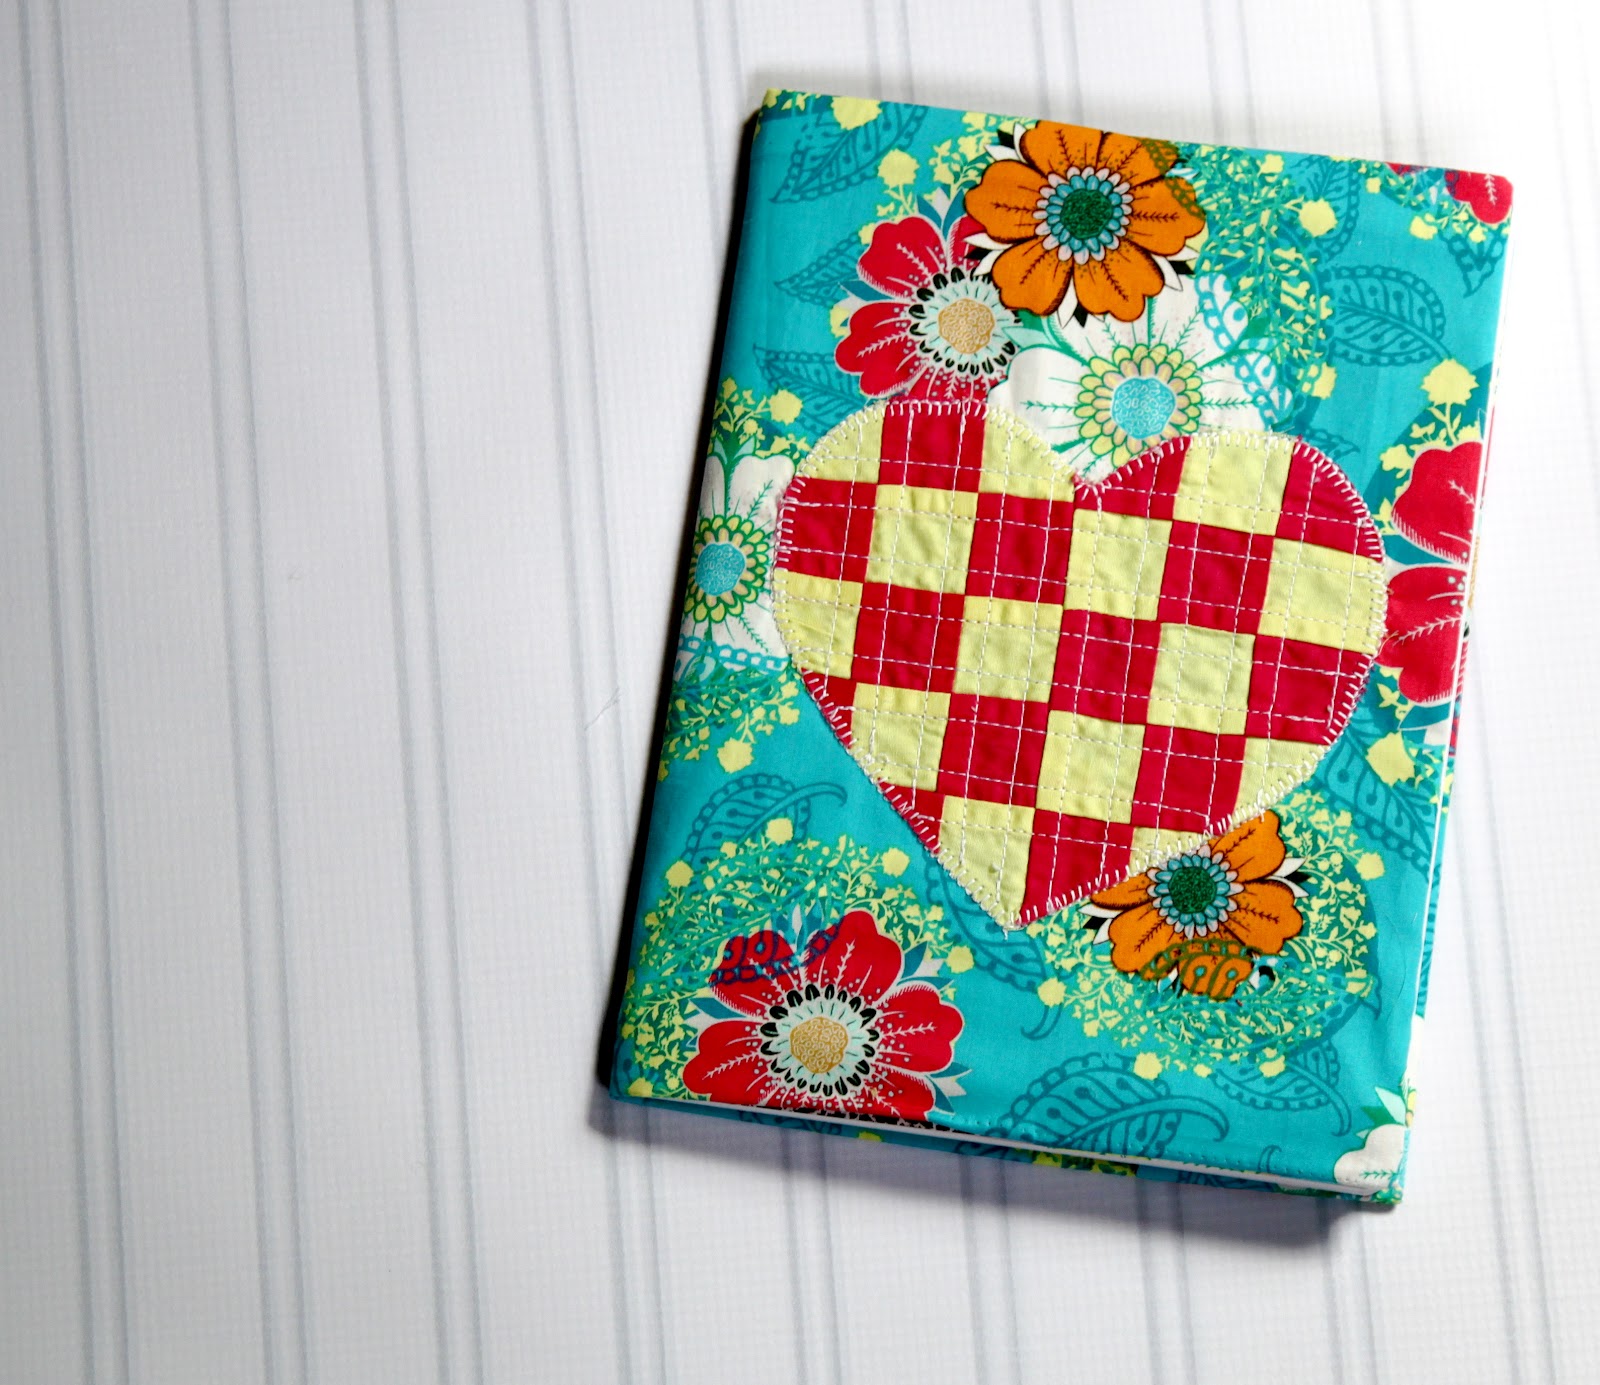
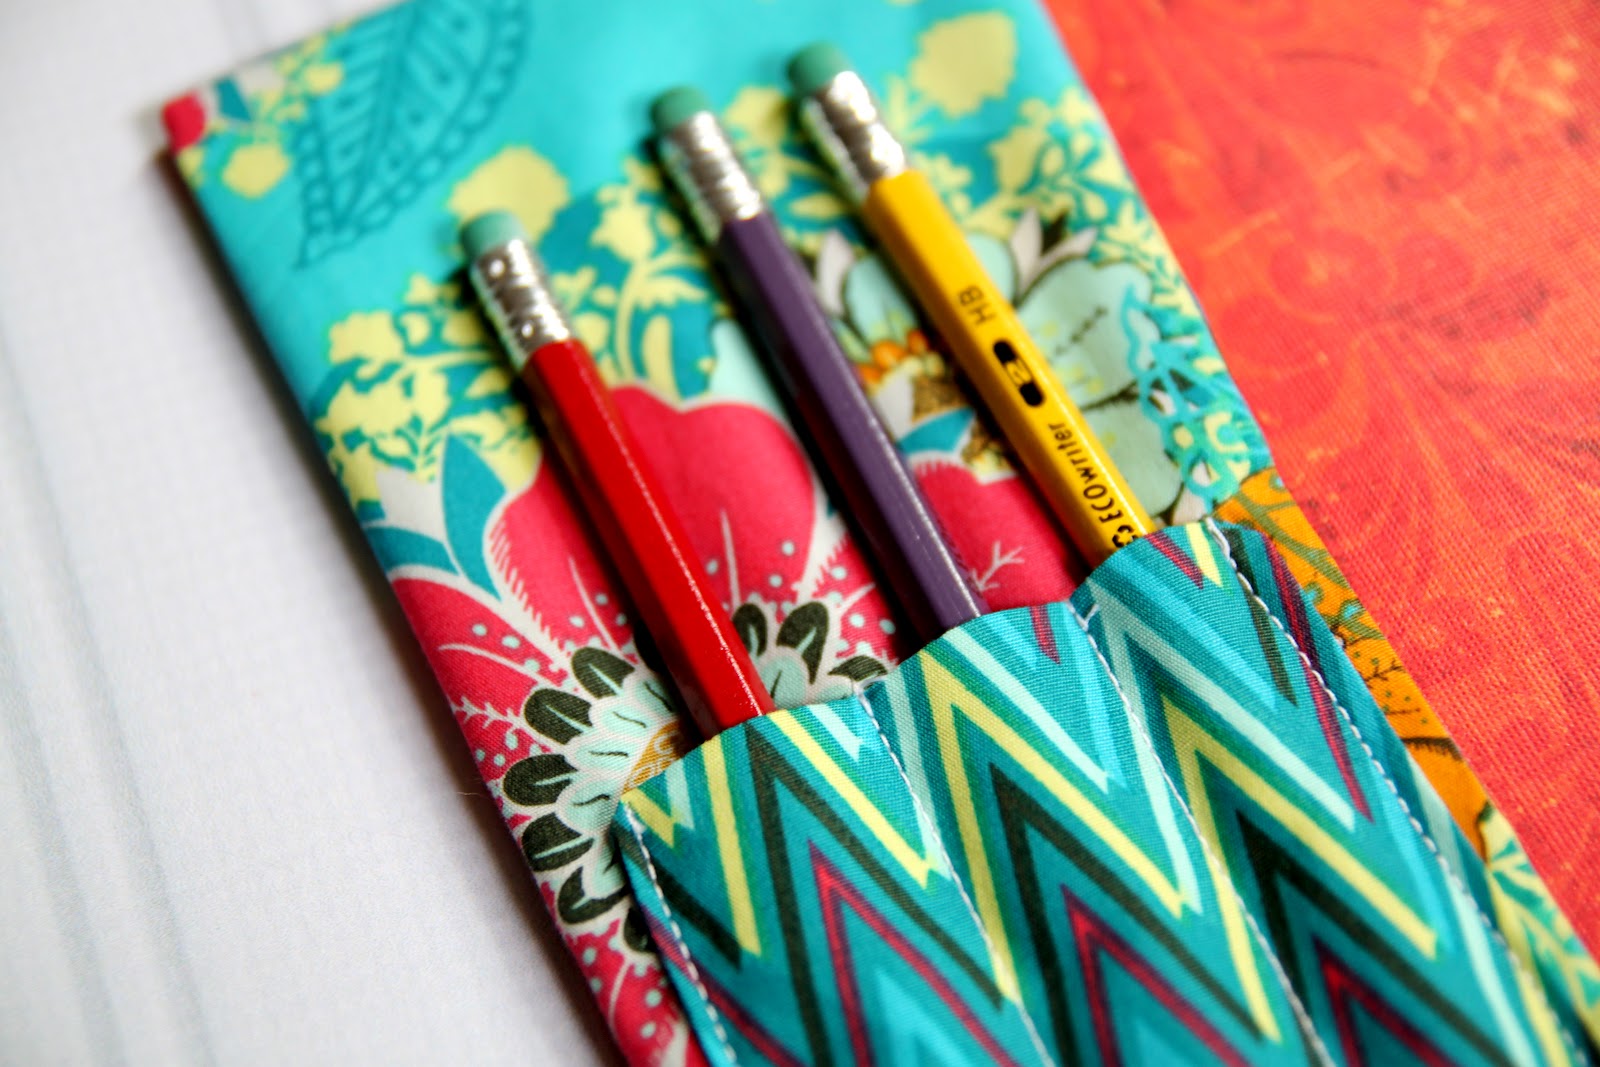
It was my birthday a couple weeks ago and my mom made me this adorable notebook cover.  I always like to have notebooks around so I can jot down my ideas, draw pictures of new designs that pop into my head, make do-to lists, ect.  Right now I’ve got about three different notebooks scattered around to make sure I have a place to get my thoughts out on paper.

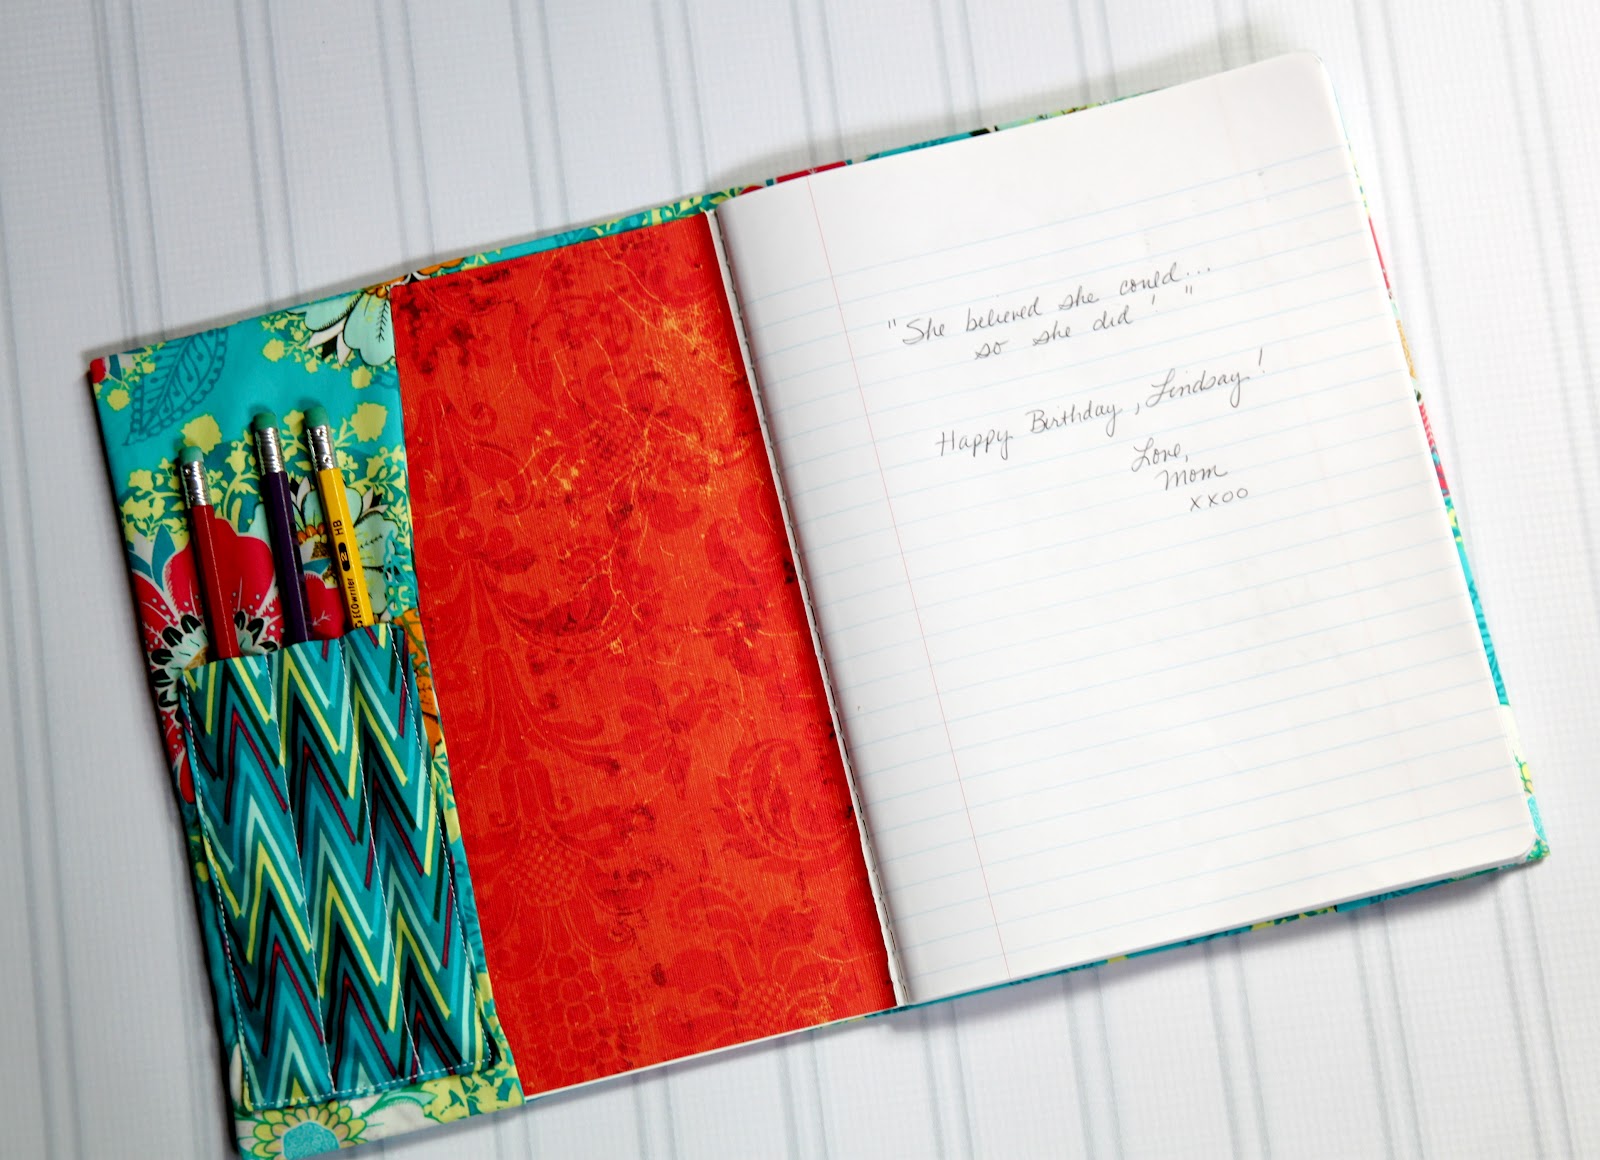
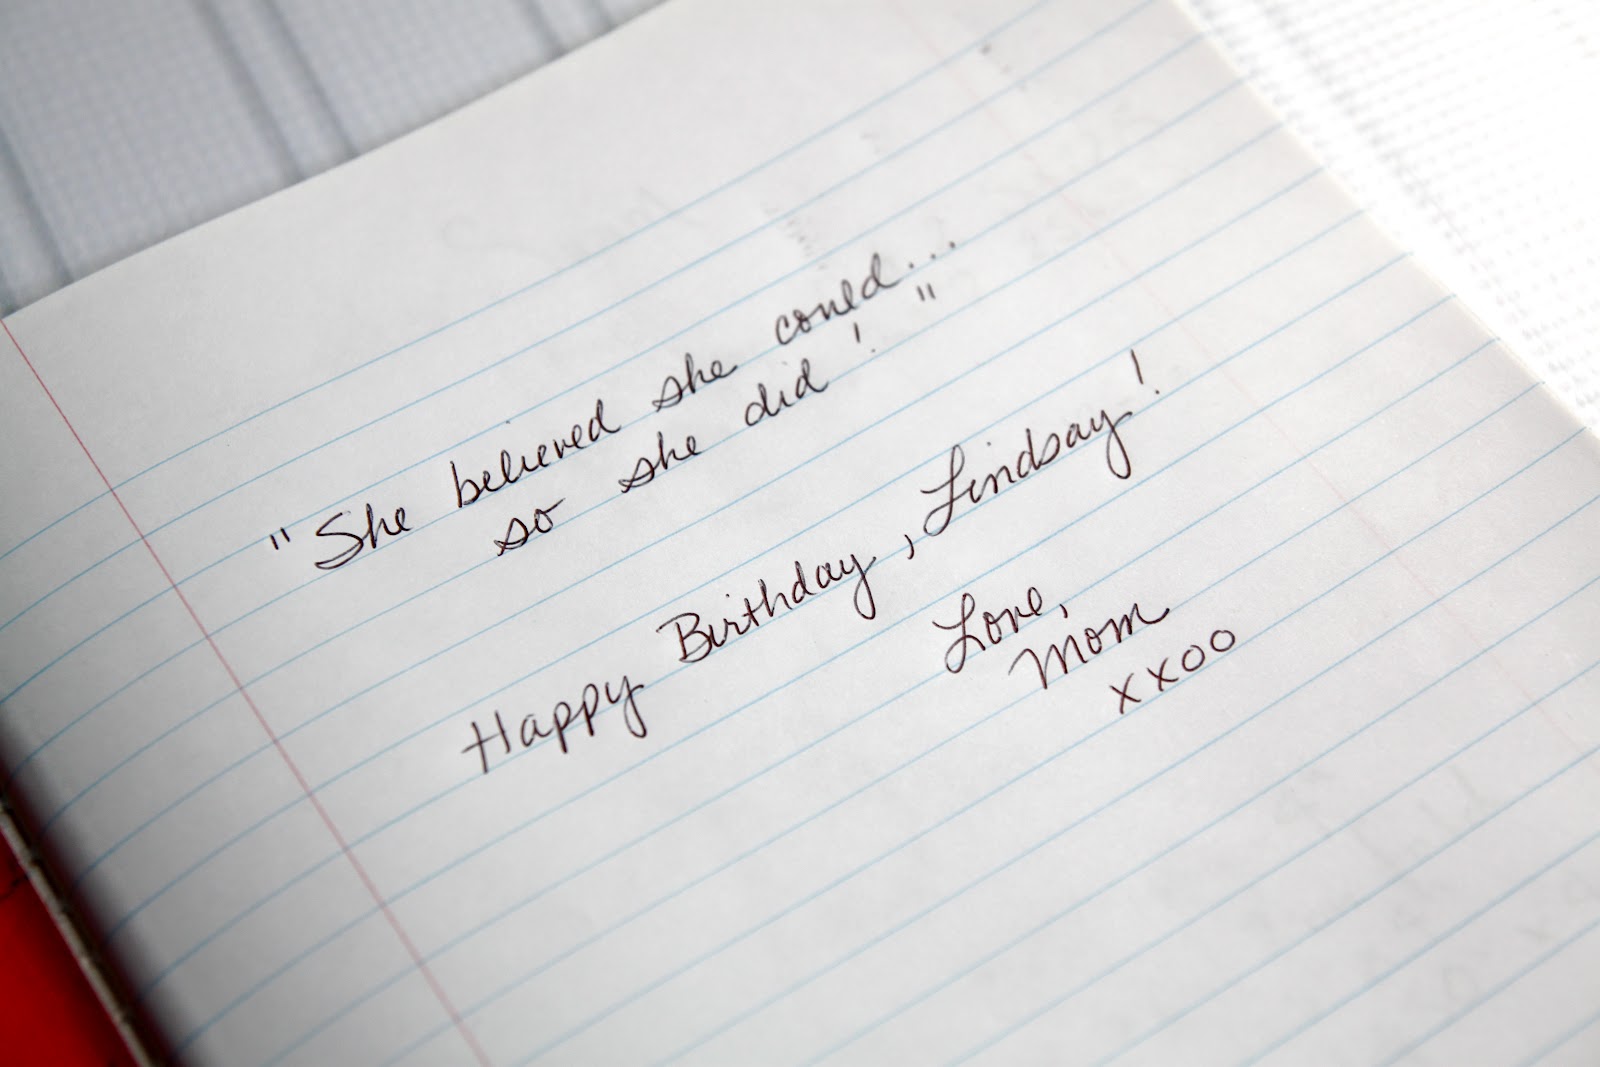
I love this notebook cover because when I fill up the notebook, I can simply slide the cover off and put in a new one.

There’s a place for my pencils.  I prefer to draw designs in pencil.

And my mom included one of her sweet labels which makes it all the more special!

Also included in the package from my mom was fabric!  She gave me a jelly roll of Lily Ashbury’s ‘Gypsy Girl‘ for Moda which I L.O.V.E.

And she gave me two charm packs of Vanessa Christenson’s new line ‘Simply Color‘.

And finally, she found this really cool old stamp in a fabric store in Taos, New Mexico last month and thought I might like to use it to try hand printing on some fabric.  Mom knows me so well!
Last weekend we went to our local farmer’s market and I got this beautiful bouquet of flowers.  They make me so happy!  And the painting behind the flowers was a birthday gift sent from my dad who lives over in Italy.  It’s my first real piece of fine art and I absolutely love it.  The colors are stunning in person and the frame is beautiful as well.
And lastly……look what arrived on my doorstep this last week………
Imagine my delight to open up this huge box of fat quarters from Dear Stella.  Yep, they sent a fat quarter of every single print in their last 11 collections.  Wow!  I couldn’t believe it.  They just sent these fabrics for me to play with.  I feel very lucky.  I have been so blessed lately.  I am just thanking my lucky stars.  Now what to make…….so many options!
Here are some pictures of this fabric eye-candy…….

If you would like to check out Dear Stella, please visit their website.  They are a new fabric company that I think you guys will really enjoy.  They have a great mix of modern, traditional and vintage charm.
So that’s it!  Just wanted to share some of those fun things with you all.  
Thanks so much for stopping by and reading The Cottage Home!

Fat Quarter Tote for Riley Blake Designs ~ ‘Seaside’ Fat Quarter Bundle Giveaway

Today you can find me guest blogging over at Riley Blake Design’s blog sharing my tutorial for the Fat Quarter Tote made from one of my favorite fabric lines, ‘Seaside‘.

To check out the Fat Quarter Tote Tutorial click HERE.
And guess what?
 I am giving away a FULL Fat Quarter Bundle of ‘Seaside‘ from Riley Blake Designs to one of you!
The Bundle includes 25 Fat Quarters from the ‘Seaside‘ collection.

To enter the giveaway, please leave a comment answering the following question:
If you win, what will you make with the fat quarter bundle?
For additional entries, leave a separate comment if you:
1) Are a Fan of The Cottage Mama Facebook or Twitter Page
2) Are a Fan of the Riley Blake Designs Facebook Page
3) Are a Follower of The Cottage Home Blog (email, RSS Feed or Google Friend Connect)

Giveaway is open until Friday, July 27, 2012 at midnight (CST).

New Sponsor Giveaway: Quilt in a Day with Eleanor Burns

I’m very excited to introduce another new sponsor here on The Cottage Home blog ~
Quilt in a Day with Eleanor Burns
I was thrilled to be contacted by the folks behind Quilt in a Day and extremely flattered to have them sign on as a sponsor.  Here is a little more information from Quilt in a Day:
Quit in a Day has everything you need to make a quilt – books, patterns, free block patterns, notions, fabrics, rulers and videos! Quilt in a Day was founded in 1975 by “Hall of Fame” quilter, Eleanor Burns. Through out her career, Eleanor has published over 100 ‘How-to’ quilt books, developed an Eleanor Burns Signature Pattern Collection and designed a variety of specialty rules all produced to aid the quilter in successfully and easily completing their quilt. Her Quilt in a Day TV series began airing on PBS and is still broadcasting nationwide and abroad, even teaching in Japan.”
Guess what?  Quilt in a Day is giving away a $25.00 gift certificate to one lucky The Cottage Home blog reader to use on their website!
Quilt in a Day has loads of quilting fabric.  Did you see that up there?  Yep, some for only $3.00 – $4.00 per yard!  Plus lots of kits, precuts and more!  Click HERE to check out their fabrics.
How about quilt books?  Yes, they’ve got them!  Lots and lots for you to choose from.  Click HERE to check out the Quilt in a Day Books.
For those of you who are visual learners, there are a large variety of videos for you to watch to learn all sorts of quilting techniques.  Click HERE to check out the video library.
I encourage you to head over to Quilt in a Day and check out all they have to offer.  You could spend hours looking around at all the wonderful information and they beautiful things that they sell in their shop.
Now for the giveaway………

Want to win a $25.00 gift certificate to Quilt in a Day?
Here’s how to enter:  
Visit Quilt in a Day and leave a comment telling me what your favorite thing is about their website?
Click HERE to visit Quilt in a Day
Giveaway open until Thursday, July 26, 2012 at midnight (CST).

The Handmade Business: Where Should I Sell My Goods?

I’m back with another handmade business post…….it’s about time, right?

So you’ve decided to start a handmade business, now you need to decide how and where you will sell your goods.  There are many different options and navigating them can be a little tricky if you are new to selling handmade.

Here are some (definitely not all) of your options:

~ Etsy
~ Big Cartel
~ Ebay
~ Your Own Blog
~ Your Own Website
~ Wholesale (to stores)
~ Wholesale (through wholesale distributors)
~ Consignment
~ Craft Fairs and/or Art Fairs

That’s a lot of options, right?  Yes, it is, but you have to start somewhere.  You don’t need to sell through all these different avenues, but it’s a good idea to sit down and ask yourself, ‘where do I see my business in five years?’.  The answer to this question will help direct you on the path you should take in regards to how and where to sell your goods.

Etsy: I’m sure most of you are familiar with Etsy.com, but if not, Etsy is an online handmade market place.  You can set up your own store on Etsy and people who visit Etsy.com have the possibility of finding your shop through keywords when they are searching for specific items.

Etsy.com is a great option for those starting out with a handmade business.  Why?  Because Etsy brings the customers to you.  You do not have to have a customer base that you have built yourself.  People who visit Etsy are looking for specific handmade items and if they like what they see, they can become your customer.  On the back end, Etsy is very user-friendly and makes it very easy to get your listings onto the site.  However, they do not offer much shop customization, so aside from your products and Etsy Banner (the logo at the top of the page), your site will look a lot like others selling on Etsy. 

Etsy can be a little difficult in the sense that there are A LOT of sellers, so if you don’t make yourself stand out then you can get lost in the crowd.  Having a definite style, great pictures and being priced right are several ways to stand out, but there are tons more that we can talk about at length on another day. Etsy charges 20 cents per item that you list and a 3.5% fee per transaction which can really add up if you are doing large volume sales.  Plus, let’s not forget the 3.5% fee that we are paying to Paypal.

Etsy has a great system for customer reviews.  Customers can leave feedback and comments about your products and services.  This can encourage new customers to feel confident about buying from you if they have never been to your shop before.  It’s a way to establish some credibility for a new, handmade business.

Personally, I have my shop on Etsy.com and I think it has done wonders for my business!  I am getting to the point that I may start a stand alone website to accommodate wholesale orders and not pay the 3.5% transaction fee through Etsy.  But I will only make that leap once I feel the majority of sales I am receiving are mainly driven through me and not through Etsy and I’m just not there yet.

Click HERE to visit Etsy.com

Big Cartel:  Big Cartel is a great option for a handmade business that already has a fan base and is doing a medium volume business.  Big Cartel charges a monthly fee rather than a transaction fee per sale.  There are different plans on Big Cartel based on the number of items that you would like to list.  You can list five items for free and then the monthly fees start after you list more than five items.  Many businesses start off on Etsy.com and then make the switch to Big Cartel once they have a loyal fan base.  You can also have your shops listed on both, if you so choose.

Big Cartel has a lot of customization options and you can really make your site look like a unique website, but you will need to know some web design or hire someone to make it look they way you would like it.  I’ve seen a lot of folks gravitating towards Big Cartel due to the low monthly fees and easy customization.  Definitely a site to check out.  Click HERE to visit Big Cartel

Ebay:  Ebay can be a great way to sell your products if you like the auction type feel or if you would like to reach a large audience.  You can set up a shop on ebay or just list individual items.  Ebay has a rating system so you can obtain a great reviews from customers and build confidence in other buyers who might purchase from you based on those reviews.  I don’t have much experience with Ebay, so I won’t go into too much detail on this one. Click HERE to visit Ebay.

Your Own Blog: You can add a page within your blog where you have products listed.  Paypal makes it very easy to create a ‘Buy’ button and code that you can install on your blog.  If you are selling patterns or a product that is not going to change too often, this is a great option.  Again, you will still have to pay the 3.5% transaction fee through Paypal, but you avoid the Etsy Fees and/or Big Cartel Fees.

Your Own Website:  Having your own website can be pretty expensive, but once you have established your customer base, it’s a great option.  The beauty of having your own website is that it can be whatever you want it to be and look just the way you want.  The drawback is that you will need to shell out some pretty big bucks initially for a designer and several other things that go with running your own stand-alone website. 

Also, you will be driving all of your own traffic to this site.  Granted, you can have your designer work on some search engine optimization (SEO) to have your site pop up earlier in Google searches, but there is only so much they can do.  Some of the bigger sites like Etsy.com have lots of money funding SEO and that helps your shop appear higher in the searches.

Once you are doing larger volume business, having shopping cart software installed on your own site can really save you a lot of money in fees.  Yes, you will be paying monthly fees to have this option, but it’s usually not based on number of transactions.  If you are doing a large enough volume that your Paypal fees are exceeding what the monthly fee of having your own shopping cart / e-commerce software would cost, then it’s probably time to start thinking about your own website.

Wholesale (to stores): Selling wholesale can be a tough decision.  Most wholesale buyers expect 50% off retail.  So if you are selling a dress for $40.00, then the store will expect the cost to be $20.00, which means you need to make sure you are making a profit at $20.00.  So you need to consider your time, materials cost, packaging, ect. and see if the profit margin is there for you.  
Personally, I want to make sure I have at least a 50% profit margin in order for me to feel it’s worth my time to sell wholesale.  Of course the larger volume sales that you start to do, you may be able to reduce your costs per item through bulk purchases, wholesale fabric/supplies purchasing, ect.  If you can afford to break even in the beginning of your business in order to build your business to a large volume level, then that is something to consider doing if you are really wanting to go the wholesale route.  But be prepared to spend several years not making a profit to get there.  Or the other option is to forgo wholesale orders initially until you have built your sales volume to a level where you can reduce production costs.

Generally wholesale orders bring a decent volume of orders because you set a minimum ordering requirement, so you aren’t just sending them one or two pieces, you are sending them a larger quantity.  What minimums you set are kind of up to you or you might pick the brains of some other individuals in your same handmade business to see where they set their minimums.

Wholesale (through wholesale distributors): Selling through distributors is a great avenue to explore if the numbers all work out.  Why?  Well, selling through a distributor means that they are selling on your behalf, usually across the country or internationally and you just sit and wait for the orders to come in.   They place very large volume orders, you ship to their warehouses and then they ship out to the different stores that are carrying your product.  And let me tell you…….shipping to stores yourself takes a lot more time than you would think!

Sounds nice, right?  Well, there’s a catch……..generally distributors expect a 25%-30% discount off of the wholesale price.  For example, if you were selling a dress for $40.00 (retail), then the wholesale price would be $20.00, which means your wholesale distributor cost is $15.00 (25% off wholesale).  That means you need to be profiting off of that dress under $15.00.  If you want to be making a 50% profit margin, that means that dress needs to cost no more than $7.50 (including time, materials, ect.) to make. 

There are certain products that will be worth selling through distributors and others that aren’t.  Another advantage of distributors is that they are purchasing at large volumes, so while your margin may be smaller, you have the volume to make up for it.  If selling through distributors is an end goal for you, you might consider working backwards to see where you should have your work priced to make it worth it for you.  So, let’s say it costs you $15.00 to make a dress (time, materials, ect.), then your wholesale distributor cost would be at $30.00 (assuming a 50% margin), your wholesale cost would be at $40.00 (remember distributor cost is 25% less than wholesale cost) and your retail cost would be $80.00.

$80.00 is a pretty high price for a dress, so you have several options.  You either figure out a way to make the dress for less, you shrink your profit margin or you build enough prestige around your brand that someone is willing to pay $80.00 for one of your pieces. 

So, let’s see…….if we shrink our margin to 25%………

Cost: $15.00
Distributor Price: $20.00
Wholesale Price: $26.68
Retail: $53.36

Again, I only show you these examples because if this is where you would ultimately like to end up, then it’s something you need to consider in your long term planning.  And you might realize, that you cannot charge $53 for a dress right now because you’d only be making $5.00 profit per piece, but once you build your customer fan base, develop the prestige in your brand and increase your volume you just may be able to sell to distributors.

Consignment:  Consignment is an interesting avenue.  Basically, you put your pieces in someone’s shop and the owner of that shop takes a percentage of the sale.  This can be slightly to your advantage as selling on consignment is usually not going to be 50% off your retail price.  The owner may take 30-40%, but each store is different. 

The major downfall is that you have spent all of this time and money upfront making your pieces and you do not get paid until they sell.  That could be a long time or a short time, you just never know.  And that means you you don’t have new cash flow (which is another topic entirely) to move forward in your business.  Also, you have turned your goods over to someone else, thus meaning you have turned over some of the control of your inventory.  What if the shop goes under?  What if the owner doesn’t pay?  And then they have your merchandise and you have not been paid for it.  But if you find a shop where you trust the owner and feel good about selling there, then consignment might be a great way to get your name out into the community.

Craft Fairs and/or Art Shows: Craft Fairs and Art Shows are a great place to start selling your handmade goods.  It is a wonderful way to make a name for yourself and develop a fan base in your local market.  Not to mention a great way to network with others in your same industry.  The key to a successful fair or show is selecting the right one for you and your handmade goods.  You need to consider the people who shop the fairs……are they your target market?  Can they afford your goods?  Are the other vendors at the fair of the same quality level and price point as you?  All of these things can affect the outcome of your successes with doing a craft fair.

If you consider yourself to be more of an artist, then I would suggest applying to some of the many ‘juried’ shows around the country.  What is a juried show?  It means that you apply to a committee who reviews your work and they hand select the vendors that are allowed to sell at that show.  This is great because then you can be pretty self assured that the other vendors will all be of the same caliber of art.  Granted, there are usually booth fees associate with different types of shows so you will need to decide if you are going to generate enough sales for it to be worth it.  I could go on and on about this topic, but since I’m just giving you an overview, I’ll save more about craft and art shows later.

In conclusion, these are just a few of the avenues you might consider when deciding where to sell your handmade goods.  I know there are so many different choices, but everyone’s situation, ambitions and handmade goods are different so there is no one right answer for everyone.  Consider what you are selling and where you want to take your business.  If you are reading this post, then I’m going to assume you are interested in taking your handmade goods to a business level.  Of course, there are different plans of action if this is something you are just planning on doing as a hobby.

I hope this has provided you all with a little more information.  Please feel free to add any additional information or insight you would like to offer in the comments section.  Or feel free to ask any additional questions your may have.  If many people have similar questions, then I may turn those into ‘Handmade Business’ posts of their own.  We can all learn from each other and grow our businesses beyond our wildest dreams.

Crafter’s Vision Giveaway Winner!

And the winner of the bundle of goodies from Crafter’s Vision is…………

Congratulations, Country Mouse!  You are going to love this wonderful bundle.  Please email me at thecottagemama[at]gmail[dot]com with your mailing address and we will get this package out to you ASAP.  And don’t be disappointed if you didn’t win this time, we have another great sponsored giveaway scheduled for this next week!

A big thank you to Crafter’s Vision for this generous giveaway and welcome to The Cottage Home family of sponsors!

Crafter’s Vision Giveaway

Over the last several month we have gotten quite a few new sponsors here at The Cottage Home and I want to make sure you get to know each and every one.  So many of them are wonderful resources for supplies for all your creative projects.  First up, is an amazing online sewing and crafting shop called Crafter’s Vision.


Crafter’s Vision is a one stop shop where you can get the latest fabrics, ribbons and accessories! They offer free shipping for fabric and ribbon orders over $30 (see website for coupon code and details), refund any shipping that can be reduced, send out free fabric and ribbon samples, and overall, offer outstanding customer service! 
Their amazing selection of crafting supplies, fabrics, notions and trims is a creative persons dream.  They stock the most up-to-date fabrics and stock many of the woven trims that I like to use in The Cottage Mama sewing creations.  Not to mention the fact that they have really great pricing on all of their products. 
A few things on my wishlist from Crafter’s Vision are…….
Adornit – Pink Dazzled – Plum Main Cotton Fabric


Anthology – The Woodlands – Cream Main Cotton Fabric
(I just love ‘cottage’ fabric……go figure)


And today, Crafter’s Vision has a very generous giveaway for The Cottage Home blog readers.  They are giving away this beautiful bundle of sewing and crafting supplies valued at over $70.00.

Crafter’s Vision Bundle
WHAT’S INCLUDED:
1 fat eight collection of Aneela Hoey’s “Little Apples” from Moda (29 piece bundle)
1 natural tote bag
Assortment of ribbons
Assortment of Heavy duty webbing
5 fob tips and split rings
5 barrettes
10 button covers
5 headbands
2 swivel hooks
5 pull apart key rings

1 pkg buttons

So what do you think?  Pretty nice, huh.  Yep, I wish I could enter!  
But here’s how you can win this great bundle from Crafter’s Vision:
Visit Crafter’s Vision and leave us a comment about what you like about their shop or what products are on your wishlist?
Giveaway open until Friday, July 20, 2012 at midnight (CST). 
I am so very grateful to all The Cottage Home blog sponsors and I’m so happy to be able to share all of these wonderful shops with all of you.  We’ve got several other new sponsors that I will be sharing with you over the next couple weeks, so check back to learn more about some other great resources for fabric, trims and more!
If you are interested in becoming a sponsor of The Cottage Home blog, please email Lindsay at thecottagemama[at]gmail[dot]com for rates and more information.

Caspian Finn’s Baptism

We have had so many family events going on here in the last couple weeks with Caspian’s baptism, Matilda’s 3rd birthday, my birthday…….summer is just that way around here.  But for now I thought I would share some special pictures of our little guy’s big day.

Usually we baptize our kids around the 3-4 month mark, but as it goes with the third child, we were a little bit late with Mr. Caspian. We kept his baptism small and intimate with just close family.

We chose my husband’s youngest sister, Katie, as Caspian’s Godmother.  We decided not to have a Godfather this time as we just didn’t have quite the right person.  Hopefully the man who Katie eventually marries will be part of the Catholic faith and will stand in as a proper Godfather.  But for now, we are very glad that Katie has taken on this important role in Caspian’s life.

The girls knew it was their brother’s big day and showered him with lots of love and affection.

Hydrangeas from our garden.
After the baptismal ceremony we invited the family back to our home for a casual dinner.  We decided to go with a Mexican theme with the food.  Why?  Well, no reason in particular, just that it’s kind of fun to have a theme.  My husband had always wanted to learn how to make my mom’s homemade tamales and since we only get to have my mom in town for special occasions, this seemed like a good time to make them!

We served a large southwestern salad and homemade green and red chile pork tamales.  On the side we had homemade guacamole, salsa, sour cream and tortilla chips.  I’ll post these recipes at a later date if you are interested.  Both of these dishes were so delicious!
It was a very special day for our little guy and we are so happy that we were surrounded by our family for this wonderfully, joyful celebration!

Charm Pack Baby Quilt Tutorial ~ Guess Whoooo Loves You?

My mom, Grandma Jane, is back with another one of her wonderful quilting tutorials!  
Take it away, Mom……..

Guess Whooo Loves You? 

I don’t know about you, but there are lots of sweet little babies making their appearance in my world these days! Every time I turn around a young person at work (or my husband’s office), nieces, nephews, friends of my children—someone is having a baby! Love it. (Notice how I said “young” person at work—what happened to me being that “young person” at work?)

Anyway…the easiest ever little crib-sized quilt is made with one charm pack and some yardage for the borders, backing and binding. So easy—you already have the colors and designs of fabric figured out for you and the charms are a breeze to chain-stitch together. My niece, Maggie and her husband, welcomed sweet little Owen into the world a couple of weeks ago. Owls were their decorating theme in the nursery so when I saw “Ten Little Things” by Moda at my local quilt shop; I scooped up a charm pack and some matching yardage.

Speaking of owls,–back in the 60’s and 70’s—the owl motif was a popular one. I had owl shaped candles, incense burners, and several little ceramic owls. Funny how so many things come back around! My mother was an artist and was even painting owls during that time! Pictured above is one of the paintings she did on a small piece of driftwood of an owl family—a treasured possession of mine that will always represent to me our own little happy family.
 
For this easy little quilt which measures approximately 36” x 40”you will need:

Supplies:
1 Charm pack –42 squares
¾ yard for small border and binding
½ yard for wide border
1½ yard for backing
44” x 48” piece of batting

Instructions:

I mentioned chain-stitching above. If you don’t do this with your quilting projects when you can, you are missing a big time-saver.

• Arrange your charm squares in 7 rows of 6 charms each with the color placement you like.

• Here’s the easy way to organize the rows for stitching. (Thanks to Elizabeth in my quilting group for showing me this.) Turn the second charm from the left on each row right side down on the first square in the row.

• Now pick those two squares up and stack the rest of the squares in the row underneath them as you move left to right across the row.

• Mark this row as one.

• Do the same for the second row. Second charm from the left, right side down on the first square, and stack the rest, moving left to right.

• Repeat for all seven rows and mark your rows with painters tape.

• Take the first three stacks to your machine. I like to place mine to the left of my machine.

• Pick up the first two charms from Row One, which you have already placed right sides together. Stitch a ¼ inch seam down the right side of the two squares.

 
• When you get to the end of the squares—don’t cut the thread. Take the first two charms from Row Two (which are right sides together), place close to the edge of the first two squares—still on your machine, and stitch a ¼ inch seam down the right side of the squares. Repeat for the first two charms from Row Three.

• Now you have three sets of squares chain-stitched and connected to each other by a little tiny piece of thread.

• Don’t cut the thread in between the squares.

• Open up the first two charms on Row One and pick up the next charm in the Row One stack.

• Place right sides together with the second charm in Row One and stitch your seam.

• Don’t cut the thread.

• Open up the charms in Row Two. Pick up the next charm in the Row Two Stack, place right sides together with the second charm in Row Two, place close to the edge of the seam you just stitched and stitch your seam. Don’t cut the thread and repeat for Row Three.

• See what we are doing? Moving down the rows, you are picking up the next charm in the stack and sewing the seams without cutting the thread until you are down to the bottom of row three.

• When you are finished, you will have three rows of 6 charms each sewn together. These three rows are still connected to each other by little bitty pieces of thread. Don’t cut the thread.

• Take these three rows of charms to the ironing board and press seams to opposite sides in each row. Row One and Row Three – seams to the left. Row Two – seams to the right.

• Now flip Row One right sides together (RST) with Row Two, matching and pinning seams, and stitch the two rows together. The little bitty threads help you guide the matching seam step. No need to cut the threads. Isn’t this easy and quick?

• Repeat for stitching Row Two and Row Three together. Press seams towards the top.You now have three rows of 6 charms stitched completely together.

• Repeat for Rows Four to Seven. You will have Four Rows of 6 charms stitched together.

• Stitch Row Three and Four together and in almost a blink of an eye—your charms are all stitched together.

 
• Add a narrow border (strips cut 1 ½ wide) and a wide border (3 ½ inch strips) and your quilt top is finished and ready to be sandwiched and quilted.

• I did easy diagonal quilting lines through the squares, stitch in the ditch around the narrow borders and a couple of lines in the wide border.

• I had enough scraps to do three cute burp cloths.

 Now it is already to be wrapped up and shipped off to dear little Owen. 
Guess Whooo loves you? — Grandma Jane—that’s Whooo! 
Thanks so much, Mom, for sharing your wonderful sewing talents.  To check out more of Grandma Jane’s tutorials (including her quilting and binding tutorials), click HERE.

What is home? ~ Happy Home by Jennifer Paganelli Book Review

I was recently sent a copy of Jennifer Paganelli’s new book ‘Happy Home‘ for my review, but rather than just tell you about the book, I thought I would take a moment to talk a little bit about the idea of ‘home’.

What truly makes a house a home?  

The structure on it’s own is generally four walls and a roof, but at what point does it become a home?  Is it with the addition of people? Furniture? Things?  I don’t think so.  I think it’s so much more.

Merriam-Websters Dictionary defines a home in several different ways. One of the definitions of home states that……home is a familiar or usual environment and the focus of one’s domestic attention. 

A home is not just a structure, it is the people and everything else inside.

What is home to me?  Home is with my family.  It’s where I am most comfortable, cozy and warm.  My home smells like home whether it be food cooking, candles burning, the scent of flowers, my favorite hand soap, or the sweet smell of my 10 month old baby boy. My home is filled with my favorite, most comforting things such as a handmade quilt made by my mom, my morning cup of coffee, my comfy bed, pictures drawn by my children, a cozy robe, a painting done by my grandmother, photographs of my family, my sewing machine, pretty fabric and my favorite cookbooks and sewing books.  Home is hugs from my husband and snuggles with my kids.

My home has signs of being lived in with things like kids finger prints on the windows, piles of laundry to be put away, crumbs on the floor, dirty dishes in the sink and toys strewn about.  But it is mine.  Every. single. lovely. imperfection. It is my safe haven in this crazy world.  A little space to call my own.

My home is not perfect and the people in it are not perfect either.  My home is a safe place where I can let down my guard.  It’s where I can reveal my inner most thoughts and feelings without fear of judgement.  It’s where I can laugh, cry and just be.  My home is where I can make mistakes and it’s ok.  It’s where I say things I might not mean and I am forgiven without question and most importantly, it’s where I am loved unconditionally 100% of the time.

The title of Jennifer Paganelli’s new book ‘Happy Home‘ resonated with me so deeply because it’s what I long for, it’s what I want for my family.  I want my husband and children to look back on these years and feel like these were happy times.  Truly happy.

Happy Home‘ focuses on many different projects for the home such as curtains, a cozy picnic blanket, a bed skirt and a sun hat, to name a few.  One of the things that brings me the most comfort in my home is being surrounded by handmade things.  I absolutely love looking at some of the quilts my mom has made for the kids, tucking my daughter, Savannah, in under the quilt I made for her bed or seeing my girls twirling around in a dress that I made for them.  There is so much comfort to be found in handmade. 

Happy Home‘ by Jennifer Paganelli is sure to inspire a focus on the domestic with all the brightly colored fabrics and beautiful prints.  The book is a gorgeous hard cover book with a pocket in the front that stores the printed pattern sheets.  The projects are pretty straight-forward and are definitely doable for a comfortable beginner sewer.  Jennifer’s beautiful fabric designs are sure to get you excited to sew!

For an intermediate to advanced sewer many of the projects are a great base to adapt them and make them your own.  By adding different trims and choosing unique fabrics you can create projects that you will love and will make your house truly feel like home.

We will not be on this earth forever, but we can leave behind a little part of ourselves in the things we create for our loved ones.  Things that will bring them comfort.  Things that will bring them ‘home’.

If you would like to check out ‘Happy Home‘ by Jennifer Paganelli, click HERE.

Summer Picnic Dress ~ Free PDF Pattern and Tutorial

The Summer Picnic Dress (aka Little Linen Dress) has taken me quite a while to put together for you guys, but I said I would make it available, so it is finally here!

If you are a beginner sewer and would like to try your hand at garment sewing this is the perfect pattern for you to try.  There is a little bit of gathering, which is a great skill to learn, but other than that it’s really straight-forward sewing. I’ve graded the pattern from size 12 Month through Size 4.  For the patterns I sell, I typically do more sizes, but since this one is free, I just kept it to four sizes.  Feel free to adjust the pattern up for larger sizes.

Also, I usually have someone that helps me digitize my patterns for printing, but this time I decided to take the plunge and digitize this pattern myself.  I’m not going to lie and say it was easy………it was a steep learning curve for me.  And it’s probably not perfect, but there is something so satisfying about learning a new skill and program.  I digitized this pattern in Adobe Illustrator and I just barely know the basics now.  I can tell that Illustrator could be amazing if you really knew what you were doing.  But baby steps, right? Anyway, I’m very proud of the digitized version of this pattern (even though it took me forever to get it done).

So without further ado…….

Summer Picnic Dress

SIZE 12 MONTH – 4 YEARS
MATERIALS:
1 – 1.5 yards of fabric (cotton, seersucker, linen, lined eyelet, denim, ect).
1/2 yard – 3/4 yard rickrack or other trim
Basic Sewing Supplies
INSTRUCTIONS:
Print the Summer Picnic Dress Pattern (print HERE).  Cut out the appropriate size and tape together the main dress piece.  There are four pieces for the main dress that need to be put together.  Overlap the pattern pieces at the solid lines to form the main dress pattern piece. See the final page of the printable pattern for a diagram.
If you have any trouble printing the pattern, please check your printer settings.  I have printed it out many times on my own home printer, so it should print properly.
Cut all pieces according to pattern.  You should have the following pieces cut using the pattern:
2 – Main Dress
2 – Yoke Pieces
2 – Facings
For the straps, cut 4 rectangles according to these measurements:
Size 12 Month & 2T: 13″ x 3″
Size  3T & 4T: 14″ x 3.5″
For the bottom ruffle, cut 2 ON THE FOLD* of the following:
Size 12 Month & 2T: 3.5″x 18″
Size 3T & 4T: 4″ x 22″
*The measurements given above are the measurement on the fold, not the long finished piece measurement.
ALL SEAM ALLOWANCES ARE 1/2″ UNLESS OTHERWISE NOTED.

At the end of the rectangle strap pieces cut them into a point, kind of like an arrow (pictured above).  Just eyeball it, but make sure all four are the same.

Fold the strap pieces in half with the right sides together and sew down the long side and to the point.  Do this for all four straps.

Leave the short, straight bottom end of the strap pieces open for turning.

Clip the corners before turning right side out.

Turn right side out and use a point turner or chopstick to work out the corner points of each strap.  Press to finish.  You could also top-stitch each strap, if you so choose.

Now we will prepare the bottom ruffle. Place the two ruffle pieces with their right sides facing each other and sew together at both of the short ends.  This will make one big long, circular piece.

Hem the ruffle.  Turn it up towards the wrong side 1/2″ and then another 1/2″.  Sew in place using a 1/2″ seam allowance.

Gather the ruffle piece of fabric.  To do this, set your machine stitch length to the longest length possible (mine is 5.0) and increase the tension on your machine to about 8.  Run a stitch along the non-hemmed edge of the ruffle making sure NOT to back stitch at the beginning or the end.  The proper way would be to run two lines of stitching about 1/4″ apart from each other, but I was doing this tutorial pretty quick.

Also, you will notice that I have a serged edge along the raw edge of my fabric (the side where I did my gathering stitch).  I always serge any raw edges because I don’t like fraying and find it has a more finished, professional look.  You can use a zig-zag stitch if you don’t have a serger or simply cut the edge with pinking shears after you have sewed your ruffle to the dress.

To gather your fabric, pull on one of the threads to start the gathering.  You will be gathering the ruffle piece so that it lines up with the bottom of the main dress piece.  But let’s hold off actually gathering the ruffle until a little later……

Since we are talking about gathering, run a gathering stitch along the top of both of the main dress pieces.

The next step is optional, but if you would like to add trim in between the yoke and the main dress, then this next step is for you.  Above is one of my most favorite sewing tools…….Wonder Tape!

Cut the rickrack a little bit longer than the bottom of the yoke of the dress. Apply Wonder Tape to the back of the rickrack trim.

Peel off the paper backing from the Wonder Tape and line up the edge of the rickrack with the raw edge of the yoke.  If you don’t have Wonder Tape, I would suggest basting your trim in place before the next step.

Gather the top of the main dress piece so that it lines up evenly with the yoke of the dress.  Place the yoke (with trim) and the main dress together, right sides facing and sew together.  You may need to adjust your seam allowance for this part depending on the size trim you are using.

After you have sewn the main dress and the yoke together, press the seam open and topstitch or edge stitch along the bottom of the yoke.

Measure in 1″ from each side of the dress for the strap placement.  Baste straps in place.  If you don’t have a hem gauge, I recommend you pick one up.  I use mine for all sorts of things and you will love having it around!

Place the facing and the dress with the right sides together and sew around the underarms and top, making sure to catch the straps in the top seam.  If your main dress piece and your facing don’t line up perfectly, do not worry.  Just trim your main dress piece and make sure it lines up just right with the facing.

Again, you may notice that I have serged the raw edge of my facing.  Again, this is not necessary, but you can always add a more finished look by using a zig-zag stitch, cutting with pinking shears or turning under the raw edge by 1/4″ and sewing in place.  That part is totally up to you.

Clip the corners and curves, turn right side out and press.

Do the same steps above for both the front AND the back of the dress.

Now we will sew the front of the dress to the back of the dress.  Turn up the facing and pin down the side of the dress starting at the top of the facing all the way down to the bottom.  Stitch down both sides of the dress.

In the picture above, I have sewn down one full side of the dress.

Where the facing and the main dress pieces come together under the arms, I like to cut a little slit so that the arm pit will lay a little more flat.  Cut as far down to the stitching as possible, but do not cut through it.  Press seams open, turn right side out and press.

Now for the final step, attaching the ruffle.  Gather your ruffle so it matches up evenly with the bottom of the dress.  Pin in place and sew together all the way around the bottom.

For an extra finishing touch, topstitch or edge stitch around the top of the dress and right next to the main dress and ruffle seam.  Again, this is an optional step, but will give you a more professional looking garment.
Now step back and admire your beautiful work!
 Ta-Da!  Your Summer Picnic Dress is complete!
I had a lot of fun taking pictures of Miss Matilda.  I think this girl gave me every funny face she has in her repertoire.  Here is the funny little miss in all her glory…….
Summer Picnic Dress - Free Pattern from The Cottage Mama
I hope you enjoy this pattern and if you end up creating your own version of the Summer Picnic Dress I would love to see it!  And feel free to come share your beautiful creations over in The Cottage Mama Patterns group on Facebook.