Archives for March 2012

45th Annual Pillsbury Bake-Off Contest Recap

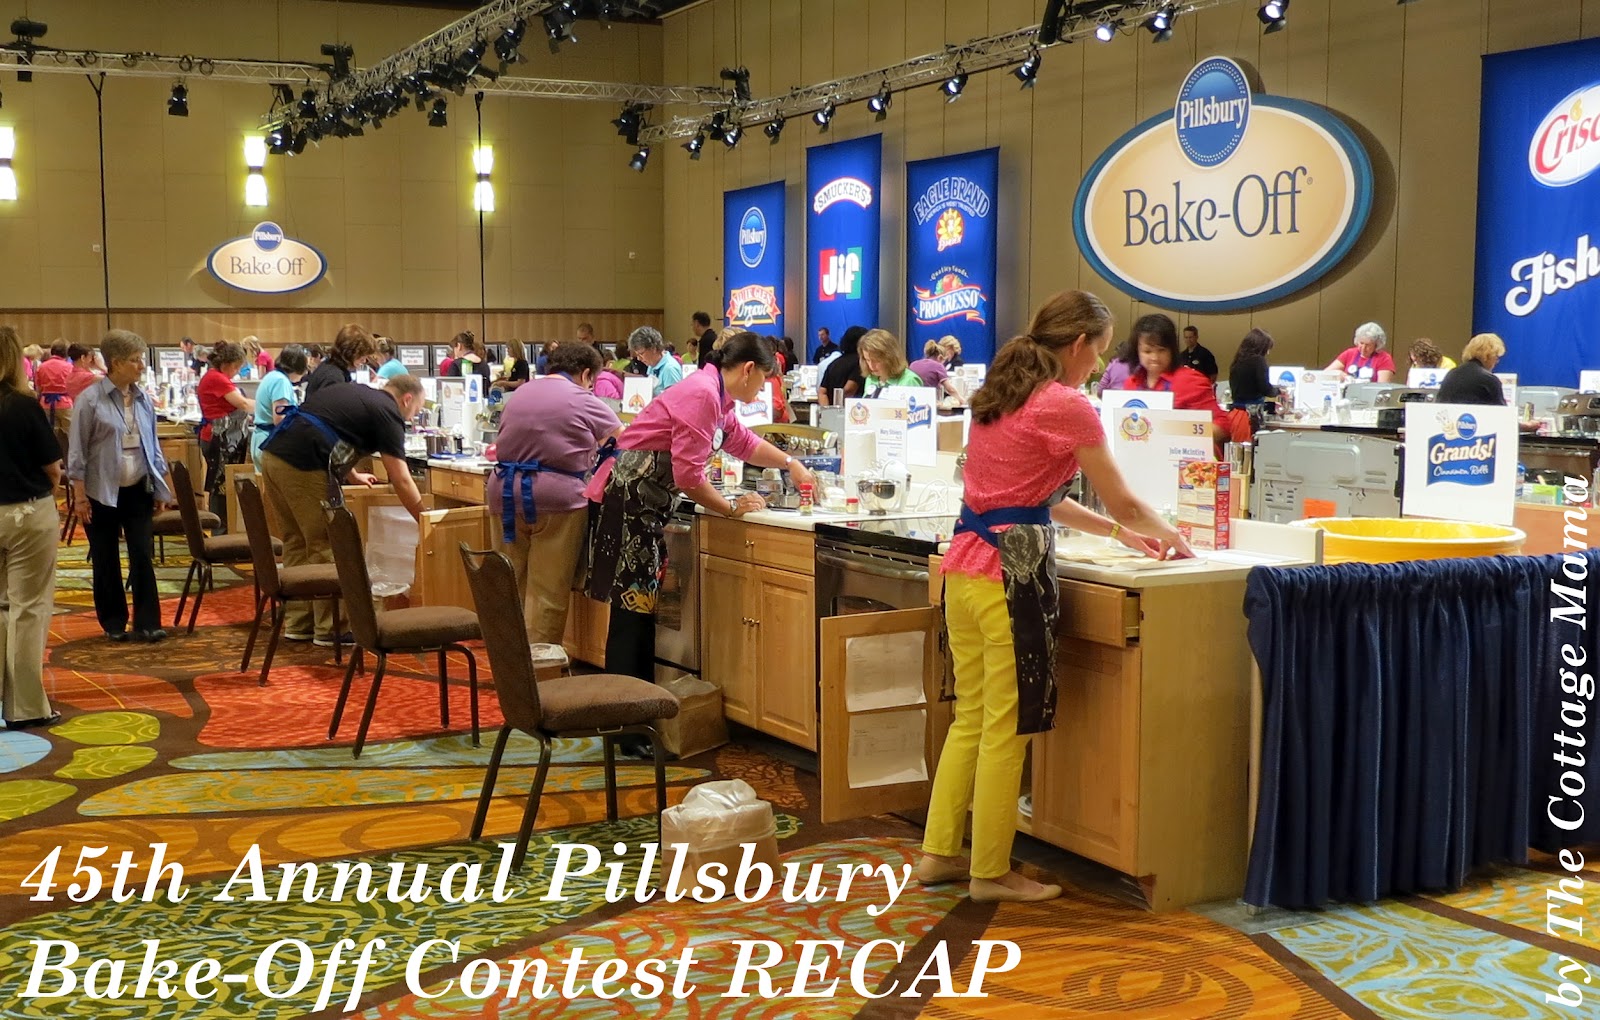
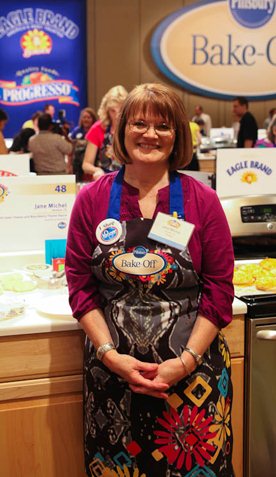
Wow, what an incredible last several days we’ve had!  The 45th Annual Pillsbury Bake-Off Contest has come to a close and though Mom didn’t walk away with the $1 million grand prize, we all walked away with memories to last a lifetime!  I feel so blessed to have been able to share this once in a lifetime experience with my mom and am so glad she invited me along for the ride!

 Mom at her station ~ #48

The 45th Annual Pillsbury Bake-Off Contest was held this year in Orlando, FL at the Peabody Hotel.  Each finalist was allowed to bring three guests, but many people came by themselves.  Pillsbury paid for the finalists entire trip, but the guest fee was pretty steep.  We all got up super-early and flew into Orlando and arrived around noon.  Mom and Pepo flew in from Houston and Caspian and I flew in from Chicago, IL.  Pillsbury had private transportation arranged for all of us (even the guests)……..I don’t think I would ever get tired of having a driver ready and waiting to pick me up!

 Pepo and Caspian

 Caspian after a long morning of traveling.

 They gave each of the finalist a ‘Doughboy’……perfect for our own, real-life Doughboy.

 Mom’s quilting group made her a hot-pad and they all signed it with good luck messages.

When we arrived at the hotel, we checked in our rooms and then went down to registration.  The finalists and guests registered and received their name badges.  They had a wonderful lunch spread for everyone with things like roast beef and brie sandwiches, pasta salad, jicama salad, terra chips and tons of sweet treats like butterscotch blondies, brownies, chocolate chip cookies and so much more!

Kroger cocktail hour.

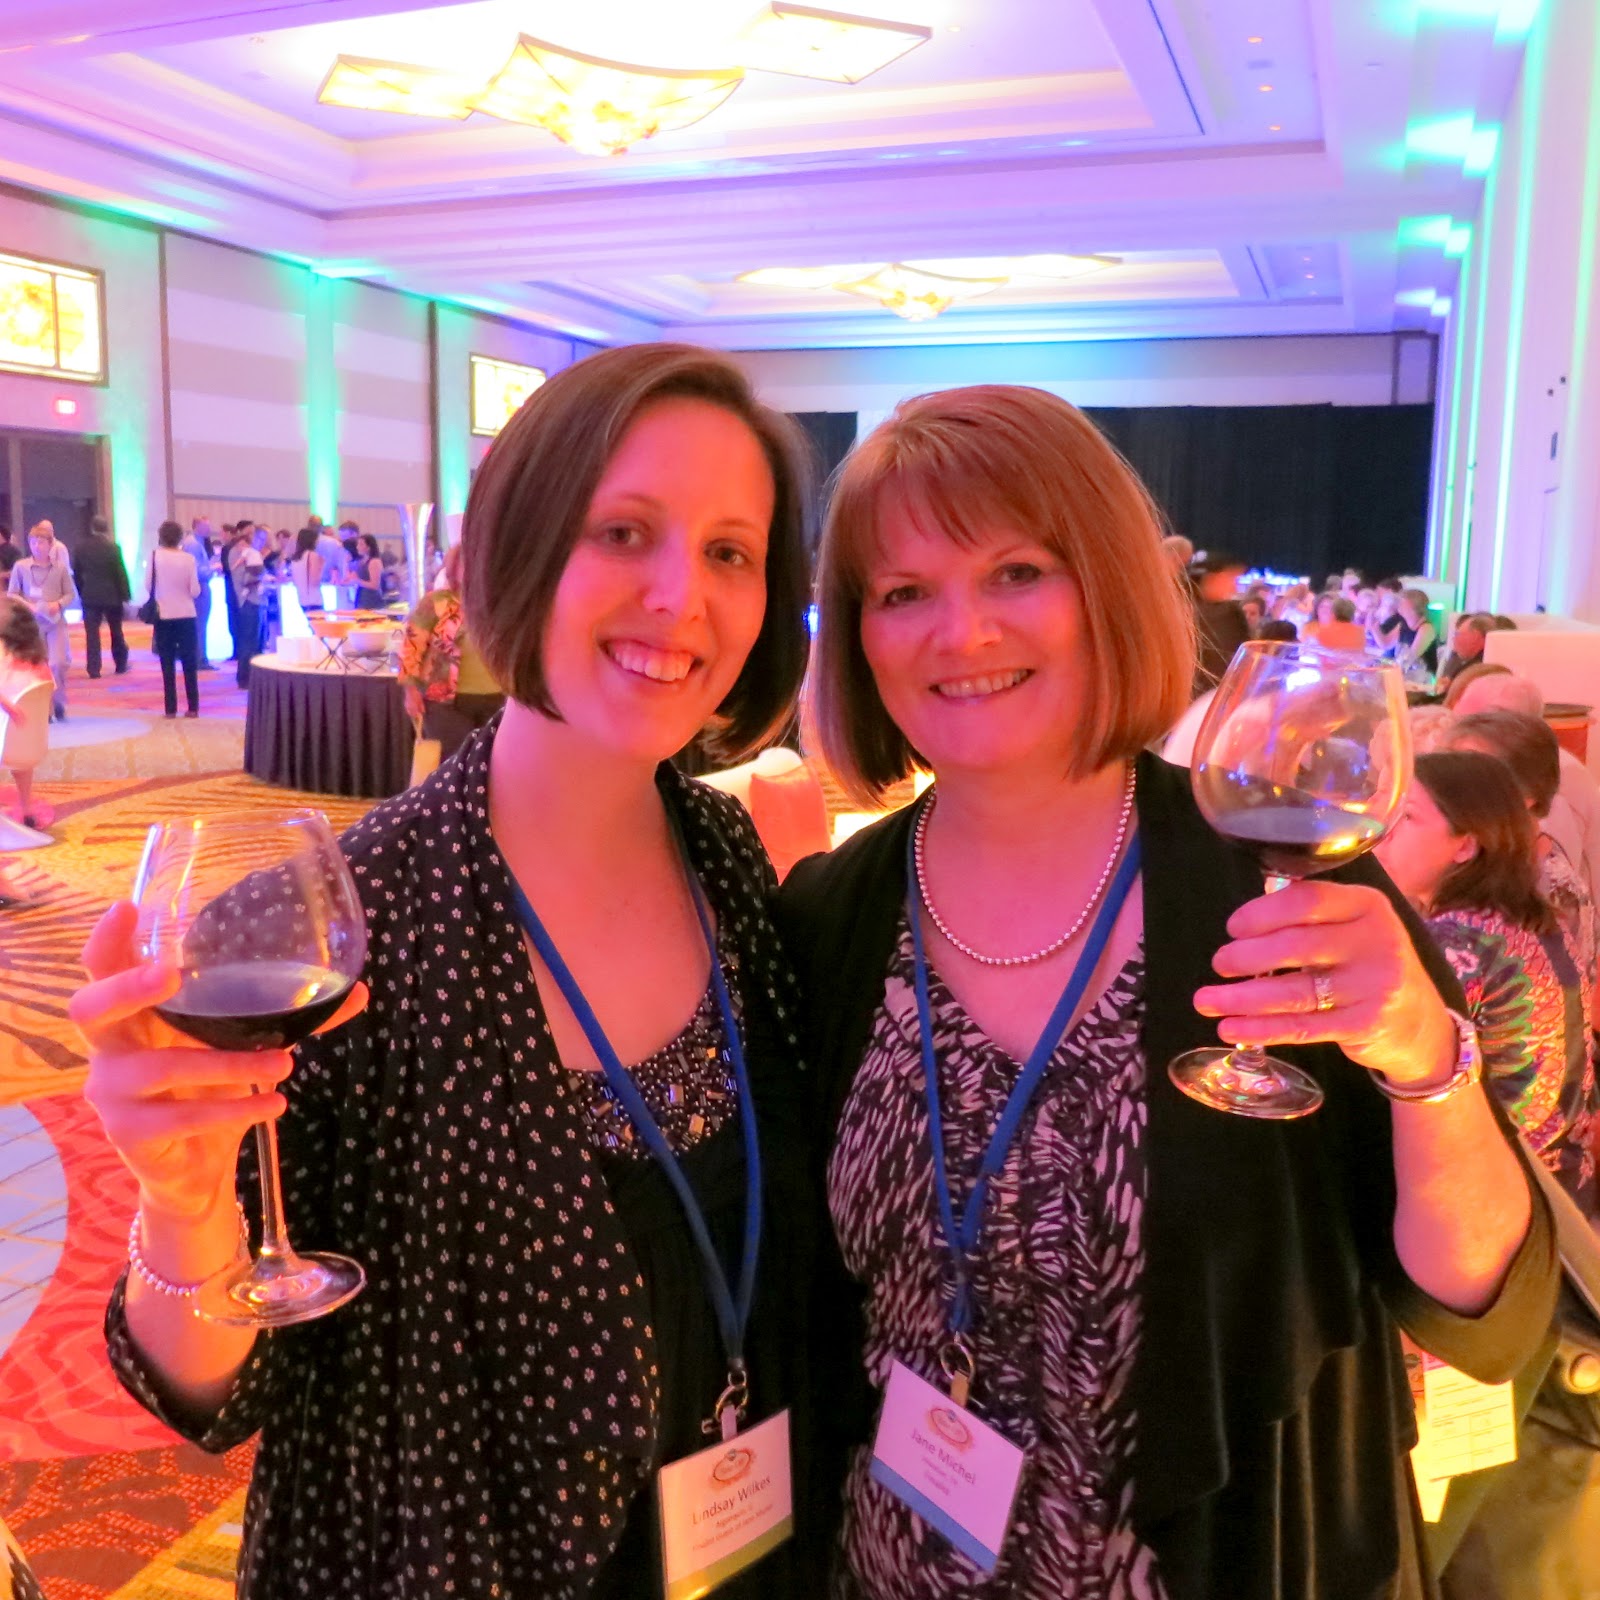
After lunch the finalists had a long orientation and then we all attended a cocktail hour hosted by the different grocery stores from around the country.  Mom’s store is ‘Kroger’ so we hung out with the folks from ‘Kroger’ and the other ‘Kroger’ finalists.  After the cocktail hour we made our way into the semi-formal welcome dinner.

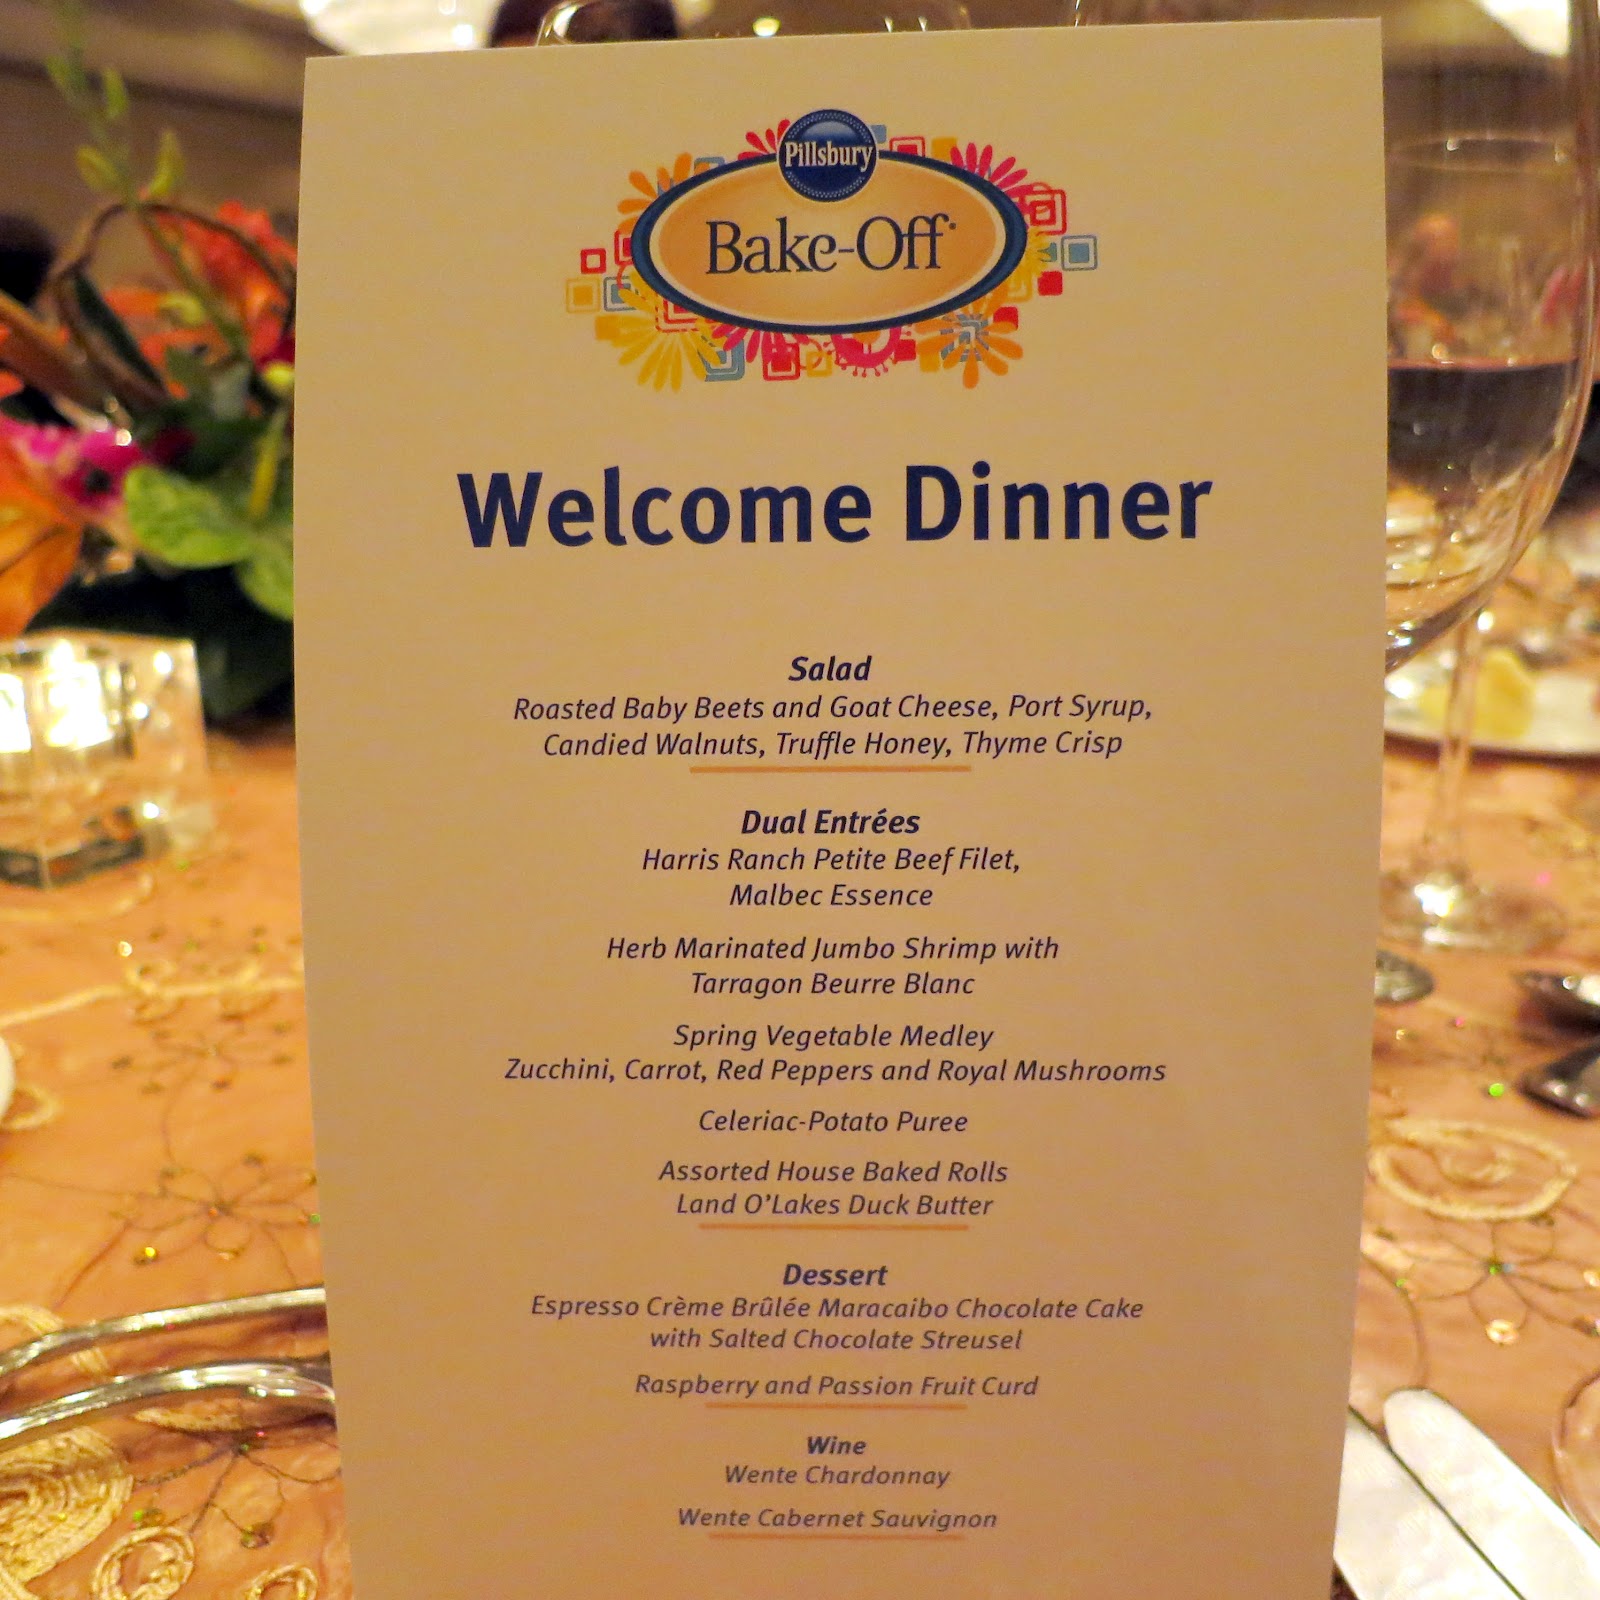
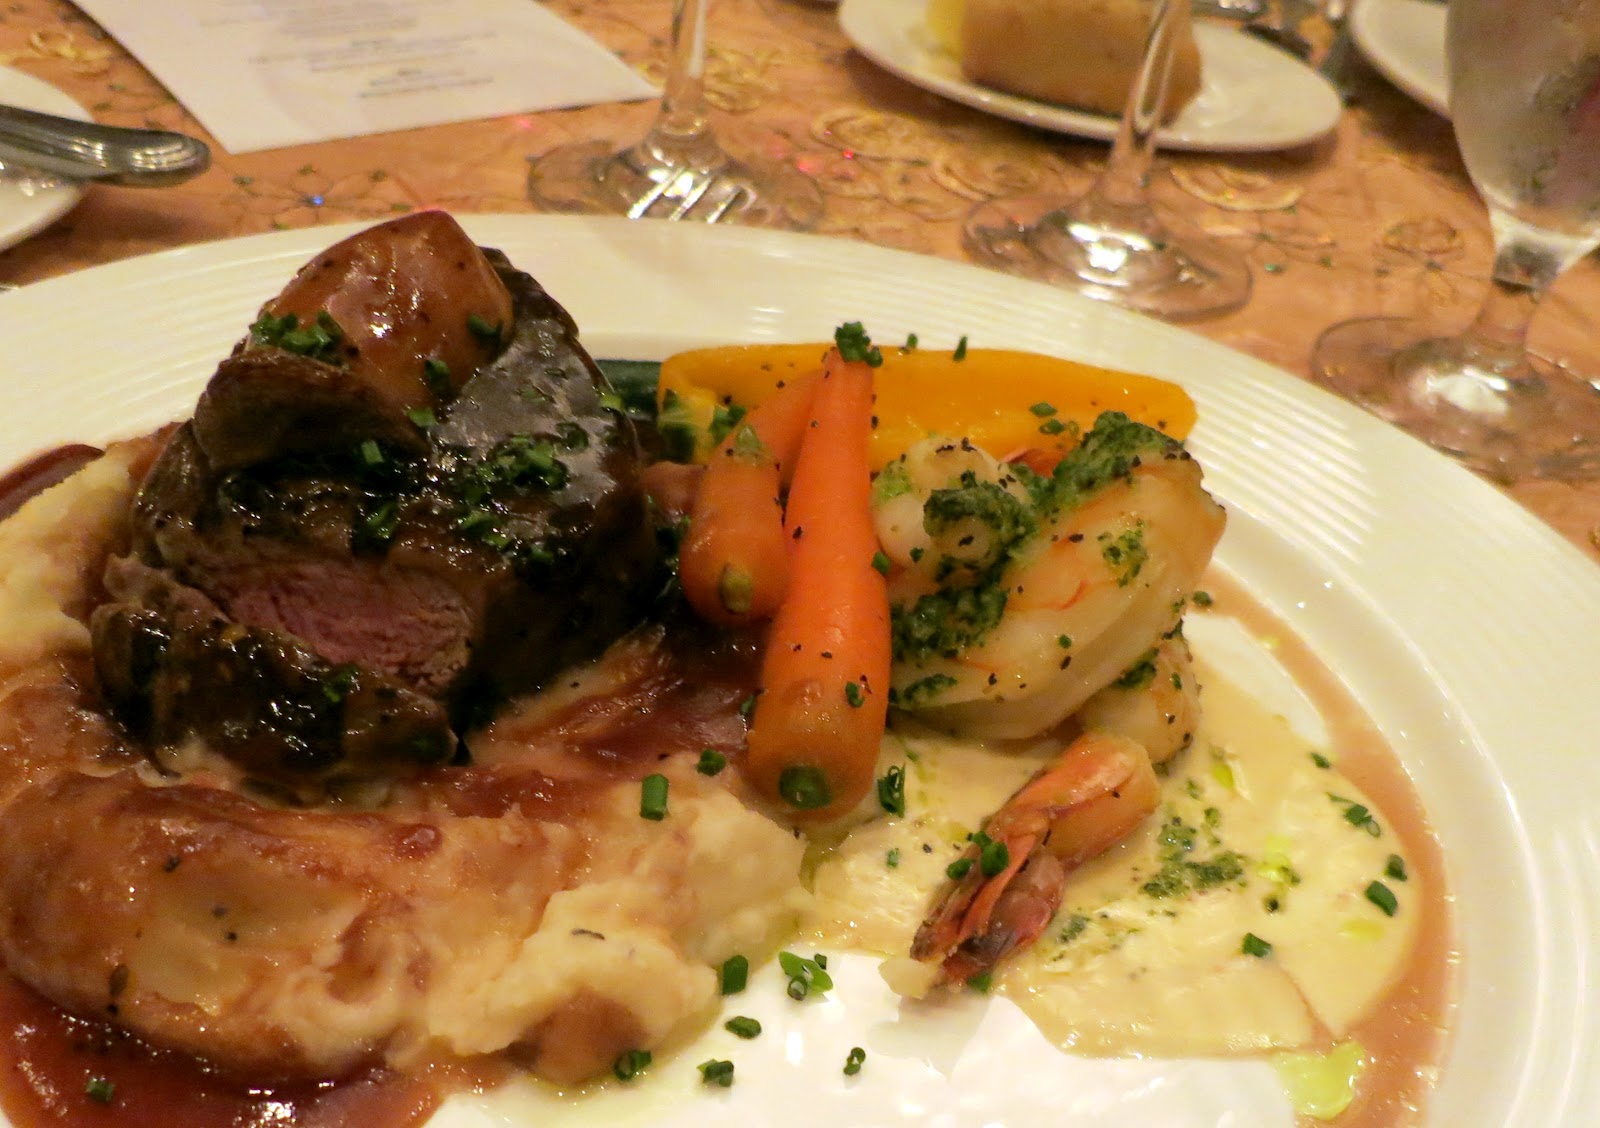
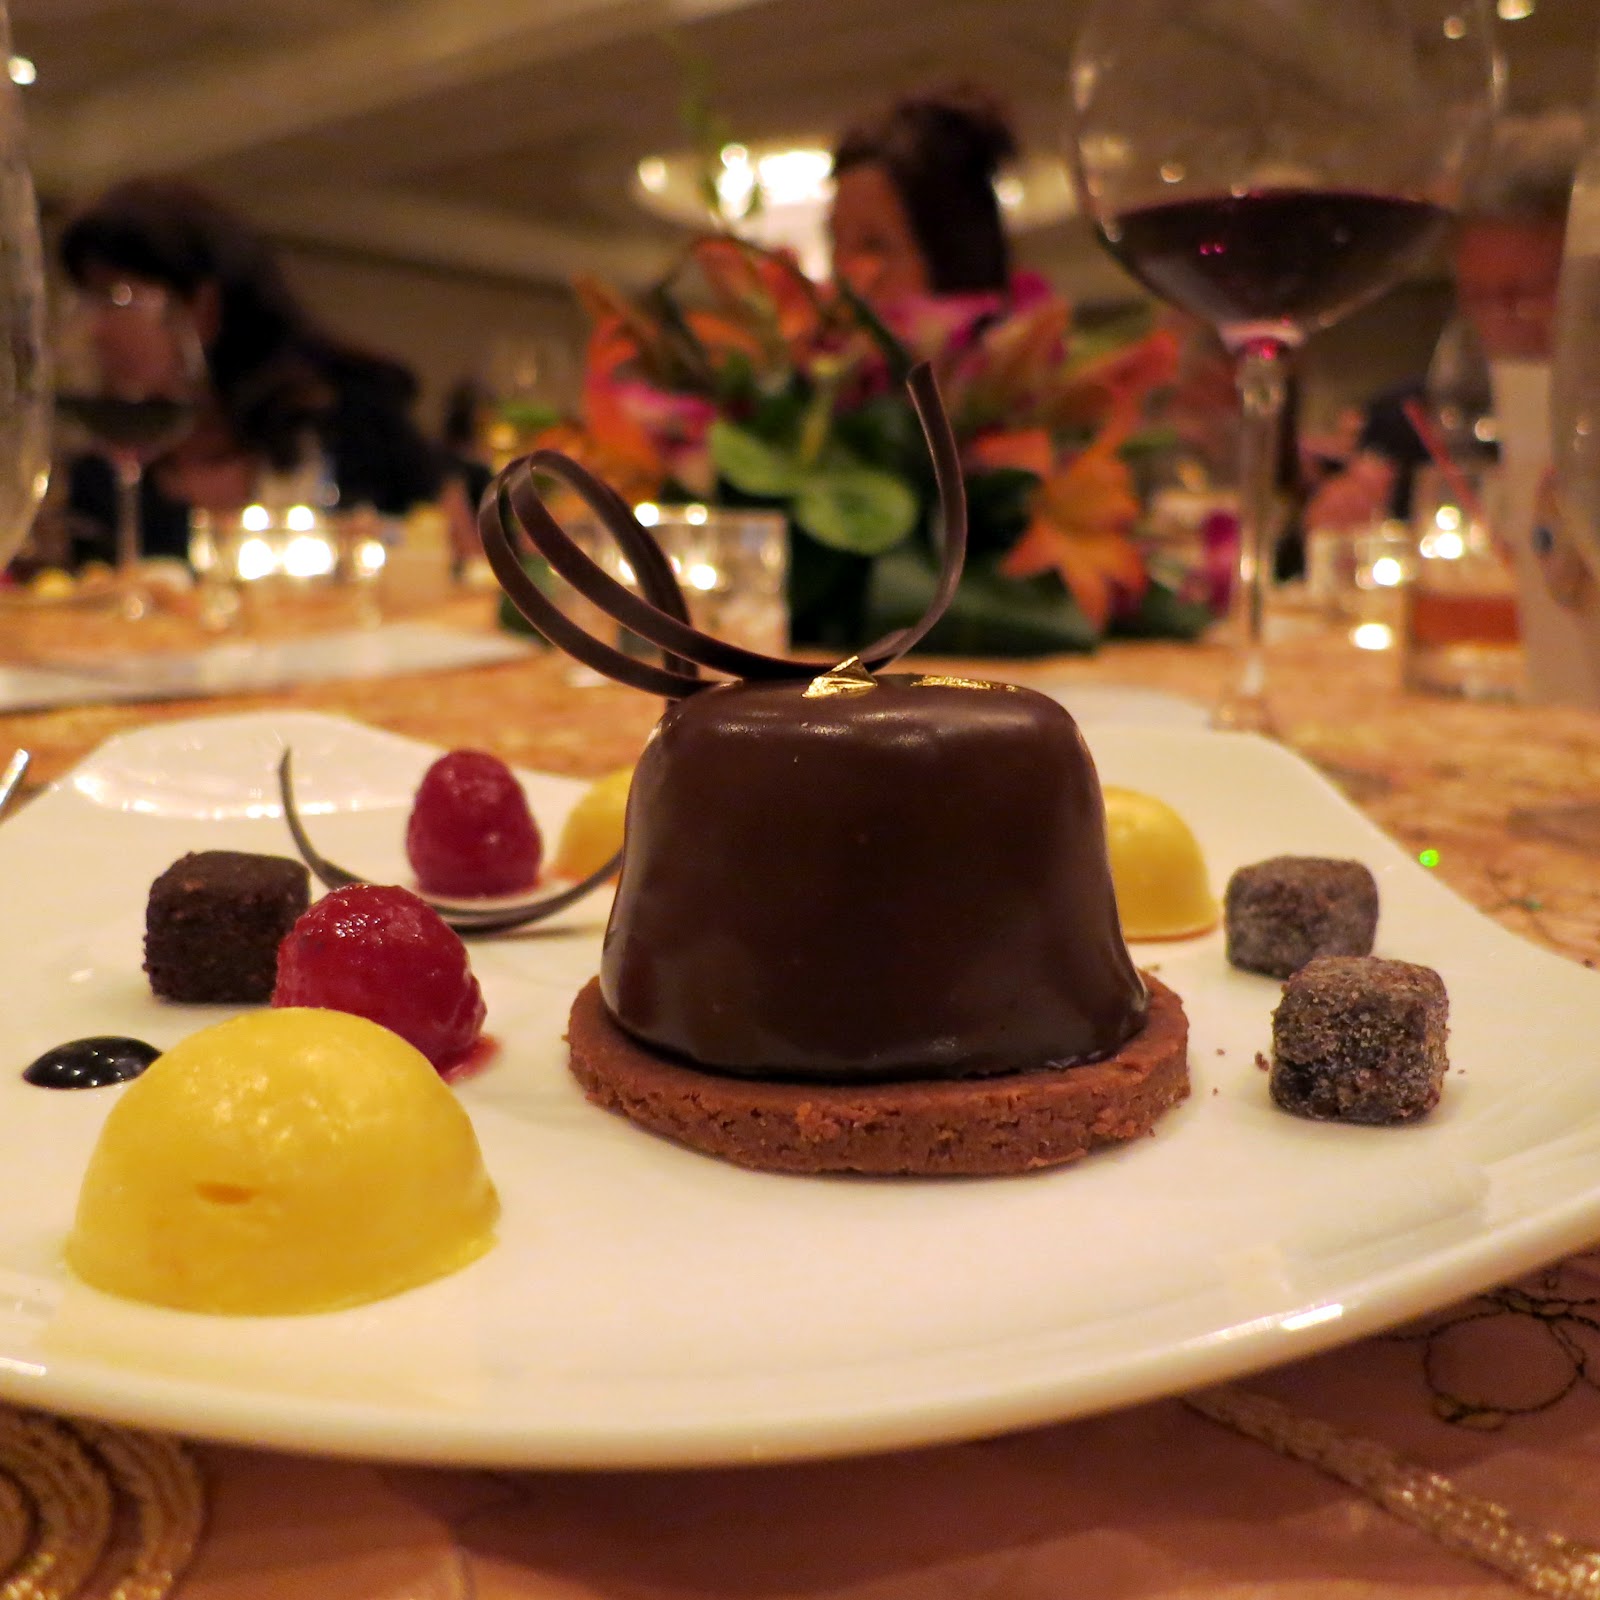
The food at the dinner was amazing!!  The salad was to-die-for and the steak was cooked to an absolute perfect medium.  The dessert was just delicious and went perfectly with our red wine!

 Mom and fellow finalists in line for the Grand March.

Getting ready for the Grand March.

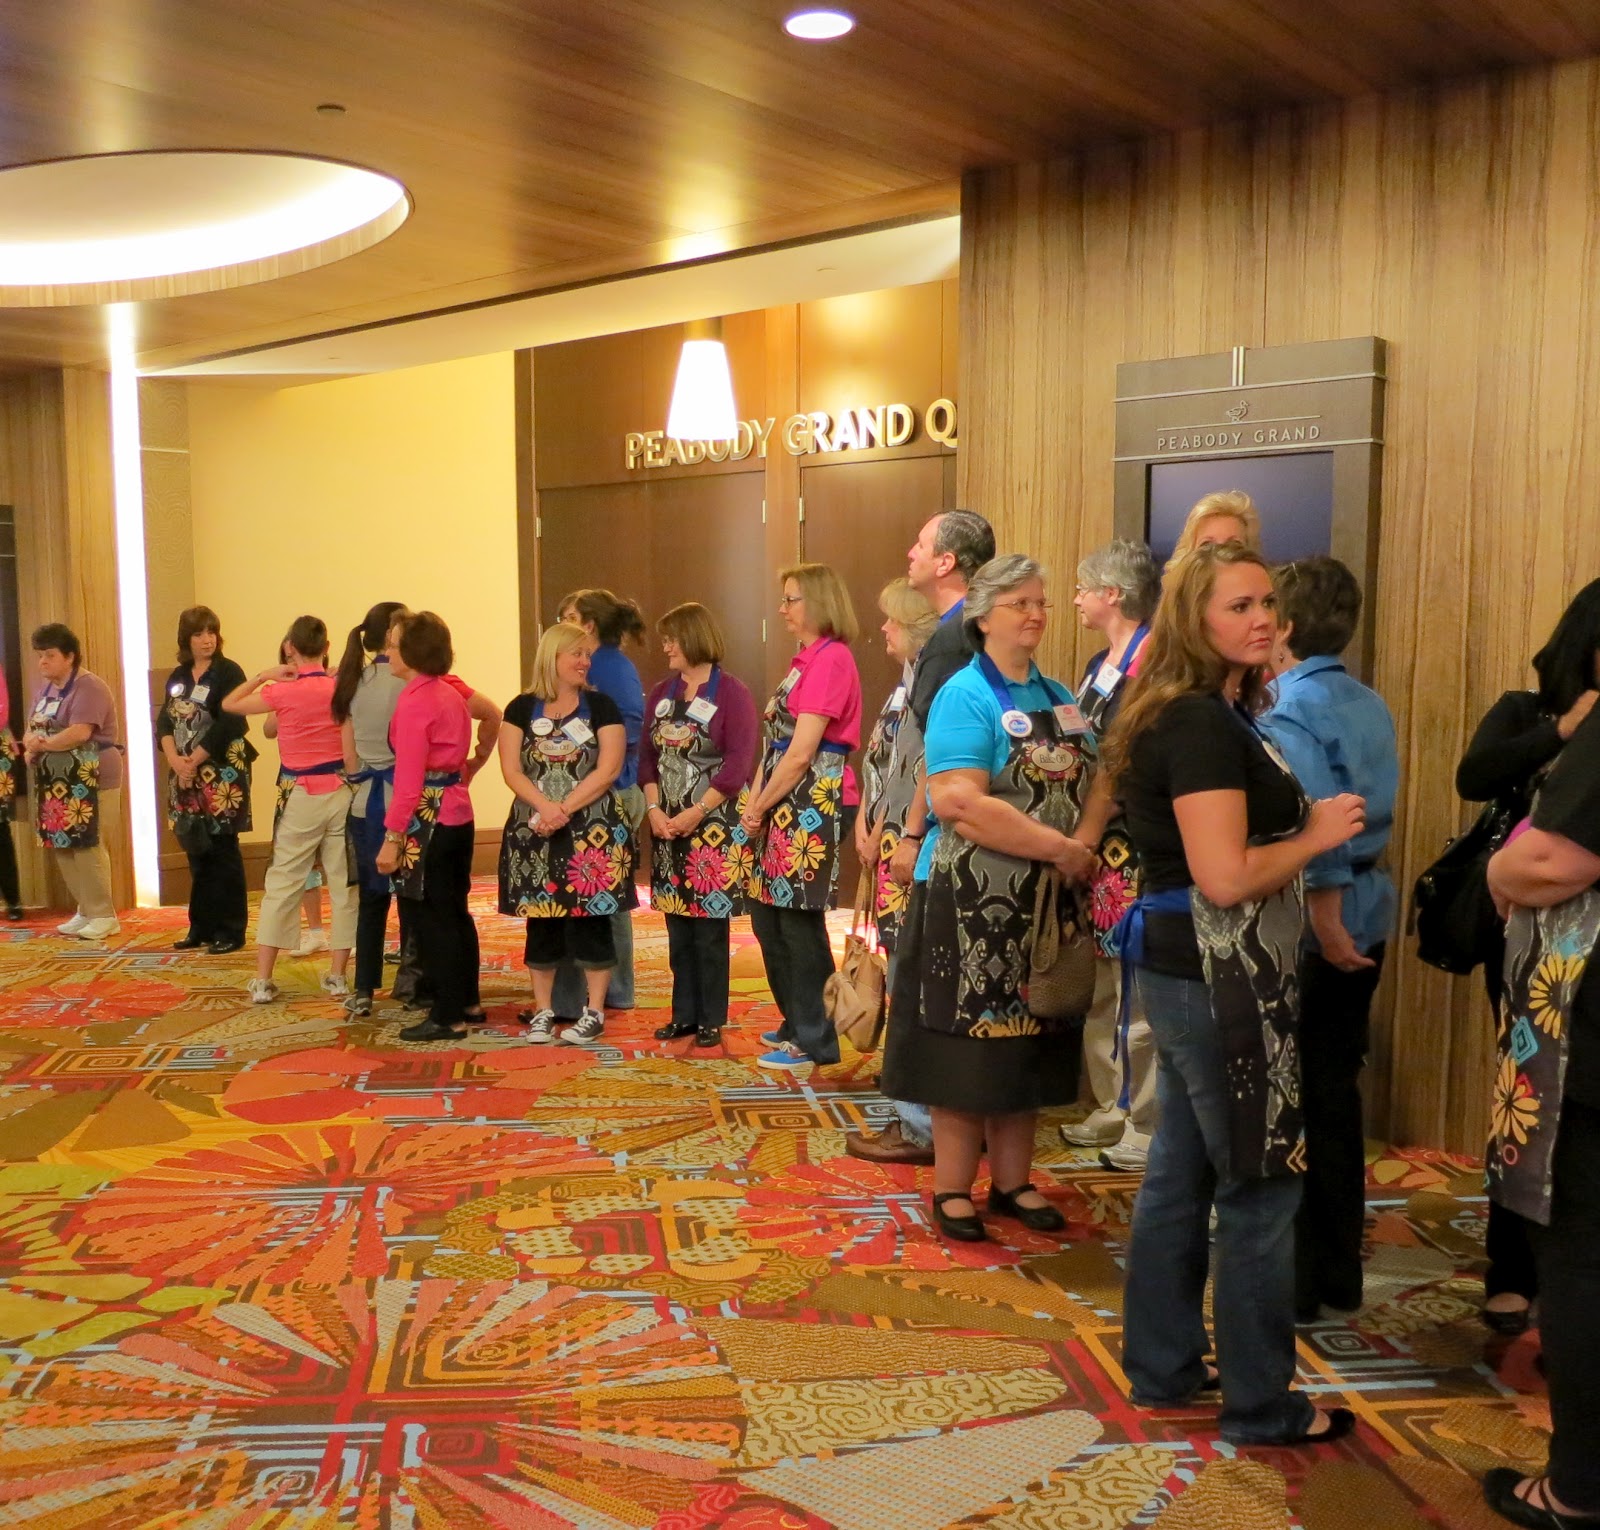
The next morning was the competition.  We had to be at breakfast around 6:00AM.  Then the finalists lined up outside the ballroom for the historic ‘Grand March’ into the Bake-Off.  While the finalists lined up, the rest of the guests, media, and folks from the Martha Stewart Show made our way into the ballroom.

 Kitchens all ready to go before the competition.

 Station…….not too large.

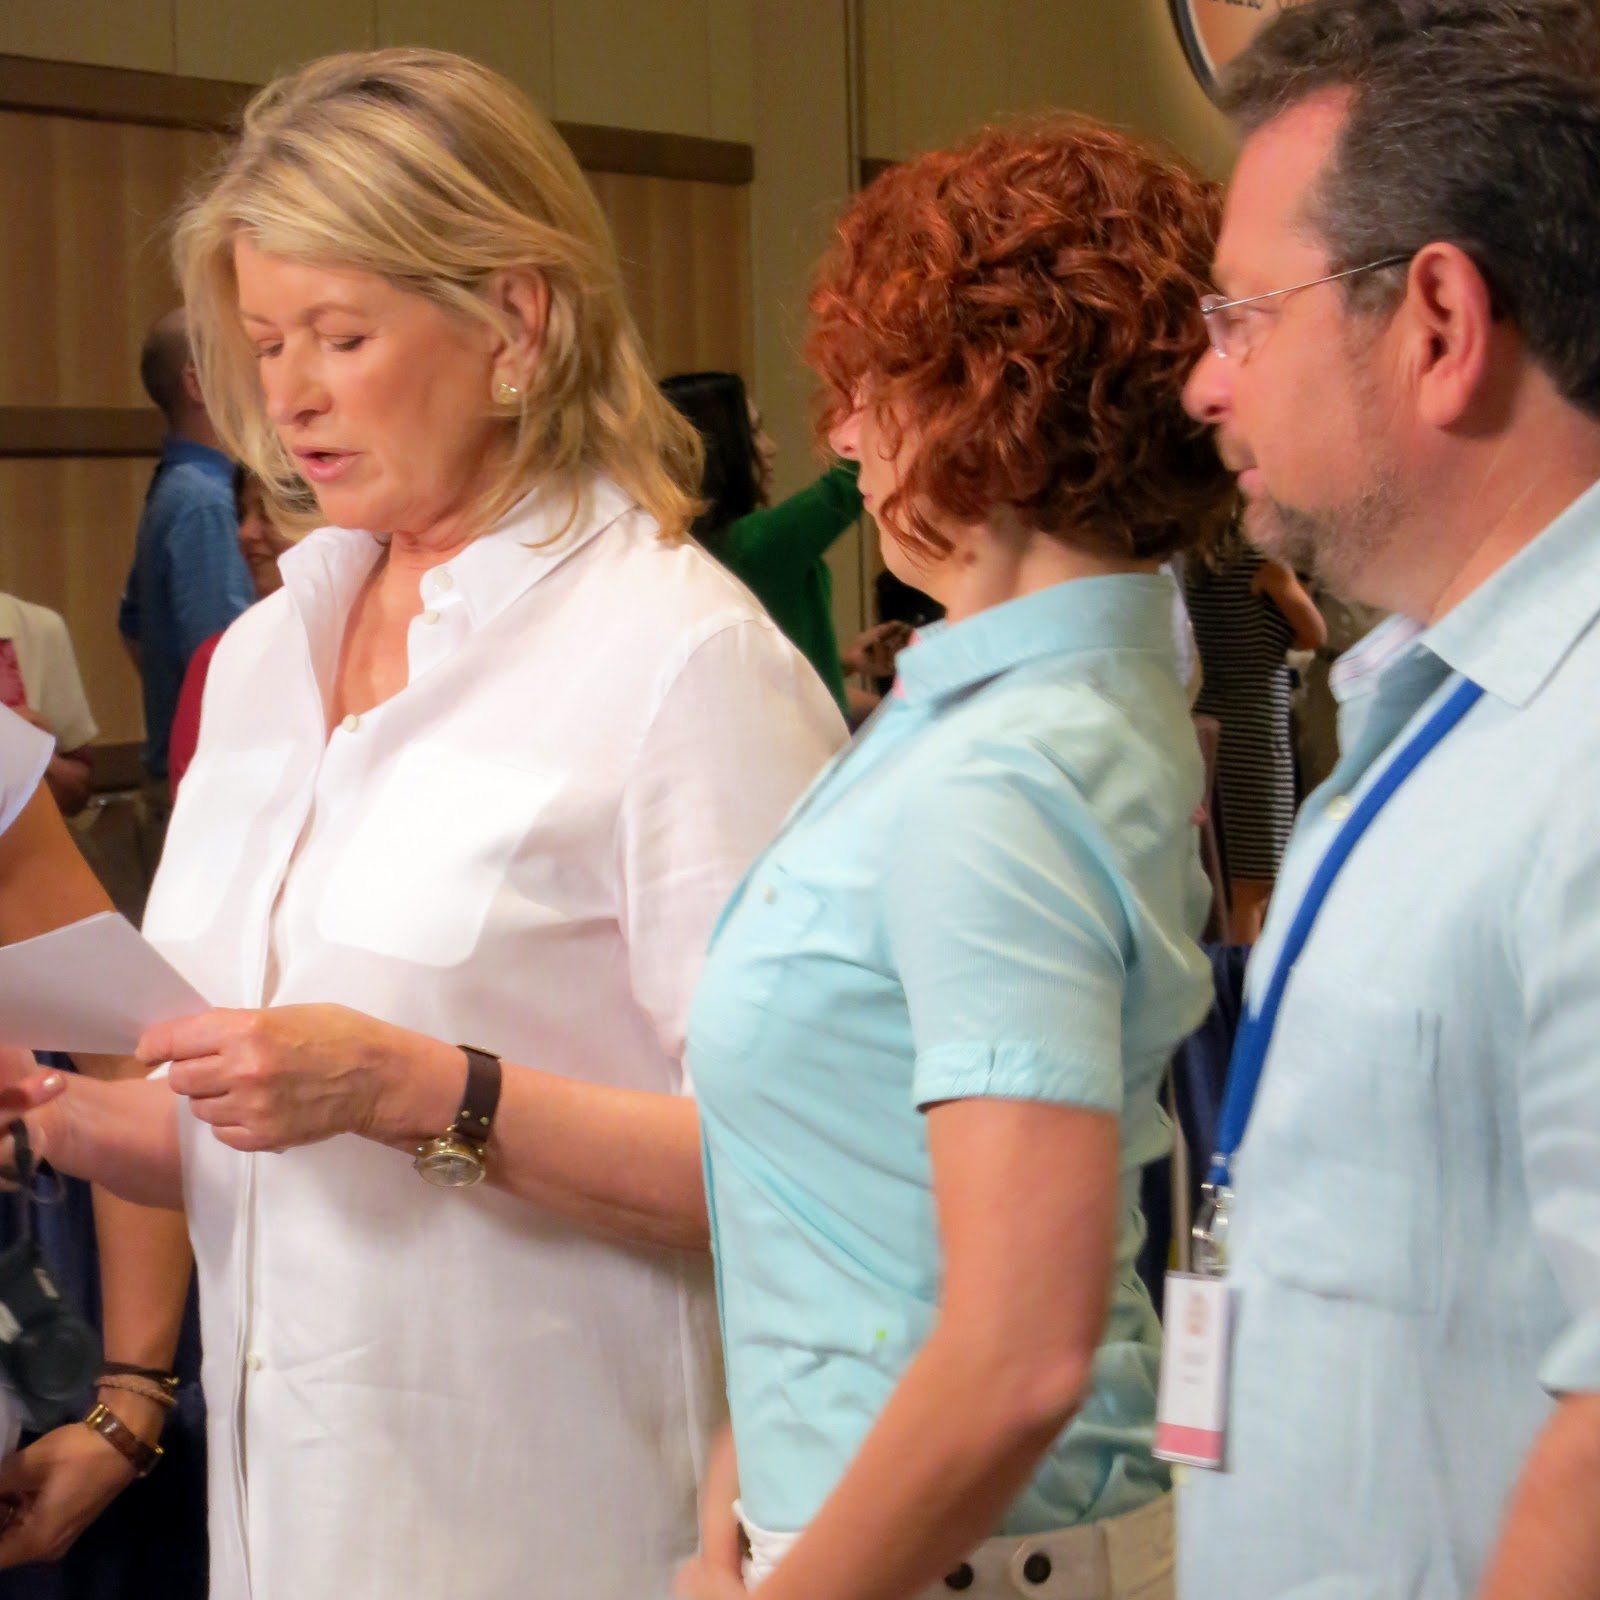
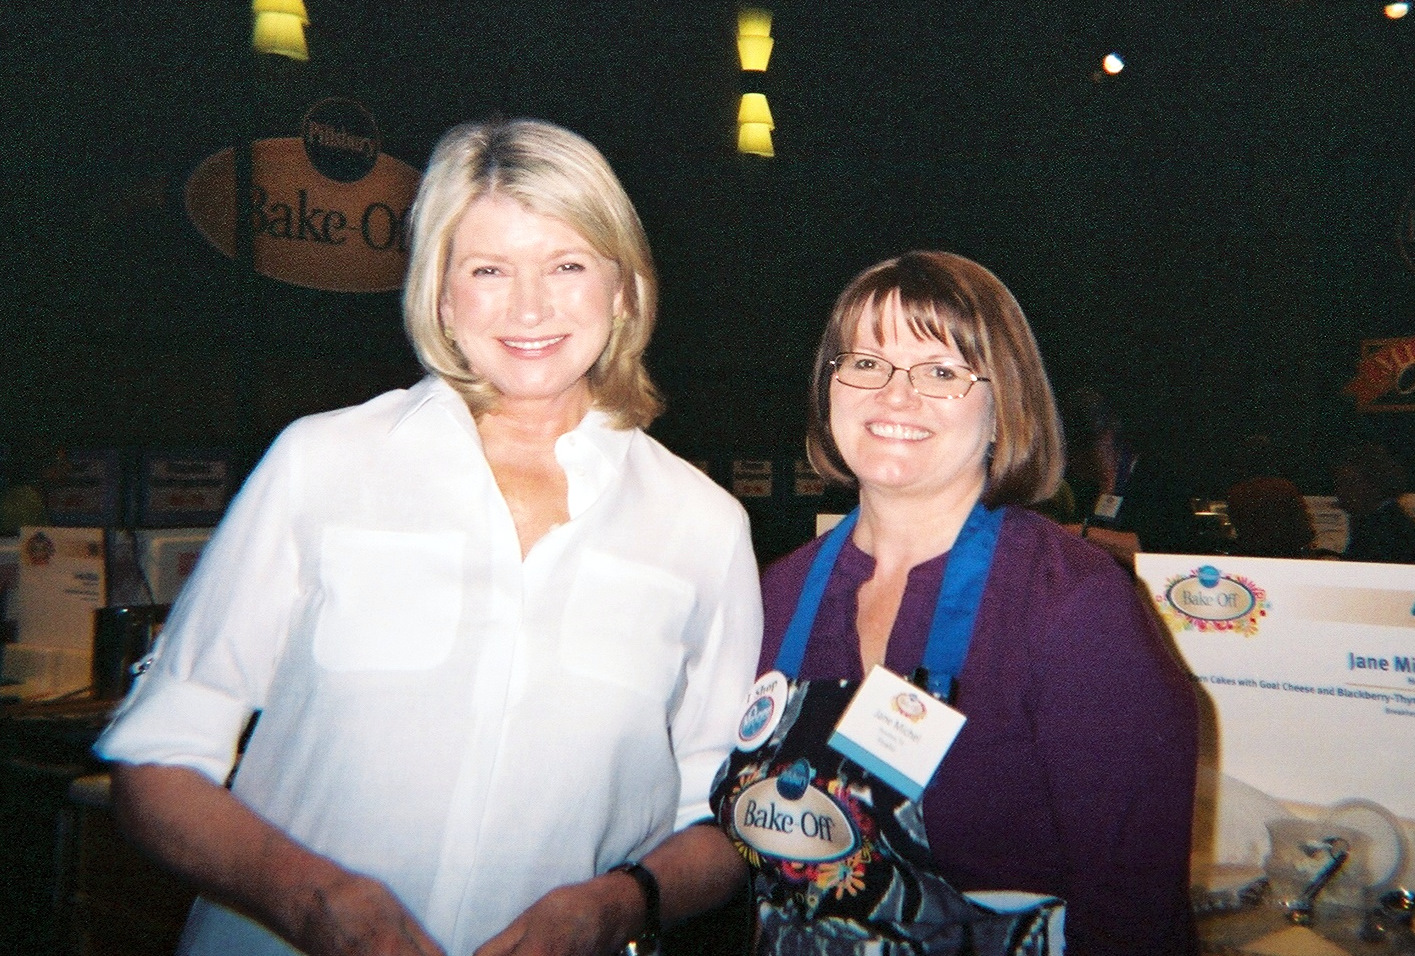
Many people get star-struck around different movie stars, models, ect……..nope, not me……..I was almost paralyzed with excitement from being around Martha Stewart herself!!  I must have taken a million pictures of her.  And the fact that I was standing next to the Editor of Everyday Food Magazine and talking with Joey Kola (Martha’s sidekick) was so incredibly thrilling!!  Martha was so sweet and lovely.  She was on the quieter side and seemed genuinely excited to be there.

 Filming the opening for the Martha Stewart show.

 Martha brought her own personal camera she was using to take pictures.
 Yes, this was how close I was to them (I’m not using any zoom)!

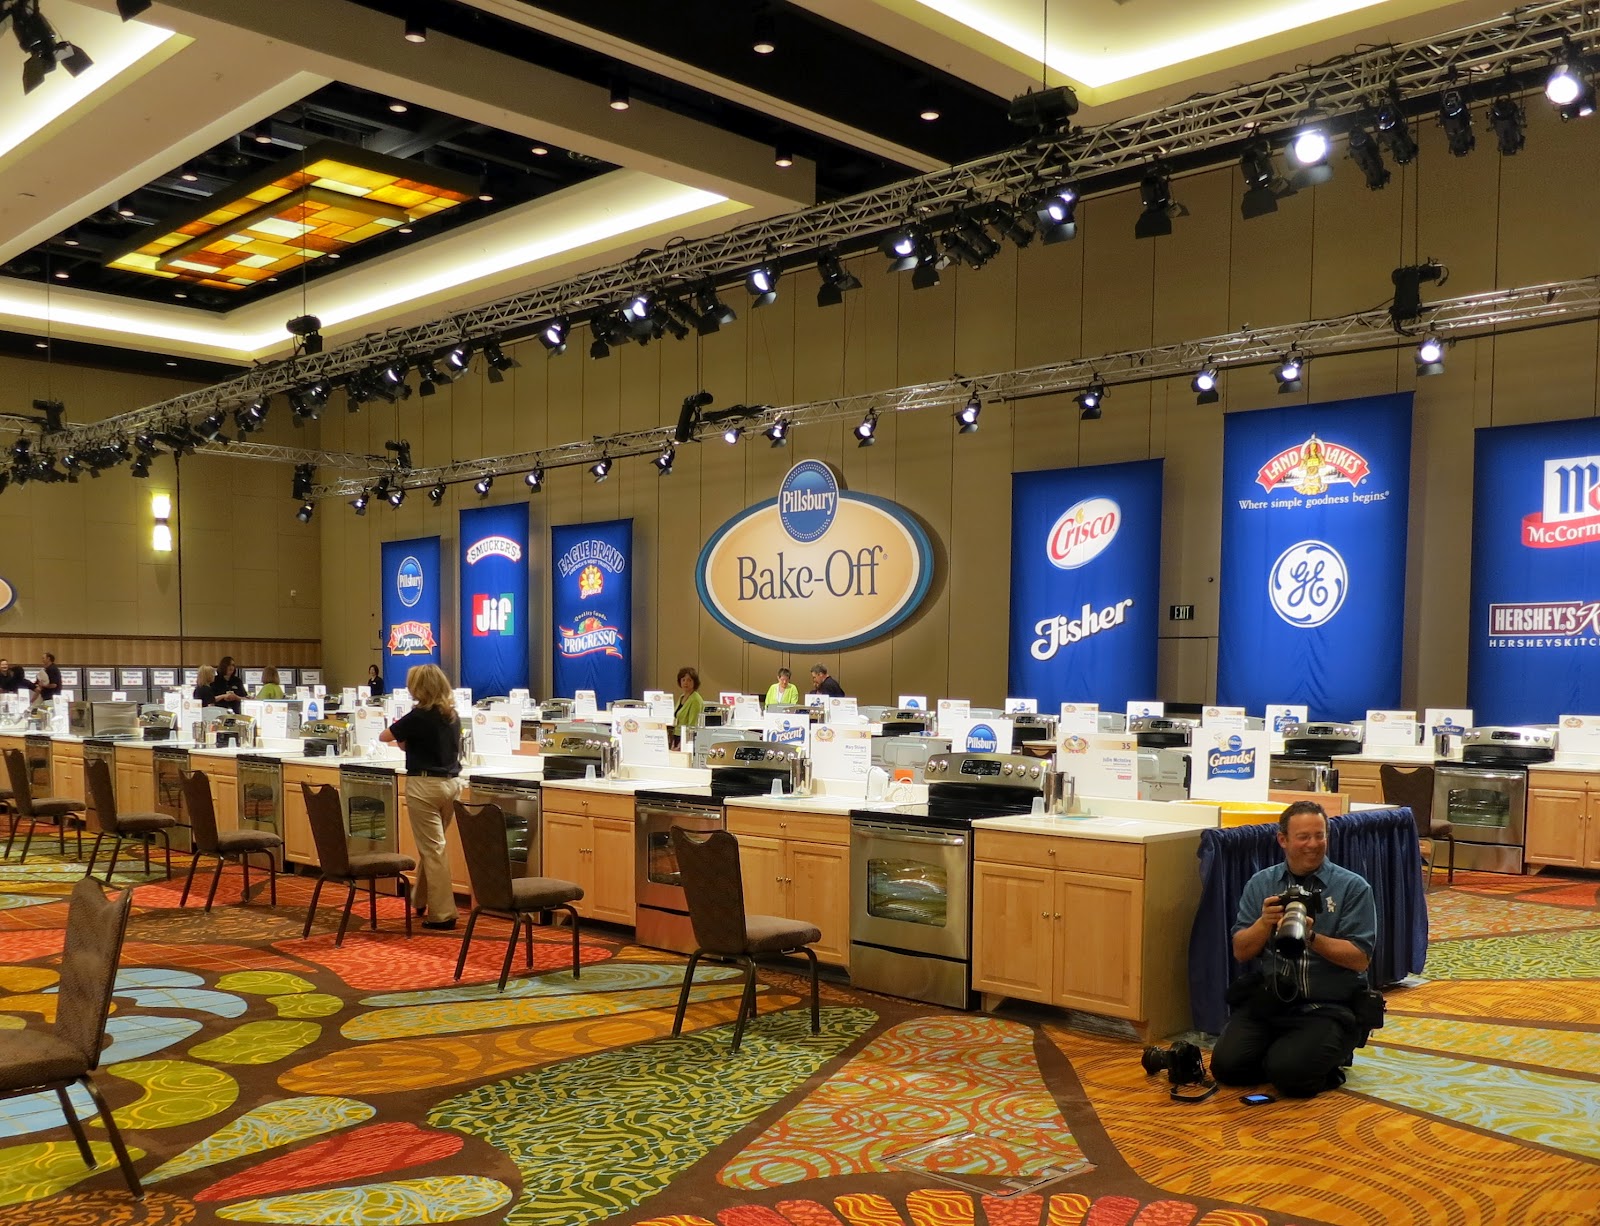
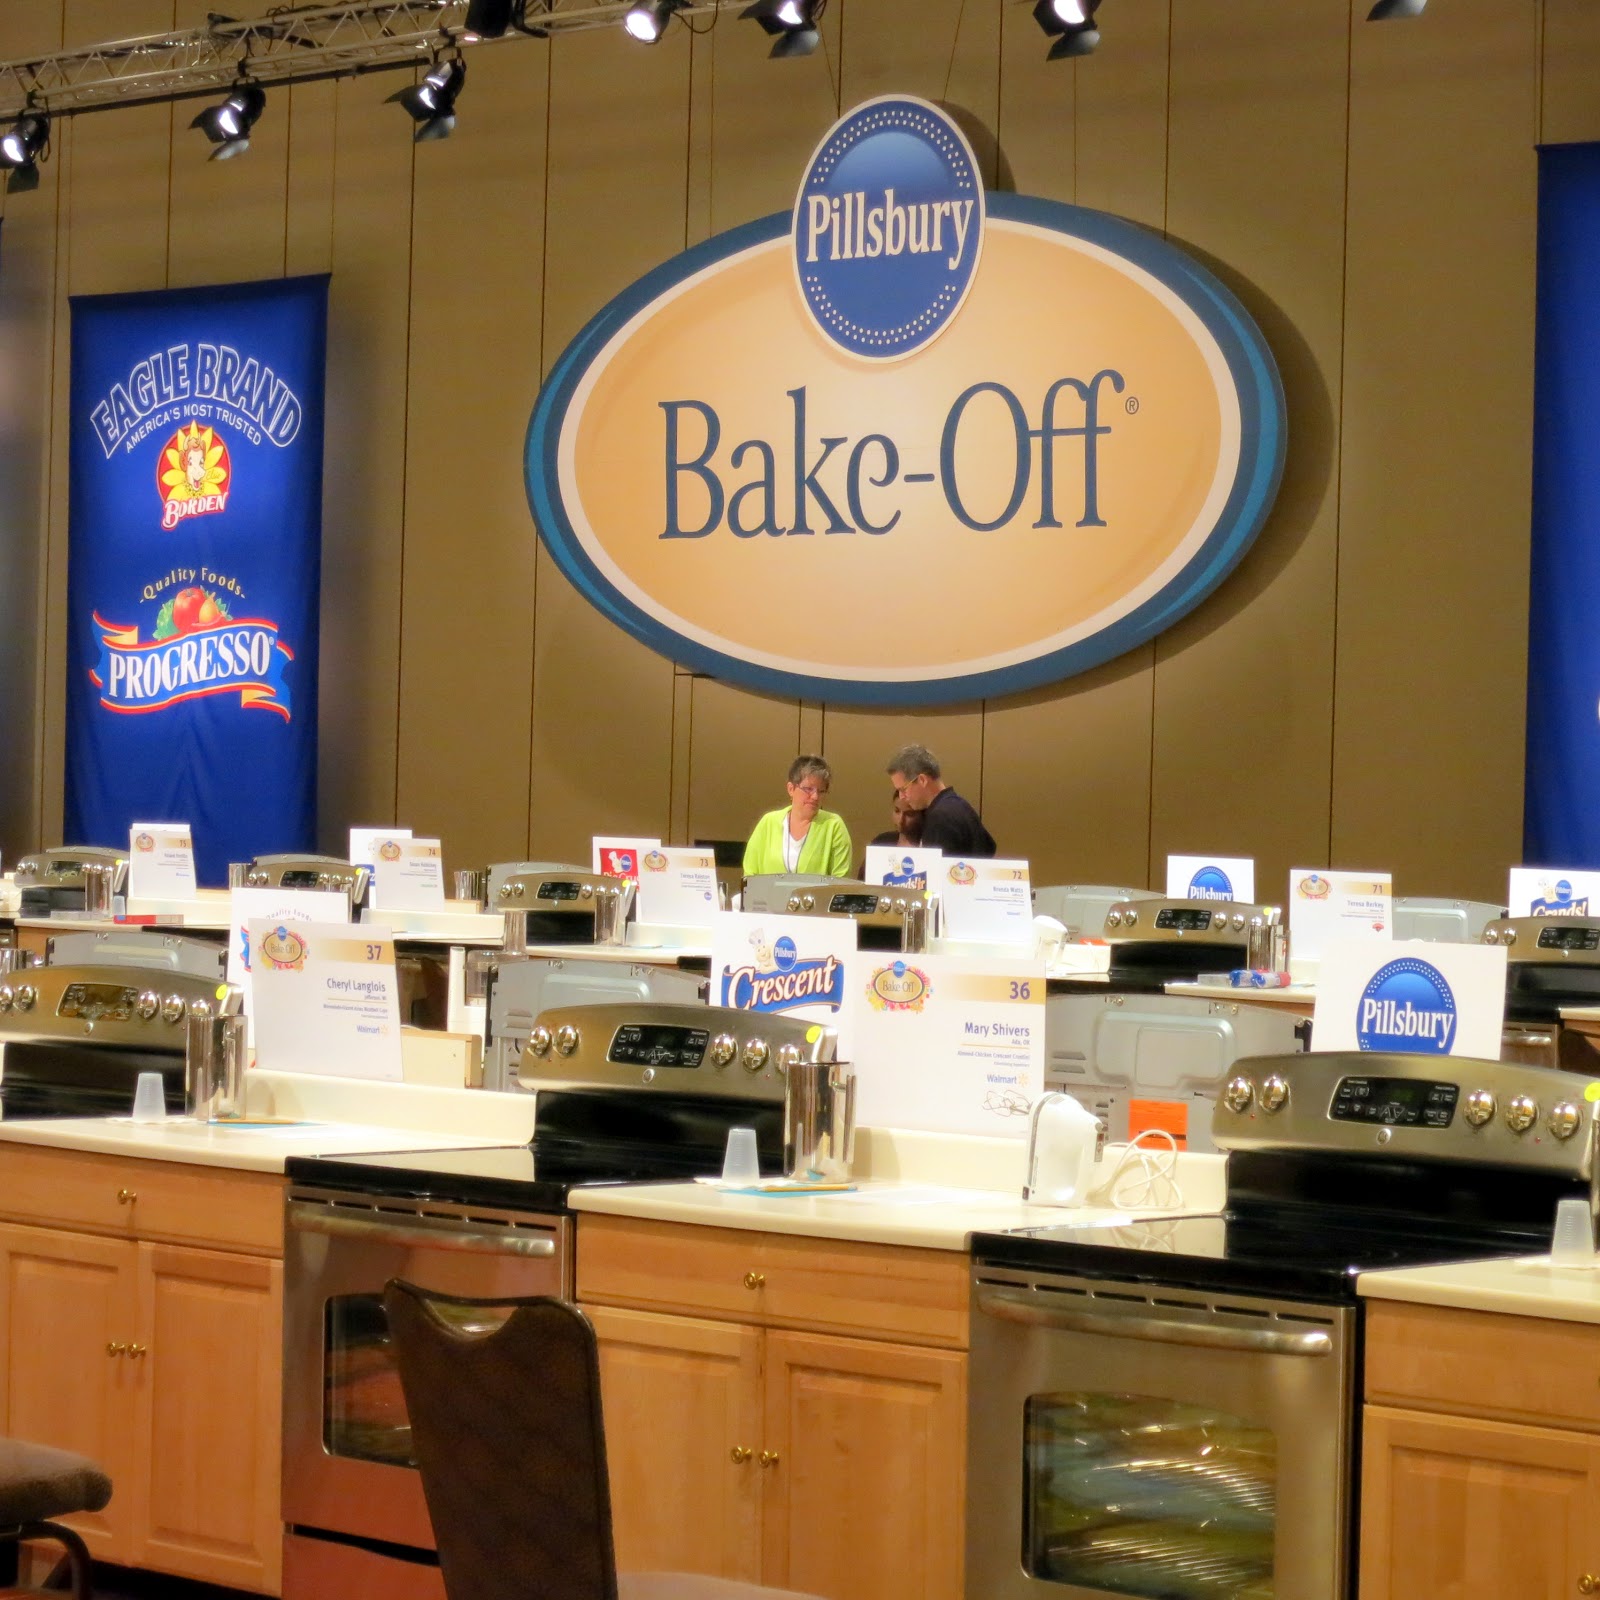
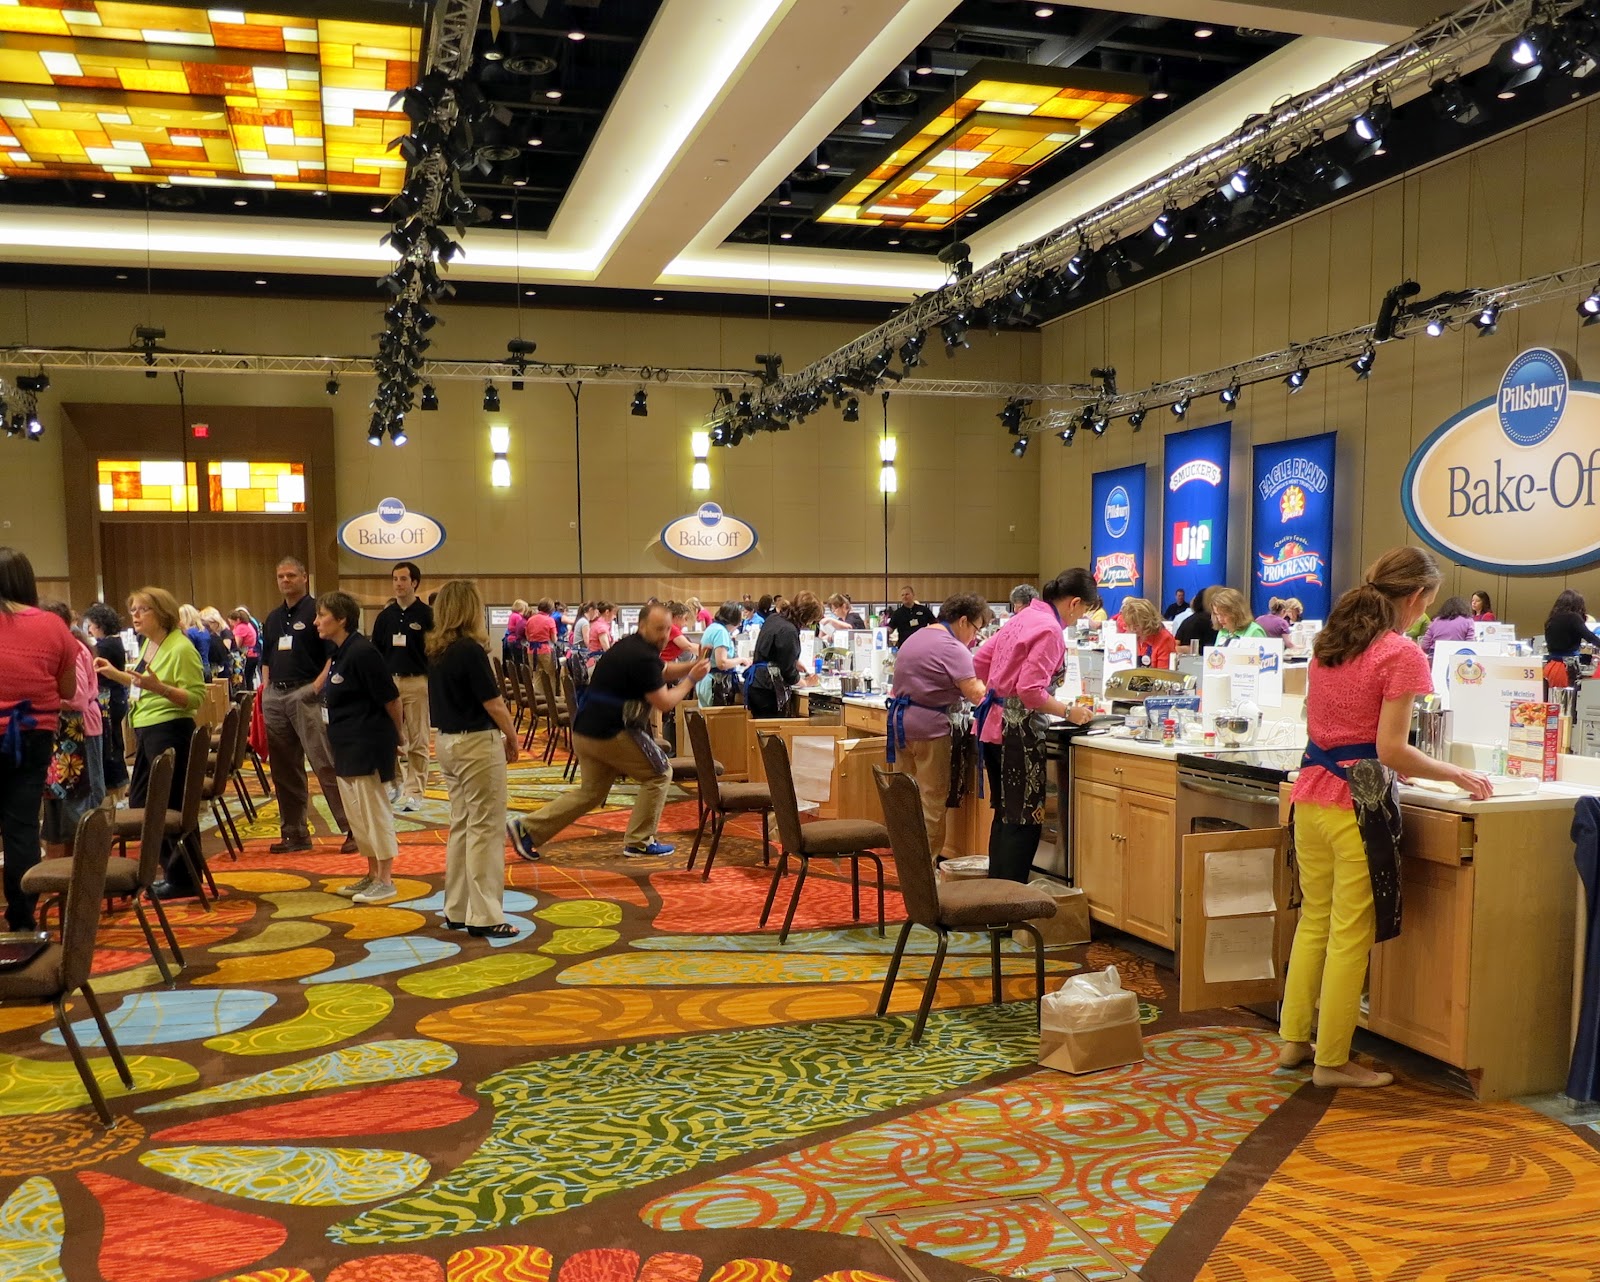
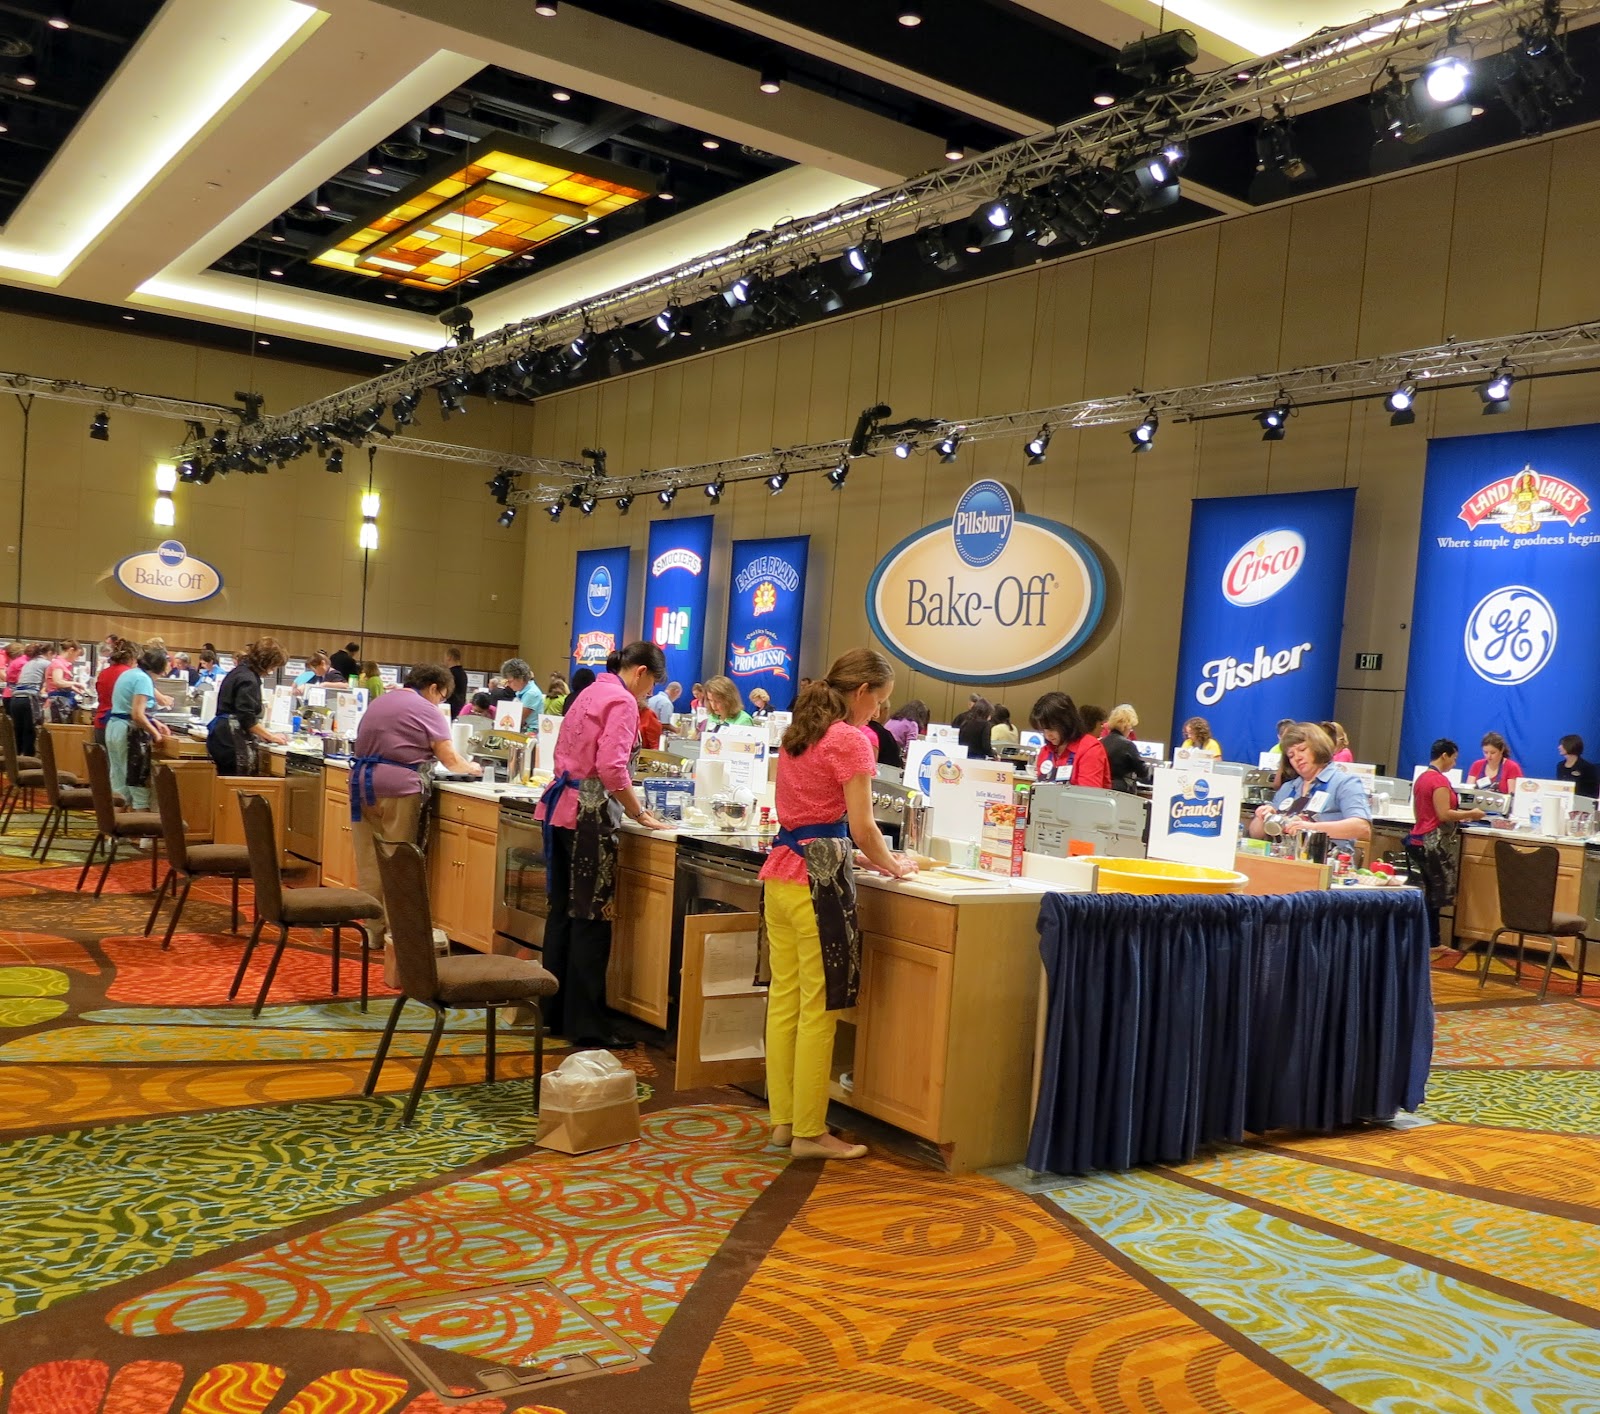
After the contestants did the Grand March into the ballroom, a deep voice came over the sound system announcing the beginning of the ’45th Annual Pillsbury Bake-Off Contest’.  And from that point on the finalists had 4 hours to make their recipes 3 times ~ once for the judges, once for the display table and an optional third time for tasting (for media and other finalists).

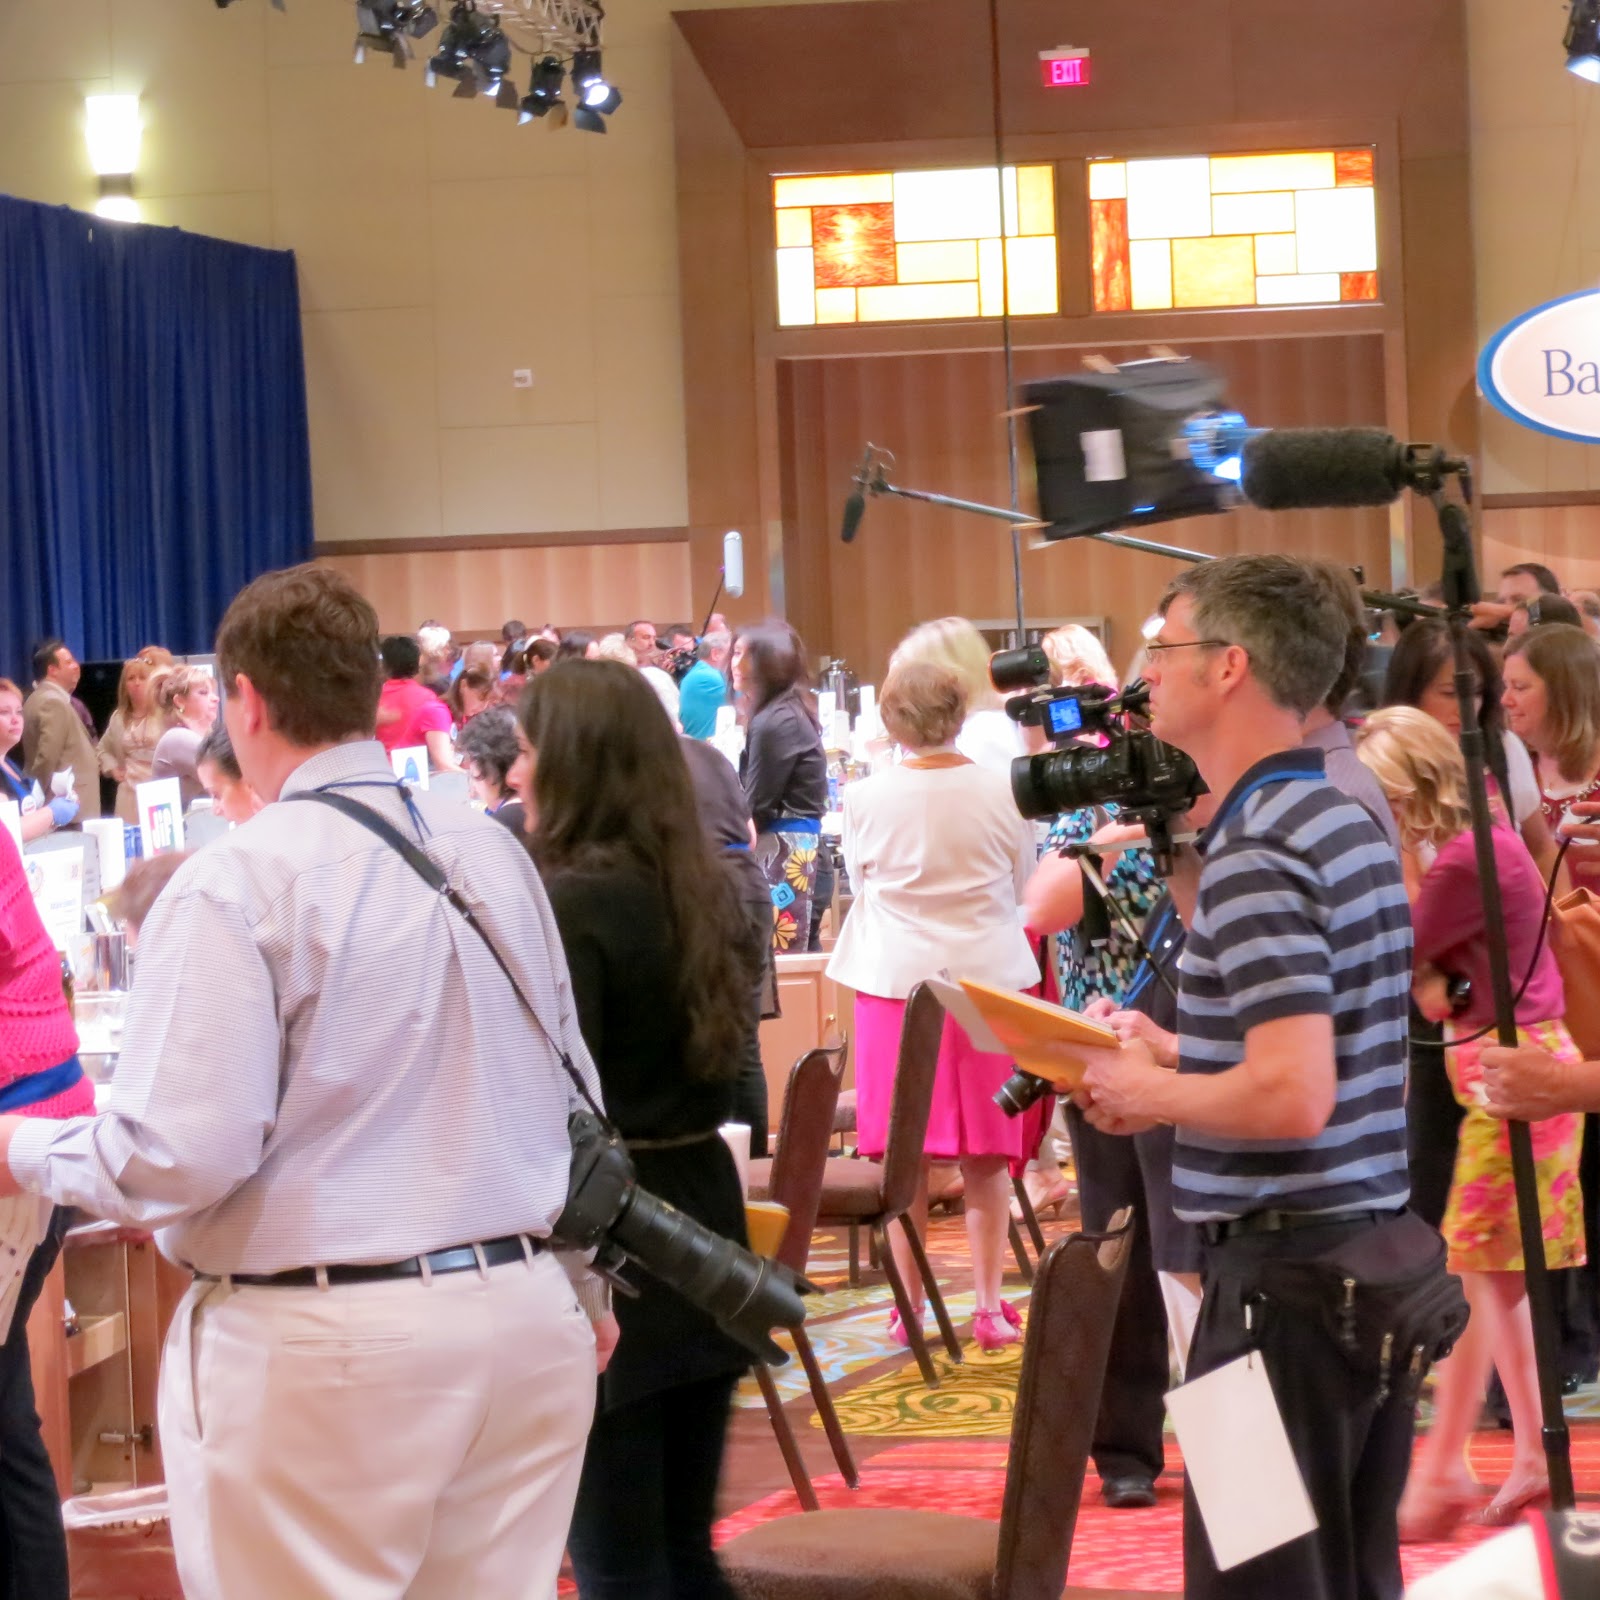
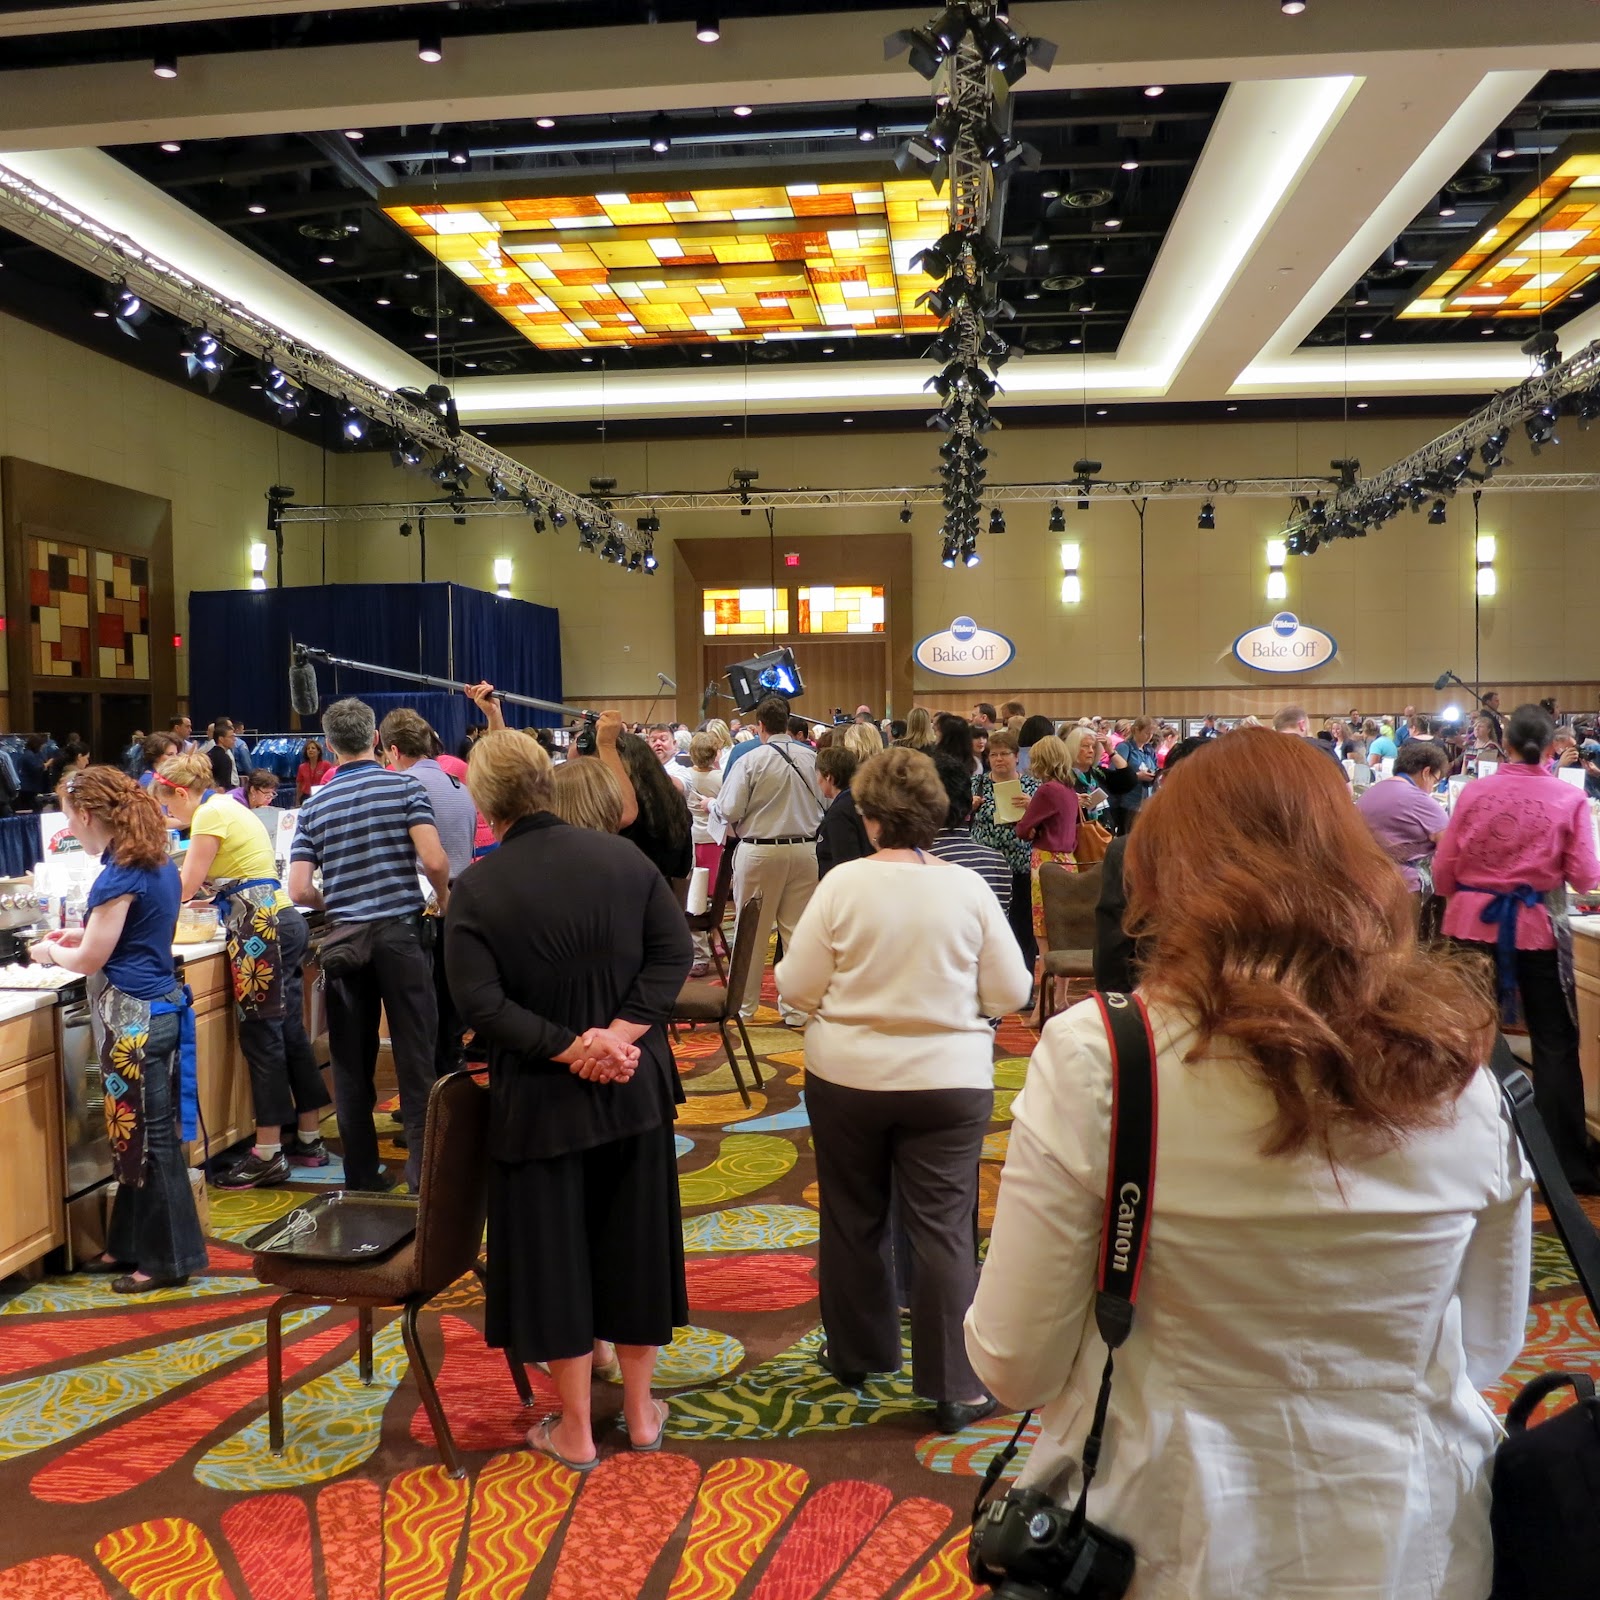
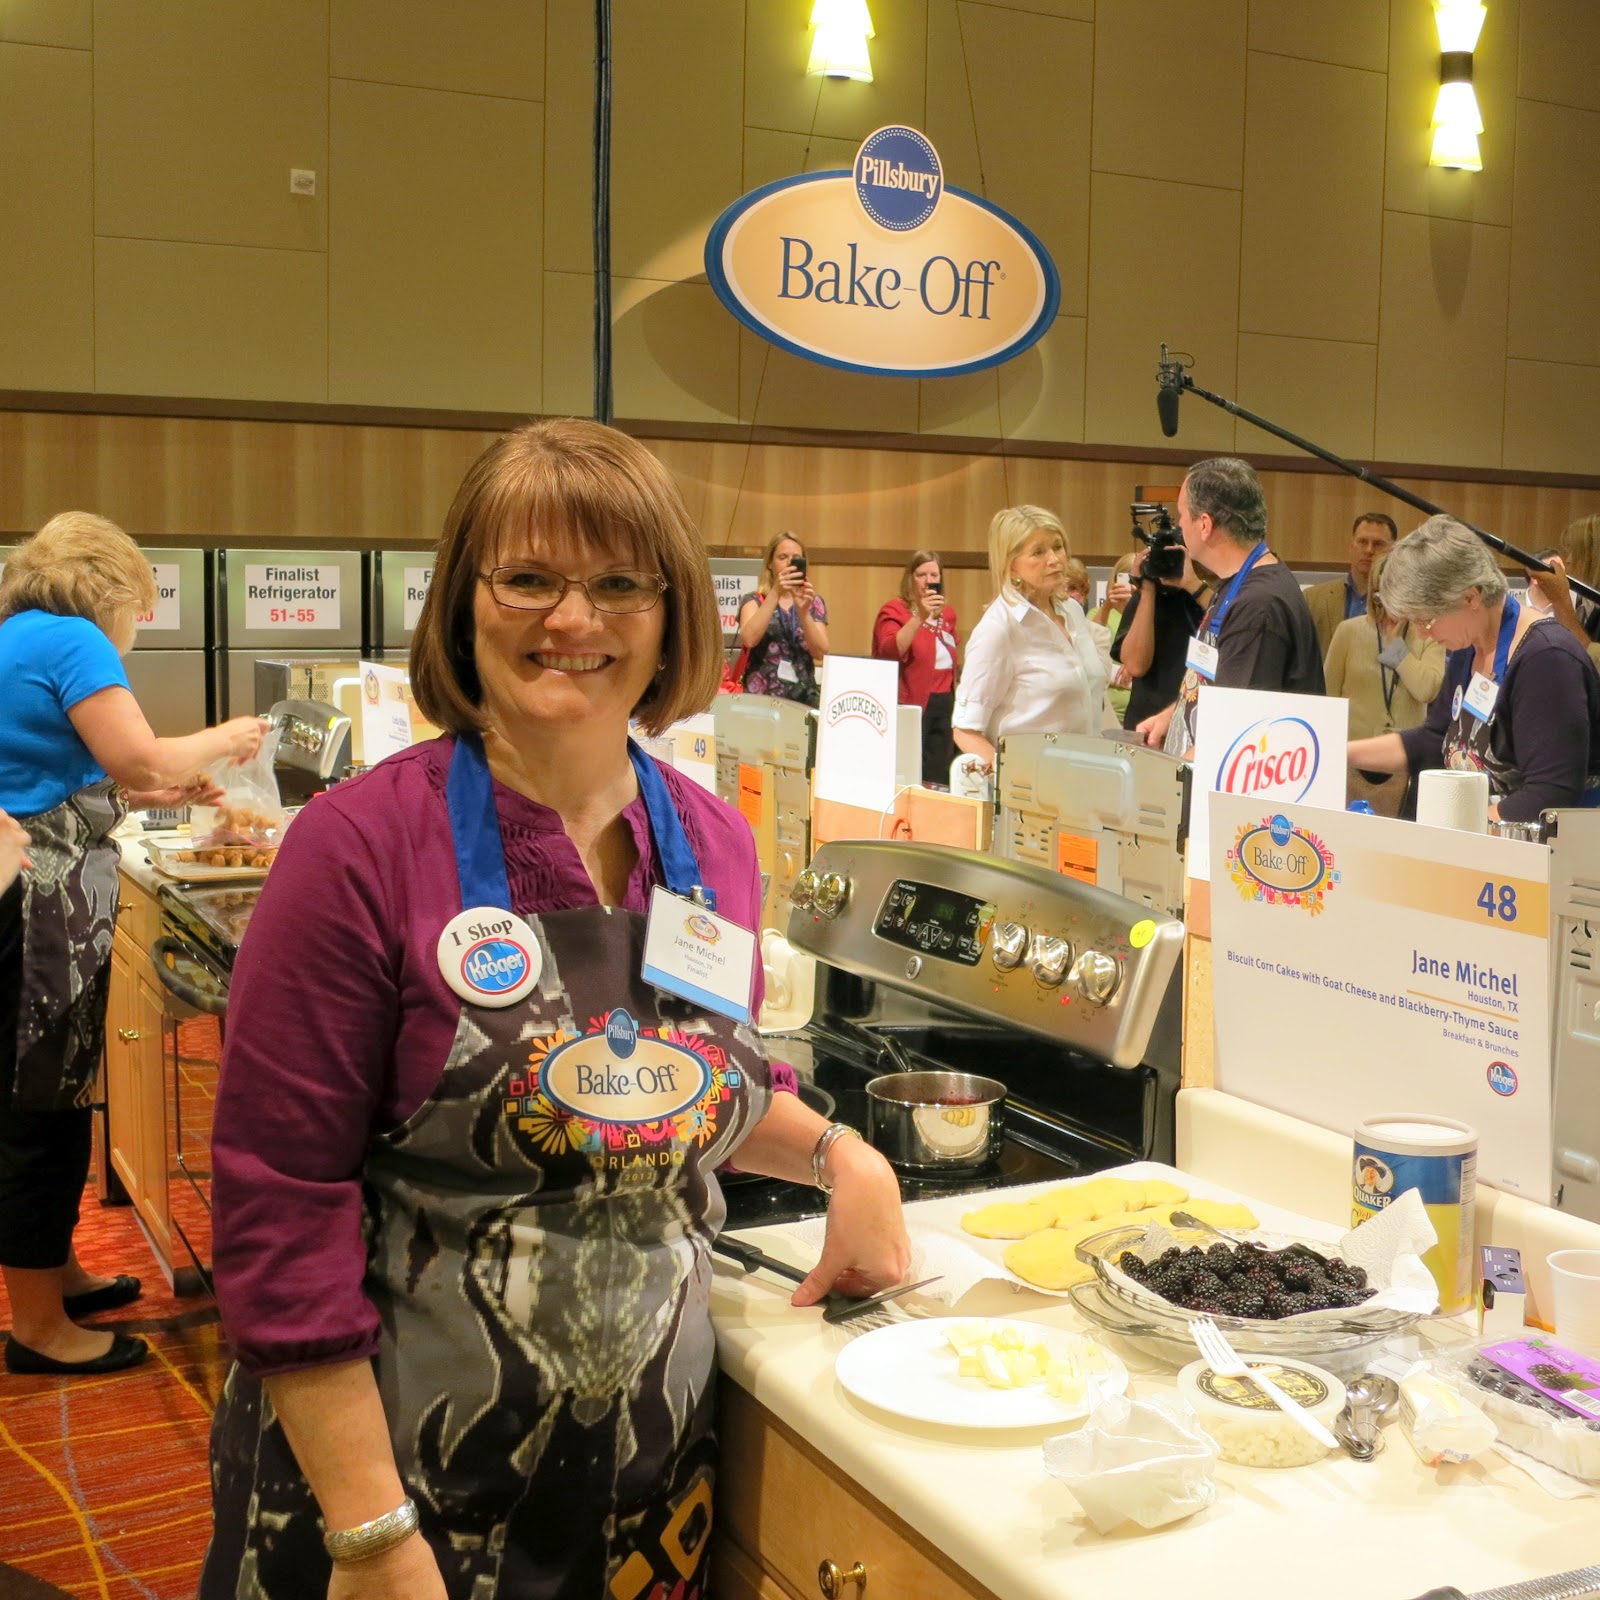
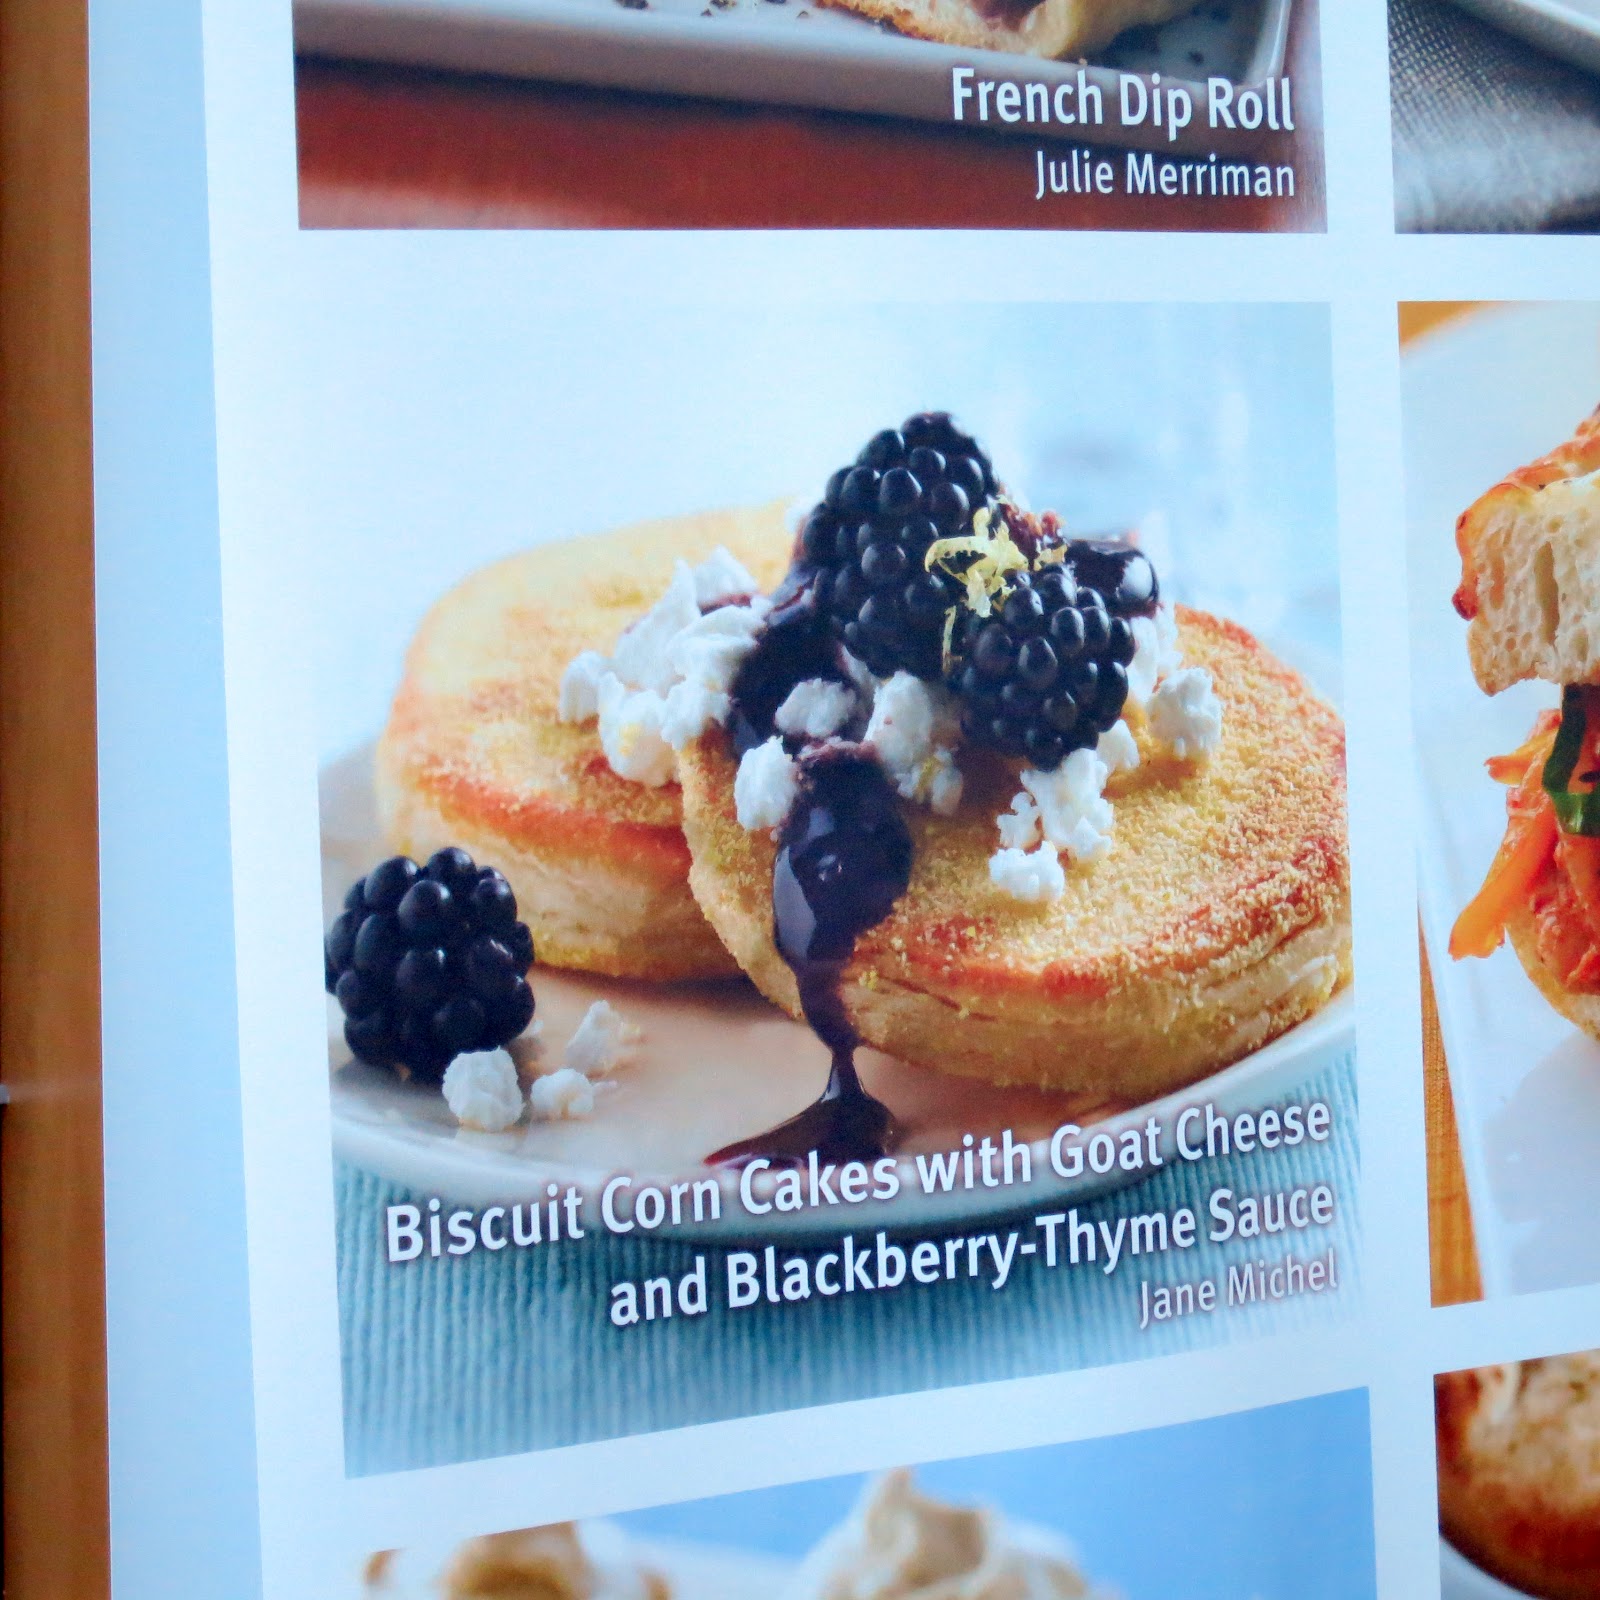
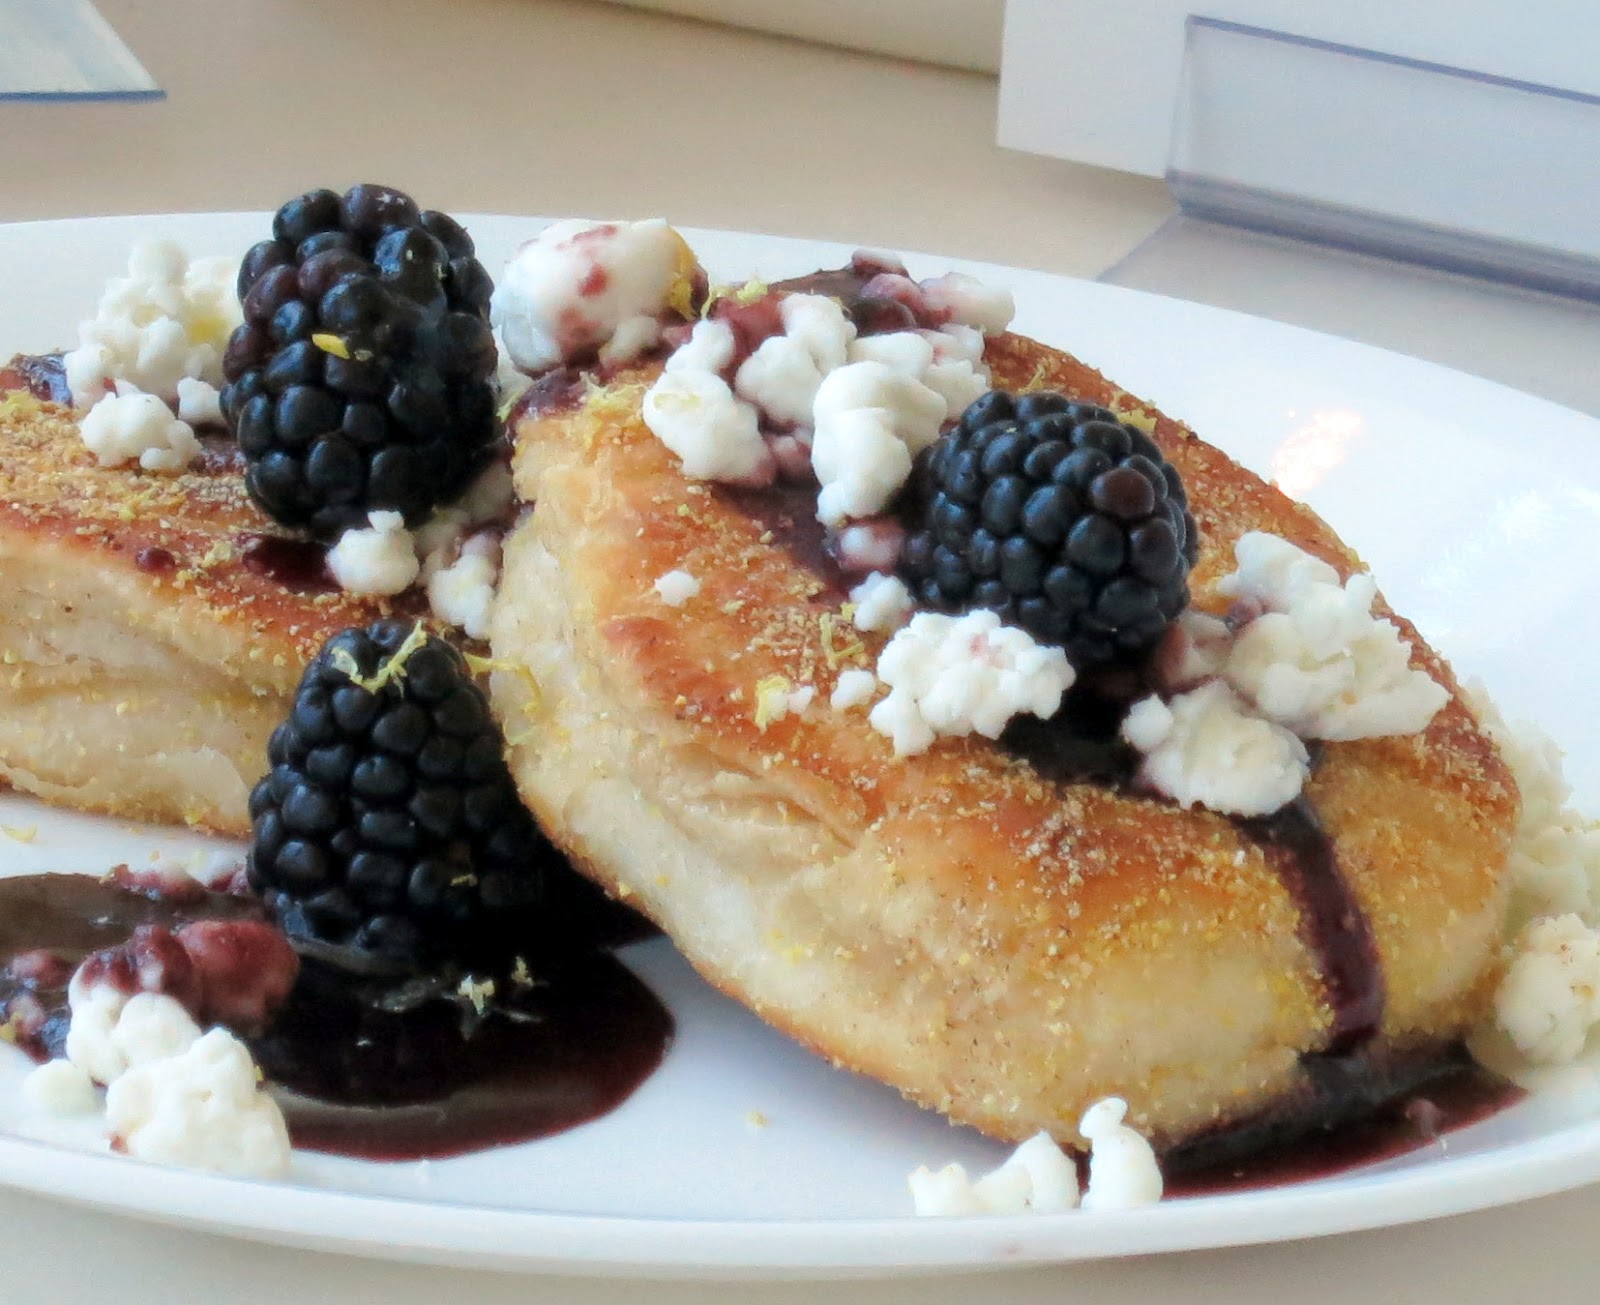
The excitement in the room was so electric!  There was media everywhere and Martha Stewart’s team was walking around with several different crews filming, interviewing and tasting different recipes.  I noticed that the Martha Stewart Show had certain finalists bookmarked and it turns out Mom was one of them.  Martha stopped by several times, tasted Mom’s recipe and took a picture of Mom’s blackberries with Martha’s own personal camera.

 Finalists were given a disposable camera at their stations.  Here is Mom with Martha.

Each finalist had a runner that was there to help them get ingredients or help them with any issues they might have.  Mom really liked her runner, ‘Cody’ and she also made friends with the finalists on either side of her.  She tried Pam’s ‘Loaded Nacho Burgers‘ and said I needed to link to them on the blog because they are SO good……Mom said she’s actually going to make them tonight for dinner!  So if you would like to check out the recipe for ‘Loaded Nacho Burgers’, click HERE.

Caspian Finn ~ the little Doughboy

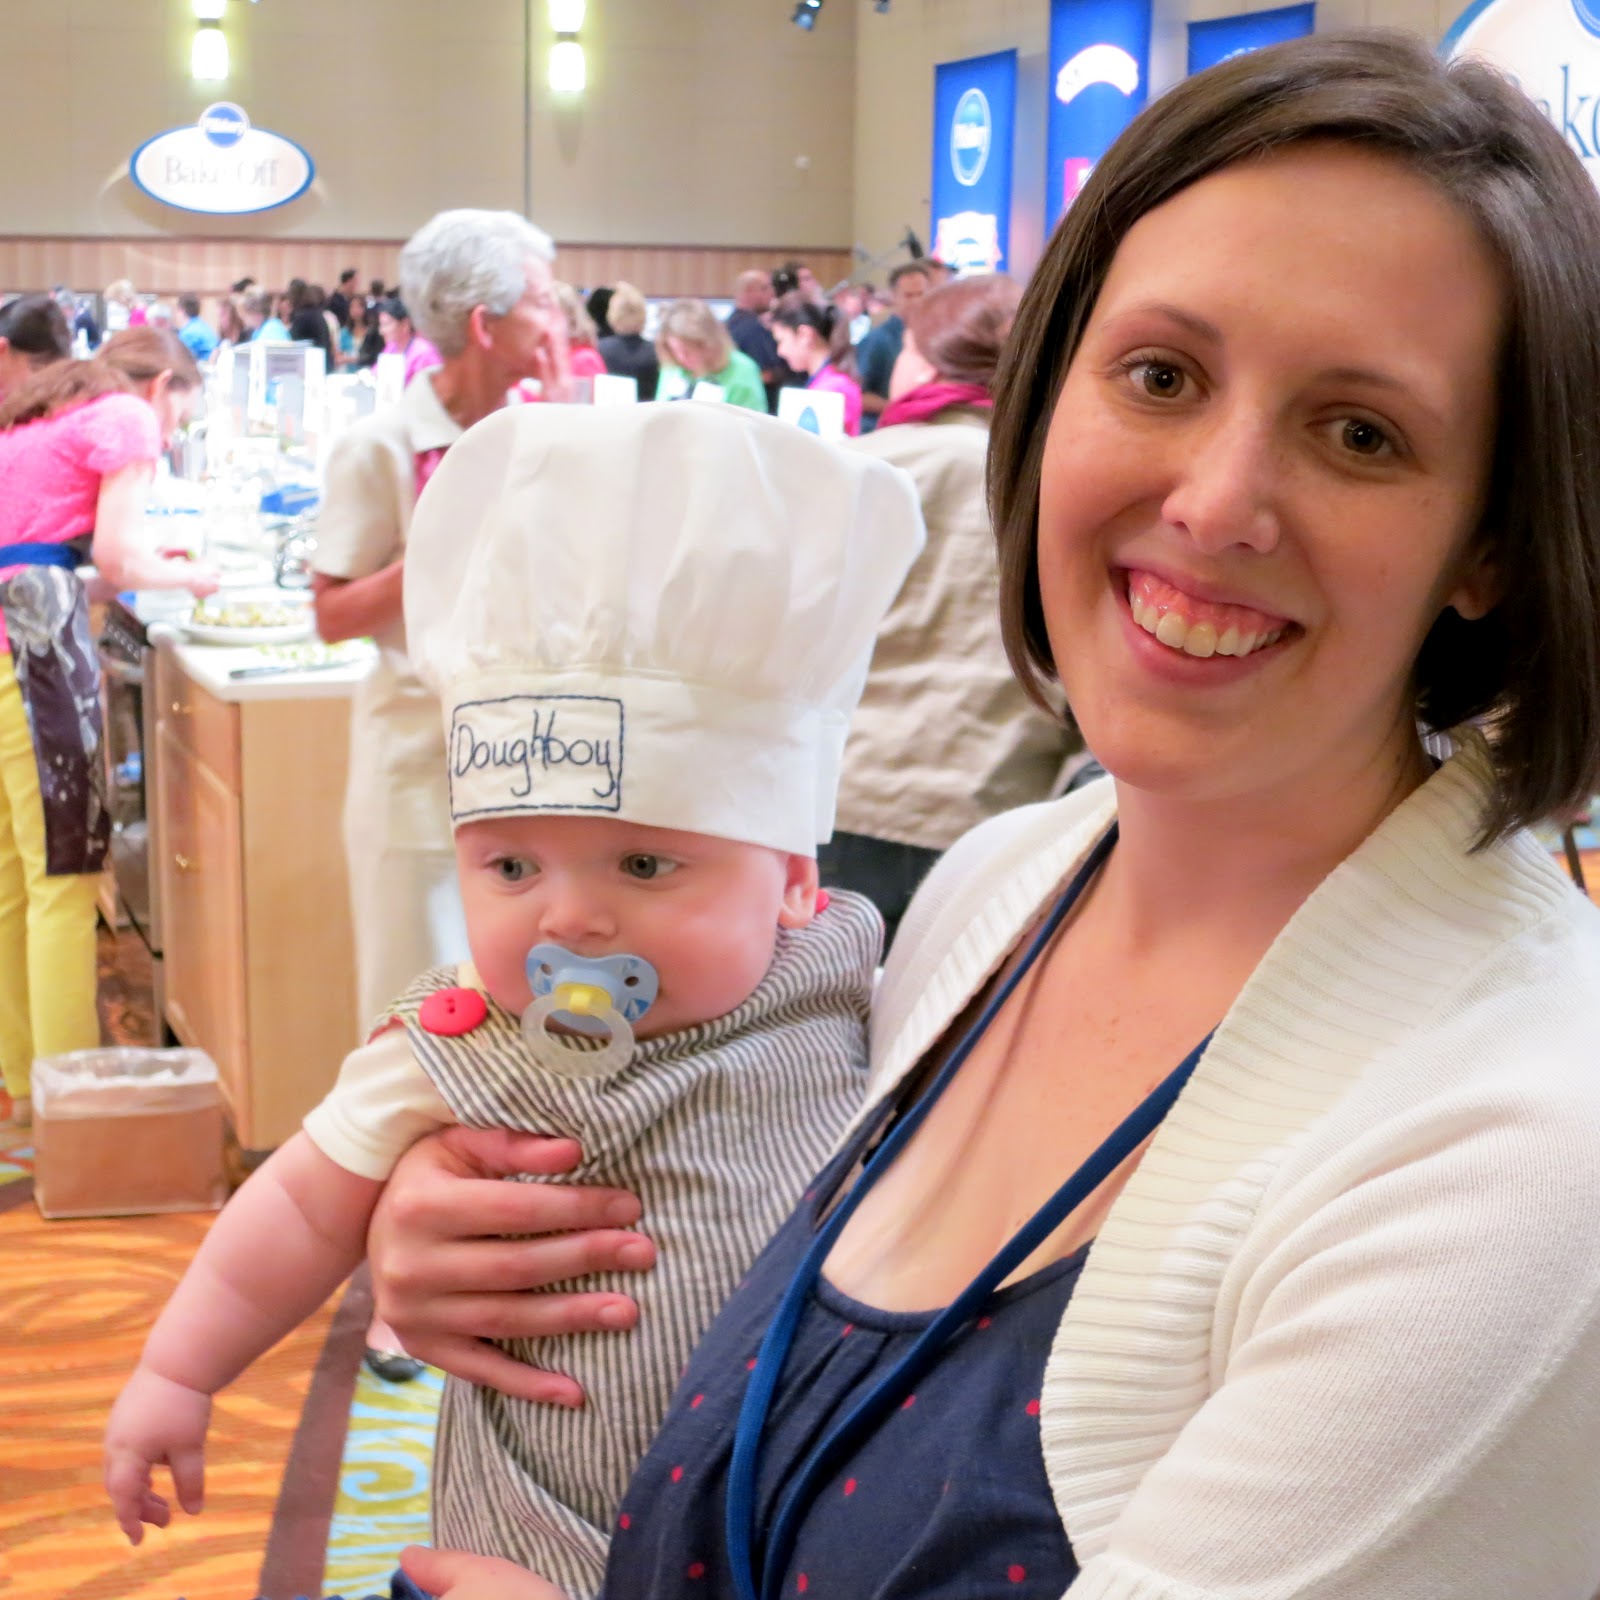
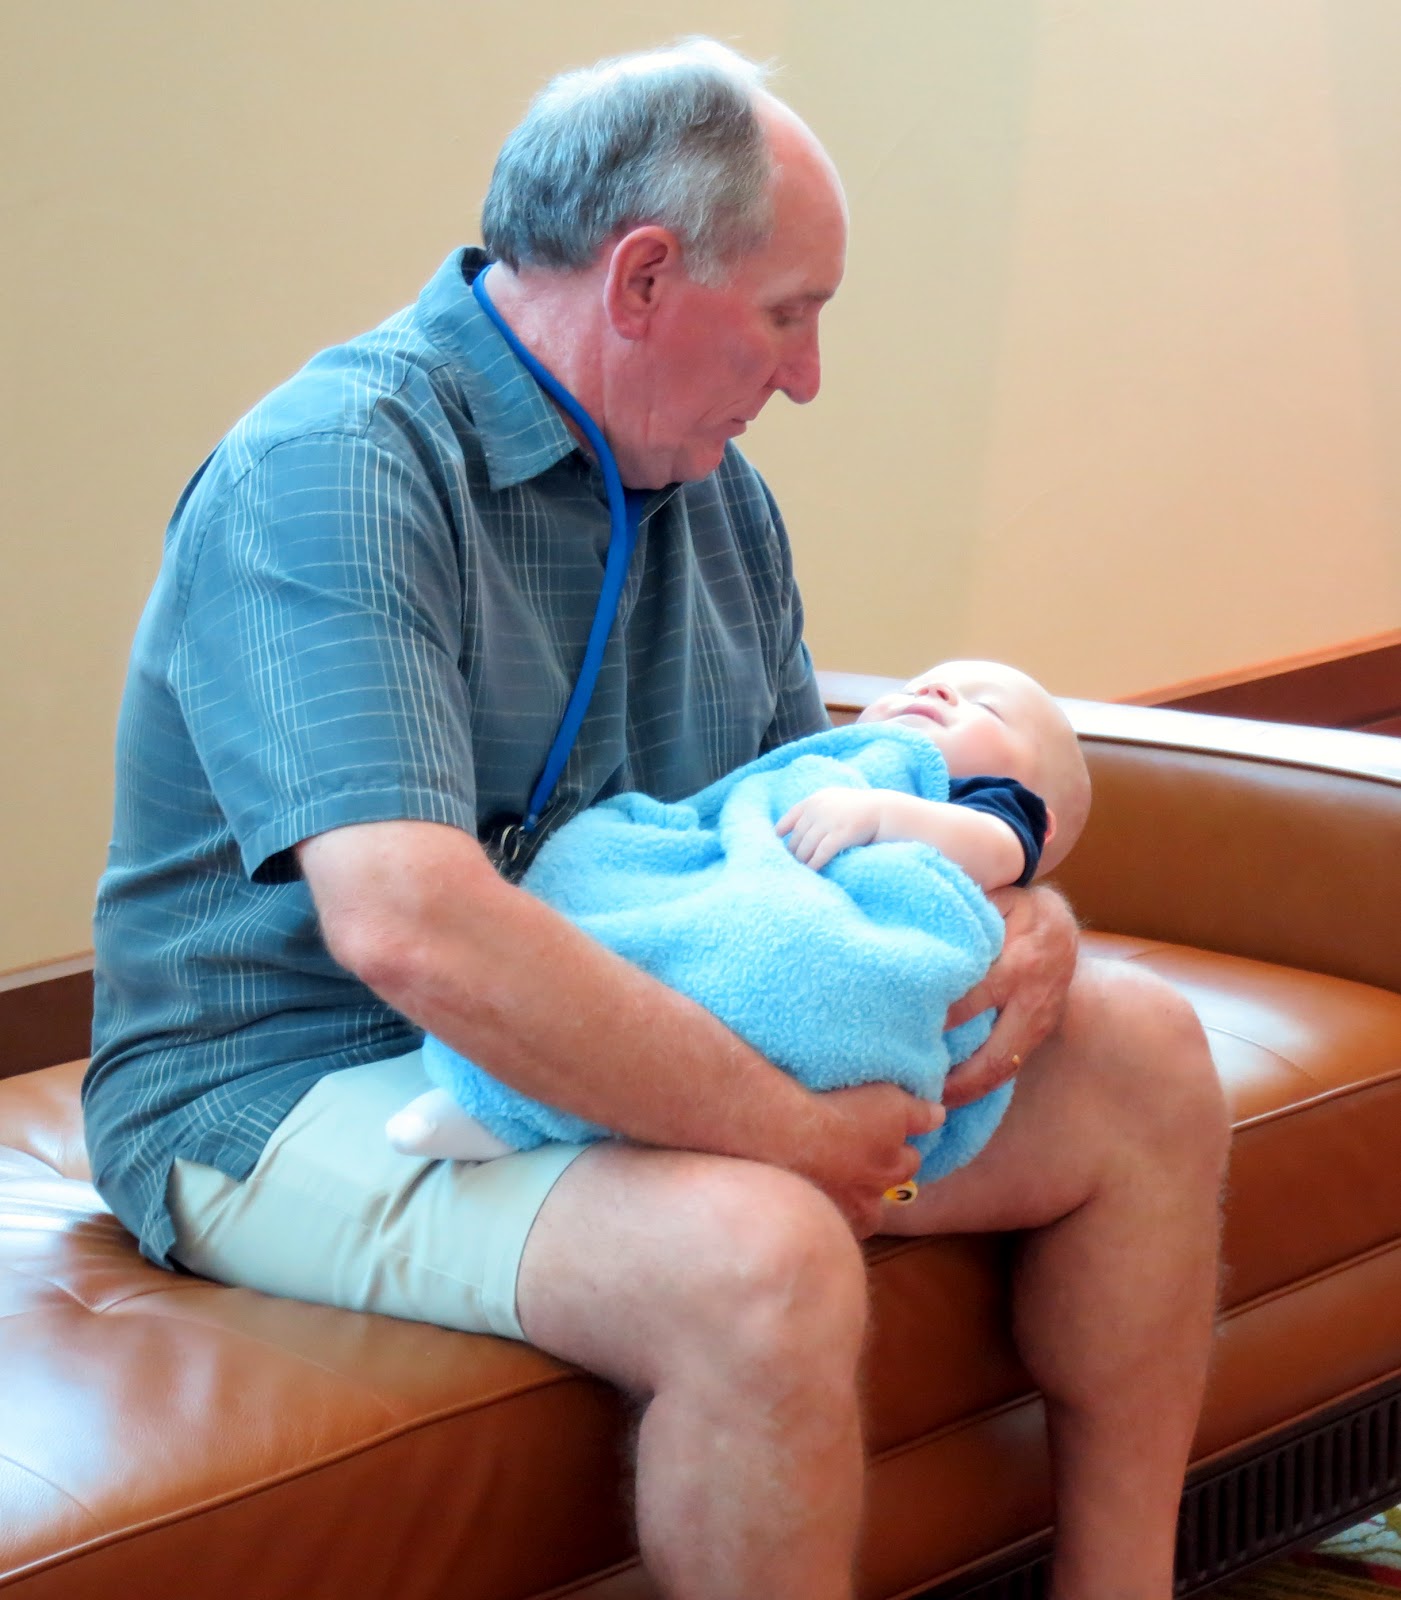
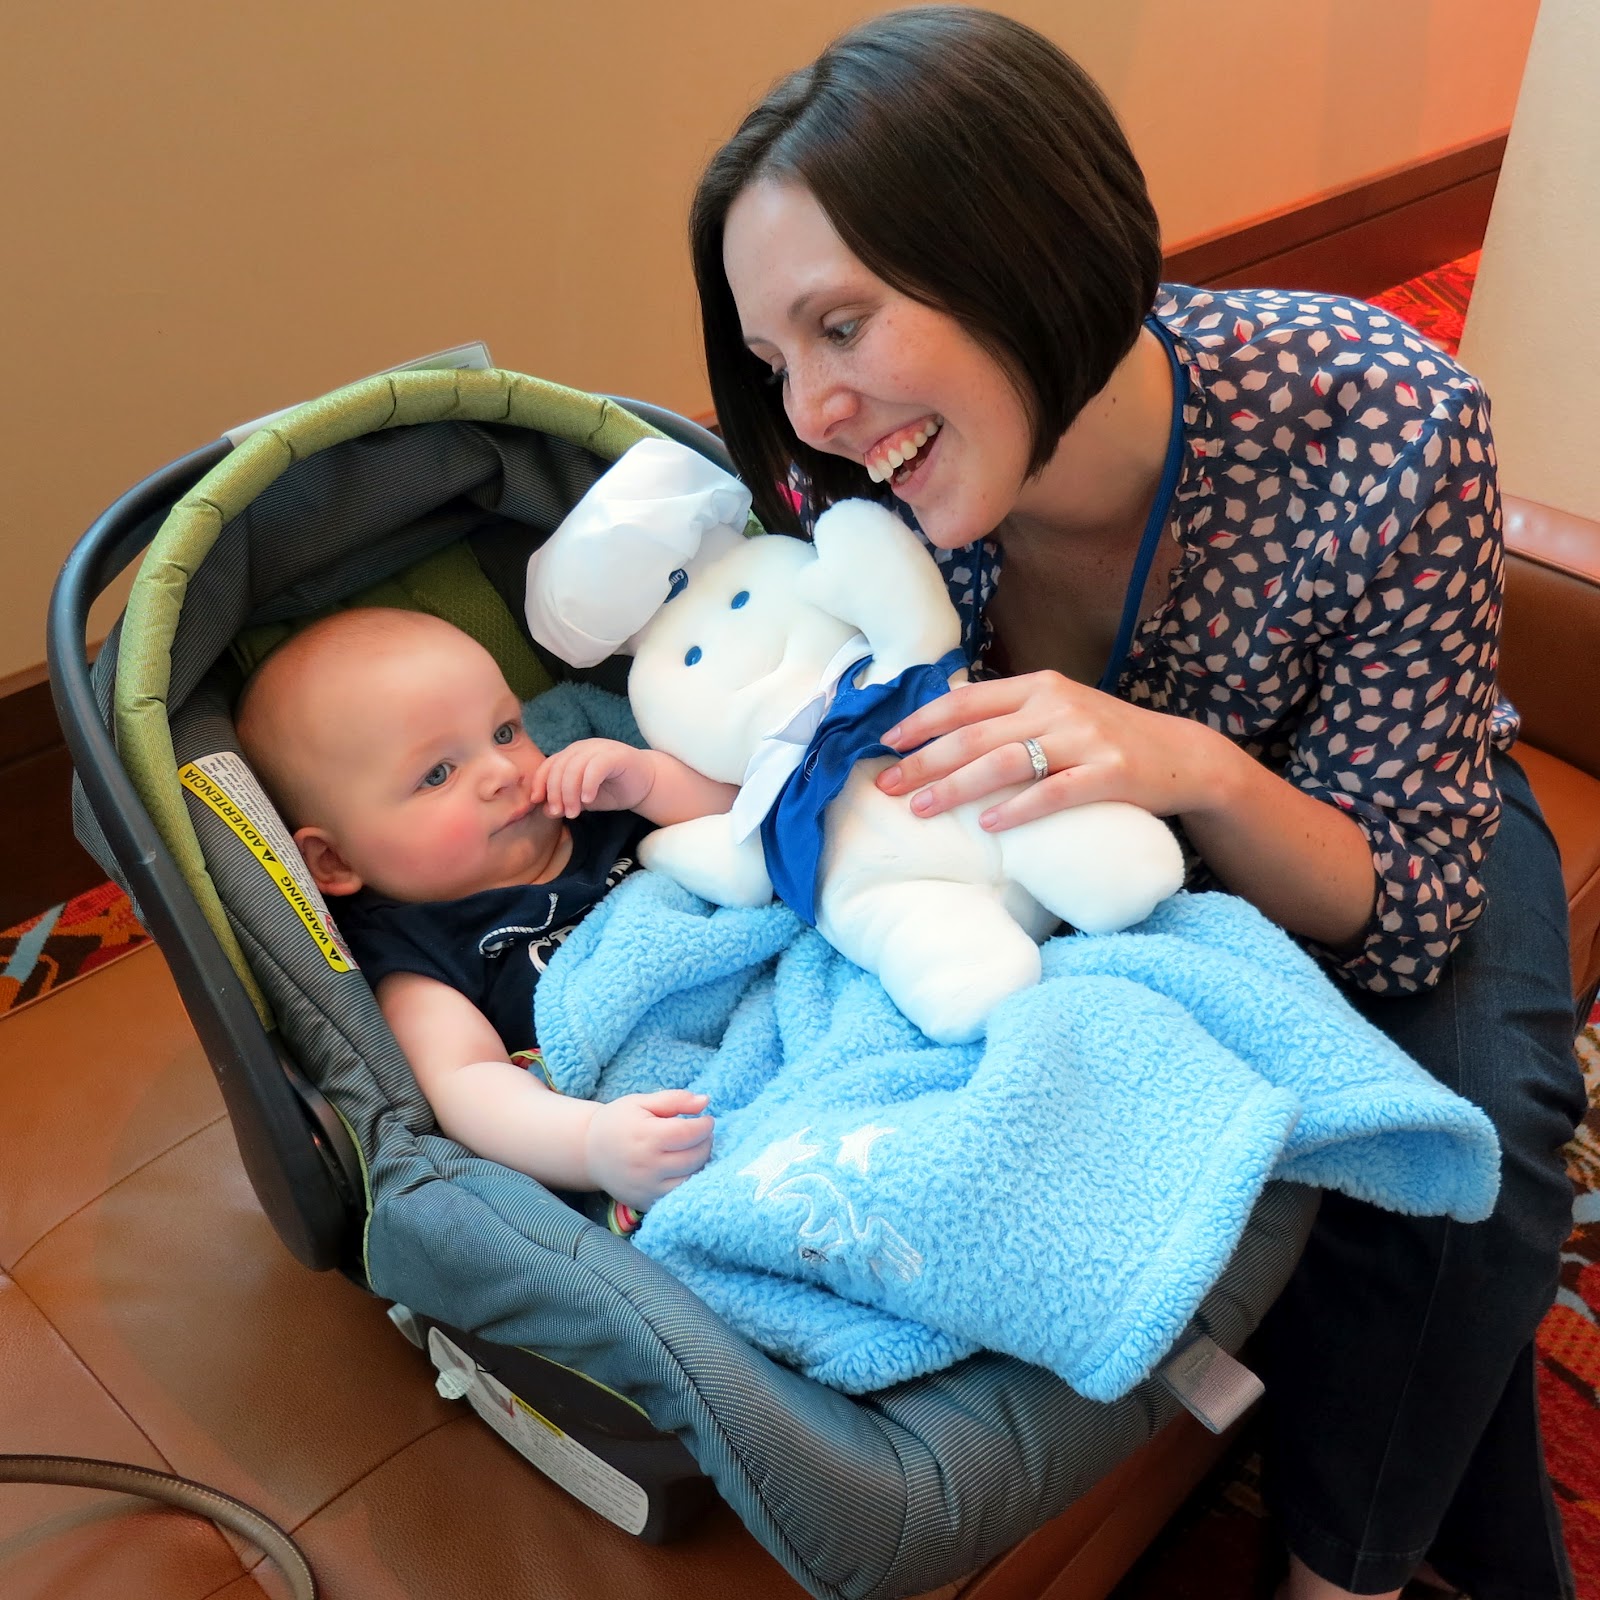
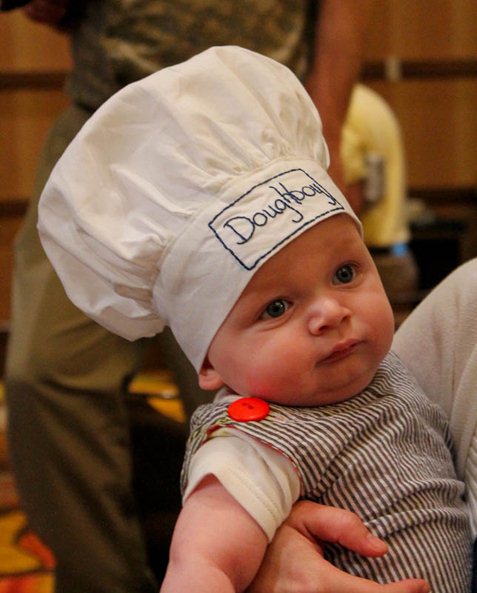
My little man, Caspian Finn, slept through the first several hours of the Bake-Off in his stroller (he was a little under the weather).  Once he finally woke up, I took him out of the stroller and put on his Doughboy hat that I made for him.  I made a basic chef hat in white and embroidered ‘Doughboy’ on the front.  And let me tell you………Caspian was a HUGE hit!  He had media swarming him……Martha Stewart’s crew, Pillsbury, General Mills, Better Homes and Gardens, ect……The President of Pillsbury even asked me to take him over to have his picture taken with the real Doughboy.  We had so much fun!

They even blogged about us (Mom, Caspian and I) on Pillsbury.com about us having three generations at the Bake-Off!  
Click HERE to read the article on the Pillsbury website.

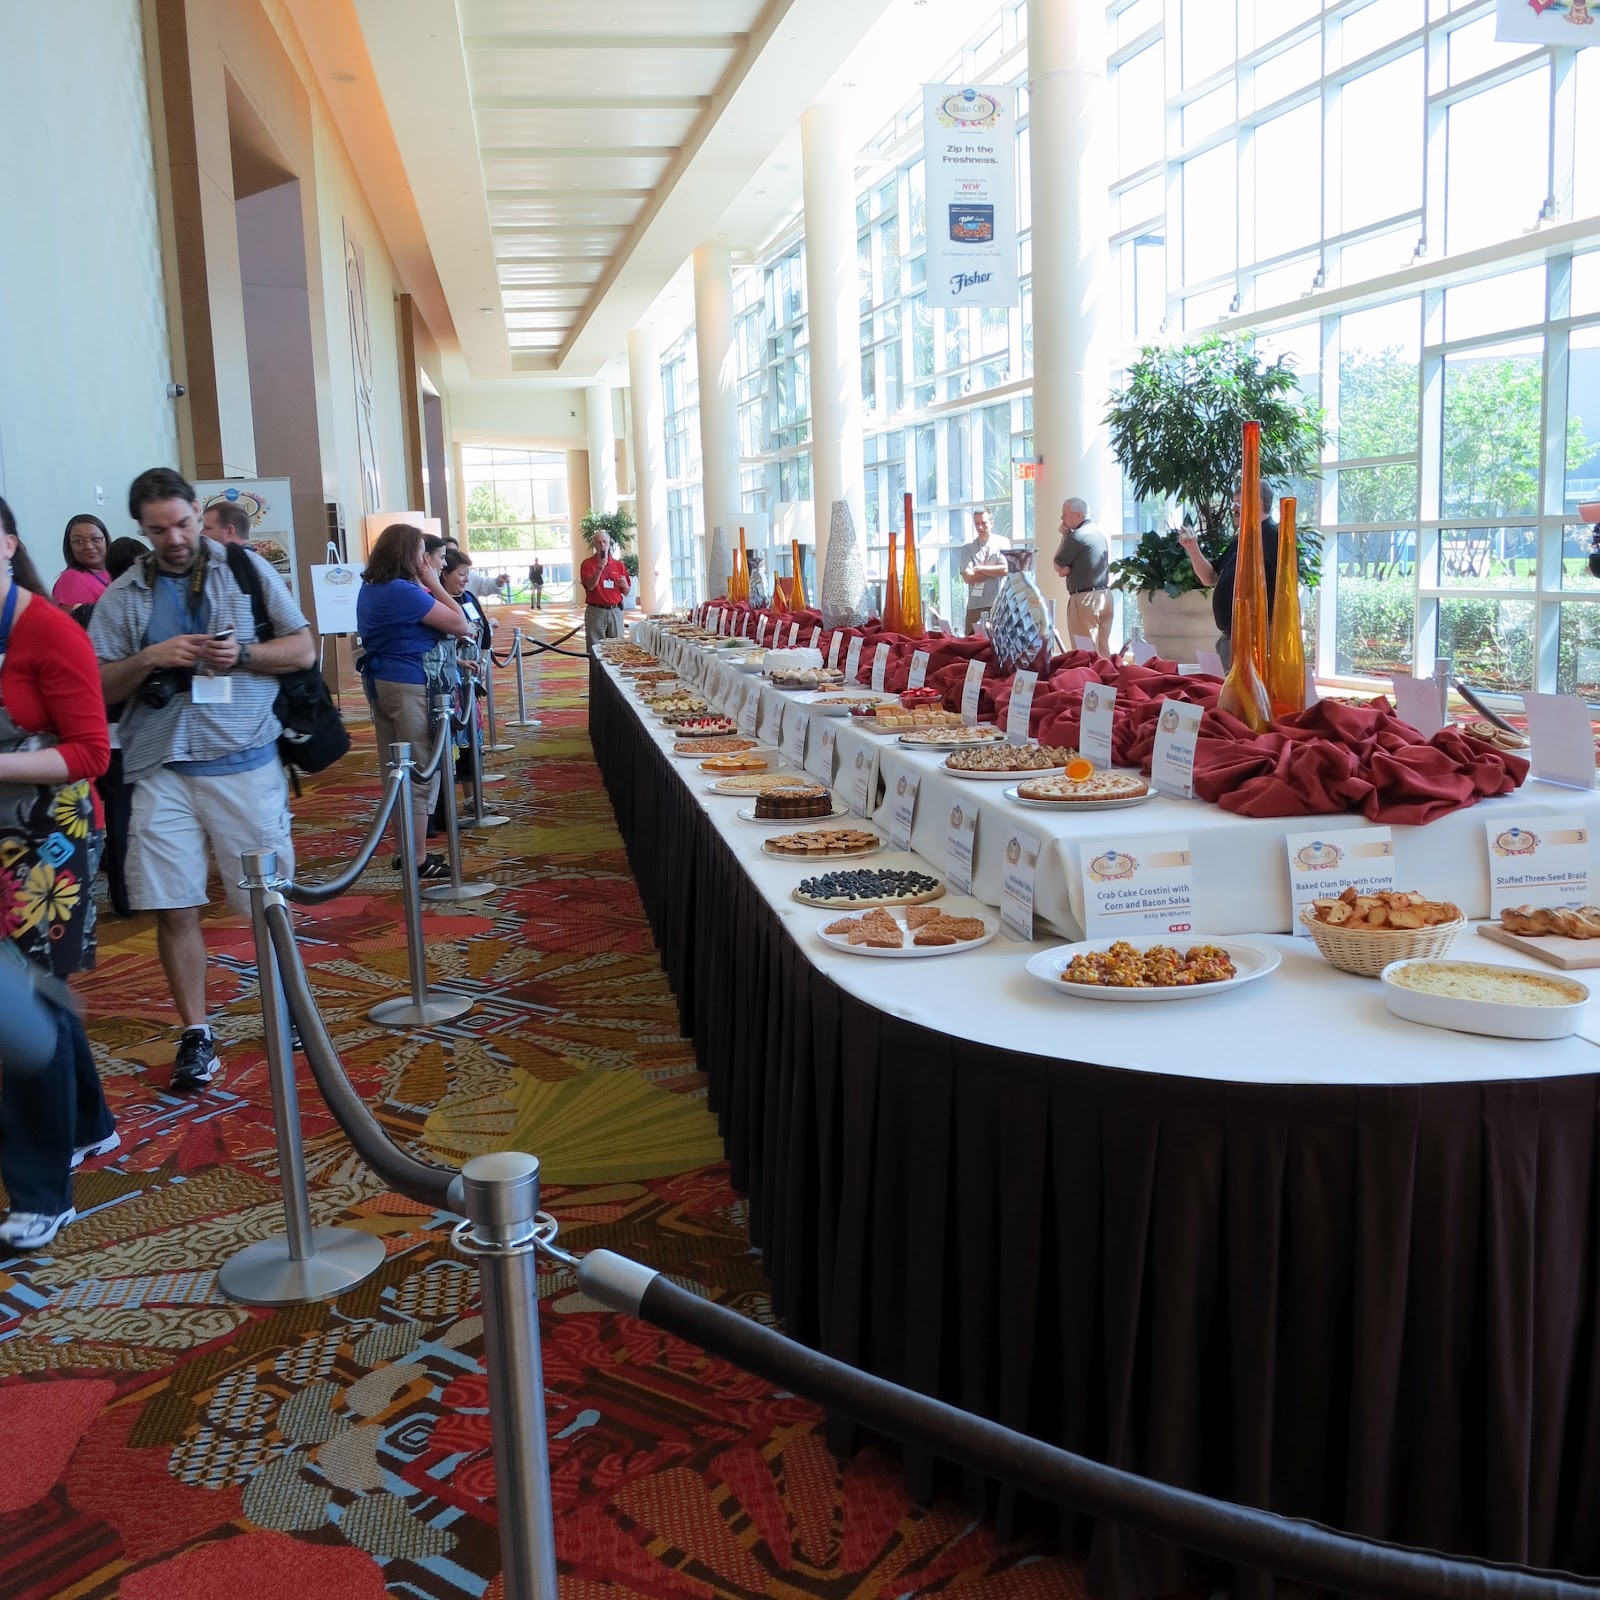
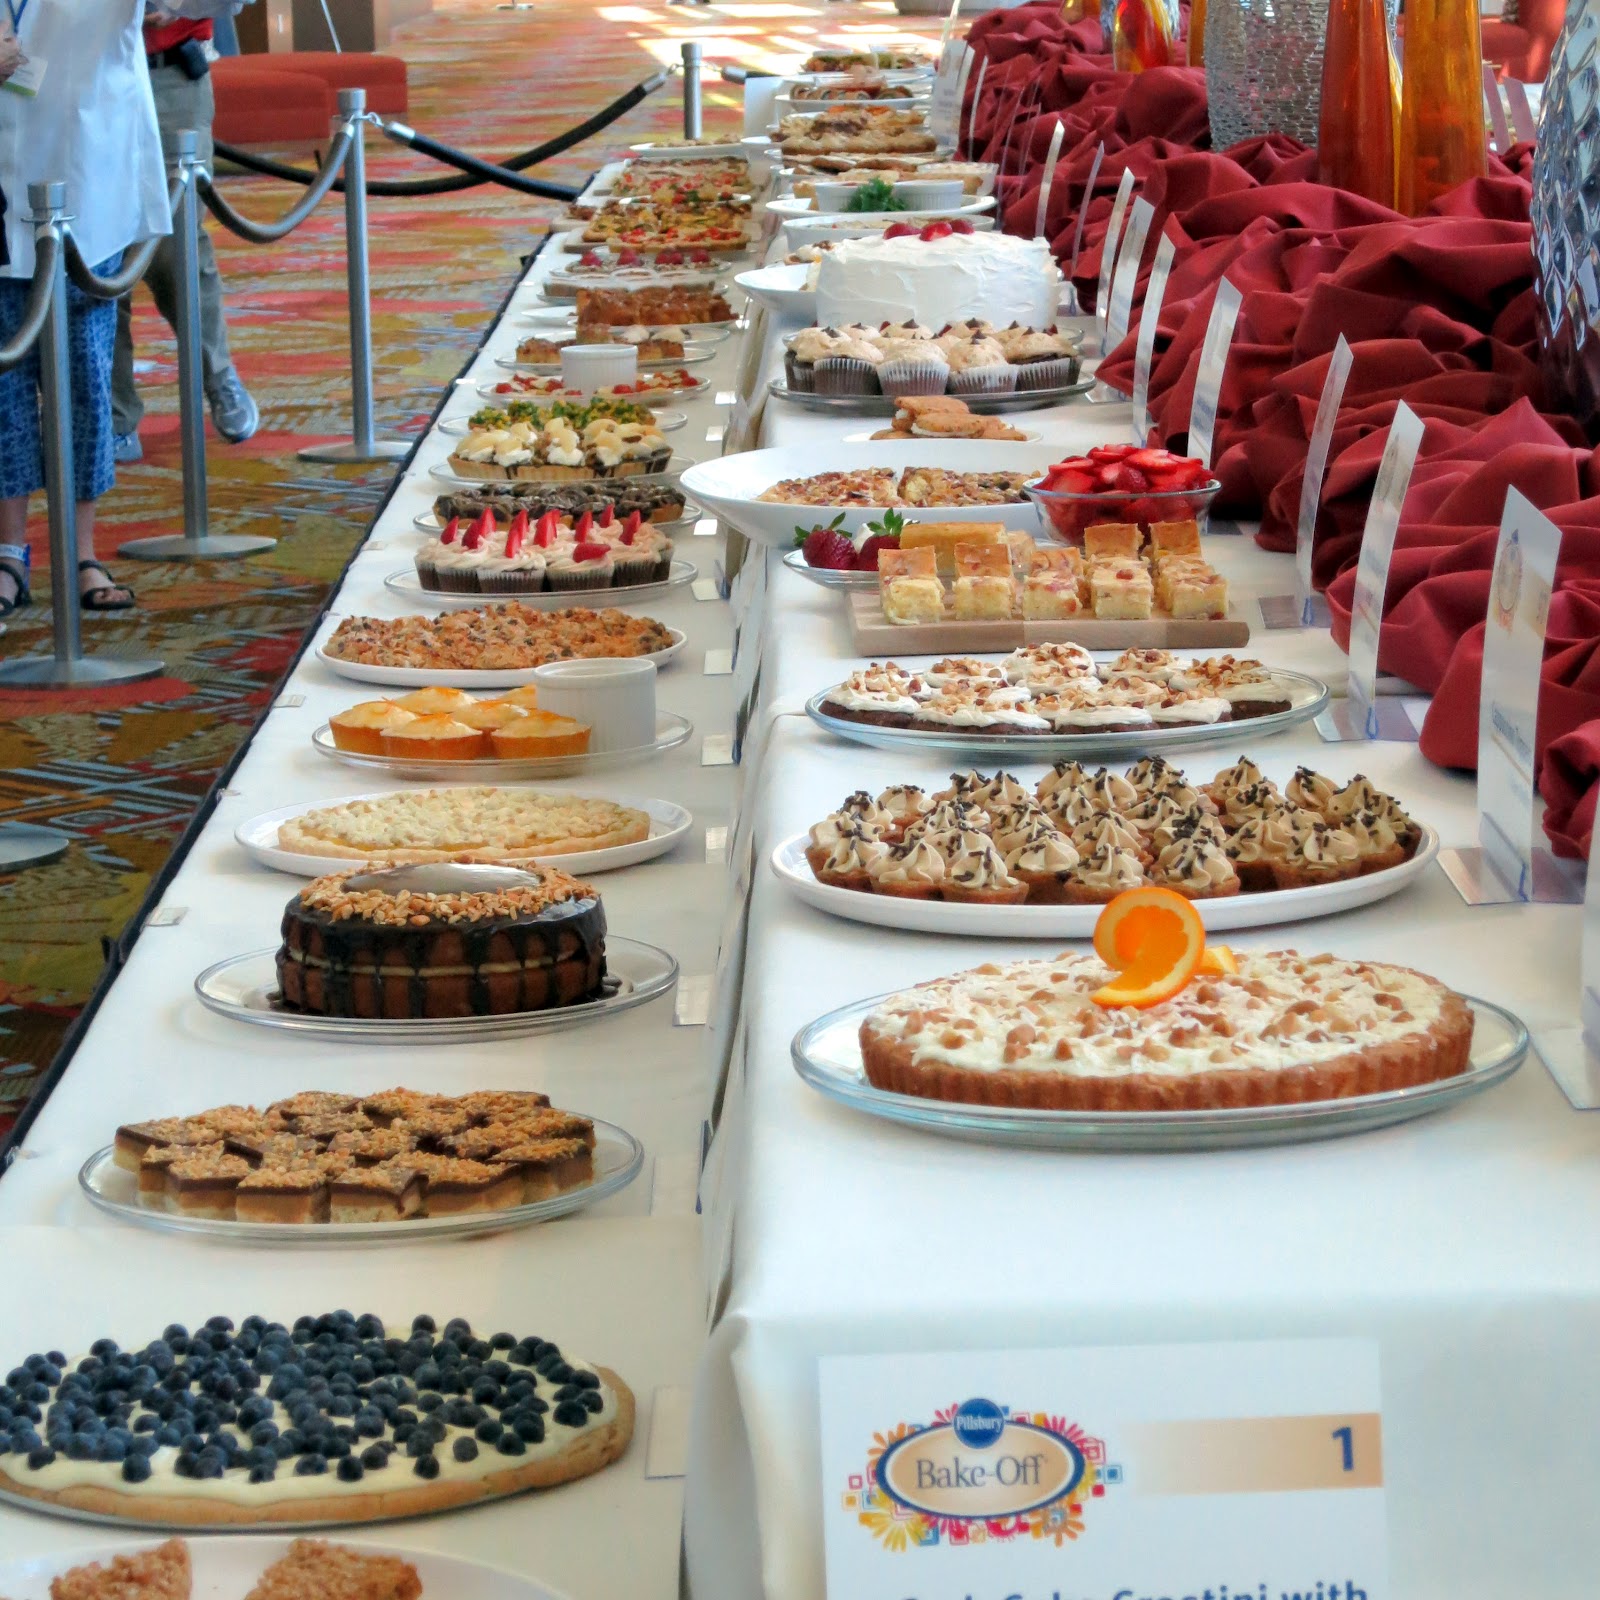
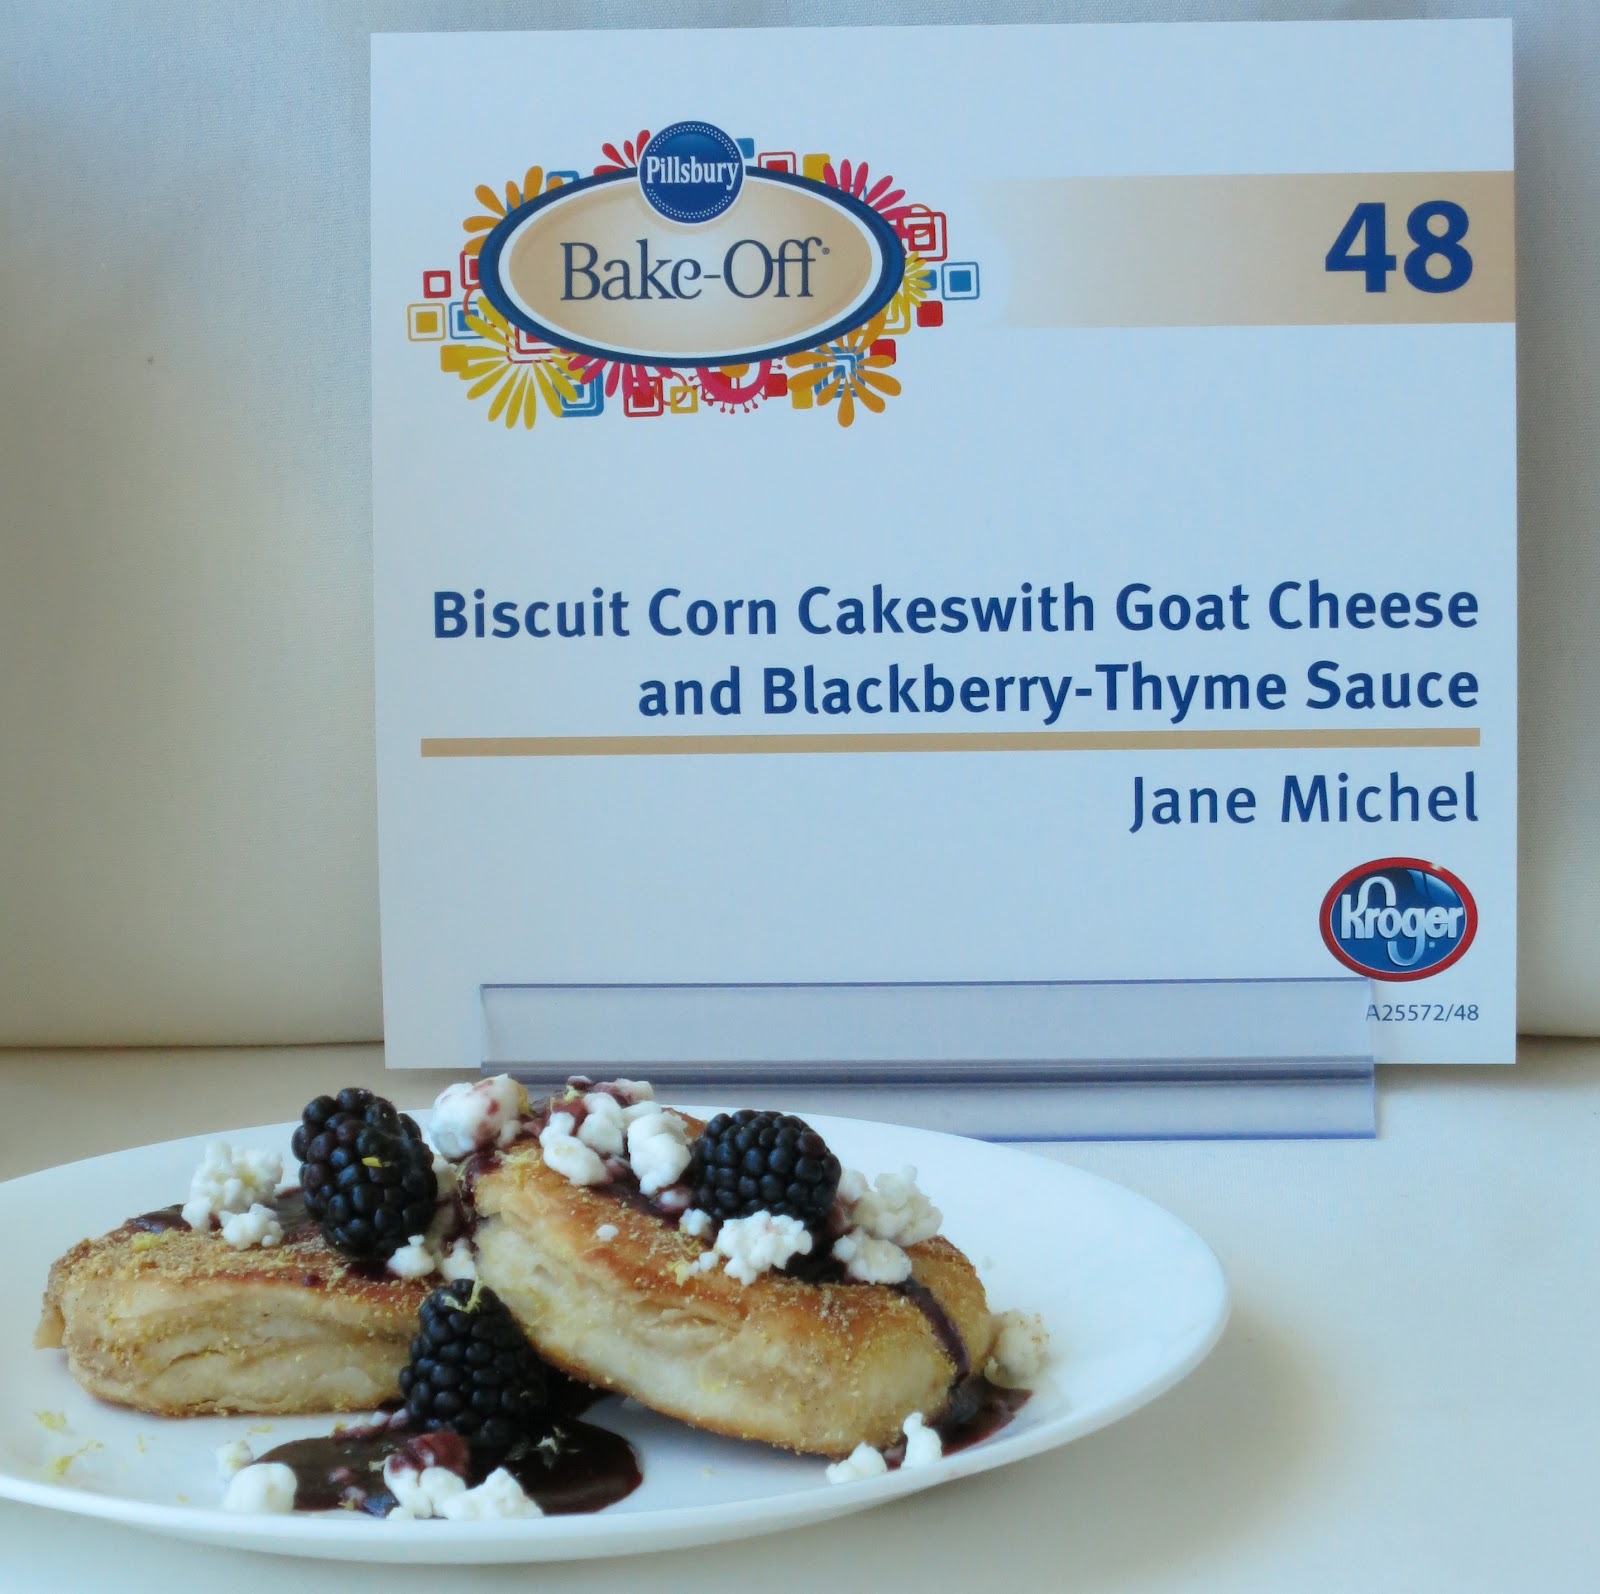
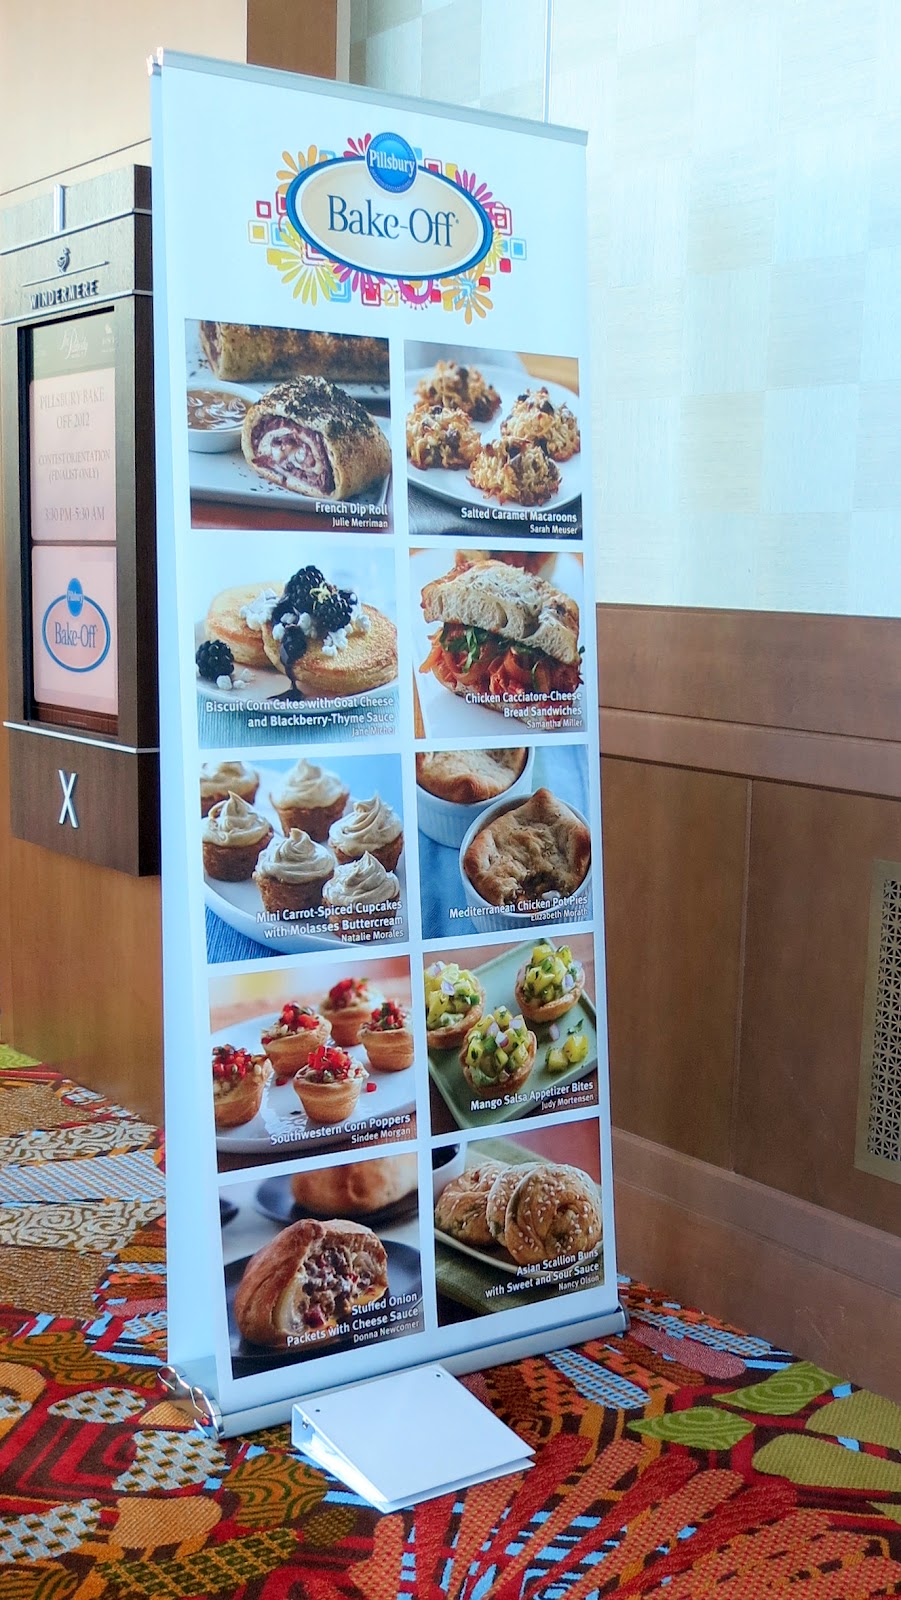
After the competition was complete, we were able to view all the different recipes on the display table.  Mom had obviously had an amazing time and was on such a high from everything.

Mom, Pepo and Caspian

We spent some time that afternoon relaxing and talking about her experience.  That evening was the celebration dinner where they had transformed one of the ballrooms into a night club.  It was really fun and they had all kinds of stations preparing different foods such as Pad Thai, Lamb and Buffalo Sliders, Shrimp and Pork Quesadillas and much more.  We didn’t stay too long because they had an awesome band playing, but it was too loud for my little man.

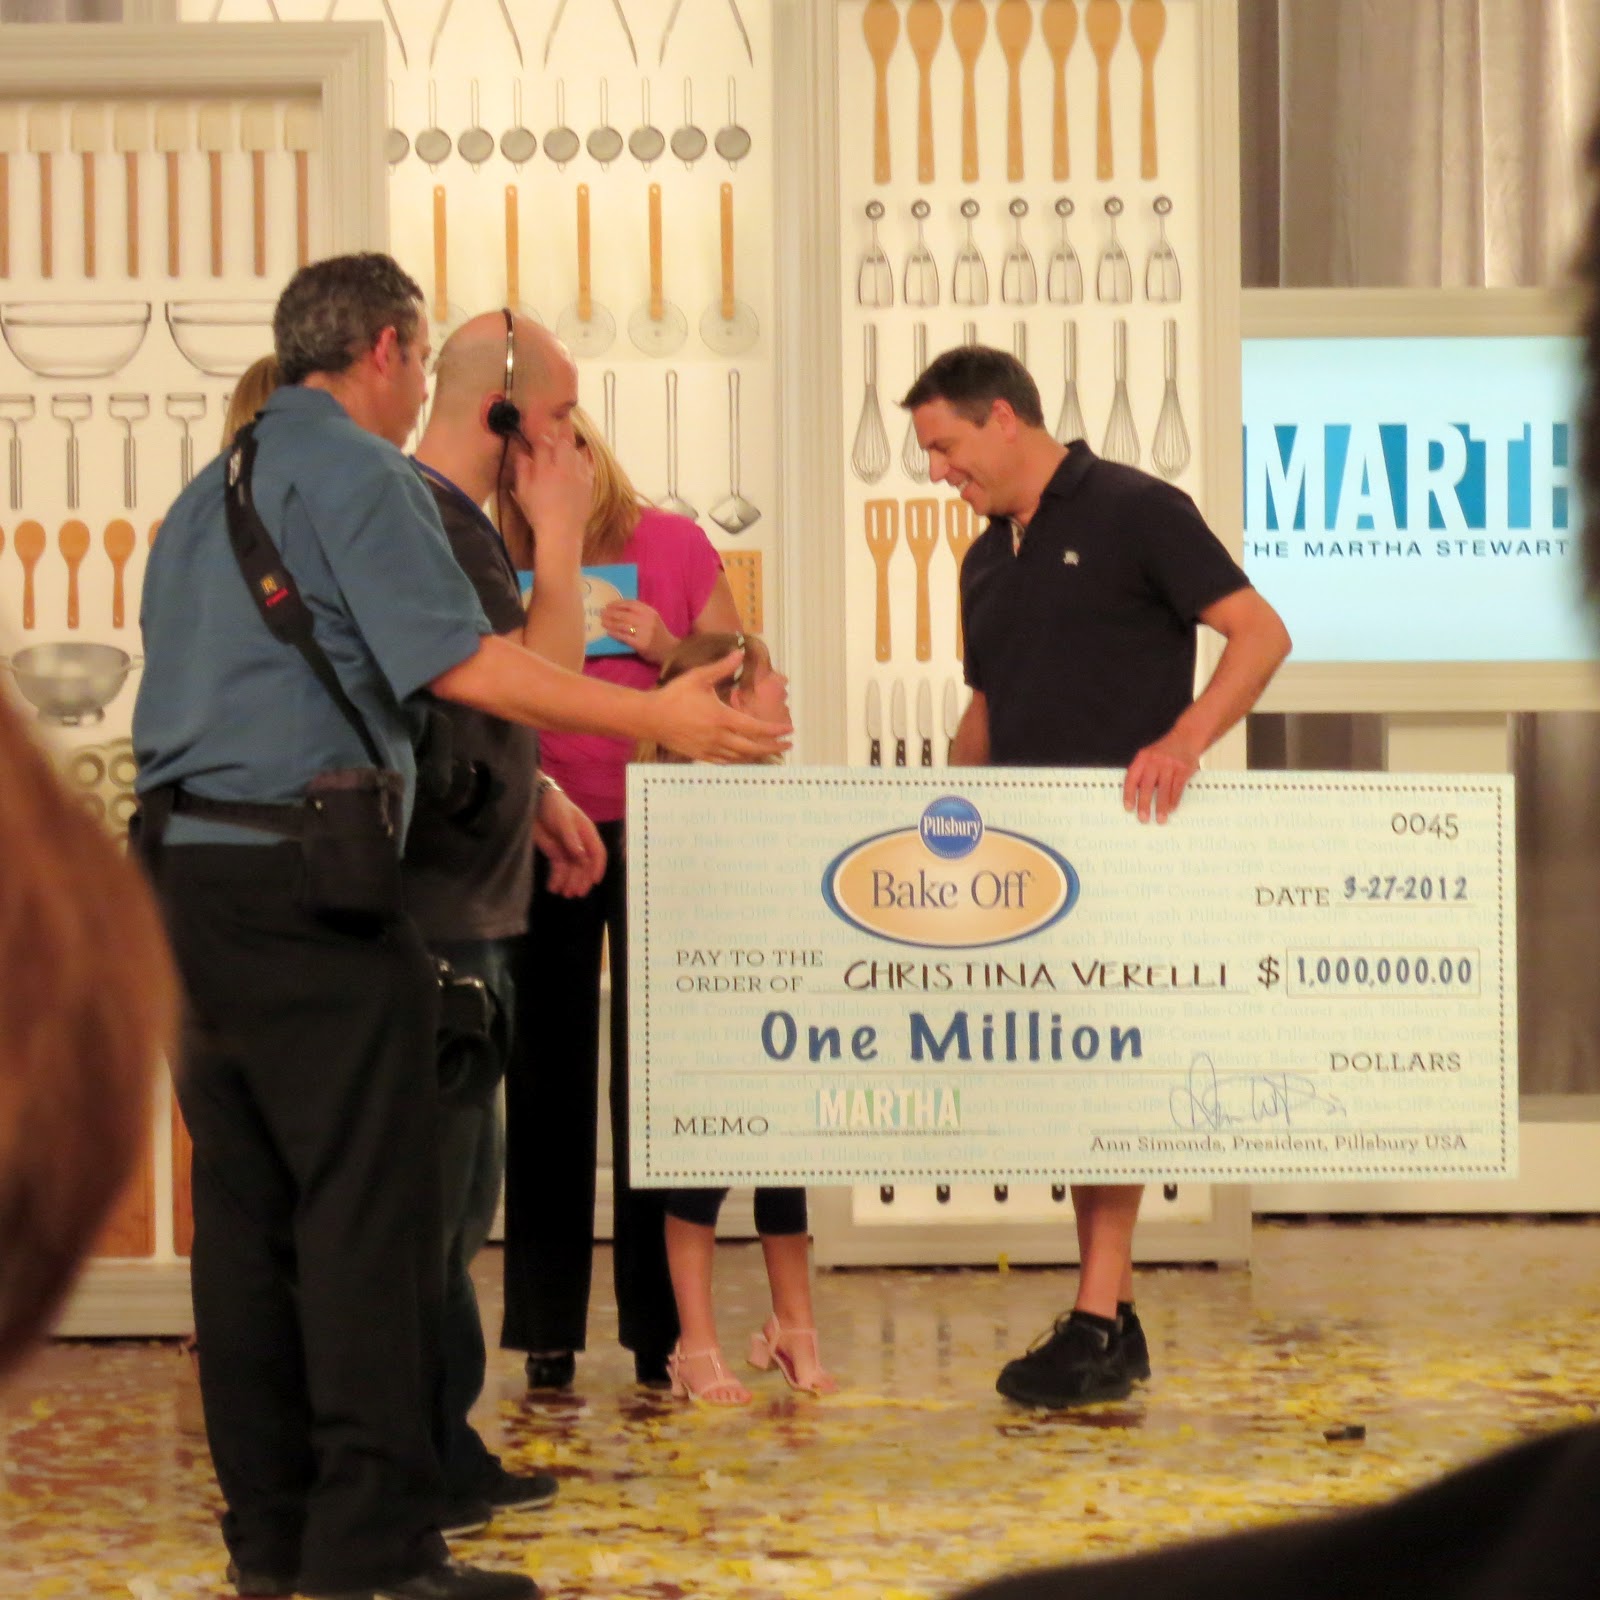
The next morning we went to breakfast and got ready for the Martha Stewart Show.  The Martha Show set was set up in one of the ballrooms and the show was broadcast live from the Peabody hotel and aired on the Hallmark Channel.  The whole show was about the Bake-Off Contest.  And while Mom did not win any of the prizes we saw her and her recipe in the television footage and Caspian and I were featured on the show as well!!  Pretty cool, if I do say so myself.

Click on the video above to see Mom’s recipe as well as Caspian and I in the Bake-Off highlights that were part of the Martha Stewart show!

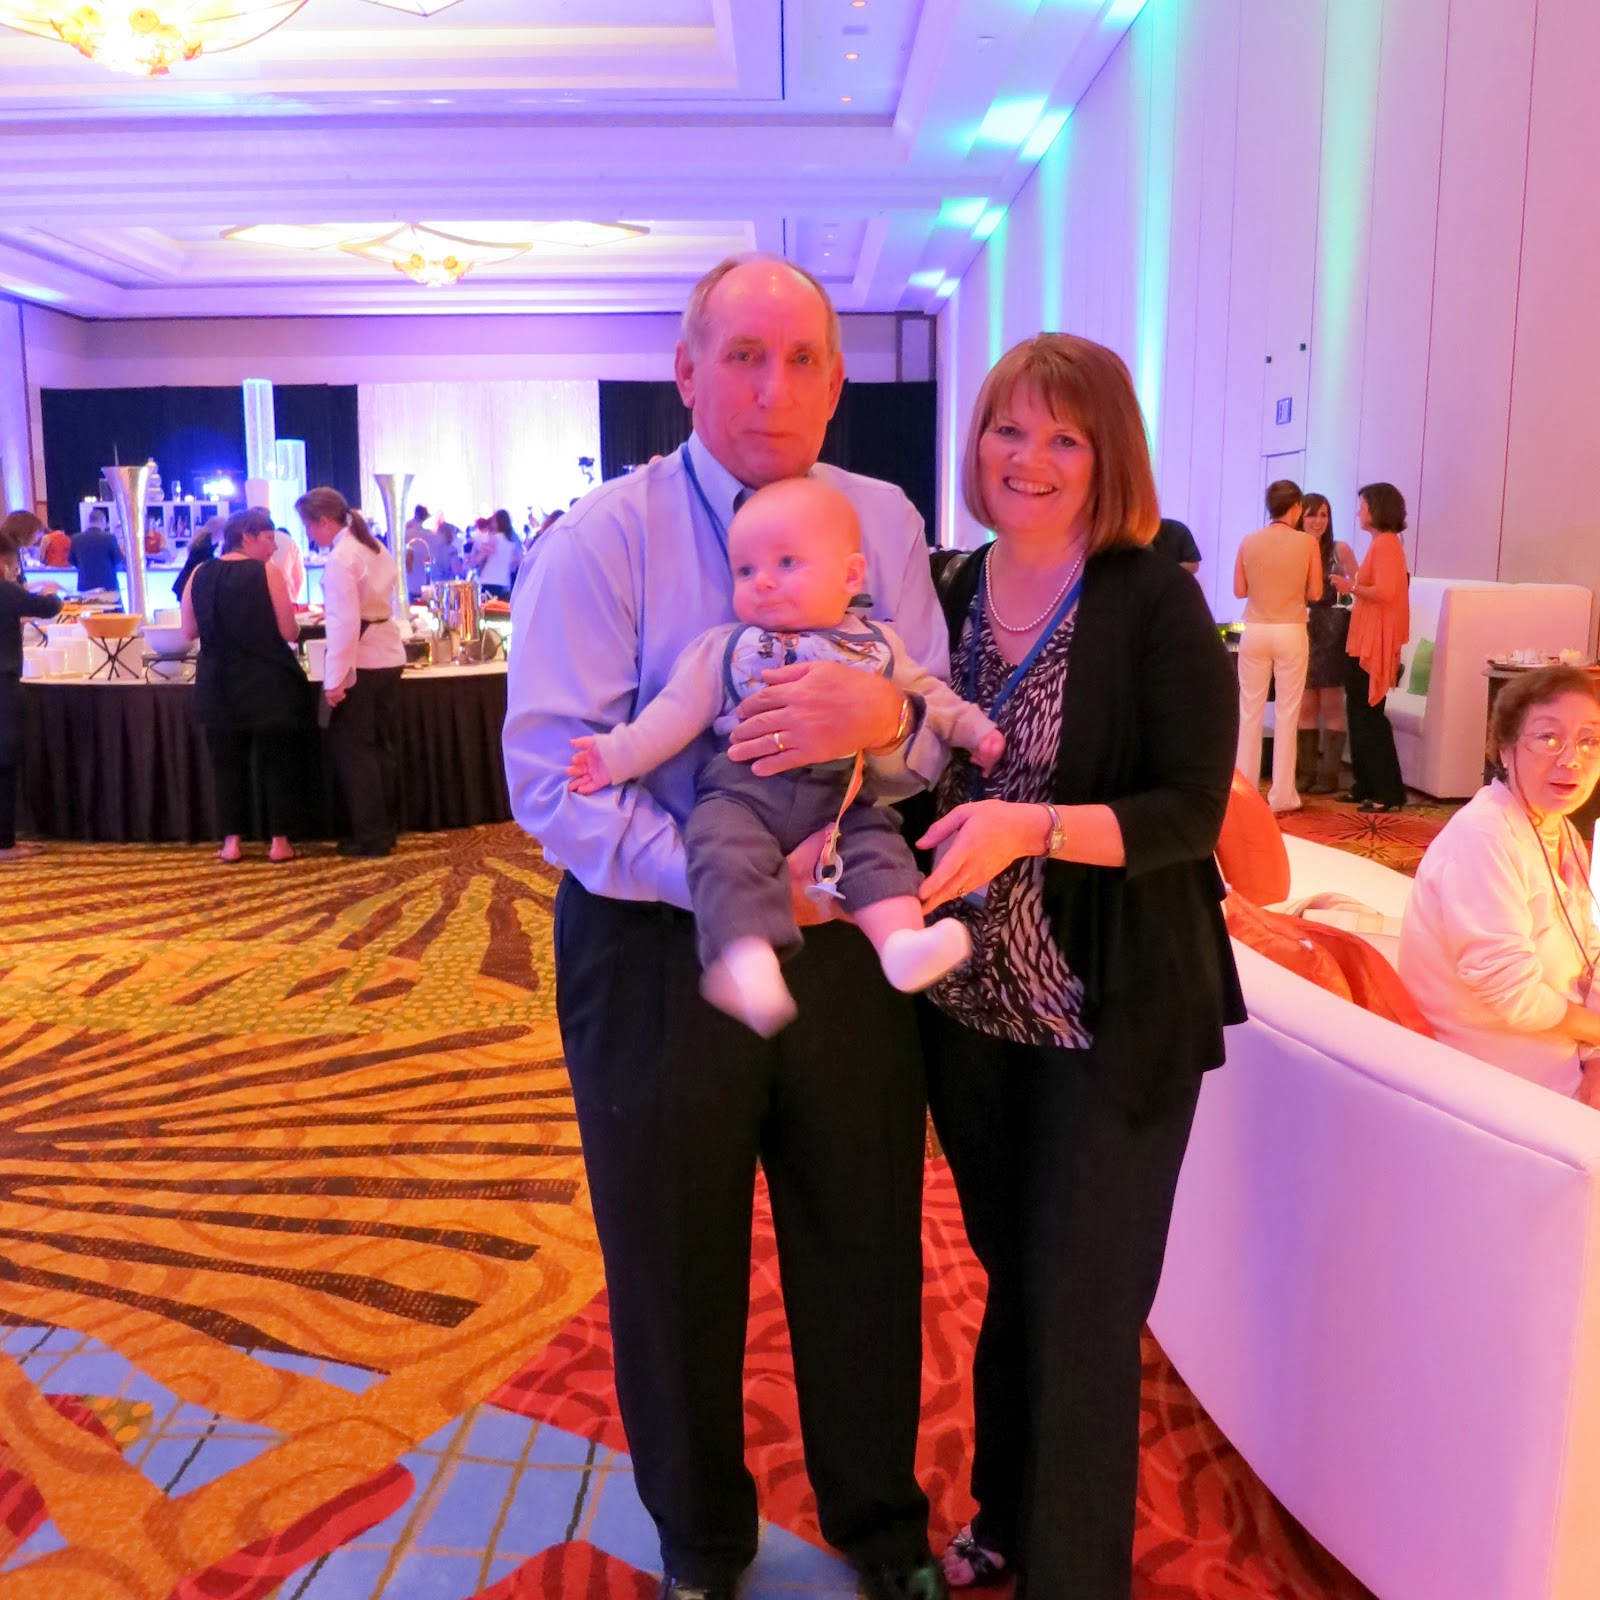
After a slight feeling of disappointment that Mom didn’t walk away with the $1 million dollars, a few hugs from her own little Doughboy certainly made her feel better!

The people at Pillsbury and General Mills did a fabulous job with this entire event.  I can see why they only put this on every other year…….it is a lot of work!  We made so many friends and got to talk to so many lovely people.  The 45th Annual Pillsbury Bake-Off Contest is one that we will remember for the rest of our lives and as the folks from Pillsbury said, Mom is now officially part of Bake-Off history.

You can purchase the cookbook with all of the Bake-Off finalists recipes at most major grocery stores (usually located where you check out) or check out the recipes online.  Also, I know many of you love to cook, so I would highly recommend you start thinking about a recipe for the 46th Bake-Off Contest that will take place in 2014 and definitely try to enter.  I know Mom already has two pages of recipe ideas going…….yes, it was that much fun……..she certainly wants to go for it again!
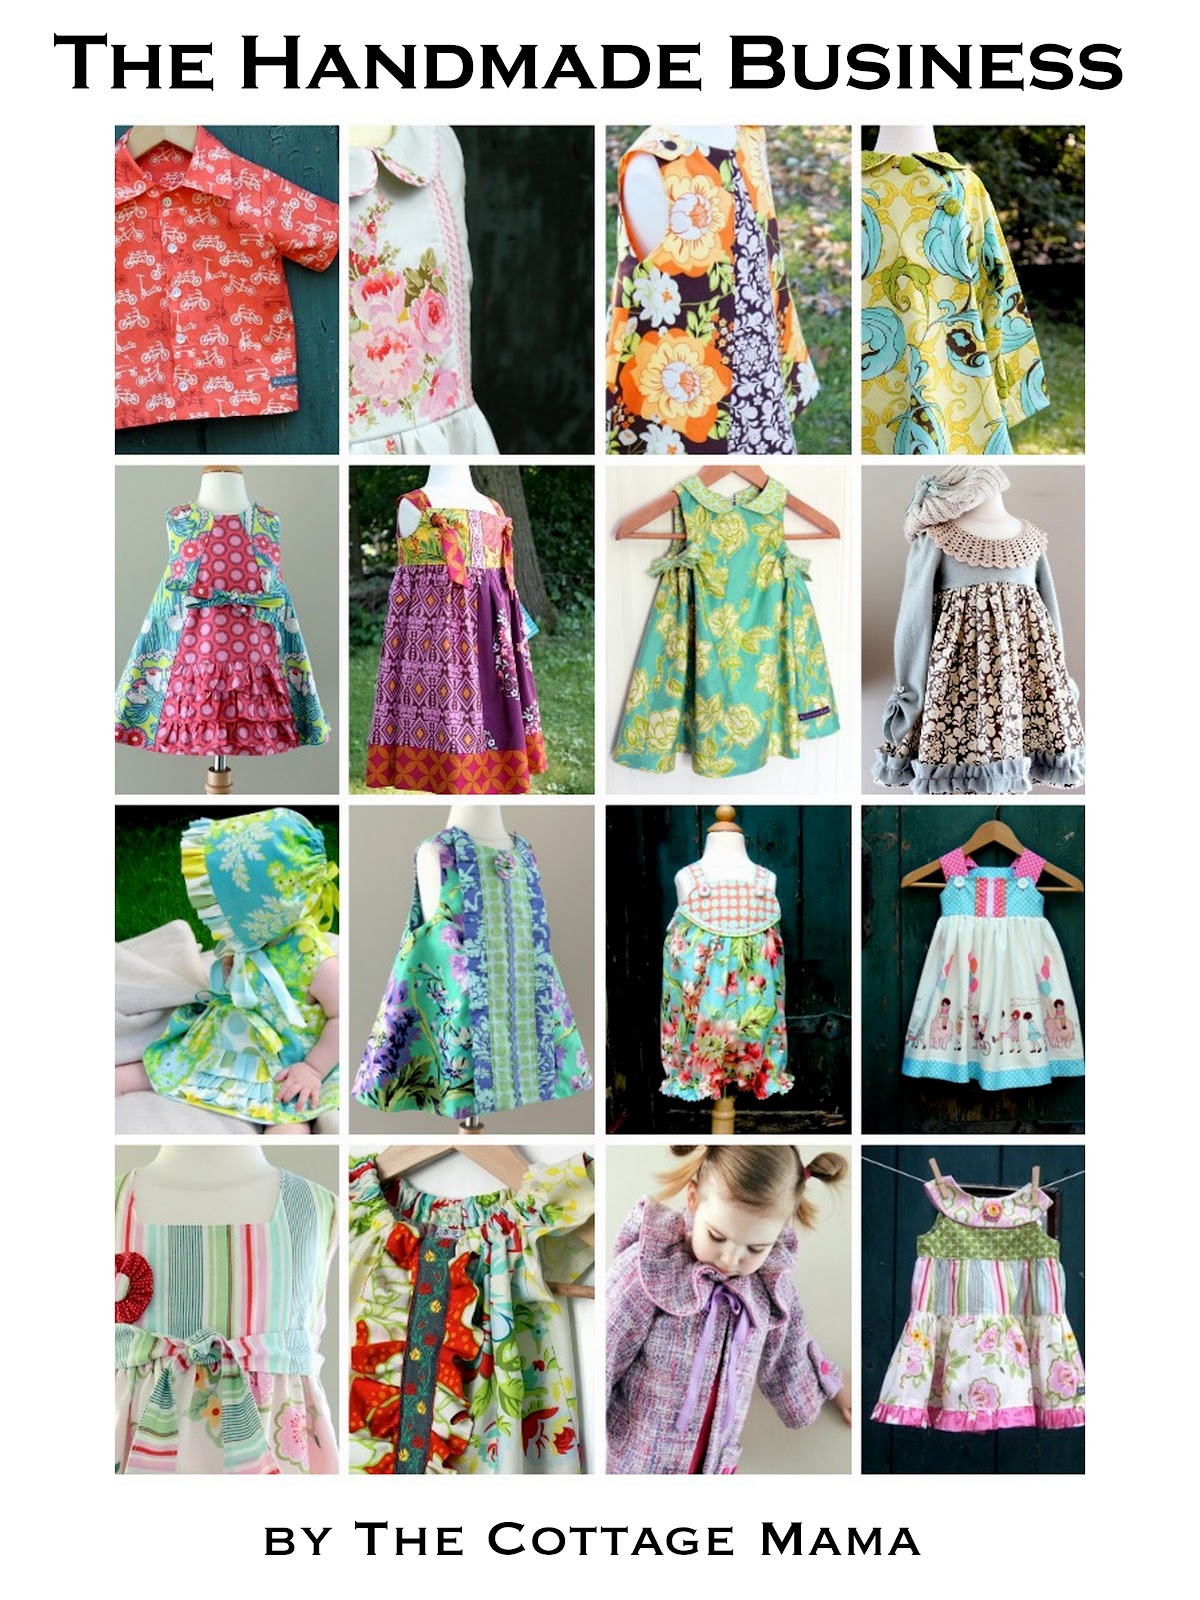
Will It Go Round In Circles? ~ Free Quilt Pattern and Tutorial ~ Part 5: Binding

Here we are on the final day of the ‘Will it go round in circles?’ quilt pattern and tutorial.  Today we will bind our quilt.  This binding tutorial is a great one whether you are binding a quilt or even a simple baby blanket.  Keep on going……..you’re almost finished!  And now here’s my mom (Grandma Jane)…………. 

Part 5: Binding

34. Binding–Stitching all complete? It is time to bind your quilt. Yea! We are almost finished! I like to machine stitch the binding on to the quilt and then finish it up with hand stitching.

35. Place the ends of two binding pieces right sides together as shown. Use a fabric marker to draw a line diagonally across the pieces, pin and stitch along the drawn line. Trim to ¼ inch and press. Attach a third piece in the same way. Continue joining all the pieces together—making one long piece of binding.

36. Fold the binding WRONG sides together and press along the length of the binding.

37. Leaving a 9-10 inch piece free, place the open edges of the folded binding along the edge of the quilt top—I usually start on the bottom edge of the quilt as the finish will be somewhat less obvious. Some quilters trim up the excess batting and quilt backing that extends past the quilt top right now but I really prefer to wait to do this later so that I am not battling to make sure I catch all the edges of the quilt sandwich in my stitching.

38. Using your walking foot, stitch the binding on the quilt using a ¼ seam. I do not pin this step—just place the binding along the edge as I go –sometimes adjusting a little to keep it smooth and without puckers.

39. To make a nice, neat mitered corner, stitch to ¼ inch away from the first corner. Lift your presser foot, rotate the quilt up slightly, put presser foot down and then take just a couple of stitches angled out to the corner edge. Clip your top and bottom threads.

40. Turn the quilt, fold the binding up and then down as shown, and start stitching again along the edge of the second side of the quilt. Repeat for the next three corners and sides.

41. Stop stitching at least 10 inches from where you began attaching the binding.

42. Sewing the two ends of the binding together is my very least favorite part of this because for some reason I always struggle to get it to fit evenly. I came across this neat little tool, cut Rite Bind Up, on-line and ordered one from www.quiltersparadiseesc.com I have used it several times and it is definitely helping me do a better job. It comes with great directions and pictures.

43. Press the two ends of the unsewn binding so they meet and match up.

44. Unfold the left side of the binding so the wrong side is up and using a fabric pen mark the creased edges as shown on the wrong side of the fabric. Lay the tool on top of the wrong side of the fabric as shown, matching the markings on the tool with the fabric pen lines on the fabric and cut along the angled edge. Repeat for the right side of the binding piece.

45. Sew the two ends of the binding together, right sides together in a ¼ inch seam. Check for a good fit and finish stitching the binding to the quilt. Whew, done!

46. Now trim the edges of the quilt on all four sides. Cut off the excess batting and quilt back fabric, at least ¼ inch away from stitches. Cut carefully—I position on the quilt on the ironing board so I can pull the fabric somewhat taut with my left hand as I trim with my right.

47. Now my favorite part—hand stitching the binding to the quilt back!! I know some quilters really do not like this and prefer to machine stitch the binding but for some reason I find this very relaxing to have a little hand work to do. I machine sew upstairs in my sewing room away from where my dear hubby, Pepo, usually hangs out in the downstairs den with the big TV. This is a great project to work on as I sit next to him and watch TV with him or make him carry on a “meaningful’ conversation with me. (He is rolling his eyes about now…he is not a big talker.) Anyway, I love the feeling of getting close to finishing a project and seeing what the quilt is actually going to look like. I really like to think about the person that I am making the quilt for as finish this last step.

48. Fold the creased edge of binding up over the edge of the quilt to the quilt back. I love these quilt binding clips—so easy and much better than pinning.

49. I start sewing the binding down on the bottom of the quilt and work right to left with my stitches. Using a single strand of thread, make a knot and pull needle through on the underside of the binding, catching slightly the batting and quilt back fabric and exiting right in the crease of the binding.

50. Take a small stitch out from the binding crease into the line of stitches you made when machine stitching the binding. Insert the needle through the quilt back fabric and batting, taking care not to catch the quilt top, and make a stitch towards the left about ¼ inch in length. Pull the needle up through the crease of the binding and repeat moving along right to left.

51. When you approach the corner, hold the binding down and take several stitches up into the corner. Fold the binding over from the next side—making a nice mitered edge and take a couple of small stitches in the angled fold. Continue stitching, taking care to keep your stitches along the creased edge as small as possible so they do not show.

52. Whew! It’s finished and is ready to toss in the washer on COLD gentle cycle. An absolute must in my book is to use a Shout Color Catcher. These little sheets are miracle workers in “catching” any color that may bleed from your fabric—especially when working with white and any dark colors like red, orange or blue. I have been known when really nervous about bleeding colors to throw in 3 or 4 of the little sheets and I have not had a problem yet.

53. Take your quilt out of the washer as soon as the washer stops so wet fabric does not get any other chance to bleed. Toss in the dryer to get it all warm and cozy. It is fun to see how it crinkles up along the quilting lines. I think I like the look of my circle quilt on the sofa in my sewing room. Piecing the back gives a nice surprise when you flip it over too. I didn’t get a label on this quilt yet and maybe we can talk about that on another day.

This has been such fun talking and sharing on Lindsay’s blog. I hope I have been able to share a little something that you didn’t already know. Most of all I wanted to share how much I love the idea of a cozy, warm gift of a quilt to be used to “cover in love and hugs” a special person. It’s a way to give a hug from miles away and who isn’t going to treasure that for many year to come? Like I said, I think I am keeping this circle quilt for me as a reminder of all those crazy, wonderful circles in my life!

P. S. My next adventure is going to be competing as one of 100 finalists in the 45th Pillsbury Bake-off Contest in Orlando, Florida on March 26th. Martha Stewart is hosting and will be announcing the Million Dollar winner live on her show on March 27th on the Hallmark Channel 11 am EST. Pepo, Lindsay and Baby Caspian will be there with me so keep a look out for us!

In case you missed the earlier parts of the quilt tutorial you can view:
Part 1 (HERE), Part 2 (HERE), Part 3 (HERE) and Part 4 (HERE)
A BIG giant thank you to my mom for putting together this wonderful series!  A lot of work goes into taking step-by-step pictures and coming up with clear instructions that everyone can understand.  So again, Mom, THANK YOU ~ You are the best!

Wish Mom luck at the Pillsbury Bake-Off Contest this weekend!  Caspian will be sporting his Pillsbury doughboy hat that I made for him, so we should be pretty easy to spot during the competition.  Although, I’m not sure Martha Stewart would appreciate him wearing his hat to her show, so we may leave that it the hotel room during the taping of her show.  But anyway, just look for the brown haired mama with a super-chubby, completely adorable, bald baby boy!  Can’t wait!!


Will It Go Round In Circles? ~ Free Quilt Pattern and Tutorial ~ Part 4: Quilting

So here we are…….we’ve got our quilt top pieced together and our quilt backing ready to go.  Now for the most exciting part, actually quilting our quilt.  Mom (Grandma Jane) has some really great information and tips in Part 4 of the ‘Will It Go Round In Circles?’ quilt pattern and tutorial.  If you’ve ever been a little nervous about quilting, don’t worry, Grandma Jane will show you the way…….

Part 4: Quilting

19. How to “sandwich” your quilt—I like to lay the backing and the quilt top out on the floor to check for placement. I decided I wanted the pieced section to be even with my second row of circles. Use safety pins to mark the sides for this placement. I also always mark the middle of the top, bottom and sides of my quilt top and backing with safety pins for help when positioning when I sandwich the quilt.

20. Fold the quilt top in half RIGHT sides together and fold in half again.

21. Fold the backing in half WRONG sides together and fold in half again.

22. Cut your batting in the size directed—you need at least 4-6 inches extra on each side top and bottom so it is cut larger than your quilt top. I usually buy a queen size batting at JoAnn’s when I have a coupon or when they are on sale. The queen size will make a good size lap quilt and a couple of baby quilts depending on size with leftovers that you can baste together for other projects. Mark the middle of the sides, bottom and top of the batting with safety pins for placement later.

23. I sandwich and pin baste my quilts with curved quilting pins on top of my dining room table with a cardboard pattern cutting board and my rotary cutting mat on top to protect the table. I take extreme care not to scratch the table finish. (This was my new hubby’s table before we got married last year and a scratch would not score me any points!) I have tried the floor for putting the quilt together but I have a knee that doesn’t cooperate so I go the careful table route!

24. Carefully unfold your quilt back right side DOWN on the table and smooth out. Fold your batting in half length wise and place on top with center fold down the middle of the quilt. Match the safety pins that you marked the middles of your batting and quilt back. Unfold batting to cover the quilt back and smooth out, starting in the middle and working out.

25. Unfold the quilt top, centering the center fold and matching up the safety pins in the middles of the tops and sides of backing, batting and top. Match up where you marked for the pieced backing—you do want that to be straight across the top. Peak under to make sure everything lines up.

26. Now smooth, smooth, smooth! Get out all the wrinkles that you can!

27. Using the curved quilting safety pins, pin baste together all three layers. Place pins every 4 -5 inches. Once I pin baste the entire area of the quilt on the top of the table, I gently move the sandwich to either side of the table and finish up the basting. I kind of scoot the cardboard and rotary mat around also to make sure my table top is still protected. Trim off the edges leaving about 2 inches all the way around the quilt.

28. Roll the sides in towards the middle of the quilt and fold to carry to your machine. I like to quilt the length of the quilt first as this is always going to be less bulky because there is less fabric than rolling up the other direction.

29. Quilt Stitching—now in my dreams, I will someday be an awesome free-motion quilter—even took a class recently with my friend, Diane. However, until I practice a lot more—I will stick with some simpler quilting. A walking foot for your machine is a must—helps evenly “walk” over the three layers of your quilt. I did not use one the first two quilts I made and noticed a huge difference the first time I used one. For my circle quilt, I decided to go with a little tip the gal who taught the free motion class showed us. You can adjust your machine to get this curvy sort of stitch and use your walking foot to change up a basic straight line quilting. I wanted something a little softer to go with the ideas of the circles and so this was perfect. This is the setting I used on my machine.

30. Starting at the top, stitch down the middle of your quilt. (See those cute quilting gloves? They look funny but really do help you hold onto your fabric as stitch.) The first few lines of stitching when you are trying to move the bulk of your sandwich through the machine are the hardest. Hang in there. Best not to let your quilt sandwich hang down off your table as that creates more resistance. I like to sling the quilt up over my left shoulder and then move it through the machine. The more table space you have to the left and back of your machine—the better but we have to work with what we have got.

31. Work your way out to the right side with each subsequent line of stitching. I used the walking foot guide to stitch 1 ¼ inch to 1 ½ inch from the previous line of stitching. This way you are reducing the bulk of the quilt that you are trying to manage in the neck of your machine. It gets so much easier as you reach the edges of the quilt. Keep the left side of the sandwich rolled up as you go so it doesn’t fall off the table, drag and cause resistance. Make sure you remove your safety pins as you go—stitching over a pin and getting it caught in the walking foot will make you jump to attention very quickly! Not fun!

32. Once you have quilted the first half from the middle and out to the right side, flip the quilt over so the bottom is now at the top. Stitch again in the middle, 1 ½ inch from your very first line of stitching, using your guide, working from the new top down. Work your way out to the other side with subsequent lines of stitching. I like my curvy stitches-what do you think? Beauty of this, too, is that no one can tell when you get off a little bit. No need to be perfect when quilting! No one will ever see your mistakes once you wash and dry your quilt.

33. Once the main body was quilted, I “stitched in the ditch” around the two borders. This can be a little tricky—you just stitch as close as you can—ideally right in the “ditch” between the two pieces that are sewn together.

Join us tomorrow for the final step as we bind our quilt.  The binding tips are invaluable, so be sure you check in with us tomorrow!  Thanks again, Mom ~ you’re the best!
If you missed the previous posts, you can find Part 1 (HERE), Part 2 (HERE) and Part 3 (HERE).


Will It Go Round In Circles? ~ Free Quilt Pattern and Tutorial ~ Part 3: Quilt Backing

Welcome to Part 3 of the “Will It Go Round In Circles?” Free Quilt Pattern and Tutorial.  Yesterday we finished up our quilt front and today we will be cutting and piecing our quilt backing.  My mom always creates the most beautiful, pieced backings for her quilts.  Take it away, Mom……..

Part 3: Quilt Backing

15. Quilt Backing—I sub cut layer cake pieces for the pieced backing but as above in the cutting instructions. You can cut strips however you like—it’s great way to use up scraps. Lay strips out to get the look you like. Then sew 16 of the 2 ½ inch x 10 inch strips (right sides together) along the long side. Press seams to left side. Sew the other 16 together, press seams to left and then join two sets together. (Doing the two sets allows easier handling instead of sewing strips one at a time).

16. Sew short ends of two narrow back border pieces together. Repeat for other two. Press seams. With right sides together, sew borders to top and bottom edges of pieced backing strip. Press seams up. Trim excess border even with pieced backing.

17. For main backing, cut 3 ½ yd fabric piece in half x WOF for two pieces 63” x 40” and trim selvages off along LOF (length of fabric).

18. Sub cut one piece LOF into 63 inches X 26 inches. Sew this piece with right sides together to the top of the pieced backing strip. Sew the 63 x 40 piece to the bottom of the pieced backing strip. Press seams up and press backing well. Your quilt backing is finished!

Join us tomorrow as we sandwich our quilt and do the actual quilting. 
Keep on going, you’re almost there!!

Thanks so much, Mom!  Having a beautifully pieced quilt backing is such a lovely, unexpected detail on all of your quilts.  If you missed the first two posts in our series you can view Part 1 (HERE) and Part 2 (HERE).

Will It Go Round In Circles? ~ Free Quilt Pattern and Tutorial ~ Part 2: Quilt Top Continued

 Welcome to Part 2 of the ‘Will It Go Round In Circles?’ Free Quilt Pattern and Tutorial.  Today we will be finishing our quilt top.  If you missed Part 1 (Cutting / Appliqueing) you can view it HERE.

Part 2 (Quilt Top Continued):

7. Now with all 56 squares, complete, lay out the squares again and make sure you like your color placement. Sew your blocks together into rows of 7 blocks each with a scant ¼ seam. I love Diary of a Quilter Amy Smart’s helpful tutorial on the “scant ¼ inch seam” (click HERE to view her tutorial). The first couple of quilts I made I did not realize that I was sewing more than a ¼ inch and I think it can make a difference.

8. Press all seams of the blocks to the side after you finish each row. I typically press odd numbered rows to the left and even numbered rows to the right. Pressing as you go is SO very important and a step you cannot skip in quilting or with any kind of sewing for that matter. Remember to “press”—running/pulling the iron back and forth can stretch your seams and fabric.

9. Now pin two rows together, carefully matching your seams. As you pin and match your seams—aim for right along the stitching. You will feel your pin slip in smoothly if it is in the right place. Some resistance may mean that you need to try again to align properly.

10. Stitch the two rows together. I typically leave the pins in the fabric until I am just about to the pinned seam, lift slightly to make sure it is aligned, pull out the pin and keep sewing.

11. This is where those nicely pressed seams come in to play as they nest so well together. Press the seams for the rows in one direction—I usually press the seam towards the top of the quilt. Press well on both sides—front and back.

12. I Like to join two rows at a time, press and then join to another two row panel just to make it a little easier to handle. Continue until all 8 rows are sewn together and press seams and front well.

13. For your borders, sew short ends of narrow borders (right sides together) with ¼ inch seams. Measure sides of quilt and cut two pieces to fit. Sew border (right sides together) with ¼ inch seam on both sides of quilt top. Press seam towards border. Trim ends/edges. Apply border in same way to top and bottom.

14. Repeat for wide border pieces. Sew sides and then top and bottom. Trim and square up edges. Your quilt top is finished!

Join us tomorrow as we cut and piece our quilt backing!

Thanks again, Mom!  
If you all have any questions, please leave a comment and Grandma Jane will be on the blog to reply. 

Will It Go Round In Circles? ~ Free Quilt Pattern and Tutorial ~ Part 1

This week we have a very, I mean very, special guest here with us on The Cottage Home ~ my mom (aka Grandma Jane)!  I am so excited that Mom agreed to guest blog and share her amazing talent and skills with everyone.  My mom is definitely not one to toot her own horn, but I’m not kidding when I say that she has serious talent in the sewing arena.

Grandma Jane is sharing a free quilt pattern and tutorial for everyone.  Today she will share the first part and will post every day this week until we have sewn the quilt from start to finish.  Sound like fun?  If you’ve ever been interested in quilting, make sure you follow along (or sew along, for that matter).

And now, without further ado, here is The Cottage Mama’s Mama, Grandma Jane:

Will it go round in circles?

How much fun it this? Here I am on my daughter, Lindsay’s, blog and have been invited to do a tutorial! Pretty amazing since a couple of years ago I had no idea what a blog was until Lindsay explained her plan for The Cottage Home. Wow! I have been so impressed with the sharing of creativity and the learning opportunities out there on blogs with all the sewing, crafting, cooking and project ideas. I must admit I spend a little too much time looking at all the great ideas/inspiration on blogs—don’t even get me started on my new love of Pinterest!

I started sewing way back in 8th grade home economics class in Colby, Kansas, with inspiration and lots of help from my sister, Sarah, who was into sewing her own clothes. (Do schools even offer home economics and sewing anymore?) Our mother didn’t sew… her creativity and artistic talents shined in many other respects (that’s a whole story in itself) but we didn’t expect her to do anything more complicated than sewing on a button.

Through the years I sewed clothes for myself and clothes, toys, costumes for my children—oh, yes, the costumes…Did you know The Cottage Mama was a musical theater major her first year of college? That path included many, many (did I say many?) costumes for the stage sewn by this “stage mama” through the years. Lindsay changed directions to a degree in finance…. but let me tell you this girl has the voice of an angel that makes me tear up and get a giant lump in my throat every time I hear her sing.

Lindsay has been an incredible inspiration for me to get the creative juices flowing and she encouraged me to get sewing again last year with a Christmas gift of several Kate Spain Fandango charm packs and an Amy Butler book. My dear friend, Diane had also invited me to join her church quilt ministry group. Margaret, the leader of the ministry and also the “Head Quilting Nerd,” as she refers to herself, got me hooked the first night of class as she talked about the beauty of the longevity of the gift of a quilt. The thought of creating a gift that could be handed down through the generations was incredibly appealing to me. So please understand I am a newbie at this quilting thing but am glad to share some ideas with you.

 Quilt Front

I have really been drawn to circles in quilt designs lately and when I saw the new Salt Air by Cosmo Cricket for Moda Fabrics, I thought it was perfect. I also was looking for a reason to use my new AccuQuilt Go Baby that I gave myself for Christmas. (Do you ever do that?)

Funny thing happened when I started working on my quilt. That 1970’s Billy Preston song, Will It Go Round in Circles, kept popping into my head. A blast from my high school past for sure. I know that sounds funny—why not the beautiful Circle of Life song from The Lion King? (That would be much more “grandma-like.”) Nope! Billy’s rock and roll song kept going through my head over and over and over again.

The more I thought about that song, I started thinking about how life is so very full of circles! (This is about where my kids kind of roll their eyes and say—“you are so corny, Mom.”) I admit it–I am a pretty sentimental type…I just can’t help it.

 Quilt Backing

But really…think about it—we have that expected cycle and “circle of life”–we grow, create our own lives and families, and we eventually come around 360 degrees and watch our children grow and start their families. We find ourselves in the places our parents and grandparents were. That circle comes “round” lots sooner than we ever thought it would.

Then we have those crazy happy, wonderful, twirly circles-you know the kind of circles that give you that dizzy, excited feeling you got as a kid when you twirled and twirled and spun with arms spread wide with pure true joy…falling in love, getting married, holding our children and grandbabies….pure joy!

Busy, busy madly running circles—the mode we get in when we are raising our families, working, and just trying to keep up! Exhausting, tiring…sometimes feeling like a hamster running round in a little wheel.

Knock you off your feet spinning circles …the kind that hit you hard and spin you around sometimes when you are least expecting it….an illness, a death, divorce, problems with our kids, losing a job… heartaches…difficult to get up and go on sometimes…but we do.

Circles of support… family, friends, co-workers, church…true blessings and gifts….they may change through the years but always present and precious.

So….will it go “round” in circles? Yes, it will….all sorts of circles …all sorts of directions…at all sorts of speeds. Here is my simple circle quilt that reminded me of this…. Think I am keeping this one for me.

I followed this basic pattern over at the Moda Bake Shop (tons of ideas and free patterns) but changed it up a little to make a larger size lap quilt and am going to give you some of my very basic sewing tips. I usually “tweak” things as I go along any way and rarely keep entirely to a pattern.

Supplies / Cutting Instructions for generous lap size quilt 56 inches x 64 inches:

Background: 3 yds neutral color fabric (Moda Bella Solids Cream)
• Cut (12) 7 ½ inch x WOF (width of fabric) strips
• Trim off selvages. Crosscut in 7 ½ inch squares. Each strip will yield (4) cut squares and one piece on the fold that you will open, press and cut into another 7 ½ x 7 ½ square. (Total 5 squares per strip)

Circles: (56) 5” charm squares, scraps, or approximately 1 ¼ yd to cut your own squares. (Moda Salt Air by Cosmo Cricket).
• If cutting your own–Cut (7) 5 inch strips x WOF, trim off selvages and crosscut into 5 inch squares. Each strip will yield 8 cut squares.

Fusible web backing: Enough to cover all (56) 5 inch squares depending on width of the fusible backing. (I used Lite Steam-A-Seam).

Narrow Borders: front 3/8 yd and back ¼ yd (Moda Bella Solids Tomato Soup)
• Cut (6) 1 ½ inch strips x WOF for front. Trim selvages.
• Cut (4) 1 ½ inch strips x WOF for back borders. Trim selvages

Wide border: ¾ yd (Moda Bella Solids Buttercup)
• Cut (6) 3 inch strips x WOF. Trim selvages

Binding: 5/8 yd (Moda Bella Solids Tomato Soup)
• Cut (7) 2 ½ inch strips x WOF. Trim selvages.

Pieced Backing Strips:
• Cut (32) 2 ½ inch x 10 inch strips. ( I sub cut 8 layer cake pieces into 4 strips each)

Backing: 3 ½ yd (Moda Butterscotch and Roses Ruby Acorn Mosaic)

Batting:
• Cut one piece at least 64 inches x 72 inches. (I like Warm and Natural)

Let’s get sewing……..

1. Color selection–I decided that though I loved all the fabrics in the Salt Air line, that I would use only the small to medium scale prints that had red and/or yellow in them. Some of the larger scale prints might have gotten lost in the circles and I wanted the front to be a little simpler with limited red/yellow/blue color scheme.

2. I used my paper cutter to speed up the cutting of the fusible web into 5 inch squares. Apply fusible web per instruction to the back of all fabric squares. I then used my AccuQuilt to cut my circles but you could use any circle shape to draw around and use as a template. Because the AccuQuilt Go Baby die for the 5 inch circles was a tight fit, I used painters’ tape to hold the 4 squares that I ran through it each time, placing fabric exactly and very carefully over the die circle. Worked like a dream! Being able to cut multiple circles at a time is an advantage of the Go Baby!

3. After my 56 circles were cut, I arranged them in the rows/columns that I liked and numbered them using my painters tape. (Love that tape—helps keep my rows in order and arrows keep me pointed in the right direction) Arrange 7 across by 8 down.

4. Cut your back ground squares as above in cutting instructions. You need (56) 7 ½ x7 ½ inch squares.

5. To center the circles on the squares—I lightly finger-pressed the squares into fourths and then did the same for the circles. I then used the lines as guides to line up the circle in the middle of the square. Press/iron and adhere the circle to the square according to the fusible web instructions.

6. Time now to appliqué around the circles. Yes, 56 circles may take a little while but it gave me lots of time to think about the circles and people in my life….and yes, by the time you have them all finished, you will be a real pro at appliquéing around a circle– in case you needed any practice to begin with? It is sort of a no-brainer sewing step and it gave me lots of time to talk and chat at my evening quilt group as my machine went round in circles. I used the basic blanket stitch on my machine but you certainly can use a tight zigzag. Catch the edge in the stitching to ensure it is not going to fray.

Join us tomorrow for Part 2 where we will finish up the quilt top by piecing the rest of the squares together and adding the sashing.  The full schedule for the week is as follows:
~ Monday (March 19) ~  
Part 1: Quilt Top (Cutting / Appliqueing)
 
~ Tuesday (March 20) ~
Part 2: Quilt Top Continued (Piecing / Sashing)
 
~ Wednesday (March 21) ~  
Part 3: Quilt Backing
~ Thursday (March 22) ~
Part 4: Quilting
~ Friday (March 23) ~  
Part 5: Binding
Thanks SO much, Mom, for sharing this wonderful project with everyone.  If you are reading this post in your reader or email, I’d love for you to pop on over and show Grandma Jane some love by leaving her a comment.  I can’t thank her enough for putting this series together!
Also, if you have any questions throughout this series, just leave a comment and Grandma Jane will be popping in to make sure you get the answers you need.

The Handmade Business: My Story

One of my goals for this year was to share a little bit more insight into how to start and grow your handmade business.  I realize that many of you reading are not interested in the least about starting a handmade business, but for those of you who are, I just want you to know that I am here to help you along the way.  You can pretty much ask me anything.

I’ve done a lot of hard work myself, but I’ve also had some very wonderful individuals that have provided me with information and guidance and I am happy to share what I’ve learned with you.  I believe there is plenty of business out there for everyone and that given the same set of tools and knowledge we will all forge a different path through our creativity and art.

So there are quite a few topics to cover, but today I’m starting out from the beginning with……my story.

I guess you could say creativity runs in the family.  My Grandma, Marge Harrison, was an amazing painter and art gallery owner, my Grandma Peggy has always been incredibly creative with different handmade businesses throughout the years, my mom is an amazing creative force in my life as well as several of my aunts and my Dad instilled the love of music through his guitar playing and singing.   Needless to say, I have always been into the creative arts.  I started dancing at the age of four, singing in second grade and acting in middle school and was very serious about becoming a musical theater performer on Broadway.  I auditioned for many different colleges around the country and was accepted into the prestigious University of Cincinnati – College Conservatory of Music as one of the 26 musical theater majors. 

I went through my first year of school and came to the conclusion that musical theater was not the life I wanted for myself.  My parents got divorced that year and money became more of a concern to me and I just wasn’t quite sure how I could truly make a living as a performer.  And with that thought in mind, I decided to switch over into something more stable.  I transferred to DePaul University in Chicago (where my high school sweetheart (now husband) attended) and three years later received my Bachelor of Science in Finance (yes, quite a switch from musical theater).  Brett and I were married a month after my graduation and I began my career.

I spent a year and a half working in commercial banking but knew pretty early on that I needed to do something else.  Sitting at a desk analyzing numbers was definitely stifling for this creative soul.  So I got my real estate license and began selling residential real estate up until I had my first child, Savannah Rose.  I have always been into decorating my home and prior to Savannah’s birth, I wanted to sew a few things for her nursery – a table runner, a table skirt and some large pillows.  I went over to my Grandma Peggy’s house and she guided me along the way using her sewing machine.  After that half day spent with my Grandma, I knew I wanted a sewing machine of my own.

I had grown up around sewing.  My mom used to make us the most amazing costumes for Halloween, dance, and theater, but I never had the patience as a child to truly learn how to use the machine.  I was mostly focused on performing, though I always appreciated all the work my my put into everything she made for us.

Four months after Savannah was born, I got my first sewing machine for my birthday (July 2008).  I started out wanting to sew a few dresses for my baby girl.  I read the manual for my machine and worked my way through my first commercial pattern using the tips that my Grandma had given me and the things I had seen my mom do growing up.  I was pretty pleased with my first dress……especially the fact that I sewed a zipper (picture below)!  

 Very First Dress and Diaper Cover I Ever Sewed

 My First Attempt at Drafting My Own Patterns
Thanksgiving Outfit for Savannah Rose

From there, I continued to sew little outfits for Savannah as well as burp cloths and bibs.  I was sewing every chance I got and I really believe that practice makes perfect!  I even started dabbling in drafting my own patterns.  But for Savannah’s 1st birthday I wanted to make her a really pretty, fancy dress.  I purchased two prints from Amy Butler’s ‘Midwest Modern’ fabric line and went about creating Savannah’s birthday dress.  From the time I cut into that gorgeous Amy Butler fabric, I was totally hooked on those bright, patterned fabrics!  I had several people ask me if I would ever consider selling my items and I did from time to time, but nothing formal.

 First Dress in Designer Quilting Cotton by The Cottage Mama

As I continued to sew, I decided that opening up an etsy shop would be a really fun thing to do as a stay at home mom, but never got around to making it official.  I wanted to make sure I had a serger (so my items would look professional) and had my business branding (logo, clothing label, ect) in order before I got started.  I guess that’s the finance major in me…….I just wanted all my ducks in a row.  In October 2009 I started this blog, The Cottage Home, to share the projects and recipes I was working on with family and friends.  And in January 2010, I finally made it official and opened up, The Cottage Mama.

 Very First Item Ever Sold in The Cottage Mama Etsy Shop

I was very nervous about listing things on Etsy since I didn’t really know what I was doing, but I listed six different items and felt really good about finally taking the plunge.  I went to bed that night and when I woke up, I checked my email and I had sold something!!!!  It was seriously one of the most exciting moments.  I couldn’t believe that a random person had liked my creation enough to buy it.  I think I needed that.  I need the affirmation from someone, other than my family and close friends, that my work was good enough to sell. 

Early The Cottage Mama Designs

From January 2010 until September 2011, I pretty much sold ready-made and custom clothing online and in September 2011 released my first two printed sewing patterns.  I plan to release the next three sewing patterns and a series of hand-embroidery patterns in May 2012.  There are lot of new projects on the horizon for The Cottage Mama, but some of which you’ll have to wait to hear about when they are ready.

So how did I get noticed on etsy?  How did I grow my blog?  Who designed my logo/blog?  How did I purchase my web domain?  How do I have a small business and still take care of my children?  When did I incorporate my business?  Why did I decide to go into selling patterns?  Do I have a business plan?  How do I manage my finances?  What business books and publications do I read? How did I start working with different fabric manufacturers?  Where do I buy my fabric, clothing labels, size labels, mannequins, notions, ect.?  Do I buy wholesale or retail?  Do I sell my items wholesale?

These might all be questions that you would like answered, but these are all questions that will have to be answered in later ‘The Handmade Business’ posts.  These are questions that have come to me via email or through The Cottage Mama Facebook Fan page.  If you look at my time-line from when I started my business to where I am now, you will see that I haven’t been doing this for very long, but I have figured out ways to make it work and have grown my business beyond my wildest dreams.  I hope knowing this will help inspire those of you wanting to turn your hobby into a full-fledge business to realize that it is a very real possibility.

So that’s my story in a nutshell, but my question is………do you have any other questions you would like addressed?  

Remember, I am an open book, I’m here to help you become a success story of your very own.  
There are no silly questions, what do you want to know?

Olay Total Effects Anti-Aging Tone Correcting Moisturizer ~ Review and $50 Visa Gift Card Giveaway

I jump at the chance to try Olay products because they never seem to disappoint.  I have tried other brands of facial moisturizers in the past but I always end up coming back to my Olay.  So when I was offered the chance to try the new Olay Total Effects Anti-Aging Tone Correcting Moisturizer, I said sign me up!

I was so surprised when this product arrived, it really looks so cool.  Granted, I don’t generally purchase a product based on appearance, but this presentation really caught my eye.  It looks like swirled moisturizer and foundation all in one.  I couldn’t wait to try this, so after my morning shower, I gave it a whirl.

My skin has been a little all over the place since the birth of my son, Caspian Finn.  And with these chilly Chicago winters staying moisturized is super important.  I thought the moisturization factor was great and I didn’t feel like I needed to put anything else on.  Sometimes when I’m racing out the door to get Savannah to preschool, all I have time for is moisturizer.  But what I thought was really great was that this product offered so much more than moisturization – it moisturized my skin and gave me an even smooth colored skin tone.  Definite bonus!  Not to mention the fact that the feel of my skin was awesome.

Mr. Caspian is still waking up during the night.  And while I haven’t had many issues in the past with circles under my eyes or eye puffiness, I think baby number three is catching up with me.  Many mornings I feel compelled to use concealer under my eyes, but again, I felt like this product took care of eye puffiness I had as well.

One of my other favorite components of the Olay Total Effects Anti-Aging Tone Correcting Moisturizer was that it contains SPF 15 which definitely helps prevent damage to my skin.  With a history of skin cancer in my family, I always try to wear sunscreen on my face everyday.

For a busy mom on the go, I think this product is pretty near genius.  I was trying to think if there were any negative factors, but I couldn’t think of a single one and trust me, I’d tell you if I would have thought of some.  If all you have time for in the morning is sweeping some moisturizer on your face, give Olay Total Effects Anti-Aging Tone Correcting Moisturizer a try – you’ll get seven benefits in the time it takes you to use just one product!

So tell me, what are some of the ways you take care of your skin?  Do you save time by using double-duty types of products? 
Leave a comment below and you’ll be entered to win a $50.00 Visa gift card.

From Grandma with Love ~ Orange Chevron Quilt

My mom (Grandma Jane) always seems to make the girls the perfect birthday presents and Savannah’s 4th birthday was no exception.  Mom told me she was working on something ‘orange’ for Miss S., but this lovely orange chevron quilt was a total surprise to everyone!

Mom was inspired by this quilt from Red Pepper Quilts.  The unique design is created by the placement of half-square triangles.  This would be a really great project for someone that is just getting into quilting.  The design is beautiful, yet the piecing is quite straight forward.  There are so many things you can do with half-square triangles.  We’ll be showing you some of the many uses in the coming weeks!

Grandma Jane purchased the Tangerine Tango Fat Quarter Bundle from our blog sponsor, Fat Quarter Shop, and added a few other orange prints that she had on hand.  The white was cut from a bolt of white bella solid in ‘snow’.

The back of the quilt is yardage from ‘Fresh’ by Deb Strain for Moda in Garden Lattice Orange.

This quilt is the perfect lap sized quilt.  Savannah has definitely taught me that the color orange is truly wonderful.  So happy and so fresh.  I’m an orange convert, for sure!
Starting next week Grandma Jane will be sharing how to sew a quilt from start to finish with a free, original ‘circle’ quilt pattern she has created for The Cottage Home blog readers.  
I’m so excited for her week long series and I hope you are too ~ it’s going to be great!

Orange Themed 4th Birthday Party

Savannah’s 4th birthday party was this past weekend and several months back she decided that she wanted an ‘orange’ themed party since her absolute favorite color is orange.  When she first mentioned this theme, I was a little skeptical.  I was thinking she would go for a princess or character themed party, but as we began planning the orange party, we all got really excited about the color-themed birthday celebration.

Every year, I think that I’m going to keep it small, but one thing leads to another and I end up with 50+ people planning on attending our kids parties.  But I’m just going to go with it for now because in a few years we won’t be hosting all of the adults or really even choosing the guests, so for right now we are going to enjoy these early years.

Savannah wanted an orange birthday party dress, so I went through my fabric stash and found some orange fabrics that I thought really worked well together.  I also had purchased this orange woven citrus trim awhile back.  When it arrived about six months ago, I thought, ‘why in the world did I order this?’, but I guess it was just meant to be.

Here is the dress I created for Savannah’s Orange Party:

The orange party dress had so many pieces.  It was definitely not a ‘quick sew’ type of dress, but I love the end result.  Savannah could not stop twirling all day long at her party.  It was the perfect dress for her 4th birthday.  I used McCall’s Pattern 6497 as the base for my dress design, but modified, added and altered a few things.  I bought it for 99 cents at Joann’s when they had their McCall’s pattern sale, so it was a great deal.

I like to construct dresses a certain way, so I used the pattern more for sizing and didn’t really follow their instructions.  I also wanted to use the orange citrus trim, so I added that along the bottom of the dress.  This dress also took a TON of fabric, I want to say it was around 4-5 yards when all was said and done.

The bodice is fully lined and buttons in the back with four orange buttons.  I added piping into the cross-over bodice because I just love the way piping finishes a garment.  I thought about doing green piping, but I wanted to stick to orange since that was the party theme.

I added a wider/longer sash than the pattern called for and it has a large bow that ties in the back.  I also made a rolled-rose flower embellishment that I added to the sash and is accented with several corker ribbons that I made as well.

We asked all of our guests to wear orange attire, so I also made Caspian and Matilda little outfits to coordinate with the party.
I just made Caspian an easy tie appliqued onesie.
Here is Matilda with my mom (Grandma Jane) in the skirt and shirt that I made from scraps of fabric from the orange birthday dress.  I didn’t want to go too crazy with her outfit because I wanted to make sure she didn’t up-stage the birthday girl.
So now onto the party details………..
We tried to do as much orange food and candy as possible.  We had orange goldfish crackers, sweet potato chips, carrots with southwestern dip, macaroni and cheese and more candy than you can even imagine!
I brought out a lot of crystal serving pieces that were given to me by my Grandma Ethel.  I thought this would be the best way to have the full orange impact.  And it sure was……..there was no doubt what the color-theme was when you walked into our dining room.
We used little clementines as a centerpiece in a large hurricane glass, but they were also a great snack for the little ones to eat.  I just love the way fruit looks on a table.  So simple, yet so beautiful.
Did you know that you could find this much orange candy?  I ordered all of the candy from an online store called ‘Oh Nuts‘.  I found them just doing a Google search and the website is really great because you can search by color and find all the candy you need.  I ordered jelly orange slices, orange M & M’s, jelly beans, rock candy, peach licorice, orange and cream salt water taffy and orange candy sticks.  I found orange pixie sticks and orange tootsie pops at our local party store. We let each of the kids at the party fill a bag full of the different candy as their party favor.
For the adults, I had the idea of doing some Orange Chinese Chicken, but I really didn’t like the idea of having to be cooking while all of our guests were there, so I decided to make our life easier and order Chinese catering.  Sometimes I have to realize that it’s ok if I don’t make and do everything myself.  The Chinese was a huge hit!!
We ordered orange chicken, a beef dish, fried rice and lo mein noodles.  Since we were feeding about 50 people, I’m really glad we decided to go this route.  Not to mention the fact that Chinese food leftovers are delicious.
We made four boxes of Kraft Macaroni and Cheese for the kids and just put it in the crock-pot on the ‘keep warm’ setting.  The girls LOVE Mac & Cheese from the box so I didn’t dare try to mess with it and make a version from scratch.
For drinks we served juice boxes for the kids, soda, as well as mimosas (champagne and orange juice) and home-brewed beer for the adults.
I know I’ve mentioned it before, but my husband, Brett, is an avid home brewer and has brewed a special brew or two for each of the girls parties.  Of course, this will be coming to an end once we start to have kid-only parties, but for now he has a lot of fun with it.  Both of these beers were ‘orange’ inspired in flavor and slightly in color as well.  If you recall in my birthday post regarding Savannah turning four, her knock knock joke punchline is always ‘Pancakes on your head’, so that’s where that title came from.  The other beer was called ‘Savannah Slam’.
And for the decorations……….
I used an orange tablecloth and layered some orange and white polka dot wrapping paper on top.  I did one piece down the center of the table like a runner and a couple more pieces across the top of the runner in the opposite direction. I also made large tissue paper flowers that I nested in between the different serving pieces.
I used some orange fabric to make a whimsical garland. Some of the fabrics were from Savannah’s birthday dress and others were different variations of orange that I already had around.  I didn’t buy any new fabric for this party – yay!
I tied this pretty pink and orange flower ball from the center of our dining room chandelier.  It was pretty and brought the whole color scheme of the party together.
I ordered some orange and white straws from ‘Cupcake Social‘ on Etsy as well as this orange twine and the little cups for the goldfish crackers.  All of our drinking classes are ‘ball’ jars so I just pulled some of those out of the cabinet to use as containers for candy and some other items.  I tied a simple bow with twine around the top of each jar.
I did not make the cake.  I’m not really a baker.  I love, love, love to cook, but baking……eh, I could take it or leave it.  We ordered this cake from Costco.  Their cakes are super-tasty, really affordable and feed 48+ people.  I just had them put orange roses on it to go with the party theme.  We also served orange sherbet with the cake (which turned out to be Savannah’s favorite part).
I didn’t get a ton of great pictures of Miss S. since she was very busy during her party.  She was so excited to have all of her friends there to celebrate, but I did manage to get this one before the party started.
The Cottage Papa and our little man, Caspian Finn.  I wouldn’t be able to plan such fun parties for our kids if it weren’t for that man.  Thanks, honey, for all you do!
The orange party was a great success and most importantly, Savannah had the best time ever!  Miss Matilda’s favorite color is blue and she seems to think she is having a blue-themed party come July.  I’m thinking that one might be a little more difficult.
If you are looking for the ‘orange’ party invitation, you can view the post and free printable by clicking HERE.
I still can’t believe my baby girl is 4 years old!